
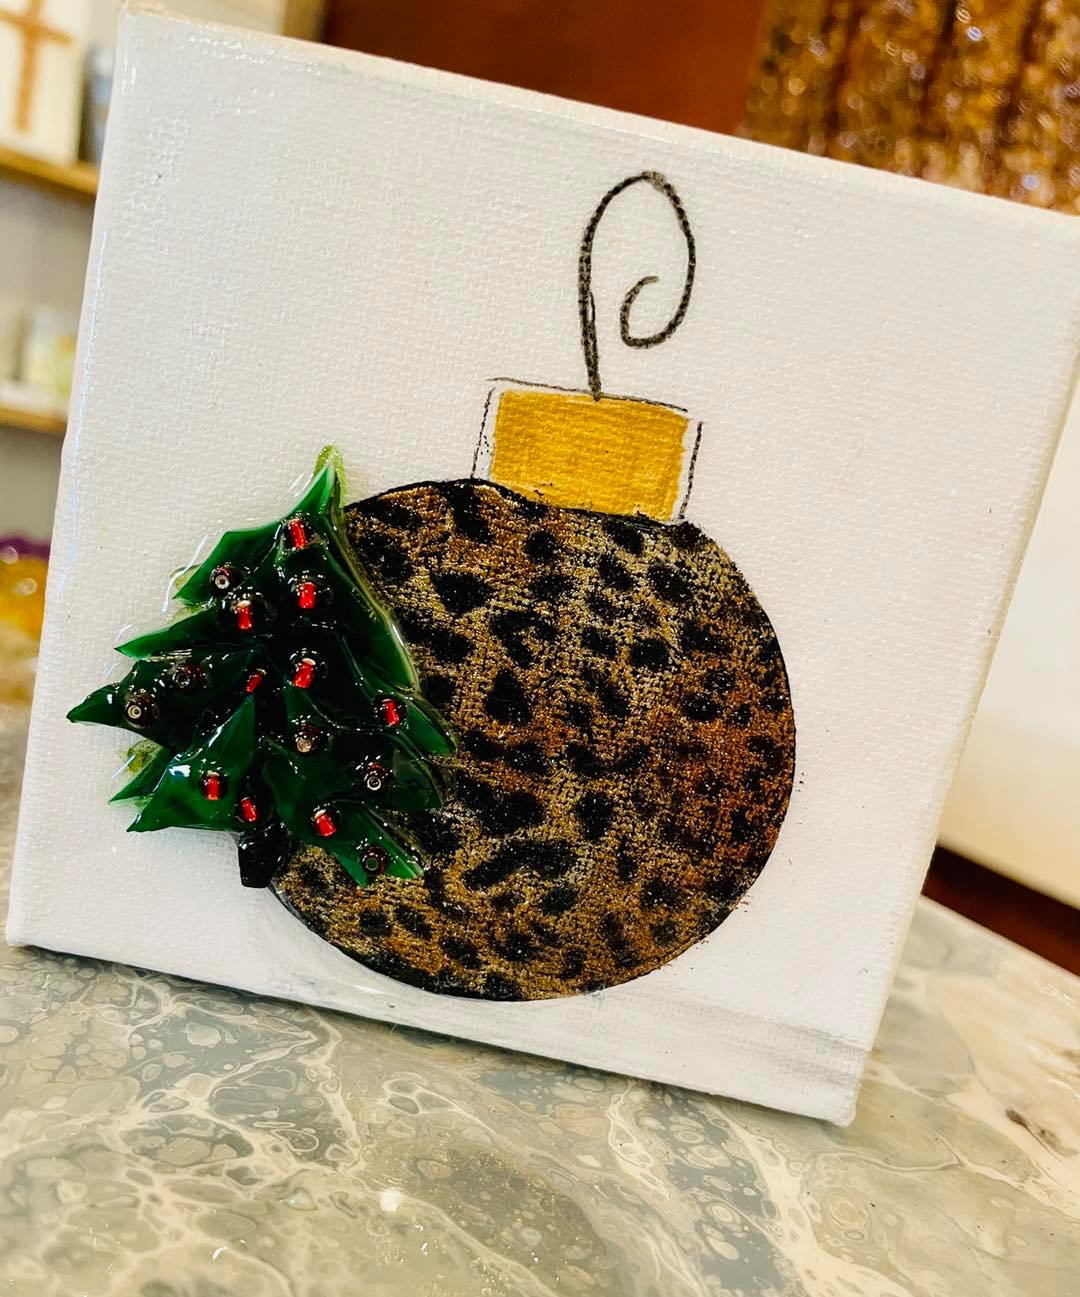
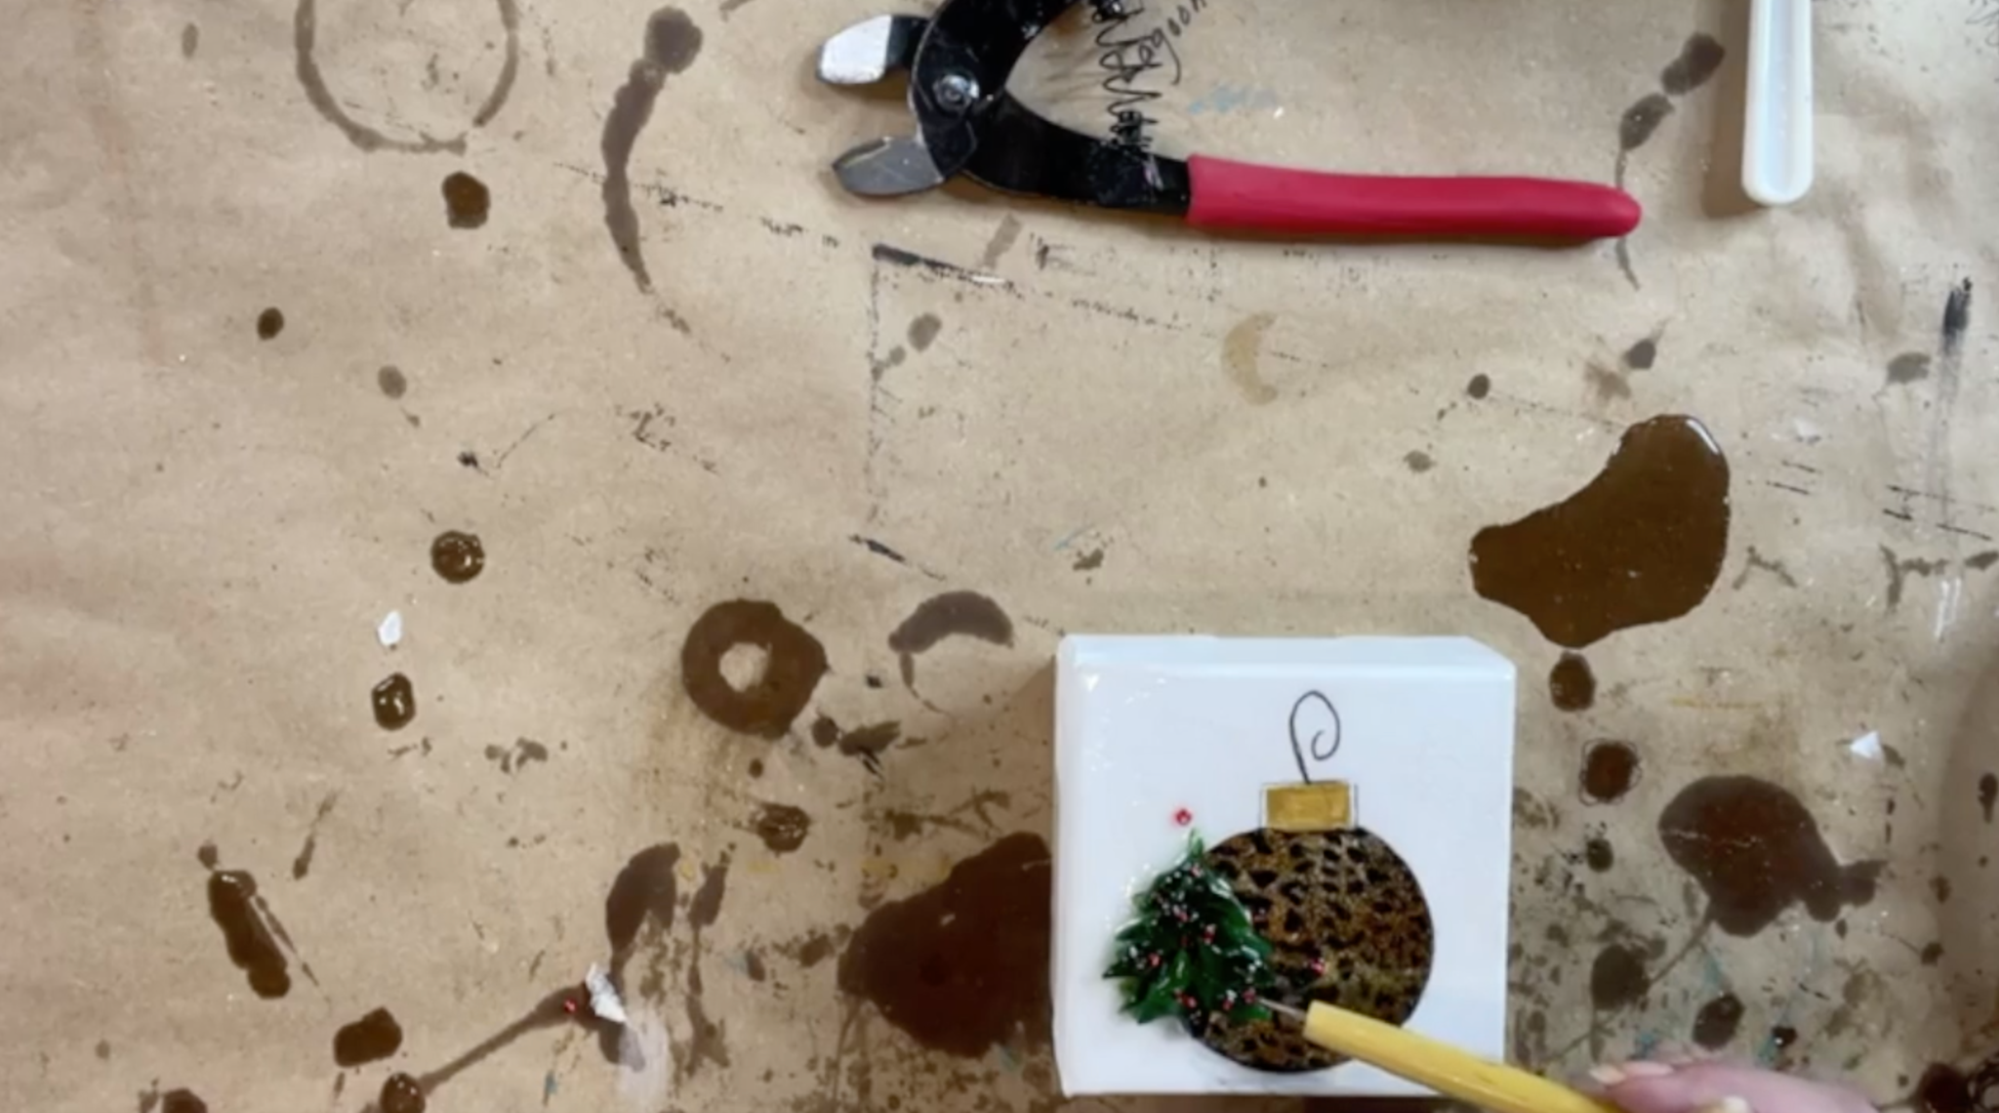
Animal Print Ornament
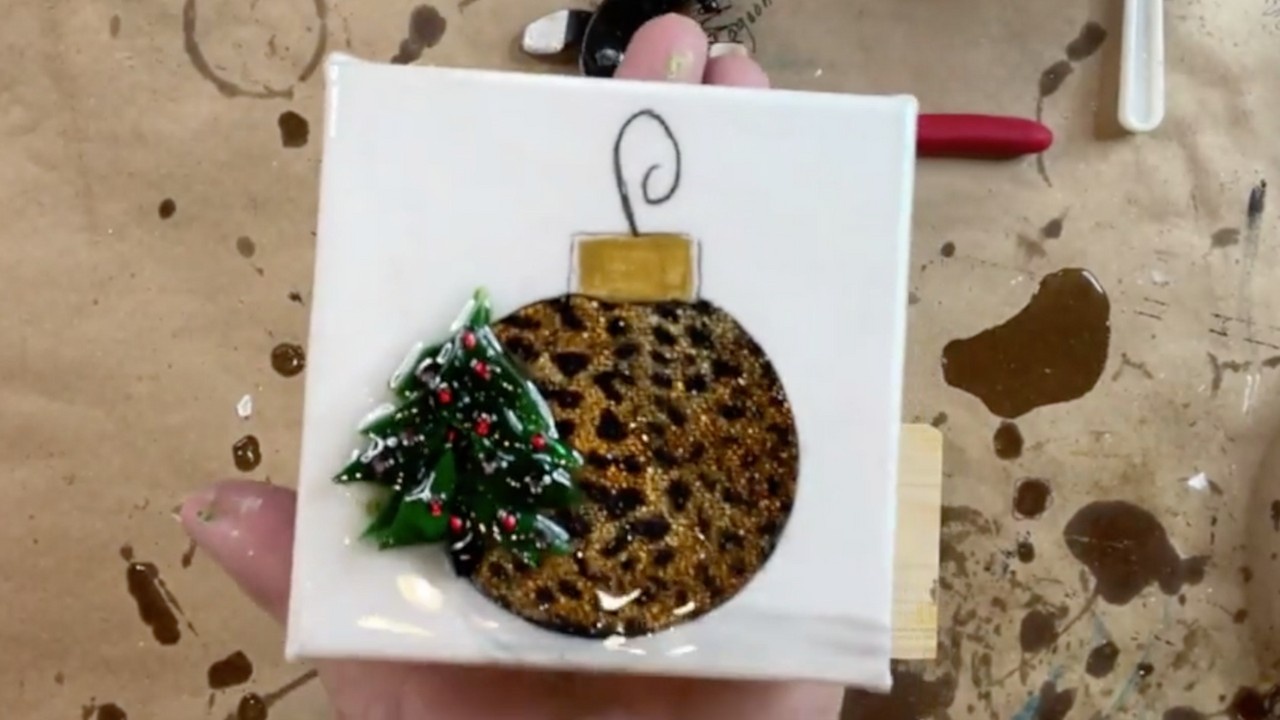
We are going to make something really fun and different today. I got a little hooked on the foils and started thinking about what else I could do with them. Today, we’re going to make a small canvas with a leopard print ornament and glass Christmas tree!
I put one coat of paint on this already because I was thinking it was going to need two, and so what I'm using is Deco Art in Enchanted. It is turquoise and it is an iridescent flash paint. It says iridescent top coat acrylic, but it's flash. It goes on white and then as the light hits it, it flashes turquoise green.
We're going to do a cute little animal print ornament, and then we're going to embellish it with a little Christmas tree made of glass. These tiny 4 x 4 canvases come from Michael's. You can buy one or you can buy a whole pack that has about 9 in it, so that's an option too.
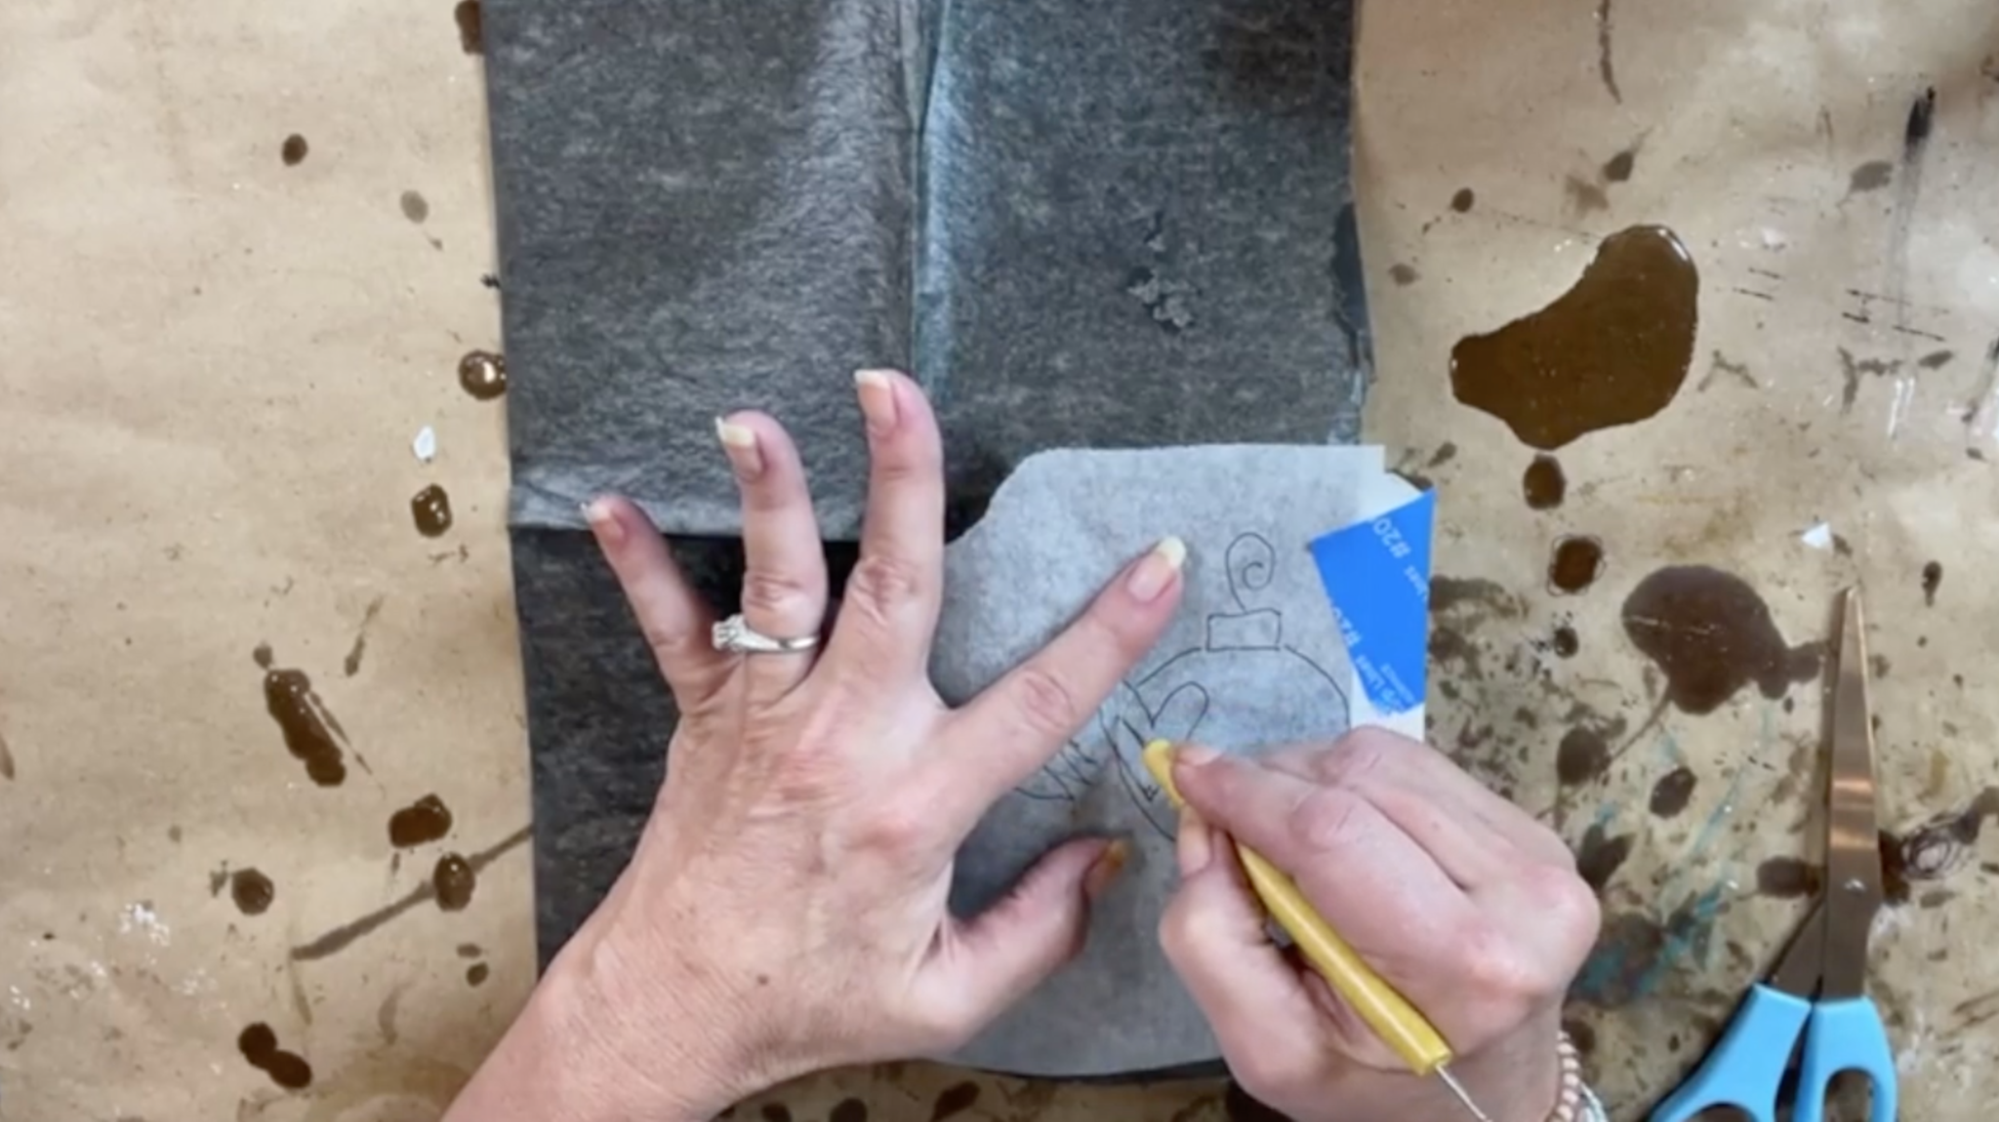
You do not need to reinforce the weight. We're not going to be using that much glass on these. If you are trying to make a circle, you can just get a jar or something along those lines to help you make a circle. I'm actually going to just trace this onto my canvas.
Before we get started, we are going to do one more coat of the Deco Art Enchanted turquoise because I want this to have a little bit of flash to it. I'm just going to squirt a little bit of paint right onto my canvas and spread that out. I'm going to kind of pull in one direction, so it's not splotchy. Then we'll dry that real quick with a dryer.

The foil does come from Walls and More By Mimi. You can purchase those foils from her. You also need to purchase the foil adhesive. It's the glue that keeps the foil attached to your canvas or your artwork.
We're going to trace this on our canvas. I'm going to center my ornament as best as I can. I'm just going to tape that down and I'm going to use my graphite paper or transfer paper, and just going to trace my ornament.
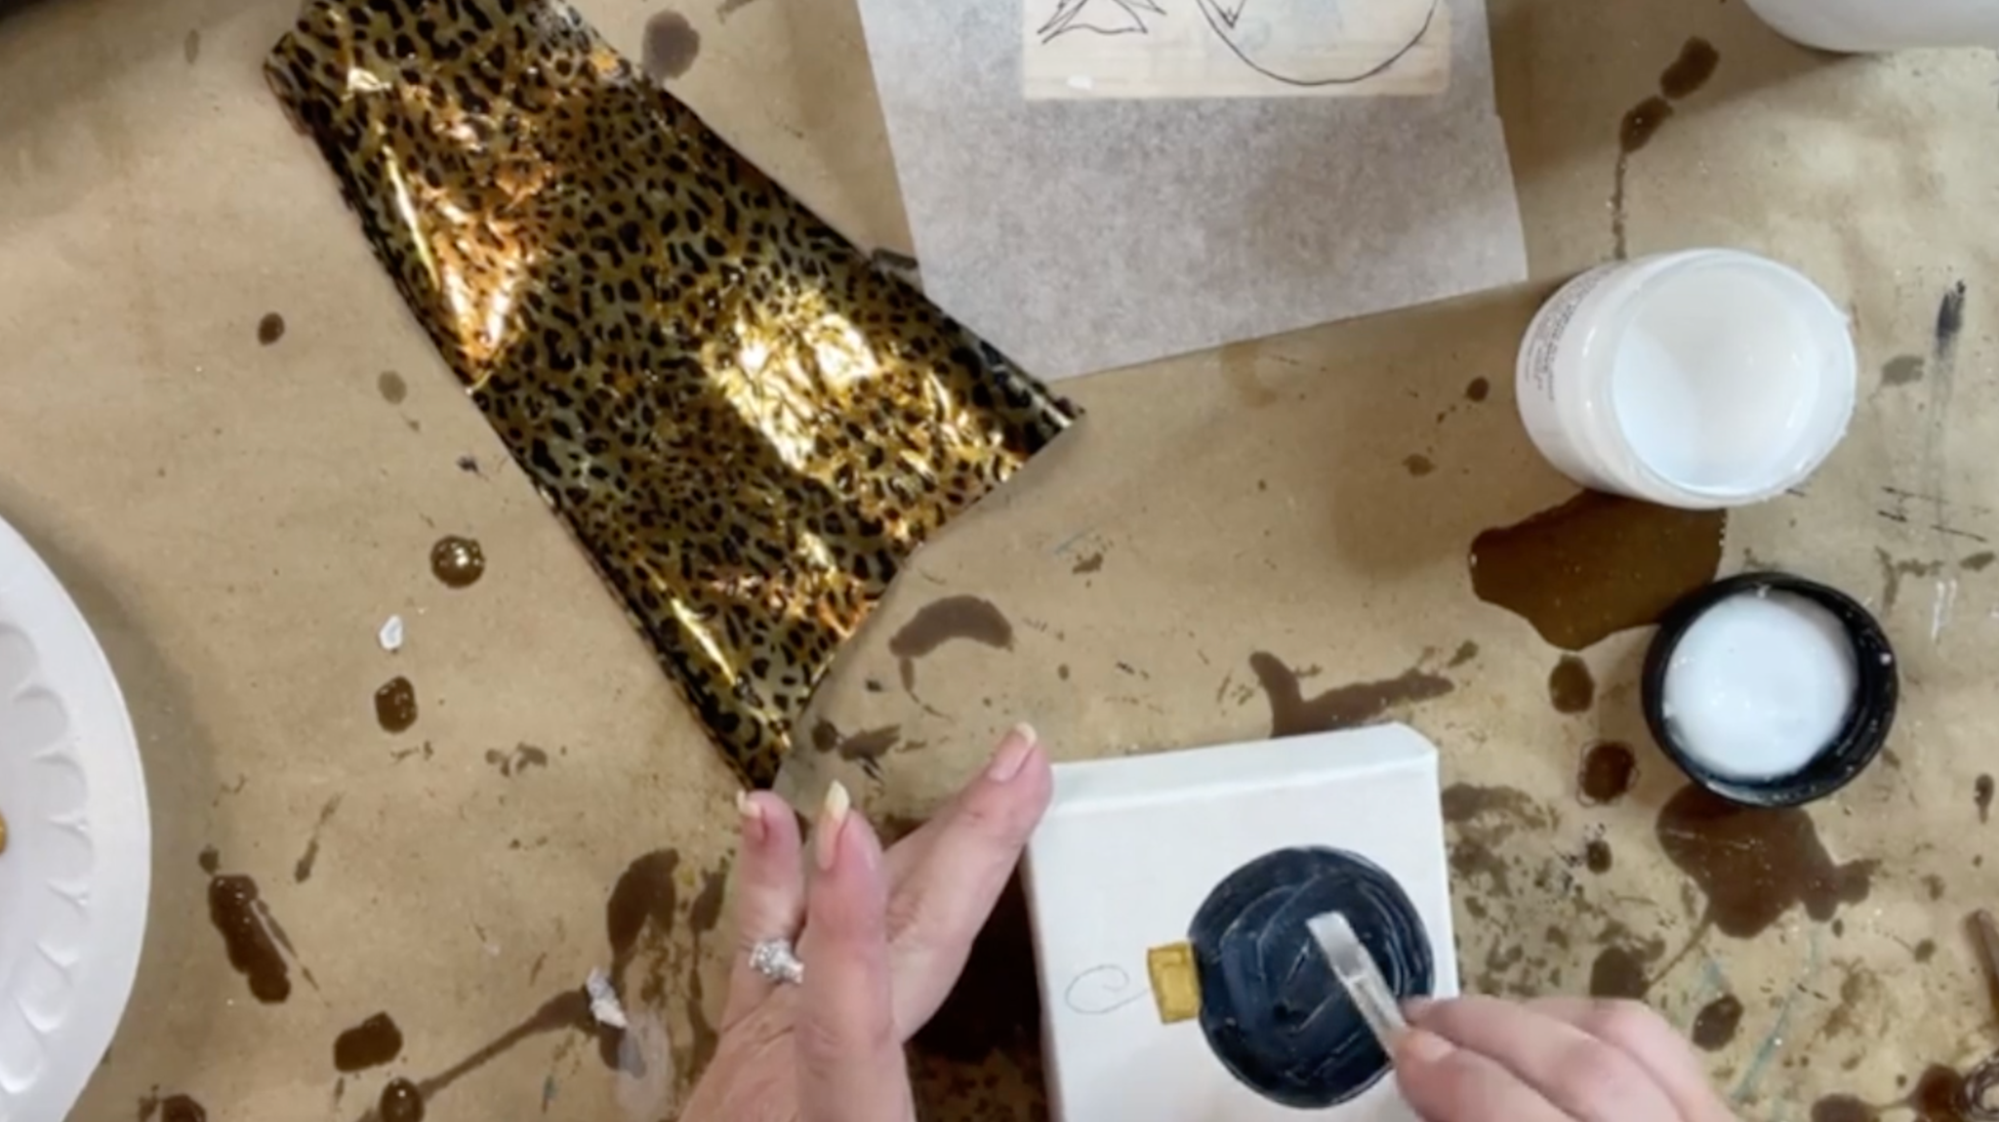
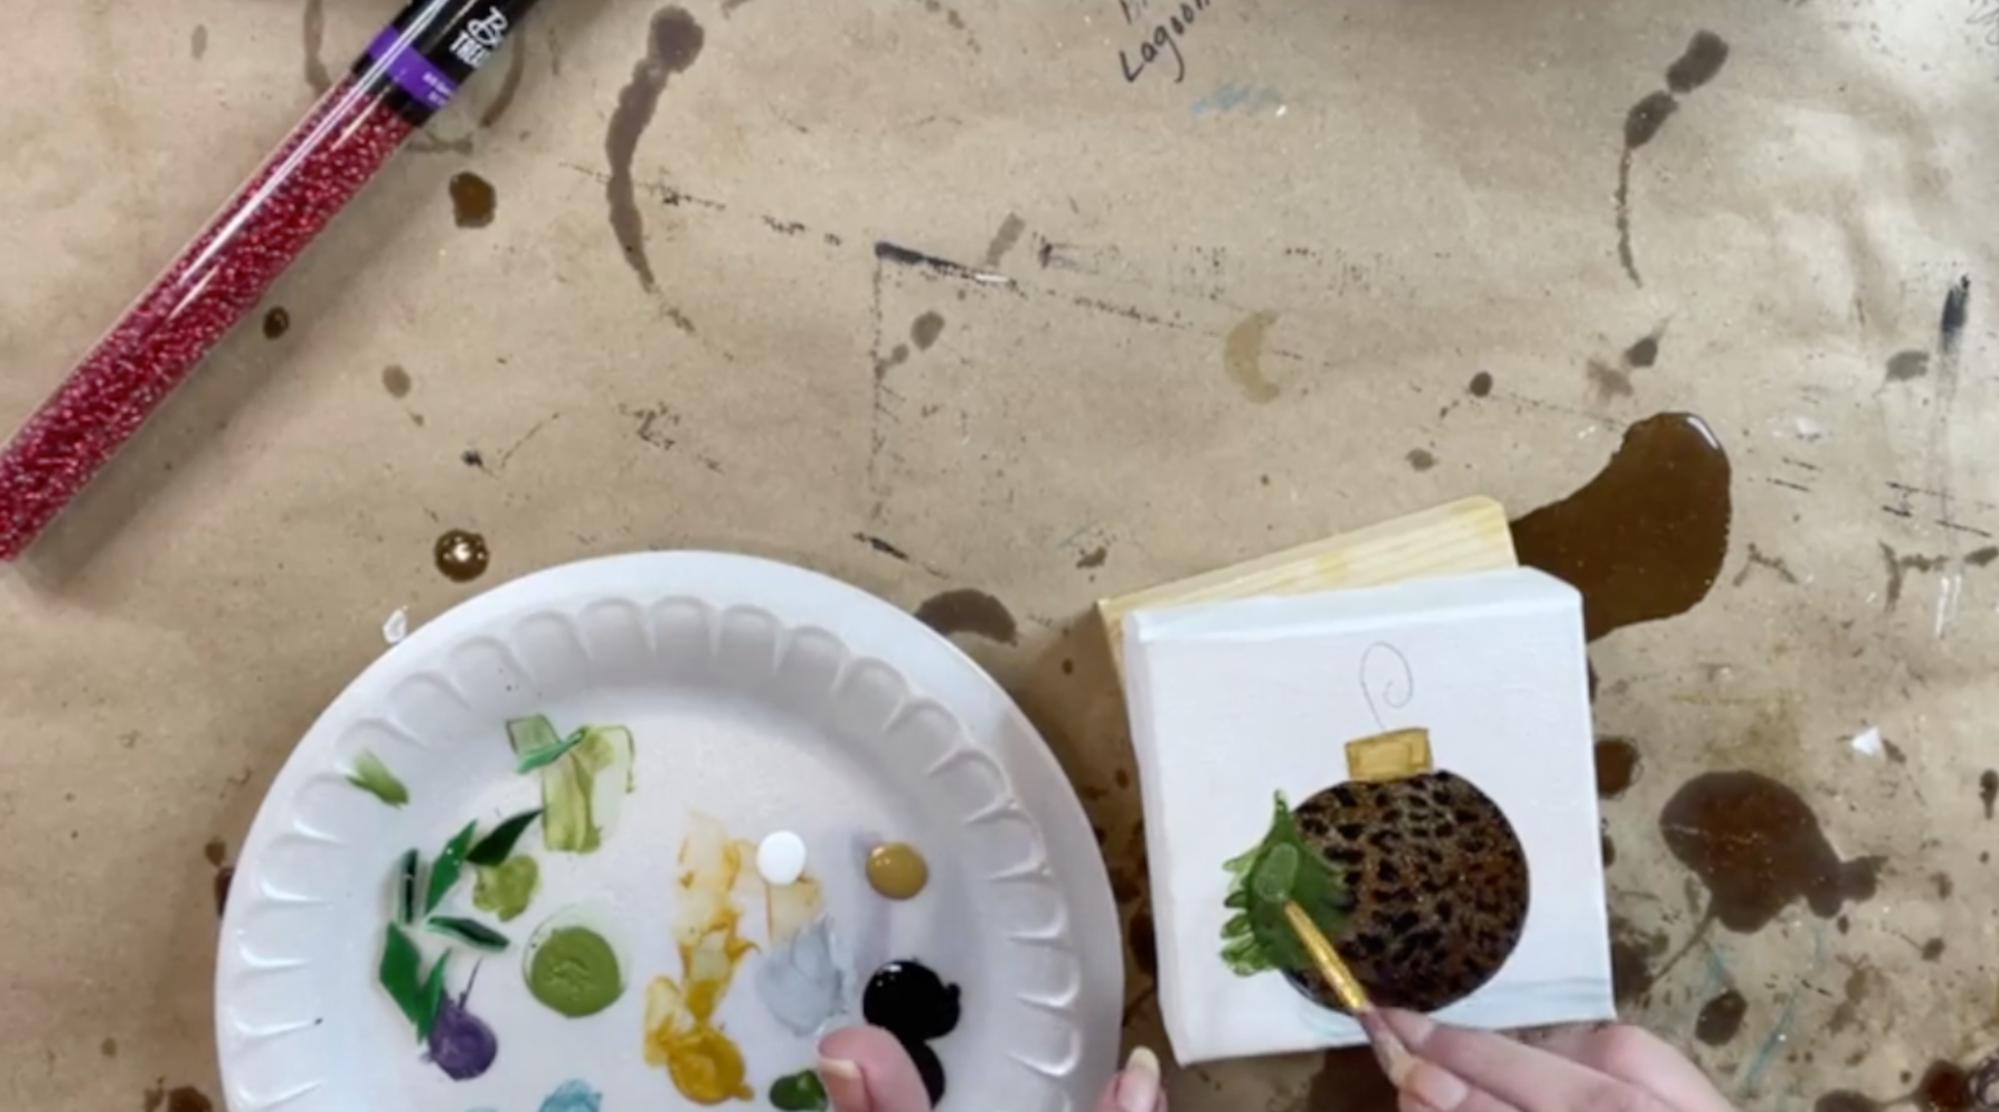
We do need to put something on the background so that you don't see white pressing through the foil. I am going to use black. You could use black or gold or whatever color you want, but some of that is going to show through. Be mindful of whatever color you use for that.
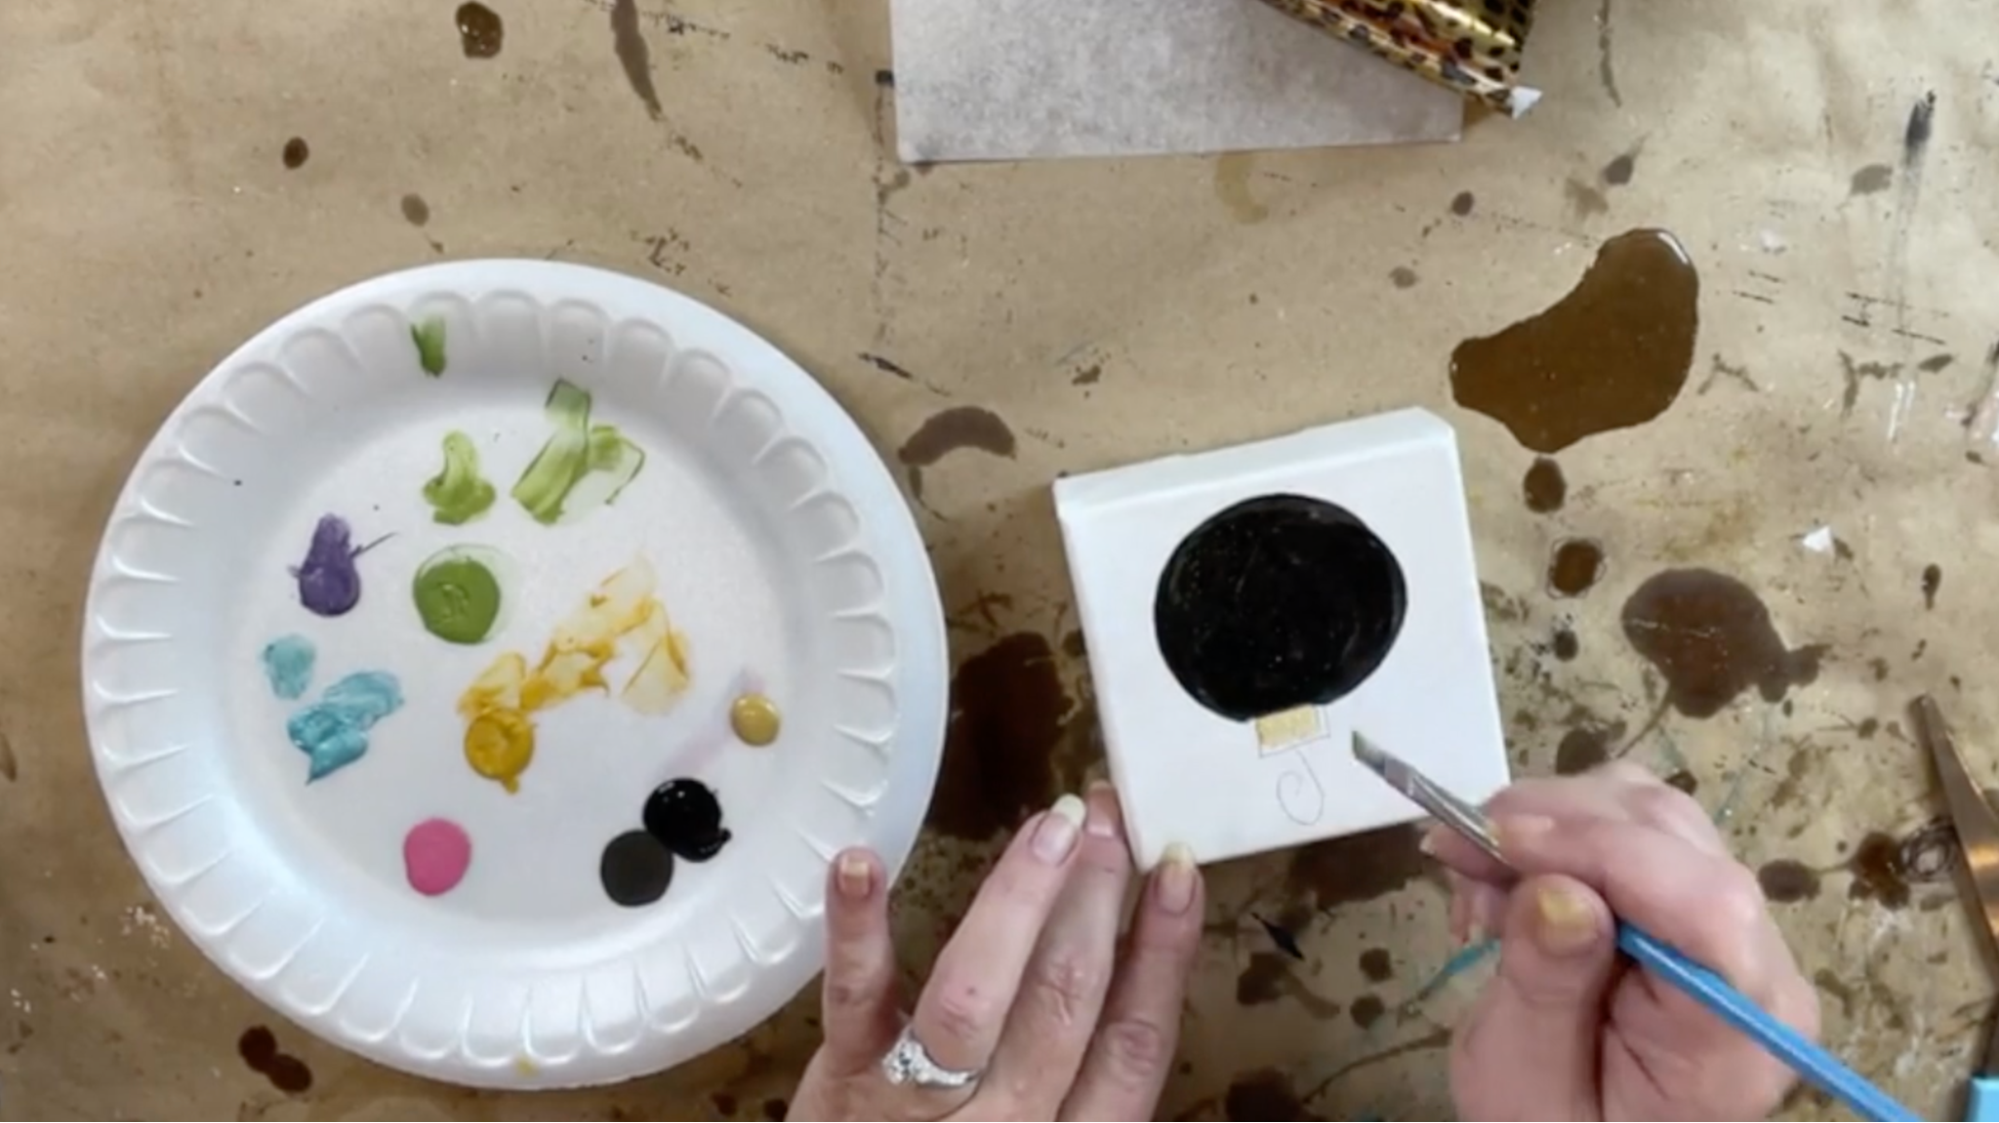
I'm going to put a little bit of gold right here. Before we can apply our foil, I'm going to blow dry this really quick.
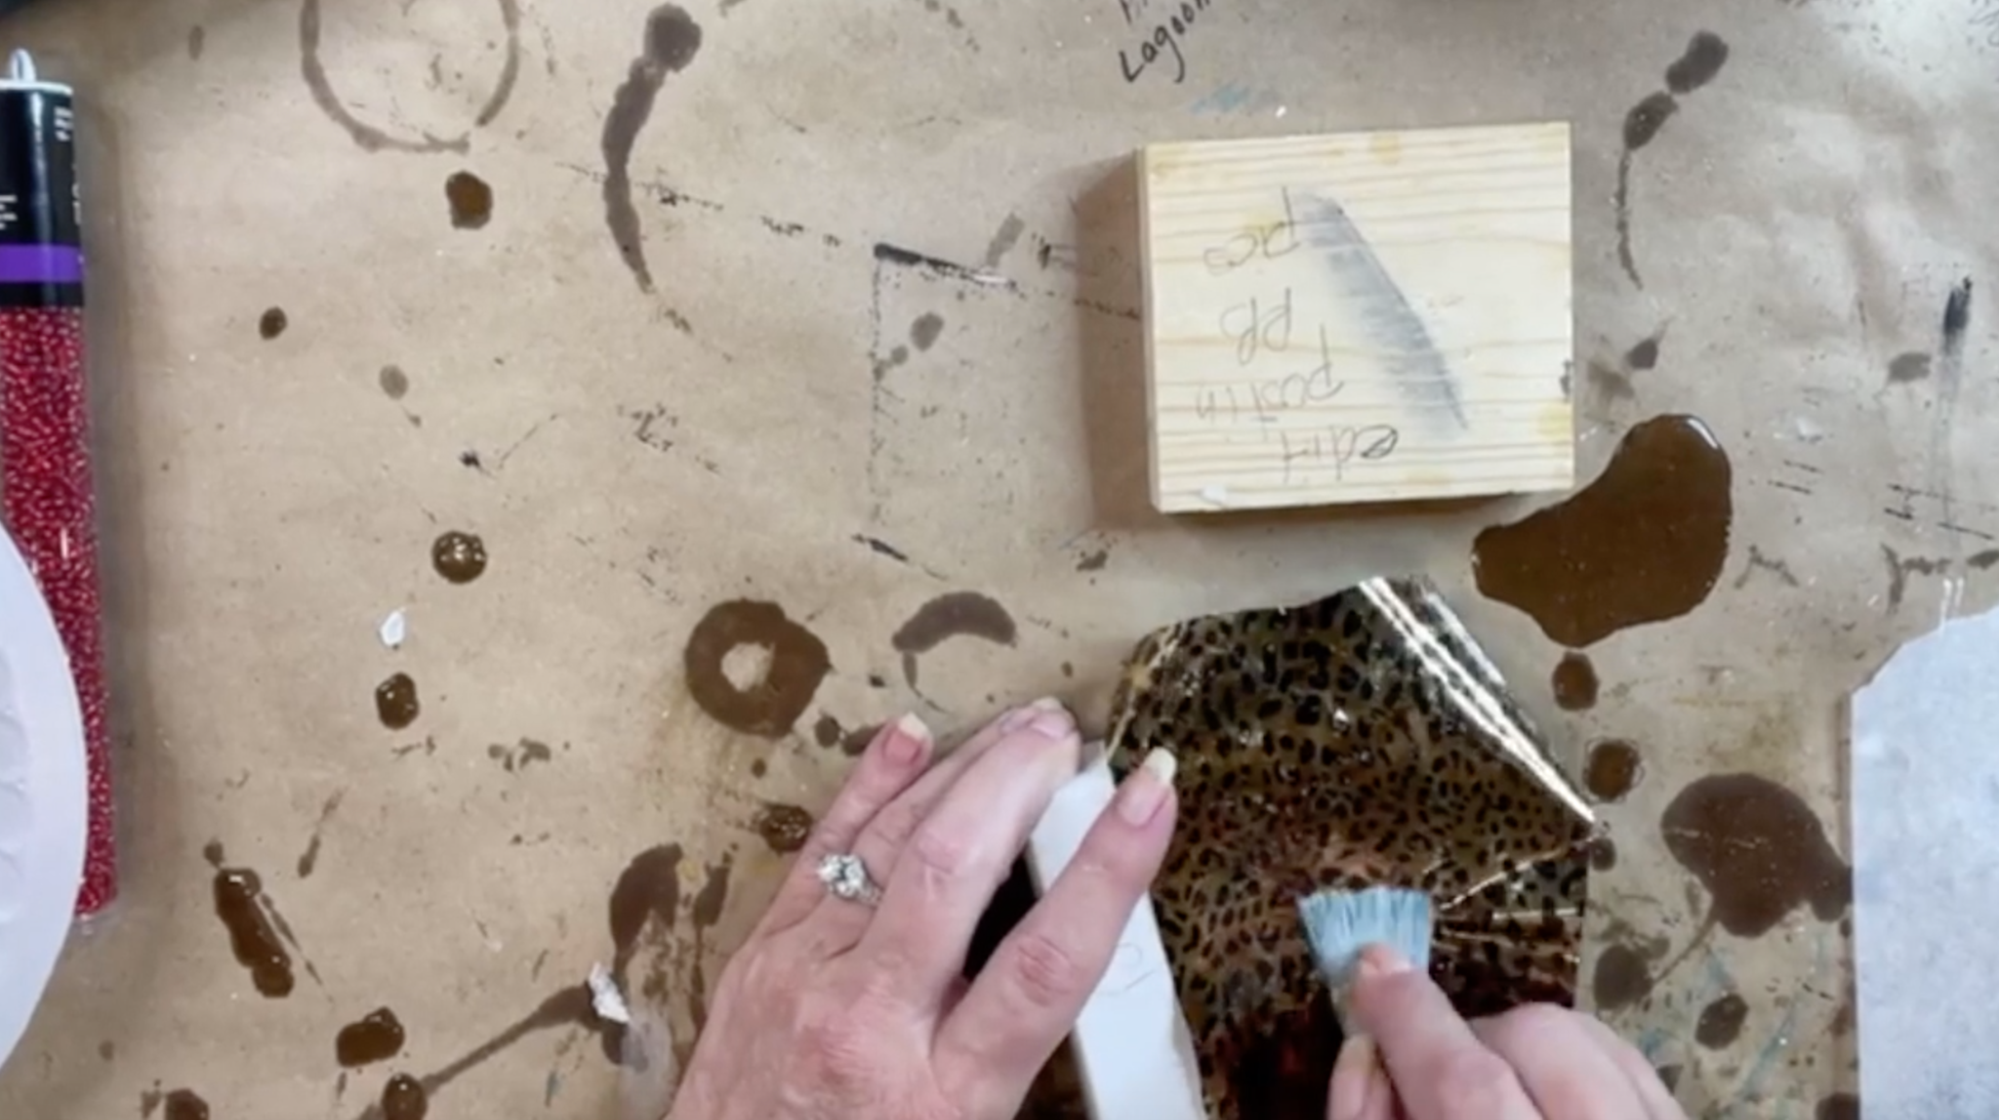
So, this is foil adhesive. You can get this from Rima at Walls and More by Mimi. It is what helps adhere the cute little foil to our art piece. I'm just going to paint that glue right onto my canvas and then we need to let that dry really nicely before we move on. Let it dry until it's completely clear, then you can come back and apply your foil. If you try to apply your foil too soon, it's just going to be a mess. It's not going to stick and it's going to mess up the size, the glue, and it won't adhere. Just do a nice thin coat.
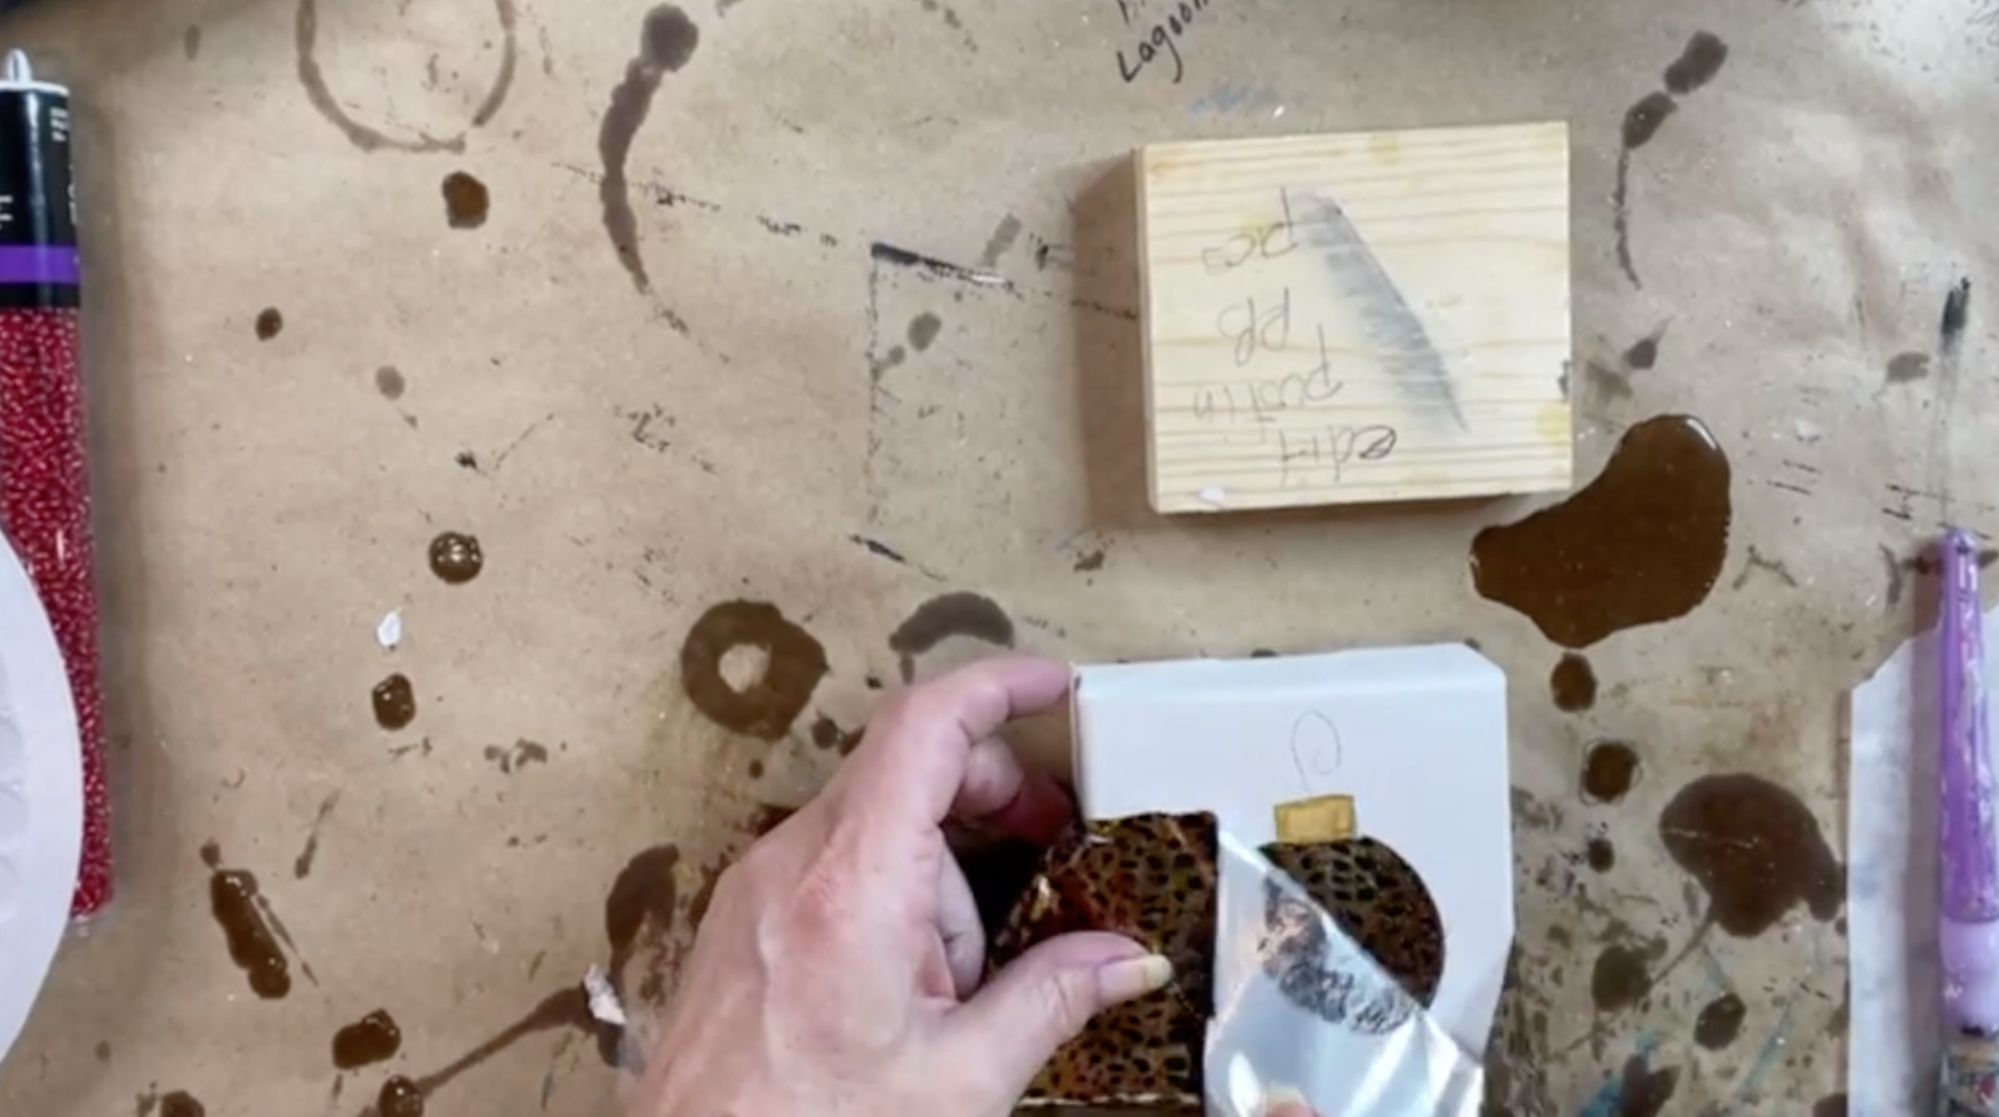
For the foil, you do the pattern side up. You want the pattern facing up towards you. You're going to just lay it down. It'll stick to that glue and then you can take a brush and just scrub that in and it will transfer that foil to your art piece. If it doesn't transfer one hundred percent, don't stress about it. You can add more adhesive and let that dry and transfer it again.
Before I move on, I'm going to do one more little thing. I have a little bit of black on my palette and I'm going to add just one drop of white. I am going to give this piece a little bit of a shadow underneath one side. I'm going to get white on my brush and I'm going to mix one little pin dot of black in and make myself a little bit of a gray. I just want a tiny hint of a shadow right along the outside edge of the ornament.
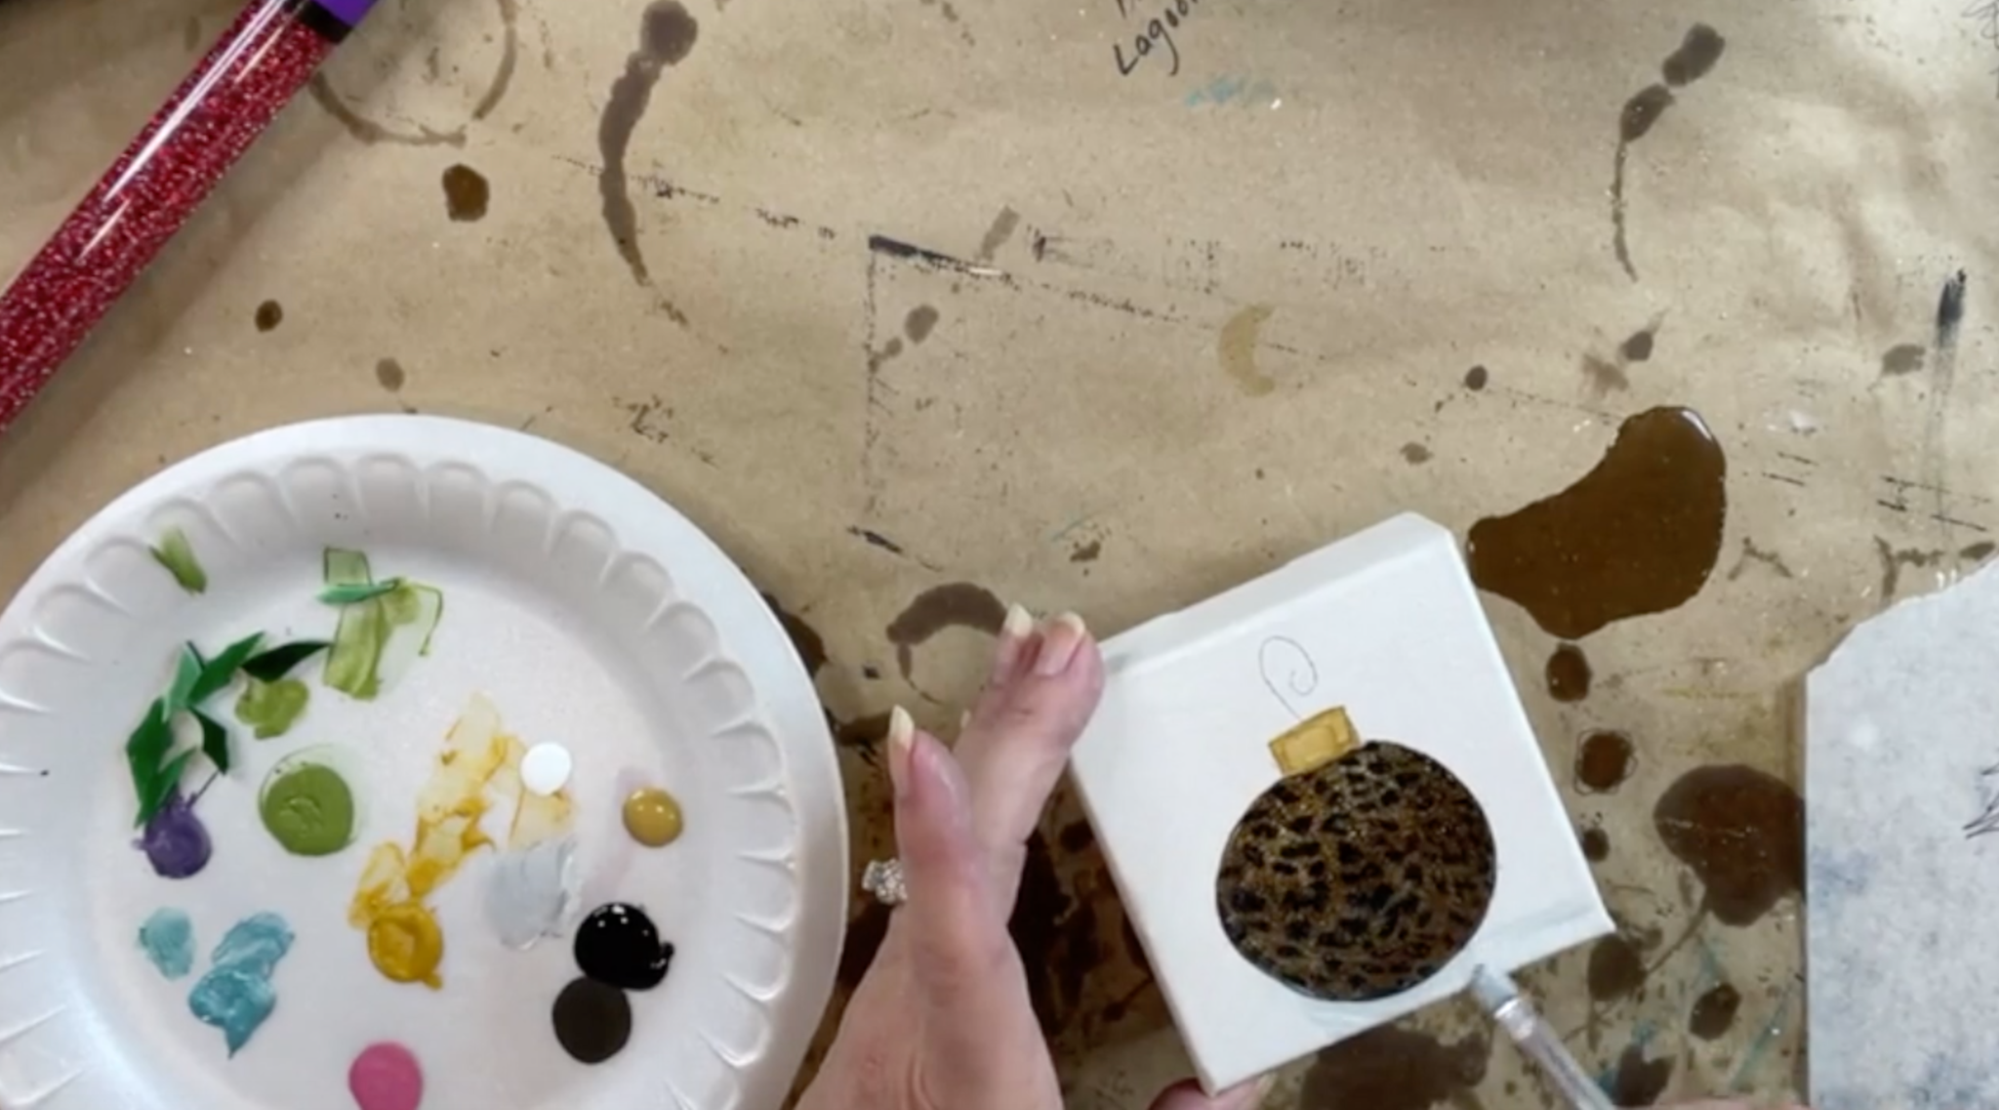
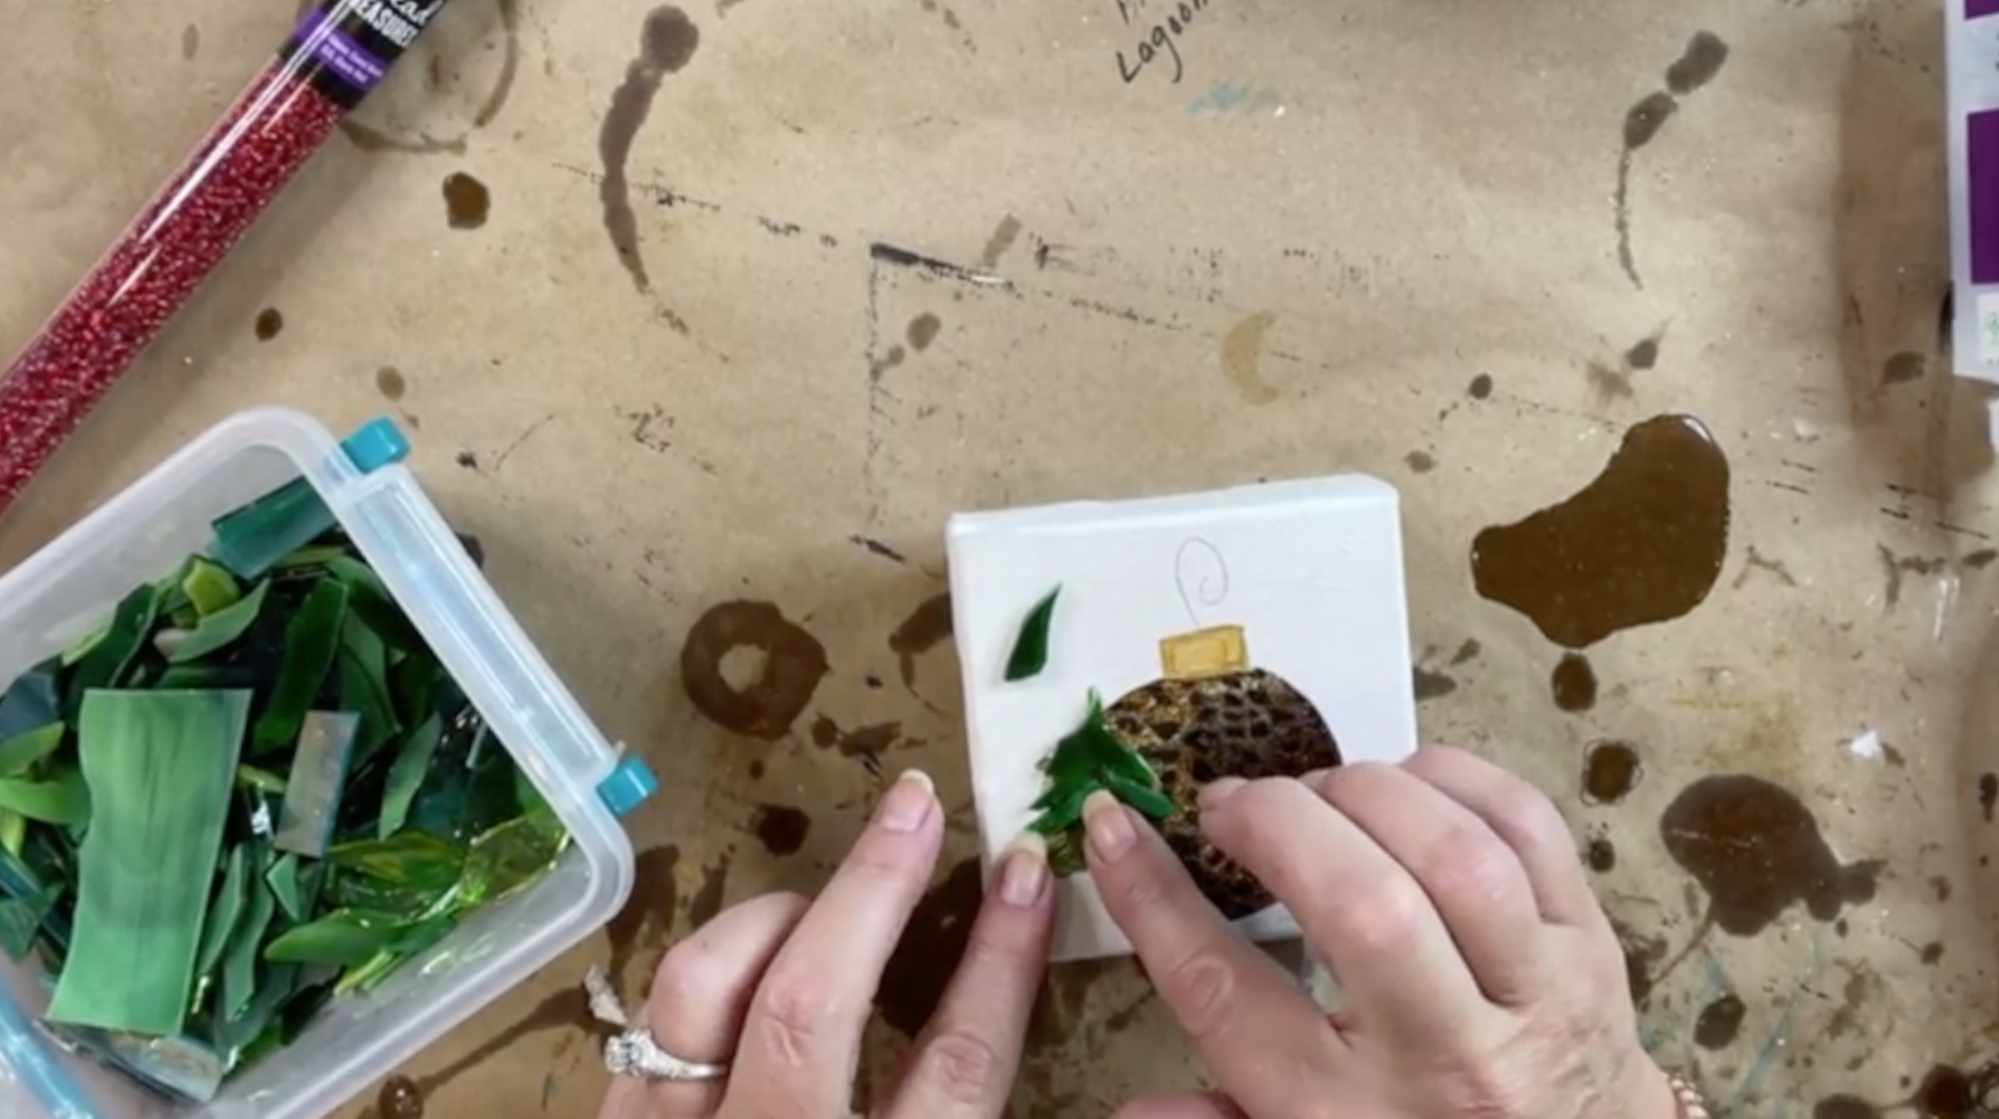
We're doing a Christmas tree, so I'm going to use this dazzling metallic, festive green. I'm going to put a little bit of this on my palette, and we're just going to give ourselves a little formation of a Christmas tree. Nothing too fancy, just a little background. If we have any space in between our little glass pieces, it will still show green through that. Don't worry too much about it being perfect because we are going to put glass on top and most of this will be covered up.
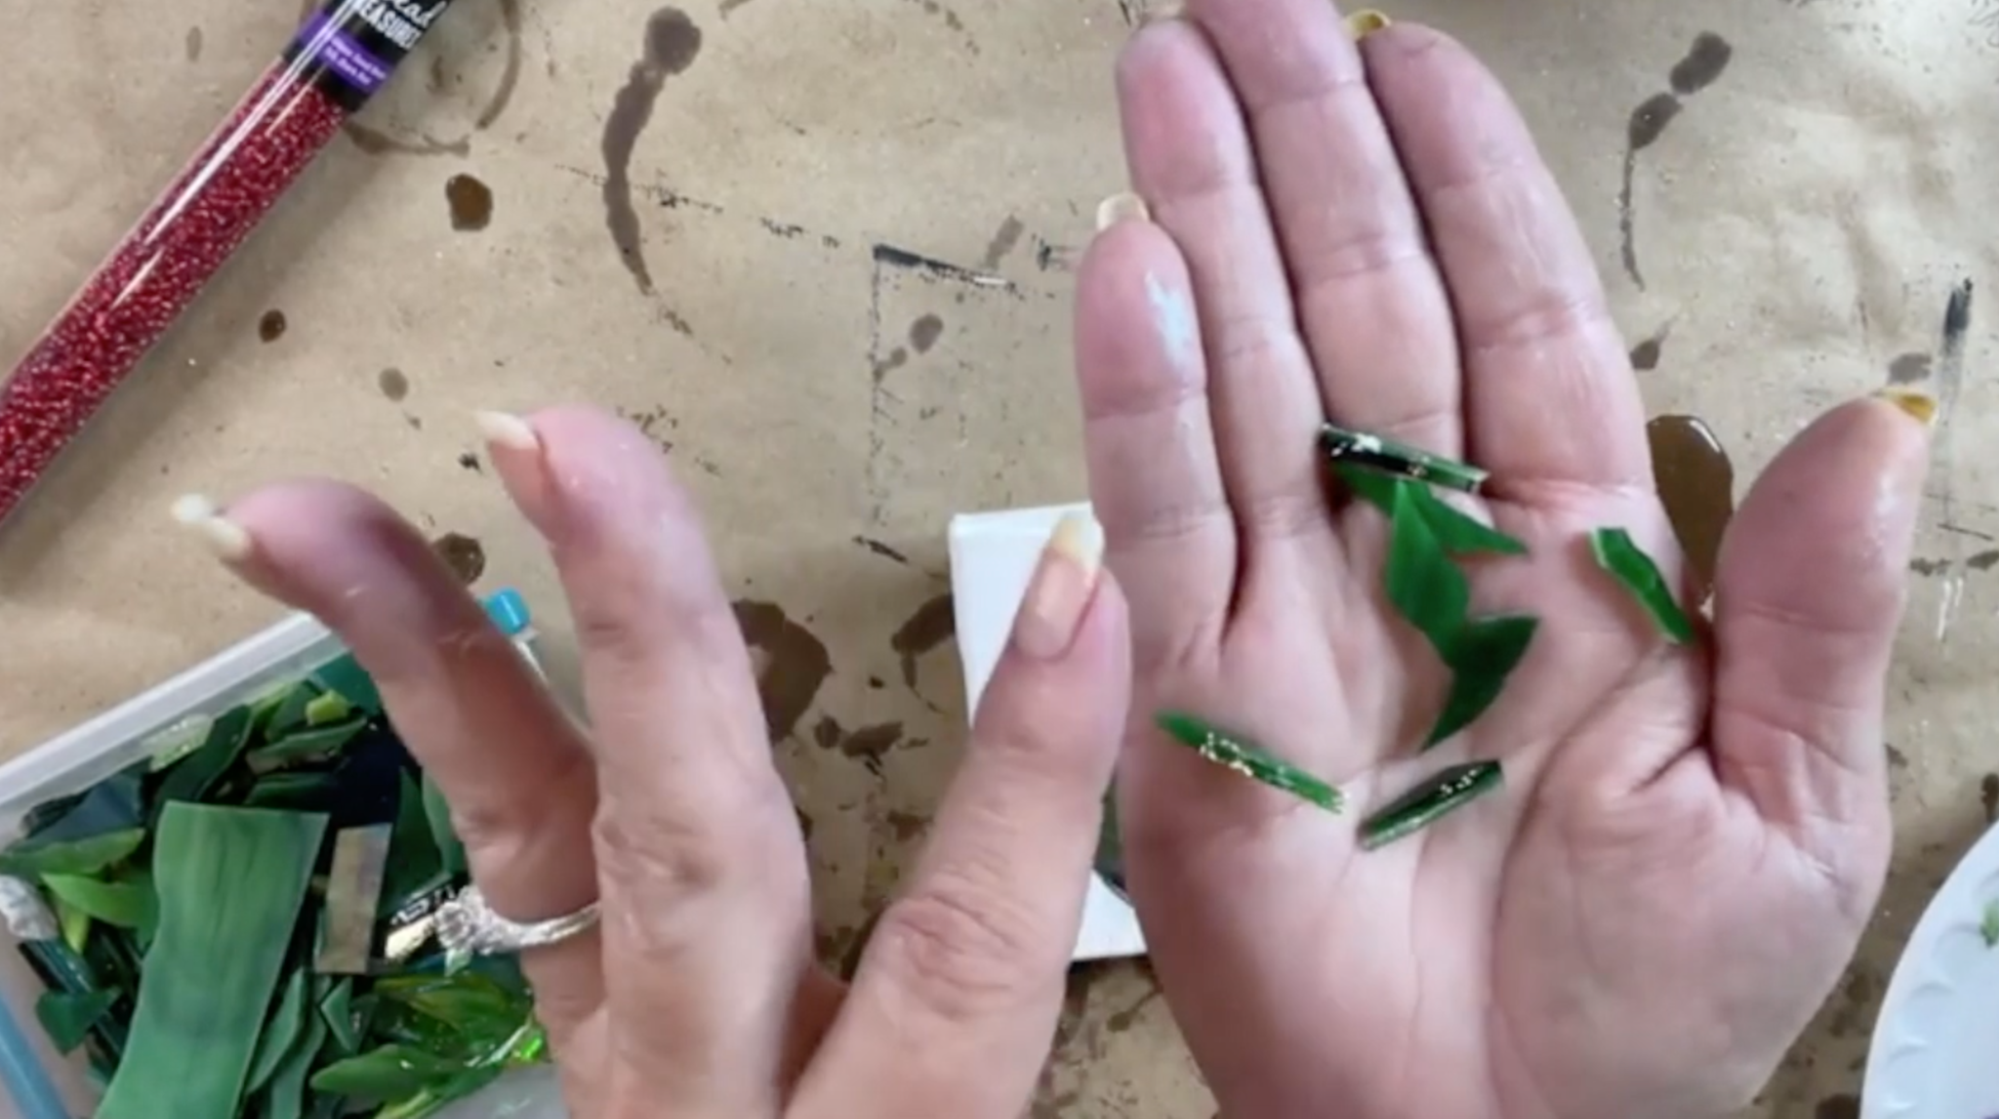
Now I'm going to show you what we're going to do for glass. I bought a sheet of glass from Hobby Lobby. It's a 12 x 12 inch square of sheet glass. I use these to create what I like to call leaf shapes. Just squeeze and create these little bitty leafy shapes. We’re going to use these shapes to create our Christmas tree. You want them to be fairly small, maybe three quarters of an inch.
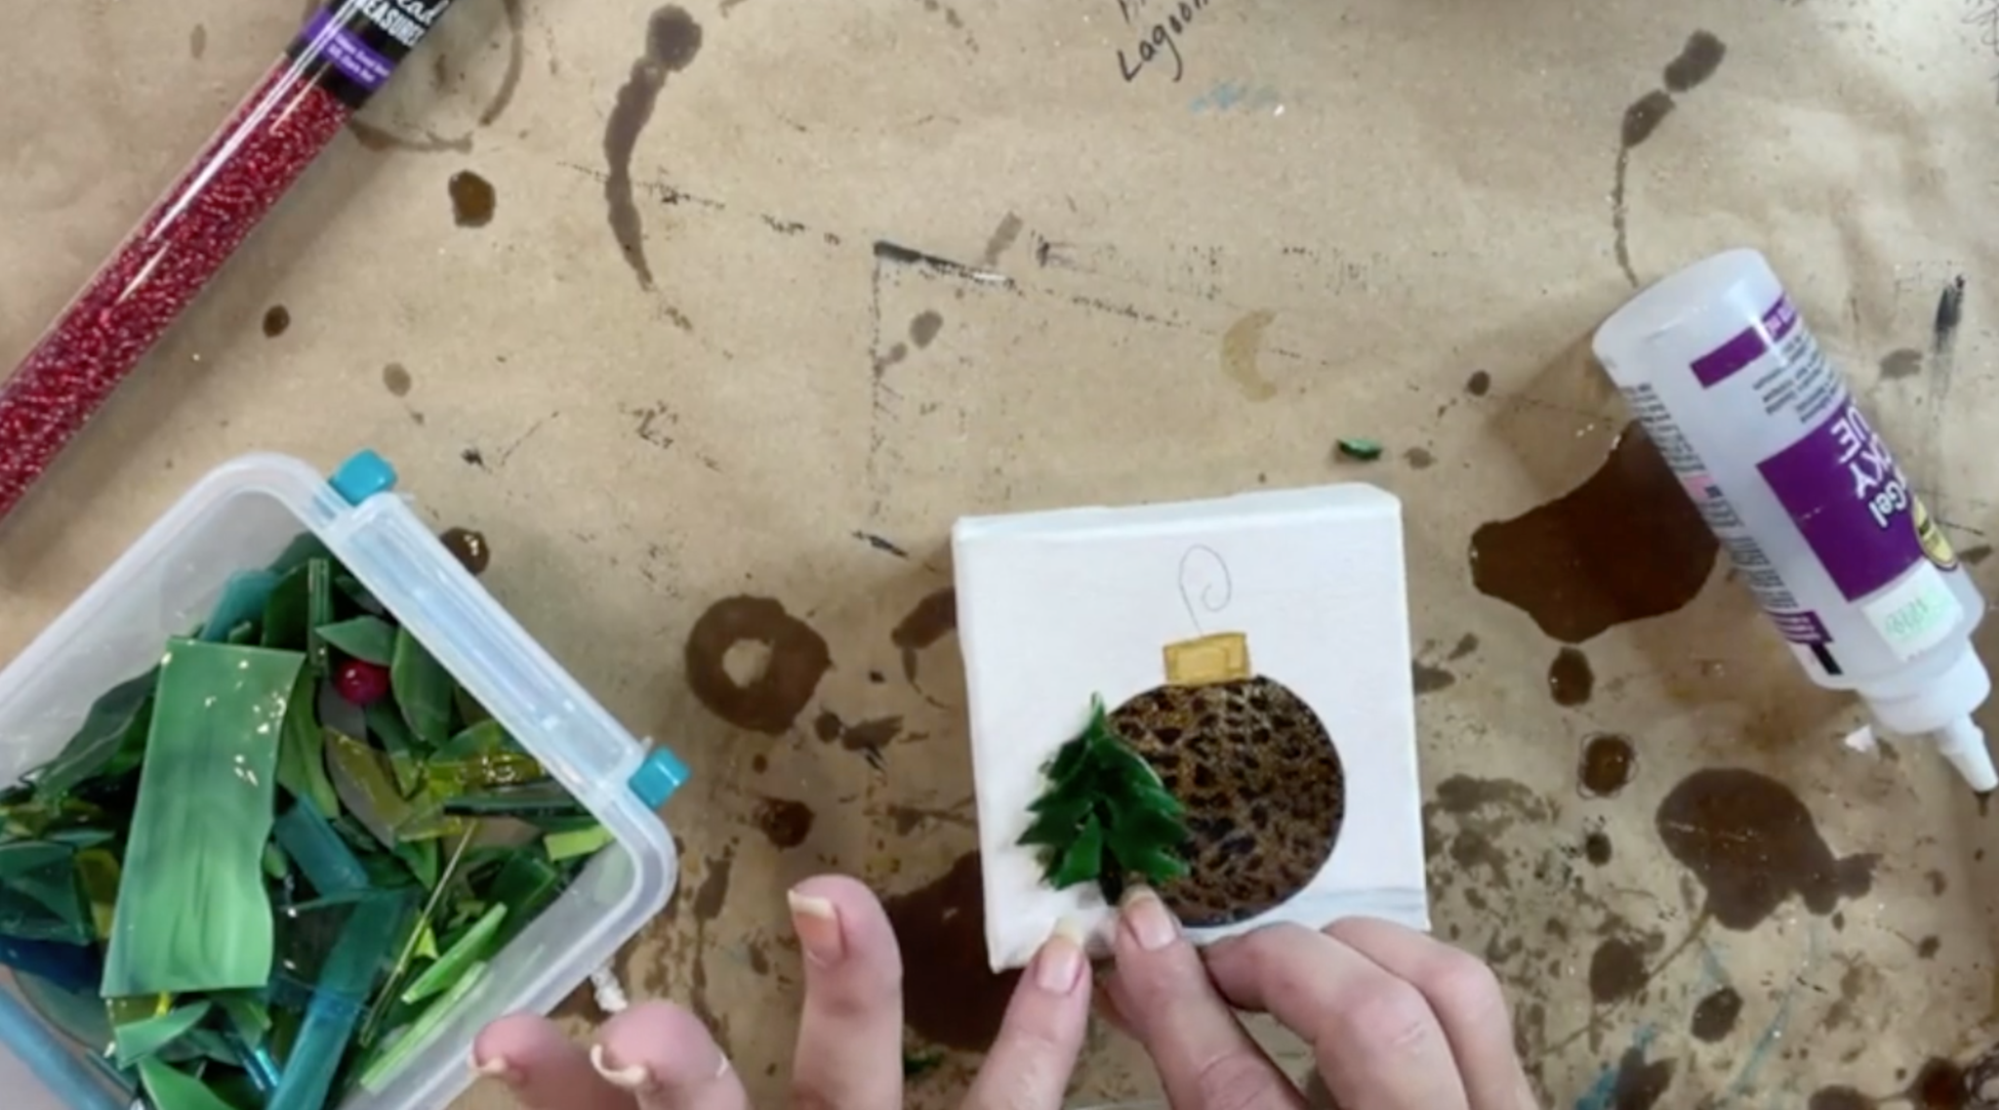
I am going to add a little bit of glue to my tree. Just about the top third or top half, and then we're going to situate some glass bits to our piece. We're just going to keep adding and then we'll do a second layer. You're going to overlap your first pieces to make it multi-dimensional.
I'm just going to find something I could use for a little piece of a tree trunk. I do have this little piece of string glass. You could use a piece of bronze, copper, or gold. I'm just going to get a small tree trunk out of this black glass.
I'm going to take my graphic needle drawing pen, which is great for outlining and making things kind of pop, and I'm going to outline that hook with my needle drawing pen. Make sure the pen ink is dry before moving on.
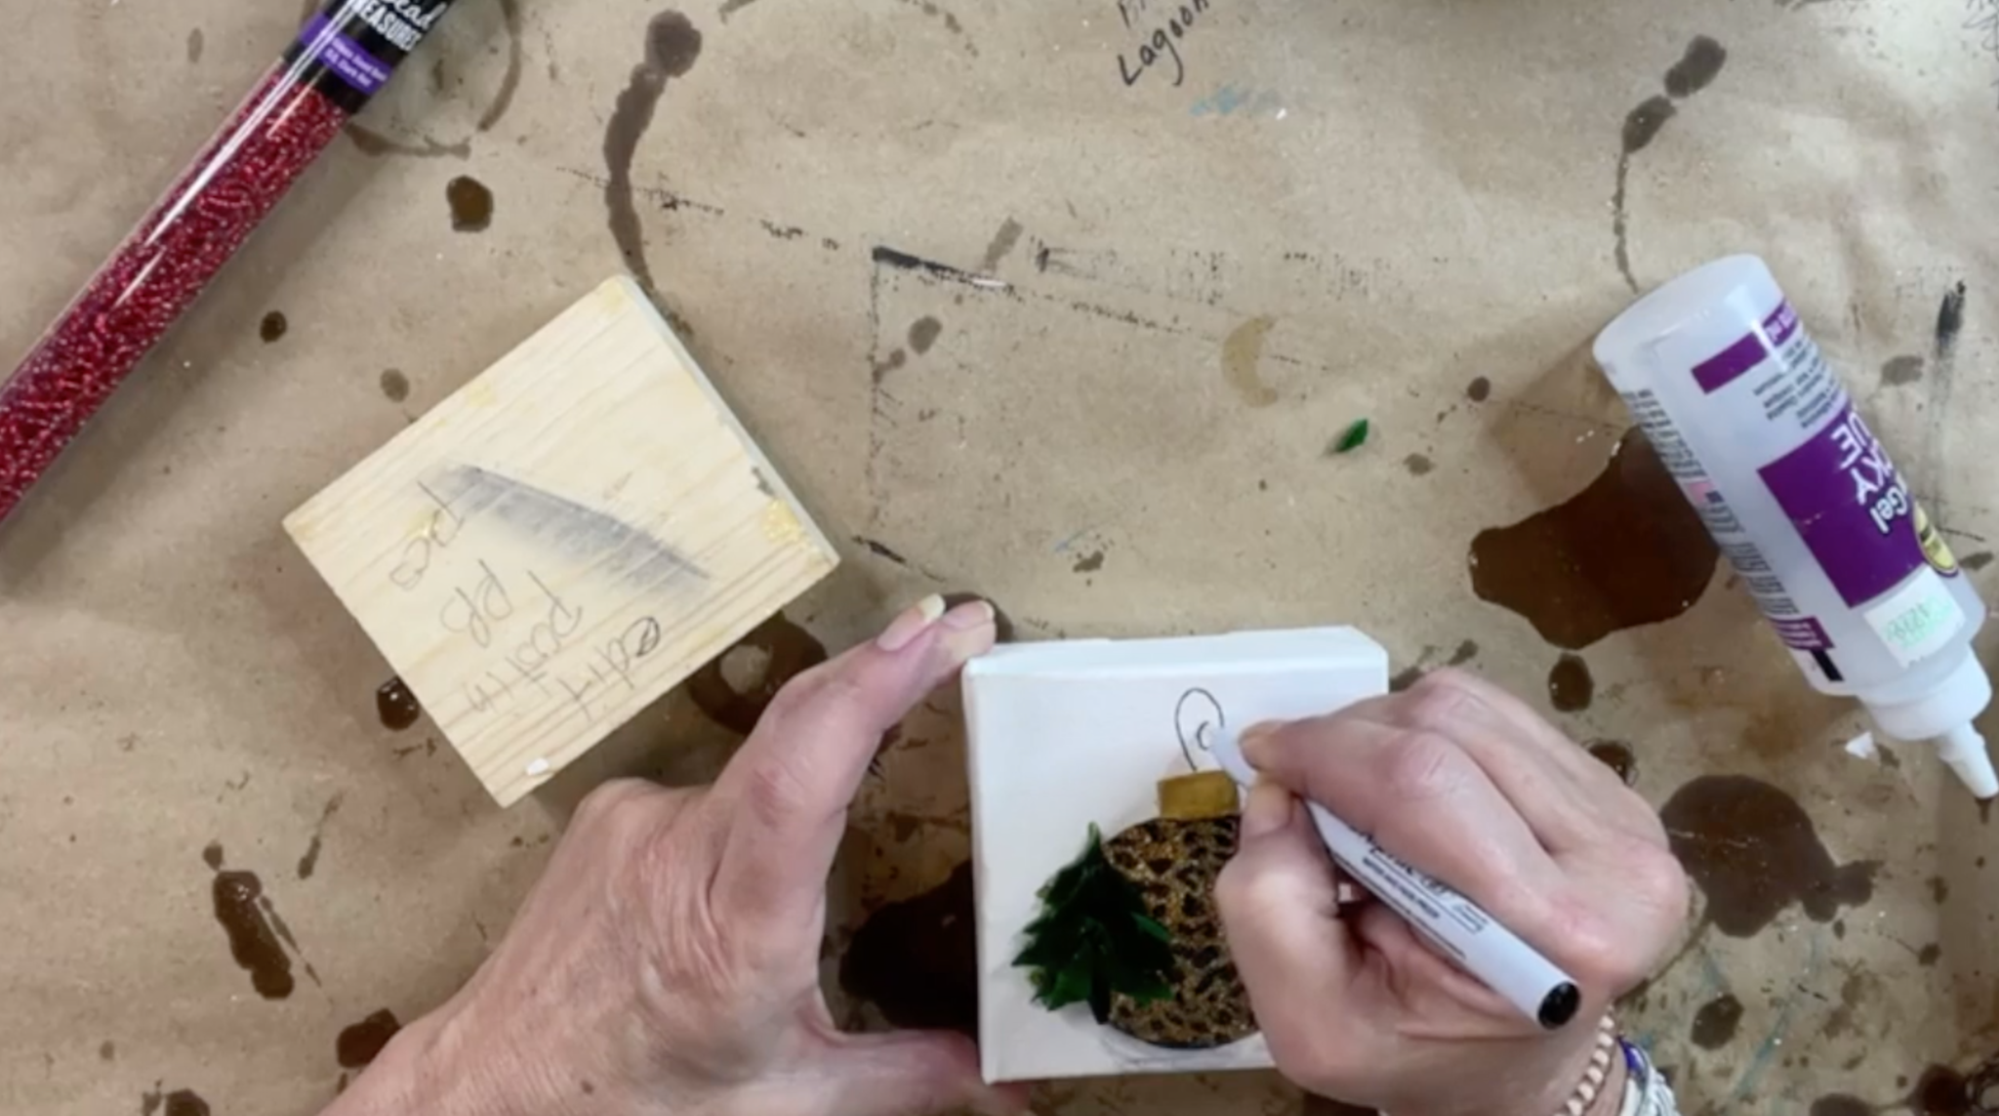
I'm going to go ahead and put resin on this. After the resin is dry, we're going to drop in a few of these cute little red seed beads onto our tree so that it's decorated. If you don't have seed beads, you can just take red paint and use the tip end of your paintbrush and just put on some little tiny red dots for ornaments. It doesn't have to be beads, but I think it's going to be really cute.
I have the tiniest amount of ArtResin here, a quarter of an ounce will make two easily. We have to stir this for three minutes. You’re going to scrape the side, scrape the bottom, and do this for three minutes.
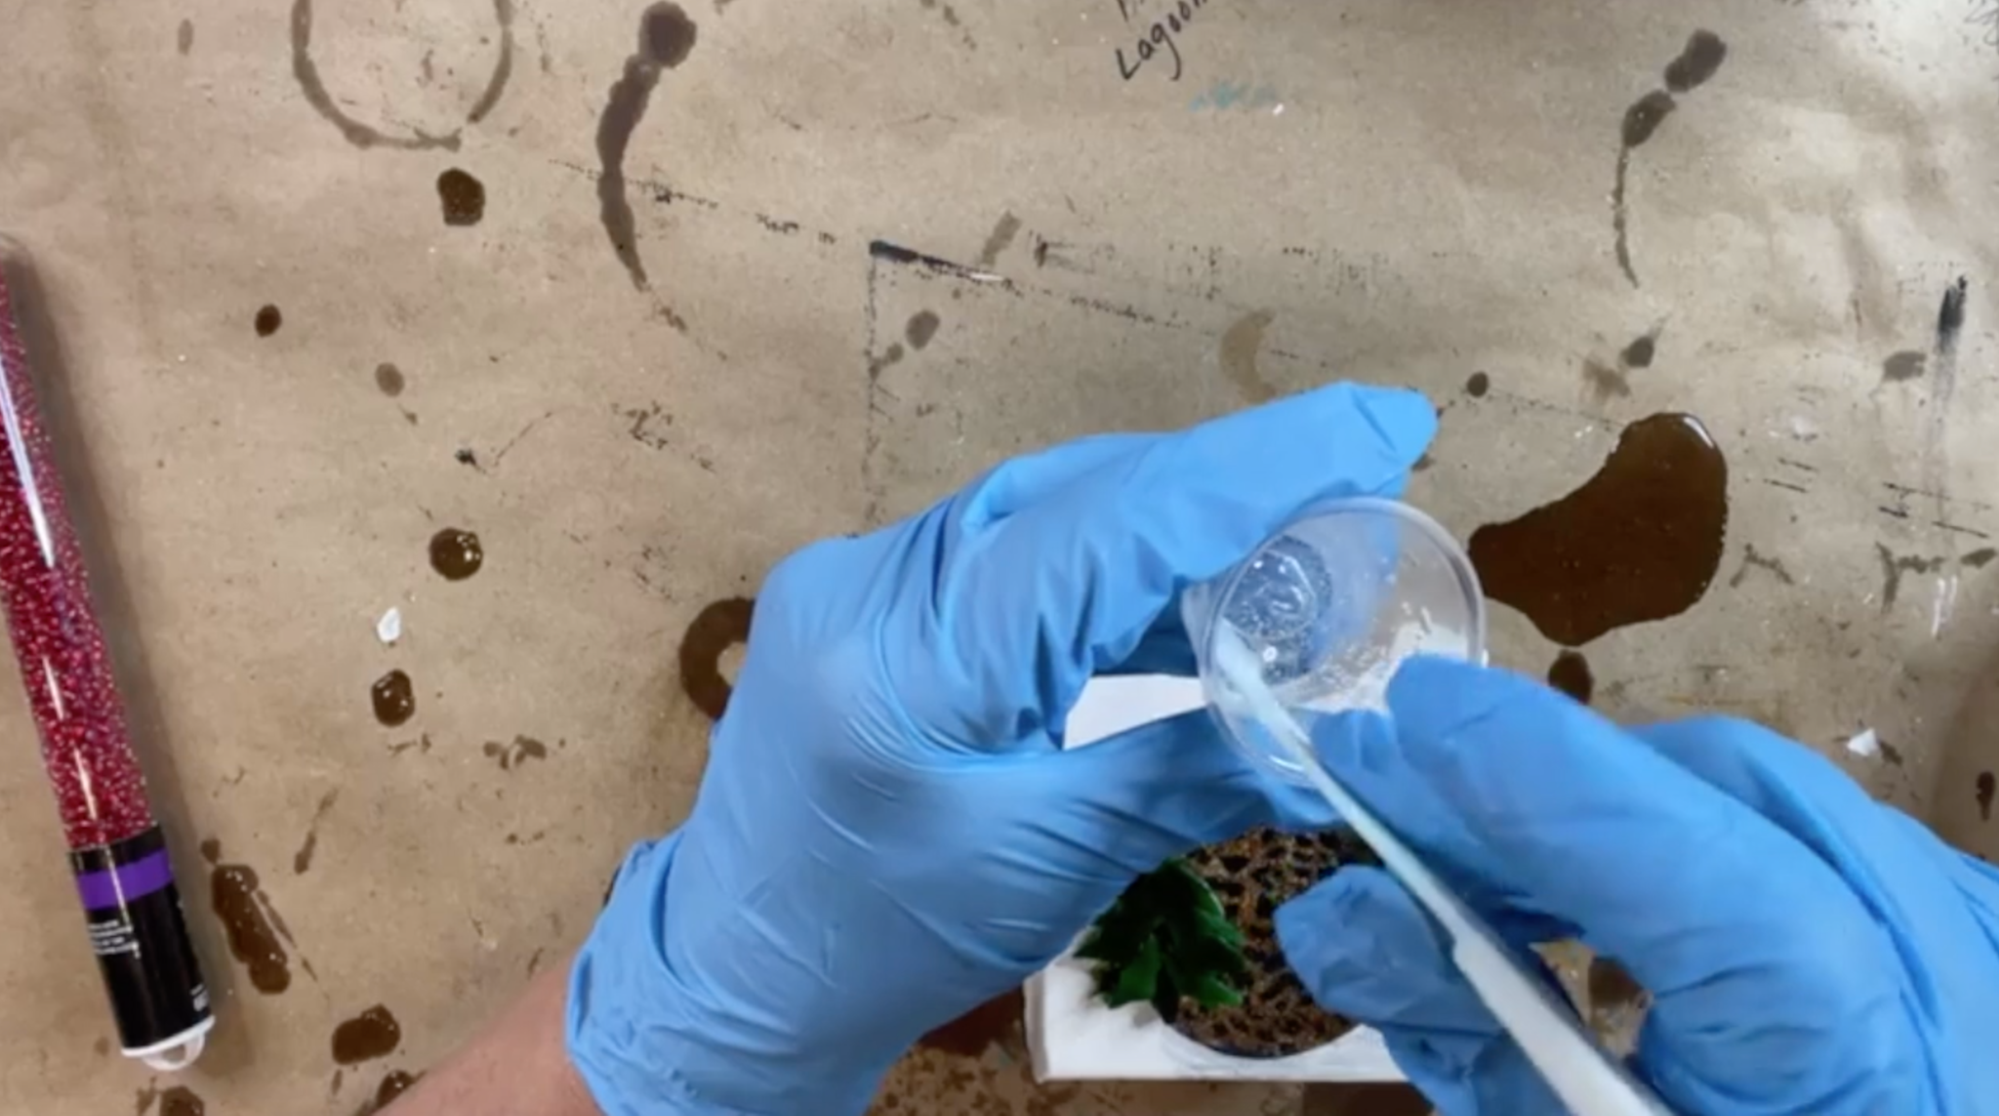
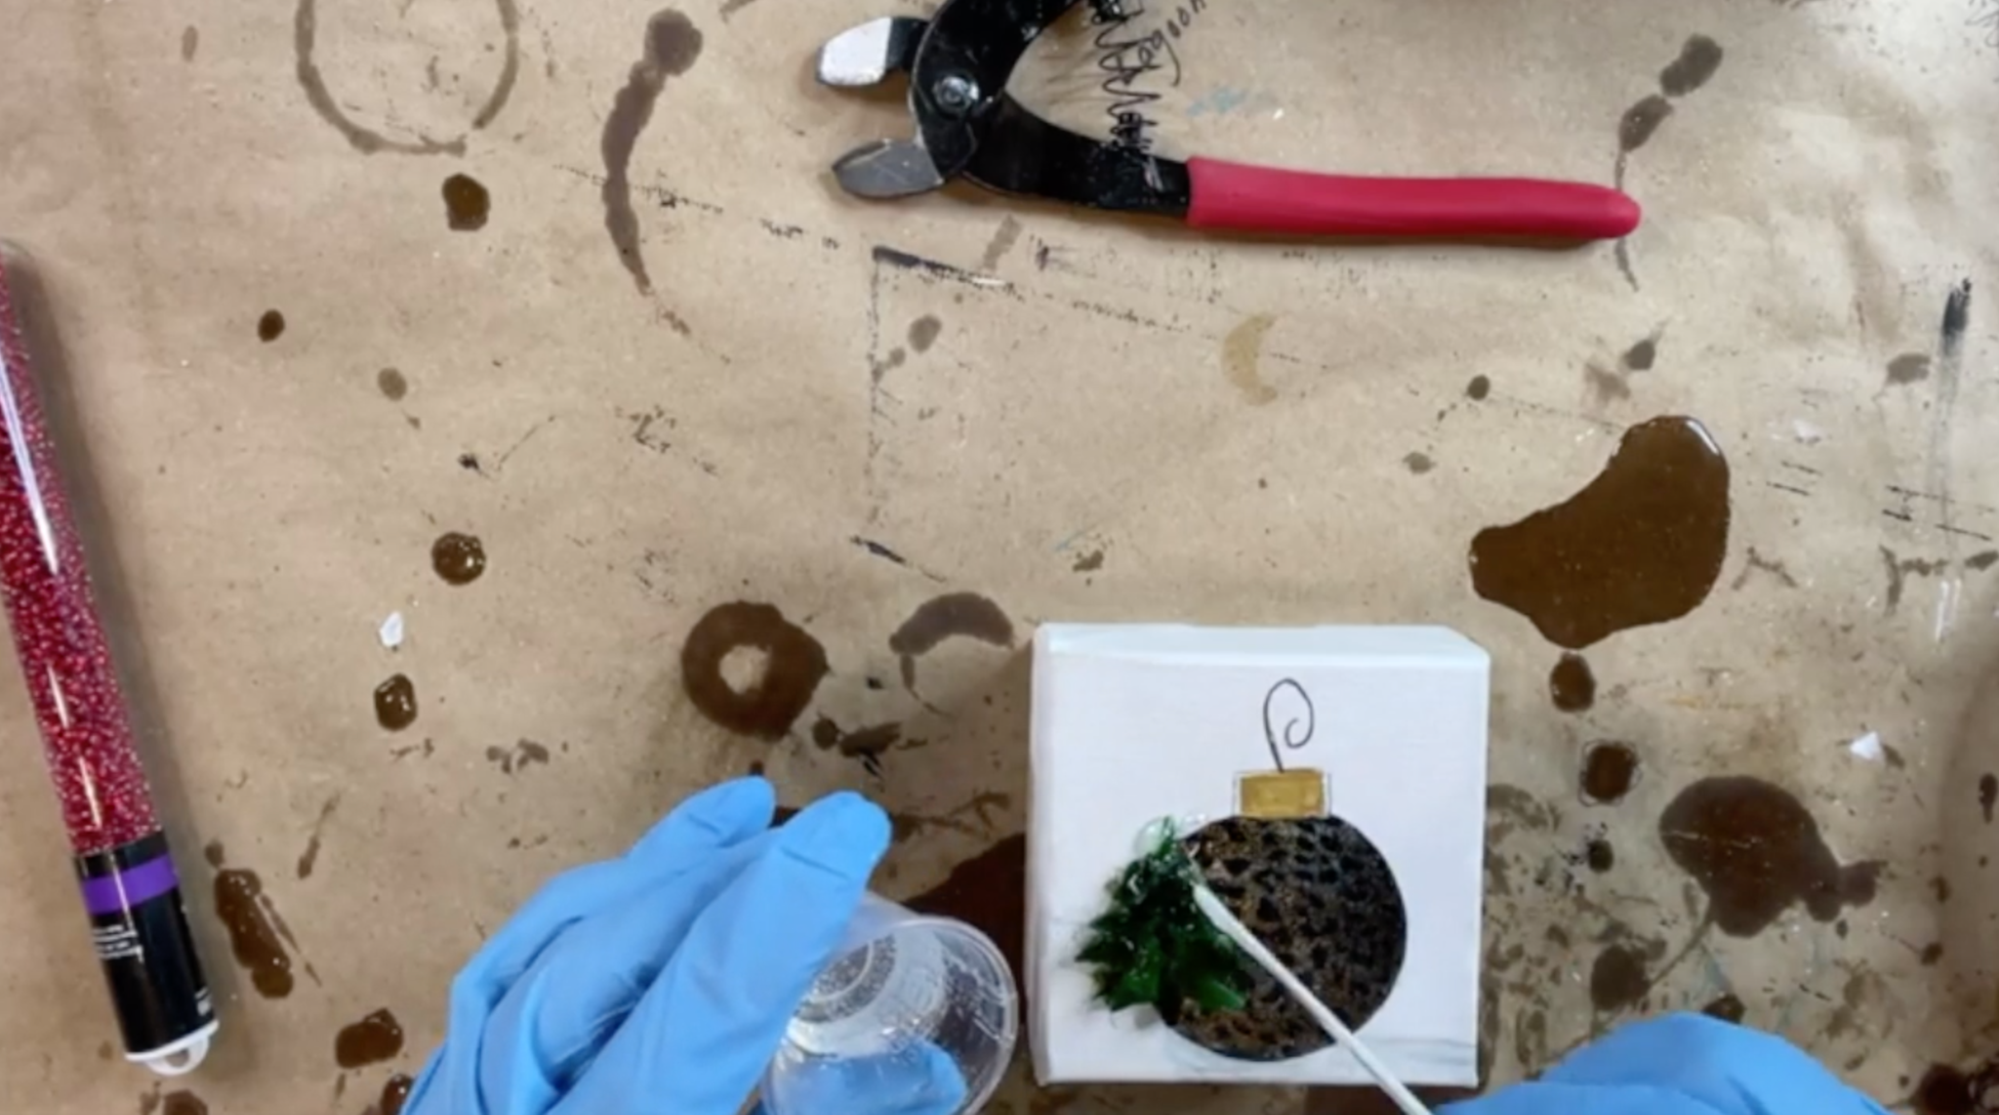
Now that the resin is ready, I'm going to first drizzle right on my glass, so that it just kind of seeps down into the crevices and covers it all nicely. It will start running out of the edges and that's when you know you’ve covered it really well. I'm going to use my stick to kind of spread that resin out.
Before I add my glass beads, I'm going to use my heat gun. You can use a blow dryer too. It's just a matter of getting some heat in there. I'm going to just dump a few of these red beads into a little cup. These come from Hobby Lobby in the jewelry department. They're glassy beads and the color is called Dark Red.
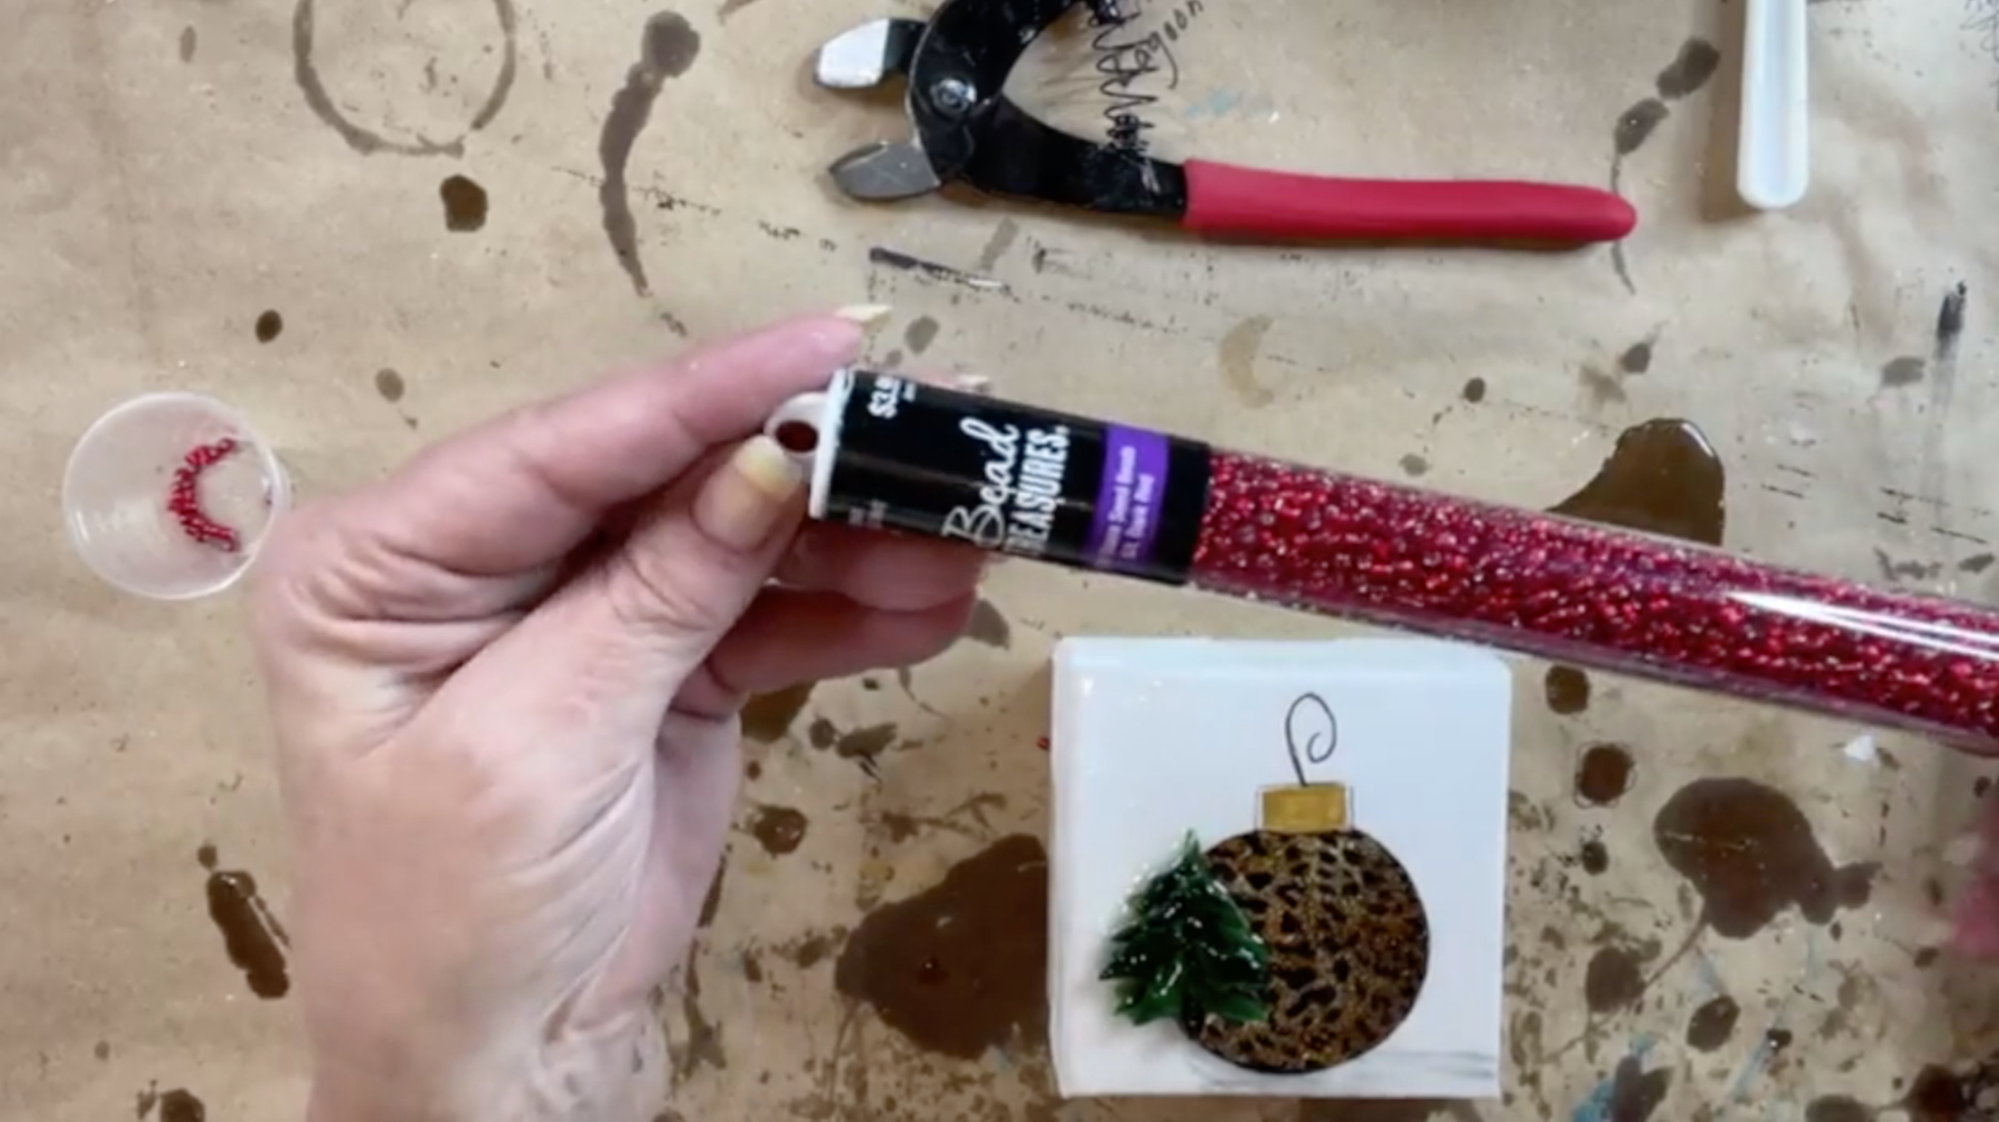
The reason we don't add the beads first is because they're so lightweight. They'll float everywhere and you won't be able to control where they're going. I'm just going to take a couple in my hand and I'm going to just place them with a toothpick. You could use all kinds of colors. You could use gold, you could use clear, you could use red, but I'm just going to drop a few in.
It takes art resin about 8-12 hours to dry to the touch and 72 hours before it's fully cured. You just don't want to ship or wrap it in anything for 72 hours.

This is a cute little teacher’s gift, stocking stuffer, or something small for your coworkers!
If you'd like to watch the video tutorial, you can find it here.
Want to join me live the next time I create? Text "Hey Cindy" to 901-519-2923 and follow the prompts! We will send you a few minutes heads up when we are about to go live on the Art Shattered page!
*Supply lists and tracers are only available to members of The Shattered Circle. If you'd like to learn more about member benefits or get on the waitlist, click here.
