
Step 1: Paint the Background
Start by covering the entire canvas with white paint. Once that’s down, add just a tiny drop of French Gray into a bit of white paint and brush it across the canvas to create a warm, rustic white background instead of stark white. This small change matters, because it helps the white fur and the glass beard stand out instead of disappearing into the canvas.
Step 2: Trace Your Gnome
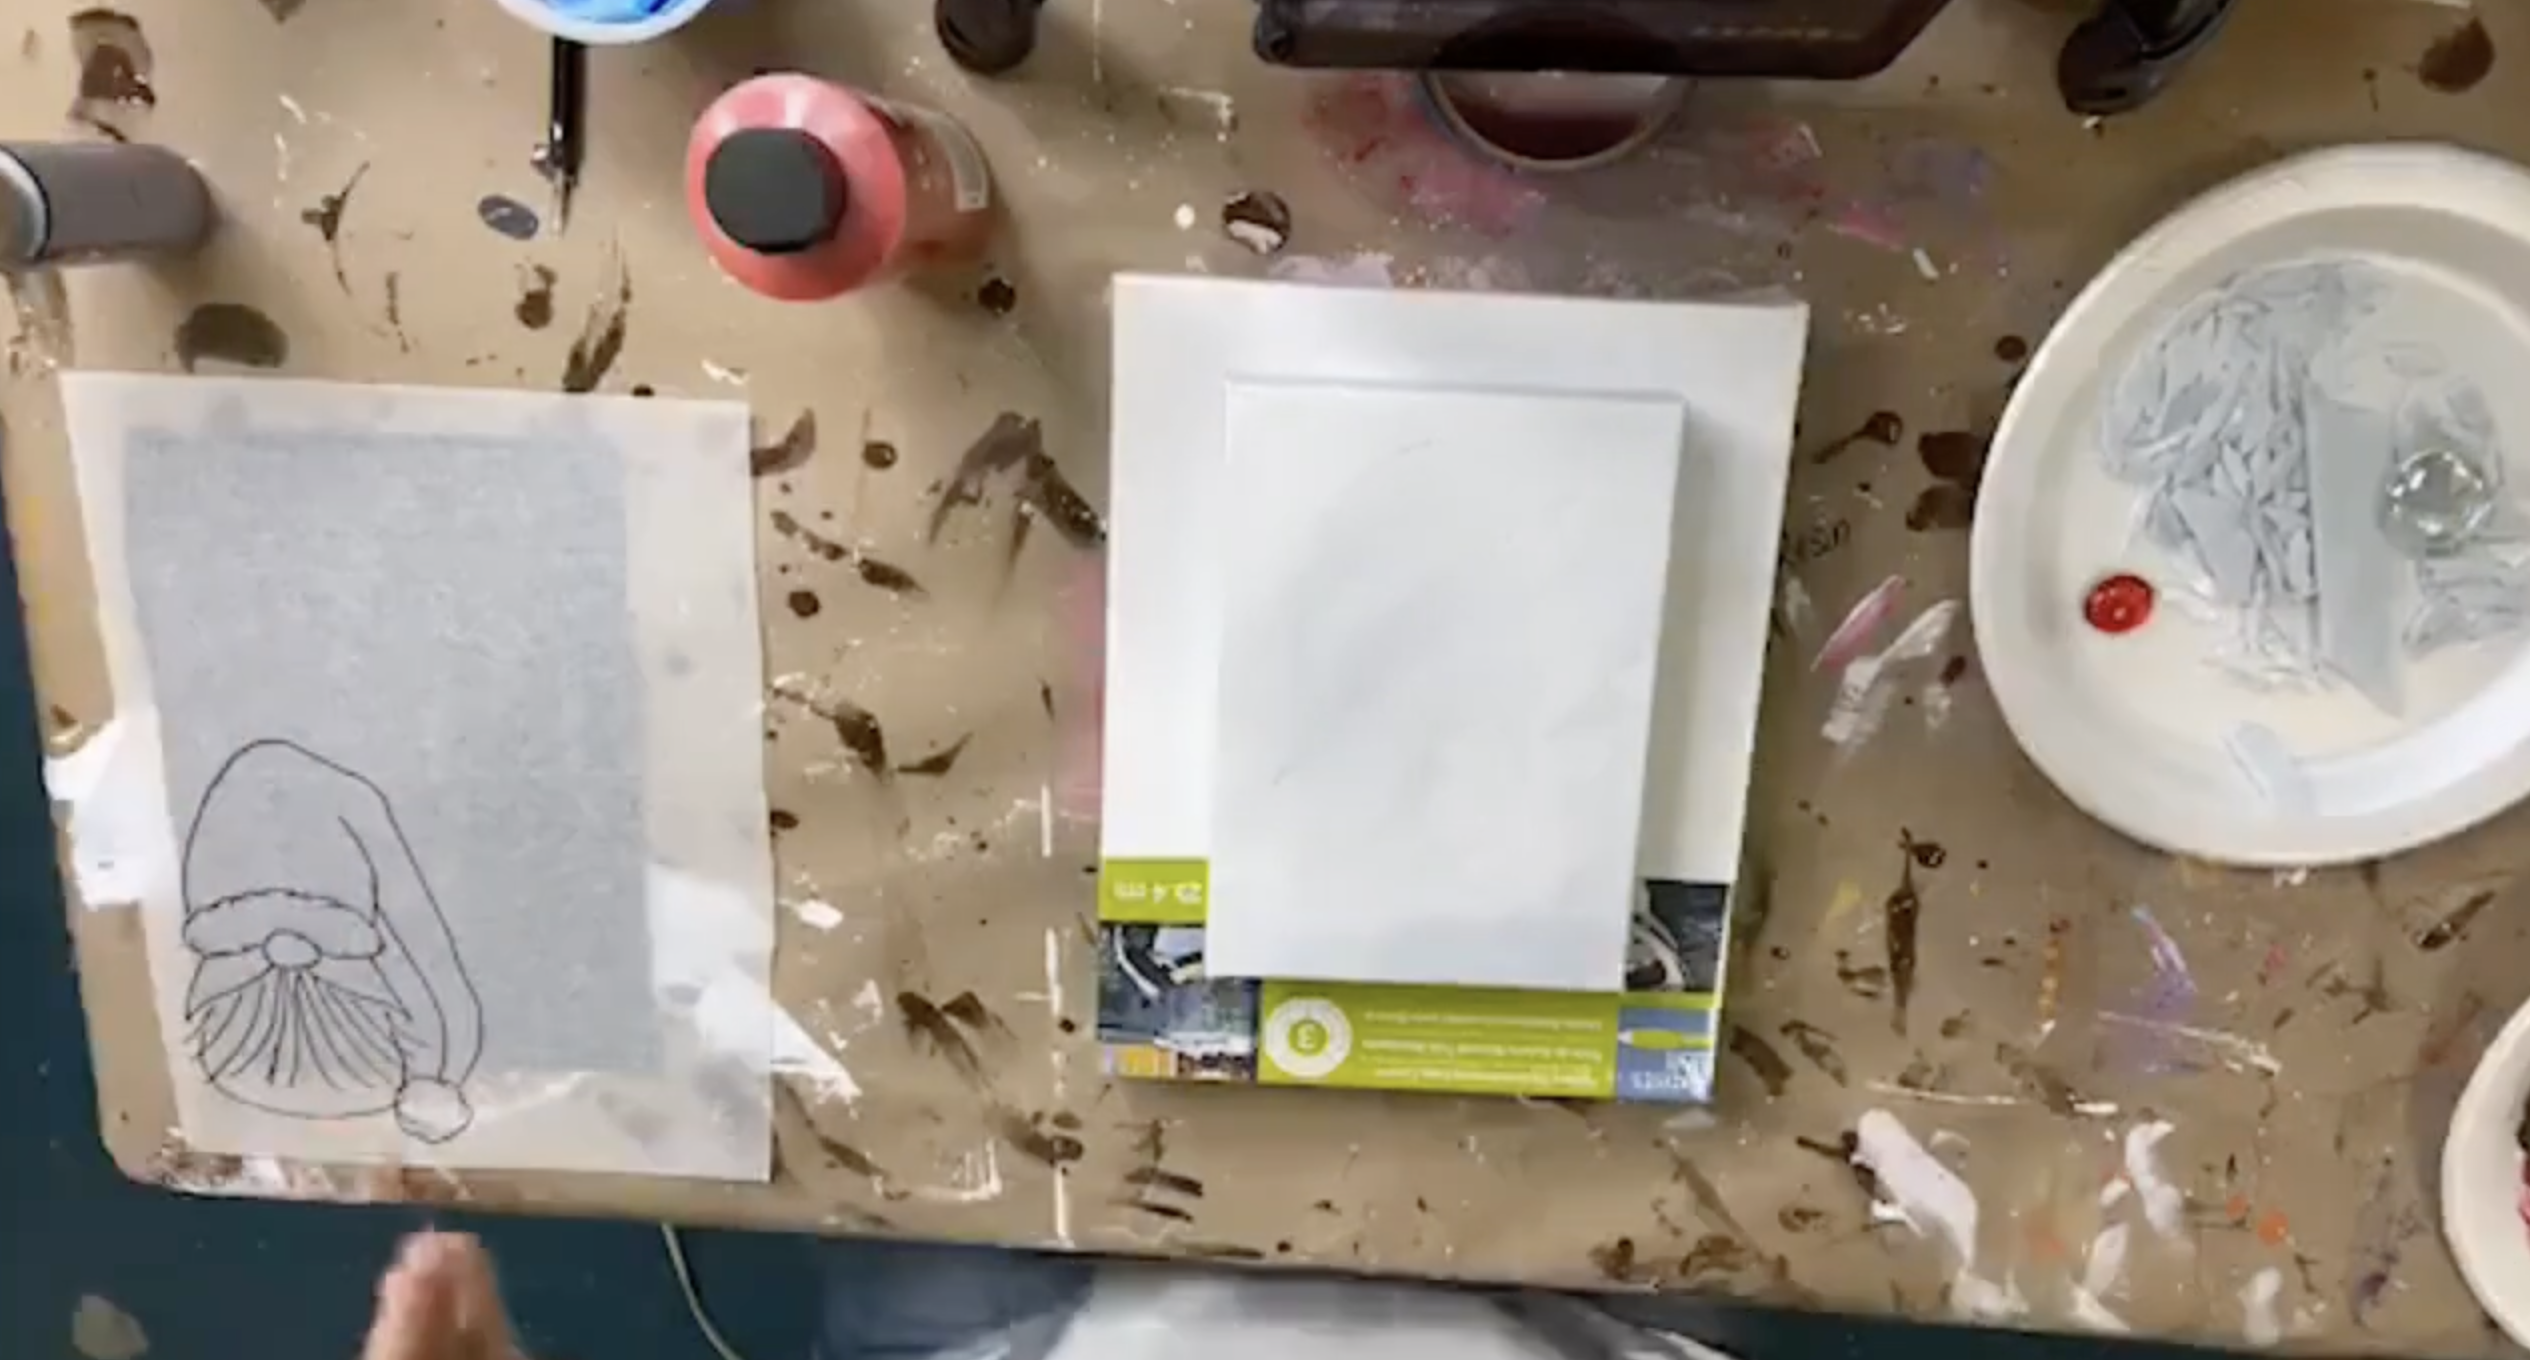
Using your tracer, graphite paper, and a stylus, transfer the gnome design onto the 5x7 canvas. Make sure you’ve captured the hat shape, the fur band, pom-pom area, nose placement, beard/mustache area, and the small strip at the bottom for his pants.
Step 3: Add a Base Coat to Your Gnome
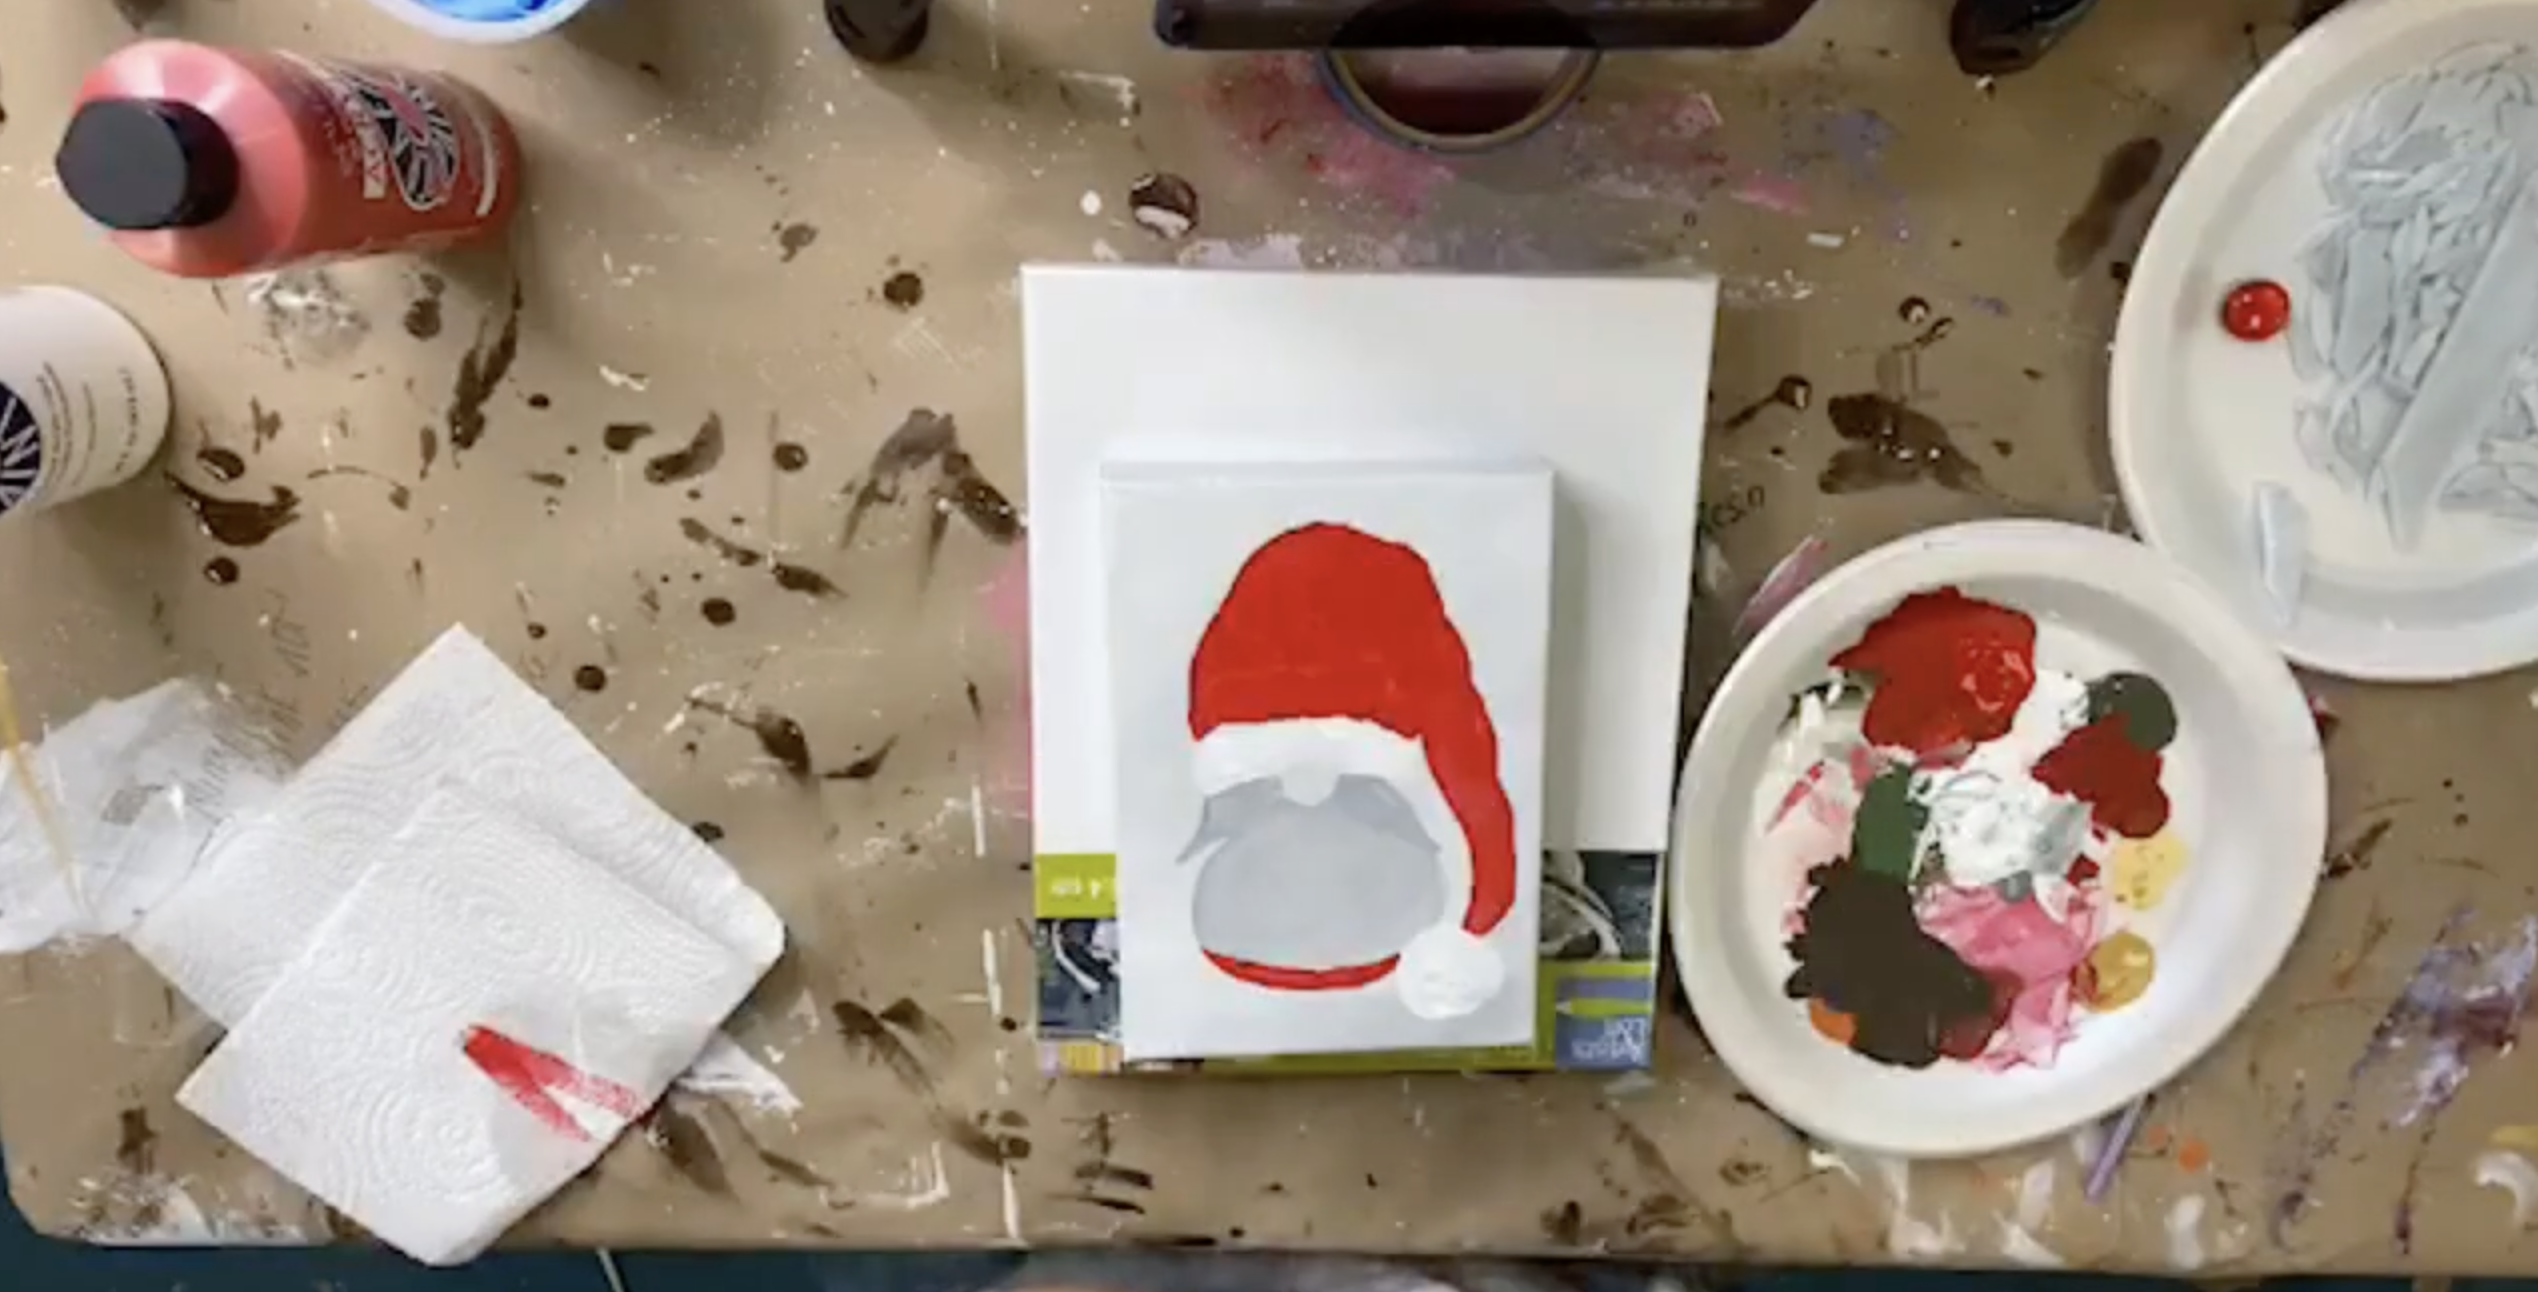
Using a flat brush, pounce (don’t brush) white paint onto the fur band of the hat to give it a fluffy, textured look. Then paint the pom-pom area in white as well. Pouncing gives you that soft, furry vibe without doing anything complicated.
Mix a little French Gray into your white paint to make a pale gray-white. Use that mix as a basecoat in the beard and mustache area. You’re not trying to create a finished painted beard here - this is simply a backdrop so that if tiny gaps show between glass pieces later, you won’t see the background peeking through. A soft tinted base makes everything look cleaner once resin goes on.
Add a small band of red paint at the bottom of the gnome for his pants. Fill in the hat using red, working right up against the white fur band without making the line too perfectly straight. Red paint often needs two coats, so plan on letting it dry for a moment and coming back for a second pass if needed.
Step 4: Add Shading and Dots
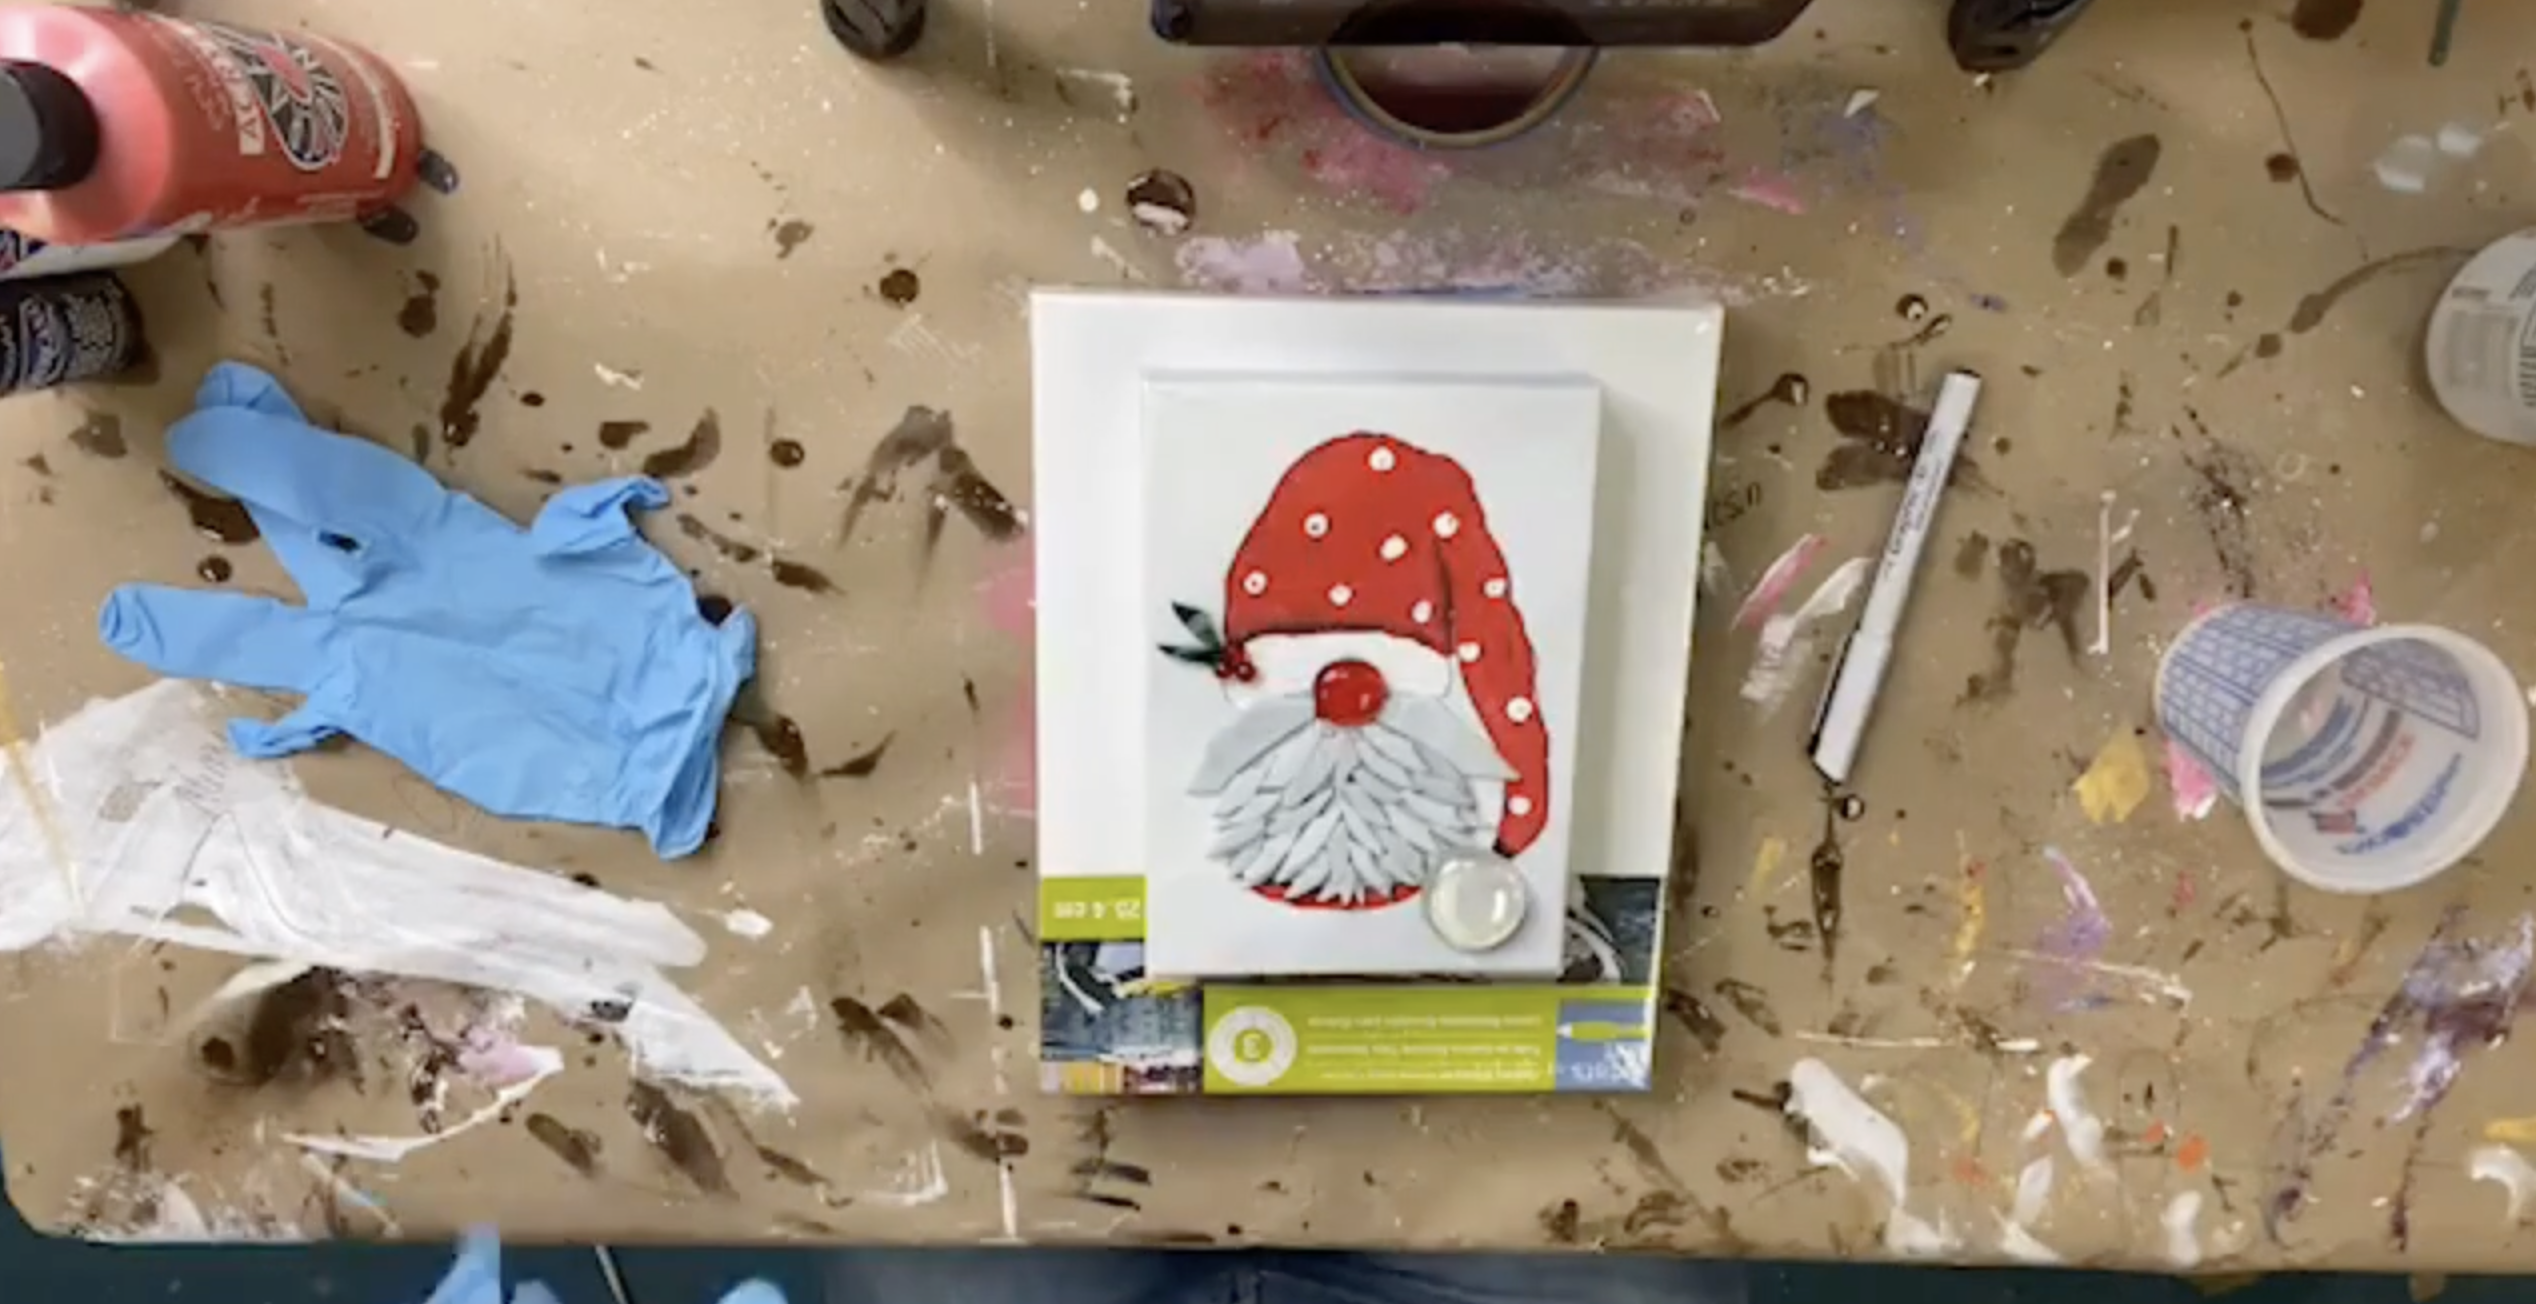
To keep the hat from looking flat, add shading with a super simple method. Lightly dampen a brush, offload the water, then dip only one corner of the brush into black paint and offload again so the black isn’t harsh. Use that corner to shade where the long section of the hat overlaps the top portion, along the top edge where red meets the white fur, and near the connection point by the pom-pom. If you go too dark, soften it by brushing a little red back over the area. This tiny detail instantly gives the hat more dimension.
Use a small brush to paint the nose red. Once the hat is dry enough, use the end of a larger brush handle like a stamp to add white polka dots to the hat. Dip the handle into white paint each time so the dots stay round and bold, then scatter them around so the hat looks playful instead of plain. Let the dots dry before moving into glue and resin steps.

Step 5: Prep & Apply the Glass
Cut your beard pieces from a gray-white/white 12x12 sheet of mosaic glass. Using wheeled nippers, snip lots of tiny shard-like pieces so you have a good variety of sizes. Because these pieces can be razor sharp, rub the tips and sharp points on a grinding stone to dull them.
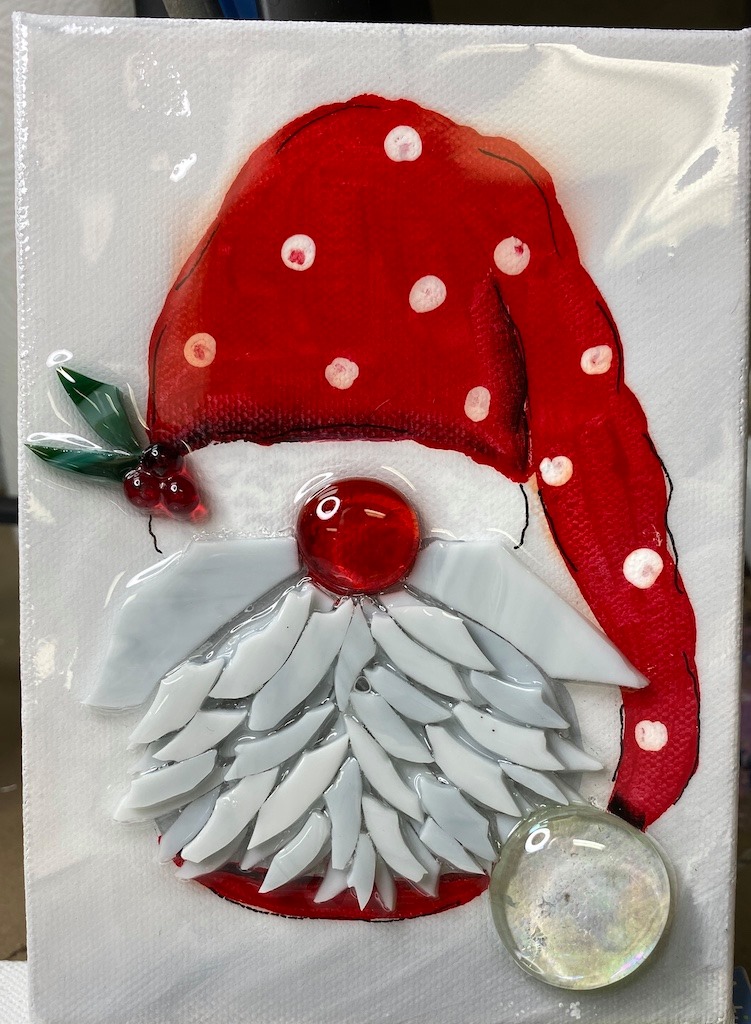
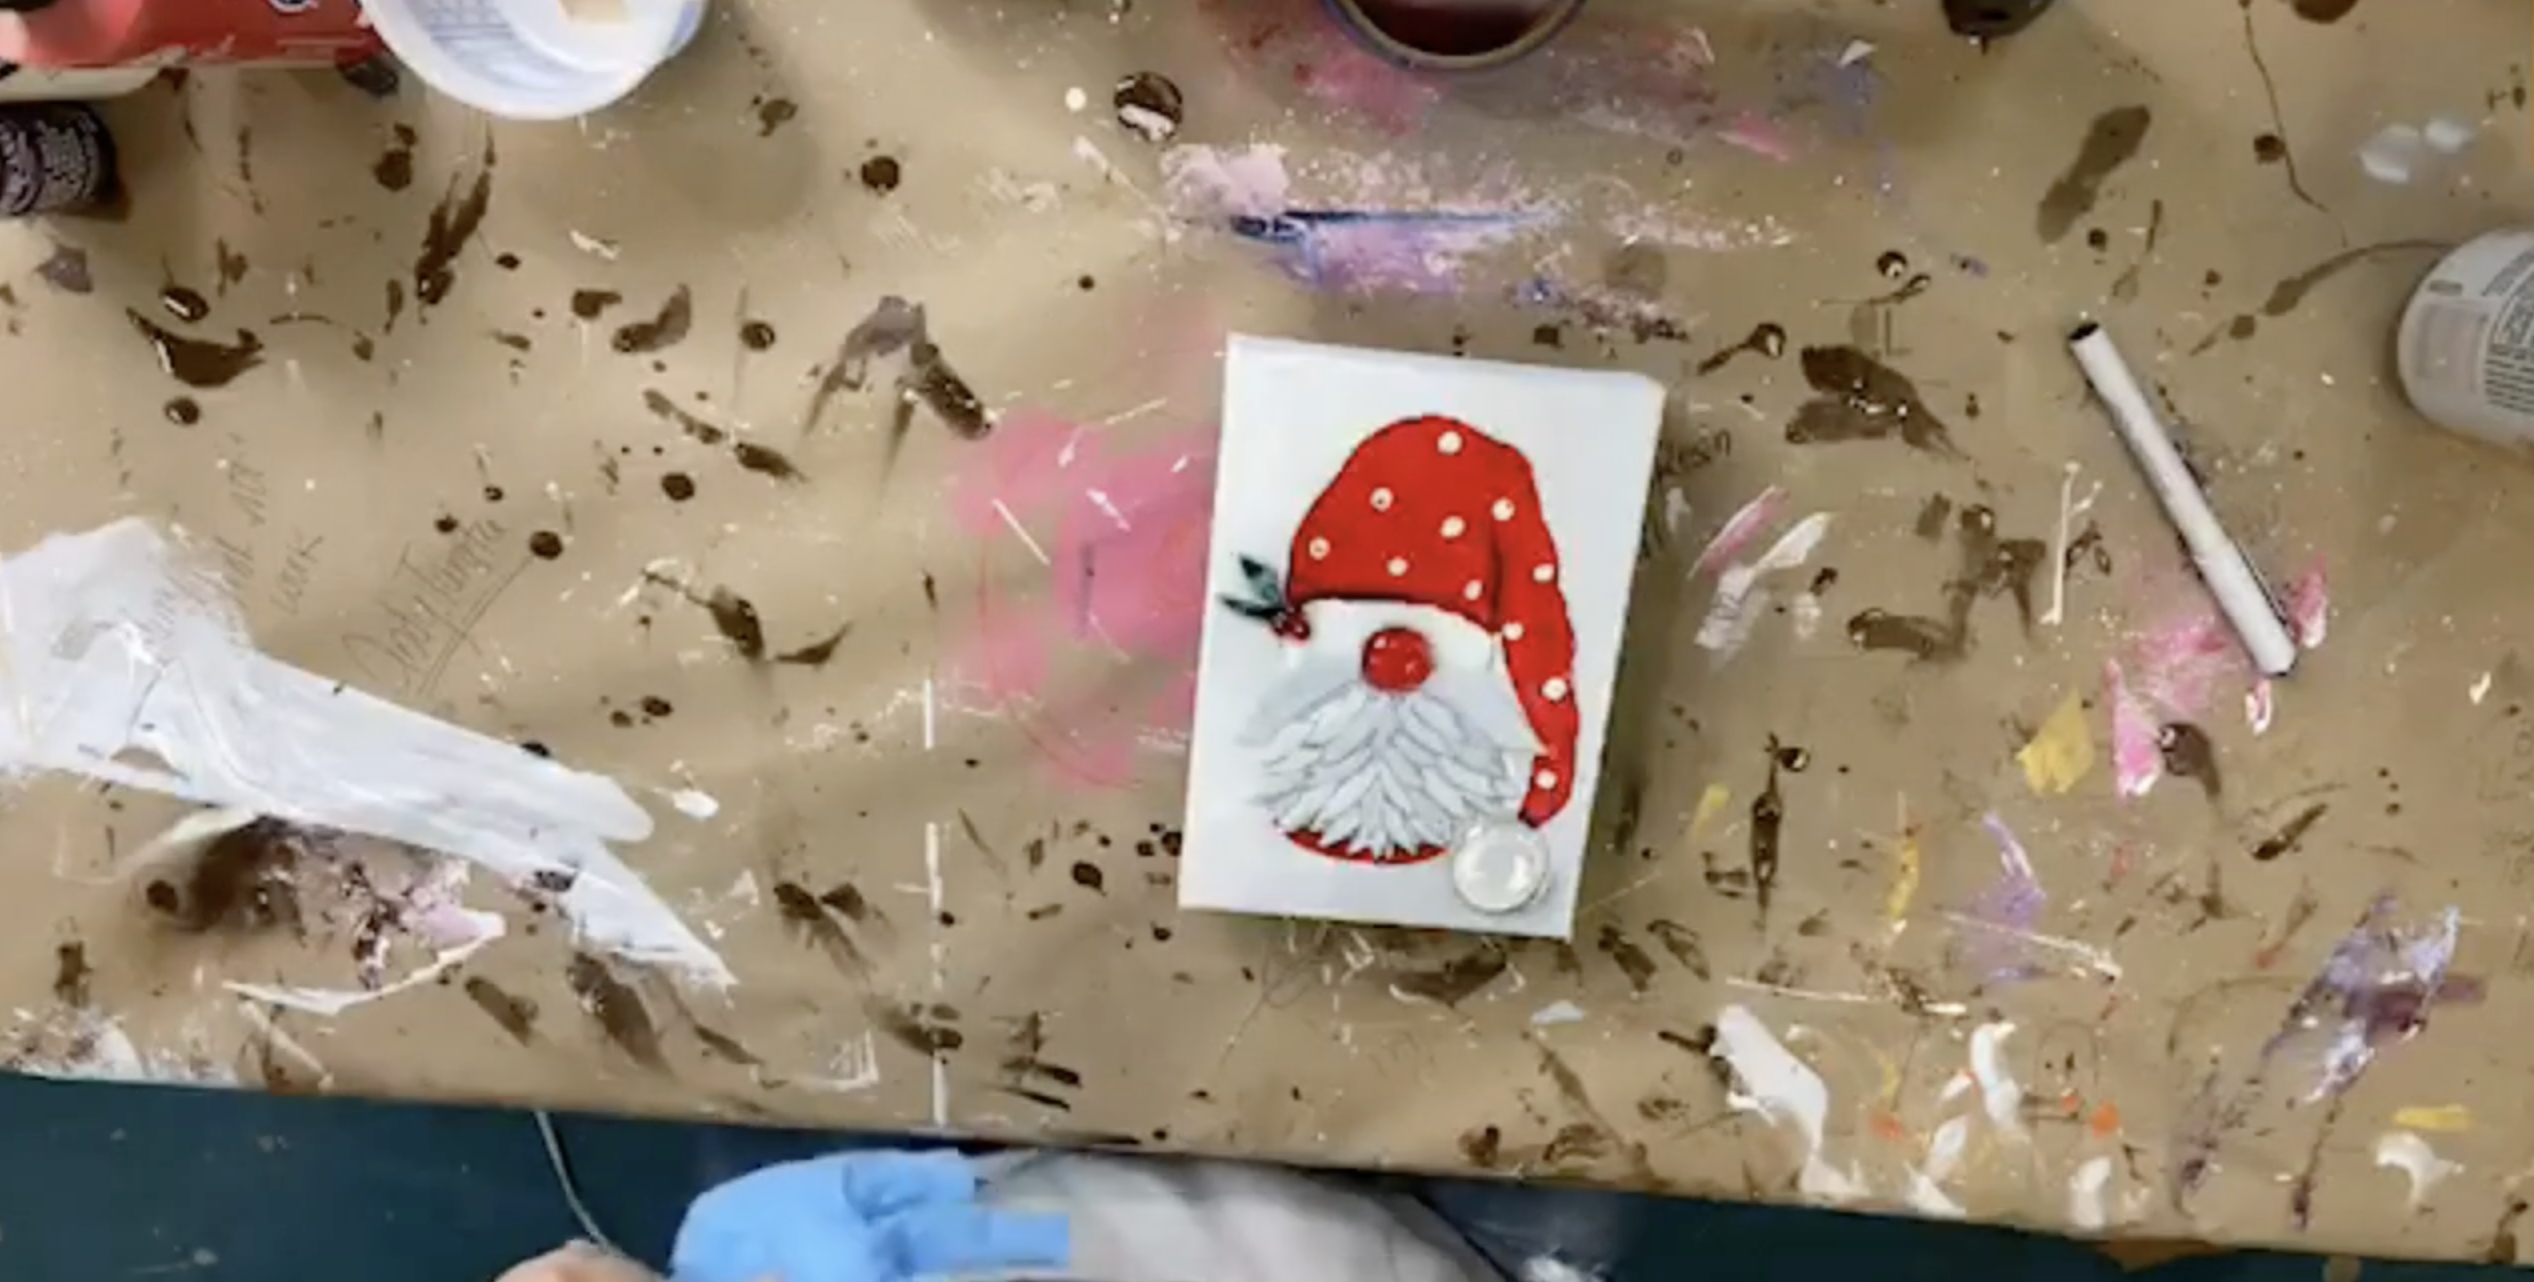
Start by placing two slightly larger glass pieces for the mustache. They don’t need to match - different shapes add character. Once you like their placement, apply tacky glue in the beard area and begin building the first layer with your glass pieces. Work like you’re puzzle-piecing, starting near the nose and filling downward. Don’t stress about making it perfect, and don’t be afraid to let the beard extend a little beyond the painted shape.
After your first layer is set, squeeze or spread another thin layer of glue over the beard area and add a second layer of glass. This layer is the magic because it fills the gaps between pieces and makes the beard look thick and dimensional. Focus on placing new pieces where you see seams or open spaces from the first layer. Once you step back and look, the beard should feel layered and textured, not flat.
If you want extra charm, nip two small green glass leaf shapes and pair them with three tiny red beads as holly berries. Test the layout first, then glue it down once you love it. When the paint is dry, place a flat red floral gem for the nose and a clear iridescent gem for the pom-pom area at the bottom.
Before resin, use an archival pen to add a little definition. Outline the hat edges, the fur band, and any spots that need separation so the shapes read clearly once everything turns glossy.
Step 6: Mix and Pour Resin
Even though it’s tempting to mix a lot “just in case,” this piece uses very little resin - often around ½ ounce or less for a single 5x7. If you do mix extra, have another small project ready to coat so it doesn’t go to waste. Mix resin according to your brand directions (ArtResin is 1:1), stirring slowly for three full minutes while scraping the sides and bottom. Pour resin onto the glass beard first so it seeps into the cracks, then spread the rest across the canvas with gloved fingers, pulling excess back from edges if it starts running over the sides.
Use a torch, heat gun, or mini torch to pop bubbles, keeping your heat source moving constantly. Once it looks clear and glossy, set the canvas on a level surface, cover it to protect from dust, and let it cure according to your resin instructions.
If you're a member of The Shattered Circle, you'll find this tutorial in your classroom under Art Shattered Weekly Facebook Lives, search for "Five Days of Christmas".
If you don’t want to miss my Facebook LIVE art instruction, make sure you are on my texting list. I always text 10 minutes before I’m going to go LIVE, so you won’t ever miss it. You can text “Hey Cindy” to 901-519-2923.
Want more inspiration and artwork?
- My website artshattered.com with resources, shop, and more!
- My creative membership The Shattered Circle, where you can explore the world of glass art with online workshops, a supportive community, and more!
- My mini creative membership Just A ‘Lil Bit Monthly Glass Art Club, where you’ll get a new quick and easy online tutorial for just a lil' bit of sparkle in your life!
- My Facebook page where I go LIVE every Wednesday night.
- My YouTube channel which has tons of free art lessons right at your fingertips.
