
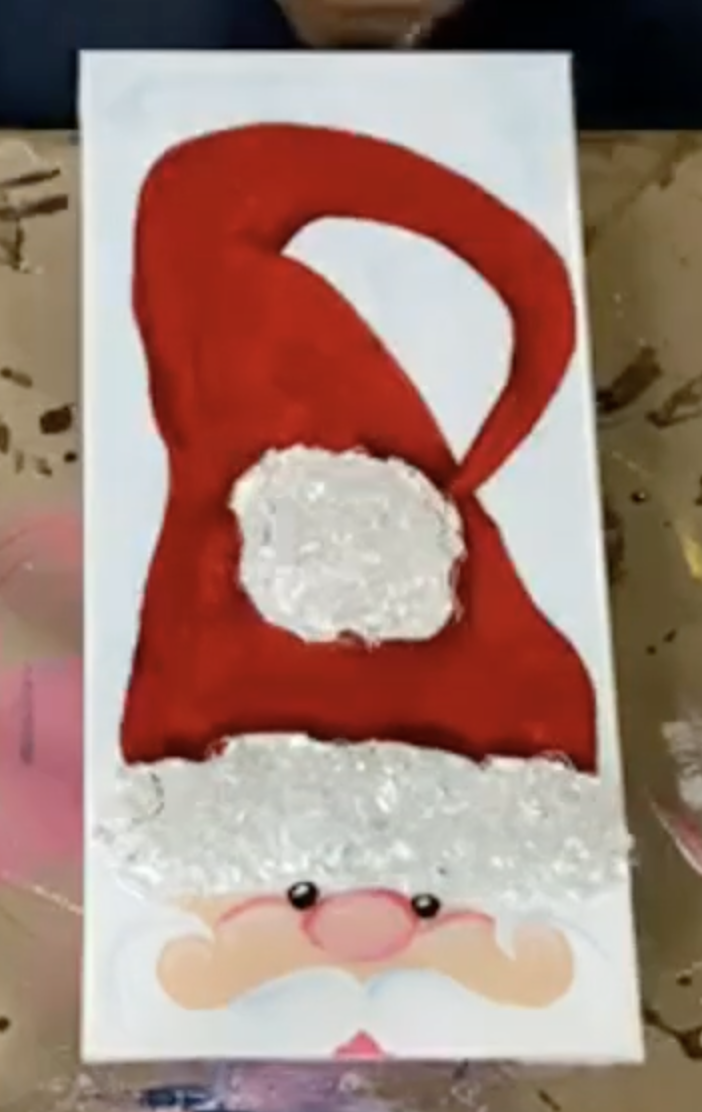
Christmas Santa 🎅🏻
This adorable Santa is the perfect holiday project if you love painting, glass art, or just want something festive and fun for your home. In this tutorial, we’ll walk through painting Santa’s face, hat, mustache, and background, then adding sparkling glass and resin for that magical Christmas shimmer!
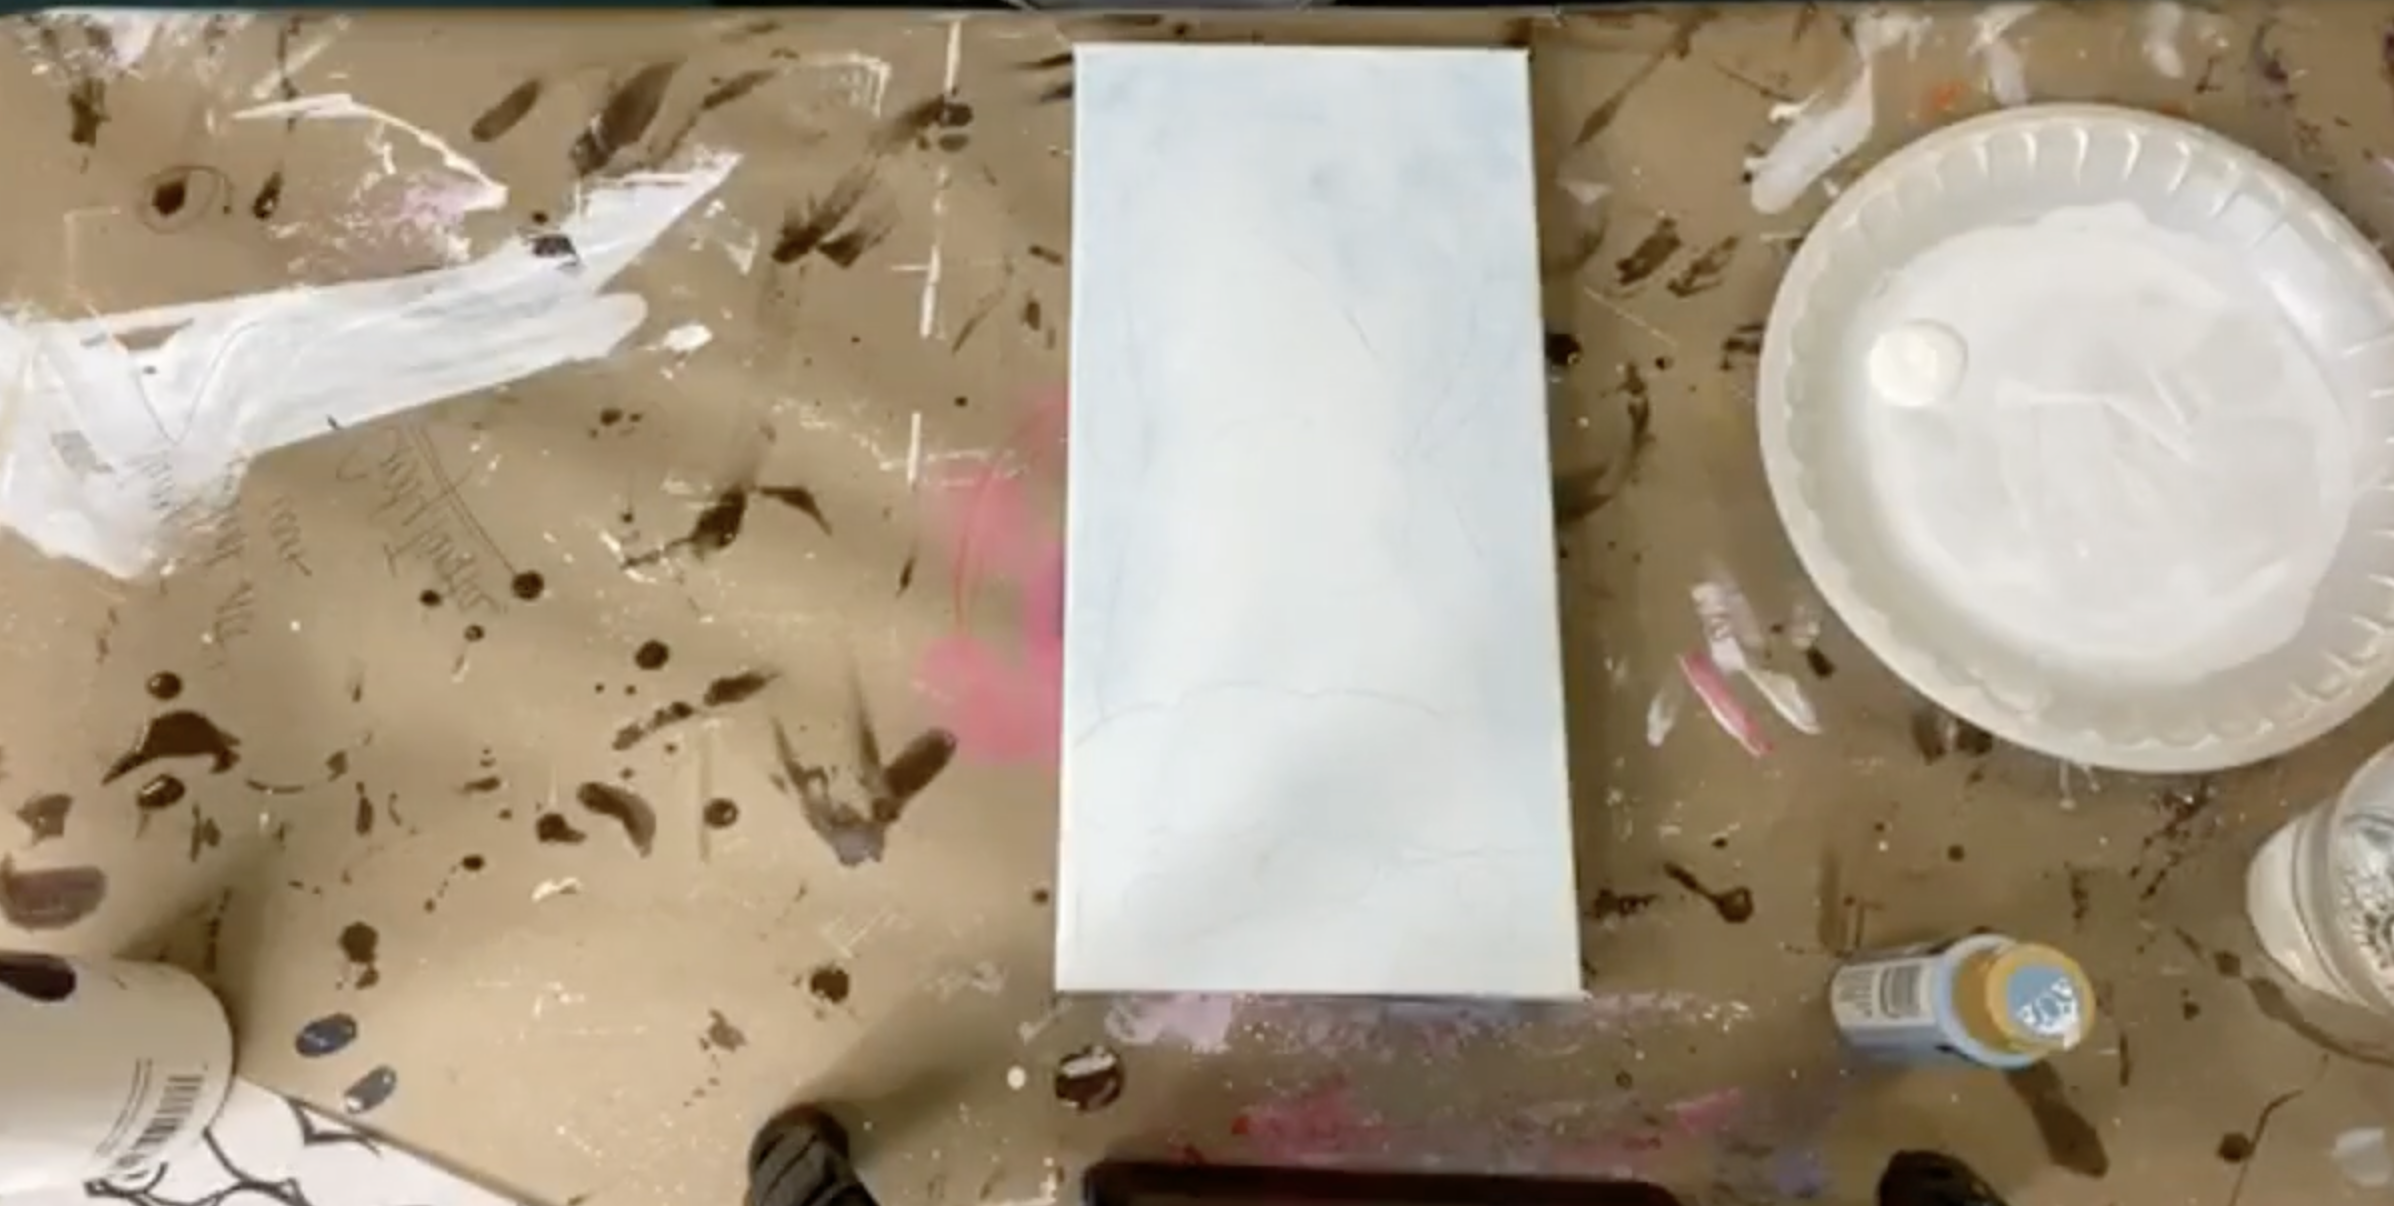
Step 1: Paint the Background
Before painting Santa, begin by giving your canvas a soft, wintery background. Cover the entire canvas with white paint. While the white paint is still wet, place one dot of FolkArt Dolphin Blue on the upper right area and one on the lower left area. Using a chip brush, pounce the blue into the wet white to create a subtle, sponged blue tint. This soft color helps Santa’s white beard, hat trim, and mustache pop without being harsh against a stark white background.
Once your background dries, grab the tracer, place graphite paper underneath, and trace the Santa design onto the canvas with a stylus. Make sure the fur trim, pom-pom, mustache, and facial features are clearly marked so painting goes smoothly.
Step 2: Paint the White Areas First
Using a flat brush, apply white to the entire trim section of the hat, the fluffy pom-pom at the end, and Santa’s mustache. Make sure the tracer lines disappear under the paint. Don’t worry if the mustache looks flat right now - we’ll add shading later.
Let the white sit while you prepare to paint the red areas next.
Step 3: Paint Santa’s Hat Red
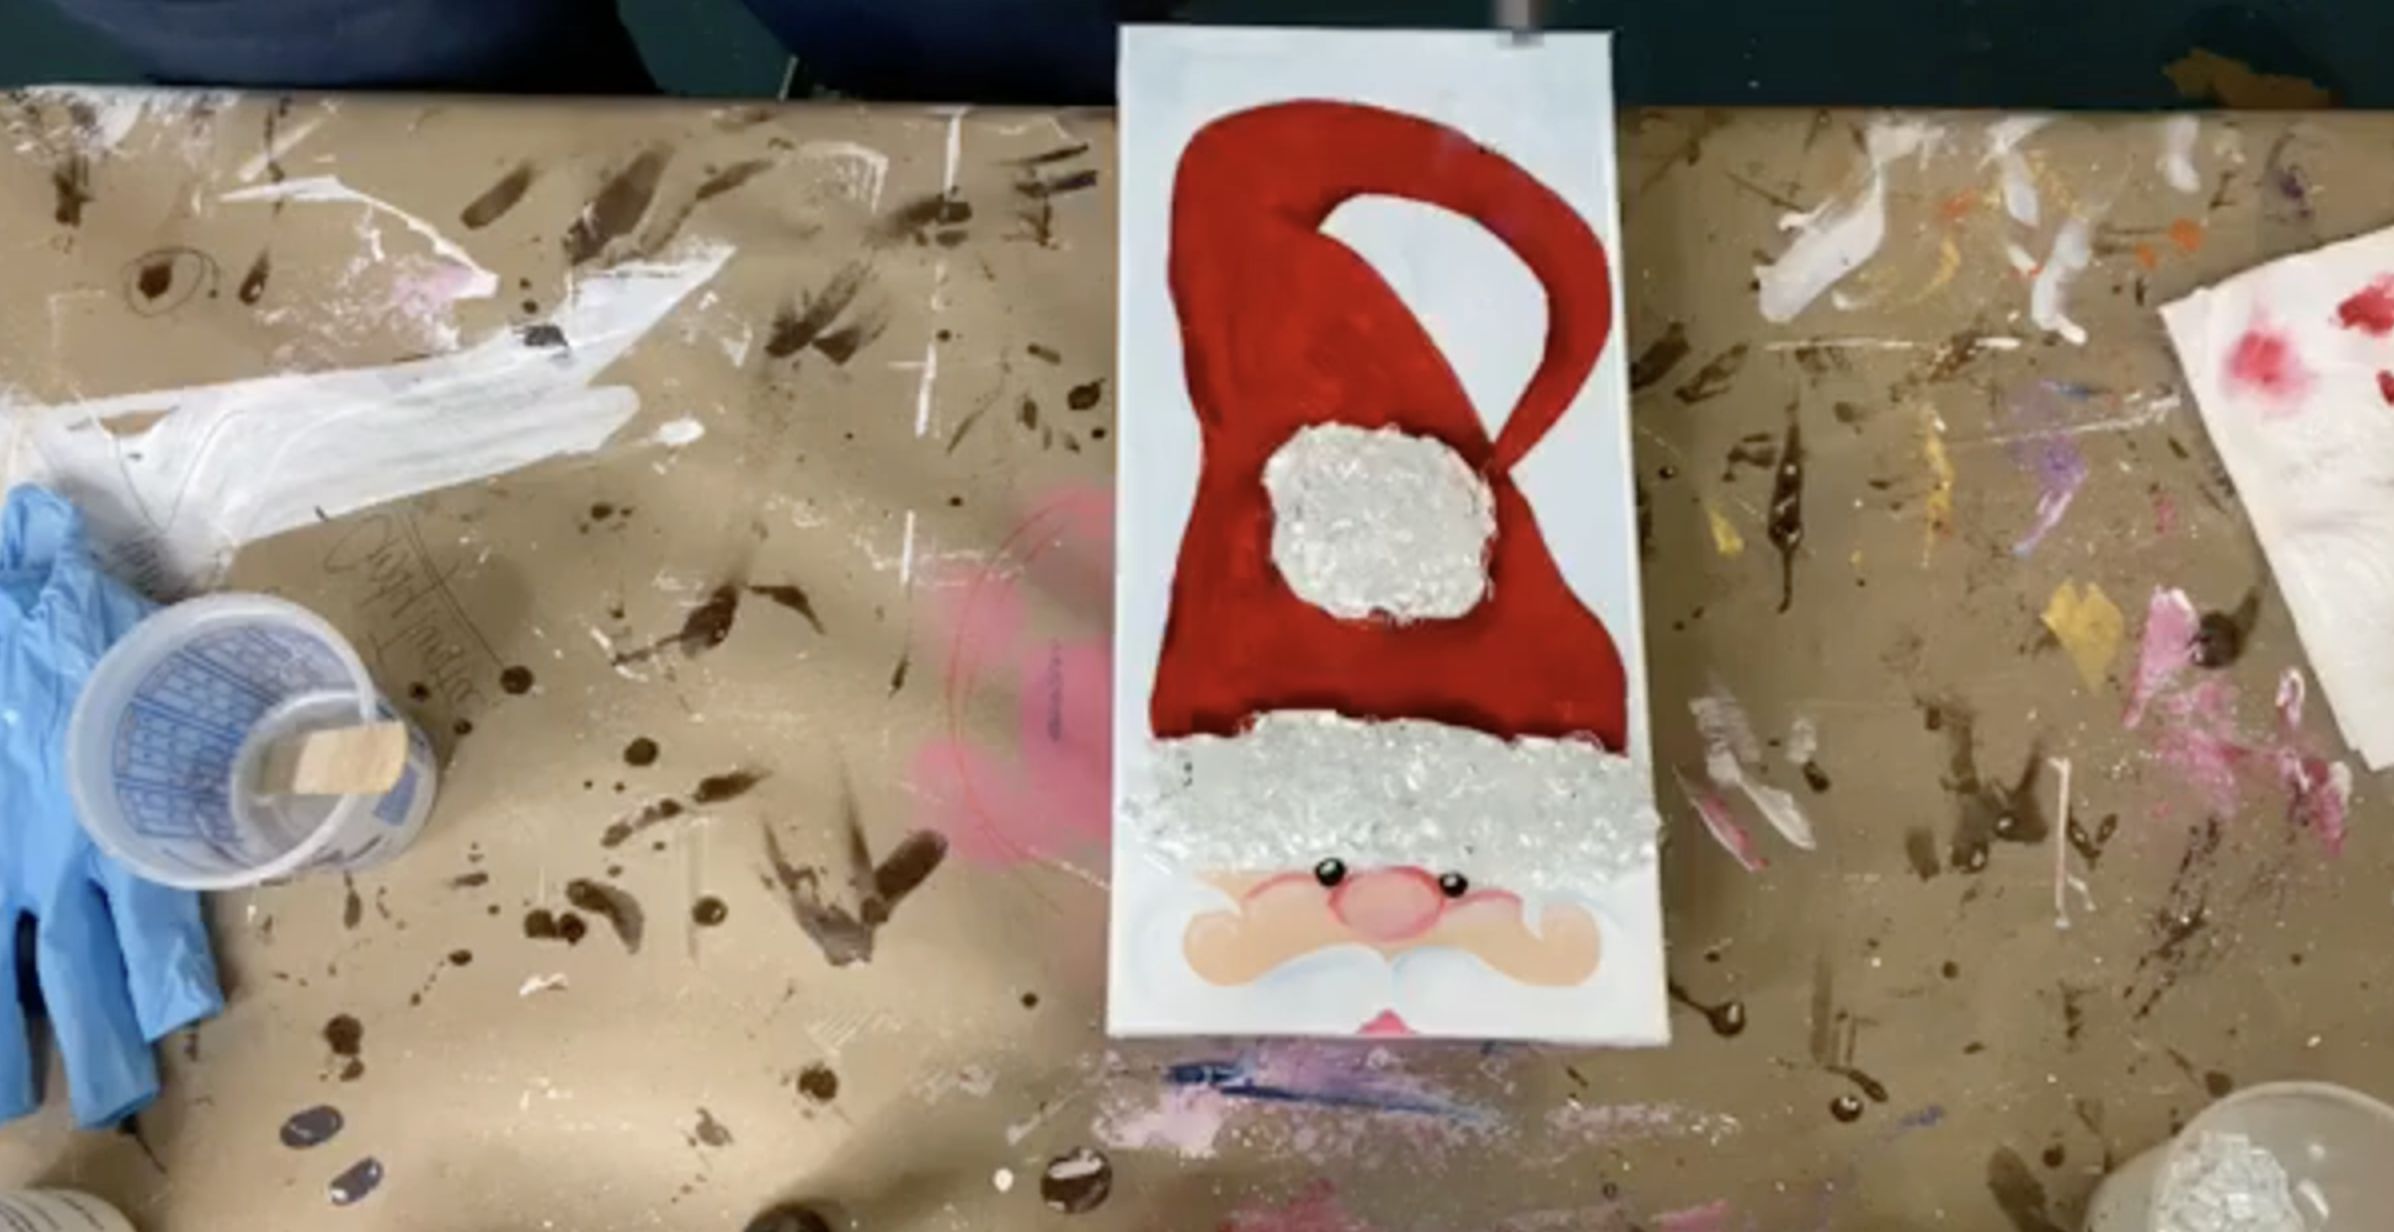
Use Americana Cherry Red to fill in Santa’s hat. Reds often require more than one coat, so apply the first layer generously but neatly. If your brush feels too small, switch to a larger flat brush to speed up the process. Once the first coat dries, apply a second coat to deepen the color and ensure smooth coverage.
With the second coat still wet, introduce Americana Napa Red to add shading and dimension. Load the corner of a flat brush and brush the darker red gently around the top edge where the hat meets the fur trim. Add small amounts around the pom-pom and the fold in the hat. Darkening these areas helps the hat look more realistic without needing complicated blending.
Continue adding bits of Napa Red anywhere you’d naturally expect shadows.
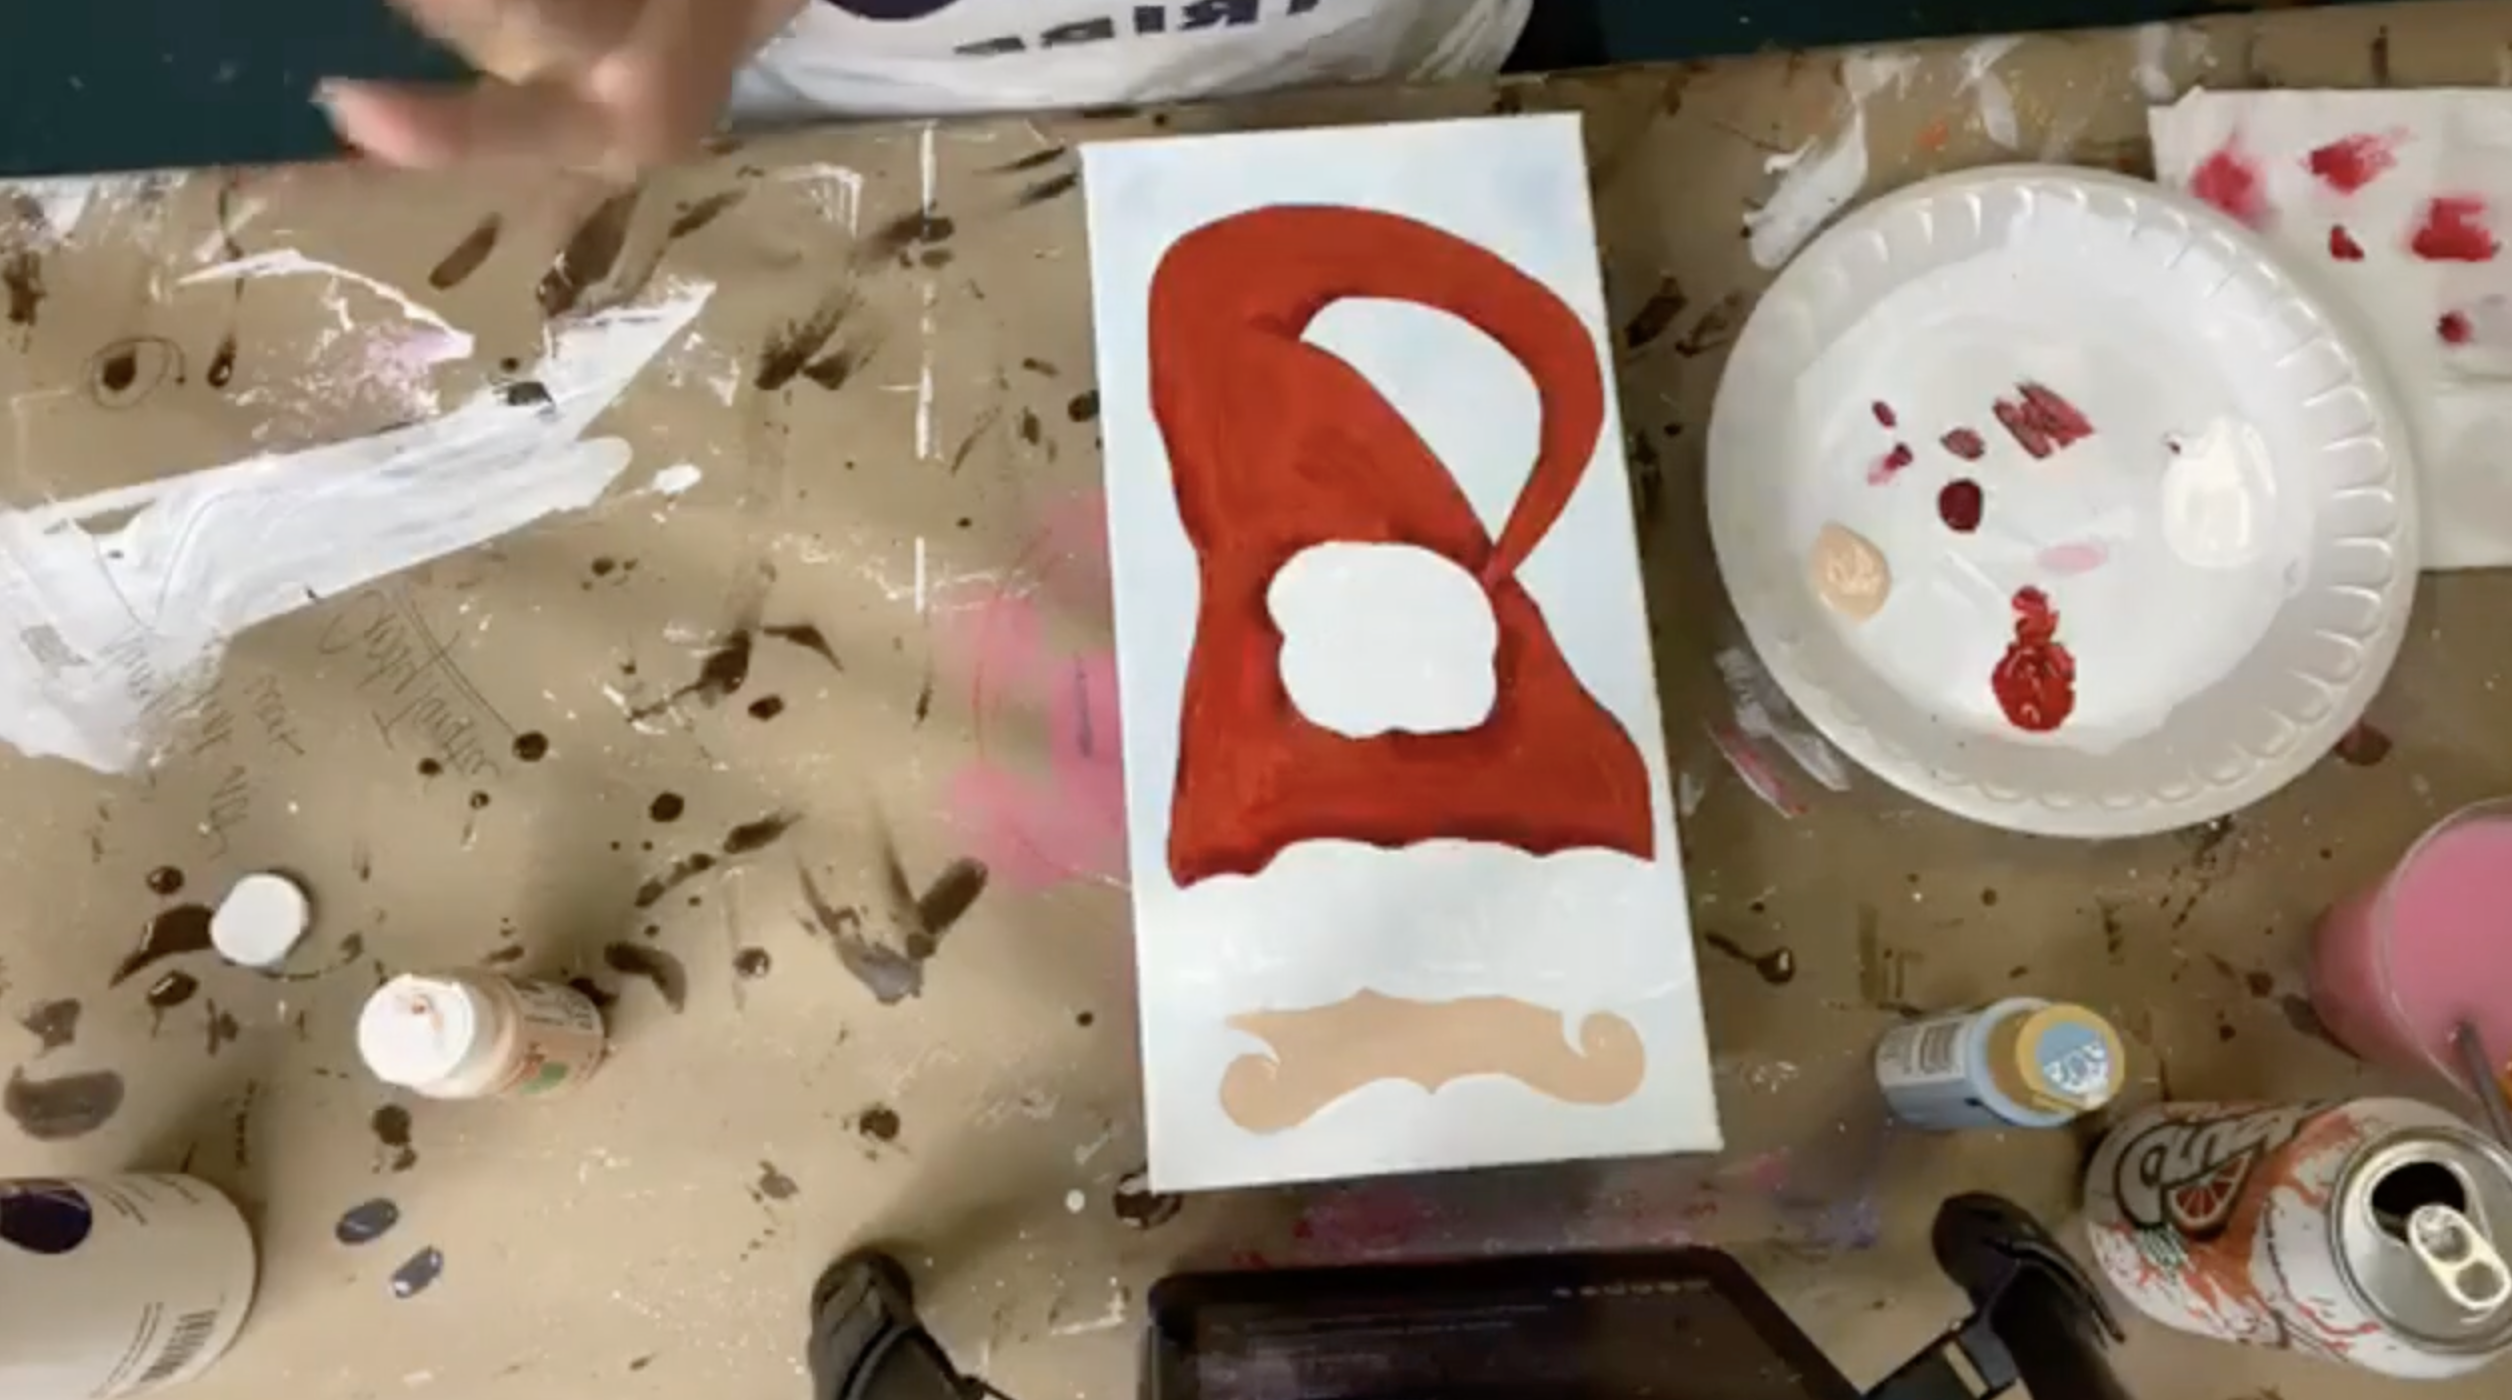
Step 4: Paint Santa’s Face
For Santa’s skin tone, use any peach-toned flesh color. Switch to a smaller round brush so you can paint around the hat and beard details. Fill in the entire face area with one smooth coat.
Let the face dry while you prepare to add shading to Santa’s facial features.
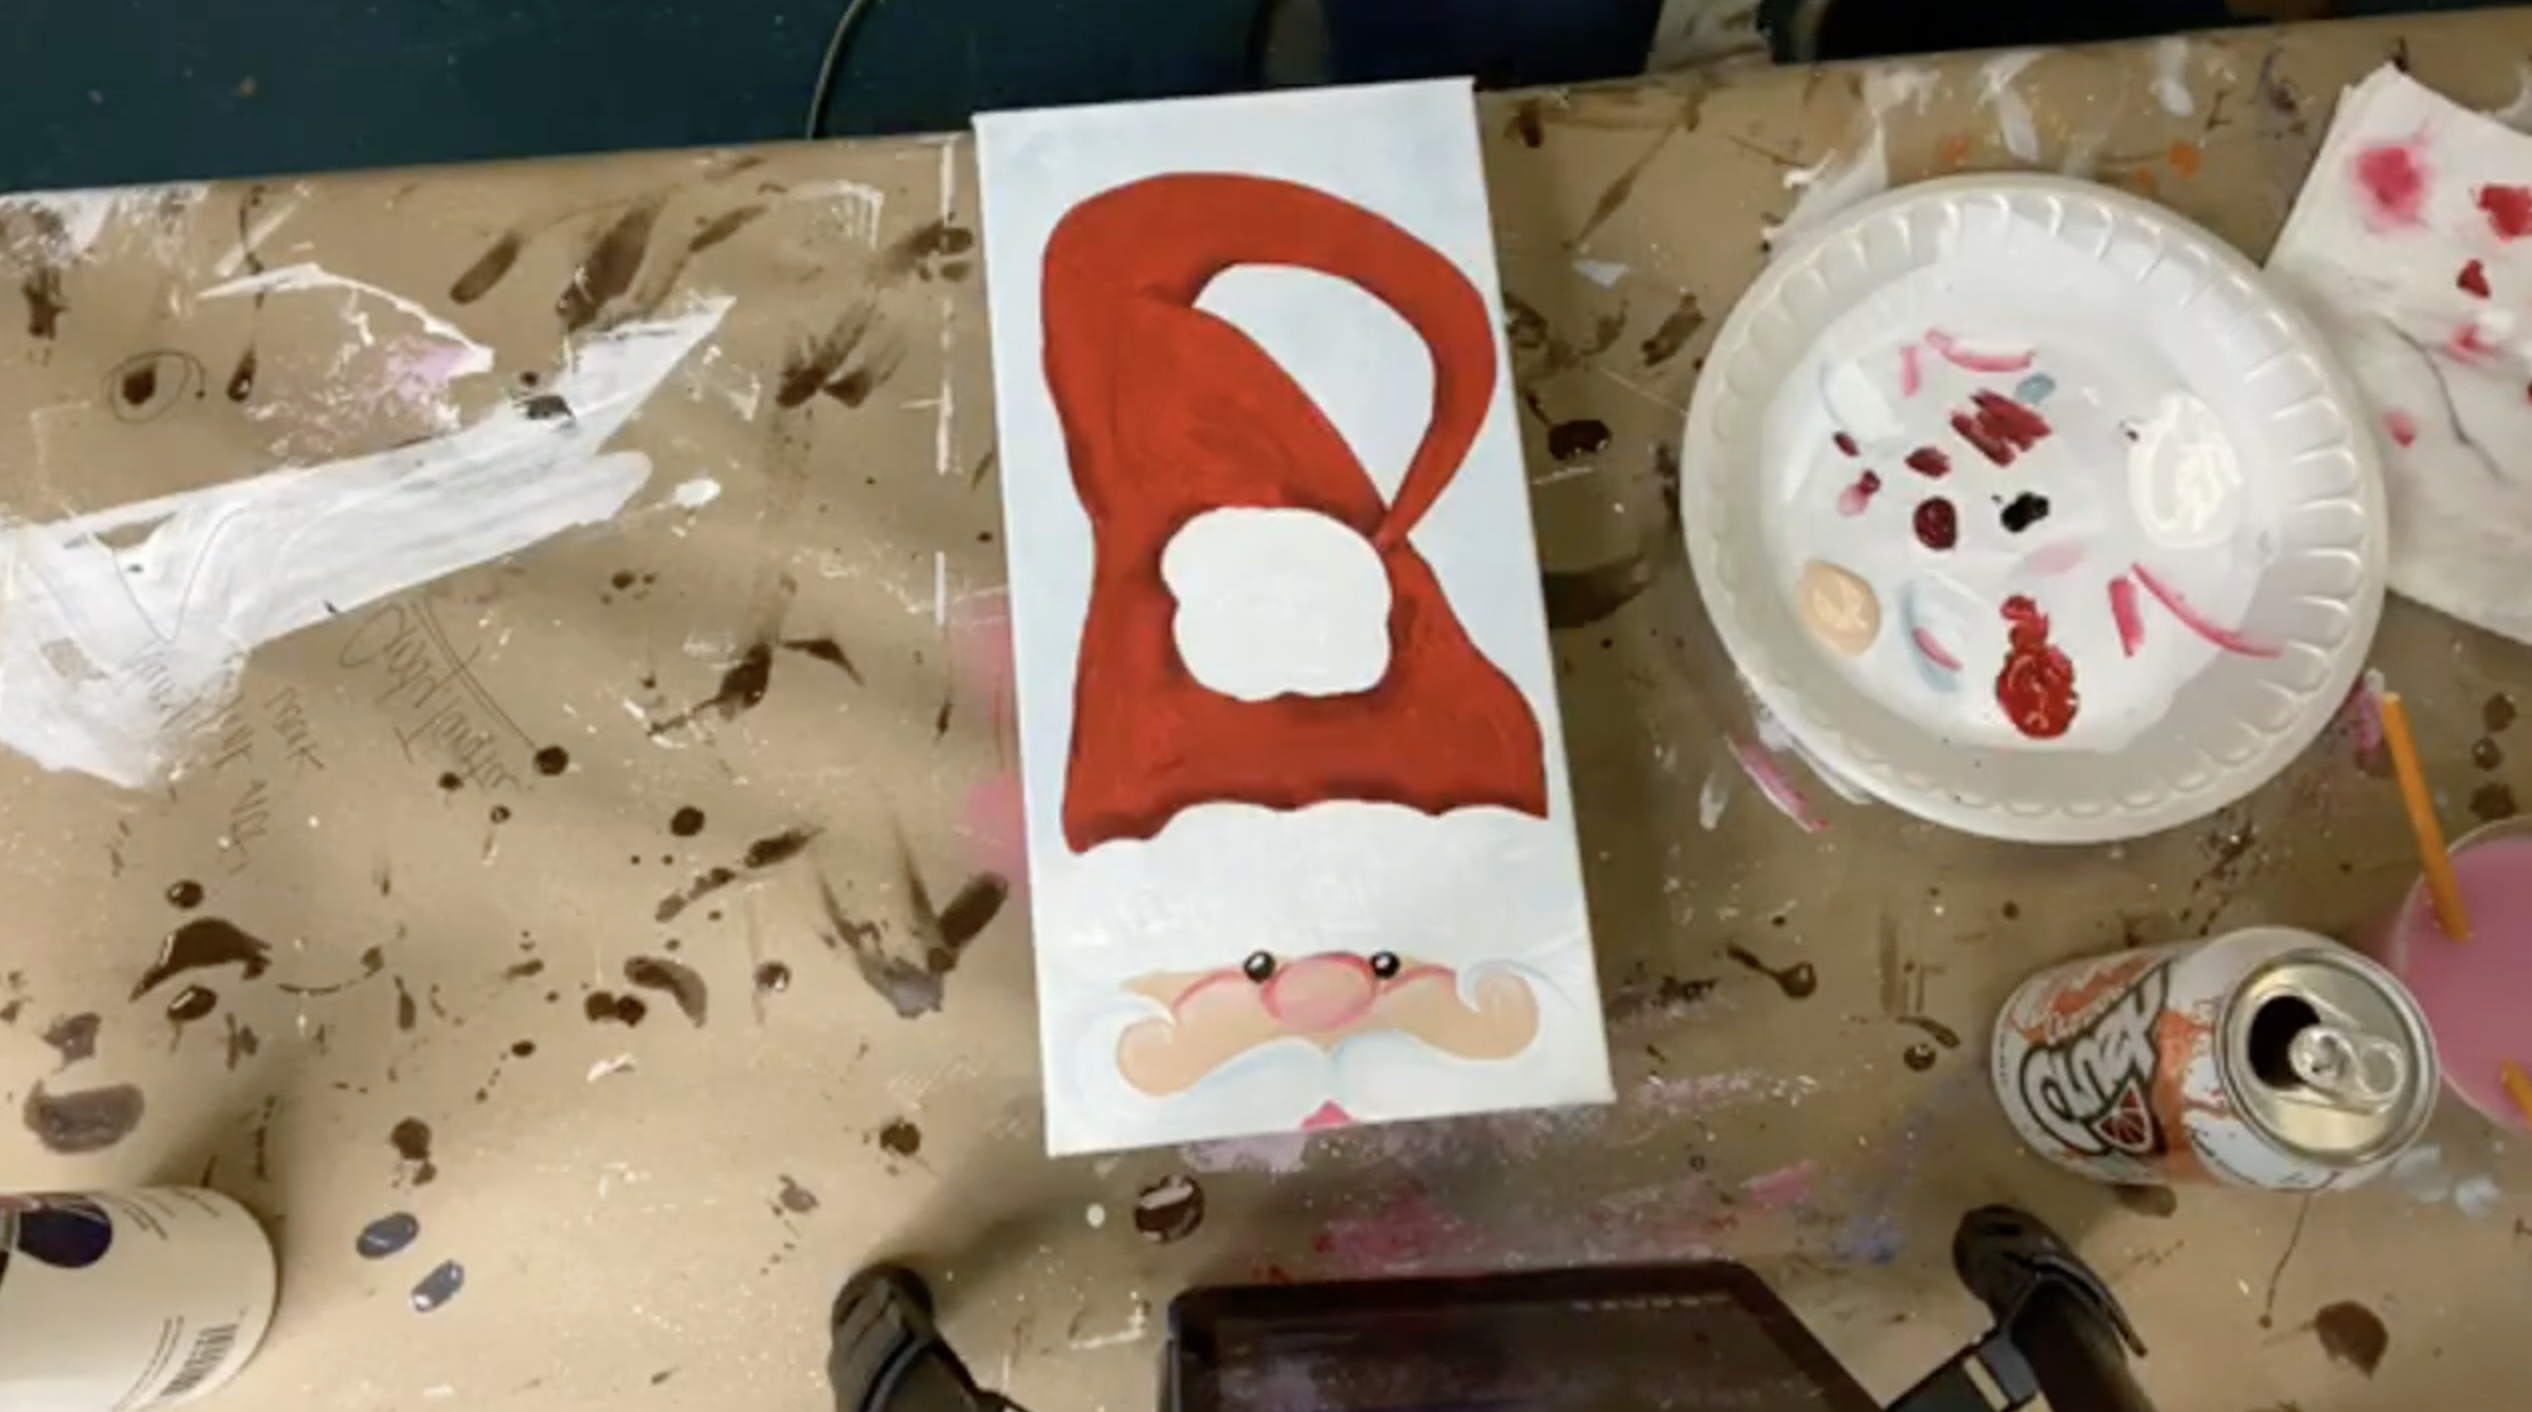
Step 5: Add Blush to His Cheeks and Nose
Load a 3/8" angled brush with a small amount of red on the long pointy edge of the bristles. Offload excess paint so the brush is nearly dry. Lightly swirl the red around the top of Santa’s nose for a rosy winter glow. Repeat the same technique on the tops of his cheeks to give him that jolly appearance.
To highlight, dip the angled brush into white, offload, and gently blend soft strokes under the red areas. Adding a touch of the peach paint back into the center of the nose creates the perfect blend of blush and highlight.
Step 6: Add Eyes, Highlights & Facial Details
Using a small round brush and Americana Lamp Black, paint two round eyes on Santa’s face. Rinse the brush, dip it into white, and add a small dot on each eye for a sparkly highlight.
Next, return to the mustache. Add another thin layer of white so the surface is wet for shading. Place a dot of Dolphin Blue on your palette. Dip the corner of your brush in the blue and blend it slightly into the white left on your brush. Use this soft tinted mixture to create subtle shadows along the top edges of the mustache and where the mustache dips near the mouth. If needed, mix a touch of grey by adding a dot of black, but keep it soft - just enough to distinguish the mustache from the beard.
Add a tiny red triangle in the center under the mustache to represent Santa’s mouth. It instantly gives him charm and personality.
Step 5: Add Crushed Glass to the Hat Trim & Pom-Pom
Once all painted areas have dried, it’s time for the fun part! Apply Aleene’s Clear Tacky Glue along the hat trim and pom-pom. This glue acts as a dam to help hold the glass in place. Begin piling on Starfire glass (or any clear crushed glass). Use your fingers to guide the pieces into the fur shape, keeping the edges clean and fluffy.
Repeat the same process on the pom-pom at the tip of Santa’s hat.
Step 6: Mix & Apply the Resin
Put on gloves and prepare two ounces of ArtResin - one ounce of Part A and one ounce of Part B. Stir slowly for three full minutes, scraping the sides and bottom of your cup as you mix. Slow stirring helps reduce bubbles.
Pour resin directly onto the glass-covered areas first. The resin will seep down between the glass pieces, coating everything and helping the design settle. Tilt your canvas slightly if necessary to encourage the resin to flow into the fur trim and pom-pom.
Use your gloved hands to gently spread the remainder of the resin across the entire canvas surface.
Using a small heat gun or kitchen torch, hover warm air over the canvas to pop any bubbles that formed while mixing. Keep the heat source constantly moving and never let the flame touch the resin. Bubbles will disappear almost instantly.
Once the resin is smooth, level, and glassy, leave Santa undisturbed to cure completely.
If you're a member of The Shattered Circle, you'll find this tutorial in your classroom under Art Shattered Weekly Facebook Lives, search for "Five Days of Christmas".
If you don’t want to miss my Facebook LIVE art instruction, make sure you are on my texting list. I always text 10 minutes before I’m going to go LIVE, so you won’t ever miss it. You can text “Hey Cindy” to 901-519-2923.
Want more inspiration and artwork?
- My website artshattered.com with resources, shop, and more!
- My creative membership The Shattered Circle, where you can explore the world of glass art with online workshops, a supportive community, and more!
- My mini creative membership Just A ‘Lil Bit Monthly Glass Art Club, where you’ll get a new quick and easy online tutorial for just a lil' bit of sparkle in your life!
- My Facebook page where I go LIVE every Wednesday night.
- My YouTube channel which has tons of free art lessons right at your fingertips.
