
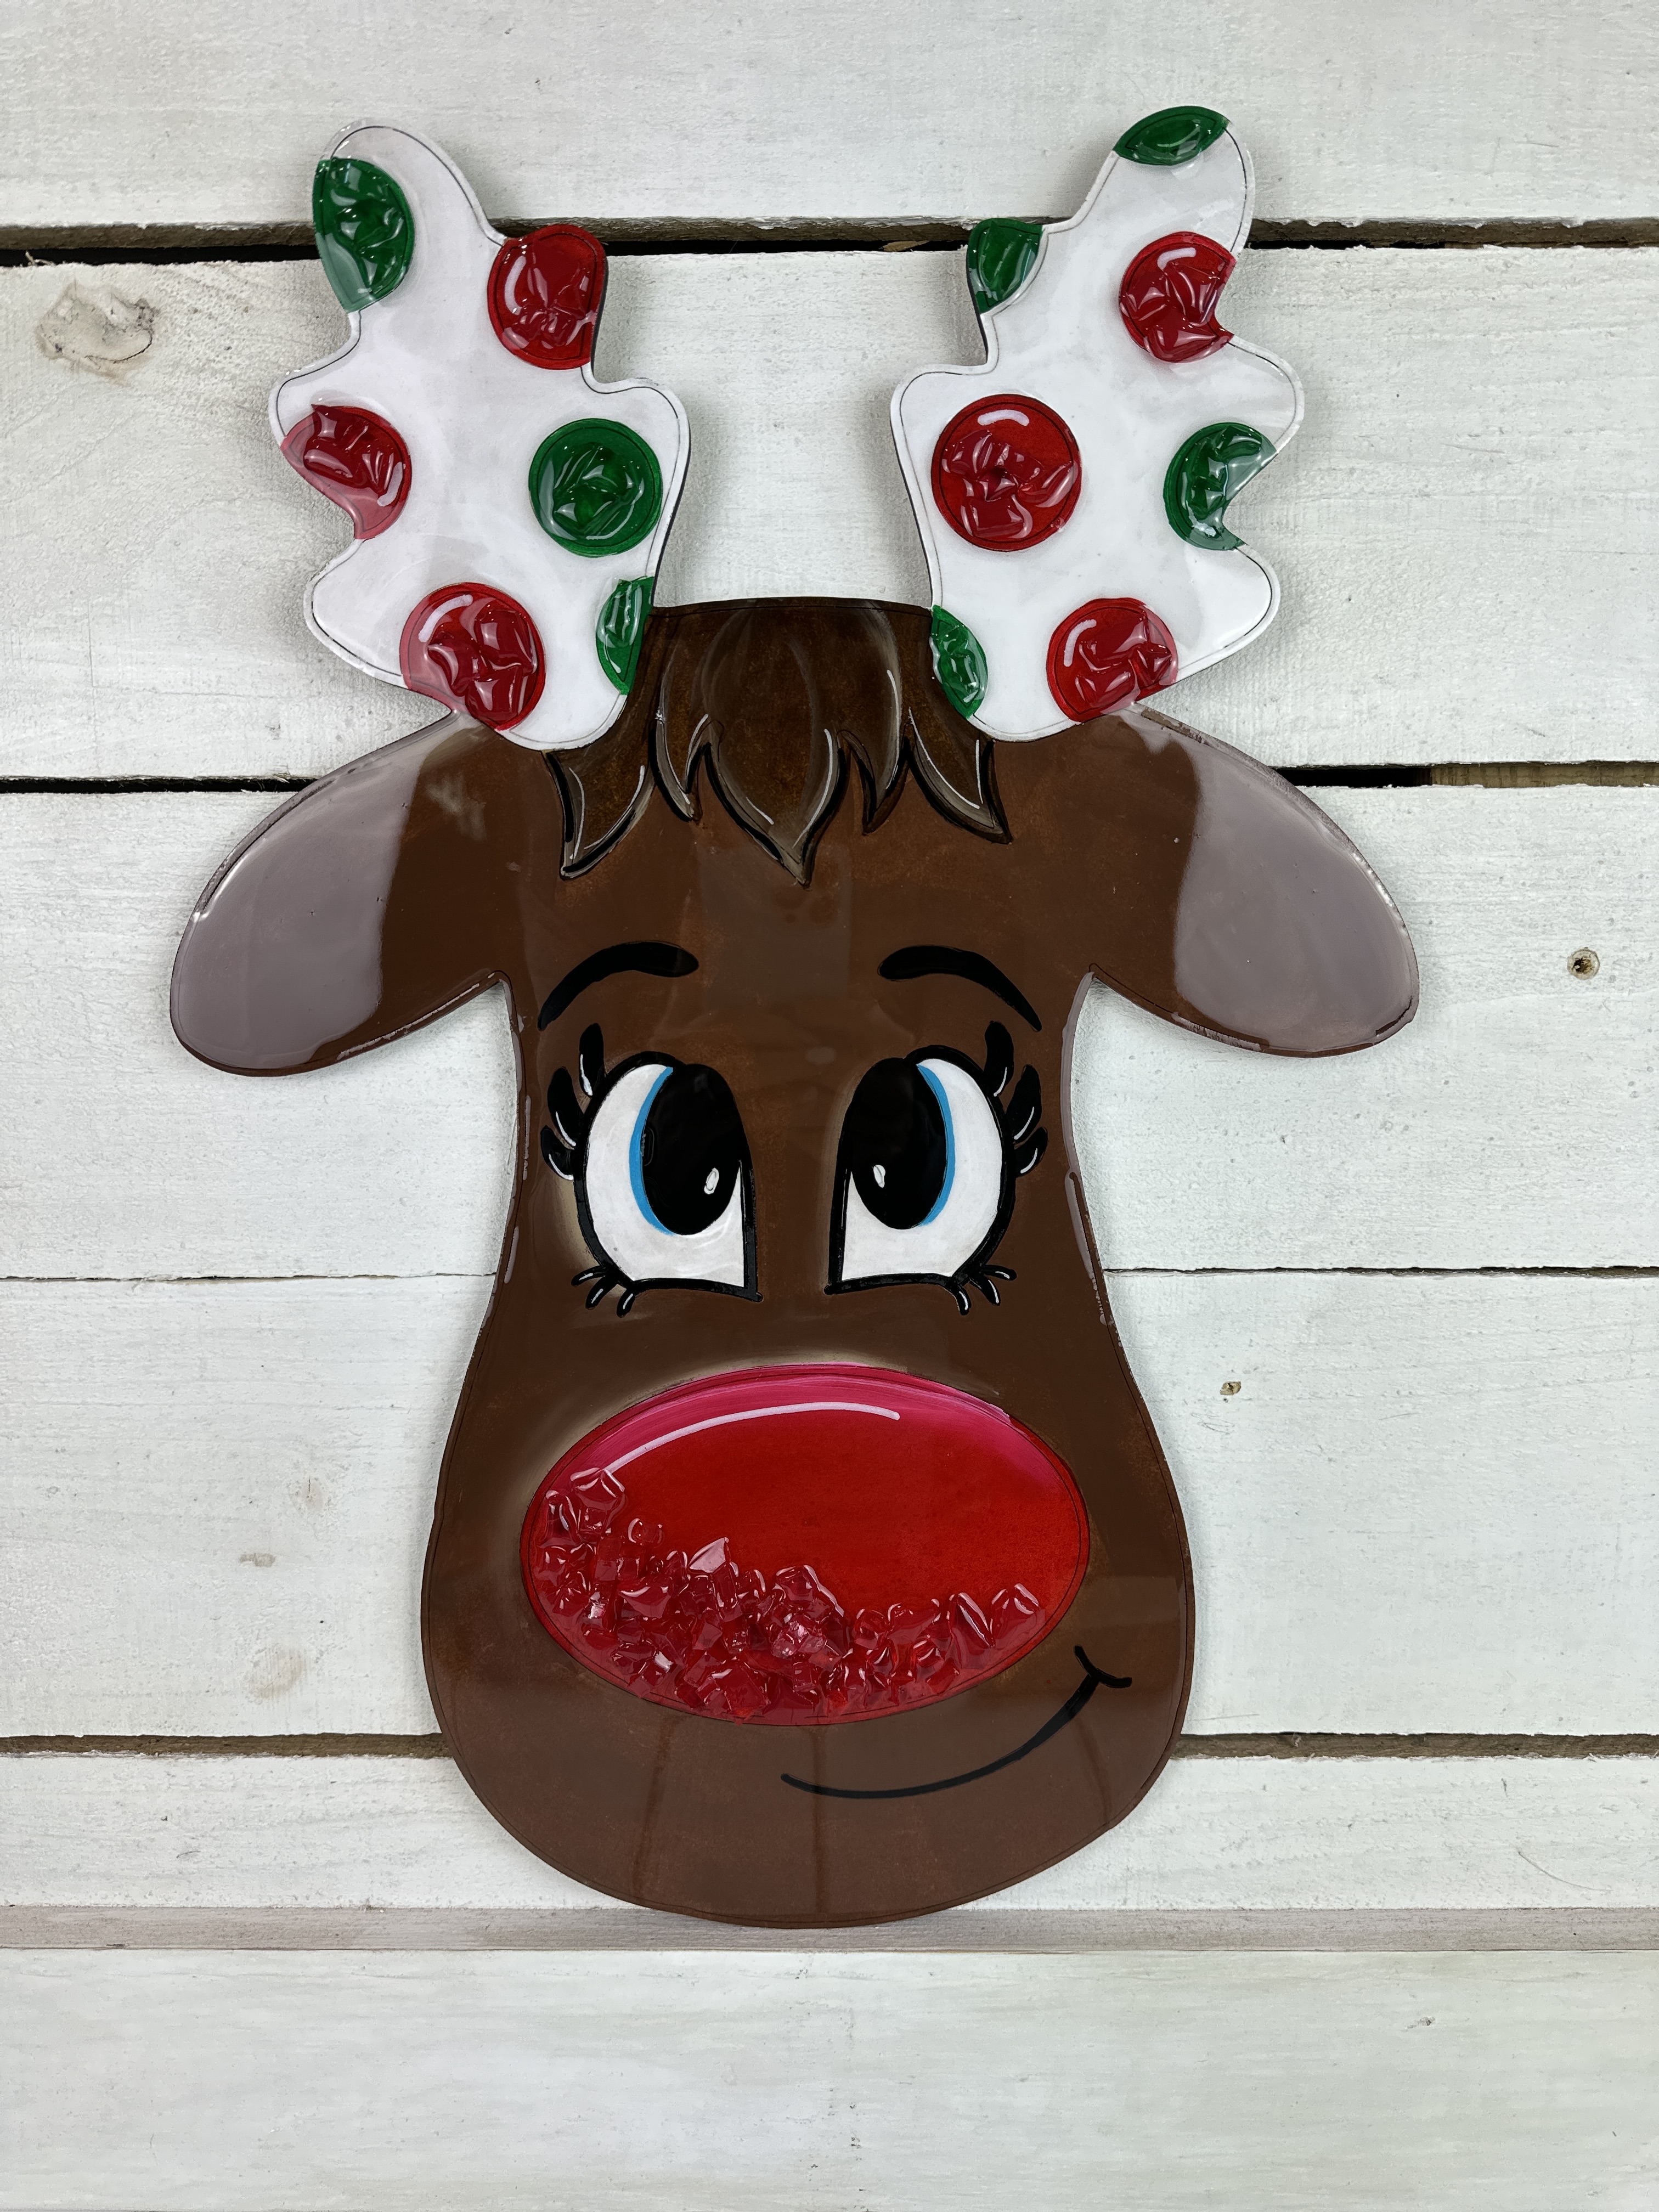
Reindeer Door Hanger ✨
If you’re looking for a cute, festive Christmas project that’s fun to paint and easy to customize, this little reindeer is going to steal your heart! In today’s tutorial, we’re using the 18-inch Reindeer Door Hanger from Southern Adoornments, but the cutout also comes in multiple sizes, so grab the one that works for your space.
This etched wood blank paints like a dream and feels just like coloring in a giant holiday coloring book. And because we’re extra, we’ll finish the piece with a little touch of glass on the nose and antlers and seal it under resin for that glossy, professional finish.
Step 1: Paint the Reindeer Base Coat
Start by loading your palette with Espresso and a bit of Khaki. These two colors blend beautifully and keep the deer from looking flat.
Paint the entire reindeer face and head area in Espresso, working in sections so you can blend in touches of Khaki as you go. This gives the fur soft dimension and keeps everything from looking monotone. Since the wood surface is laser-etched, the outlines make painting easy... you’re truly just “coloring in the lines.”
Keep painting around the brows, nose, ears, and antlers. Don’t stress about painting over the etched eyes or lashes - we’ll redefine those later.
Step 2: Add Dimension to the Face
While the base is still slightly damp, dip your brush into Khaki and lightly sweep it across the top of the head, around the snout, and along the edges. These soft highlights bring the face to life.
For the bangs at the top of the head, switch to Burnt Umber to paint them a deeper brown. Blend in just a touch of Khaki too.

Step 3: Paint the Nose
Use Cherry Red to paint the nose.
Before the red dries, add a tiny swipe of white to the top curve of the nose. We’ll be adding glass here later, but the highlight still matters, especially if someone chooses not to glass their version.
Step 4: Paint the Eyes
Paint the whites of the eyes first with white acrylic paint. Then fill in the pupils with black, going slowly around the tiny etched dots so you don’t lose them.
To define everything, use a bold black Posca pen to outline the eye shape. Add eyelashes with the fine-tip Posca. Feel free to add some white lines to the eyelashes as well.
Optional: Add a thin blue ring around the inside edge of the eyes to give your reindeer a sweet, bright-eyed look.
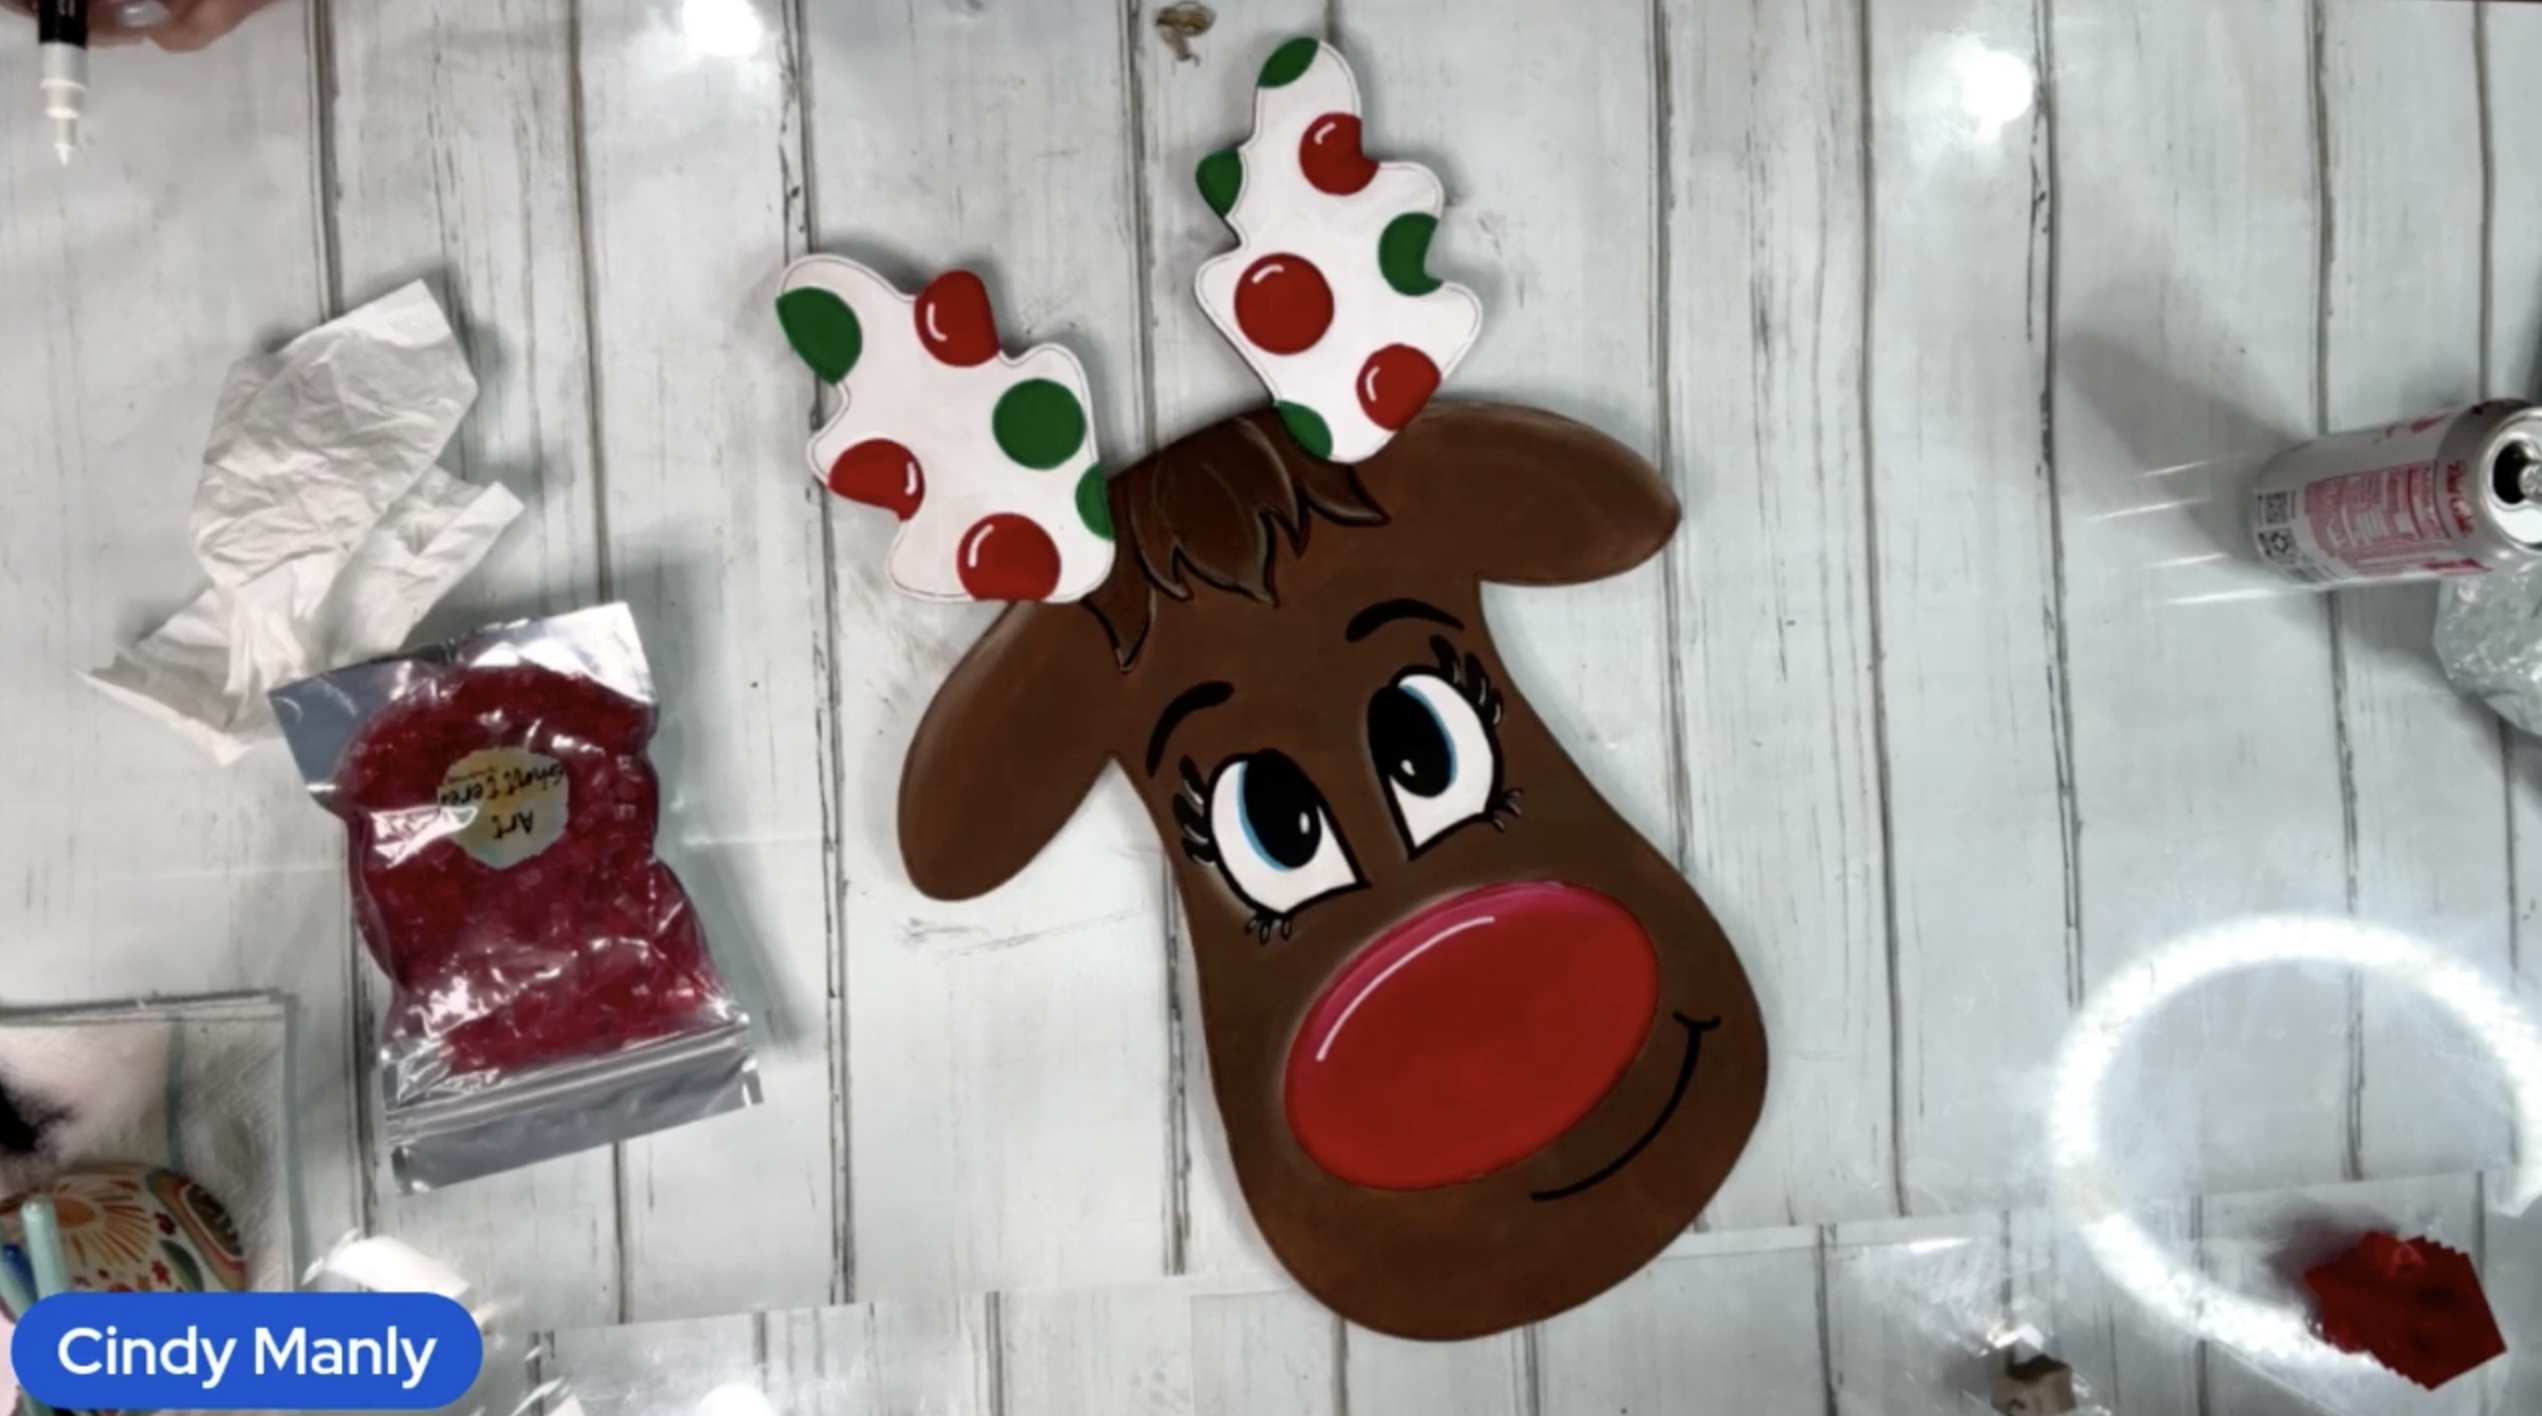
Step 5: Paint the Antlers and Decorative Dots
Paint the antlers with white paint. Each antler has etched polka dots ready to fill in. Use a mix of Cherry Red and Holly Green.
Alternate the colors around the antlers for a classic Christmas palette. If you want extra detail, add tiny highlights to a couple of the dots with white paint or a white Posca pen.
Don’t forget the mouth! A quick swipe with your black Posca pen brings the whole expression together.
Step 6: Add Glass to the Nose and Dots (Optional but Adorable!)
If you want your reindeer to sparkle, pull out your crushed glass:
For the nose, add a small curved cluster of red glass along the bottom area of the nose for a “glowing Rudolph” look. For the antler dots, add tiny bits of red or green glass directly on top of the painted dots. A little goes a long way - you still want this to hang nicely on a door without weighing it down.
Step 7: Prepare and Mix Your Resin
If you’ll be sealing this with resin, make sure all paint is thoroughly dry. Mix 3 ounces total of Art Resin (1.5 oz hardener and 1.5 oz resin). Stir for a full 3 minutes, scraping the sides and bottom of your cup.
(White paint can cause faster ambering in resin. If your piece will hang in direct sunlight, consider spray sealing first.)
Step 8: Apply the Resin
Place the reindeer on risers or pyramids.
Start by pouring resin over all glass areas first. Spread the resin gently using a gloved hand (preferred) or a silicone spreader. Hands help minimize bubbles and give you more control around the cut edges.
Continue spreading resin over the entire reindeer, right out to the edges. Use a heat gun on low and sweep across the surface quickly. Avoid holding heat in one place too long.
Let the reindeer cure 8–10 hours until dry to the touch and 72 hours for a full cure before hanging.

If you don’t want to miss my Facebook LIVE art instruction, make sure you are on my texting list. I always text 10 minutes before I’m going to go LIVE, so you won’t ever miss it. You can text “Hey Cindy” to 901-519-2923.
Want more inspiration and artwork?
- My website artshattered.com with resources, shop, and more!
- My creative membership The Shattered Circle, where you can explore the world of glass art with online workshops, a supportive community, and more!
- My mini creative membership Just A ‘Lil Bit Monthly Glass Art Club, where you’ll get a new quick and easy online tutorial for just a lil' bit of sparkle in your life!
- My Facebook page where I go LIVE every Wednesday night.
- My YouTube channel which has tons of free art lessons right at your fingertips.
