
Rustic Angel 😇
This glass angel project may look intricate, but it’s surprisingly simple and incredibly satisfying to create. Using broken vase glass, crushed glass, and resin, you’ll build a tall, elegant angel full of texture, shimmer, and movement. This is one of those projects where imperfections are not only welcome, they’re what make the piece beautiful!
Step 1: Preparing the Wood Board
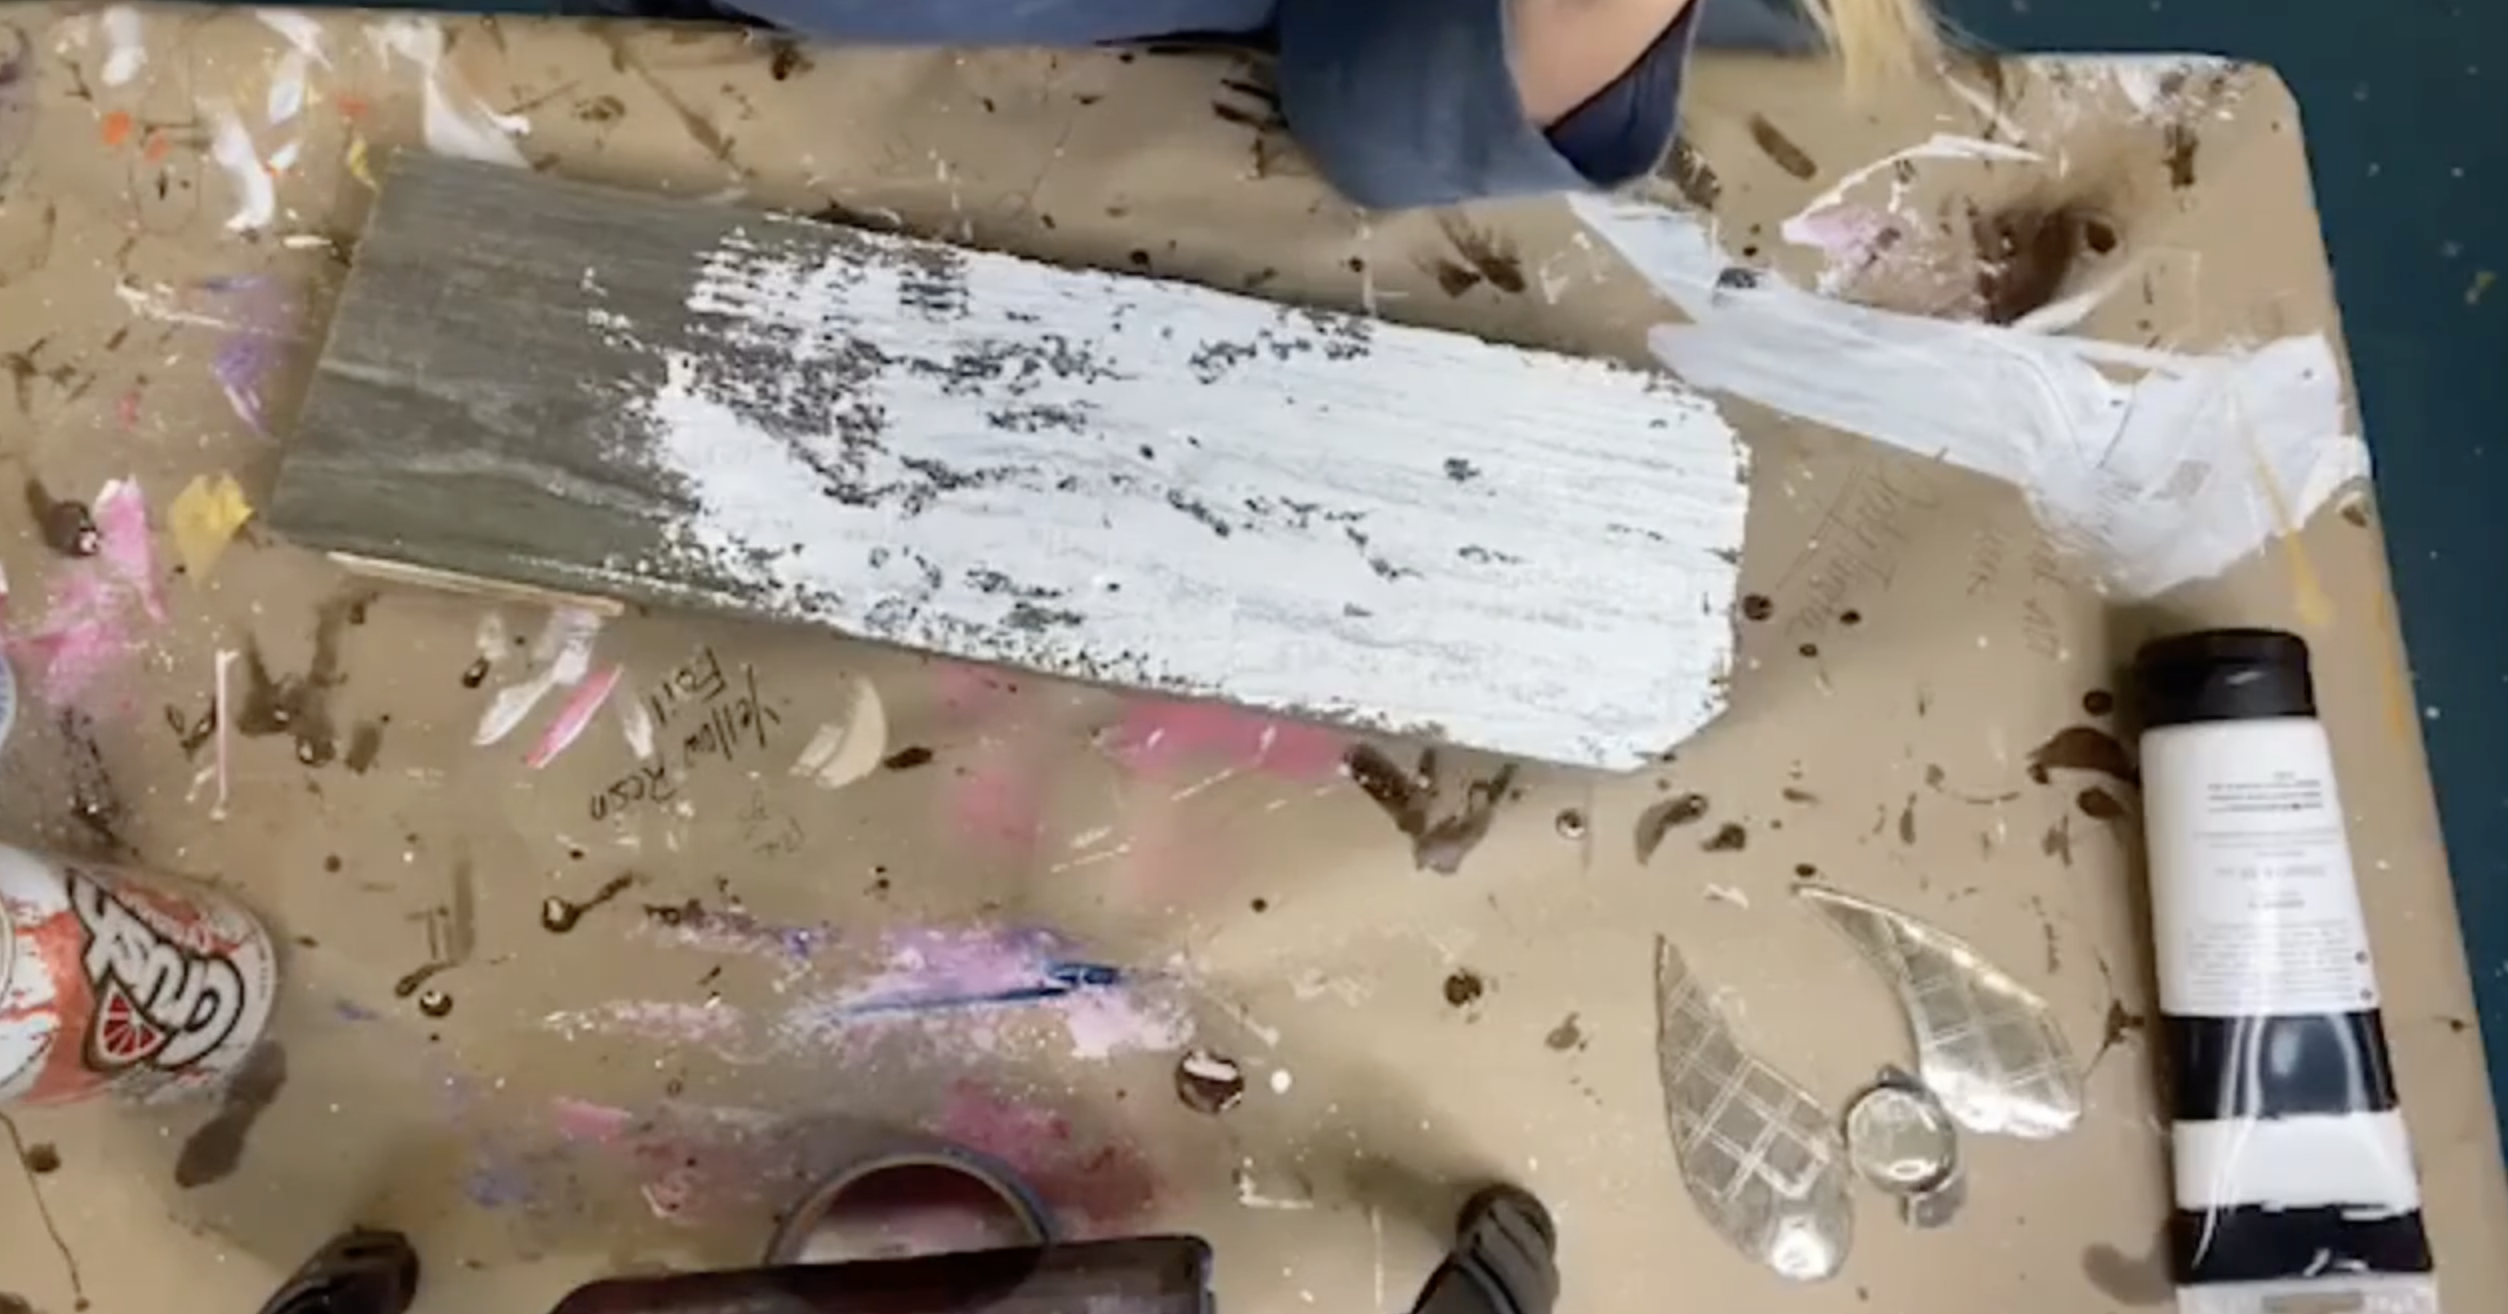
Begin with a wooden board roughly 5 inches wide and about 18 inches long. Lightly sand the surface if needed and wipe away any dust so the paint will adhere well. The goal here isn’t perfection, it’s simply creating a clean, workable surface.
Using a palette knife, spread heavy-bodied white acrylic paint or modeling paste across the board. Pull the paint downward in loose, uneven strokes, intentionally allowing some of the wood to show through. Avoid creating straight edges or harsh lines. The texture and variation give the finished piece a rustic, aged look that works beautifully with the glass. Once you’re happy with the coverage, allow the board to dry completely.
Step 2: Creating the Glass Angel Wings
The angel’s wings are created from an old mercury glass vase or another thick glass vessel. Choose a large piece and sketch a simple wing shape directly onto the glass with a marker. Don’t attempt to score or cut the entire shape at once. Instead, focus on removing excess glass gradually.
Start by scoring along the inside curve of the wing, then break away larger sections to make the piece more manageable. Using wheeled nippers, take tiny, controlled bites around the traced line. Small cuts give you the most control and reduce the risk of cracking the glass incorrectly. Continue nipping until the wing shape is fully formed. Repeat the process to create a second wing, keeping the shapes similar but not necessarily identical.
Always wear safety glasses and gloves while cutting glass. Small shards are unavoidable, and safety should come first.

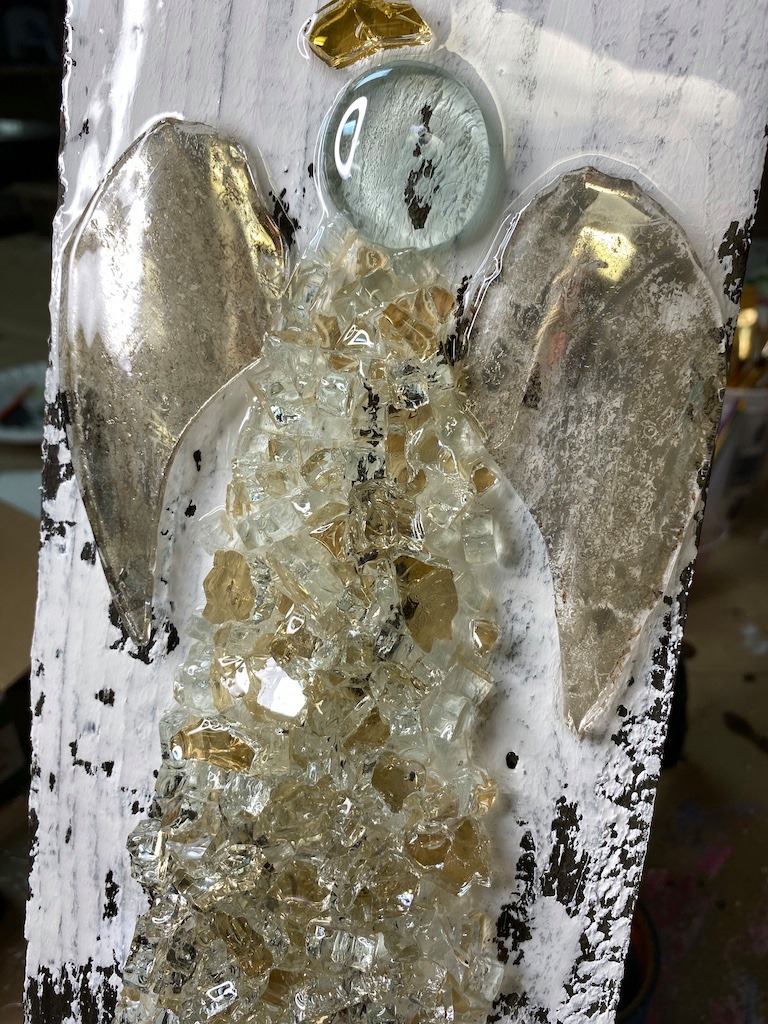
Step 3: Adding the Head and Halo
Once the wings are ready, move on to assembling the angel’s head and halo. Use a large, flat glass floral gem for the head and glue it near the top center of the board using clear tacky glue. This gem provides a smooth focal point and contrasts beautifully with the rough texture of the crushed glass.
For the halo, select a thin sliver of glass and glue it just above the head at a slight angle. A slightly crooked halo adds charm and keeps the piece feeling organic rather than stiff. Allow the glue to set briefly before continuing.

Step 4: Sketching the Angel’s Body with Glue
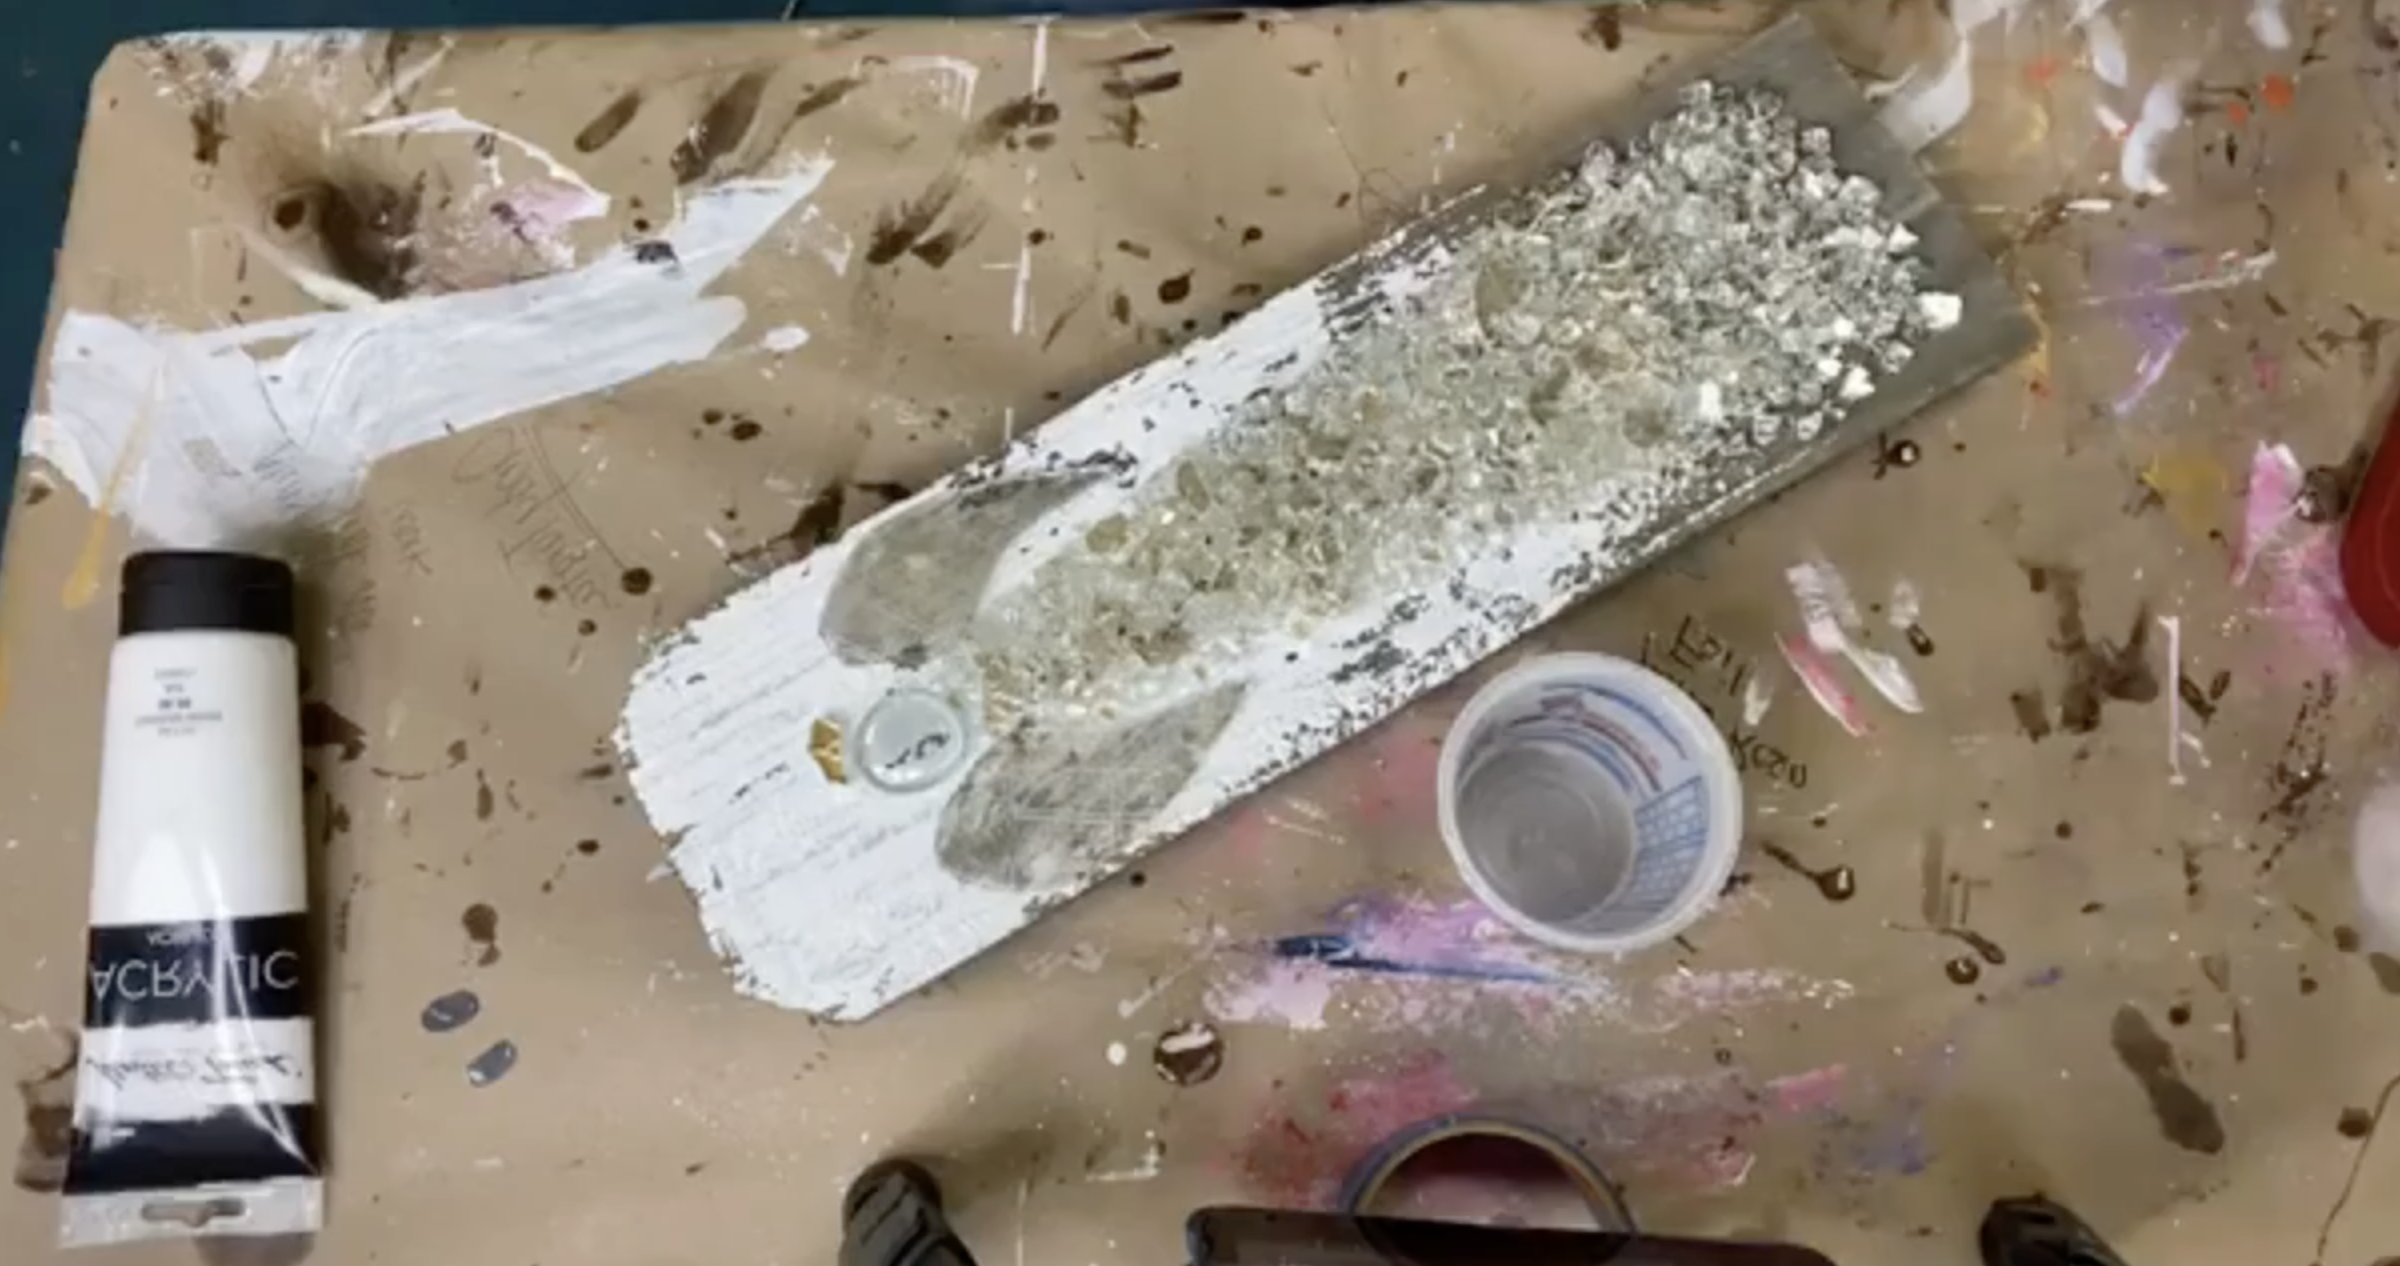
With the head in place, lightly sketch the angel’s body using clear tacky glue. Start just beneath the head and draw a loose, flowing shape that extends downward toward the bottom of the board. Think long, elegant, and soft rather than straight or rigid.
This glue line serves as a guide for the crushed glass. Because the glue dries clear, there’s no need to worry about precision. Organic lines work best for this project.
Step 5: Building the Angel’s Body with Crushed Glass
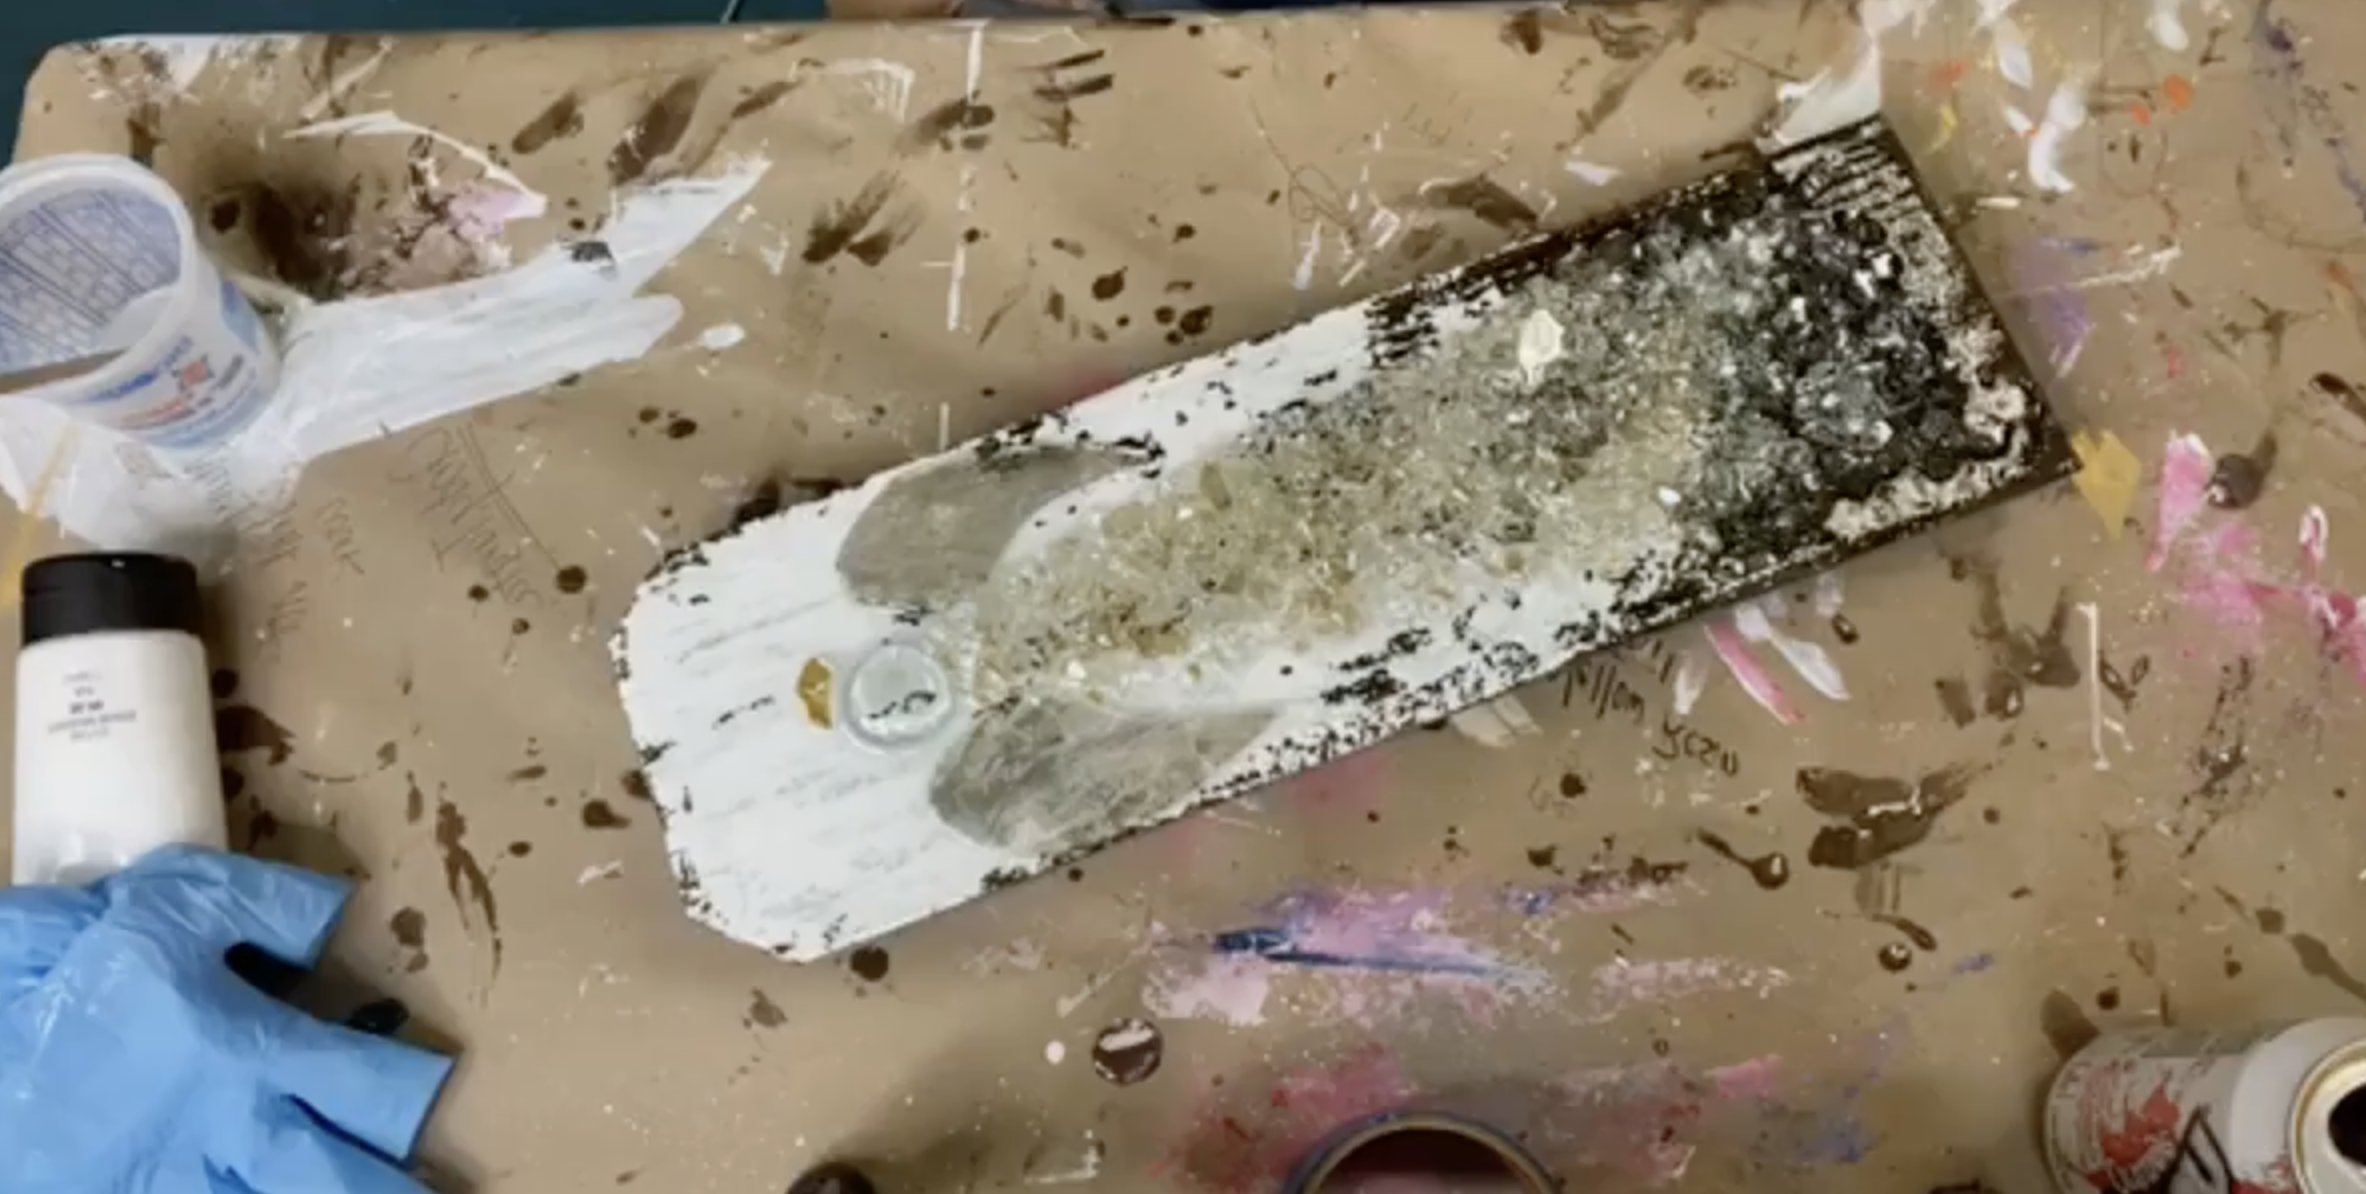
Generously sprinkle platinum or silver reflective crushed glass over the glue outline, building the body from the neck downward. This angel is meant to feel substantial, so don’t be shy with the glass. Use your fingers to gently shape and mound the glass, allowing it to fall naturally rather than forcing a specific outline.
Once the body feels full and balanced, carefully slide the glass wings into place on either side. Make sure they are level and not extending beyond the edge of the board. Press them gently into the crushed glass so they feel secure.
Step 6: Mixing & Applying the Resin
Because this piece uses a thick layer of glass, it will require more resin than smaller projects. Mix ArtResin according to the manufacturer’s instructions using a one-to-one ratio of resin and hardener. Stir slowly for a full three minutes, scraping the sides and bottom of the cup as you go.
Slow mixing helps reduce air bubbles and ensures the resin cures properly. For this project, expect to use between three and four ounces of resin, depending on how thickly the glass was applied.
Drizzle the mixed resin slowly over the angel’s body, starting near the head and working downward. Drizzling allows the resin to flow through all layers of glass rather than sitting only on the surface. Continue adding resin until all glass appears wet and glossy.
Be sure to seal any sharp edges, especially along the wings. Adding a bit of resin beneath the wings also helps stabilize them and prevents movement as the resin cures. Use a gloved finger or stir stick to gently guide the resin where needed, pulling excess away from edges so it doesn’t pool.
Once the resin is applied, use a torch, heat gun, or blow dryer to pop surface bubbles. Keep the heat moving constantly and never allow the flame to touch the resin directly. Because wood naturally releases air, some bubbles are expected. Do your best to remove visible ones, but don’t stress - the texture of the board helps disguise minor imperfections.
Place the piece on a level surface in a dust-free area and allow it to cure fully according to the resin’s instructions, typically 24 to 72 hours. Once cured, the angel will have a glossy, luminous finish that highlights every layer of glass and texture.
If you're a member of The Shattered Circle, you'll find this tutorial in your classroom under Art Shattered Weekly Facebook Lives, search for "Five Days of Christmas".
If you don’t want to miss my Facebook LIVE art instruction, make sure you are on my texting list. I always text 10 minutes before I’m going to go LIVE, so you won’t ever miss it. You can text “Hey Cindy” to 901-519-2923.
Want more inspiration and artwork?
- My website artshattered.com with resources, shop, and more!
- My creative membership The Shattered Circle, where you can explore the world of glass art with online workshops, a supportive community, and more!
- My mini creative membership Just A ‘Lil Bit Monthly Glass Art Club, where you’ll get a new quick and easy online tutorial for just a lil' bit of sparkle in your life!
- My Facebook page where I go LIVE every Wednesday night.
- My YouTube channel which has tons of free art lessons right at your fingertips.
