
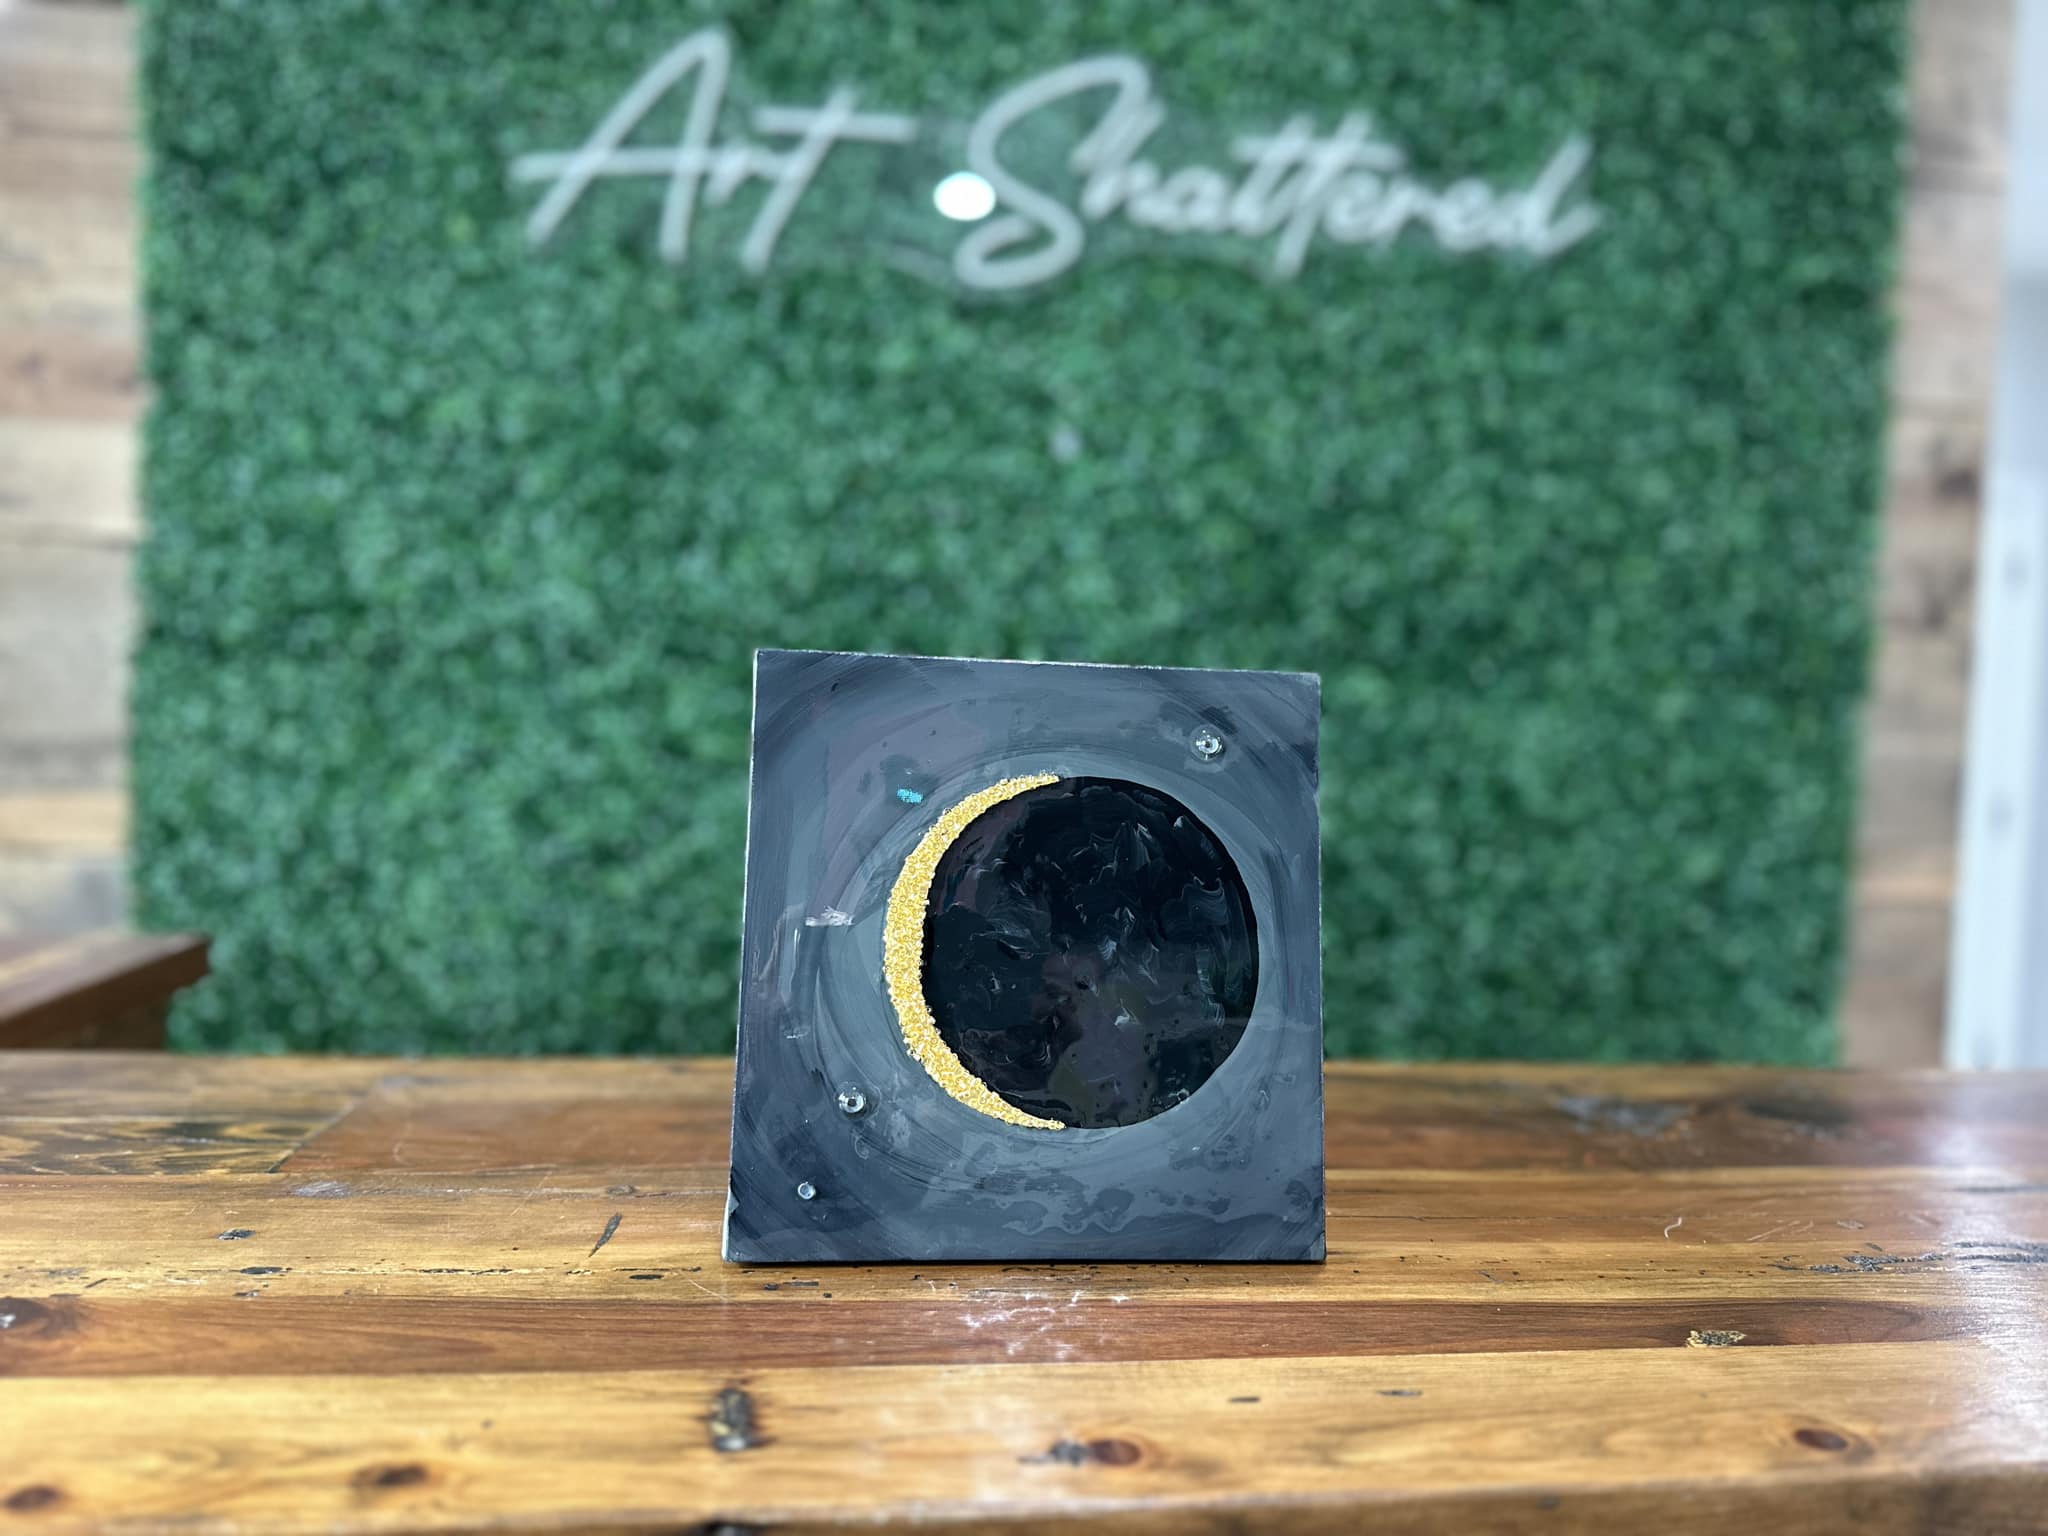
Total Eclipse 🌘
If you want a small art piece that feels dramatic, moody, and a little magical, this eclipse project is such a fun one to make. It starts with a dark, stormy sky on an 8x8 canvas, adds a bold black eclipse with a gold leaf glow, and finishes with resin and a few tiny embellishments that make the whole thing feel special.
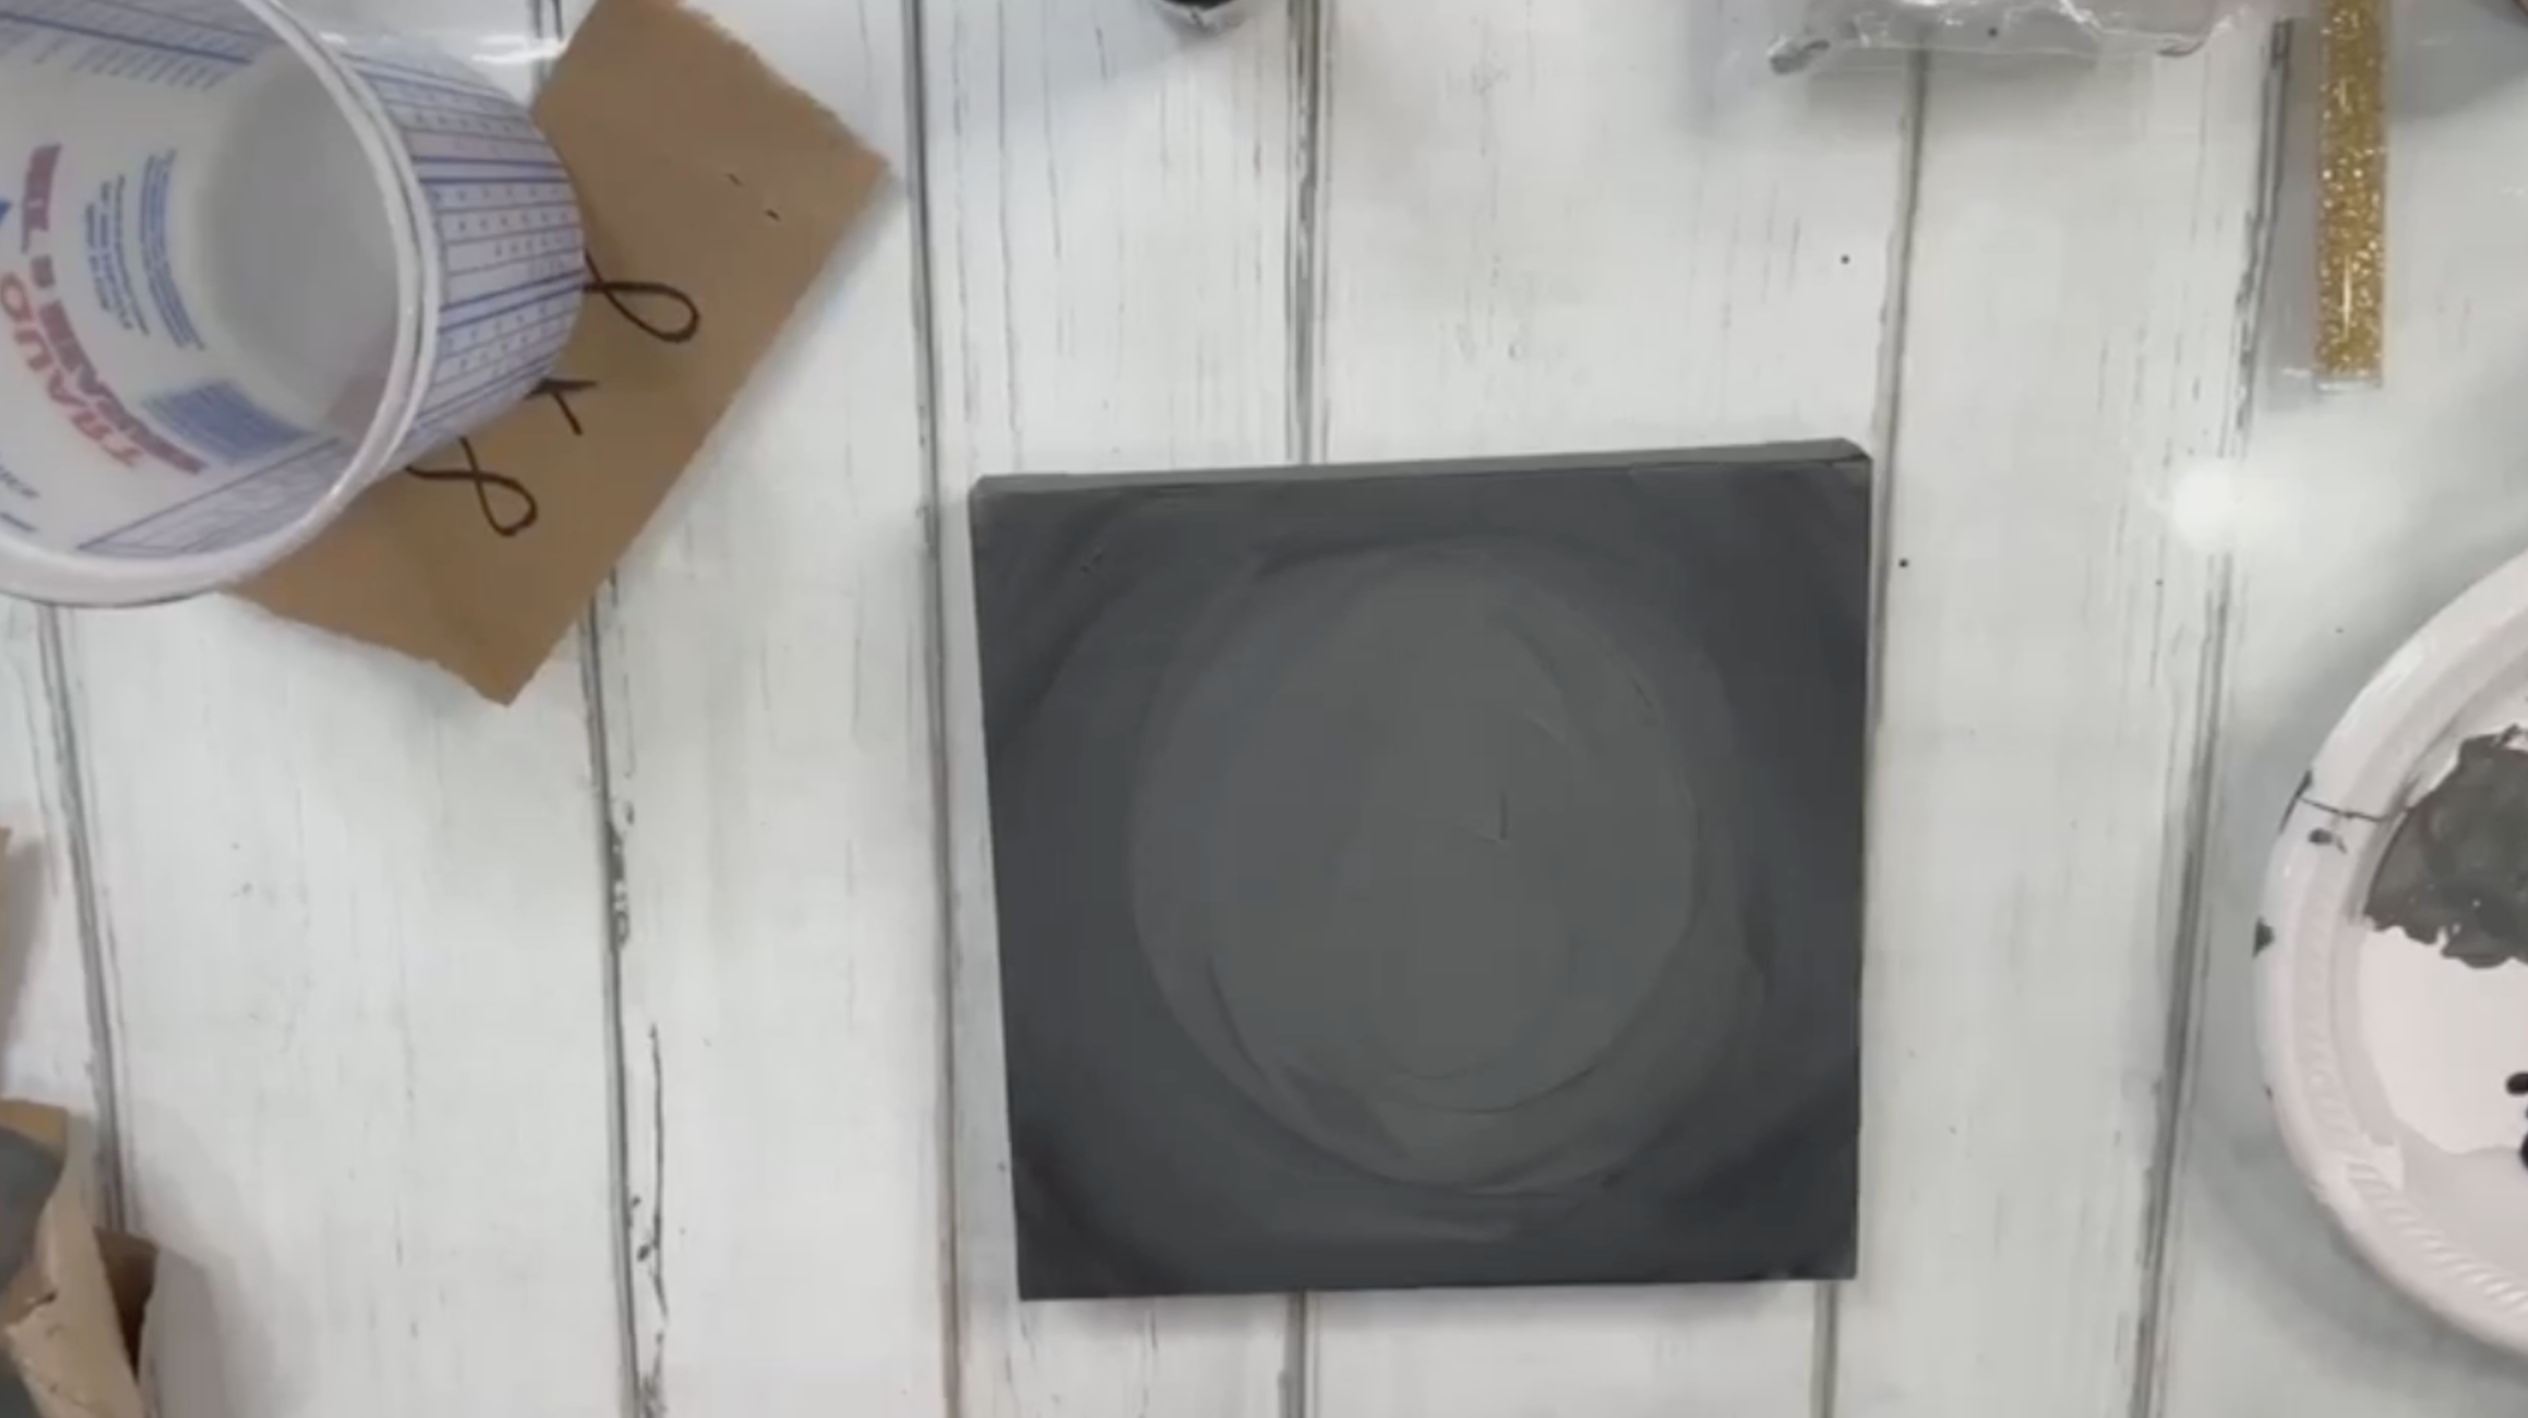
Step 1: Paint the Background Dark Gray
Start by painting the edges of your canvas with Gray Storm so you do not end up with white sides on a dark piece. Then paint the entire front of the canvas in Gray Storm as your base coat. This first coat may look a little translucent over the white canvas, and that is okay. It is just giving you a foundation for the dark sky.
Dry it with a heat gun or blow dryer, then add a second coat of Gray Storm. On that second round, bring in a little Lamp Black around the outer edges and corners and blend it inward in soft circular motions, keeping the center area a little lighter and grayer so the eclipse will stand out. The goal is a dark sky, but not one flat solid black square.
Once you are happy with that dark gray-to-black sky, dry it thoroughly. Let it cool for a minute before you start tracing on top of it.
Step 2: Trace the Eclipse Circles
Take a cup or small bowl that fills roughly three-quarters of the canvas and place it in the center. Trace all the way around it to create your main circle. Then shift the cup upward slightly—about three-quarters of an inch—while keeping it lined up with the first circle, and trace again. That second line creates the sliver where your gold eclipse glow will go.
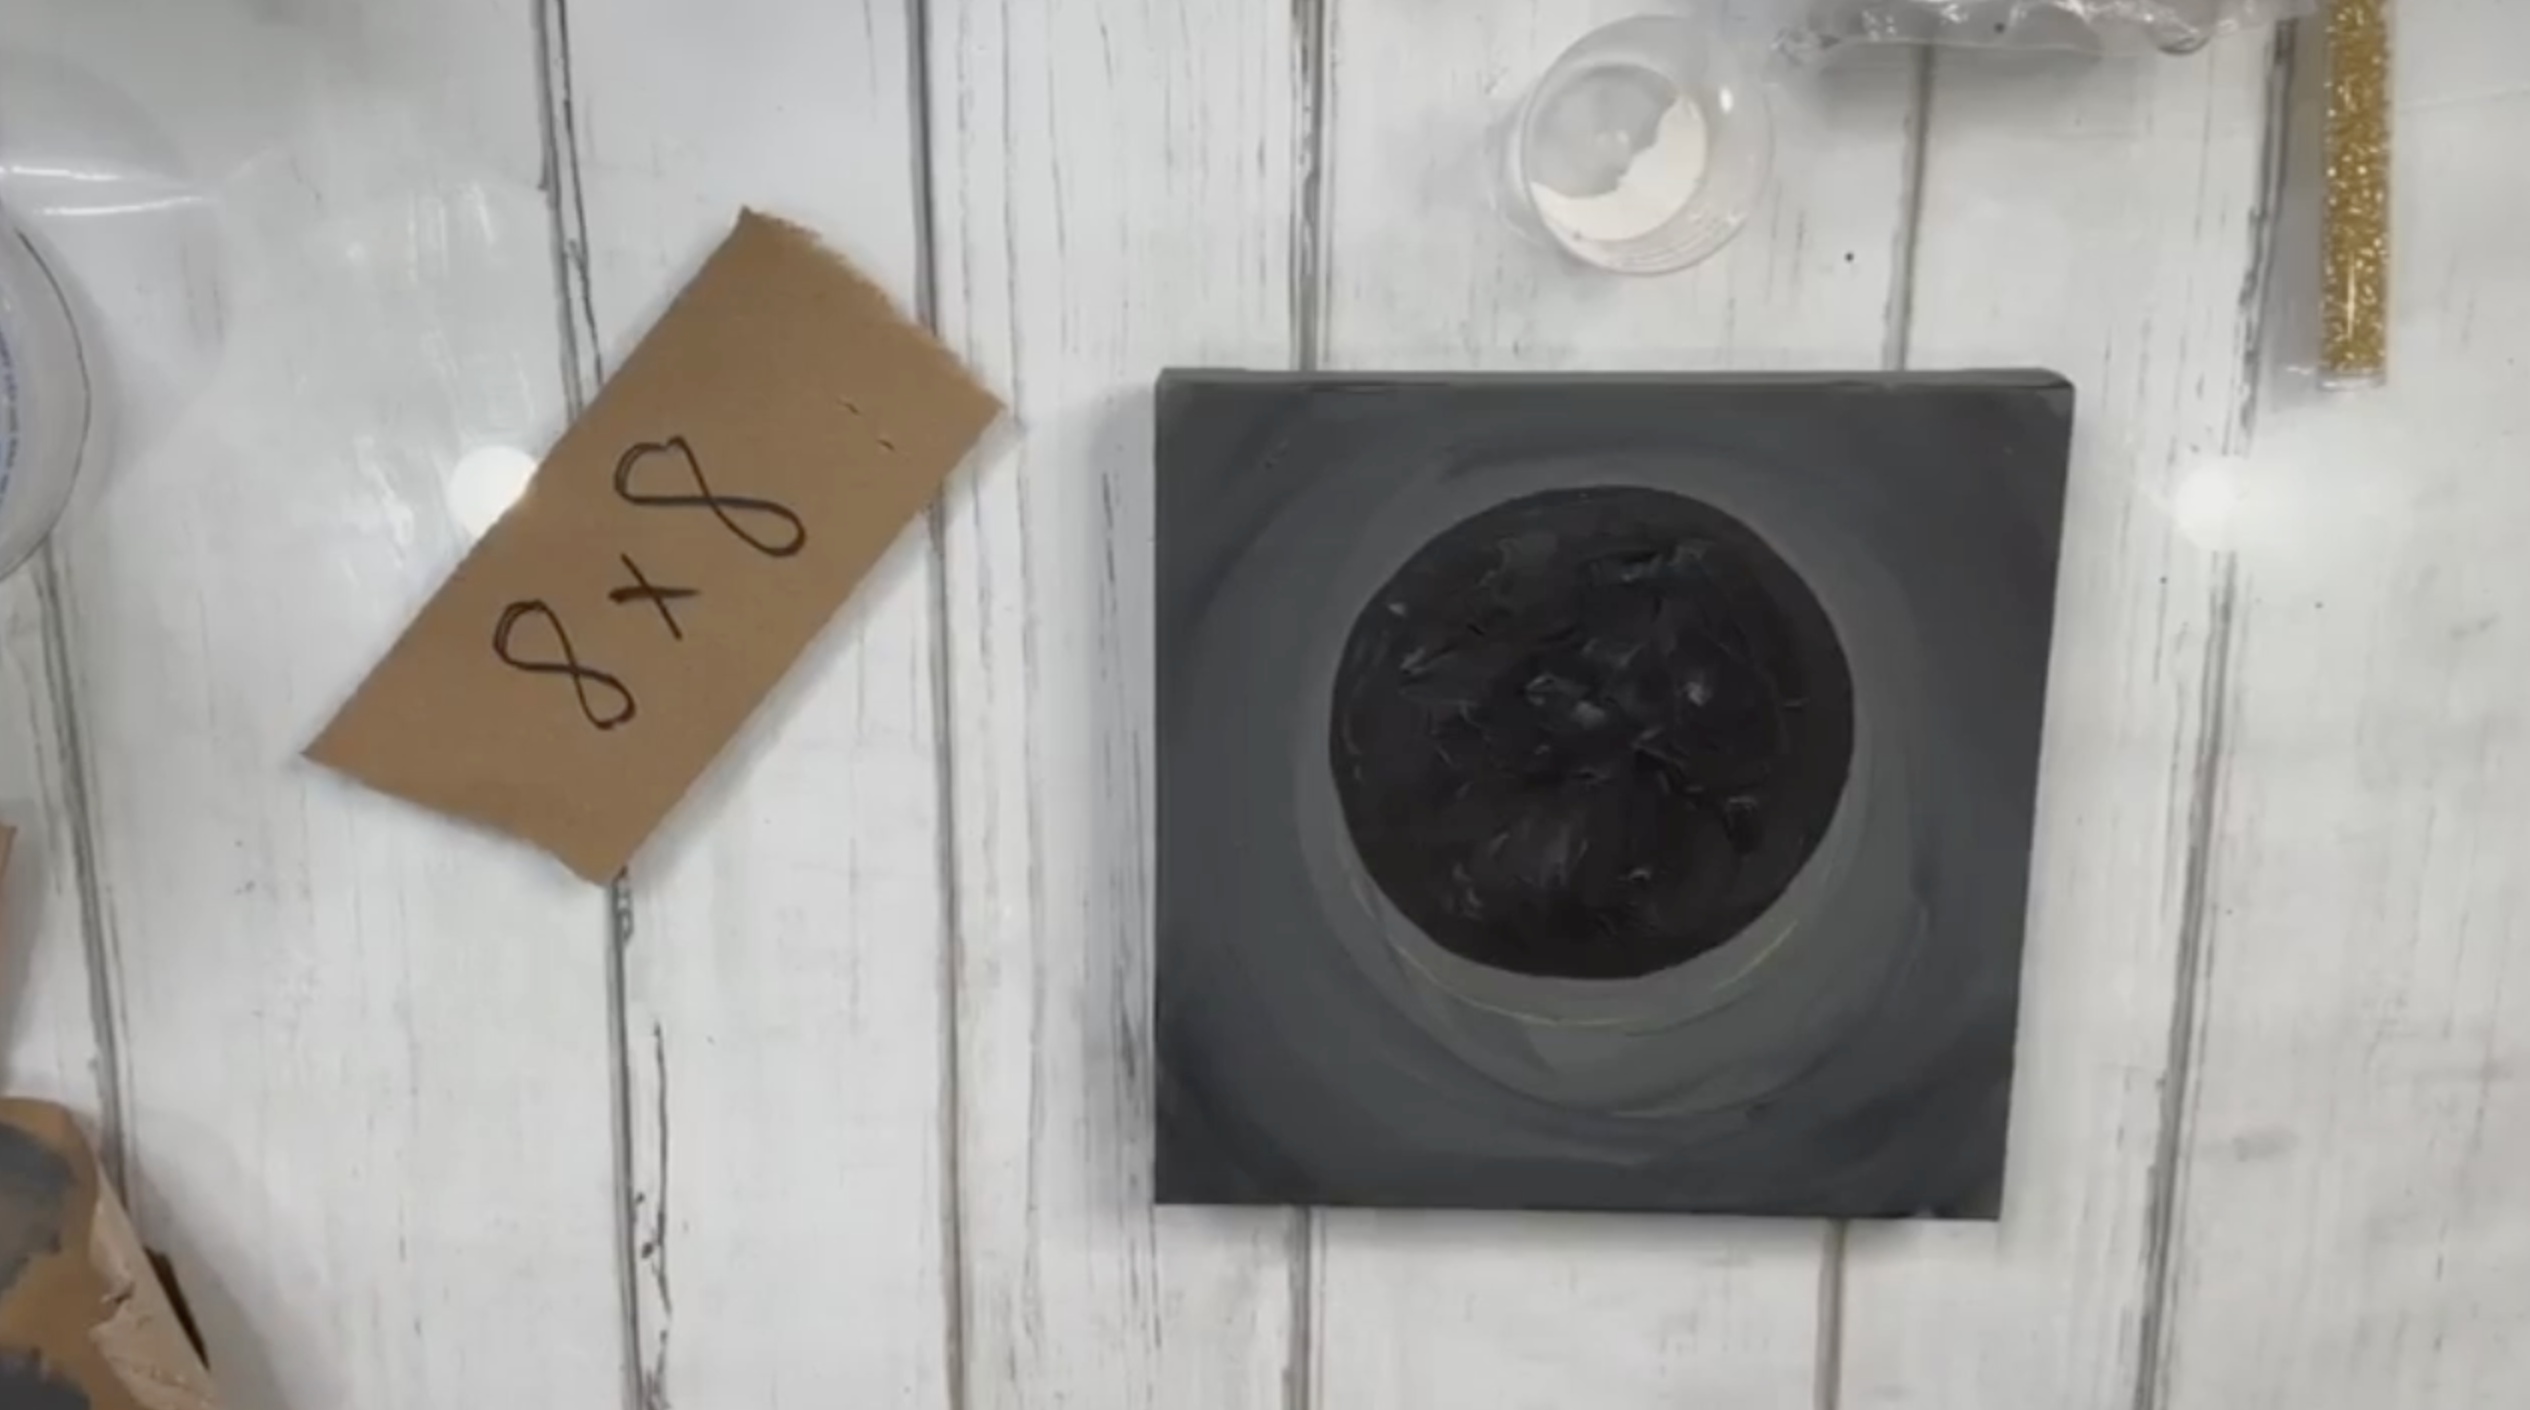
Step 3: Paint the Eclipse Circle
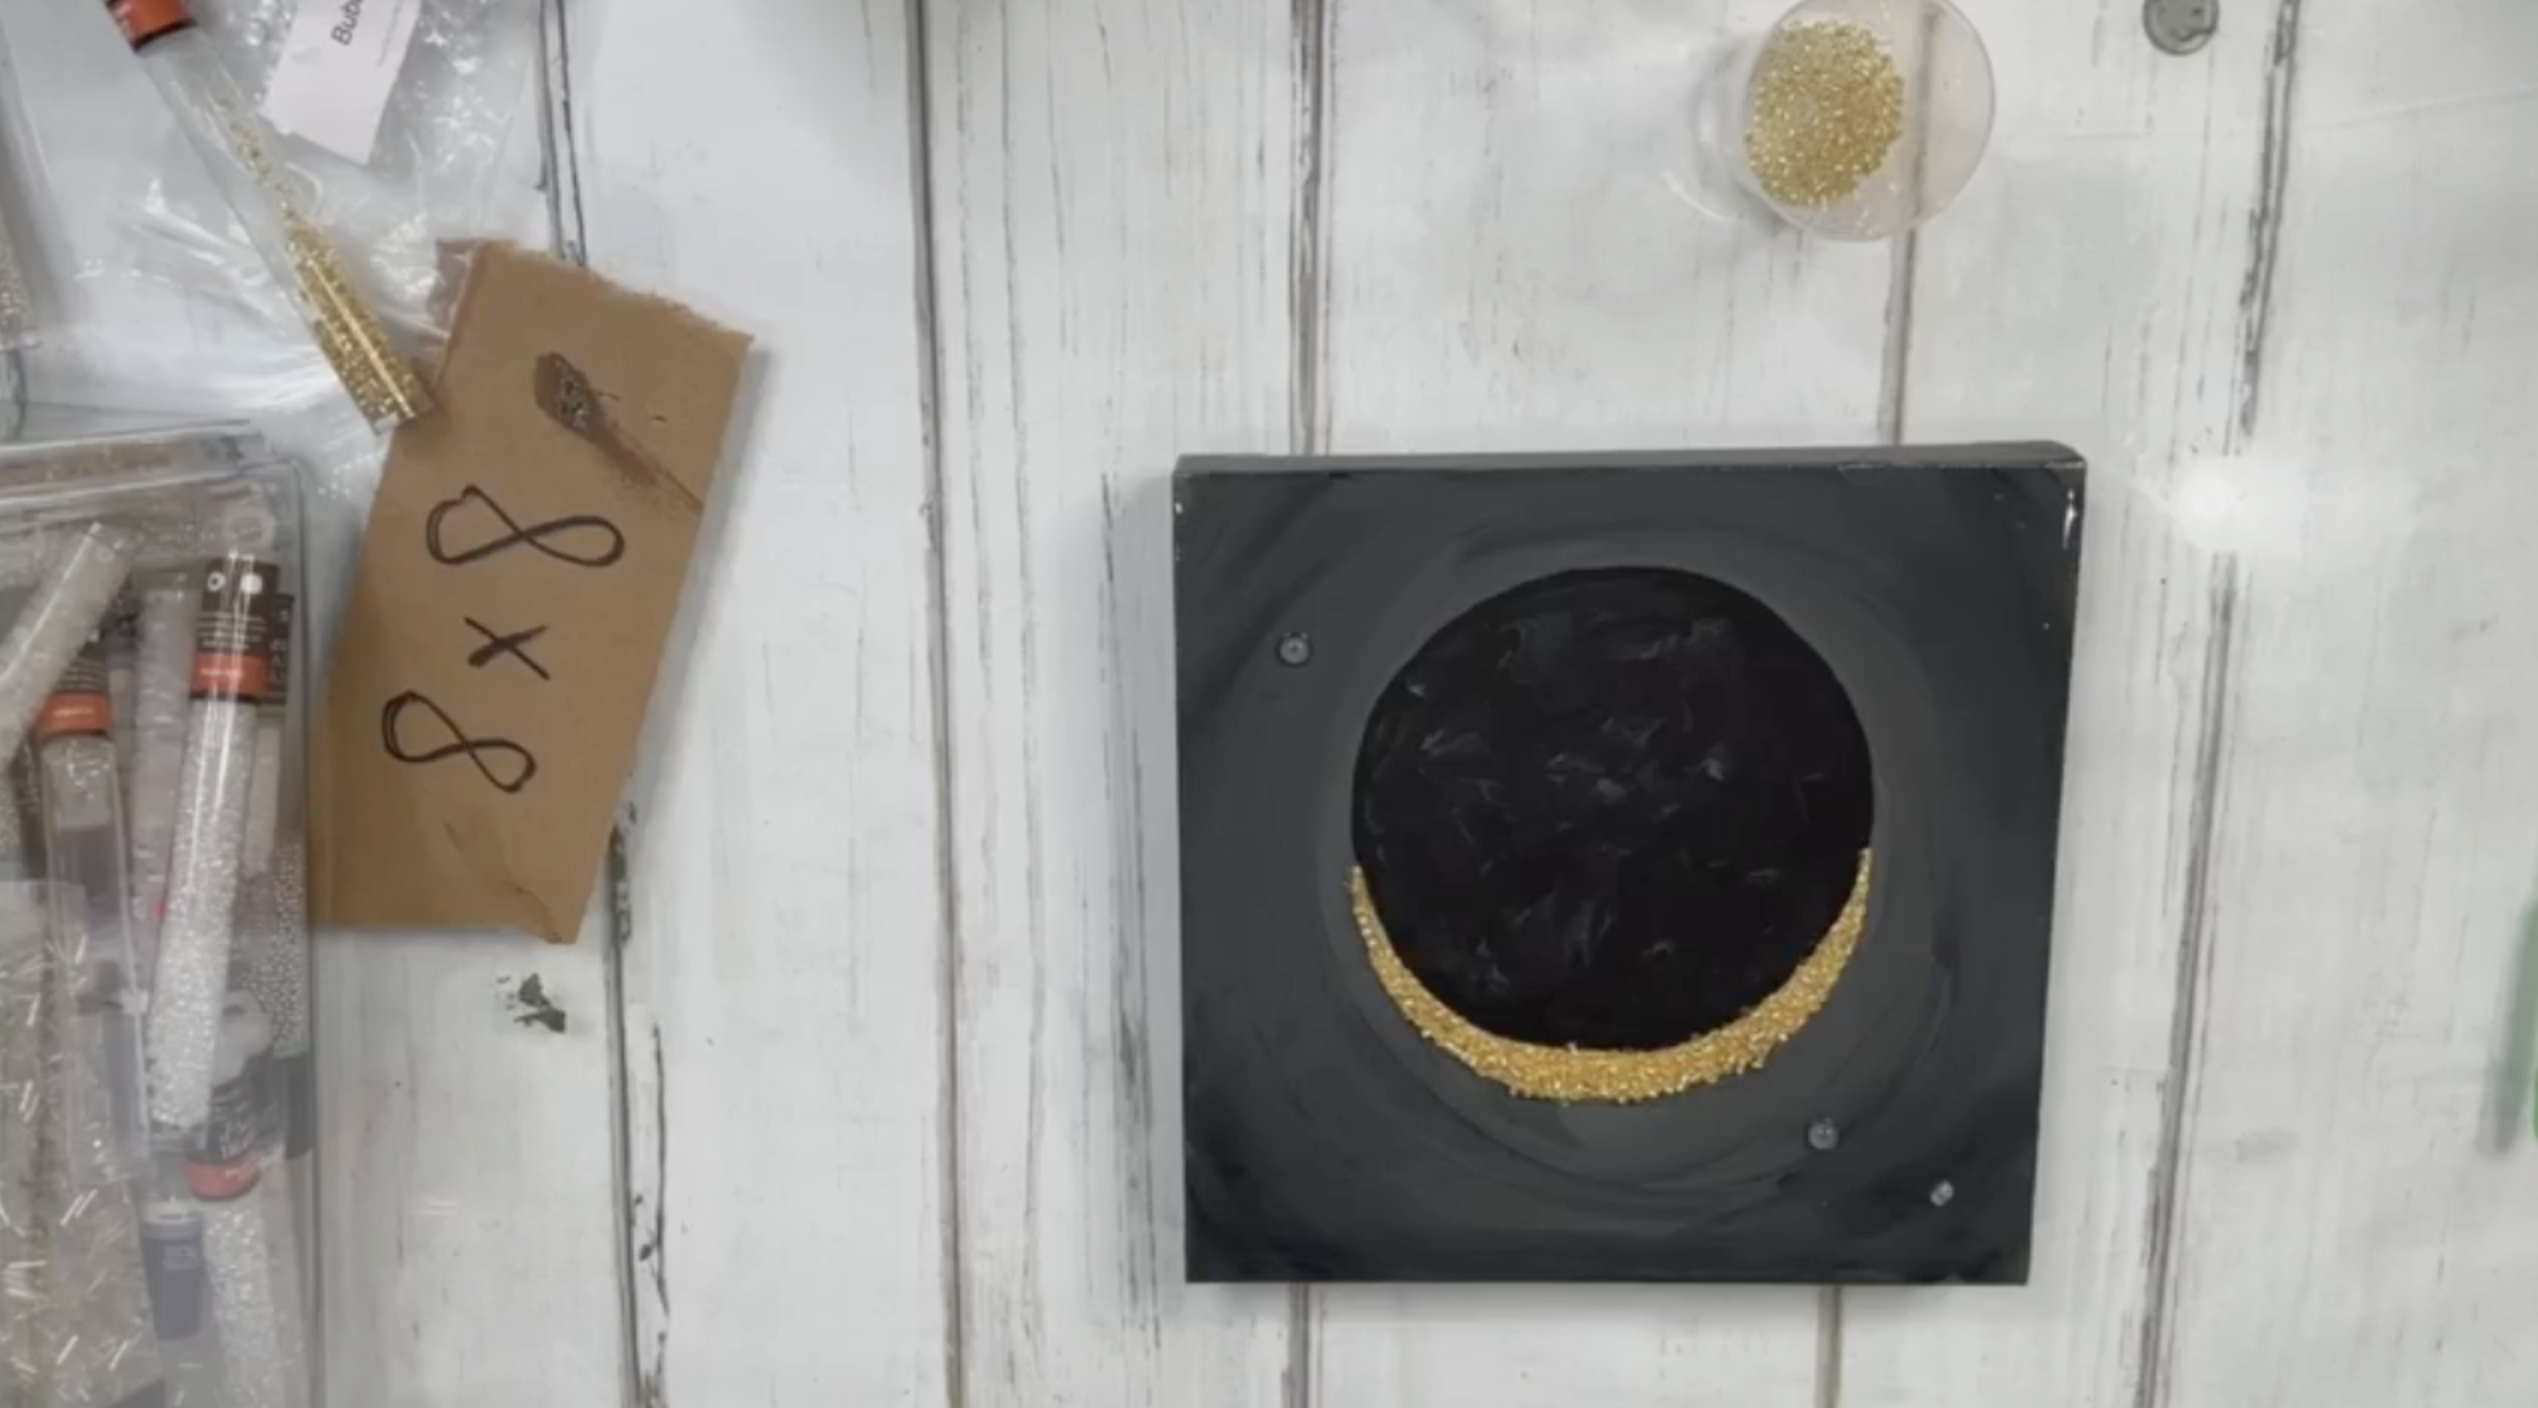
Using a smaller brush, paint the main circle in Lamp Black. Cover your pencil lines as you go so they do not show through. While the black paint is still wet, add a little Gray Storm into the black in soft, random patches so the eclipse is not just one flat black blob. Blend the gray into the black enough that it looks subtle, giving the surface a little texture and movement. That little bit of variation makes the black circle feel more interesting and dimensional.
Dry the eclipse circle completely before adding your leaf adhesive. This is especially important because the gold leaf size goes exactly where you want your crescent, and you do not want it mixing into wet paint. Once dry, you should have a dark circle with soft gray variation and a clean little crescent space along the lower edge.
Step 4: Apply the Gold Leaf Adhesive
Use a tiny liner brush and carefully paint gold leaf adhesive size into that crescent-shaped sliver at the bottom of the eclipse. Stay snug against the black circle and follow your traced line as closely as you can. This part is a little meticulous, so just go slow. The adhesive will go on milky white at first. Let it sit until it turns clear and tacky. Once it looks clear, it is ready for the leaf.
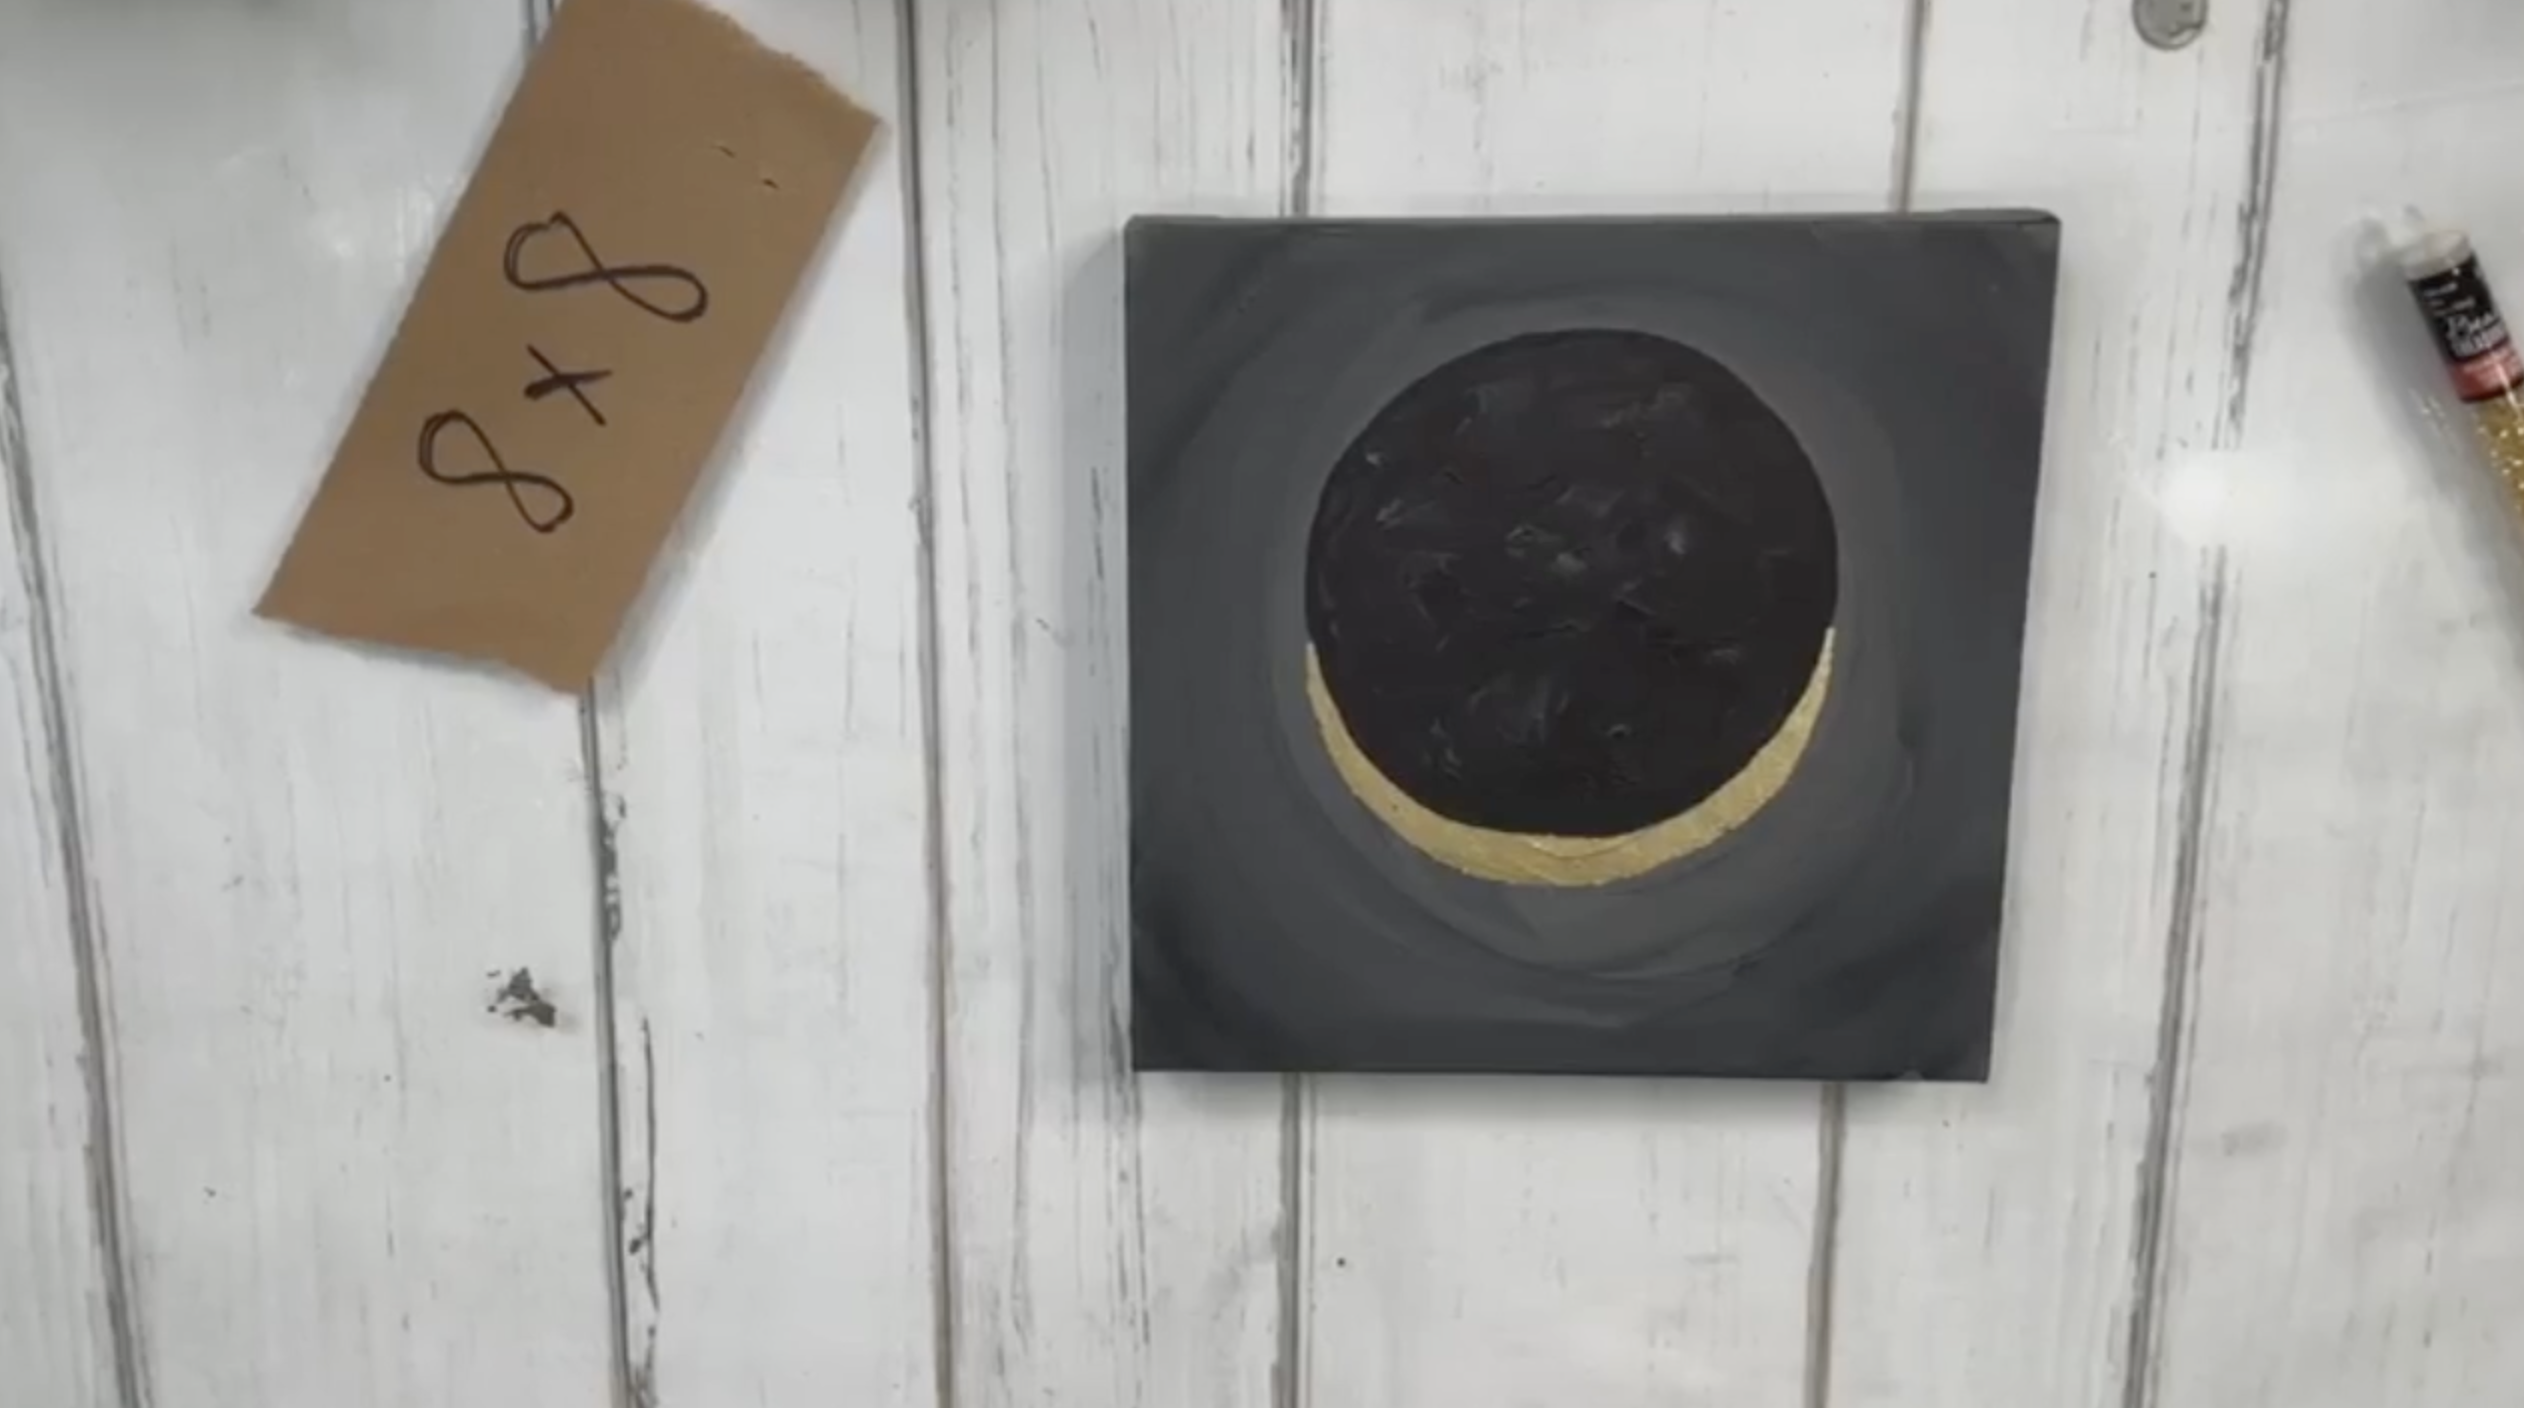
Step 5: Add the Gold Leaf
Press a small piece of composition gold leaf onto the tacky crescent. Gently rub or brush it down into the adhesive, then brush away the excess. A slightly stiffer brush helps remove the extra flakes and define the edge. Once the excess is brushed off, you will have that pretty gold crescent glow against the dark eclipse. It is messy, like glitter, so expect a few crumbs and just brush away what you can before moving on.
Step 6: Mix a Small Batch of Resin
This piece does not need much resin. A quarter ounce total was mixed for the sample, which ended up being just about perfect. Mark a small cup if you need to, then mix equal parts resin and hardener according to your resin brand’s directions. I always use ArtResin, mixed very gently and stirred slowly so bubbles would stay minimal. For a tiny piece like this, you do not need much working time, but it is still plenty to cover the canvas.
Step 7: Resin the Entire Surface
Pour the resin onto the canvas and spread it out evenly over the whole surface, including the black circle and the gold leaf area. A silicone tool works great here because resin peels right off it later. Pull the resin all the way to the edges and make sure the surface is evenly coated. The resin will deepen the black, make the gold richer, and give the whole piece that glossy, finished look. Use a heat gun or torch briefly to pop any bubbles.
While the resin is still wet, add gold seed beads along the lower part of the crescent to emphasize that glowing eclipse edge. In the original piece, the beads were added more heavily on one side and then trailed off so it did not look like a perfect solid band all the way across. Use a bead tool or toothpick to nudge them into place if needed. This step makes the gold edge feel more dimensional and intentional.
Step 8: Add Little “Stars” or “Planets”
To finish the sky, add a few tiny embellishments in the surrounding dark area. The sample piece tried a few options and ended up using a couple of little bubble-like embellishments near the top edge, plus the resin itself helped catch a few tiny flecks of gold leaf that looked star-like. You could also use small, clear beads. Keep it minimal so the eclipse stays the focus.
Once your beads and embellishments are in place, add a tiny dot of resin on top of any raised pieces you want to secure, then hit the surface one more time with your heat gun or torch to pop final bubbles. After that, leave the canvas flat and let it cure completely. If you want to make it extra meaningful, write the date of the eclipse on the back once it is cured.
This is such a fun little project because it feels dramatic without needing a lot of complicated steps. The dark stormy background, the black eclipse, the gold crescent, and those tiny little accents all work together to create something that feels special and almost celestial. It would be really sweet as a keepsake for a real eclipse day or a space-themed kids' room, and it is also a great reminder that sometimes the best projects start as a quick idea and turn into something unexpectedly beautiful.
If you're a member of The Shattered Circle, you'll find this tutorial in your classroom under Art Shattered Weekly Facebook Lives, search for "Total Eclipse".
If you don’t want to miss my Facebook LIVE art instruction, make sure you are on my texting list. I always text 10 minutes before I’m going to go LIVE, so you won’t ever miss it. You can text “Hey Cindy” to 901-519-2923.
Want more inspiration and artwork?
- My website artshattered.com with resources, shop, and more!
- My creative membership The Shattered Circle, where you can explore the world of glass art with online workshops, a supportive community, and more!
- My mini creative membership Just A ‘Lil Bit Monthly Glass Art Club, where you’ll get a new quick and easy online tutorial for just a lil' bit of sparkle in your life!
- My Facebook page where I go LIVE every Wednesday night.
- My YouTube channel which has tons of free art lessons right at your fingertips.
