
3D Pumpkin 🎃
Most of our glass art projects start with a flat canvas, but today we’re changing things up and taking our art off the canvas and onto an actual 3D pumpkin! We’re starting with a simple faux pumpkin and using layers of blue and teal paint, metallic gold, crushed glass, resin, glitter, and other fun embellishments to completely transform it. It’s a great example of how you can take the same mixed-media techniques we use in our canvas projects and apply them to something totally different.
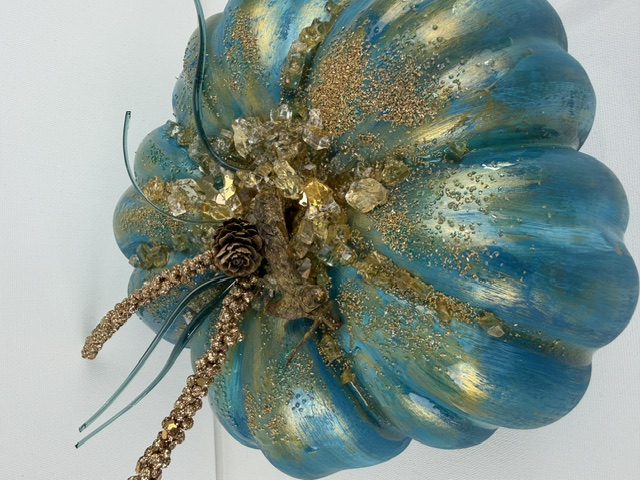
Step 1: Remove the Stem
Start by carefully pulling the stem out of the top of your faux pumpkin. Try to remove it without damaging the pumpkin because we're going to put it right back in later. Trim away any excess material around the opening if needed.
Step 2: Paint the Pumpkin Tropical Blue
We're starting with Tropical Blue as our main color.
Because it's difficult to paint the entire pumpkin at once without putting your hands in wet paint, work in sections. Paint roughly half of the pumpkin, dry it, flip it over, and continue painting the other half.
Brush the Tropical Blue into all those grooves and ridges so the original pumpkin color isn't peeking through too much.
Once the first coat is dry, add another coat anywhere you need more coverage. Don't worry if the coverage isn't completely uniform at this point. We're about to add several more colors and layers.
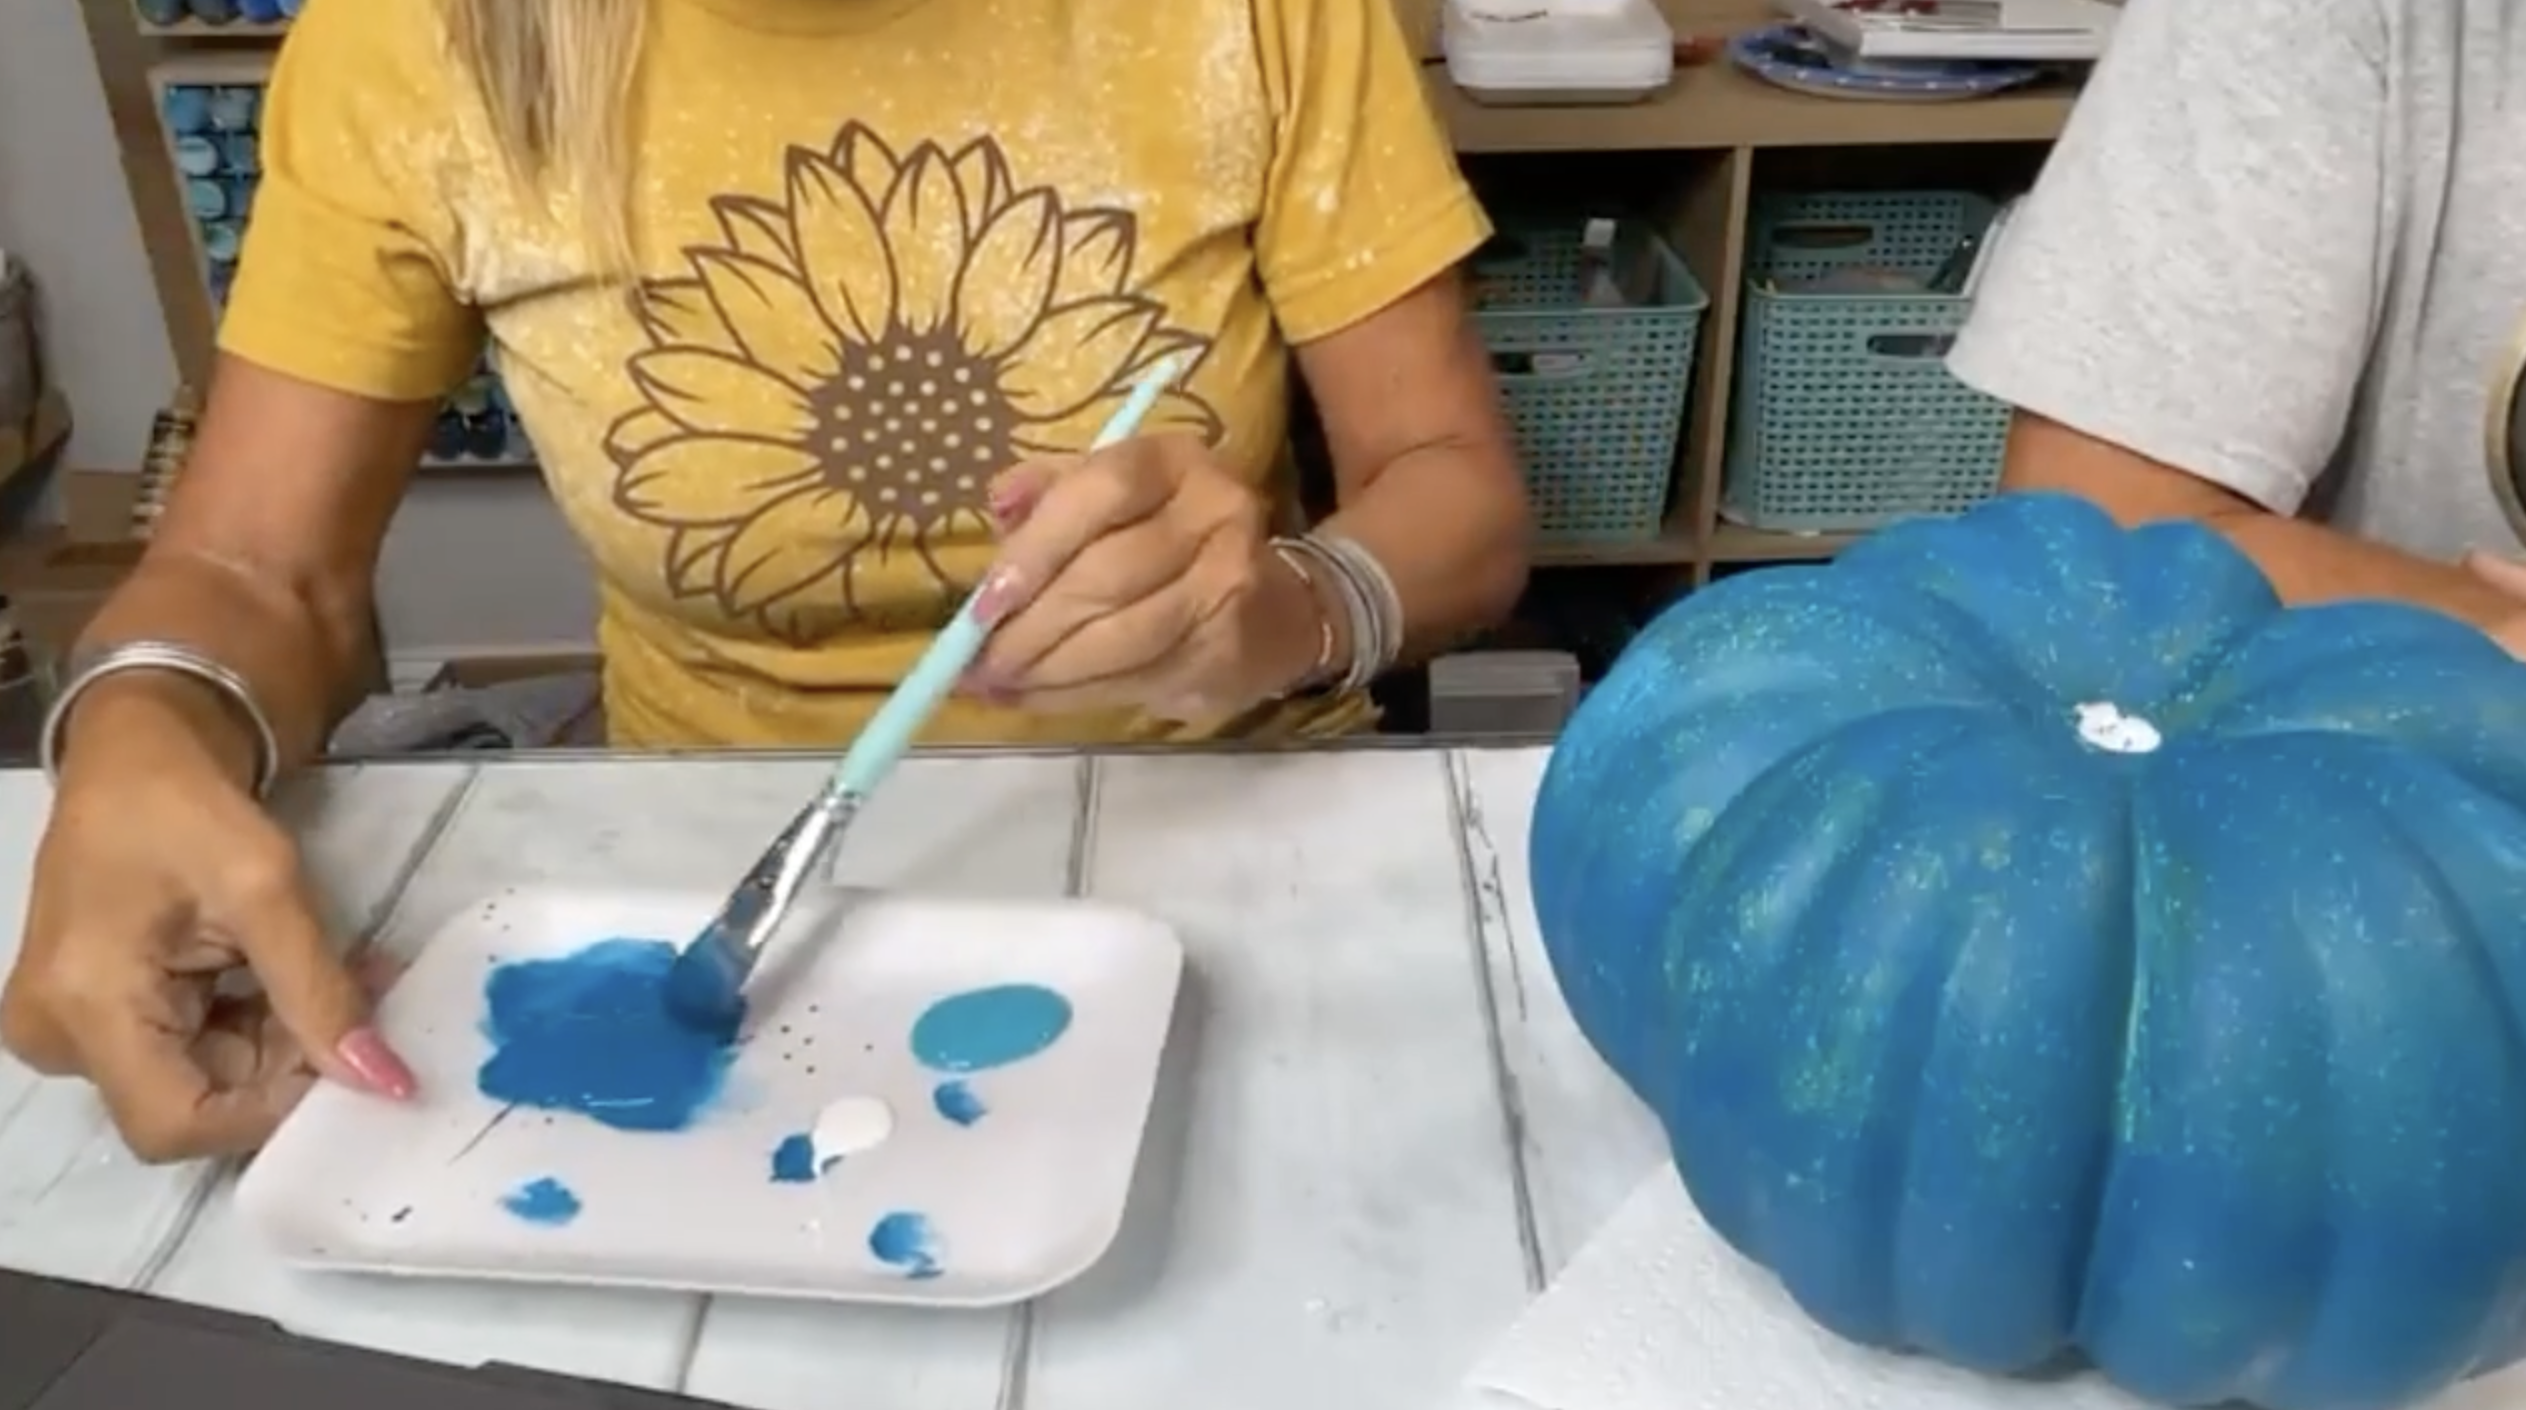
Step 3: Add Peacock Teal
Once your Tropical Blue base is dry, start working around the pumpkin one section at a time. Brush a fresh layer of Tropical Blue onto one section and then pick up a little Peacock Teal while the paint is still workable. Blend the Peacock Teal loosely into the blue, following the natural shape of the pumpkin.
We're not trying to create perfect stripes. The variation in color is what gives this pumpkin so much movement and depth. Continue around the pumpkin, finishing one section at a time.
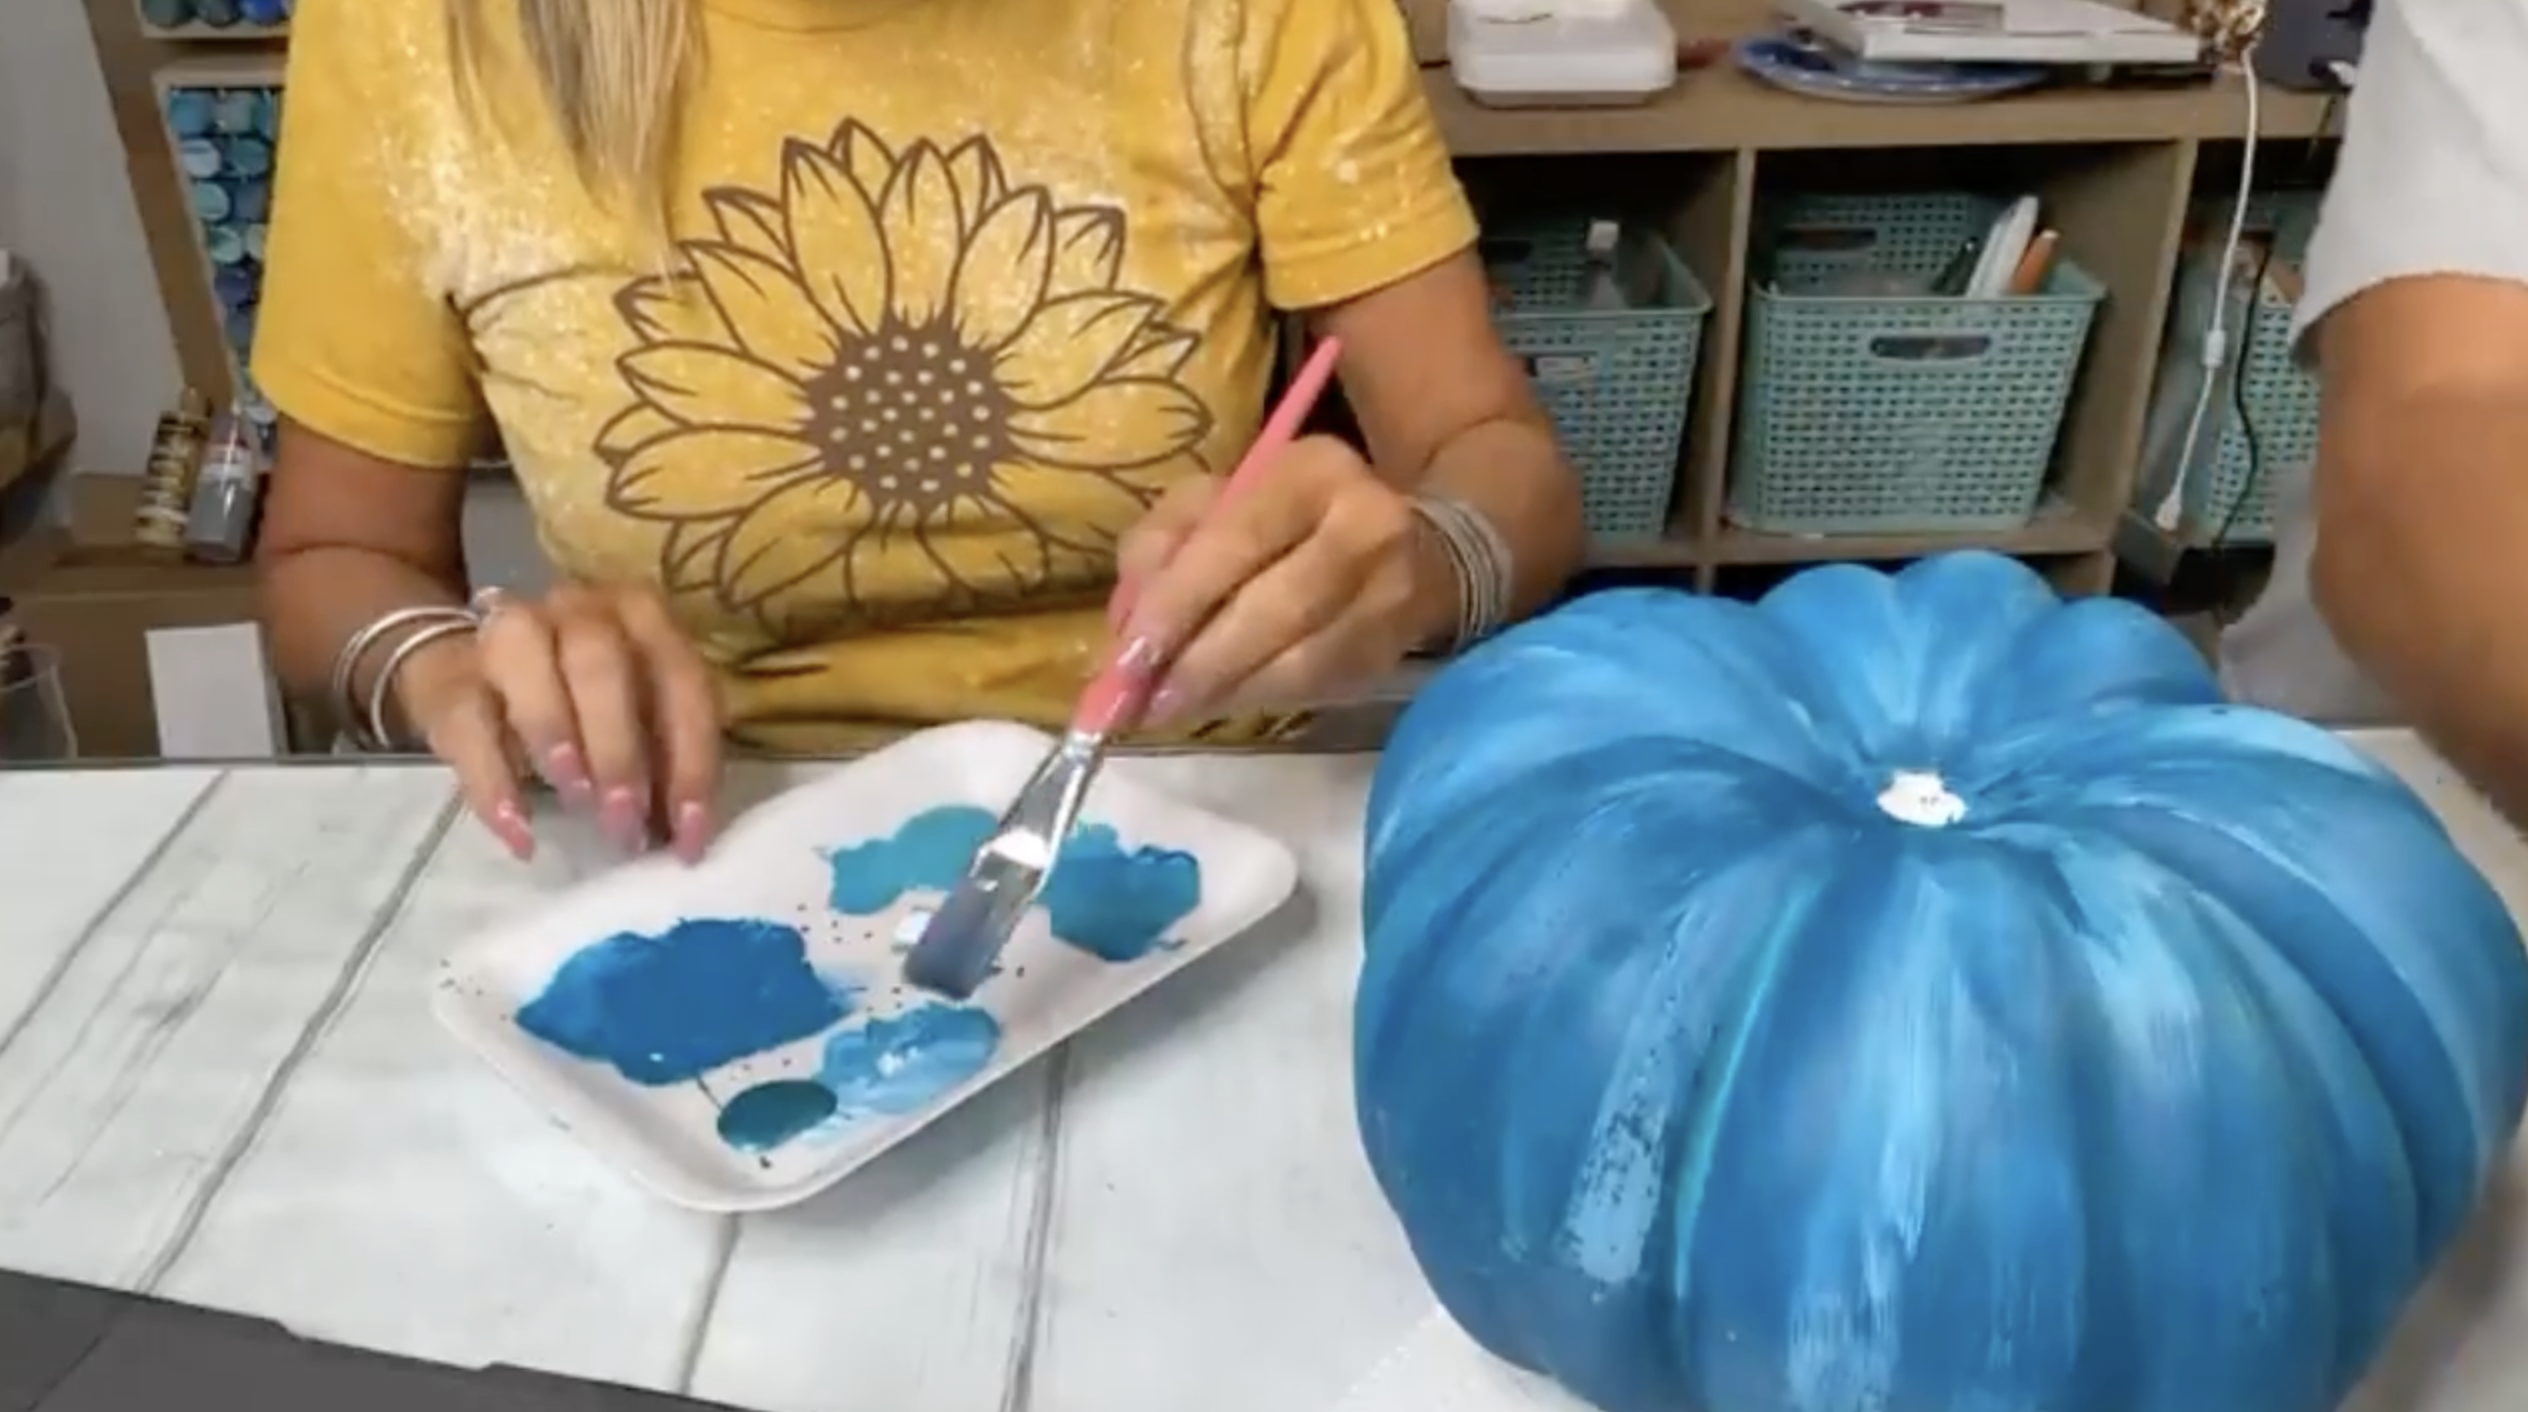
Step 4: Add Soft White Highlights
Without completely cleaning your brush, pick up a tiny amount of white and work it into the blue already on your brush. This gives you a softer pale blue rather than stark white.
Very lightly brush this color onto the raised portions of each pumpkin section. If you get a little too much white somewhere, don't panic. Grab more Tropical Blue and blend it right back in. Keep repeating the Tropical Blue, Peacock Teal, and soft white combination until you've worked your way around the entire pumpkin. Dry everything thoroughly before moving on.
Step 5: Brush on Metallic Teal
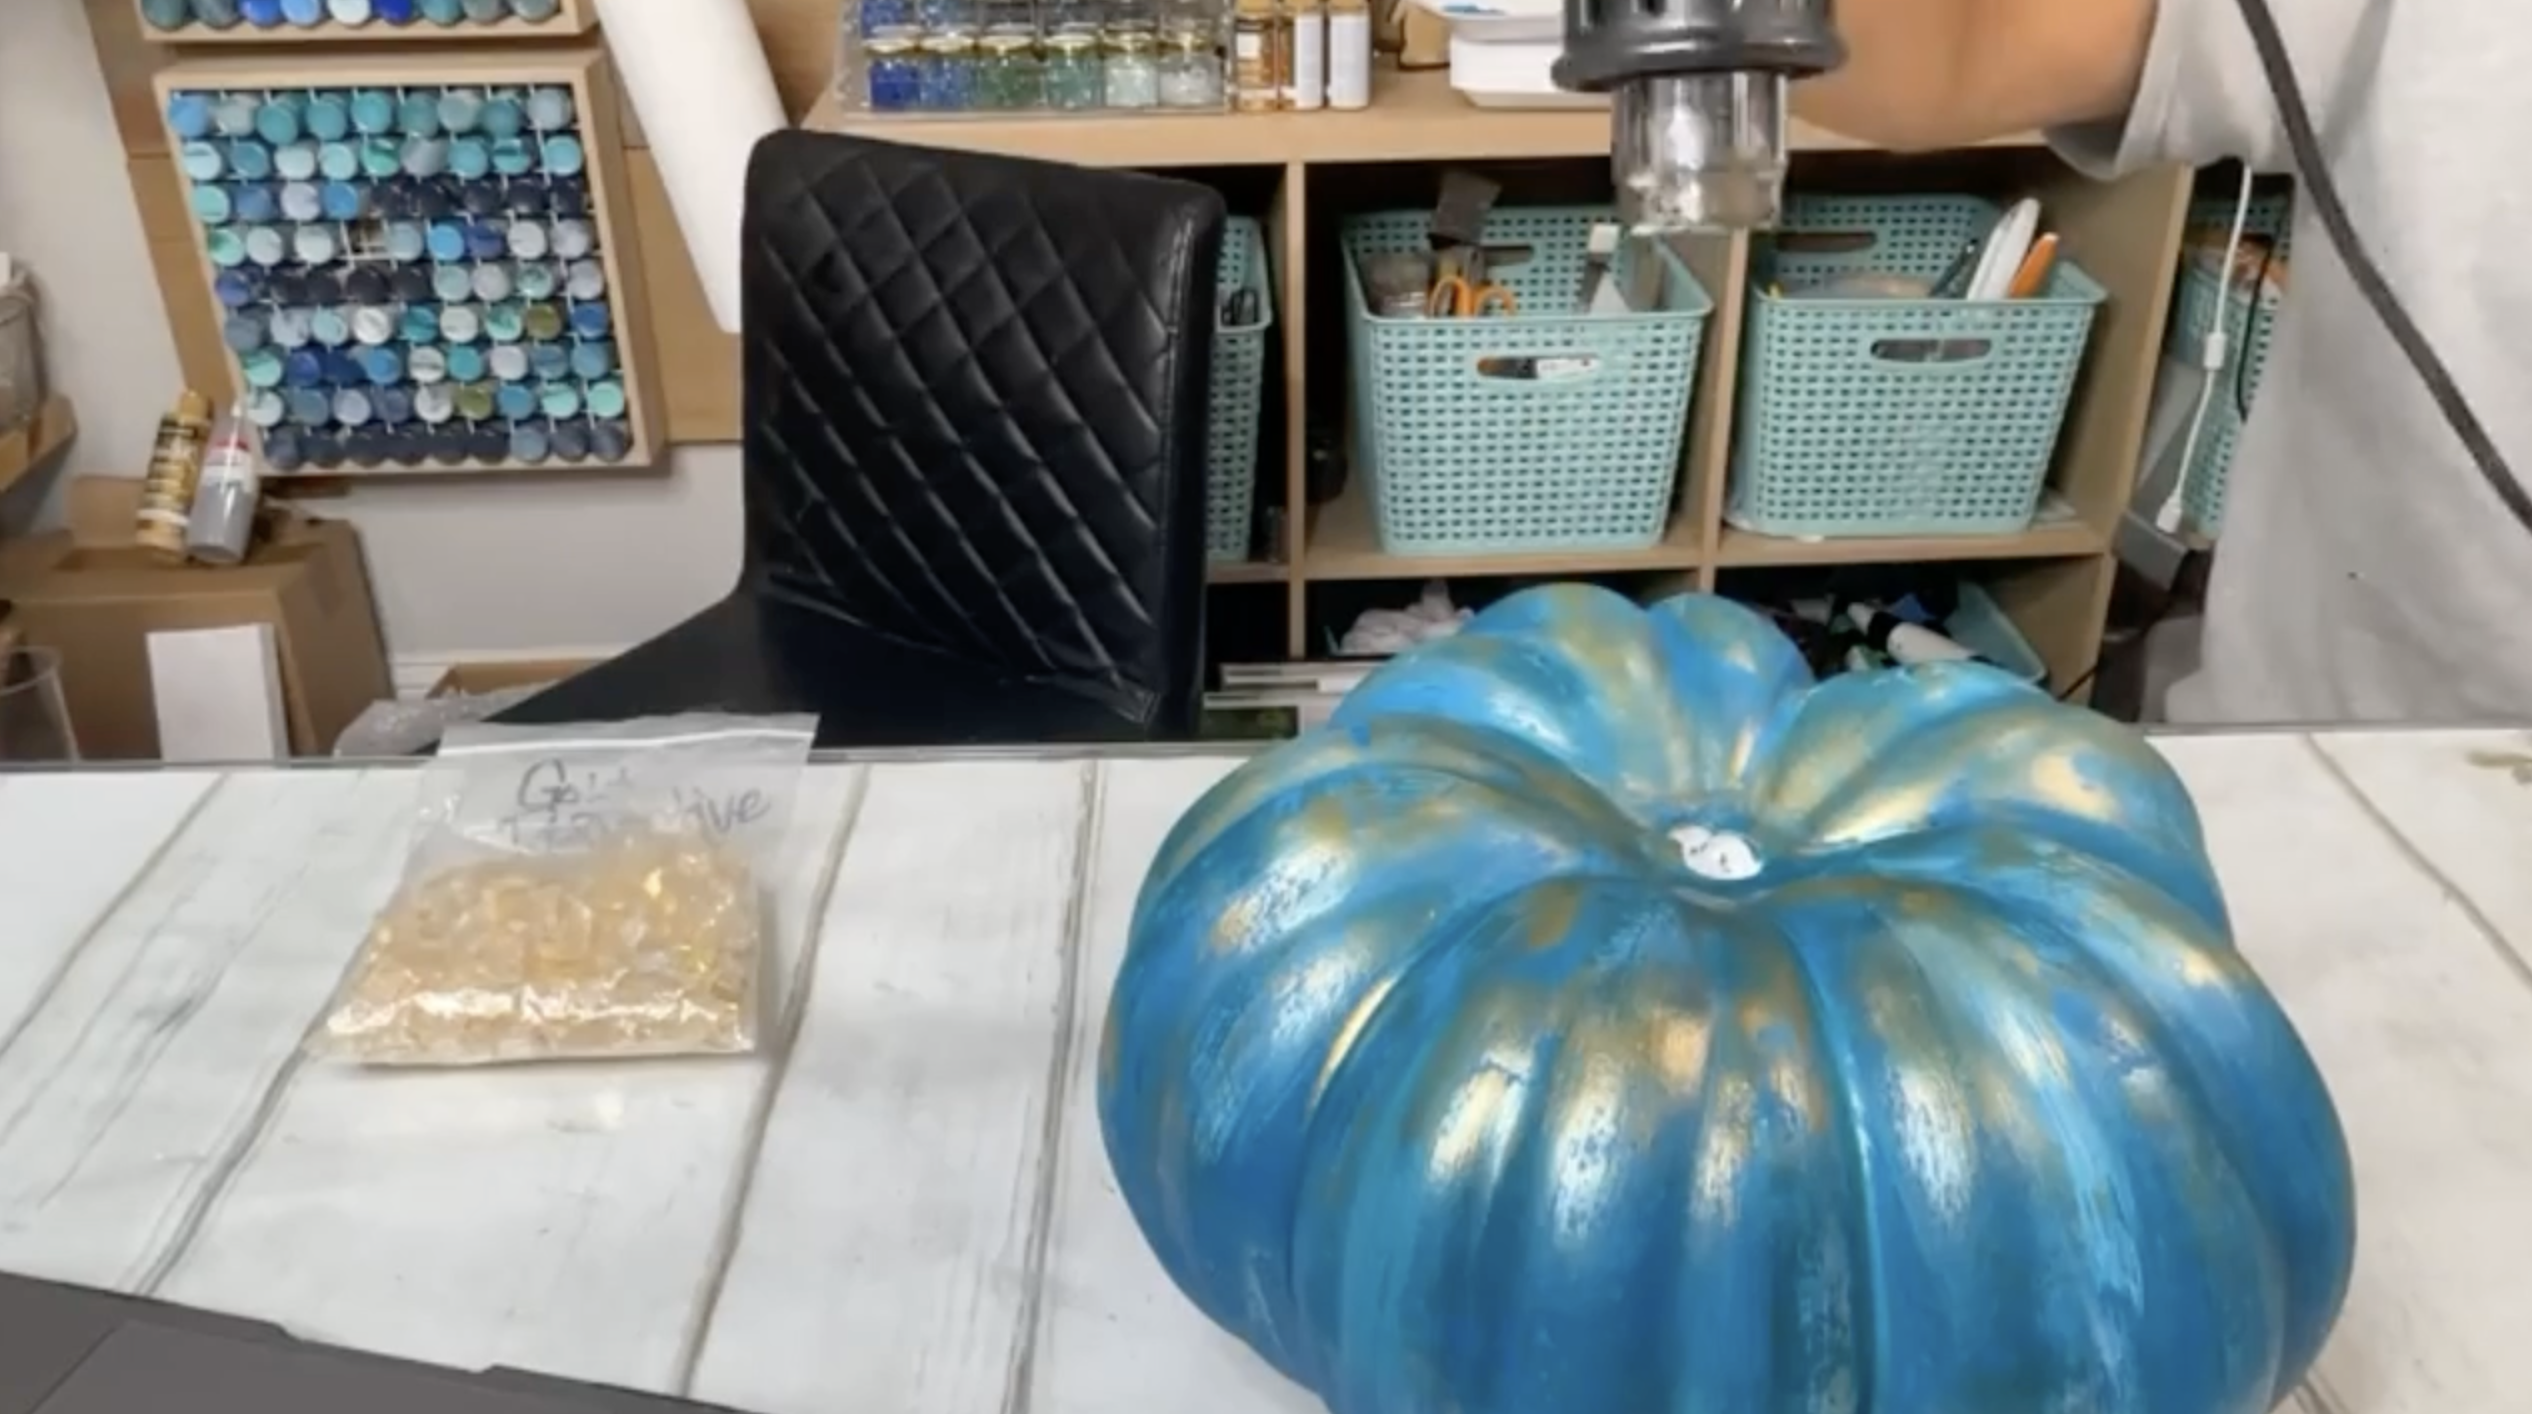
Now we're going to start adding some shimmer. Using a clean, dry brush, pick up a small amount of Metallic Teal. Very lightly drag the paint over some of the raised areas of the pumpkin, following the ridges from top to bottom.
You don't need metallic paint everywhere. We're just catching some of those high points so they'll reflect the light. Dry the metallic teal before adding the next layer.
Step 6: Add Metallic Gold Highlights
With another clean, dry brush, pick up a small amount of Metallic Gold and work some of the excess off your brush first. Then lightly brush gold onto selected areas of the pumpkin.
Think of this as a little caress of gold rather than a full coat. We want hints of metallic color appearing over the blues and teals. If you get too much in one area, simply wipe some away with a paper towel while it's still wet.
Step 7: Put the Stem Back In
Once the painted pumpkin is dry, add a little glue into the opening at the top. Add glue to the bottom of your original stem as needed and press it back into place.
It doesn't have to be absolutely perfect because we're about to build our glass and resin embellishments around this entire area.
Step 8: Mix Your Resin
For this pumpkin, we mixed approximately 1½ ounces of resin total. Measure equal parts resin and hardener according to the directions for your particular resin.
Pour both parts into a larger mixing cup and slowly stir for about three minutes, scraping the sides, bottom, and your stir stick as you go.
Don't whip it quickly. Slow, intentional mixing helps prevent adding unnecessary bubbles.
Step 9: Make Gold-Tinted Resin
Pour a little less than half of your mixed clear resin into a second cup. Add approximately ½ teaspoon of Metallic Gold paint and stir it into the resin. If you'd like the gold to be a little stronger, you can add another small amount.
Now comes the fun part. Drizzle your gold resin into some of the deep grooves near the top of the pumpkin and allow it to naturally run downward.
Don't try to make every drip match. Let gravity do some of the work! Make sure your work surface is protected because the resin may continue dripping beyond the pumpkin.
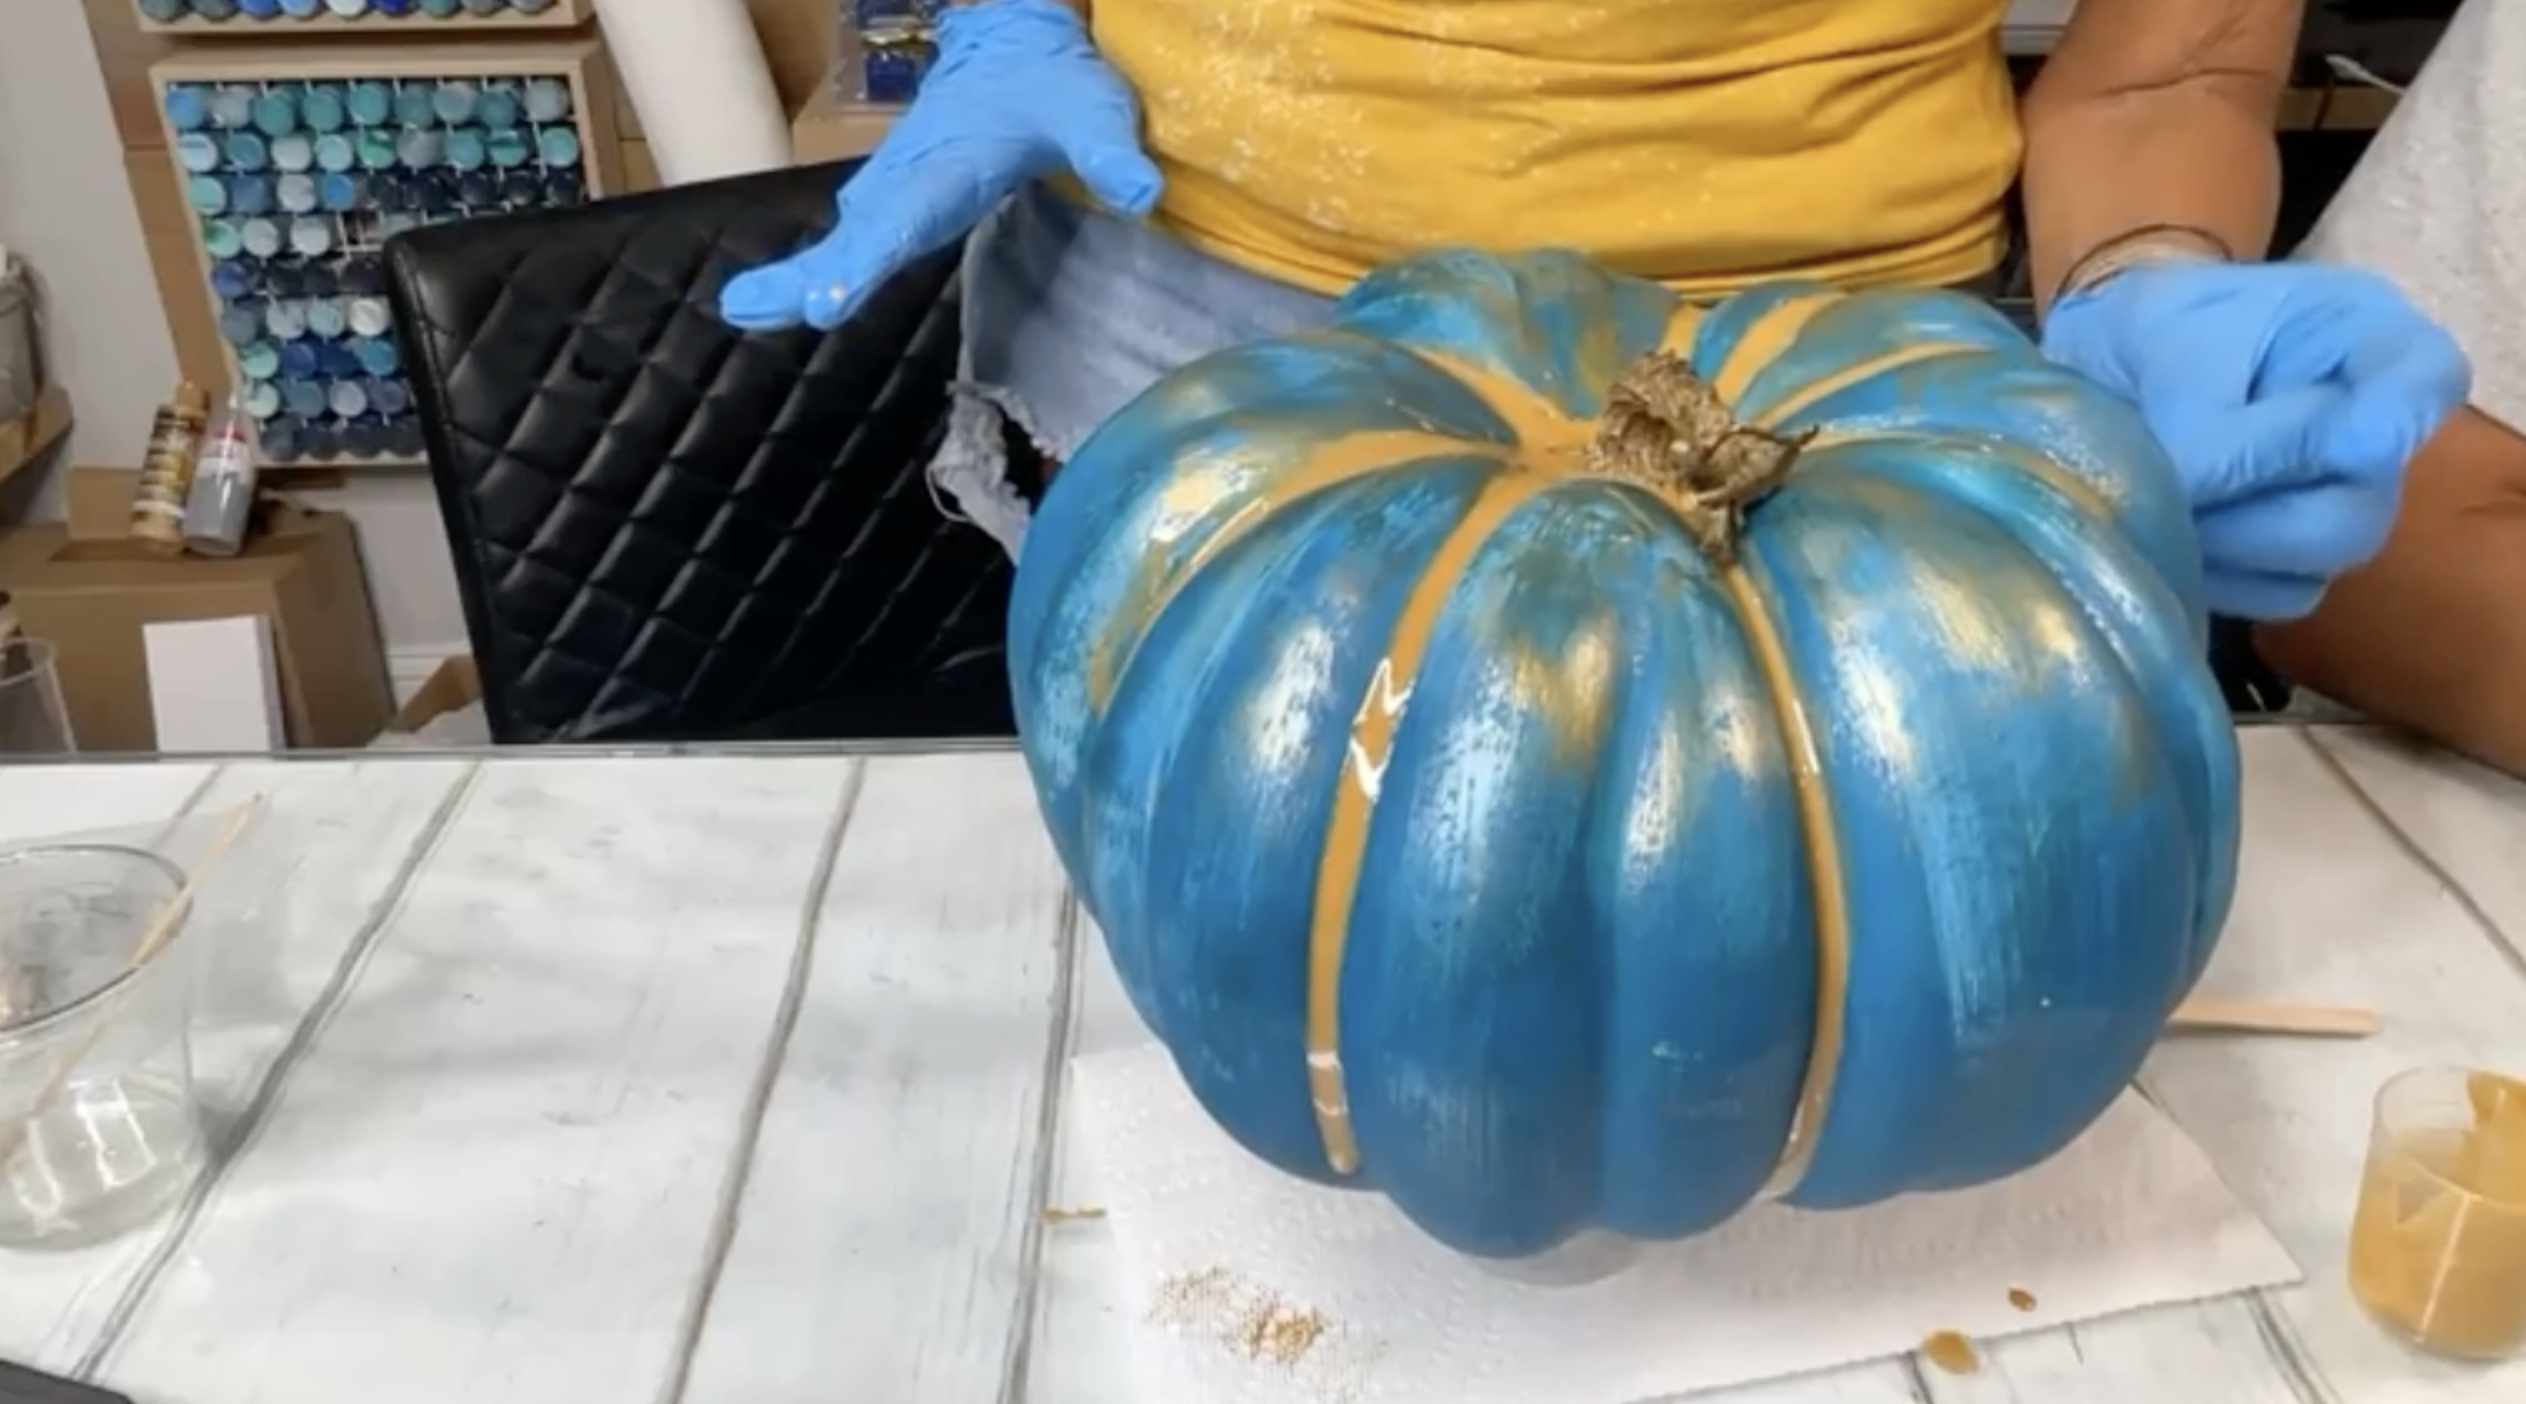
Step 10: Add Gold Crushed Glass
While the resin is wet, grab your Gold Reflective crushed glass. Place a generous amount around the stem and allow some of the smaller pieces to travel outward and down the pumpkin's grooves.
You can create a concentrated cluster around the top while allowing thinner trails of glass to follow some of those gold resin drips. This is where that plain painted pumpkin really starts becoming glass art.
Step 11: Add Clear Resin Over the Glass
Use some of your remaining clear resin to secure the crushed glass. Drizzle it over the glass and make sure all of your pieces have enough resin to hold them in place.
You don't necessarily need to coat the entire pumpkin in resin. For this design, we're concentrating the resin and glass embellishments around the top and allowing some of those details to trail downward.
Step 12: Add Glitter
Now let's add even more sparkle. Apply a little clear resin around the top of the pumpkin wherever you want your glitter to stick.
Sprinkle on some blue-green glitter, followed by touches of gold glitter. Go lightly at first. You can always add more. The combination of glitter, metallic paint, resin, and crushed glass creates several different kinds of shimmer rather than one solid glittery surface.
Step 13: Add Sea Blue Glass Accents
For another layer of dimension, add a few pieces of Sea Blue vitrigraph glass. Break or trim the pieces into lengths that work with your pumpkin, then carefully tuck them into the resin around the stem.
Let some stand upward and allow others to curve outward. There's no exact placement here. Play around with the pieces until the arrangement feels balanced. The blue glass ties beautifully into all of the Tropical Blue and Peacock Teal underneath.
Step 14: Add Decorative Picks
Now you can really have fun with the top. Tuck a few decorative picks into the resin and glass cluster. The finished pumpkin uses sparkling gold elements that shoot upward and outward from the center.
Think about varying the height and direction of your pieces rather than placing everything perfectly symmetrically.
Step 15: Finish With a Pine Cone
For one final natural element, add a small pine cone near the center. Place a dollop of resin where you want it and nestle the pine cone into the wet resin among your glass, stem, and decorative pieces.
Then stop and take a look before adding anything else. With a project like this, it's very easy to keep going!
Step 16: Let Everything Cure
Carefully place your pumpkin somewhere it can remain completely undisturbed while the resin cures. Because the surface is rounded, keep an eye on it during the early part of the curing process for any resin that may continue to run. Once everything has cured, gently remove any loose glitter or glass that didn't adhere.
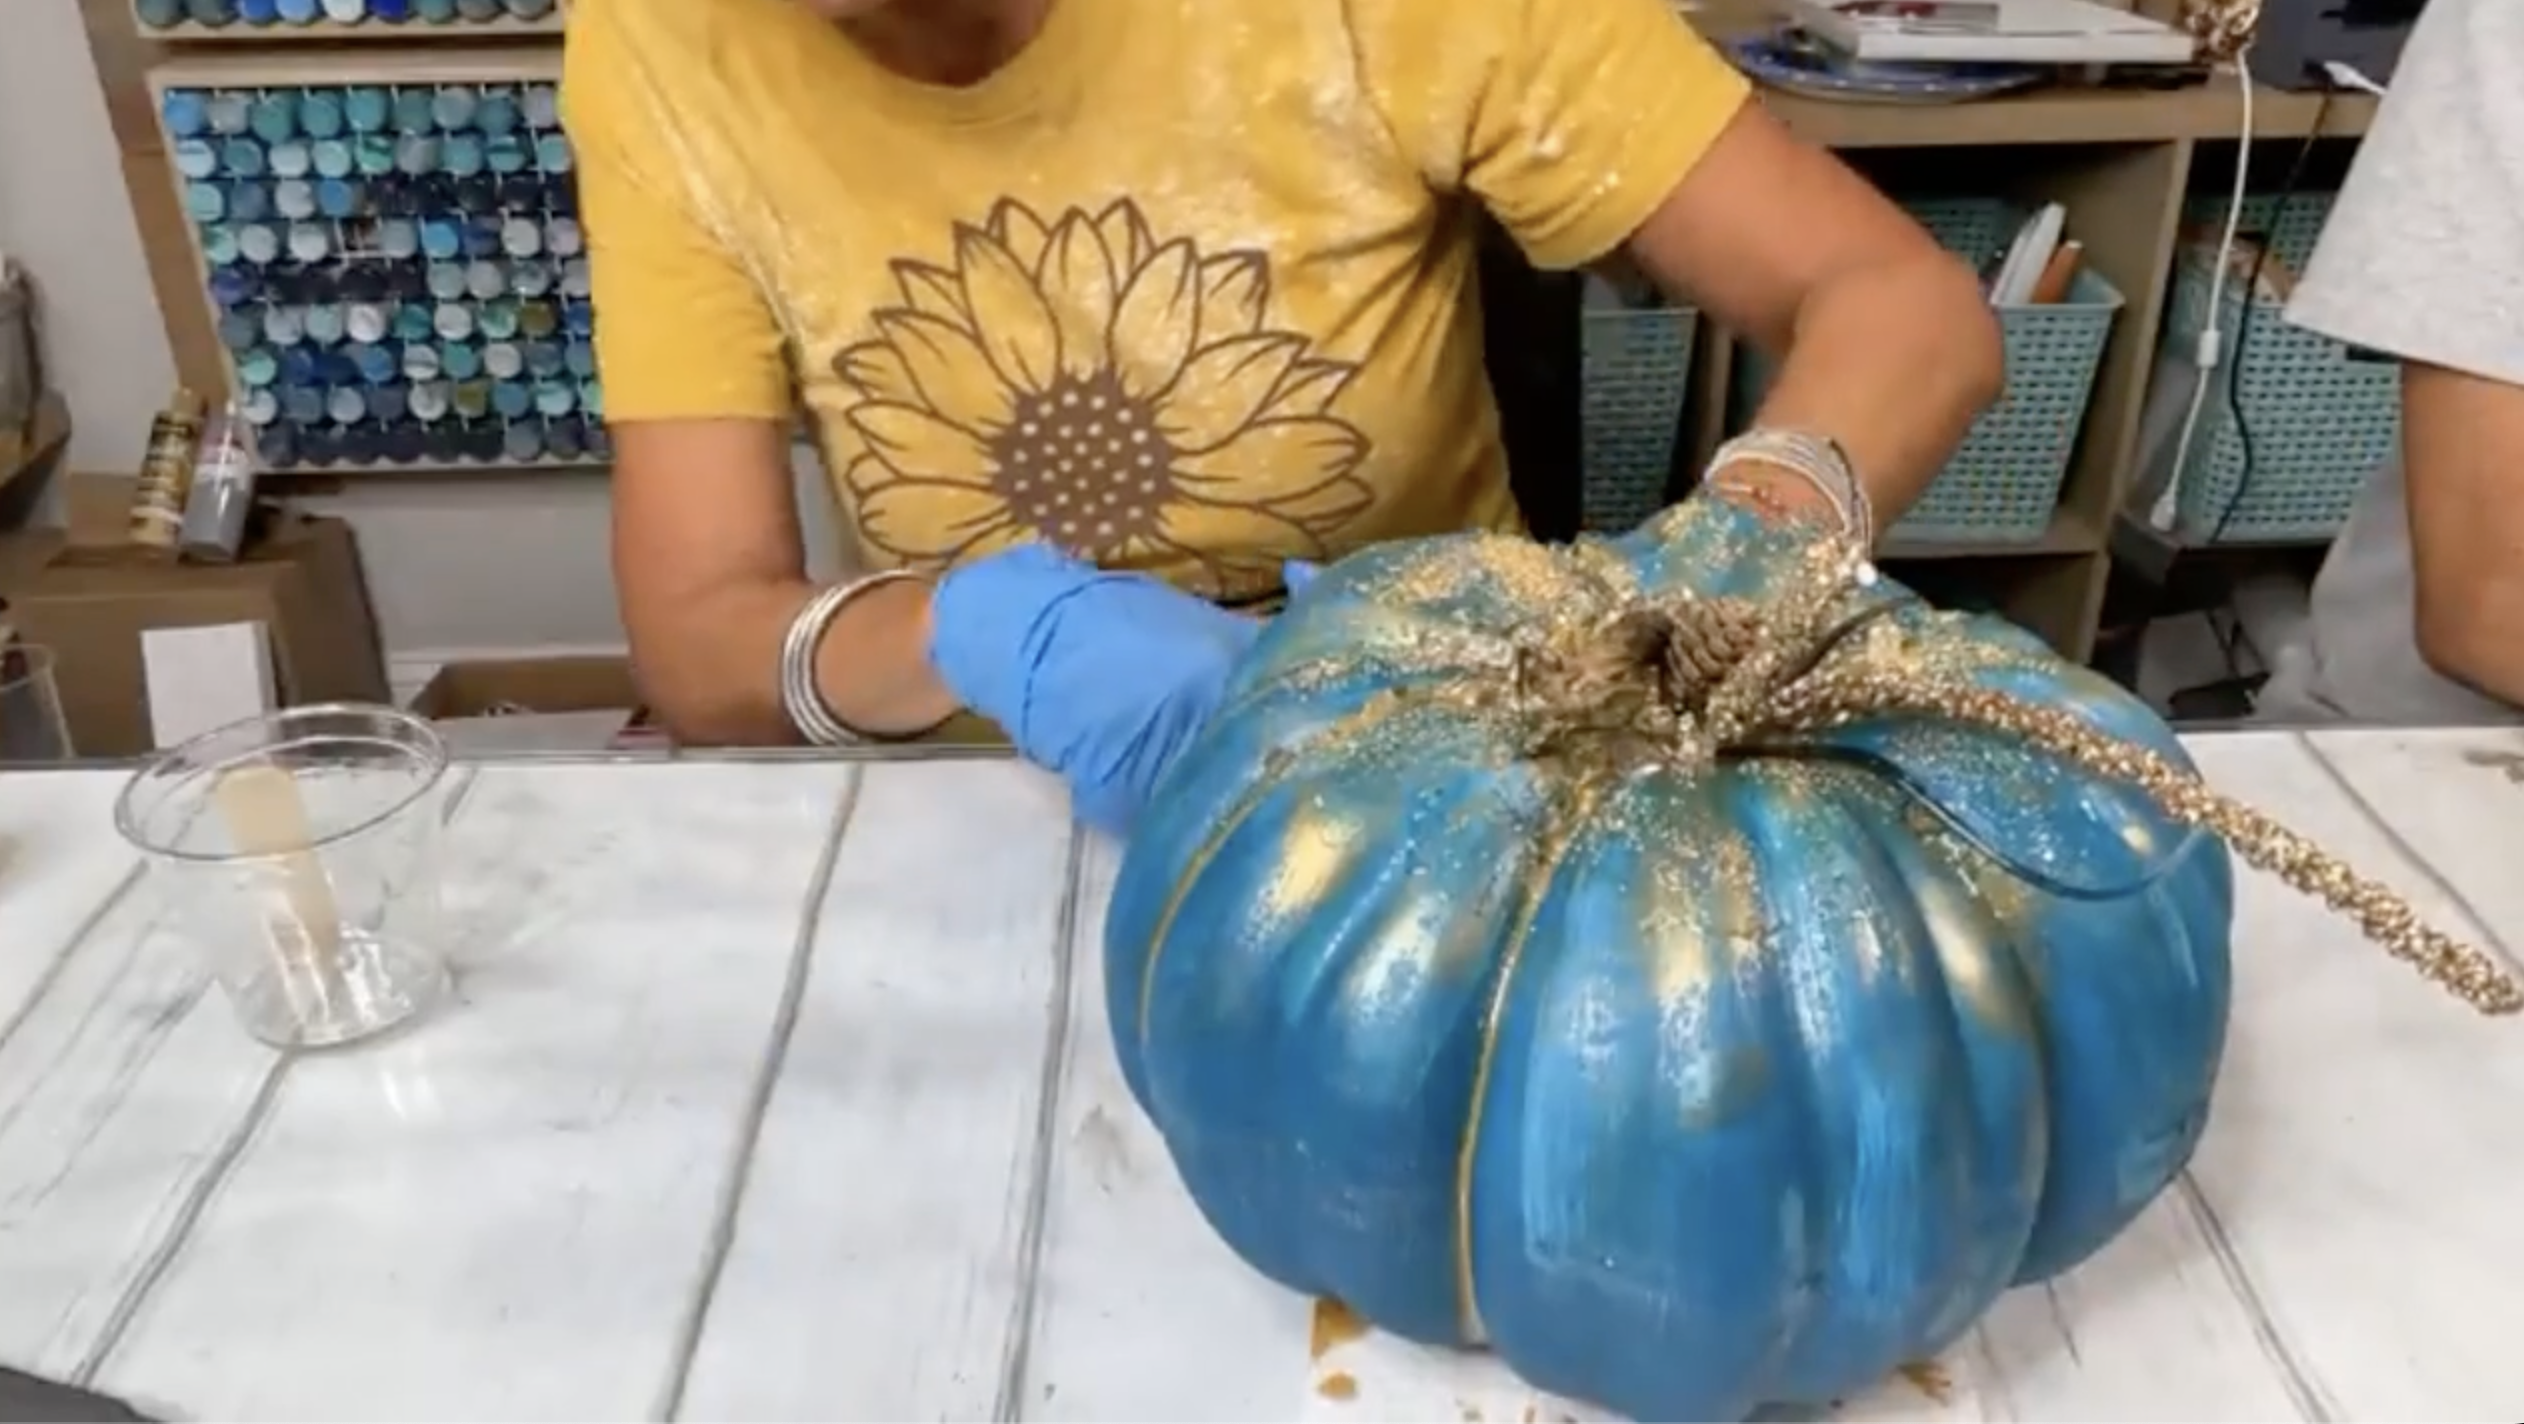
What started as a basic faux pumpkin now has layers of Tropical Blue, Peacock Teal, metallic gold, glitter, crushed glass, resin, and sculptural glass details.
I especially love that this doesn't scream traditional fall decor. The teal and blue give it a completely different look, while the metallic gold and little pine cone still bring in that warm fall feeling.
And don't feel like you have to recreate mine exactly. Try a pink pumpkin. Change the metallic colors. Use different glass. Add more decorative picks or keep yours simpler.
That's the fun of these projects. Start with the idea and see where it takes you!
If you're a member of The Shattered Circle, you'll find this tutorial in your classroom under Art Shattered Weekly Facebook Lives, search for "3D Pumpkin".
If you don’t want to miss my Facebook LIVE art instruction, make sure you are on my texting list. I always text 10 minutes before I’m going to go LIVE, so you won’t ever miss it. You can text “Hey Cindy” to 901-519-2923.
Want more inspiration and artwork?
- My website artshattered.com with resources, shop, and more!
- My creative membership The Shattered Circle, where you can explore the world of glass art with online workshops, a supportive community, and more!
- My mini creative membership Just A ‘Lil Bit Monthly Glass Art Club, where you’ll get a new quick and easy online tutorial for just a lil' bit of sparkle in your life!
- My Facebook page where I share free LIVE tutorials and inspiration
- My YouTube channel which has tons of free art lessons right at your fingertips.
