
Autism Awareness Puzzle 🧩
Did you know April is Autism Awareness Month? This sweet little project was made as a special gift for a friend with a non-verbal autistic son. It starts with a simple puzzle piece design, adds a bright red heart, layers on cobalt blue glass, and finishes with resin for shine and depth. If you want to create a meaningful or awareness-themed mixed media piece, this is a beautiful one to make!

Step 1: Transfer the Puzzle Piece Template
Start by placing your graphite paper under the tracer and taping the template down so it does not shift while you trace. Use a stylus to go over the outer edge of the puzzle piece and the heart in the center.
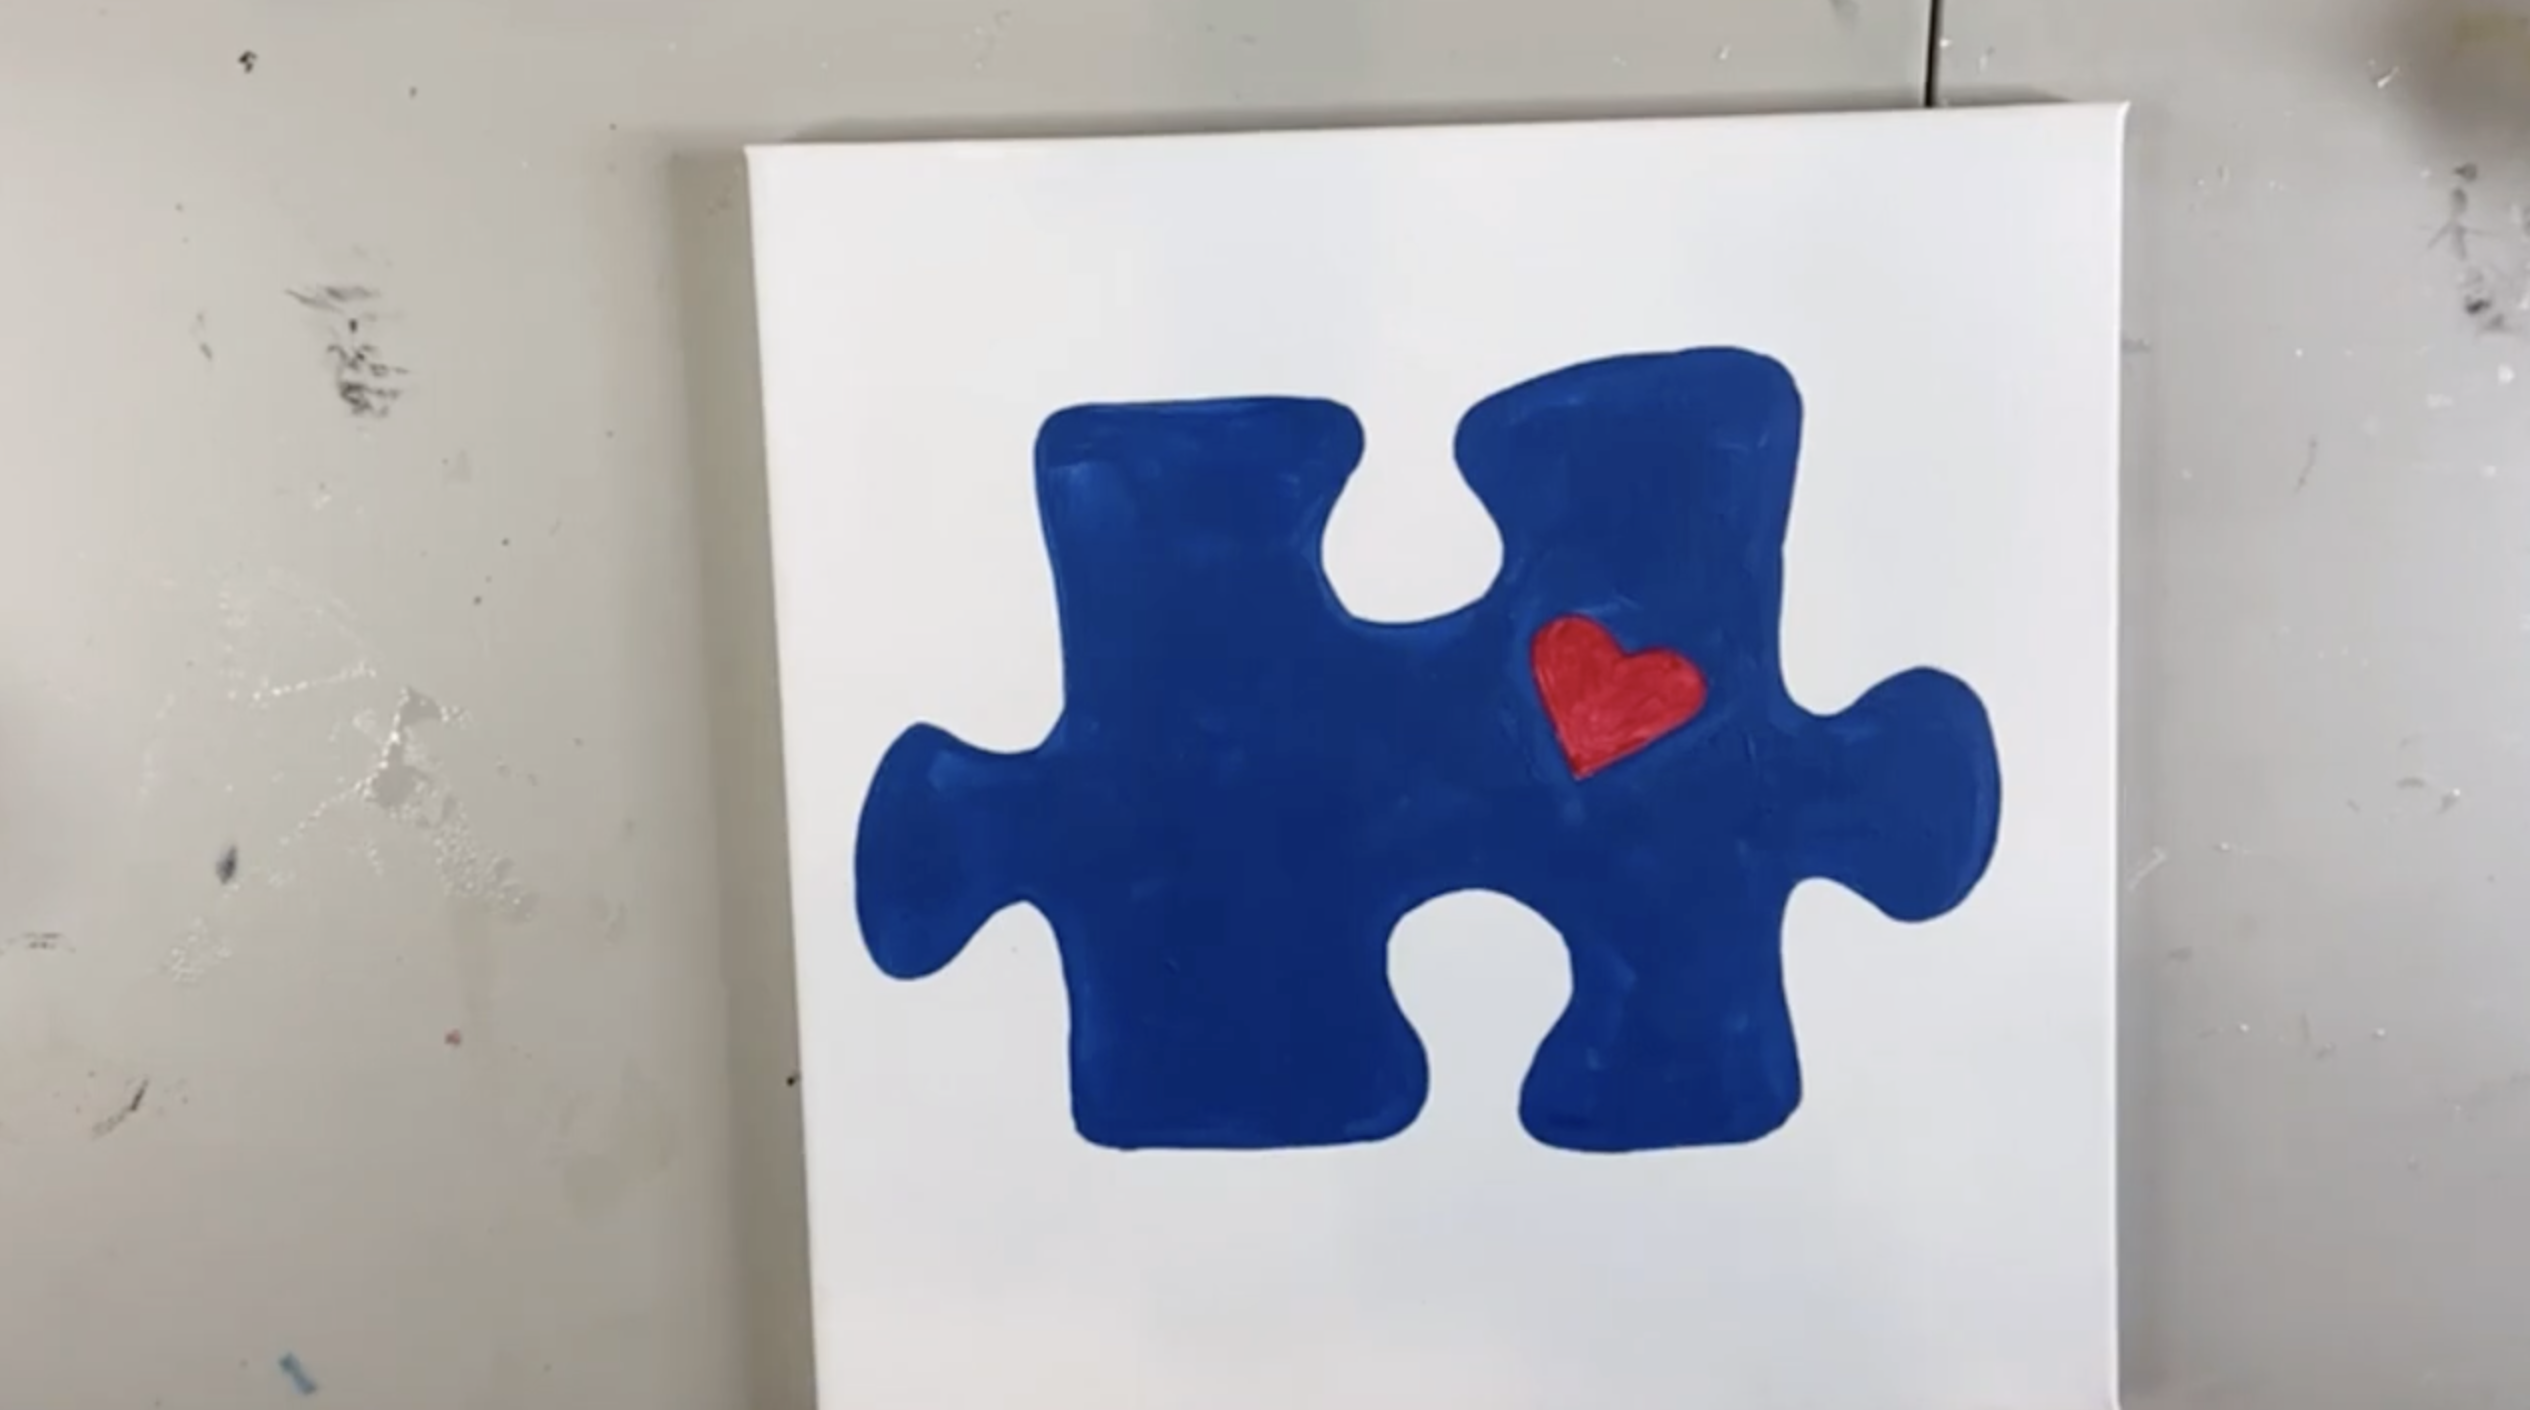
Step 2: Paint the Heart Red
Using a small flat brush, paint the heart with Americana Primary Red. Since the heart will be covered with red glass later, you do not have to stress over making it perfectly opaque. A slightly blotchy coat is fine here because the glass and resin will do a lot of the work in the finished piece. Still, make sure the shape is filled in and that you cover the traced lines as much as possible so they do not show through.
Step 3: Paint the Puzzle Piece Blue
Switch to a slightly larger flat brush and paint the rest of the puzzle piece with Americana True Blue. This blue was chosen as the closest painted match to the cobalt glass that will go on top. Work like you are coloring in a coloring book: outline the edges first with the tip of the brush, then fill in the larger areas with the flat side. Make sure to cover your tracer lines well so they do not show through your glass later. If your edges are not perfect, do not worry. The glass will soften the little imperfections and make the finished piece look polished. Let dry.
Step 4: Glue and Glass the Red Heart
Add a small amount of Aleene’s Clear Tacky Glue to the heart area and spread it with a small brush. Keep the glue mostly inside the heart shape. Then sprinkle on the red glass. Since the heart is small and you want it to stay recognizable, it helps to add a little extra glue around the outer edge of the heart almost like a boundary line. This keeps the red pieces from drifting too far and helps you hold onto the shape while you build the blue around it. If the red glass shifts a little, use the tip of your brush or the glue itself to scoot it back into place.
Step 5: Create a Glue “Dam” Around the Blue Section
Before pouring on all your blue glass, use your glue bottle to draw a line of glue around the outer edge of the puzzle piece, working in sections. This acts like a little dam and helps keep the cobalt glass where you want it. This step is not absolutely necessary for every glass project, but when you want a more exact shape like this puzzle piece, it really helps keep the edges clean and controlled. You can also use this method around the heart as you work so the blue glass does not swallow up the red center.
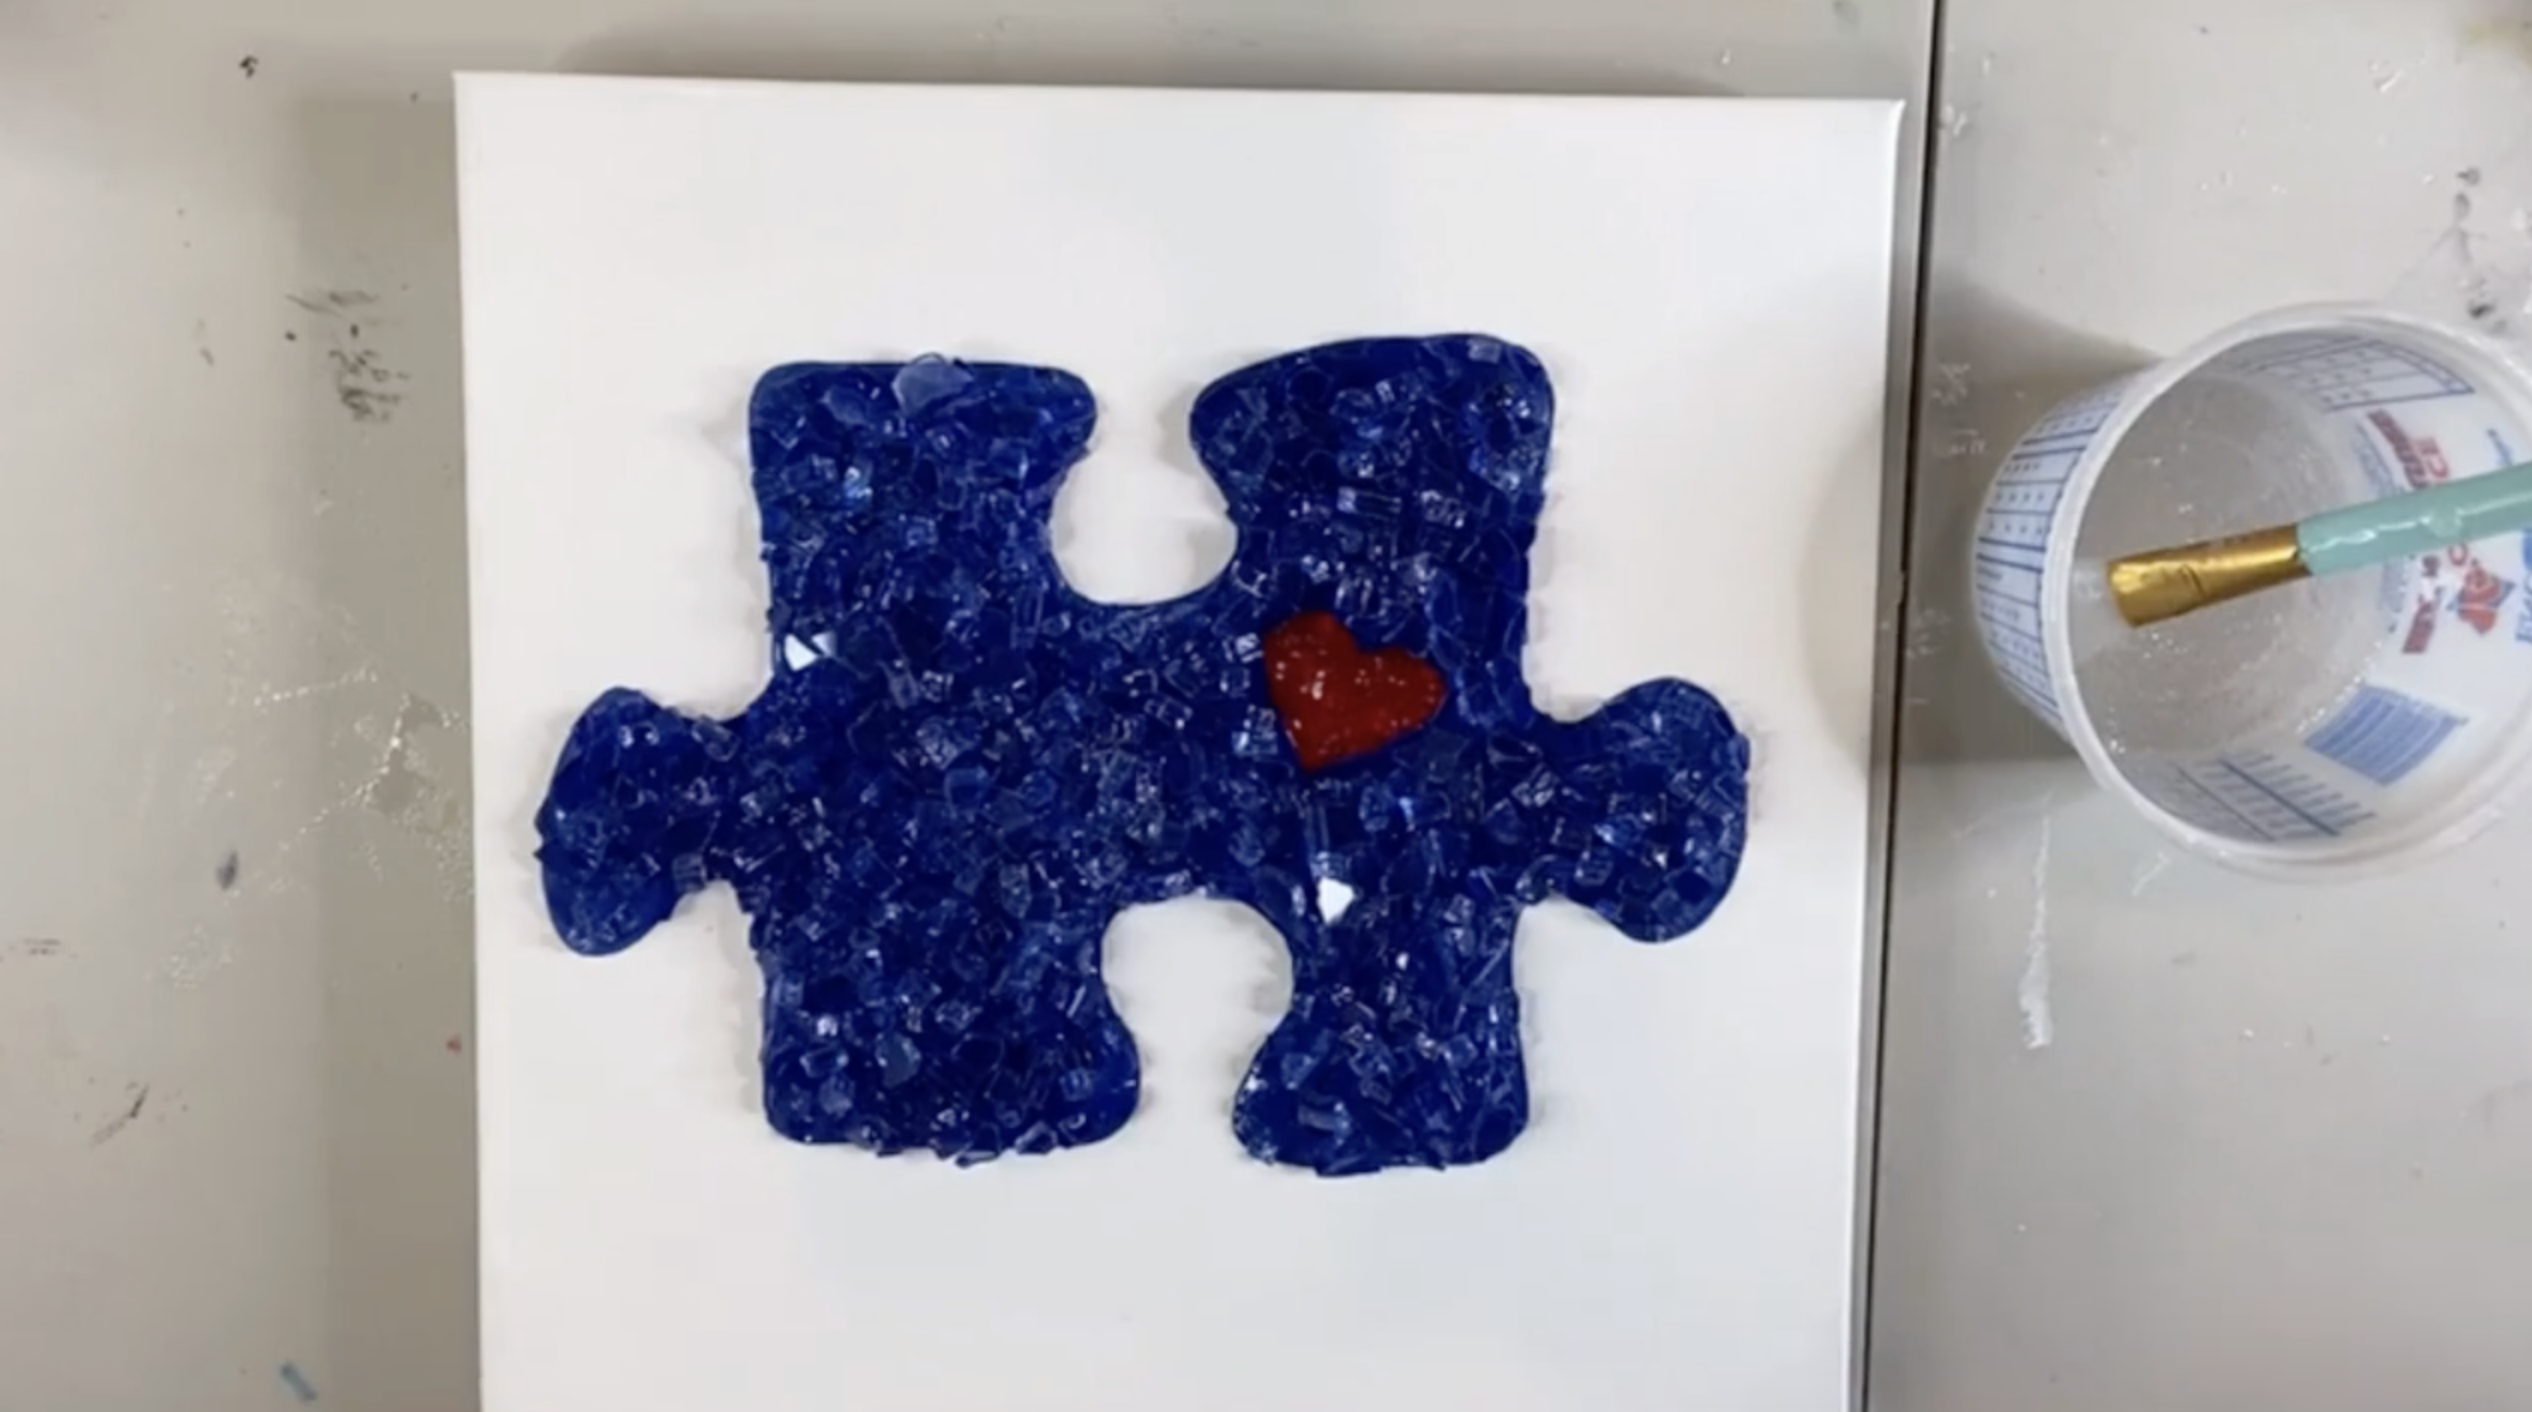
Step 6: Add the Cobalt Blue Glass
Pour the cobalt blue glass into a cup and begin placing it around the heart and throughout the puzzle piece. Around the heart, take your time and place a few curved or well-fitting pieces first so you protect that heart shape. Once that center is established, you can fill in the rest of the puzzle piece more freely. This is the one part of the project where a little micromanaging is actually helpful. The goal is to let the red heart stay clear and distinct while the cobalt surrounds it in a way that still feels full and balanced. If needed, rotate the canvas and continue the glue line in sections so you can stay in control as you work around the shape.
Step 7: Mix the Resin
For this 12x12 piece, mix about three and a half ounces total. Use 1.5 oz of hardener and 1.5 oz of resin since ArtResin is a 50/50 mix by volume. Stir slowly for three full minutes, scraping the sides and bottom as you go. Do not whip it or stir aggressively. The goal is to combine it thoroughly without creating more bubbles than necessary. In the end, the project only used about two and a half ounces, so you could likely get away with mixing closer to two ounces next time, but 3.5 oz gives you a comfortable amount to work with.
Step 8: Apply the Resin
Once the resin is mixed, start spreading it over the glass and painted areas. Work with a plan rather than going at it randomly. Cover the heart and blue glass, then pull the resin outward so everything is coated evenly. Watch for spots that look dry or missed and add a little more as needed. If a piece of glass slips when you tilt or spread the resin, simply scoot it back into place before the resin begins to set. Resin is what brings the whole thing to life, deepening the color of the glass and making the puzzle piece look finished and glossy.
After the resin is on, use a torch or heat tool to pop bubbles. Keep it moving and do not linger in one place. Check the surface closely to make sure everything is coated, and fix any piece of glass that may have shifted out of place. This is also a good time to make sure there are no bare spots or missed resin patches. Once everything looks good, leave it alone to cure fully on its blocks.

This puzzle piece project is such a meaningful one, especially during Autism Awareness Month. The red heart adds that personal touch, the cobalt glass gives it beautiful sparkle and dimension, and the resin pulls it all together into a finished keepsake. It is simple enough to recreate, but still special enough to gift. Whether you make it for a loved one, for your home, or as an awareness piece for April, this one is full of heart in every sense of the word.
If you're a member of The Shattered Circle, you'll find this tutorial in your classroom under Art Shattered Weekly Facebook Lives, search for "Autism Puzzle".
If you don’t want to miss my Facebook LIVE art instruction, make sure you are on my texting list. I always text 10 minutes before I’m going to go LIVE, so you won’t ever miss it. You can text “Hey Cindy” to 901-519-2923.
Want more inspiration and artwork?
- My website artshattered.com with resources, shop, and more!
- My creative membership The Shattered Circle, where you can explore the world of glass art with online workshops, a supportive community, and more!
- My mini creative membership Just A ‘Lil Bit Monthly Glass Art Club, where you’ll get a new quick and easy online tutorial for just a lil' bit of sparkle in your life!
- My Facebook page where I go LIVE every Wednesday night.
- My YouTube channel which has tons of free art lessons right at your fingertips.
