
Bottle Ring Art 🍷
If you love the look of glass art but want something that’s quick, easy, and totally unique, this project is for you! We’ll be using our Glass Bottle Ring Mystery Box, a one-pound mix of real glass rings cut from recycled bottles, to create a stunning framed art piece.
No painting skills required. Just resin, glass rings, and a little bit of patience while everything sets up.
Step 1: Clean Your Glass
Clean both sides of your 11x14 glass panel thoroughly. Resin loves a dust-free, grease-free surface, so use glass cleaner and dry with a lint-free cloth.
Tip: Wear gloves while handling to avoid fingerprints—once it’s clean, you want it to stay clean!
Step 2: Prep Your Bottle Rings
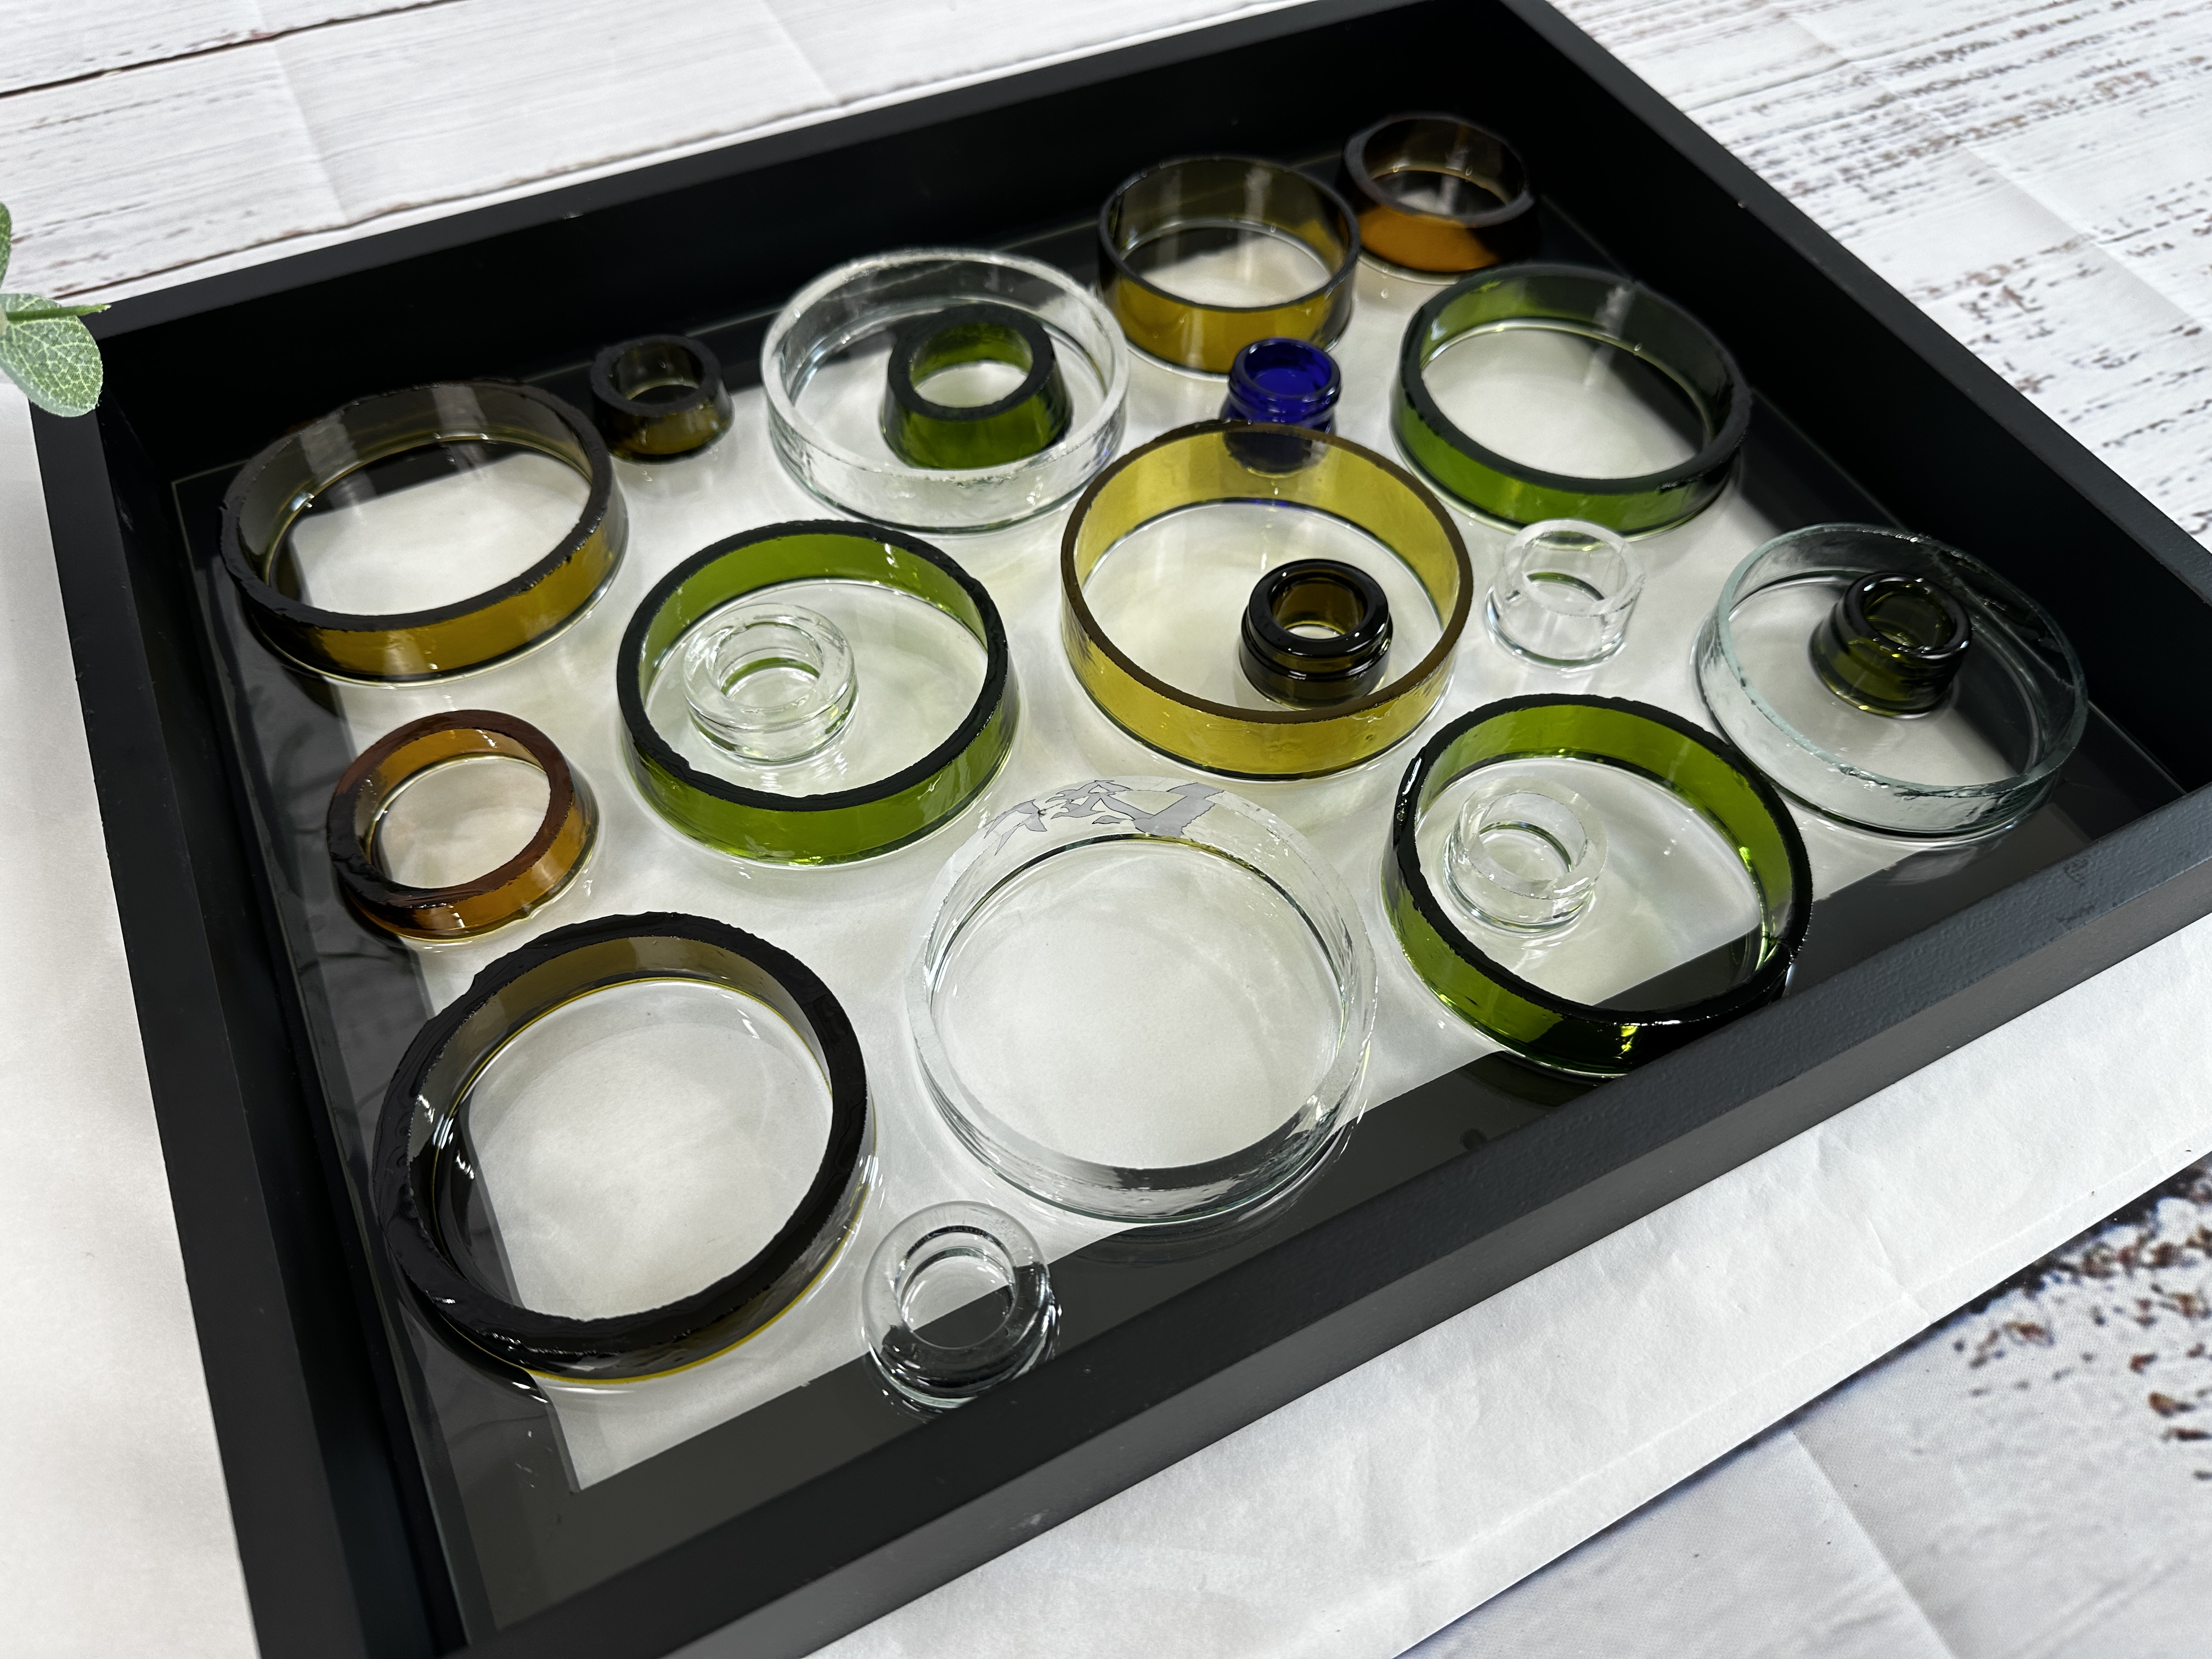
Our mystery boxes contain a mix of amber, green, clear, frosted, and occasionally rare cobalt or baby blue rings. They range in size from small neck pieces to large bottom cuts, and some are thicker than others.
A few rings may have chips or tiny cracks - that’s the charm of recycled glass! Arrange them loosely to get an idea of your design, or embrace the “fly by the seat of your pants” approach and place them as you go.
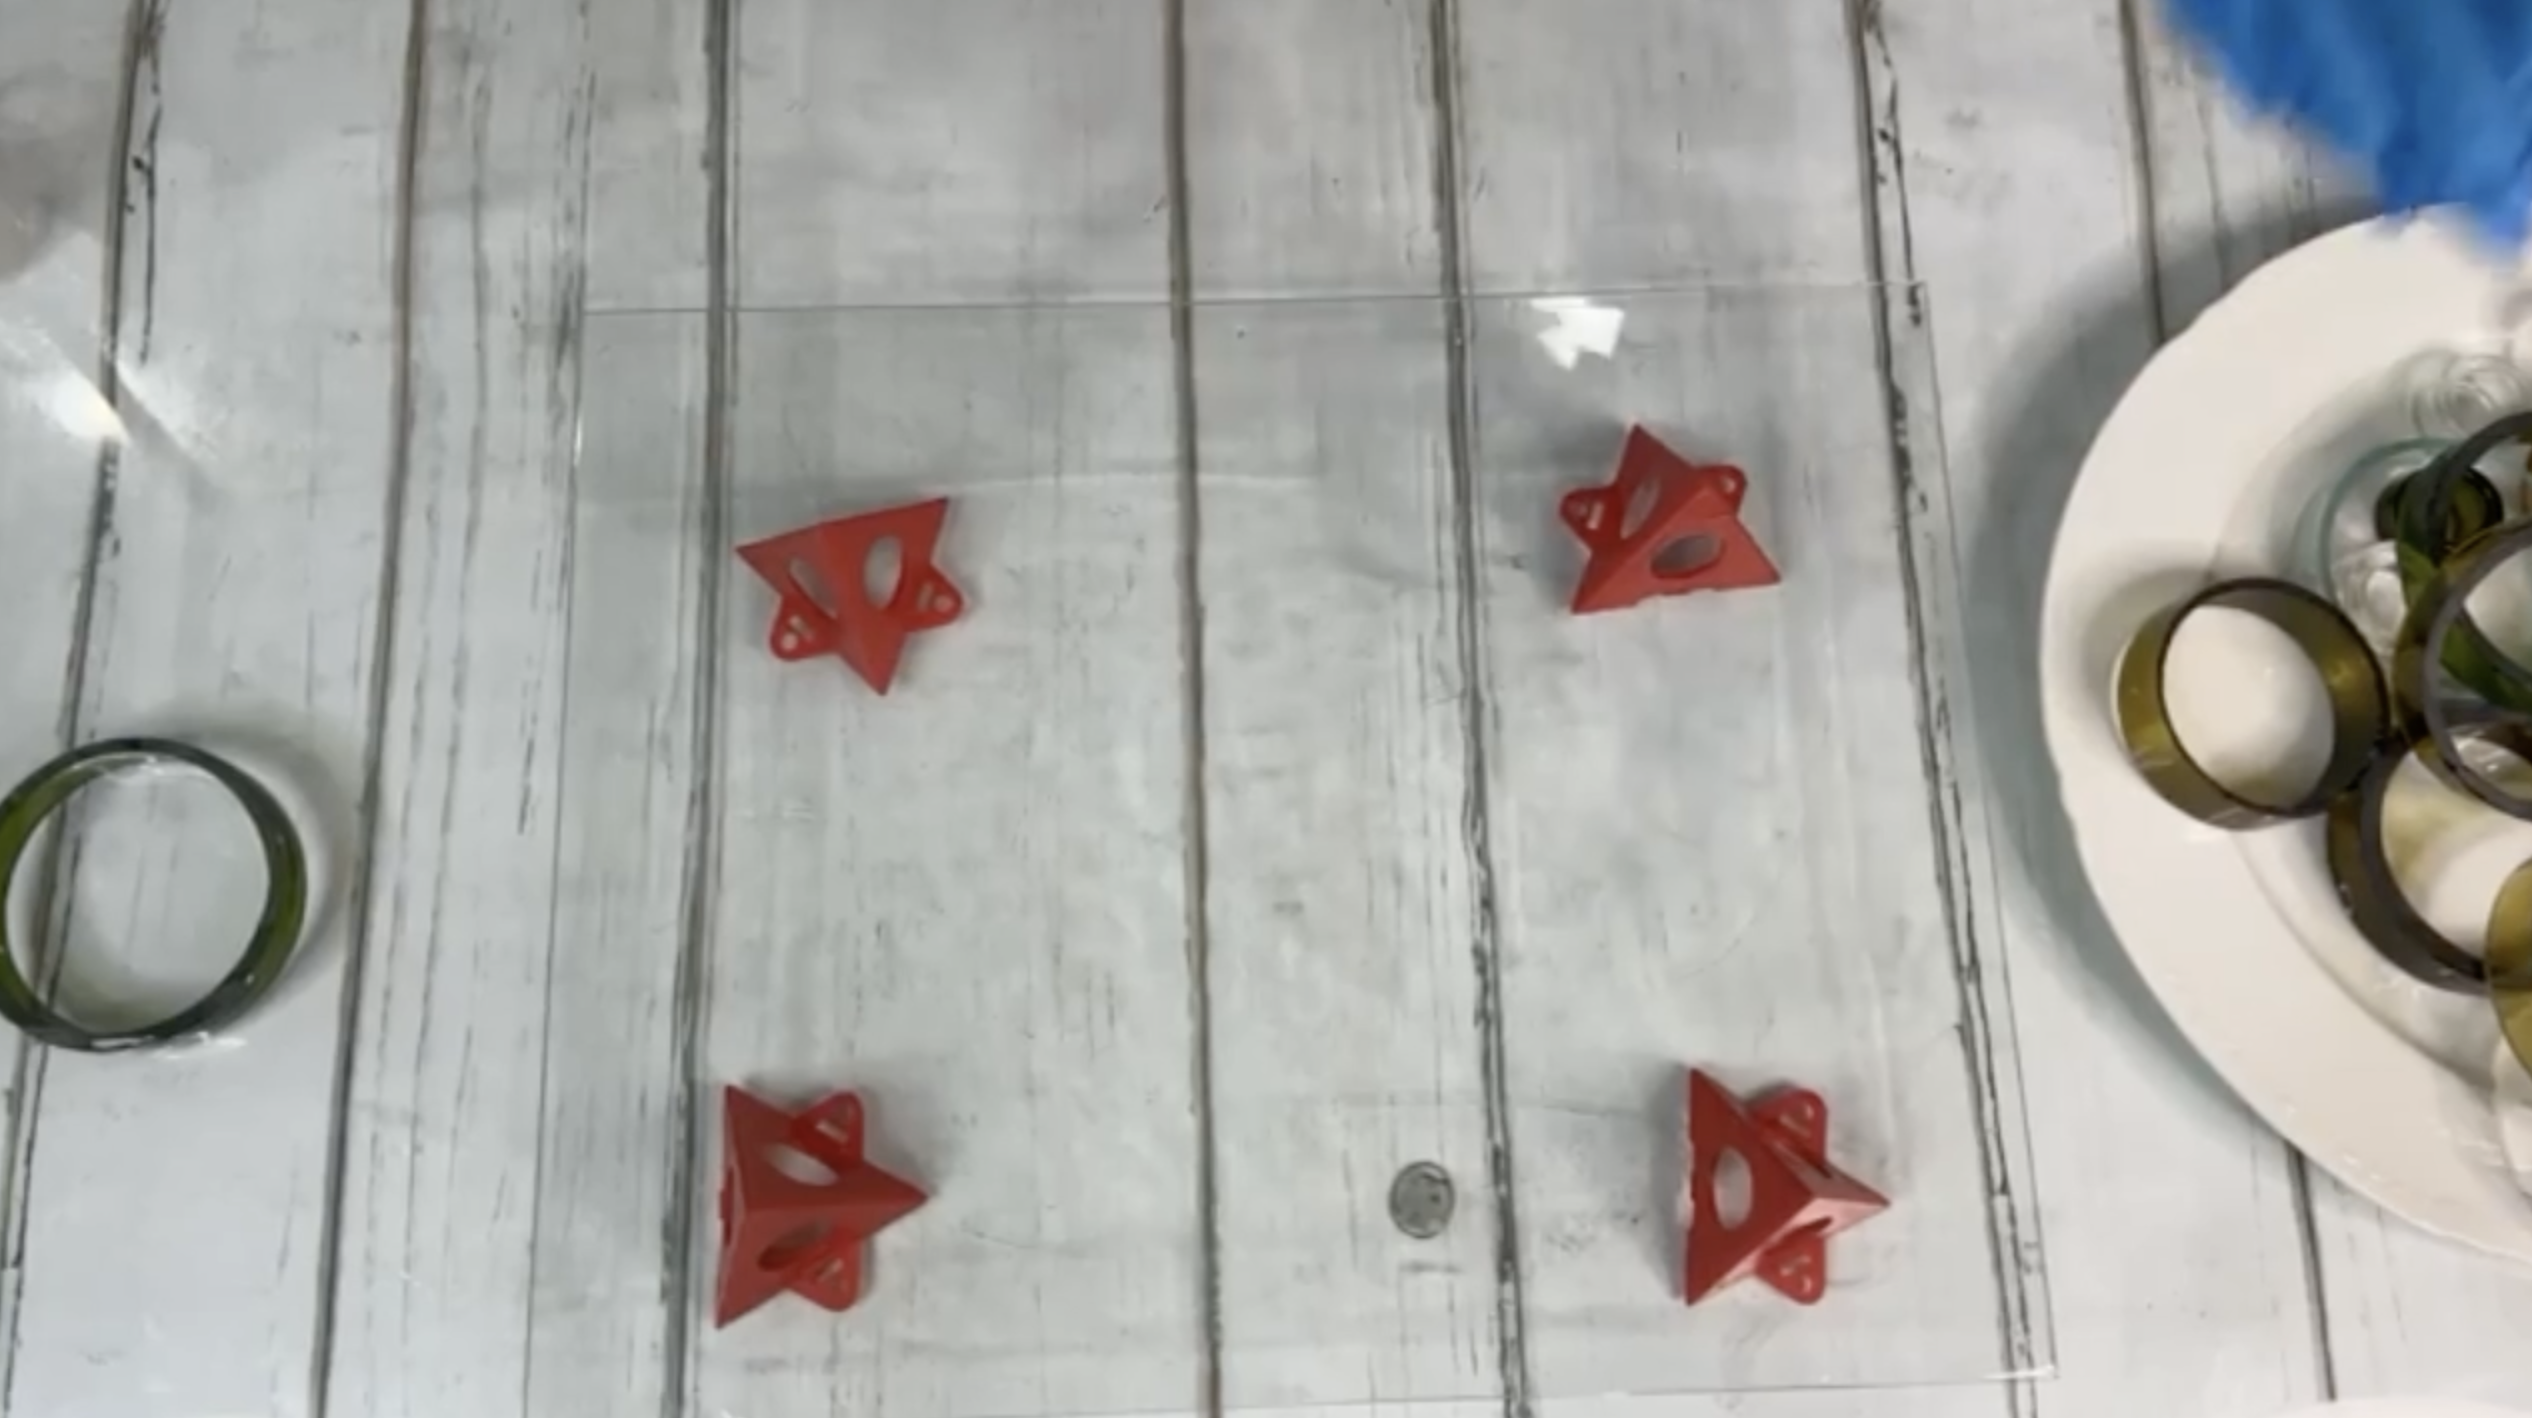
Step 3: Mix the Resin
For this 11x14 piece, mix ½ oz. resin and ½ oz. hardener (1 oz. total). Stir for 3 minutes, scraping the sides and bottom of your cup as you go. Place your glass on some corners to elevate it.
Step 4: Coat the Glass
Pour the resin directly onto your glass and use a gloved finger to spread it into a thin, even layer all the way to the edges.
Pop any bubbles right away with your torch, heat gun, or a mist of isopropyl alcohol.
Step 5: Add the Rings
For each ring:
-
Dip a finger into the resin.
-
Spread a thin coat on the ring’s surface.
-
Place the ring on your glass, leaving about ¼" from the edge.
Mix colors and sizes as you go - large pieces first, then fill in with medium and small ones. Overlap or nest smaller rings inside larger ones for extra visual interest.
Step 6: Final Touches
Once all your rings are placed, give the whole piece a quick once-over with your torch or heat gun to pop any final bubbles and help the resin self-level.
Cover your piece to protect it from dust and let it cure according to your resin manufacturer’s instructions (usually 24 hours).
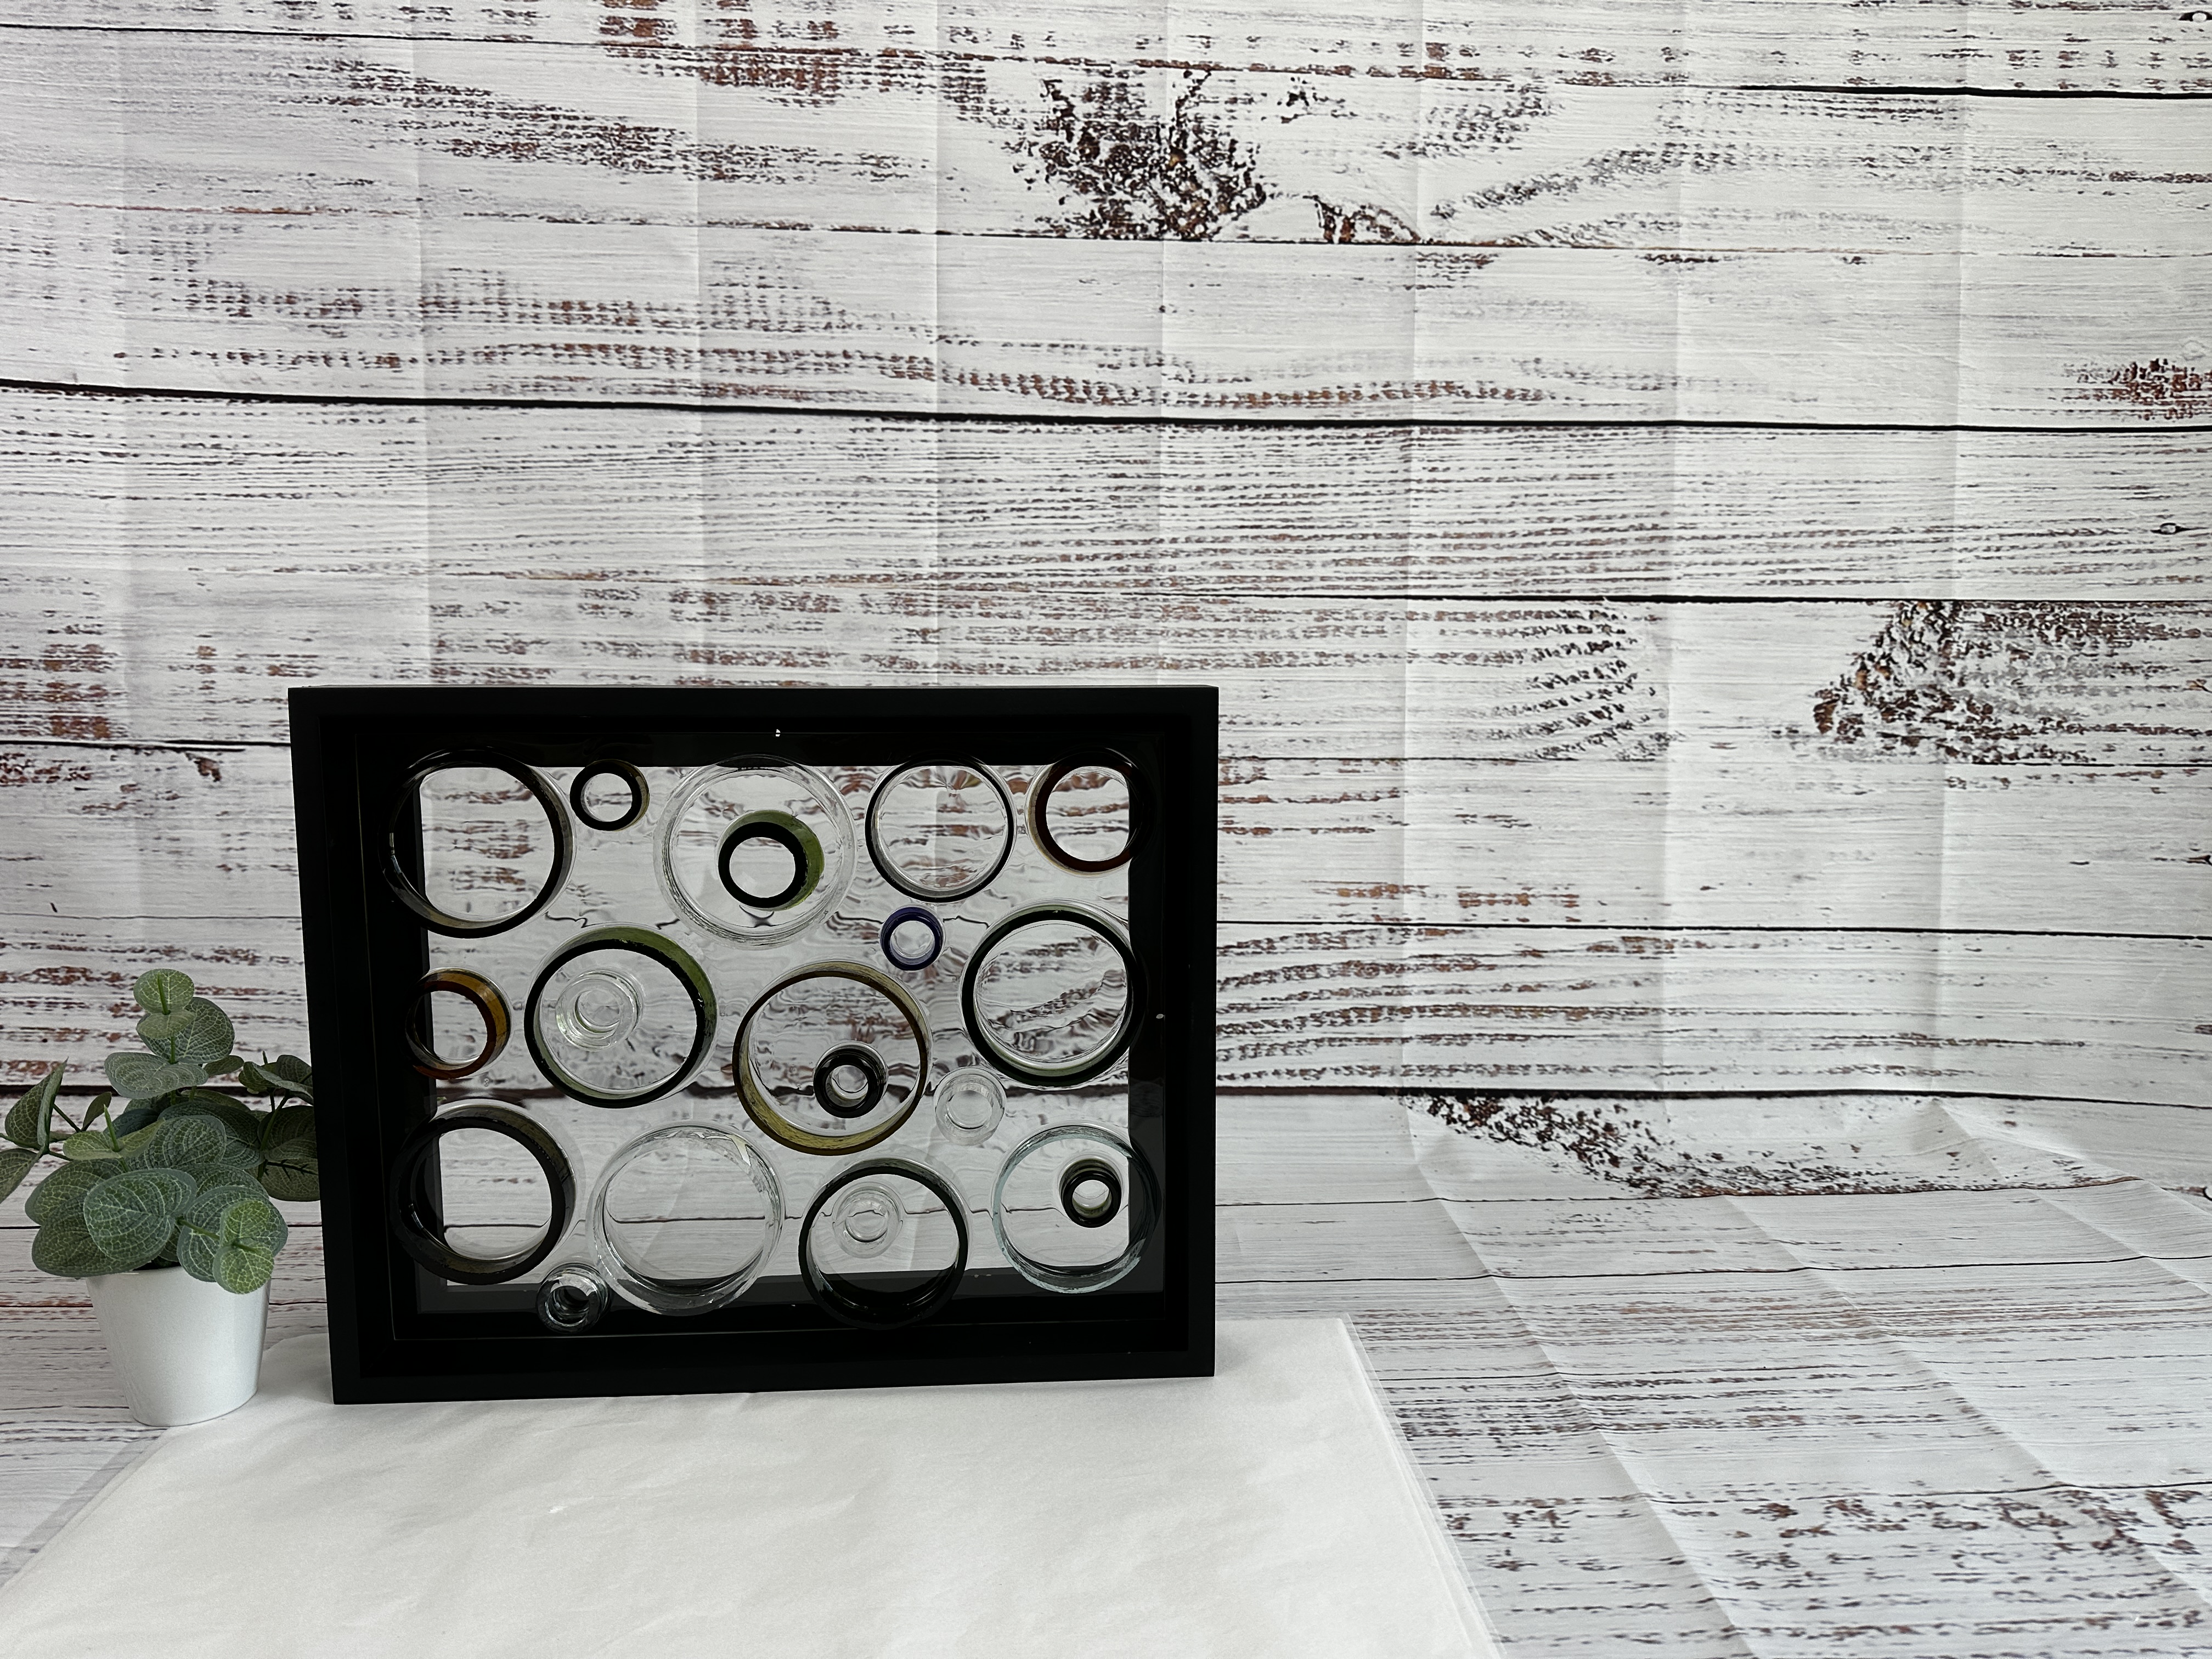
Once cured, place your glass art inside a deep shadow box frame. You can secure it with a thin line of clear tacky glue, or a light brush of resin along the frame edge before setting the glass inside.
This project is ridiculously easy (no painting, no complicated tools!) and every single piece will be one-of-a-kind thanks to the random mix of glass rings. It’s perfect as a gift, a conversation piece in your home, or a way to upcycle and showcase the beauty of recycled glass.
If you don’t want to miss my Facebook LIVE art instruction, make sure you are on my texting list. I always text 10 minutes before I’m going to go LIVE, so you won’t ever miss it. You can text “Hey Cindy” to 901-519-2923.
Want more inspiration and artwork?
- My website artshattered.com with resources, shop, and more!
- My creative membership The Shattered Circle, where you can explore the world of glass art with online workshops, a supportive community, and more!
- My mini creative membership Just A ‘Lil Bit Monthly Glass Art Club, where you’ll get a new quick and easy online tutorial for just a lil' bit of sparkle in your life!
- My Facebook page where I go LIVE every Wednesday night.
- My YouTube channel which has tons of free art lessons right at your fingertips.
