
Cactus 🌵
This glass cactus art project is such a fun way to create desert-inspired wall decor using canvas, crushed glass, and resin. Instead of painting the cactus underneath, this piece is built almost entirely with glass, which gives it beautiful texture, sparkle, and dimension. It’s a great project for anyone who loves cactus decor, succulent-inspired art, or mixed media glass and resin projects!

Step 1: Prep the Canvas Background
Start with a 9x12 thick canvas. Paint the entire canvas with a layer of white acrylic paint, then add a small amount of soft gray paint along the bottom edge. This creates just enough shading for the cactus to visually “sit” on something instead of floating on a blank white background. Keep the gray subtle and blended so it doesn’t compete with the glass cactus.
Step 2: Sketch the Cactus Shape
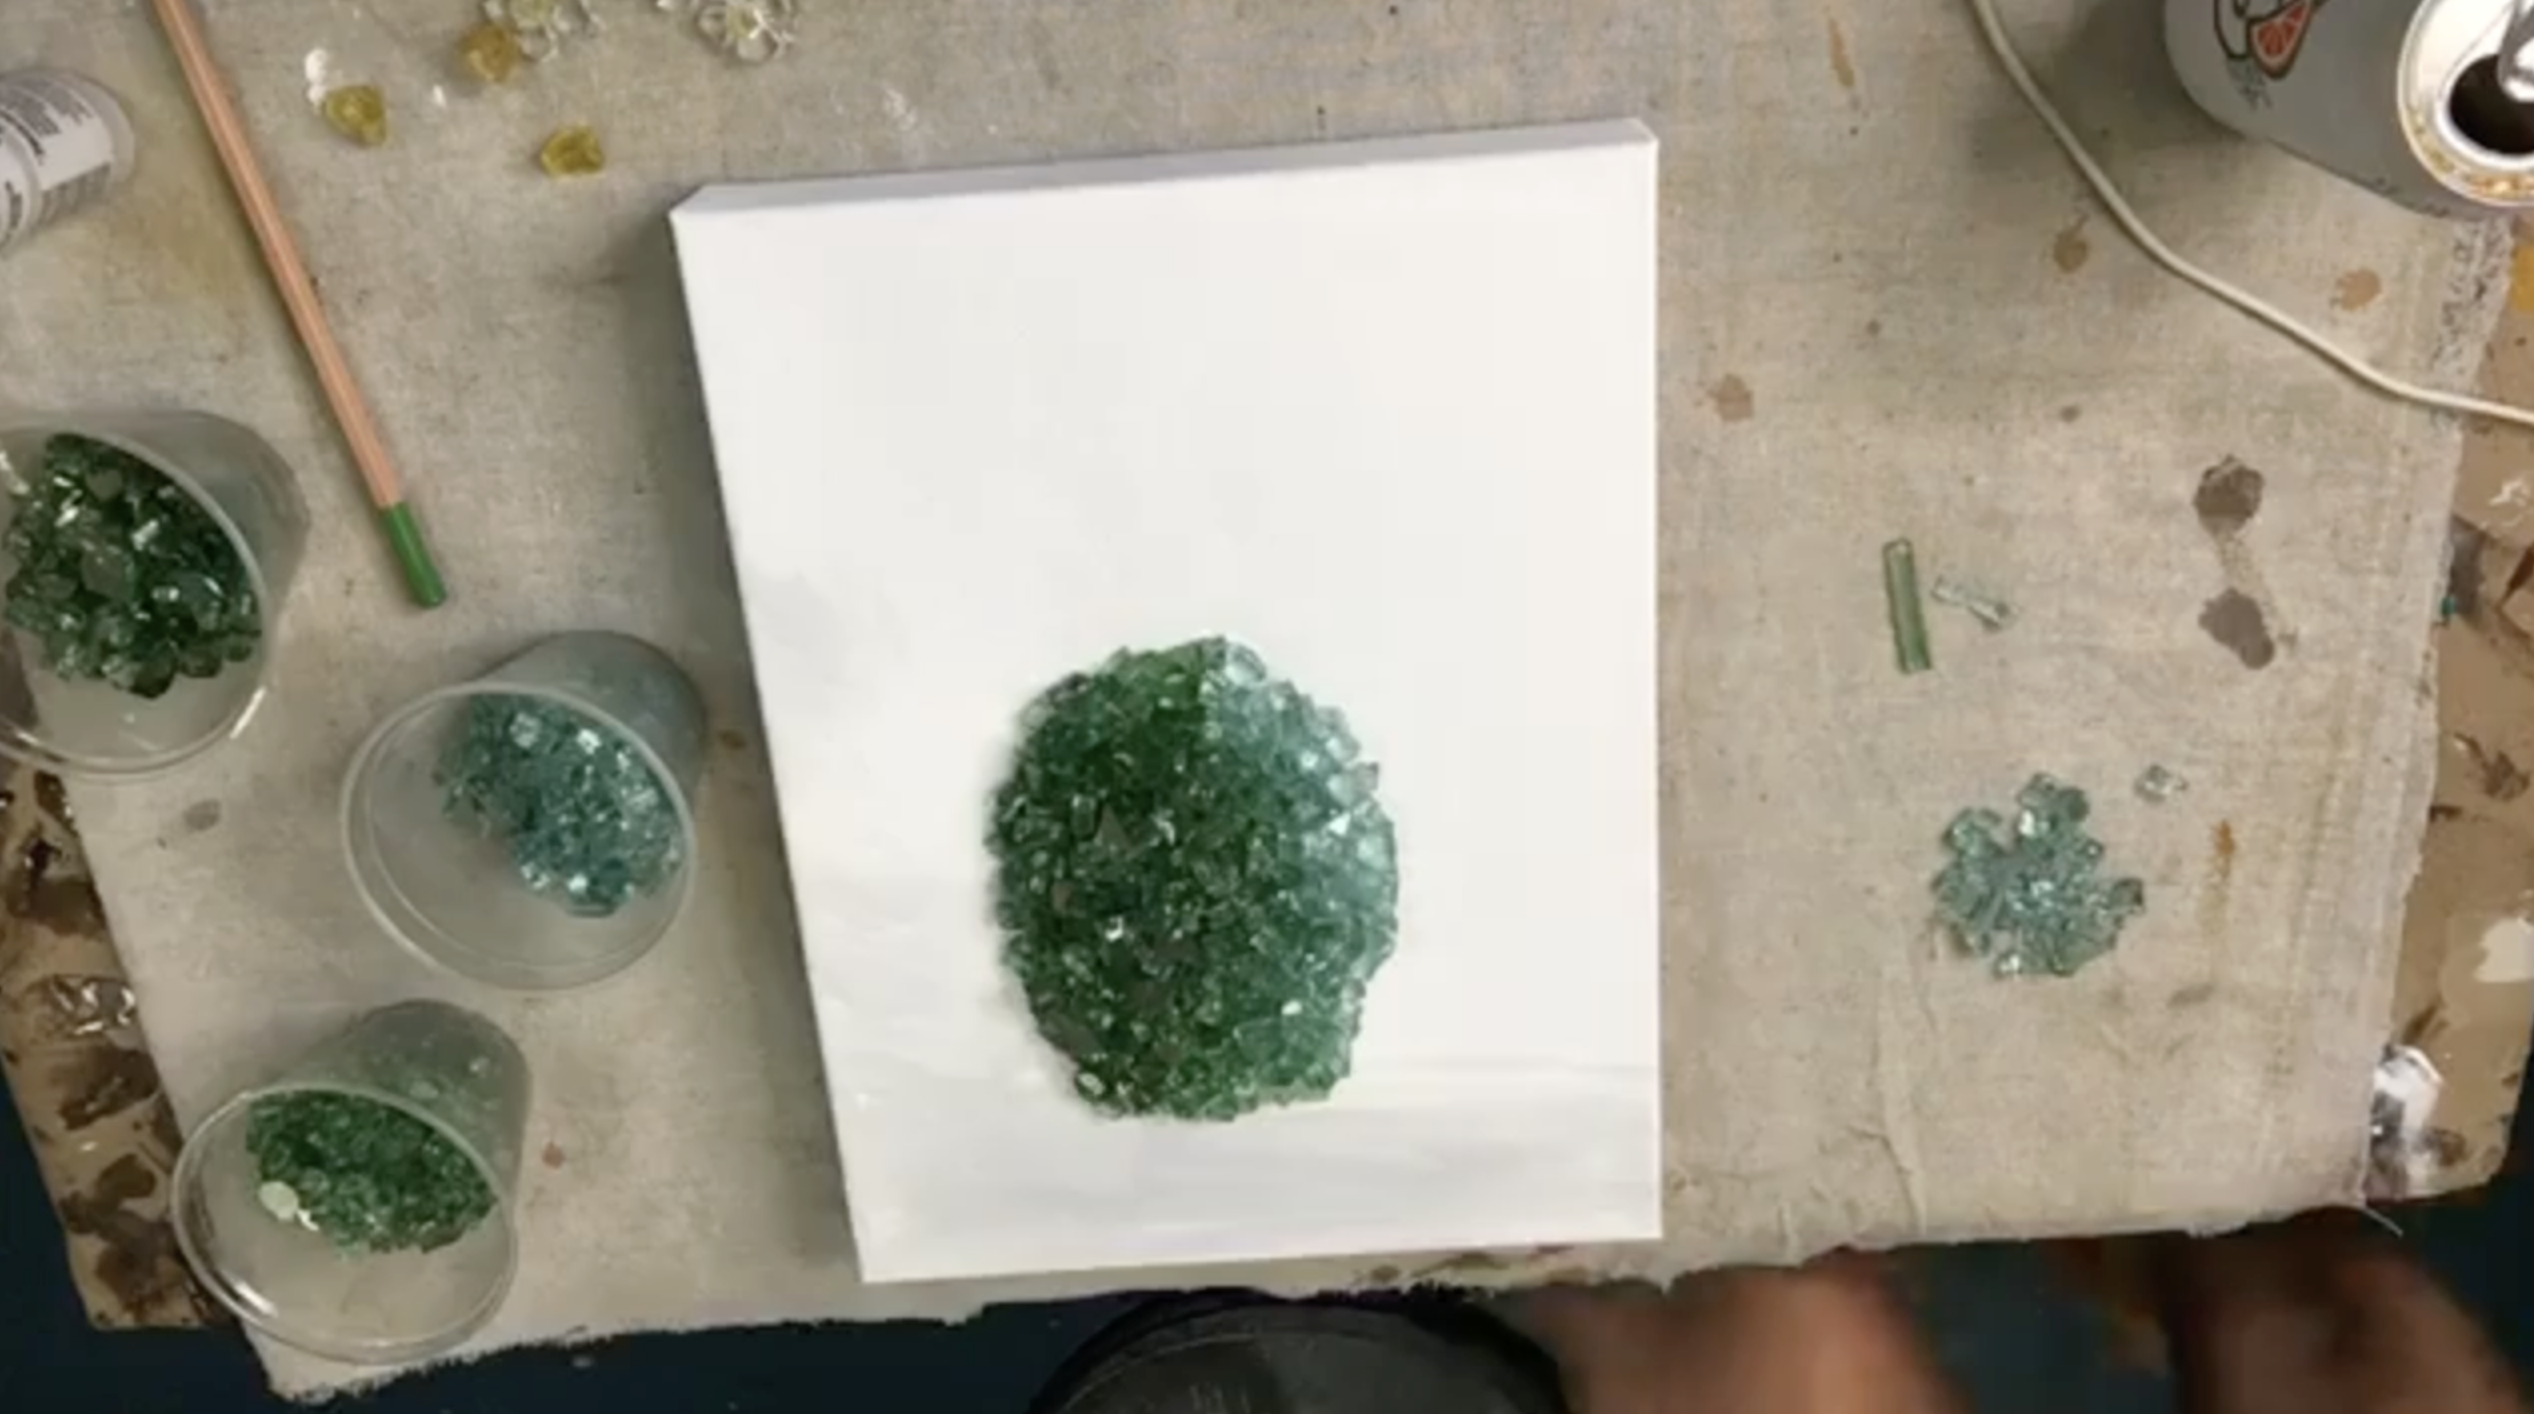
Lightly sketch your cactus onto the canvas using a watercolor pencil. Keep the lines very soft because this project does not have painted cactus color underneath the glass. The goal is simply to give yourself a guide for where to place each section of glass. Sketch the large center cactus paddle first, then add the smaller paddles around it.
Step 3: Start with the Main Cactus Paddle
Begin building the cactus with the largest center paddle. Add Solex glass to one side as the lightest highlight color, then fill the middle with classic green glass. Finish the opposite side with reflective green glass to create a darker shadow. Slightly overlap the colors so the transitions feel natural rather than striped. This three-color approach gives the cactus dimension even though you’re working with glass instead of paint.
Step 4: Add Glue as a Placement Guide
For the smaller cactus paddles, use Aleene’s Clear Gel Tacky Glue to lightly outline each sketched section. This helps you see your shape more clearly and gives the glass a little grip while you work. The glue dries clear, so it won’t show once the piece is finished.
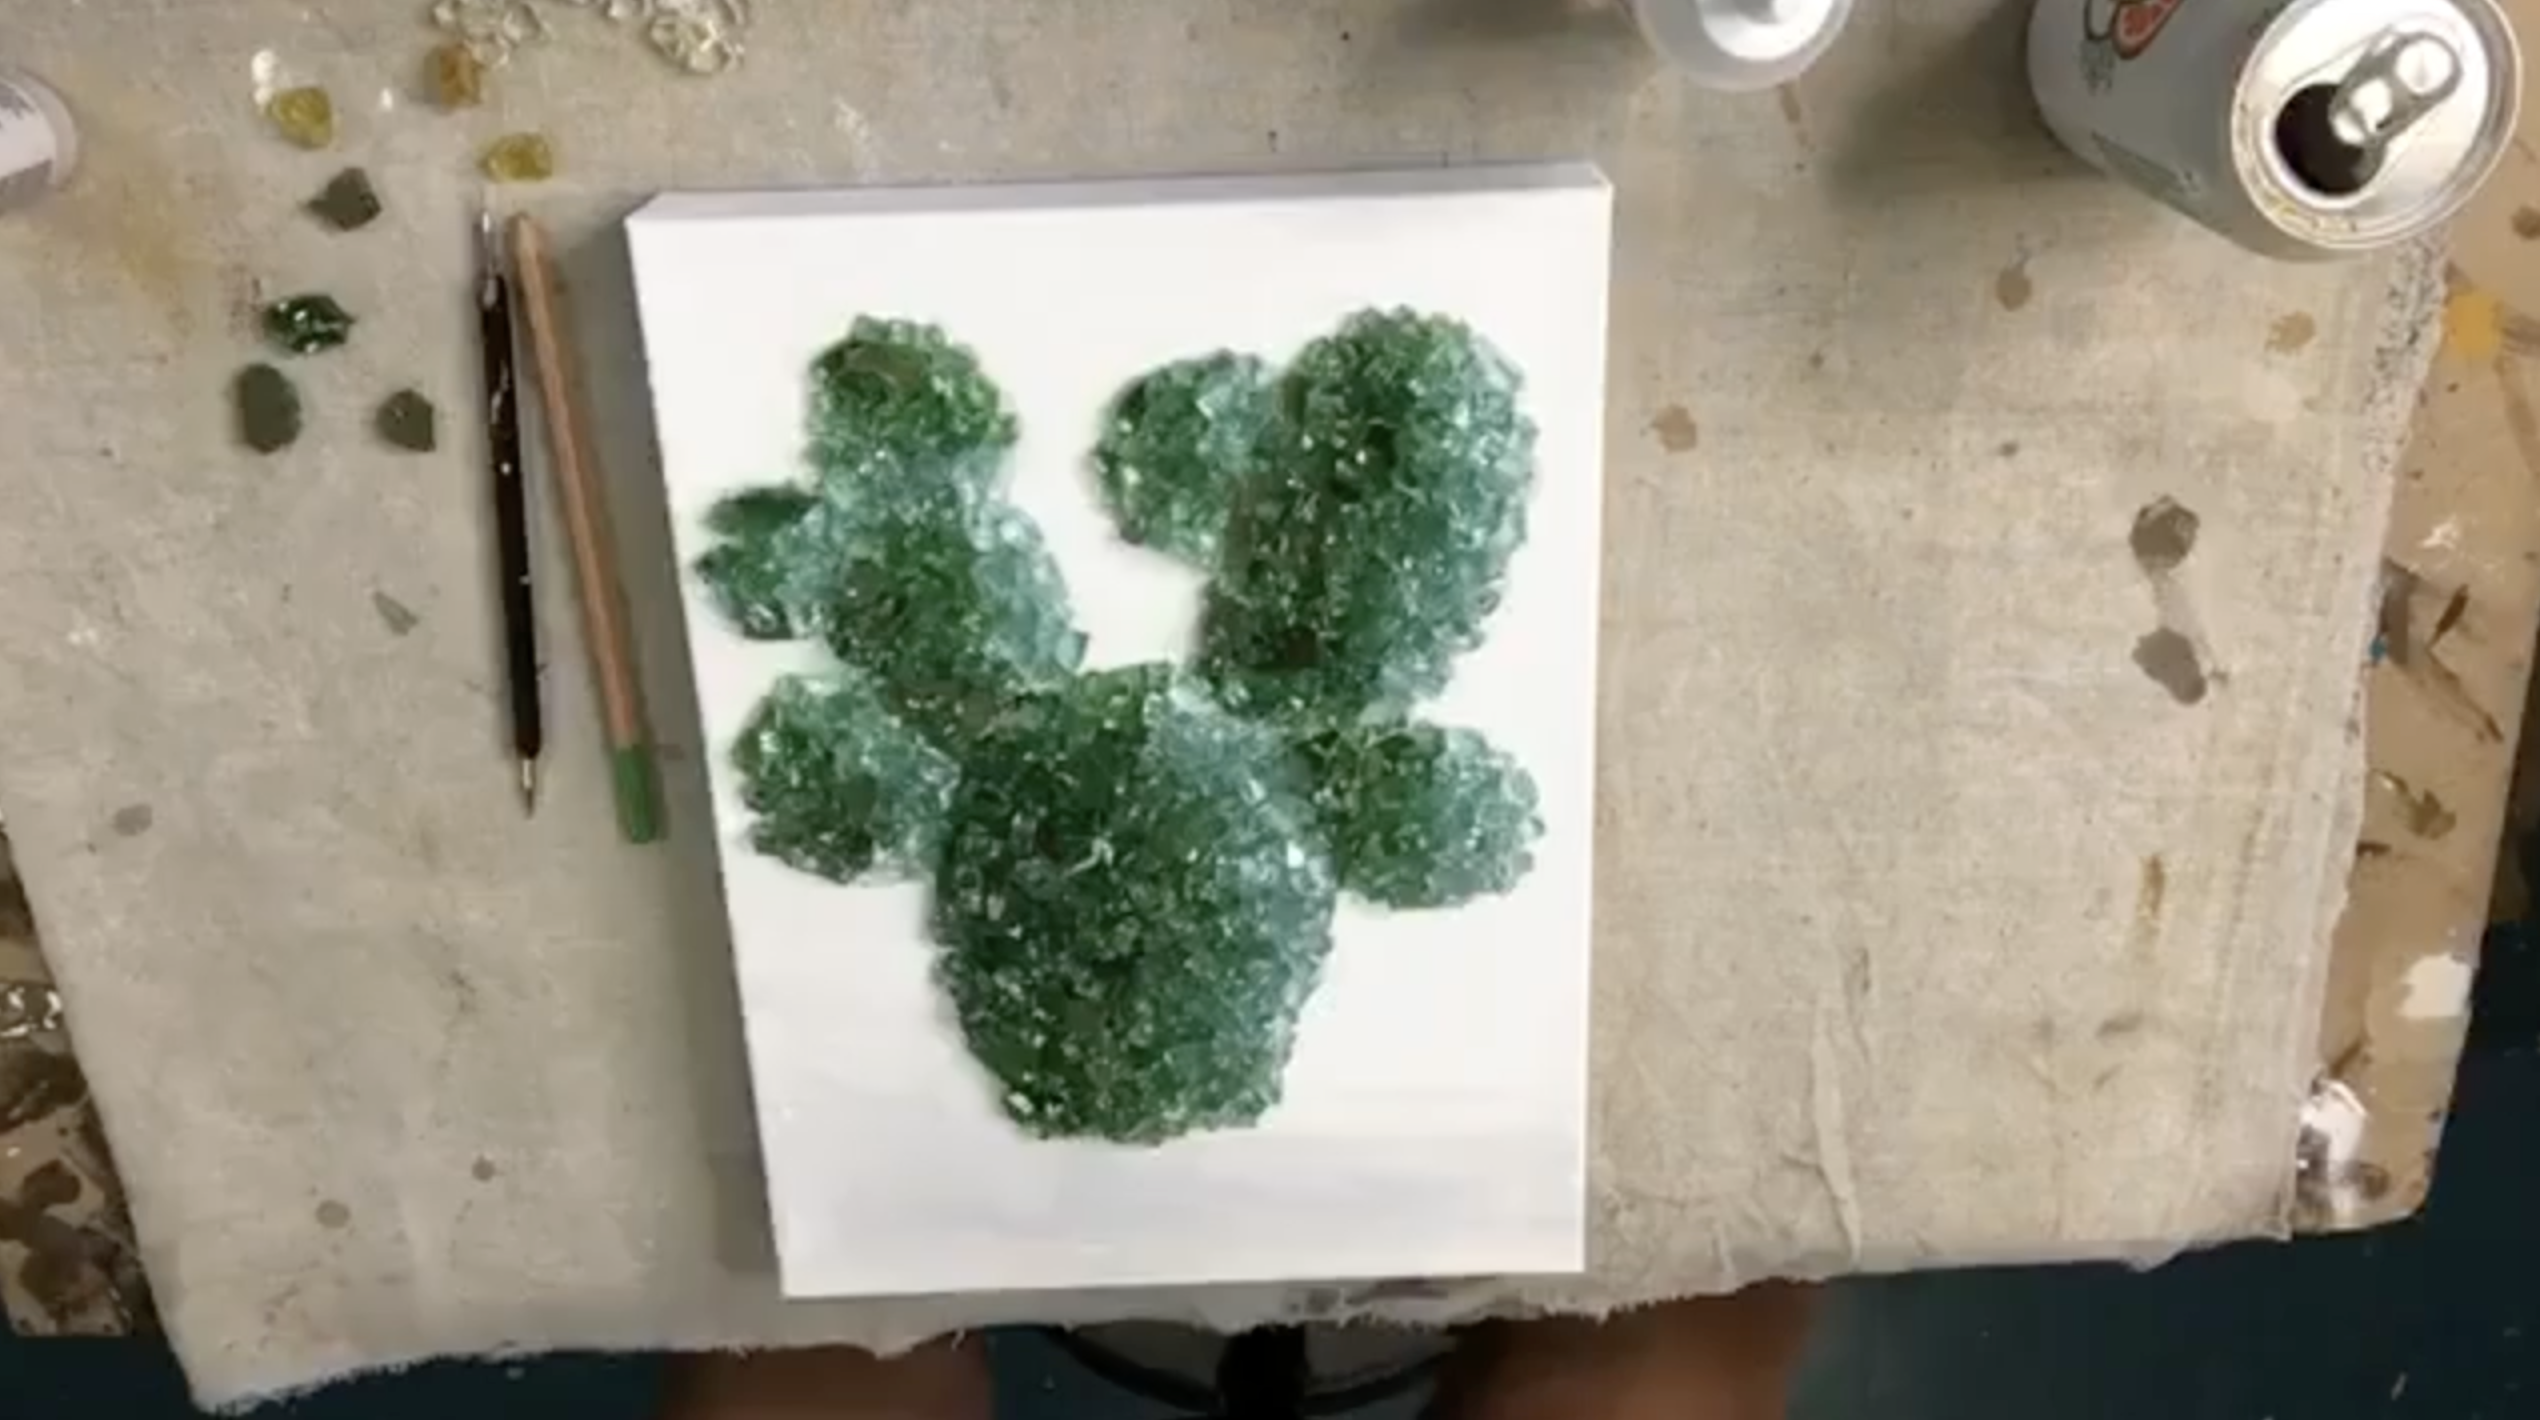
Step 5: Build Each Cactus Section
Continue building the cactus one section at a time. Use the lighter Solex glass where you want the highlight, classic green through the center, and reflective green along the darker outside edge. When one paddle touches another, place a light glass color against a darker section so each piece of the cactus stays defined. This is what keeps the cactus from turning into one big green blob.
Step 6: Layer the Glass for Texture
As you fill each cactus section, don’t be afraid to pile the glass slightly. This project uses more than one thin layer of glass, so the finished cactus has chunky texture and sparkle. Use your finger or a stylus to gently push pieces back into line if they wander outside the shape. Remove any pieces that feel too large or awkward and replace them with smaller ones as needed.
Step 7: Add the Cactus Flowers
Once the cactus shape is filled in, add small glass flowers and yellow glass chunks to the tops and edges of the paddles. The flowers in this project were made ahead of time using four small glass pieces, a tiny yellow center, and a drop of resin cured on plastic. Place the flowers where they feel balanced, then add a few small yellow pieces as extra blooms.
Step 8: Mix the Resin
Before adding resin, place your canvas on small wood blocks or canvas risers. Push the blocks far enough underneath that resin drips won’t glue the canvas to the blocks. Use a small level to make sure the canvas is even. Resin self-levels, so if your surface is tilted, the resin will run toward the low side.
For this 9x12 cactus canvas, mix 4 ounces total of Art Resin using 2 ounces of resin and 2 ounces of hardener. Stir slowly for three full minutes, scraping the sides and bottom of the cup as you mix. The project ultimately used about 1 1/2 ounces of resin, but mixing extra gives you room to work generously and make sure all the glass is covered.
Step 9: Apply Resin
Start by drizzling resin over the glass cactus using your stir stick. Work methodically from one side to the other so you don’t miss any sections. Drizzling helps the resin run over the top and down the sides of the glass pieces, securing everything to the canvas without shifting the design. You’ll know the glass is covered when it looks glossy and you can see resin beginning to seep slightly around the edges.
After the glass is fully covered, add a little resin to the open canvas areas and spread it with gloved fingers. Cover the entire top surface, but you do not have to resin the sides unless you prefer that look. If resin drips over the edge, smooth it out with your finger so the sides look intentional.
Step 10: Pop the Bubbles
Use a torch or heat gun to pop bubbles in the resin. Keep the heat moving the entire time and do not let the flame touch the resin. The heat is what removes the bubbles, not the flame itself. If you don’t have a torch, a heat gun works well, and a hair dryer can help in a pinch on low air and high heat.
Step 13: Let the Piece Cure
Let the canvas sit flat and undisturbed while the resin cures. Once dry, the cactus will be glossy, dimensional, and full of sparkle. The glass flowers and yellow accents add just the right finishing touch and make the piece feel playful and bright.
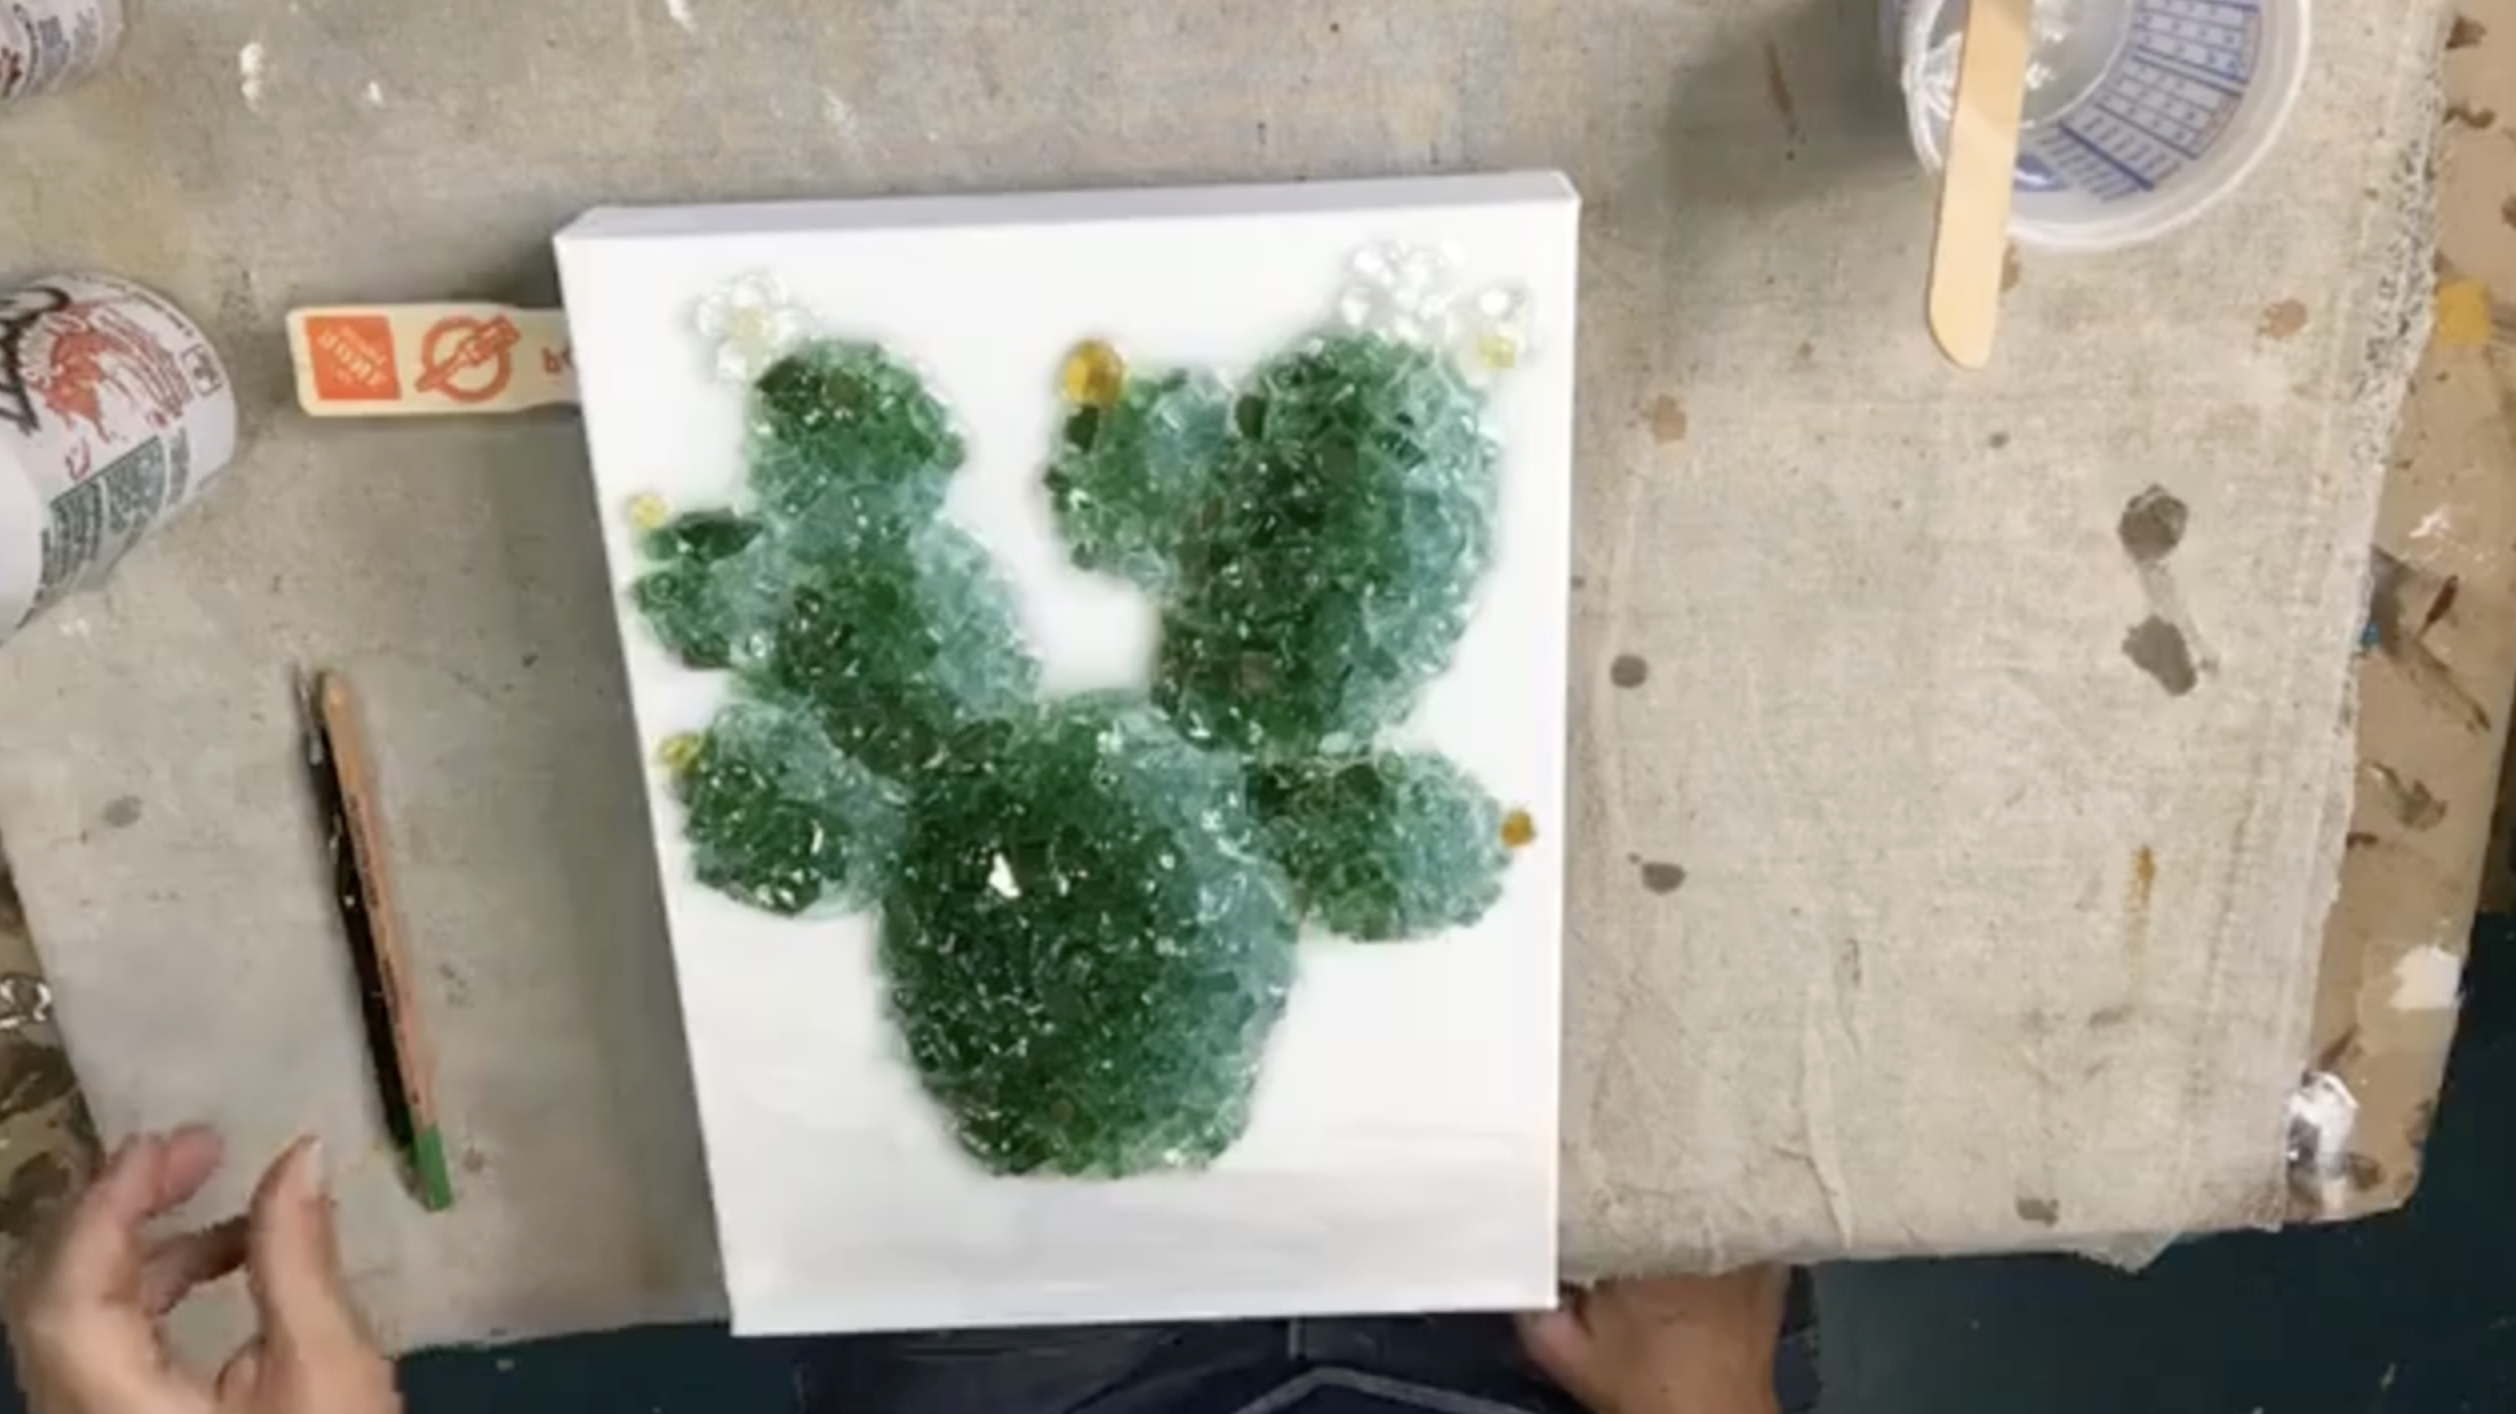
This glass cactus art project is such a fun way to use different shades of green glass to create depth without painting the cactus underneath. The soft gray shading at the bottom keeps the design grounded, while the resin brings out all the sparkle in the glass. It’s a beautiful handmade decor piece for cactus lovers, desert-inspired rooms, gallery walls, or anyone who loves glass and resin art.
If you're a member of The Shattered Circle, you'll find this tutorial in your classroom under Art Shattered Weekly Facebook Lives, search for "Cactus".
If you don’t want to miss my Facebook LIVE art instruction, make sure you are on my texting list. I always text 10 minutes before I’m going to go LIVE, so you won’t ever miss it. You can text “Hey Cindy” to 901-519-2923.
Want more inspiration and artwork?
- My website artshattered.com with resources, shop, and more!
- My creative membership The Shattered Circle, where you can explore the world of glass art with online workshops, a supportive community, and more!
- My mini creative membership Just A ‘Lil Bit Monthly Glass Art Club, where you’ll get a new quick and easy online tutorial for just a lil' bit of sparkle in your life!
- My Facebook page where I go LIVE every Wednesday night.
- My YouTube channel which has tons of free art lessons right at your fingertips.
