
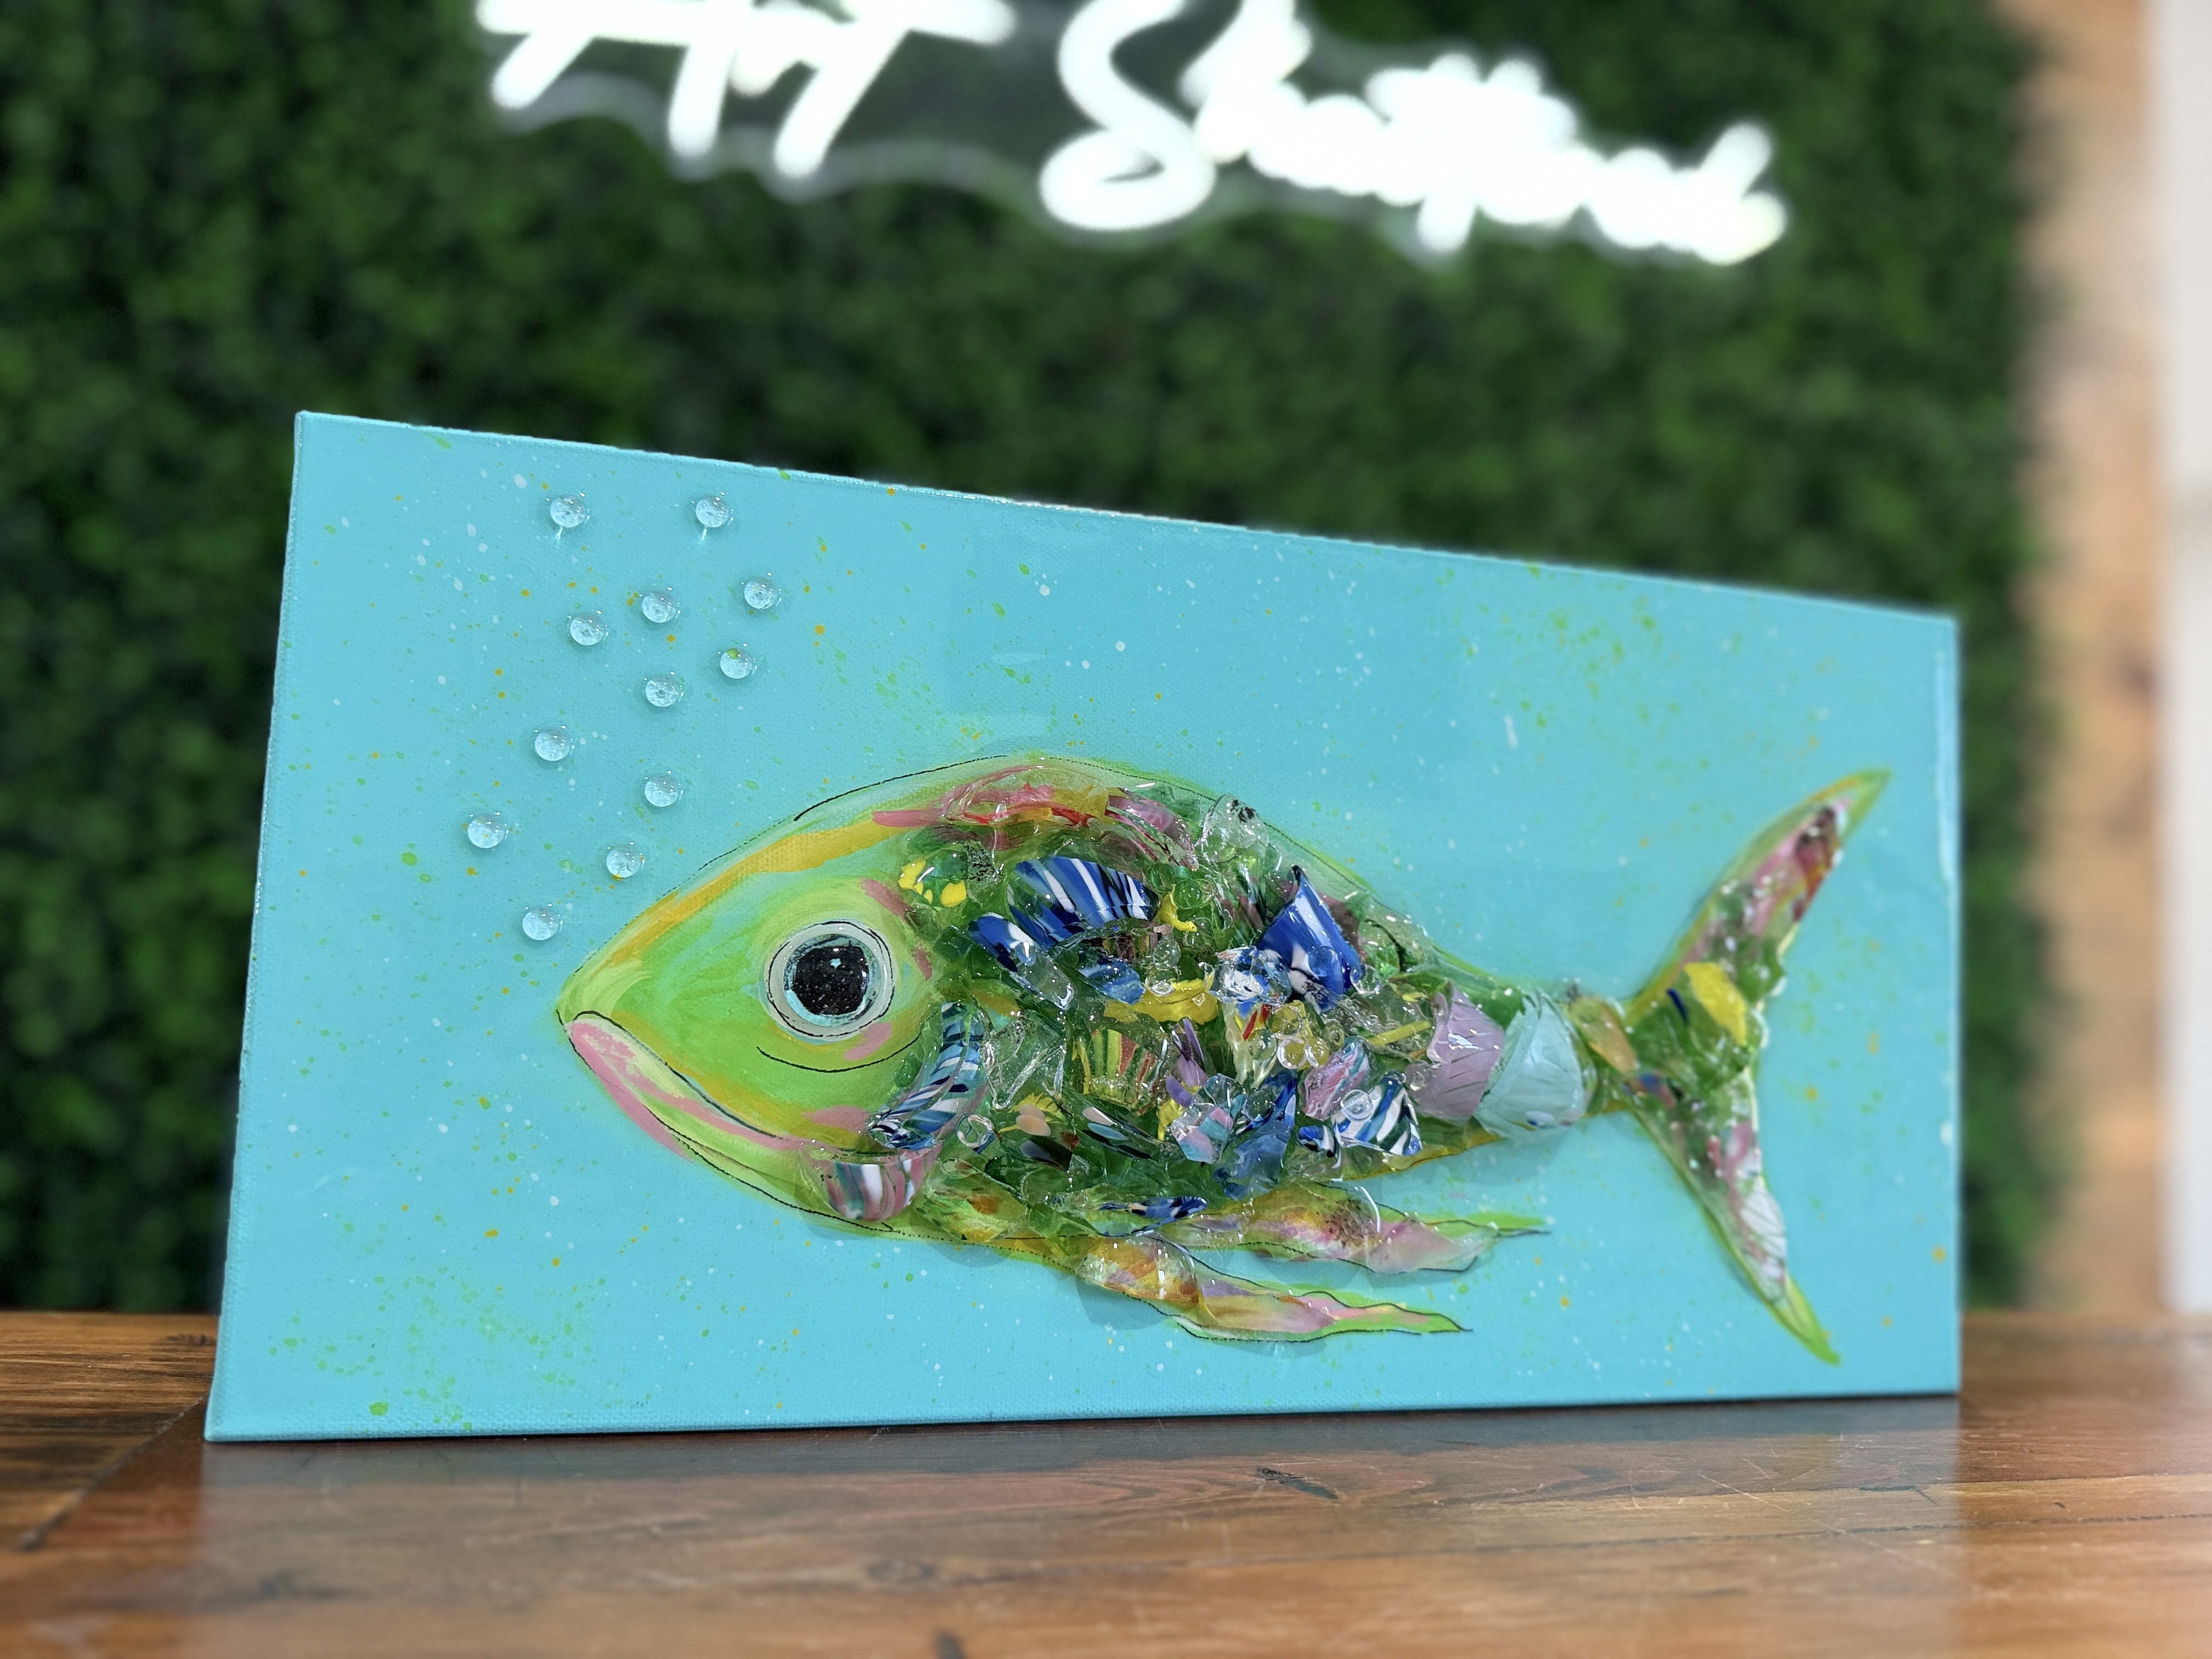
Chippy Glass Fish 🐠
If you love mixed media fish art, beach decor, coastal wall art, and glass resin crafts, this colorful fish canvas is a fun and beginner-friendly project to try. This bright glass fish painting with resin combines acrylic paint, crushed glass, glass chips, and glossy resin to create a dimensional underwater art piece full of texture and sparkle!
Step 1: Paint the Canvas Background
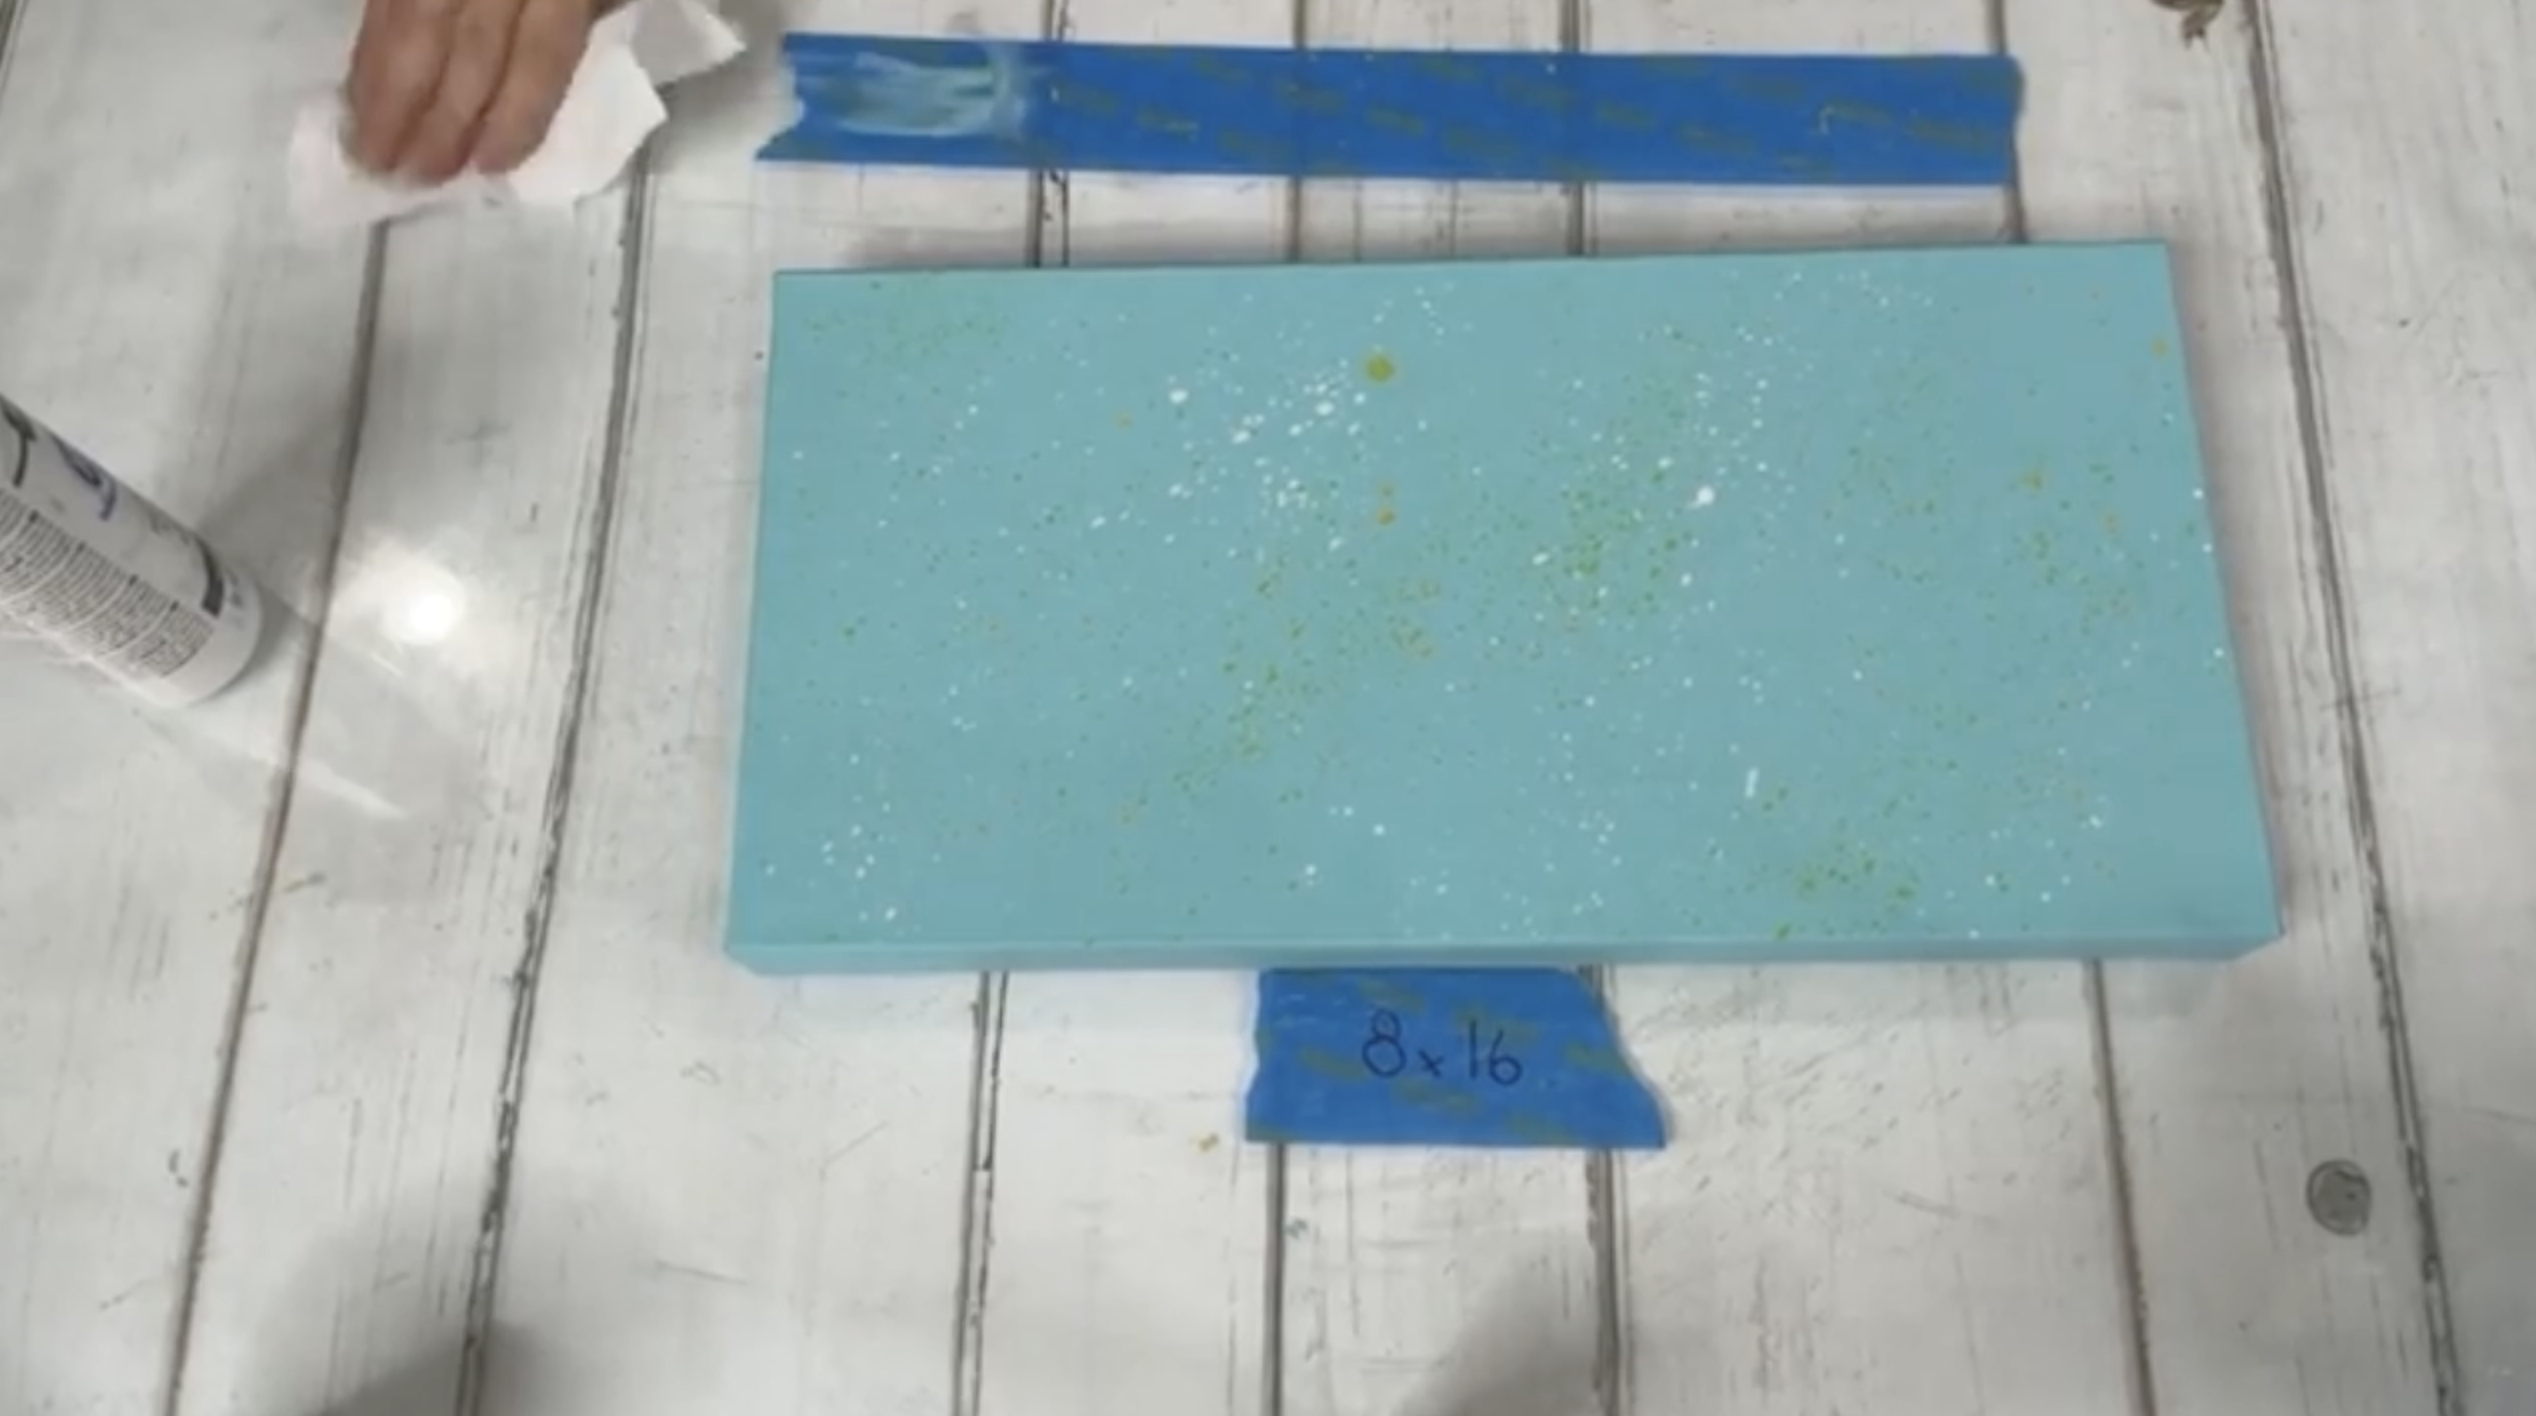
Begin by applying two coats of Bahama Blue acrylic paint to the entire canvas. Let each coat dry completely before adding the next. This aqua blue background creates the perfect ocean-inspired base for your fish art and gives the finished project a bright coastal feel.
To give your background movement and personality, splatter paint across the canvas using Golden Yellow, Sour Apple, and White acrylic paint. Thin each color with a little water until it becomes loose and fluid. Use a large brush or toothbrush to flick tiny droplets over the surface. Dry between each color layer.
Step 2: Trace the Fish Shape
Once the background is dry, place your fish tracer onto the canvas and transfer the design using graphite paper. Position the fish slightly lower and toward the right side of the canvas to leave room for bubbles above the fish later.
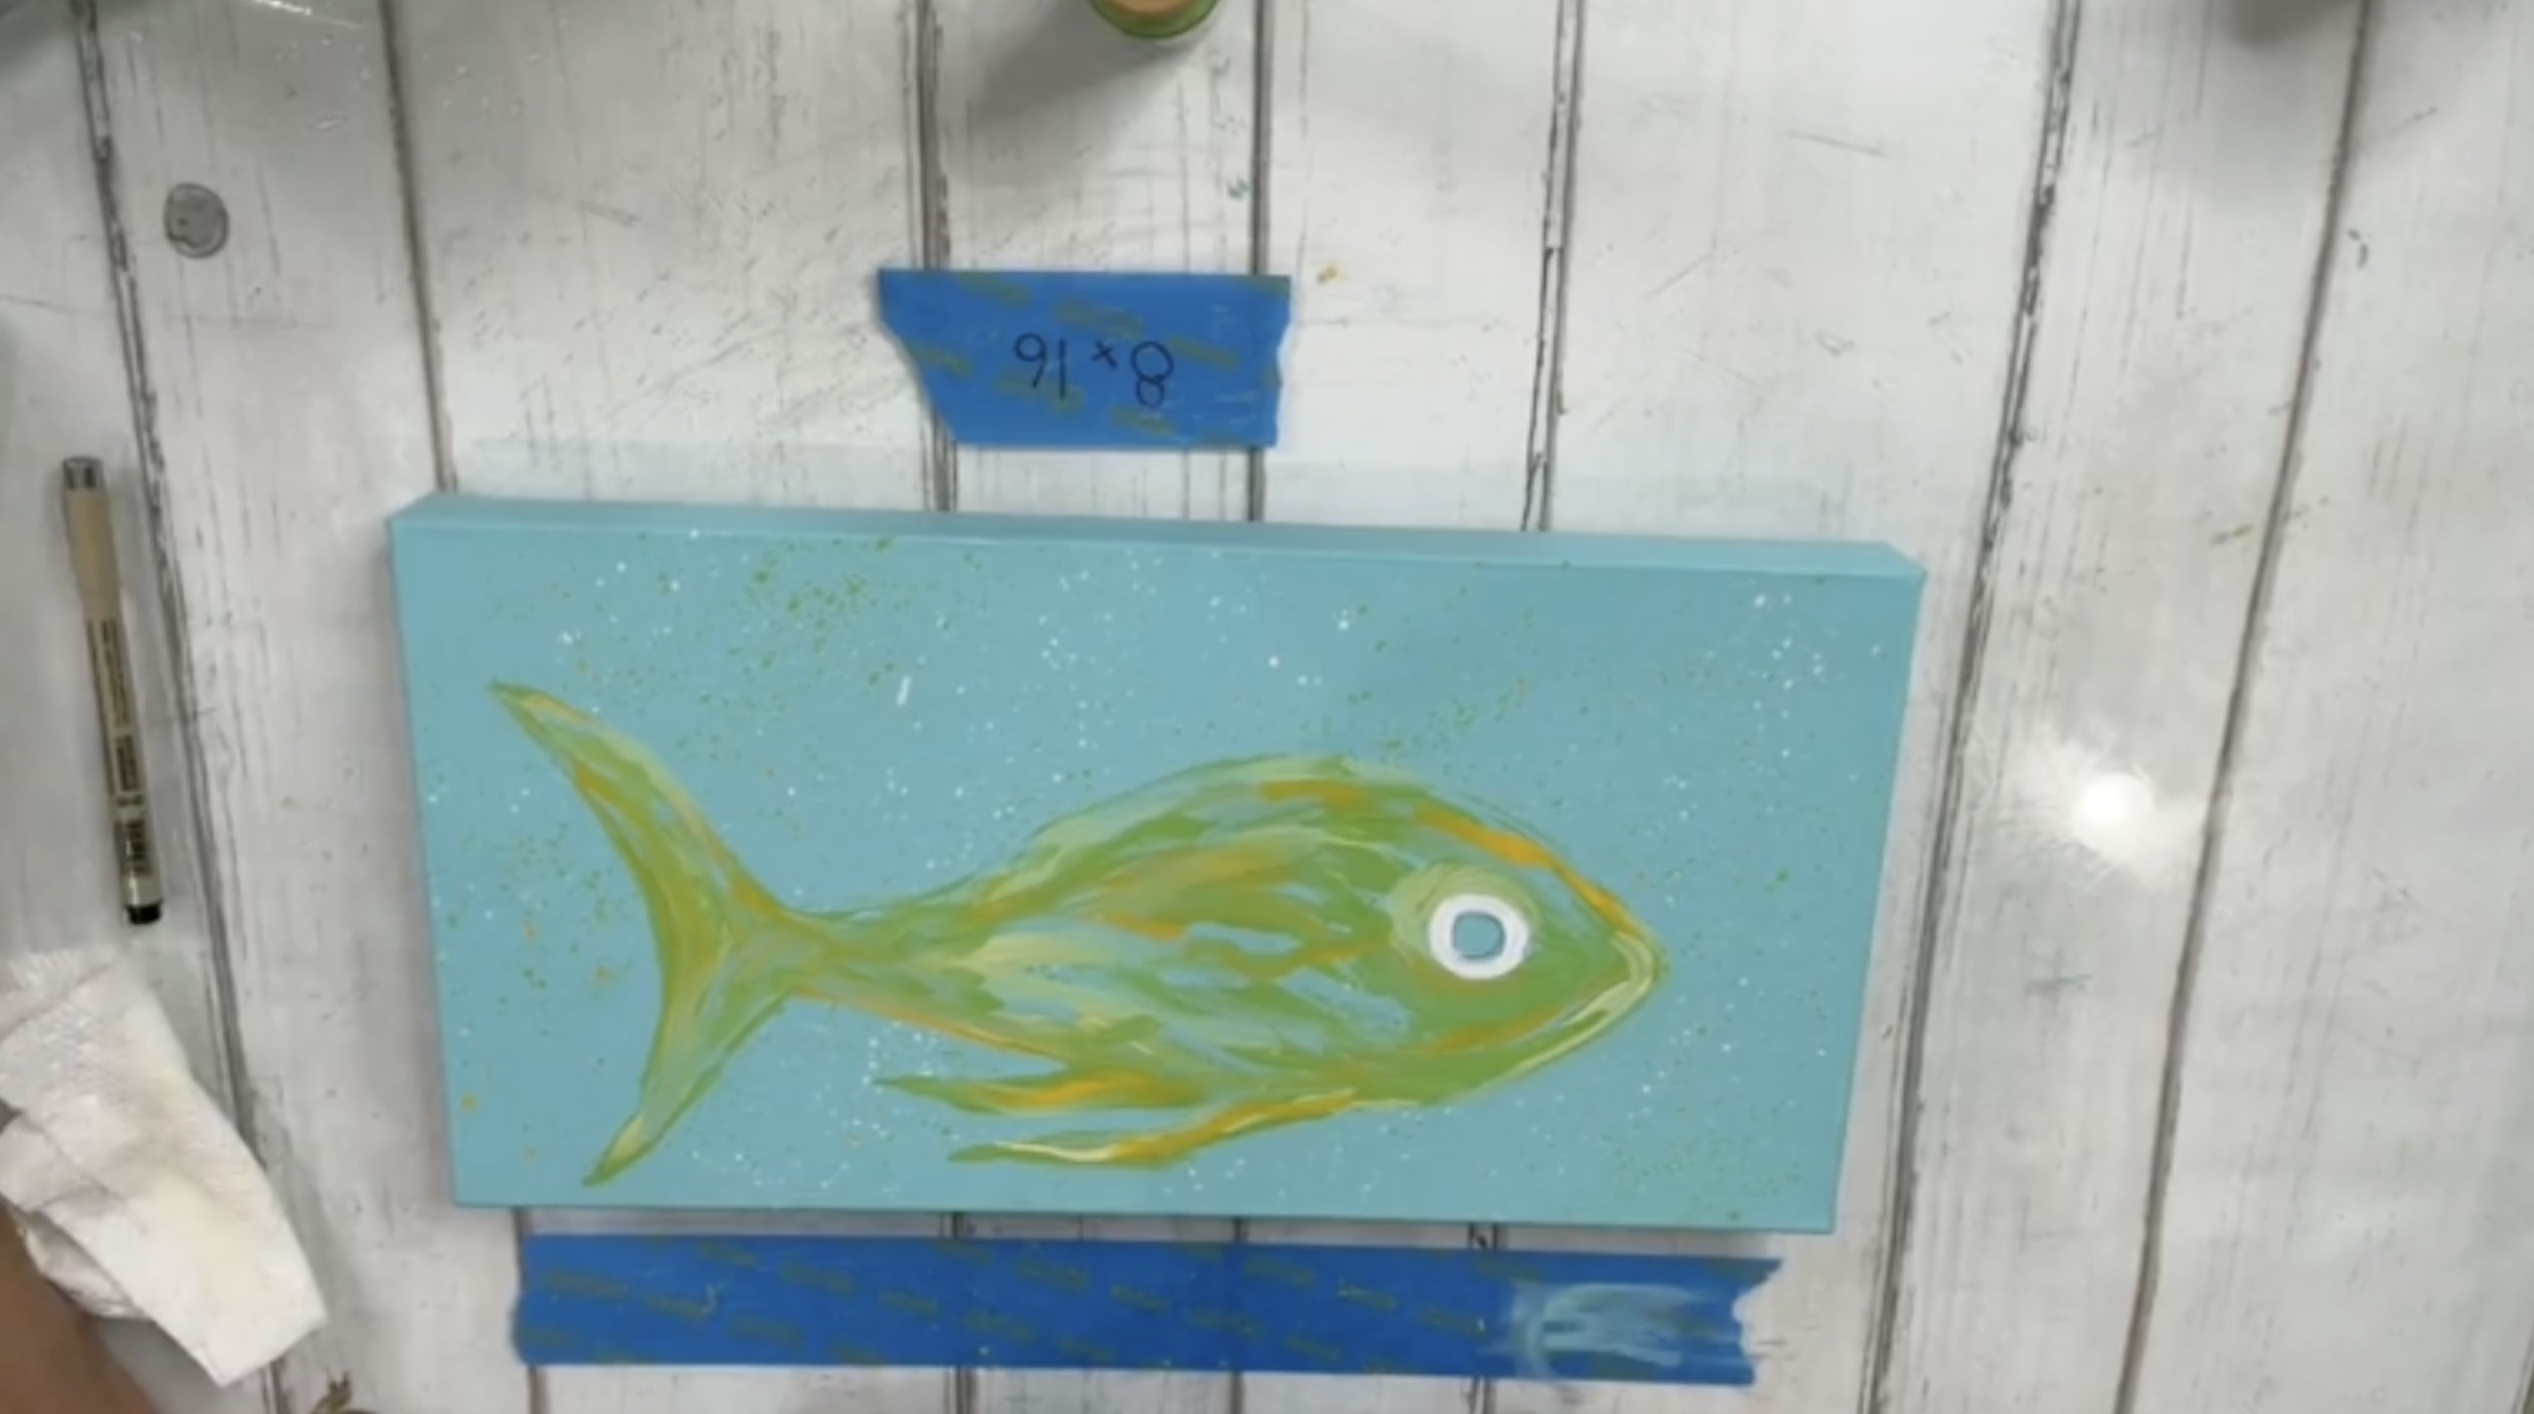
Step 3: Paint the Fish Base Colors
Using Sour Apple green, loosely paint around the fish outline and pull the color inward. Then layer in Golden Yellow and touches of Bahama Blue.
Do not worry about painting neatly. This fish looks best with loose brushstrokes and layered color. Keep some background blue showing through in places to create movement and interest. Paint around the eye with White so it stands out.
Step 4: Build Dimension with Layers
Continue layering green, yellow, blue, and lighter versions of those colors by mixing in white. Use soft, imperfect strokes and overlap the colors. This creates a painterly look that makes the fish feel lively and dimensional. The more layered and organic the color transitions are, the better your abstract fish painting will look.
Step 5: Add Dragon Fruit Pink for a Tropical Pop
Lightly mix pink with white to soften it, then drag and twist the brush across areas of the fish face, belly, fins, and body. Add just enough pink to brighten the design without overwhelming it. This pink detail transforms the project and gives the fish a vibrant tropical personality.
Step 6: Outline the Fish Details
Once dry, use a black paint pen or illustration pen to fill in the eye and outline the fish details. Add sketchy lines around the mouth, fins, smile line, and body sections. Keep the lines loose and artistic instead of perfectly clean. Use a little white paint to highlight the top edge of the fish and lips for added contrast.
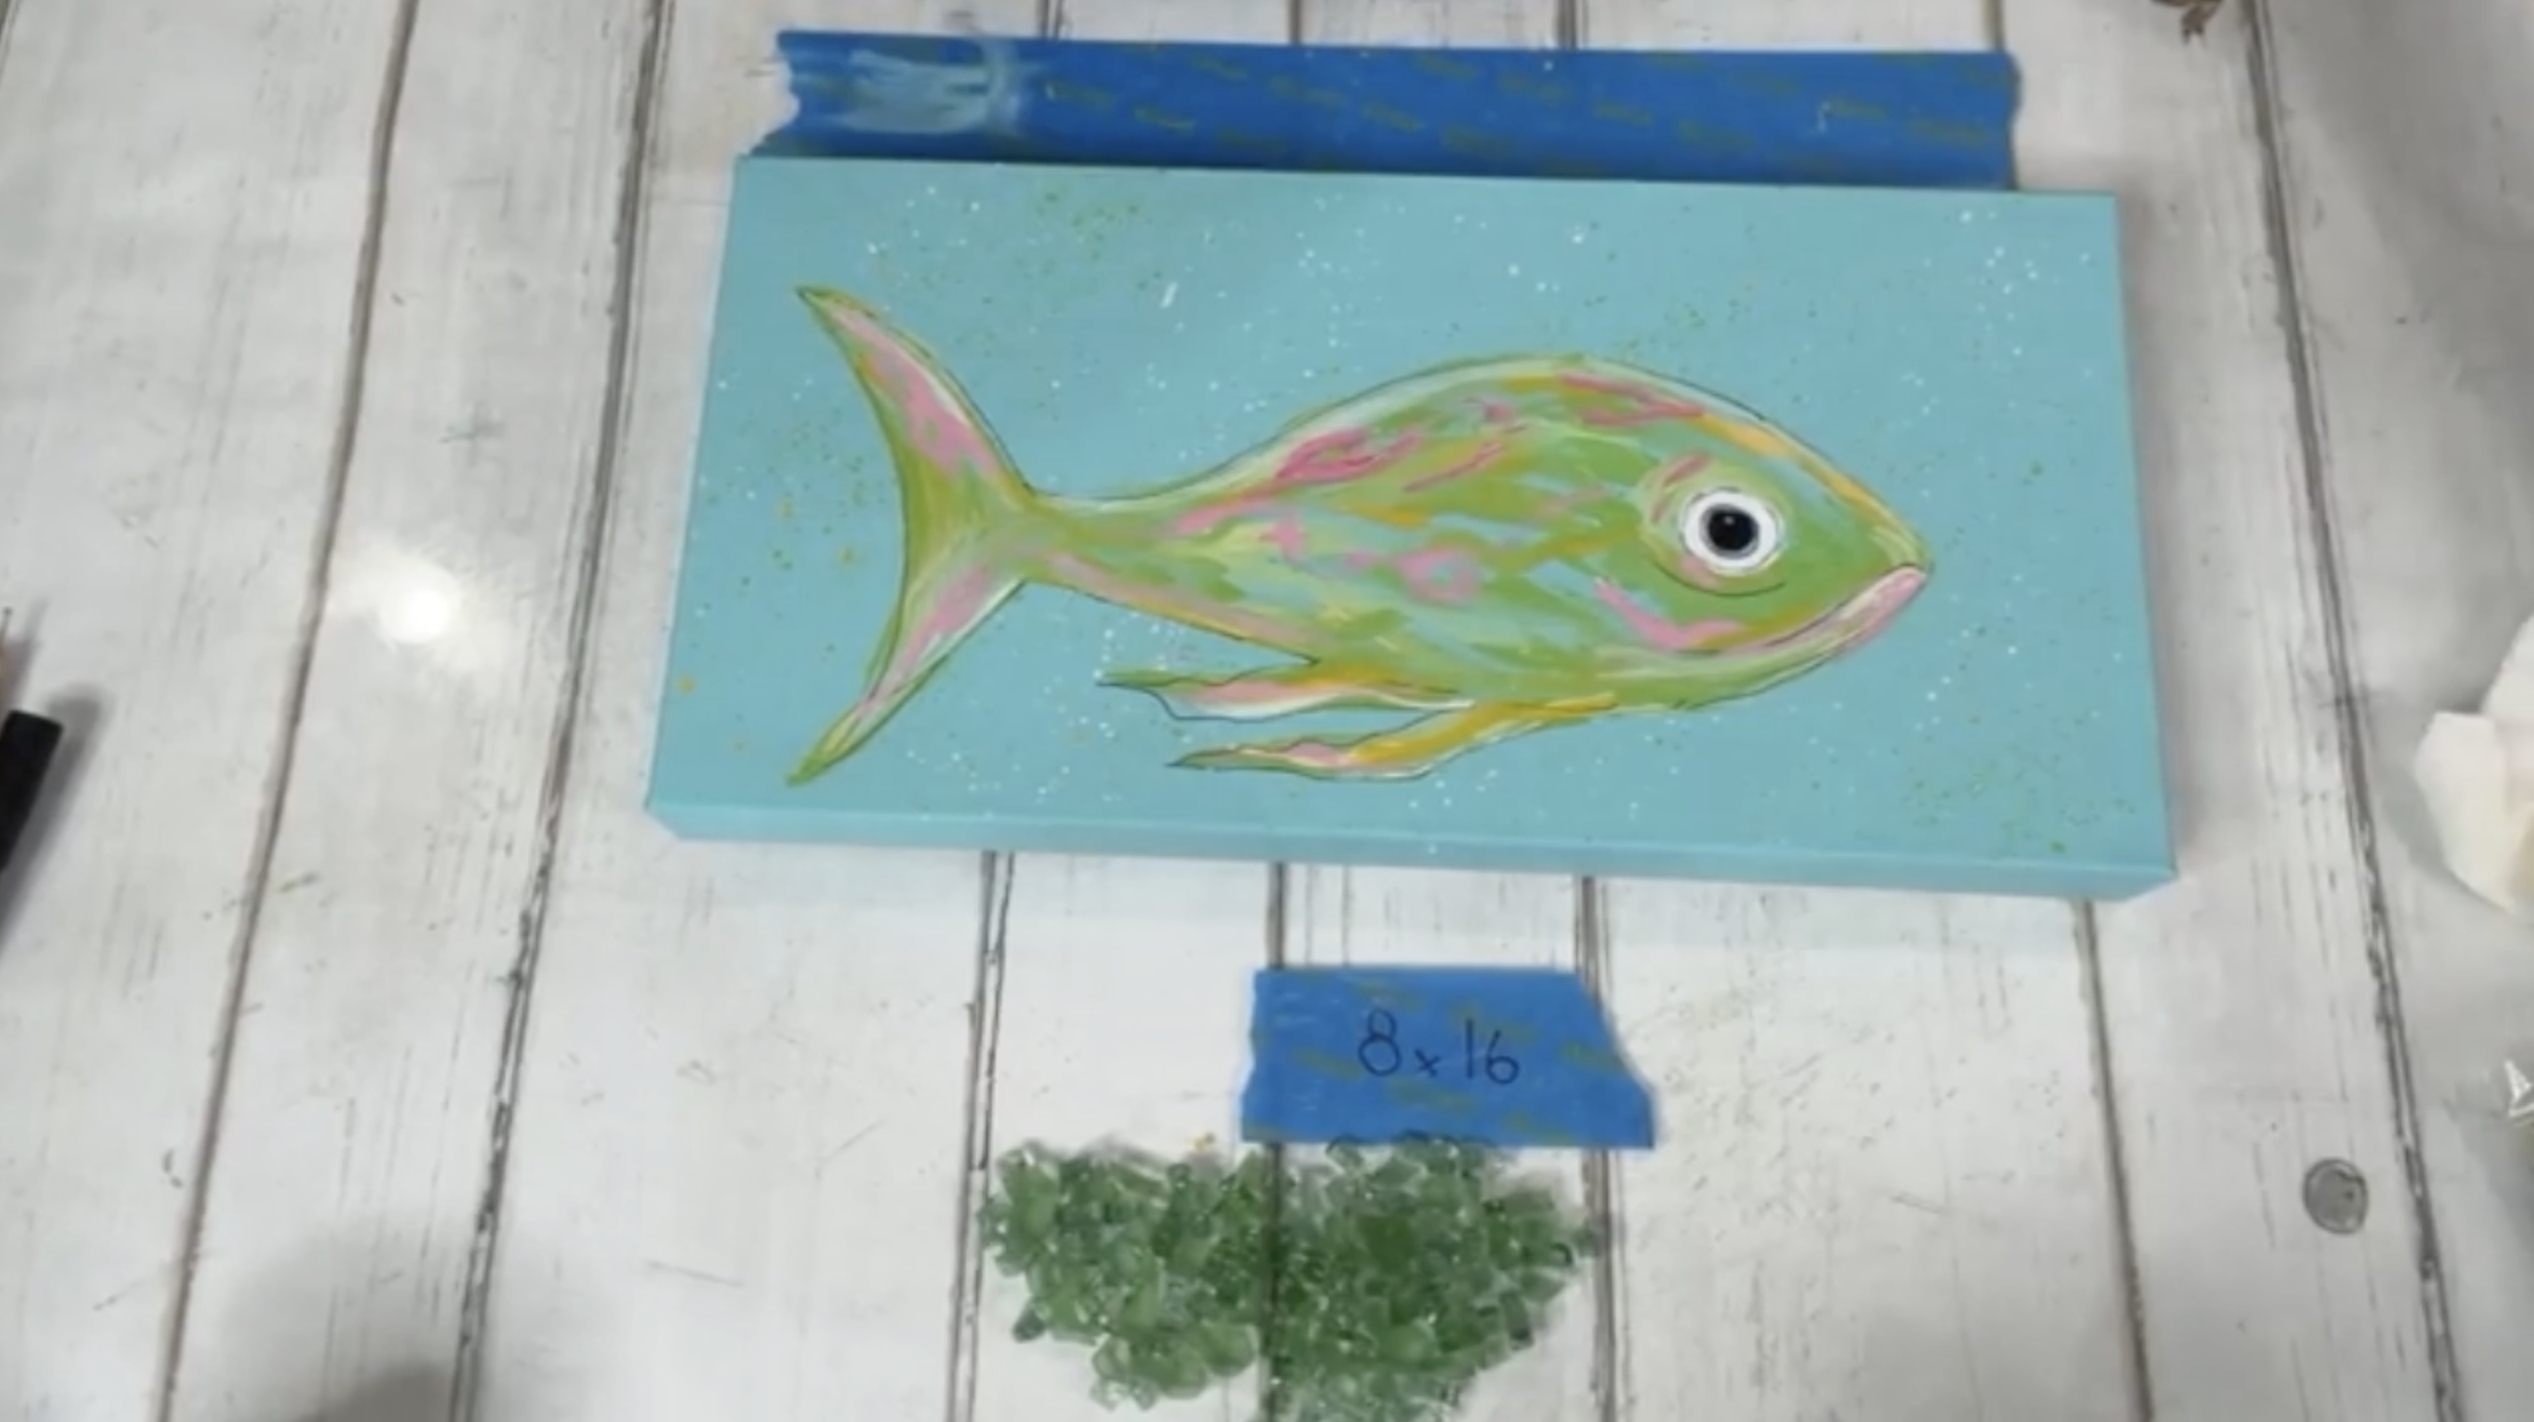
Step 7: Add Glass
Scatter a thin layer of green classic glass over the fish body, avoiding the eye and mouth. Concentrate the glass around the body, fins, and tail while leaving space for larger decorative chips. This first layer adds shimmer and texture to your glass fish canvas art.
Now place glass chips in blues, greens, yellows, and pinks throughout the fish body. Use larger chips in the center and smaller chips to fill gaps. Keep placement random so the fish feels natural and playful. These colorful chips become the star of the project once resin is added. Place a clear acrylic bubble or glass gem over the eye area.
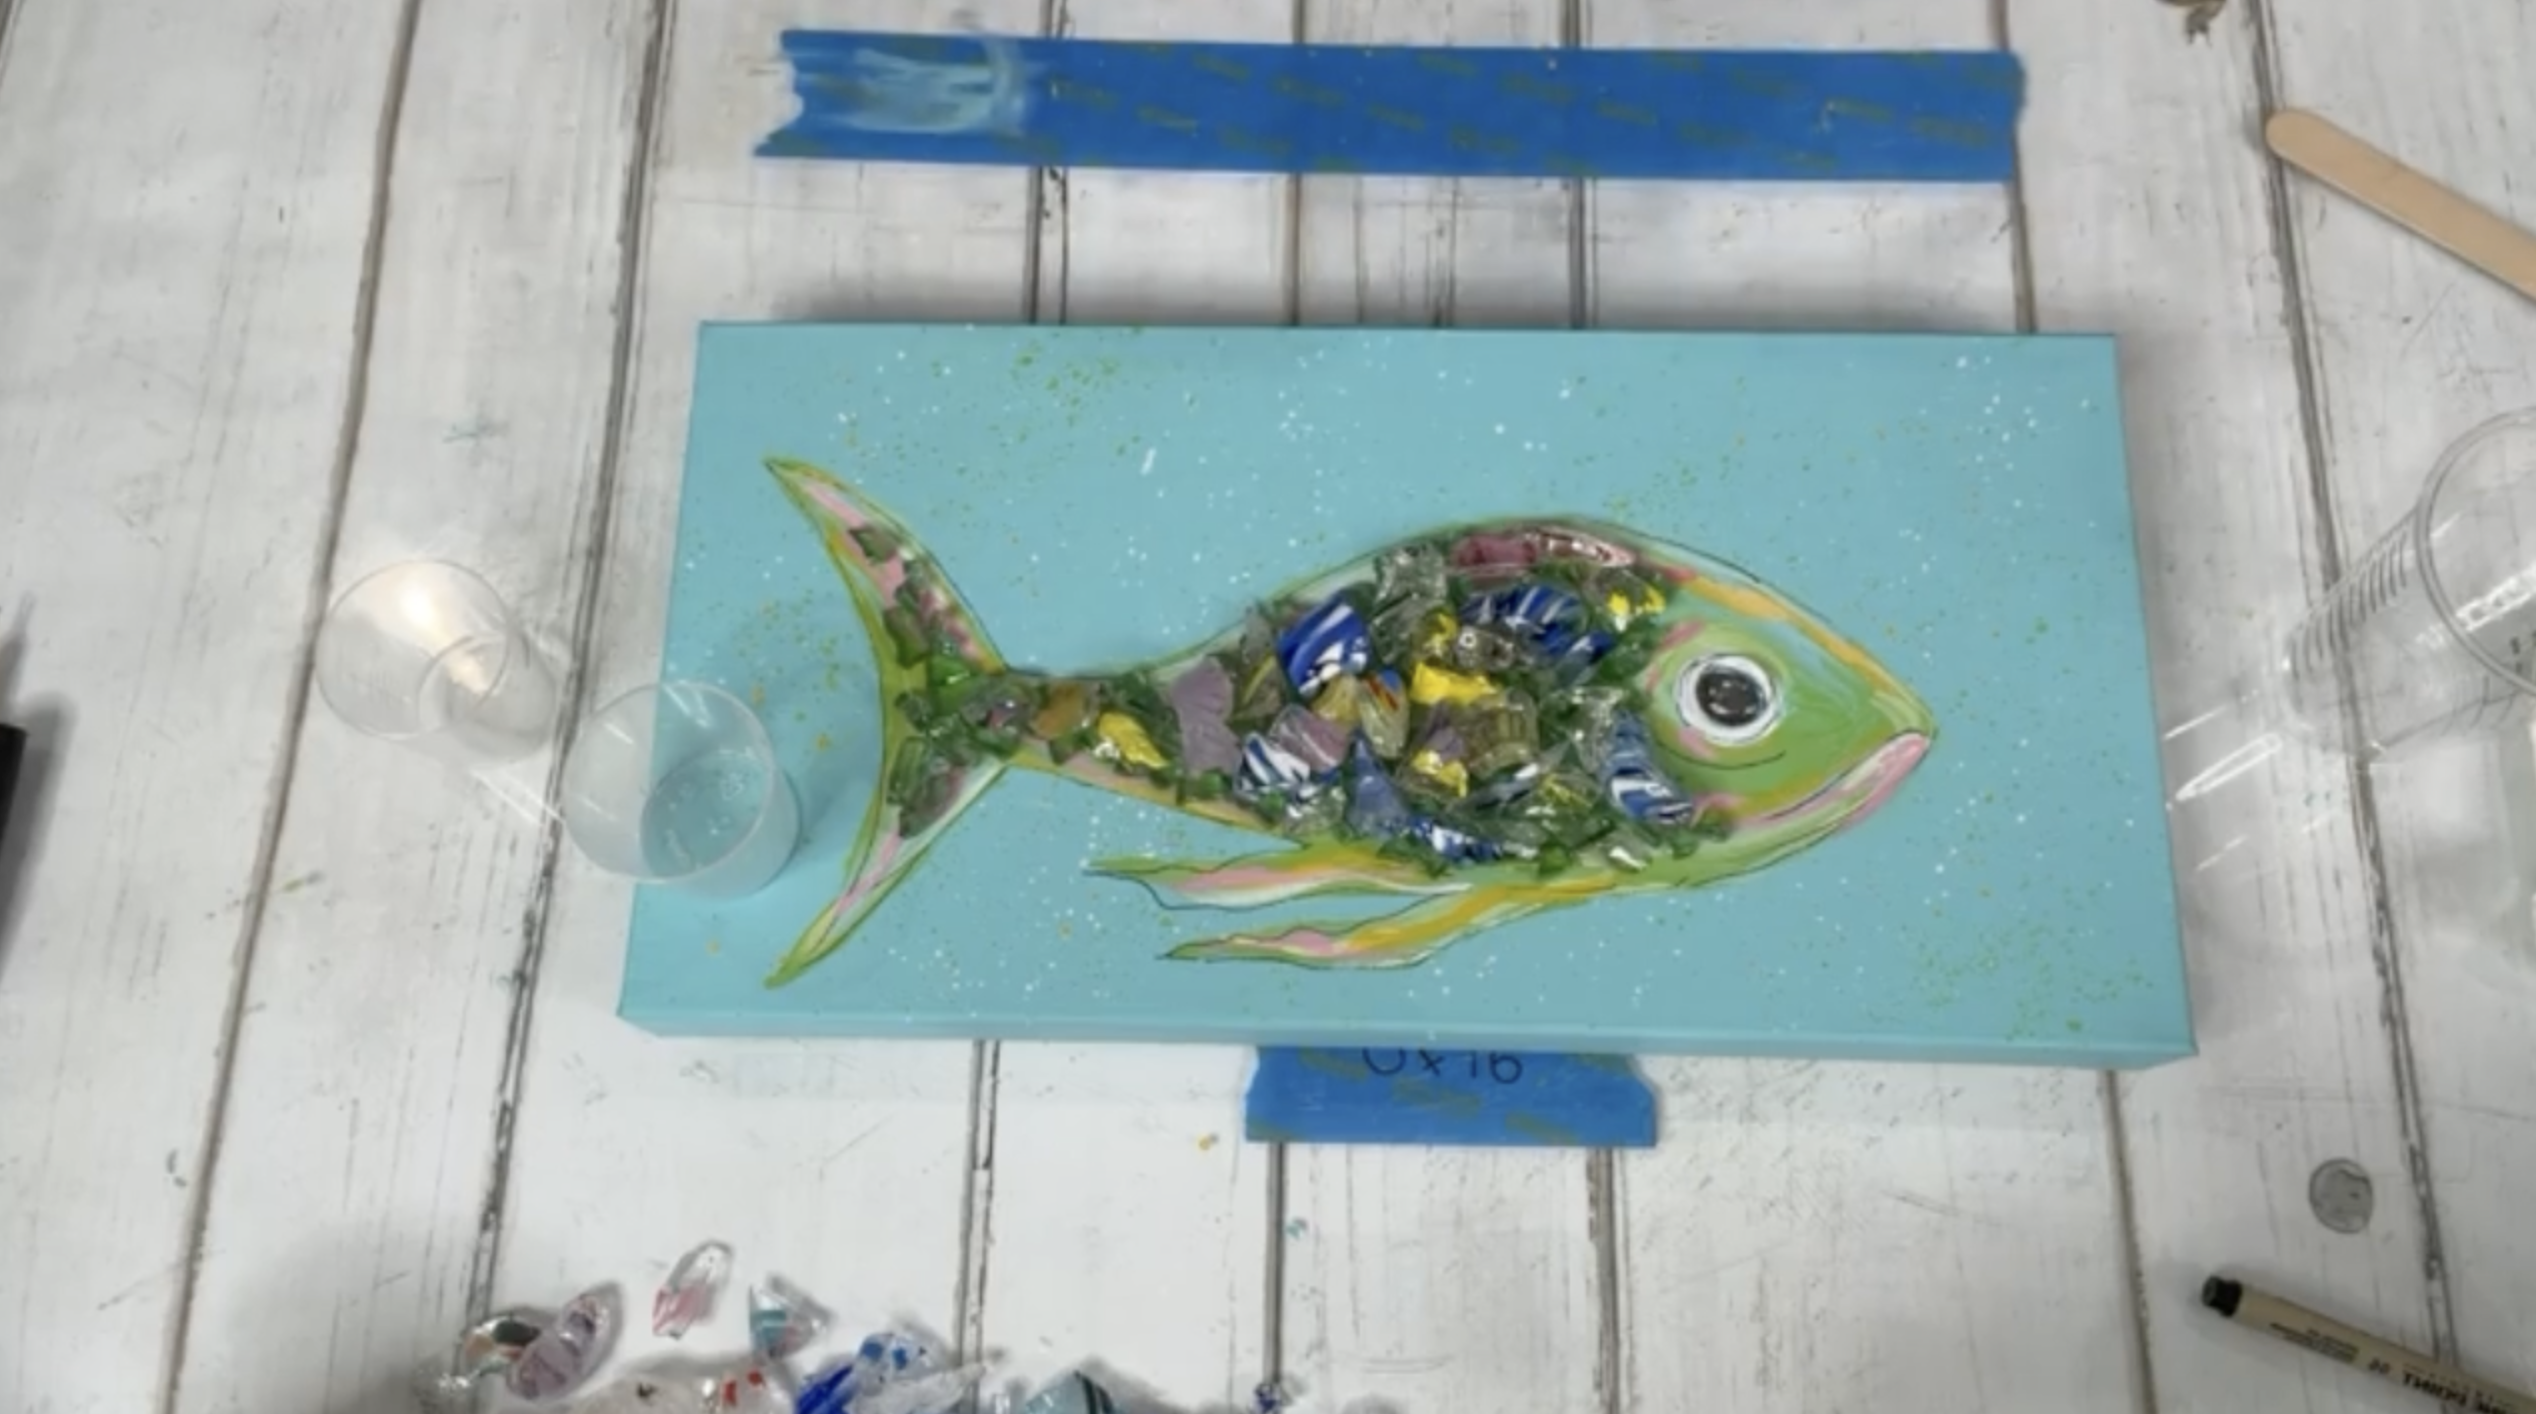
Step 8: Mix the Resin
Mix 3 ounces total of Art Resin, using:
- 1½ ounces resin
- 1½ ounces hardener
Stir slowly for 3 full minutes, scraping the sides and bottom of the cup thoroughly. Proper mixing is essential for a clear, glossy finish on your resin fish art project.
Step 9: Apply Resin to the Artwork
Drizzle resin over the fish, making sure every piece of glass is fully coated. Use a stir stick or gloved hand to spread resin evenly across the canvas surface. The resin will deepen the paint colors, brighten the glass, and create a wet glossy shine.
Use a heat gun carefully over the resin surface to pop bubbles. Check for empty spots and add more chips if needed, then cover with additional resin. Add the acrylic bubbles last and secure them with a little resin. Allow the project to cure fully according to resin directions.
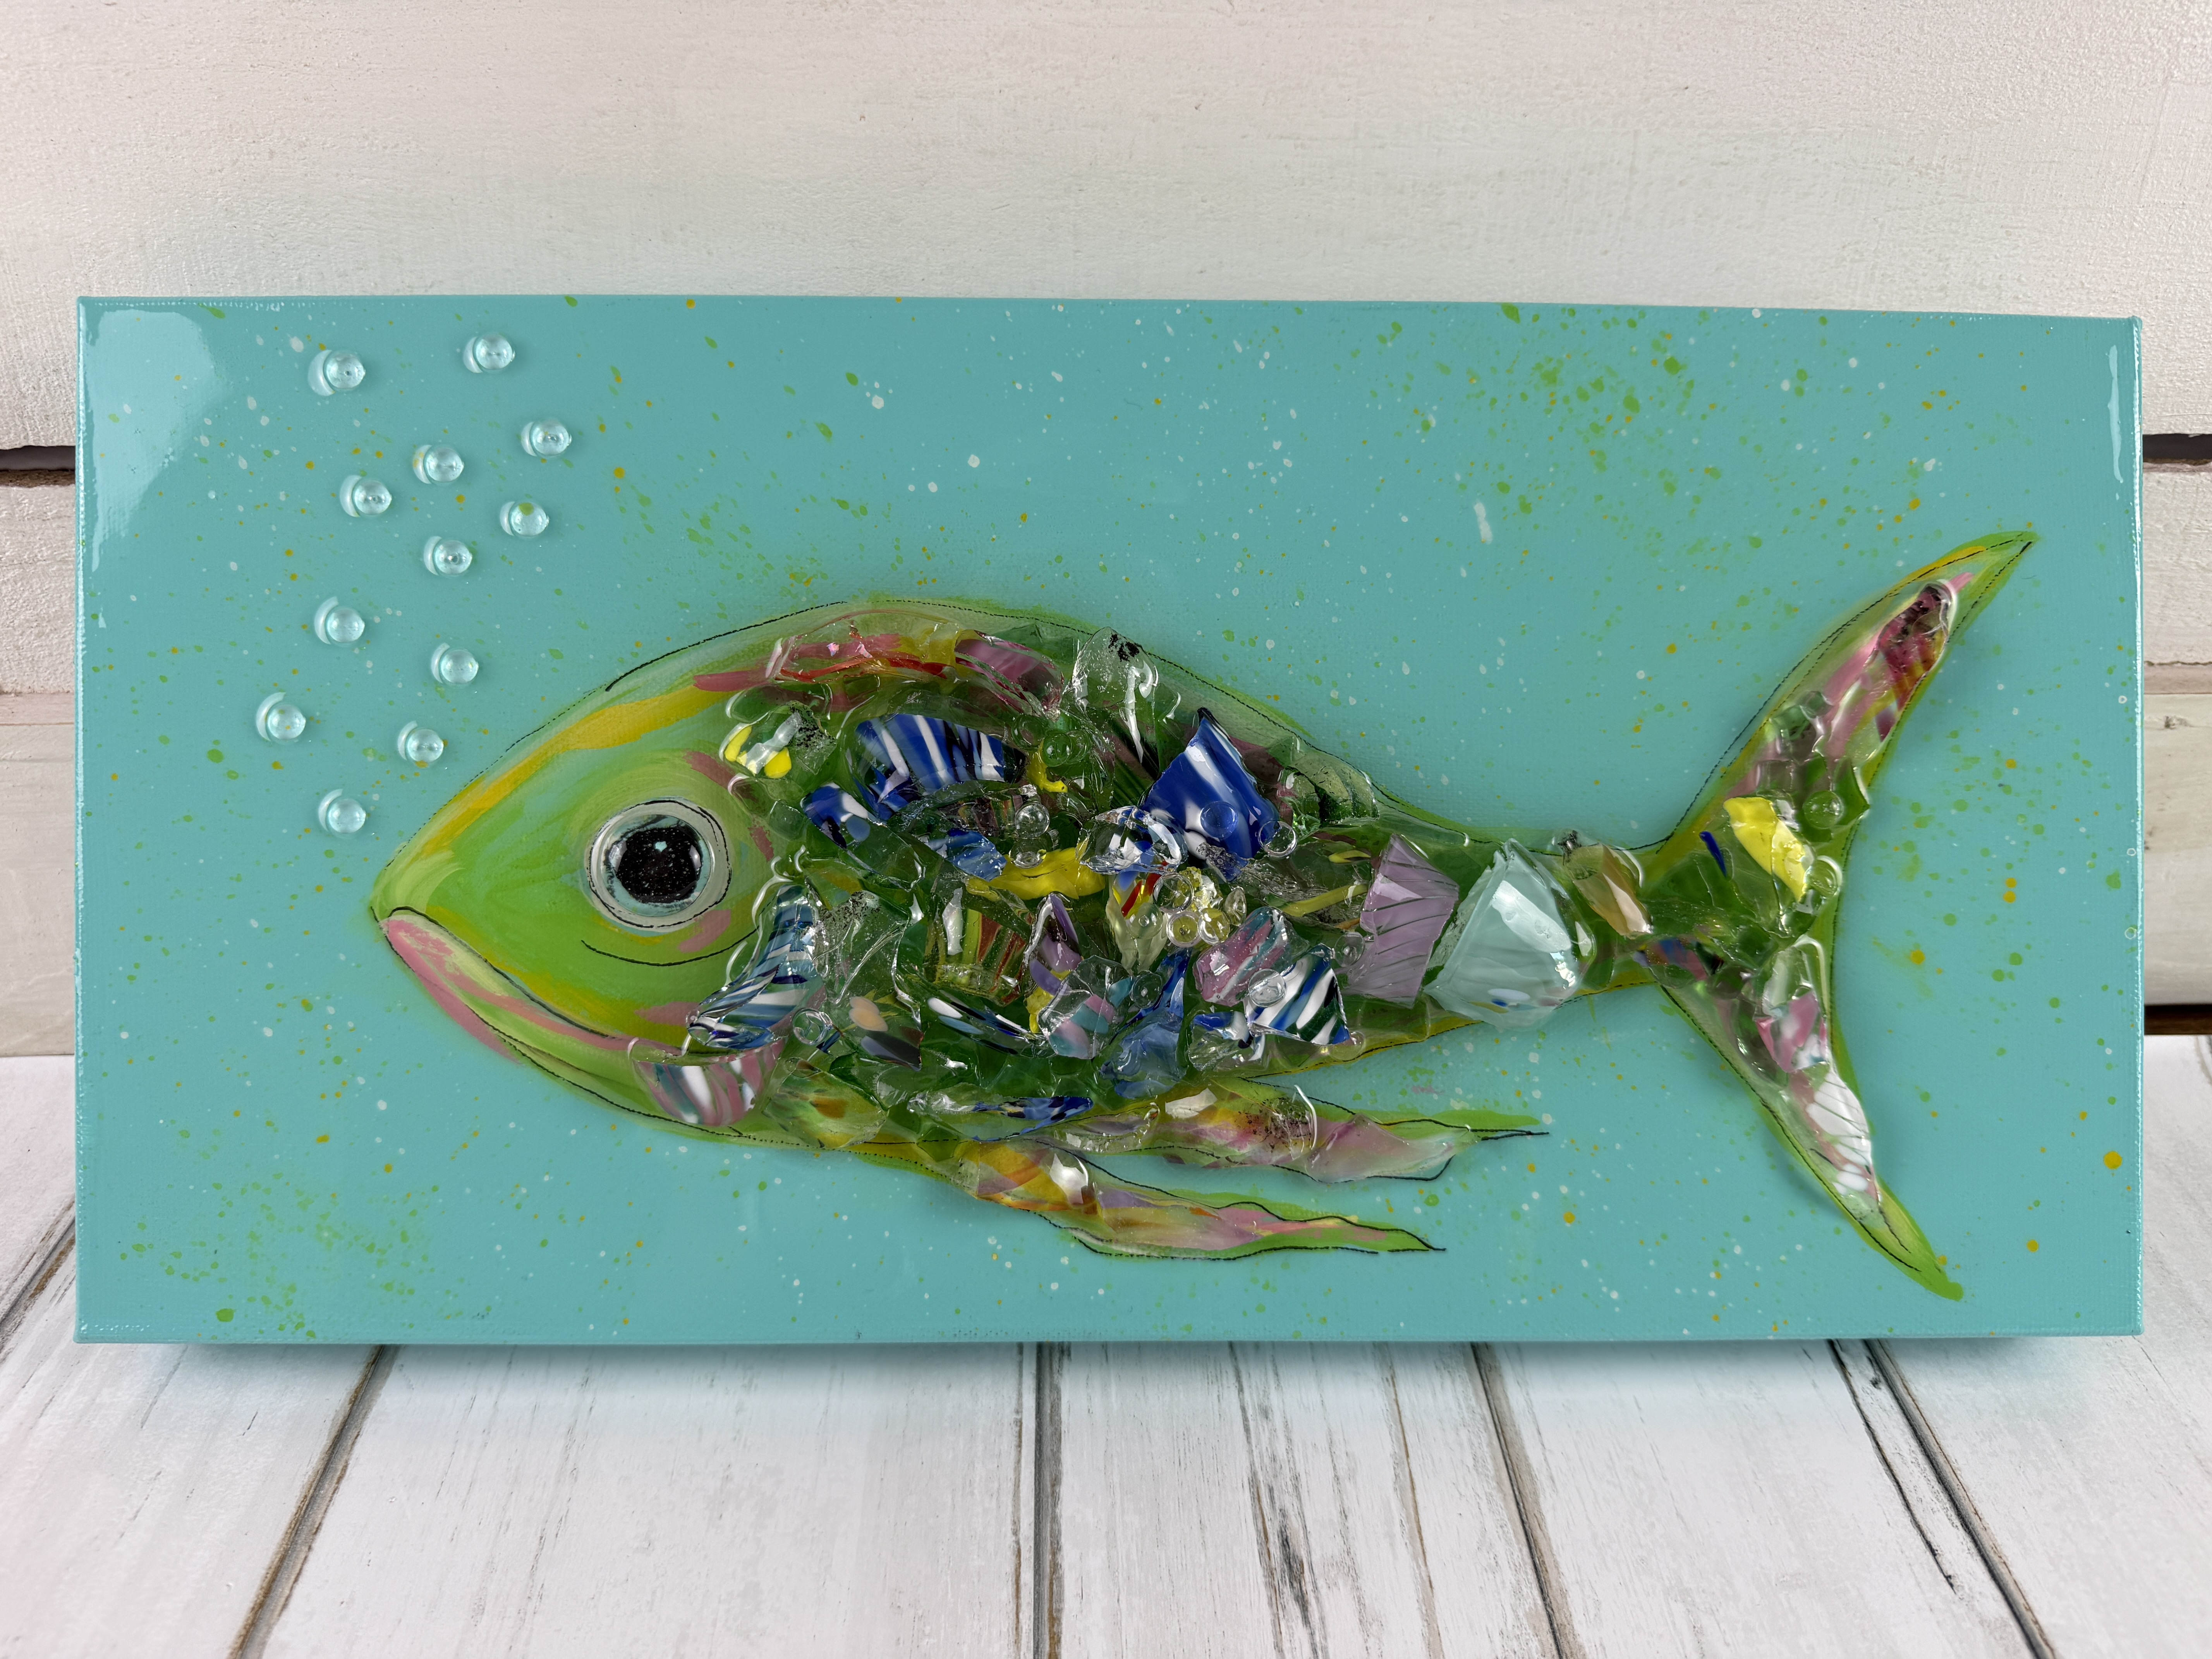
This colorful glass fish canvas art tutorial creates a bright coastal statement piece perfect for beach homes, lake houses, bathrooms, sunrooms, or summer decor.
If you love fish art ideas, beach crafts, resin canvas projects, and coastal decorating, this is one project you will want to make again and again!
If you're a member of The Shattered Circle, you'll find this tutorial in your classroom under Art Shattered Weekly Facebook Lives, search for "Chippy Glass Fish".
If you don’t want to miss my Facebook LIVE art instruction, make sure you are on my texting list. I always text 10 minutes before I’m going to go LIVE, so you won’t ever miss it. You can text “Hey Cindy” to 901-519-2923.
Want more inspiration and artwork?
- My website artshattered.com with resources, shop, and more!
- My creative membership The Shattered Circle, where you can explore the world of glass art with online workshops, a supportive community, and more!
- My mini creative membership Just A ‘Lil Bit Monthly Glass Art Club, where you’ll get a new quick and easy online tutorial for just a lil' bit of sparkle in your life!
- My Facebook page where I go LIVE every Wednesday night.
- My YouTube channel which has tons of free art lessons right at your fingertips.
