
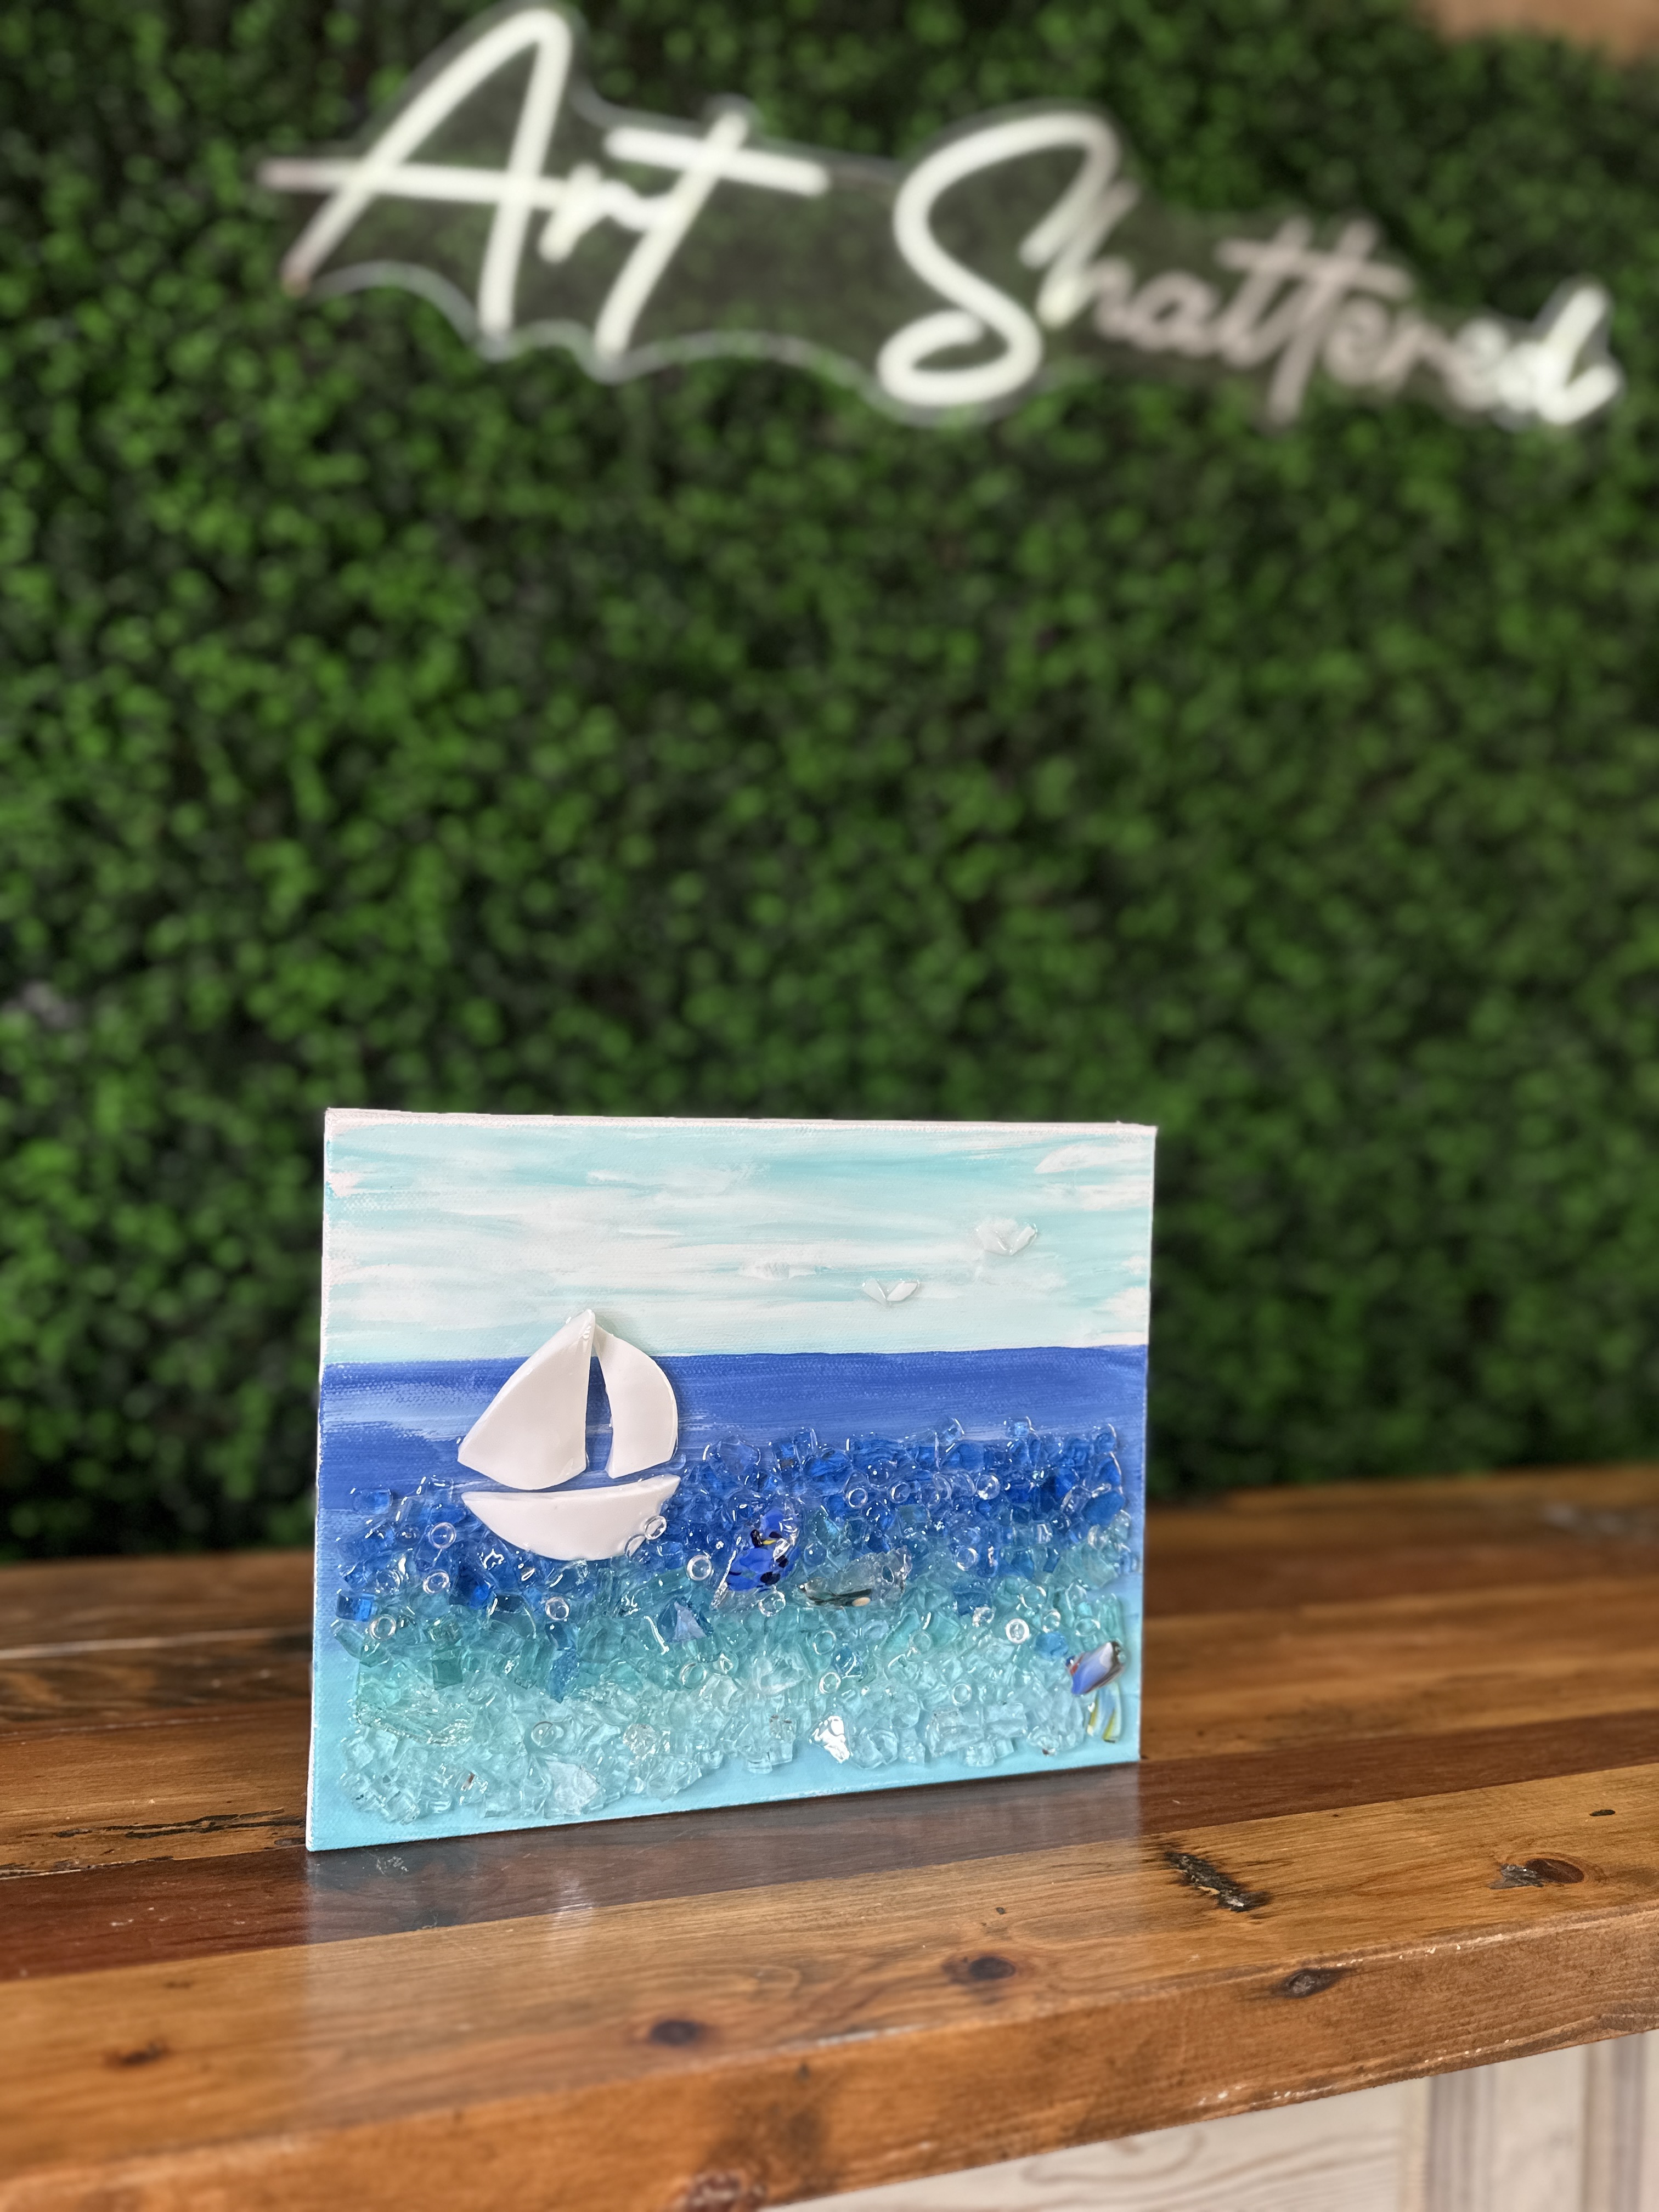
Come Sail Away ⛵️
One of my favorite things about creating mixed media art is finding beauty in unexpected places. A while back, I dropped a ceramic bowl and instead of heading straight for the trash, I noticed the broken pieces had cracked into perfect little triangles. Right away, I saw sailboats. I tucked the shards away, knowing they’d eventually become the star of a new project.
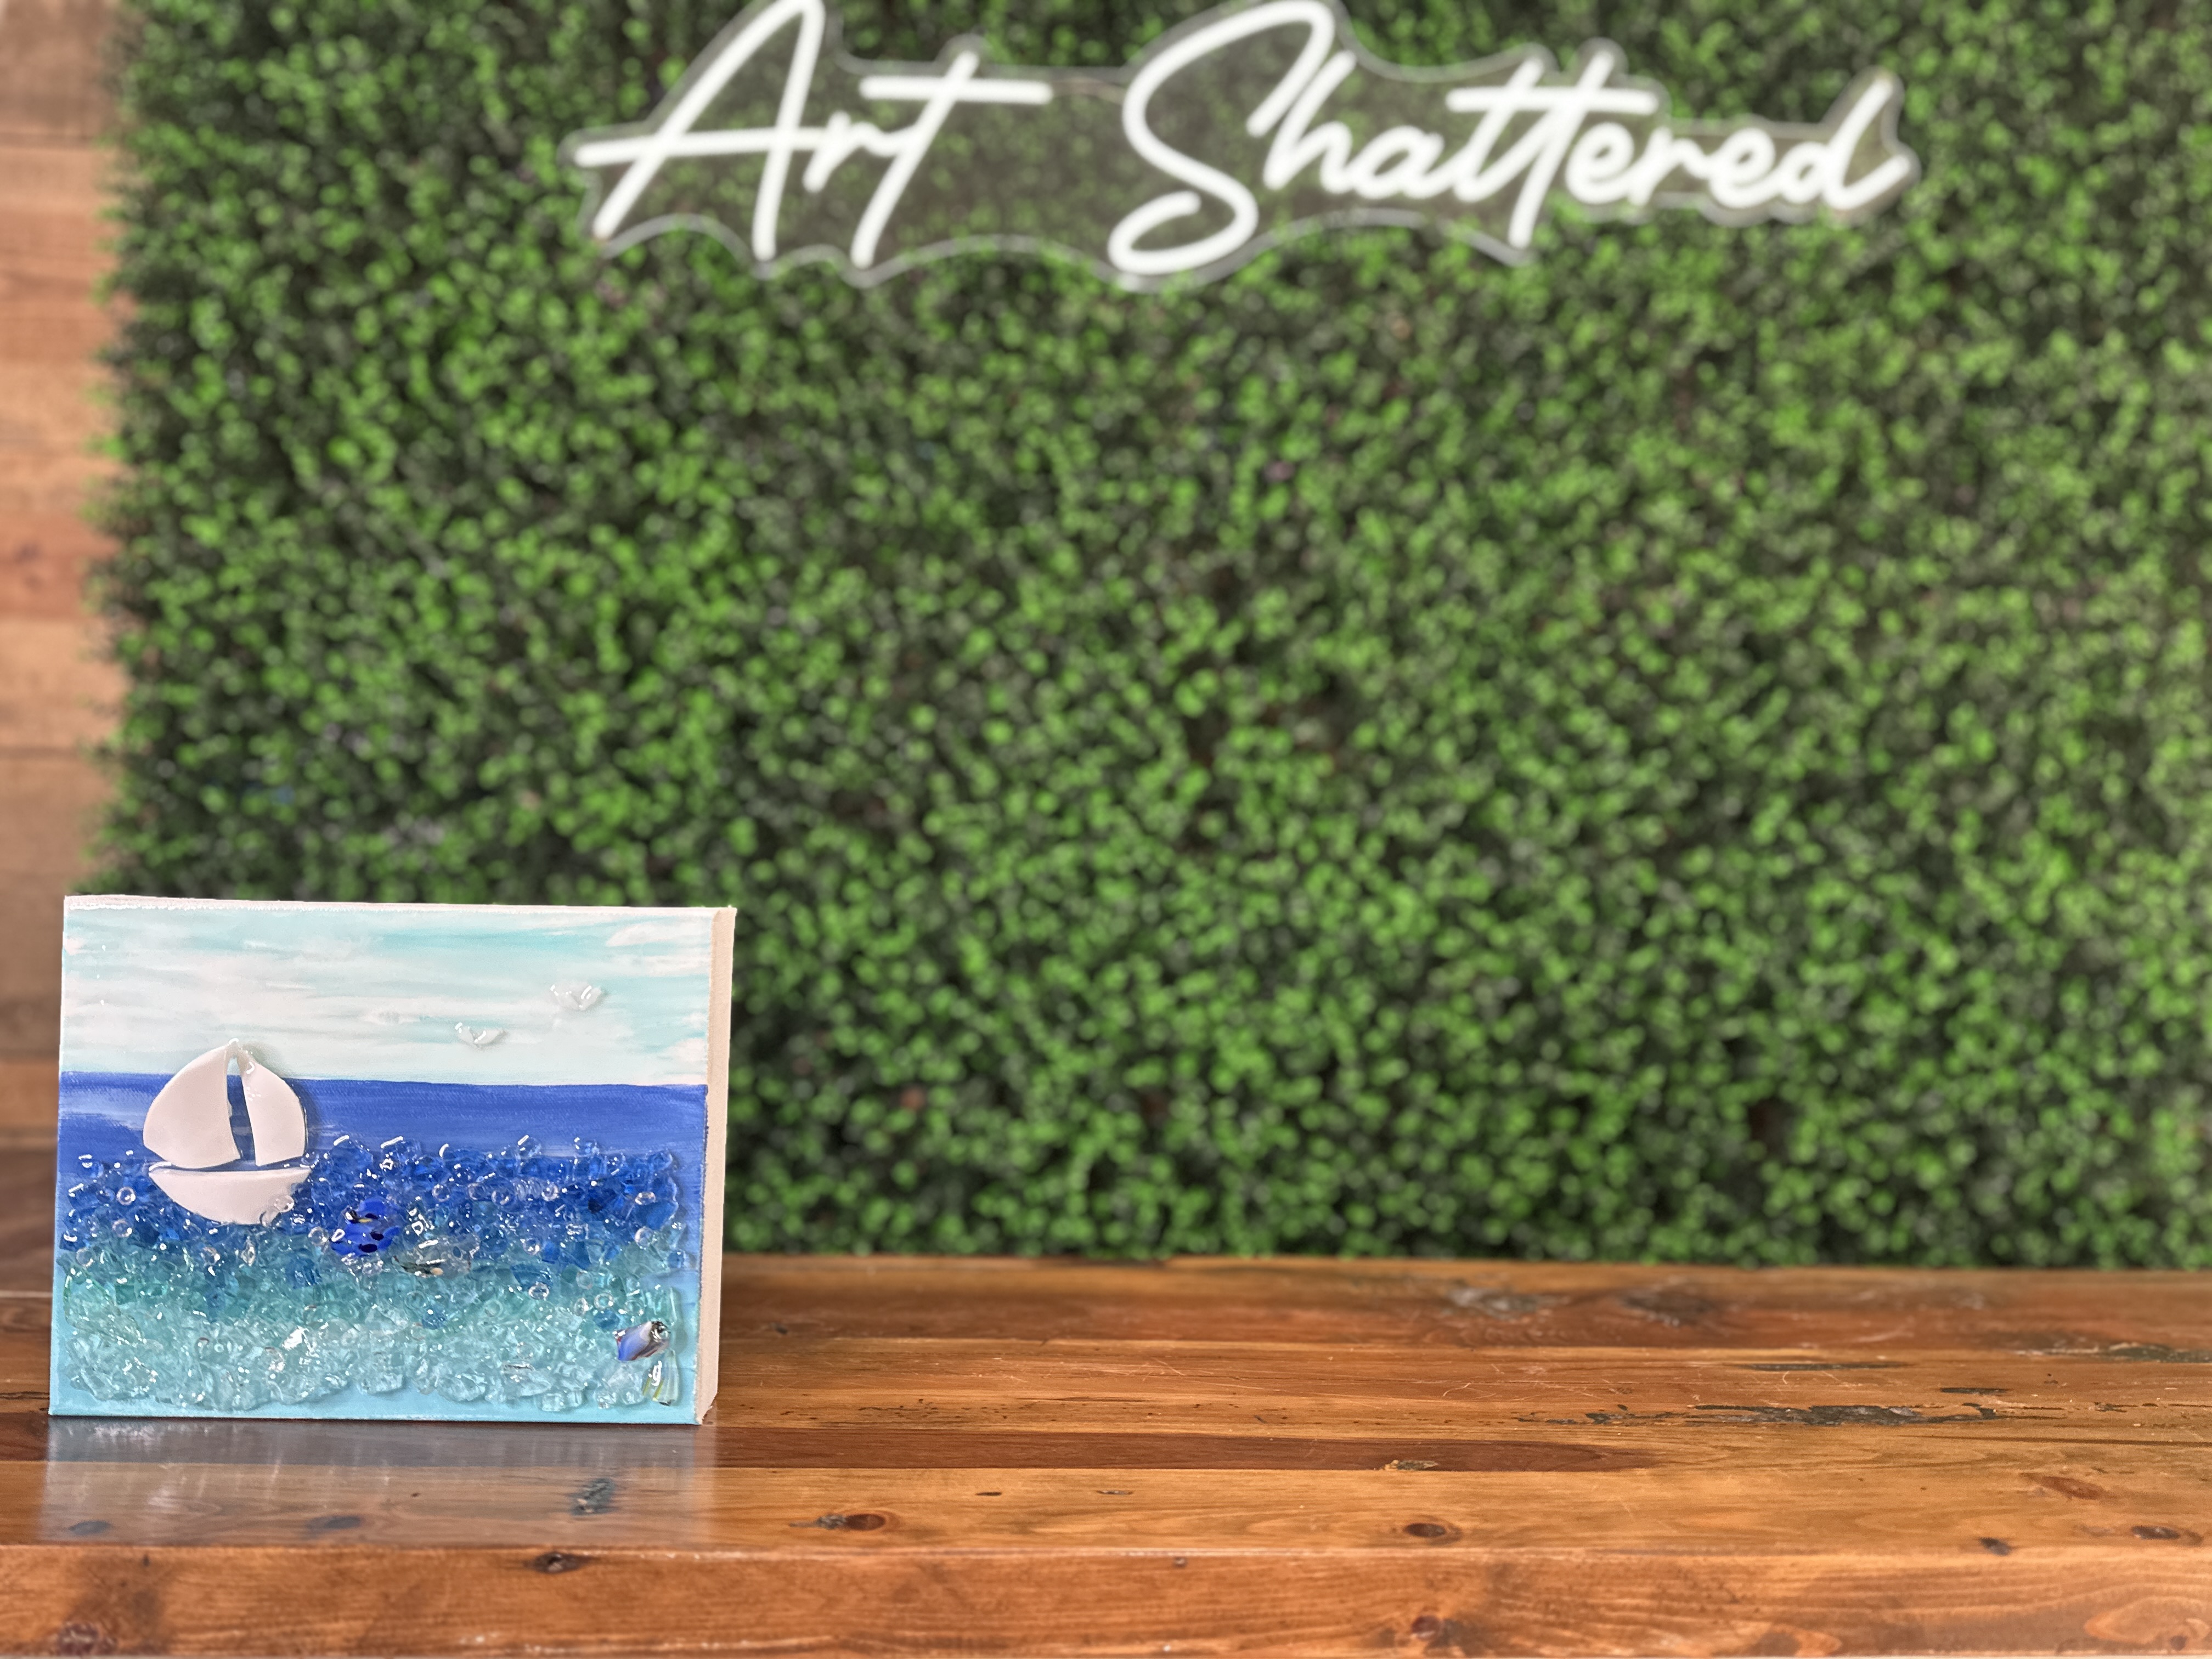
Today, I’m pairing those pieces with a simple painted background, a bit of glass, and a layer of resin to make a coastal sailboat scene that’s charming, dimensional, and beginner-friendly.
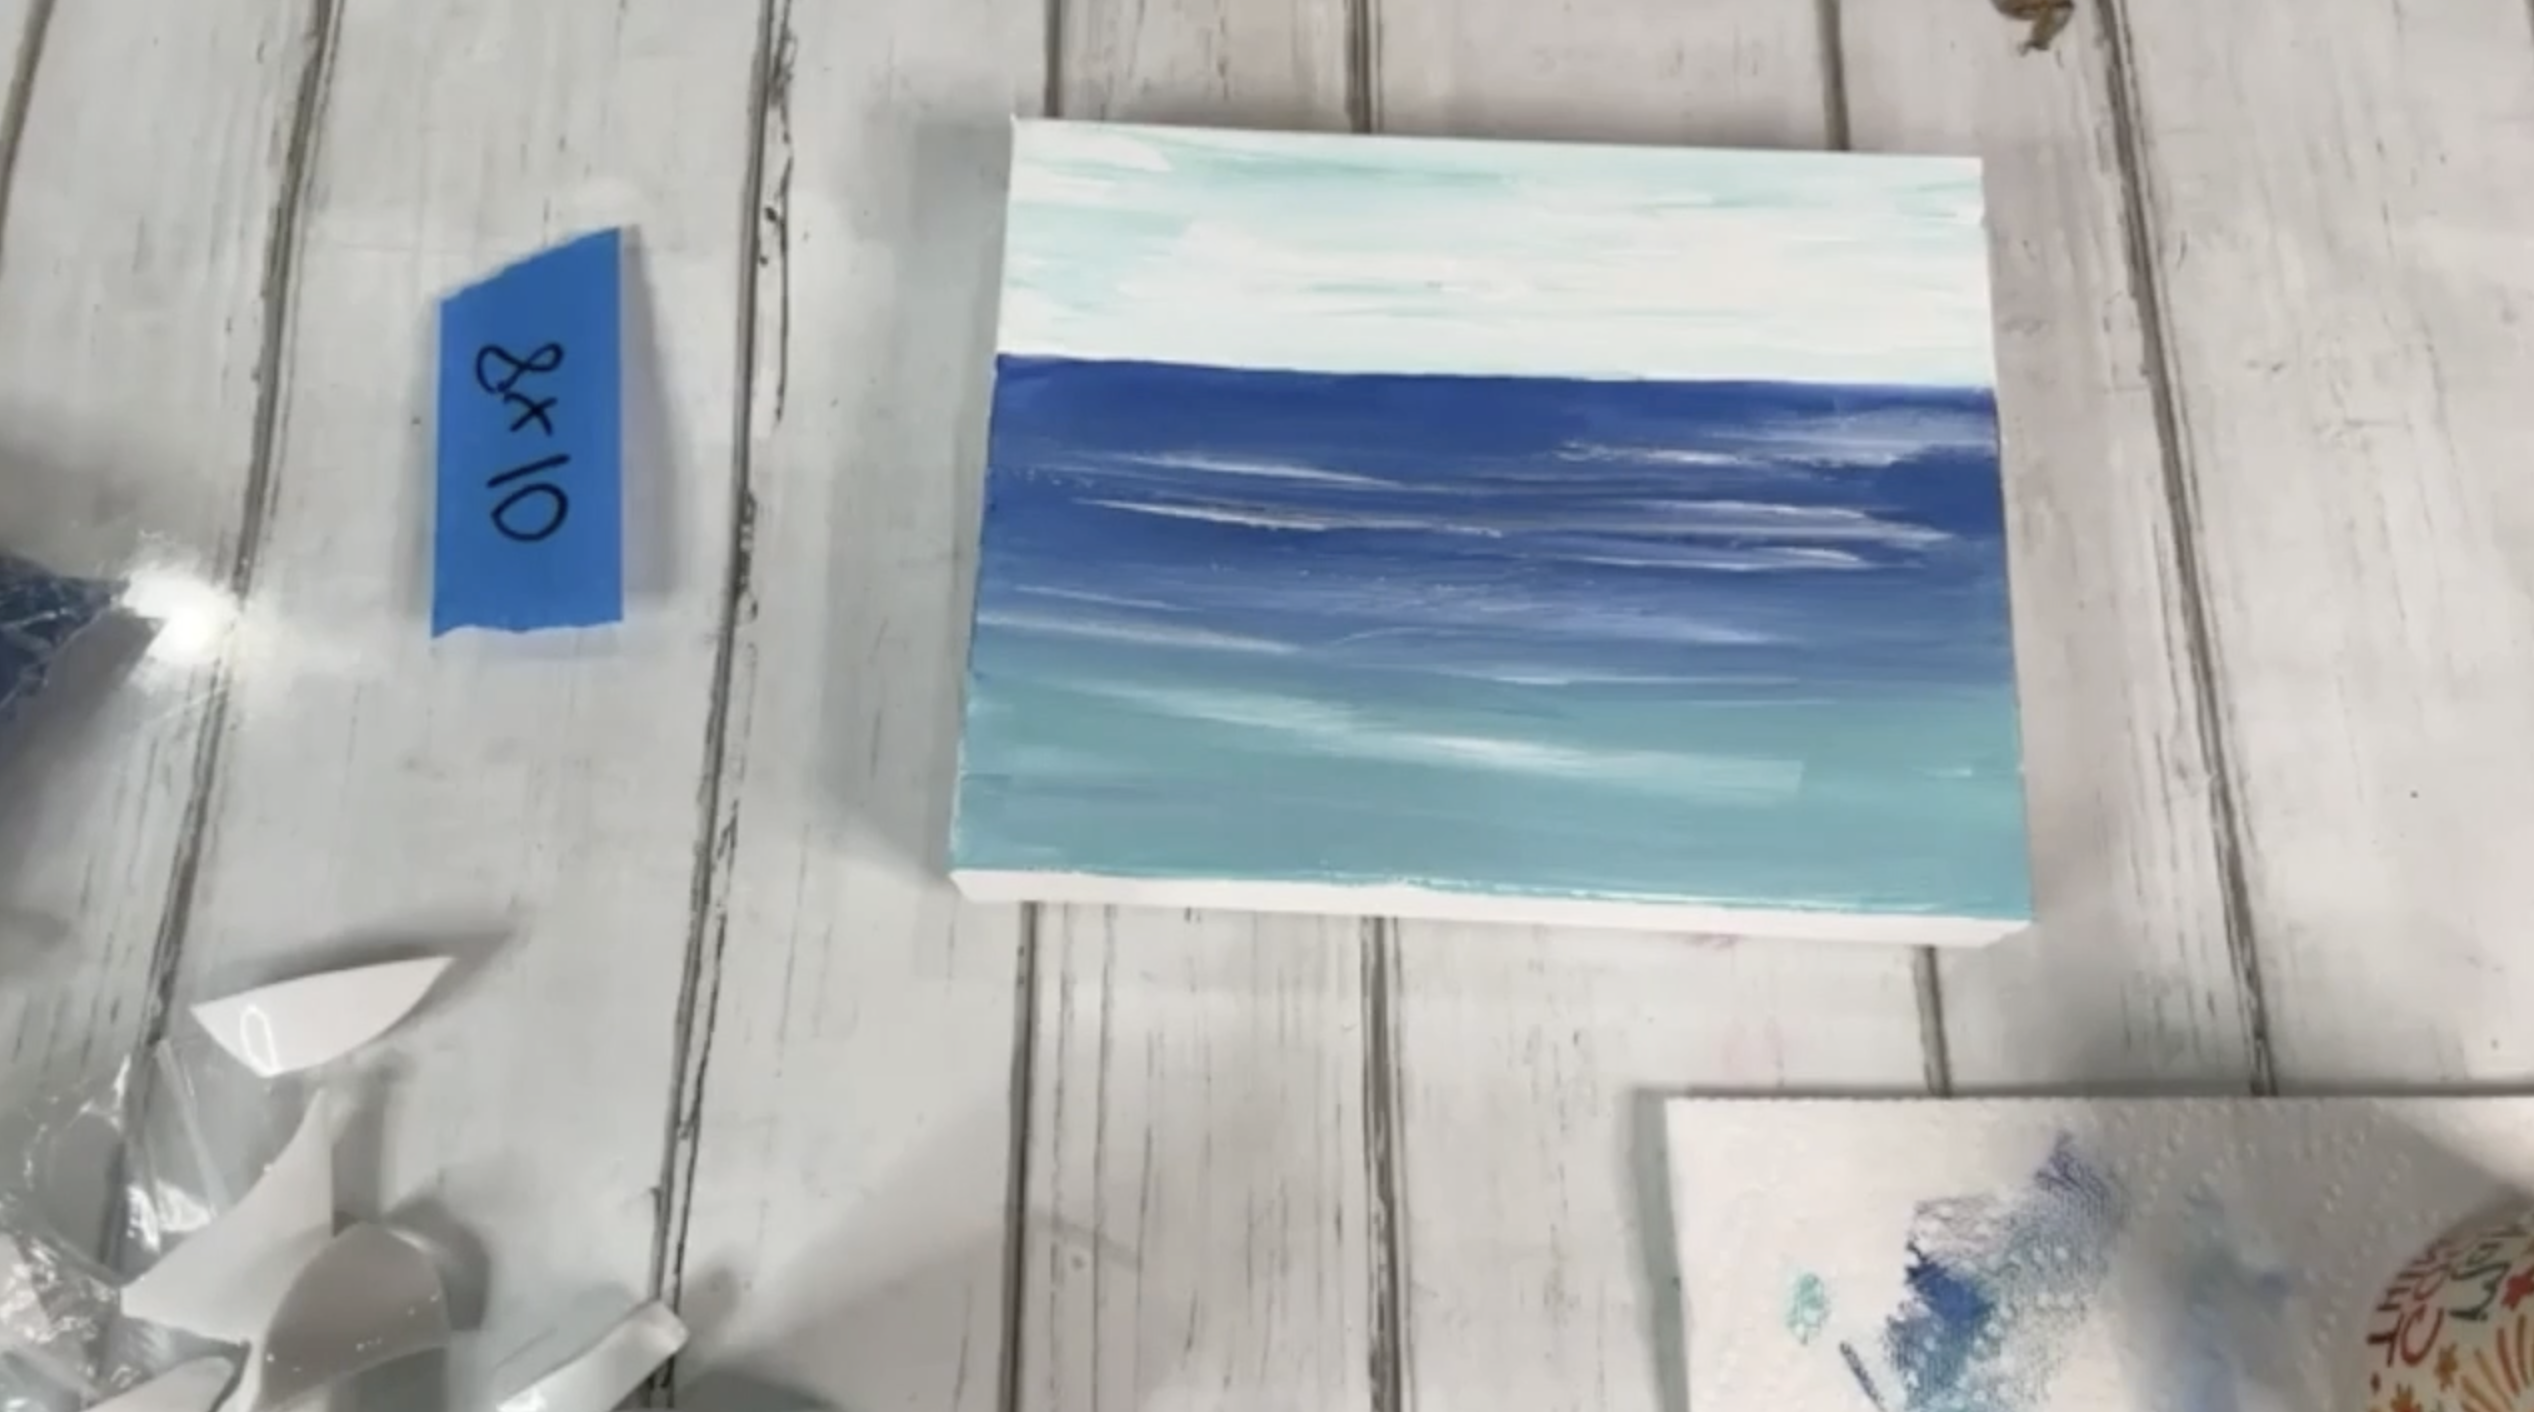
Step 1: Create Your Background
Begin by dividing your canvas so that the top third will be your sky and the bottom two-thirds your ocean. Paint the top section with white and gently blend in a touch of Bahama Blue to create a soft, airy sky. Keep some of the white peeking through for depth and lightly scrub in clouds with more white.
For the ocean, start at the horizon line with Stormy Blue. If you want a very straight line, you can tape it off, but don’t worry too much about perfection. Blend Stormy Blue into Bahama Blue as you move down the canvas, and then streak in some white across the lower portion to suggest waves. Keep your brush moving side-to-side to avoid hard lines, and let the colors blend naturally for a loose, abstract look. Let dry.
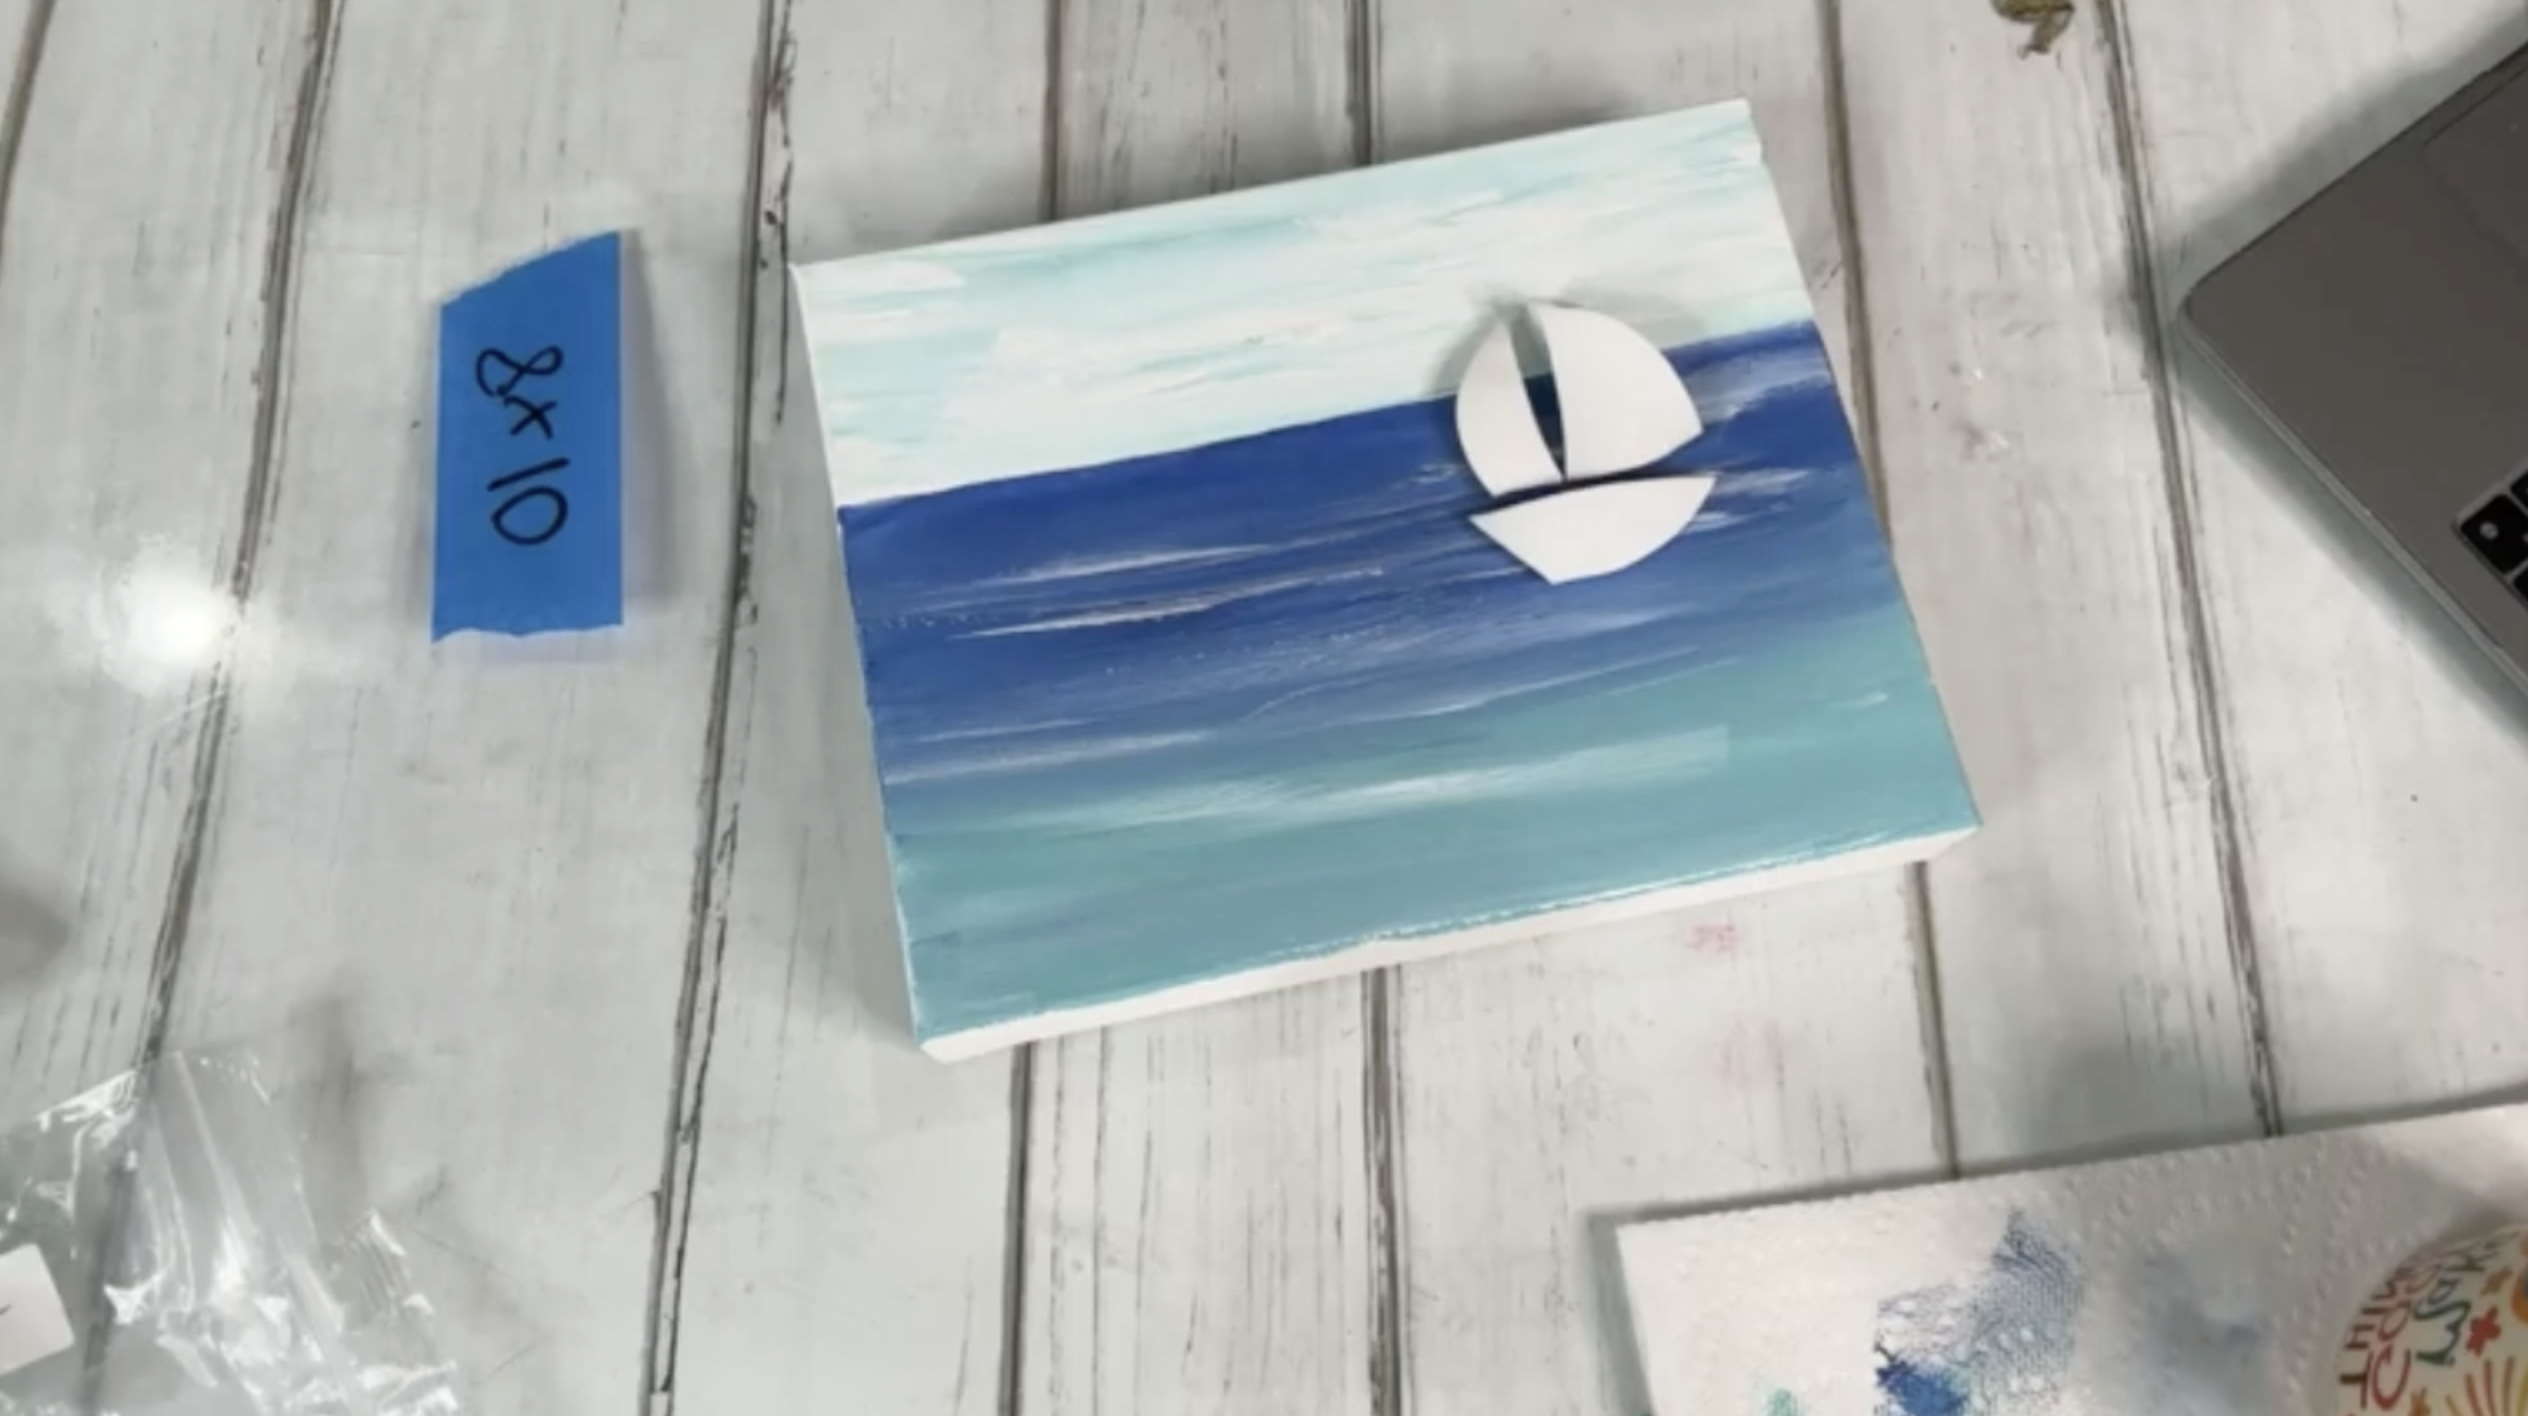
Step 2: Assemble Your Sailboat
Once the background is complete, it’s time to pick out your sailboat. Broken ceramics often naturally form into triangle shapes, which make wonderful sails. Pair these with smaller shards to form the boat itself. Try arranging them so that one overlaps the horizon line, which gives the illusion of it sailing across the water. You can use one large boat as the focal point or arrange two smaller boats for variety. Play around with placement until you find the composition you like best.
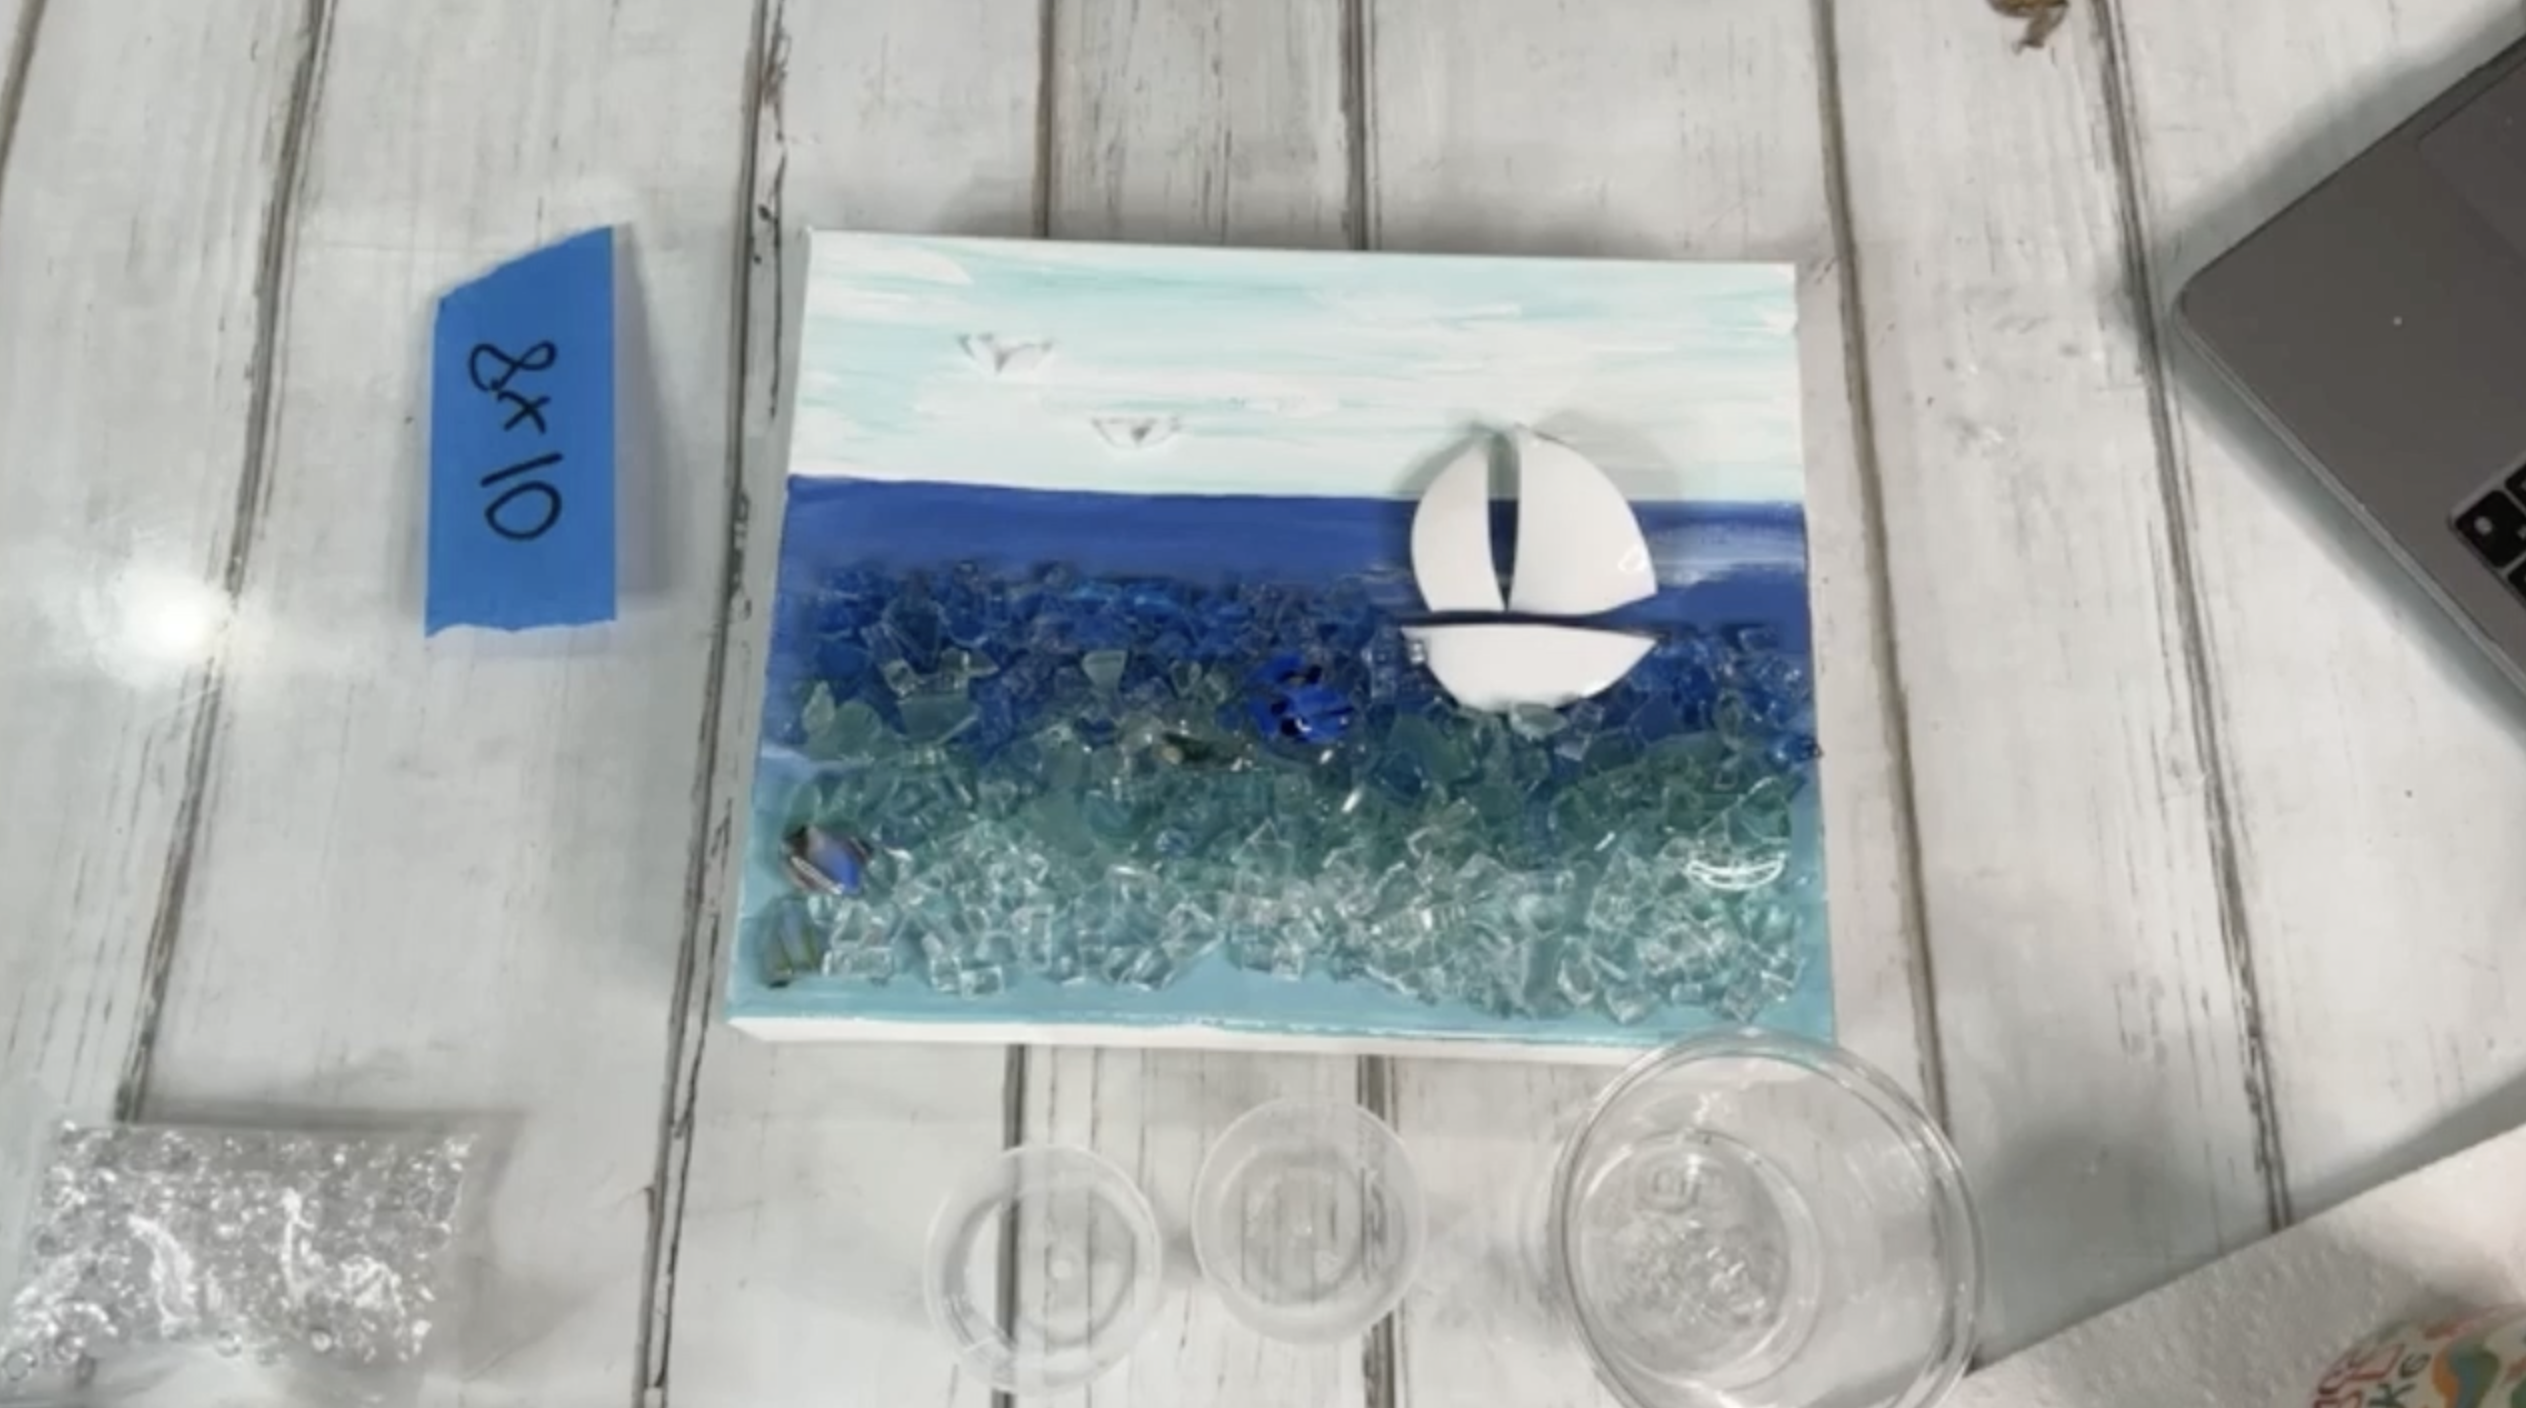
Step 3: Add Glass and Details
Around the base of your boats, sprinkle Pacific Blue glass to create depth. Next, transition into Solex glass, which has a green-blue tint that blends beautifully with the darker tones. Add clear glass on top to give the water sparkle and shine. If you want to create even more interest, tuck in a few glass chips throughout the water.
To give your piece more personality, consider adding a few extra details. Birds are simple to make by nipping small pieces of white sheet glass at an angle and placing two shards in a V-shape. When set against the painted sky, they look like they’re flying across the horizon. You can also add acrylic bubbles into the water for a whimsical effect, letting them float among the glass pieces to create movement.
Step 4: Mix & Apply Resin
The final step is coating your piece with resin, which seals everything in place and gives it a professional, glossy finish. Put on your rubber gloves. Start by measuring one ounce of hardener and one ounce of resin into separate cups. Pour them into a larger cup, leaving room for mixing, and stir gently for three full minutes.
Once mixed, drizzle the resin evenly over your canvas, making sure all of the glass looks wet and glossy. Use a heat gun to pop any bubbles and check carefully for spots that look dry. Allow the piece to cure flat for 72 hours before handling.
If you don’t want to miss my Facebook LIVE art instruction, make sure you are on my texting list. I always text 10 minutes before I’m going to go LIVE, so you won’t ever miss it. You can text “Hey Cindy” to 901-519-2923.
Want more inspiration and artwork?
- My website artshattered.com with resources, shop, and more!
- My creative membership The Shattered Circle, where you can explore the world of glass art with online workshops, a supportive community, and more!
- My mini creative membership Just A ‘Lil Bit Monthly Glass Art Club, where you’ll get a new quick and easy online tutorial for just a lil' bit of sparkle in your life!
- My Facebook page where I go LIVE every Wednesday night.
- My YouTube channel which has tons of free art lessons right at your fingertips.
