
Destin Beach Art 🏝️
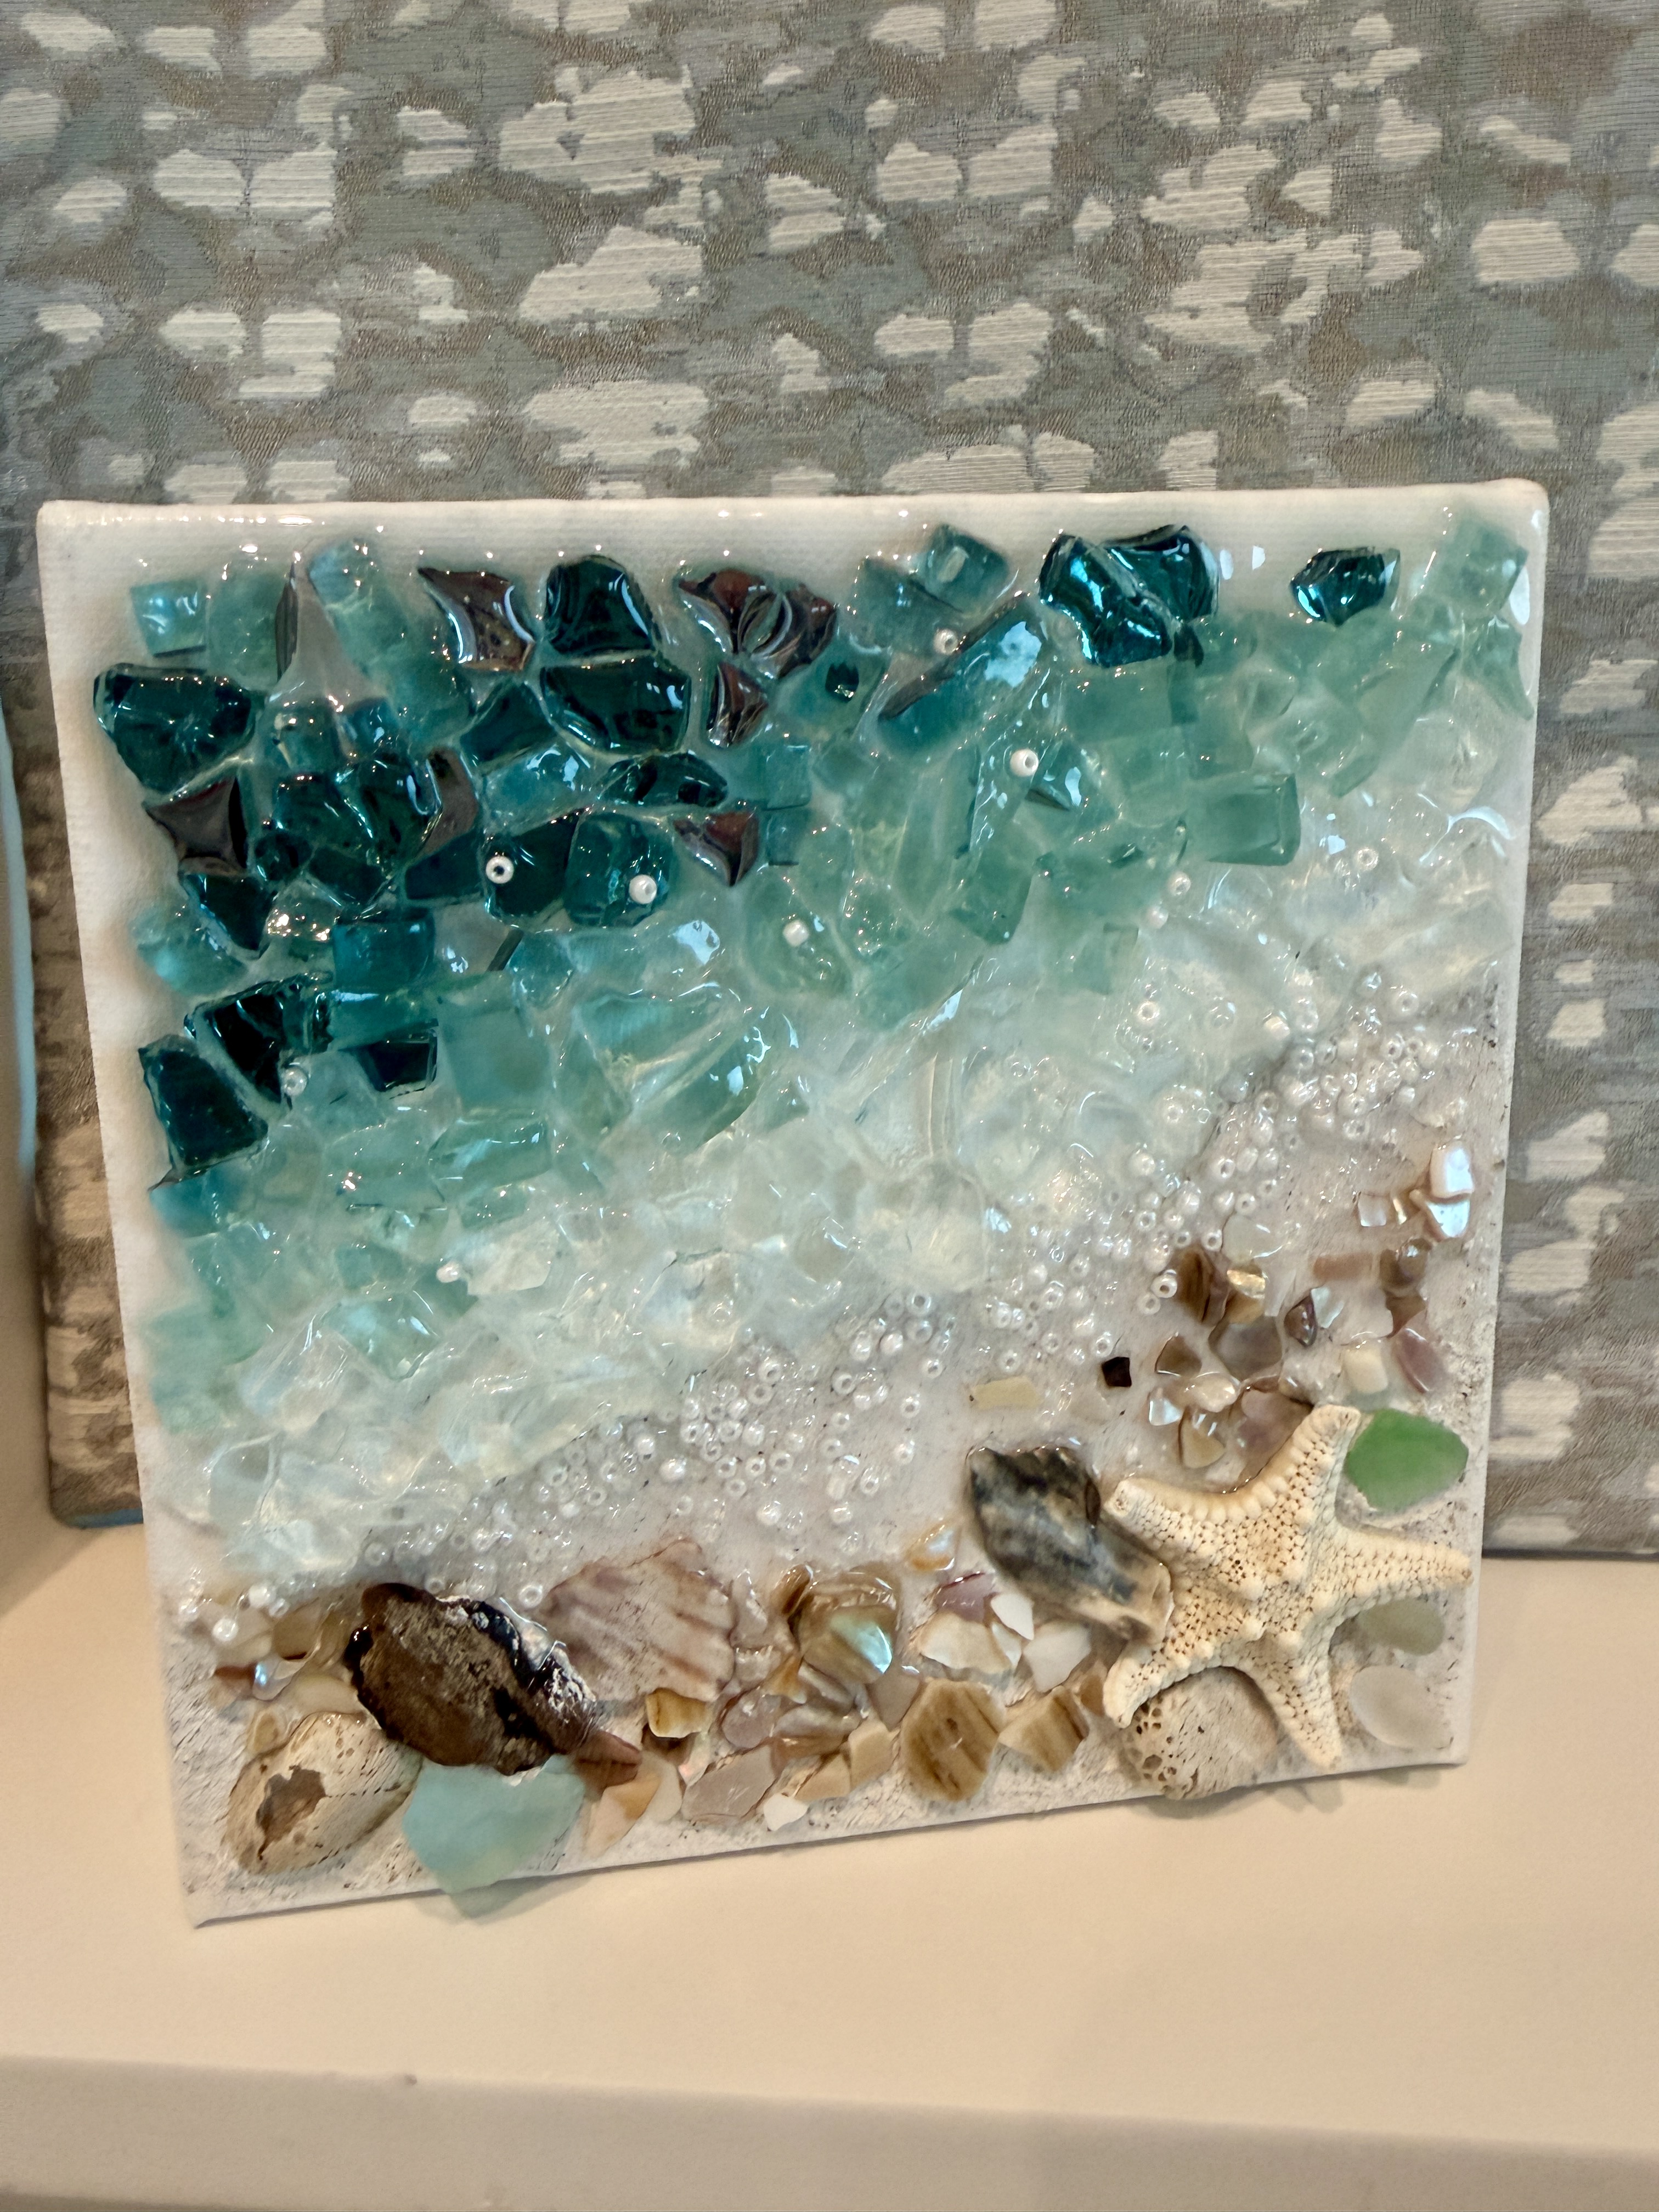
This little beach-inspired canvas is simple, textured, and full of coastal details. It starts with a sandy shoreline made from texture medium and real beachy elements, then builds into layered blue glass “water” with resin and seed beads for a foamy shoreline effect.It’s also a great project if you love small canvases, beach decor, sea glass, shells, and resin art but don’t want to spend hours painting. The finished piece gets most of its interest from texture, glass, and natural details rather than complicated brushwork.
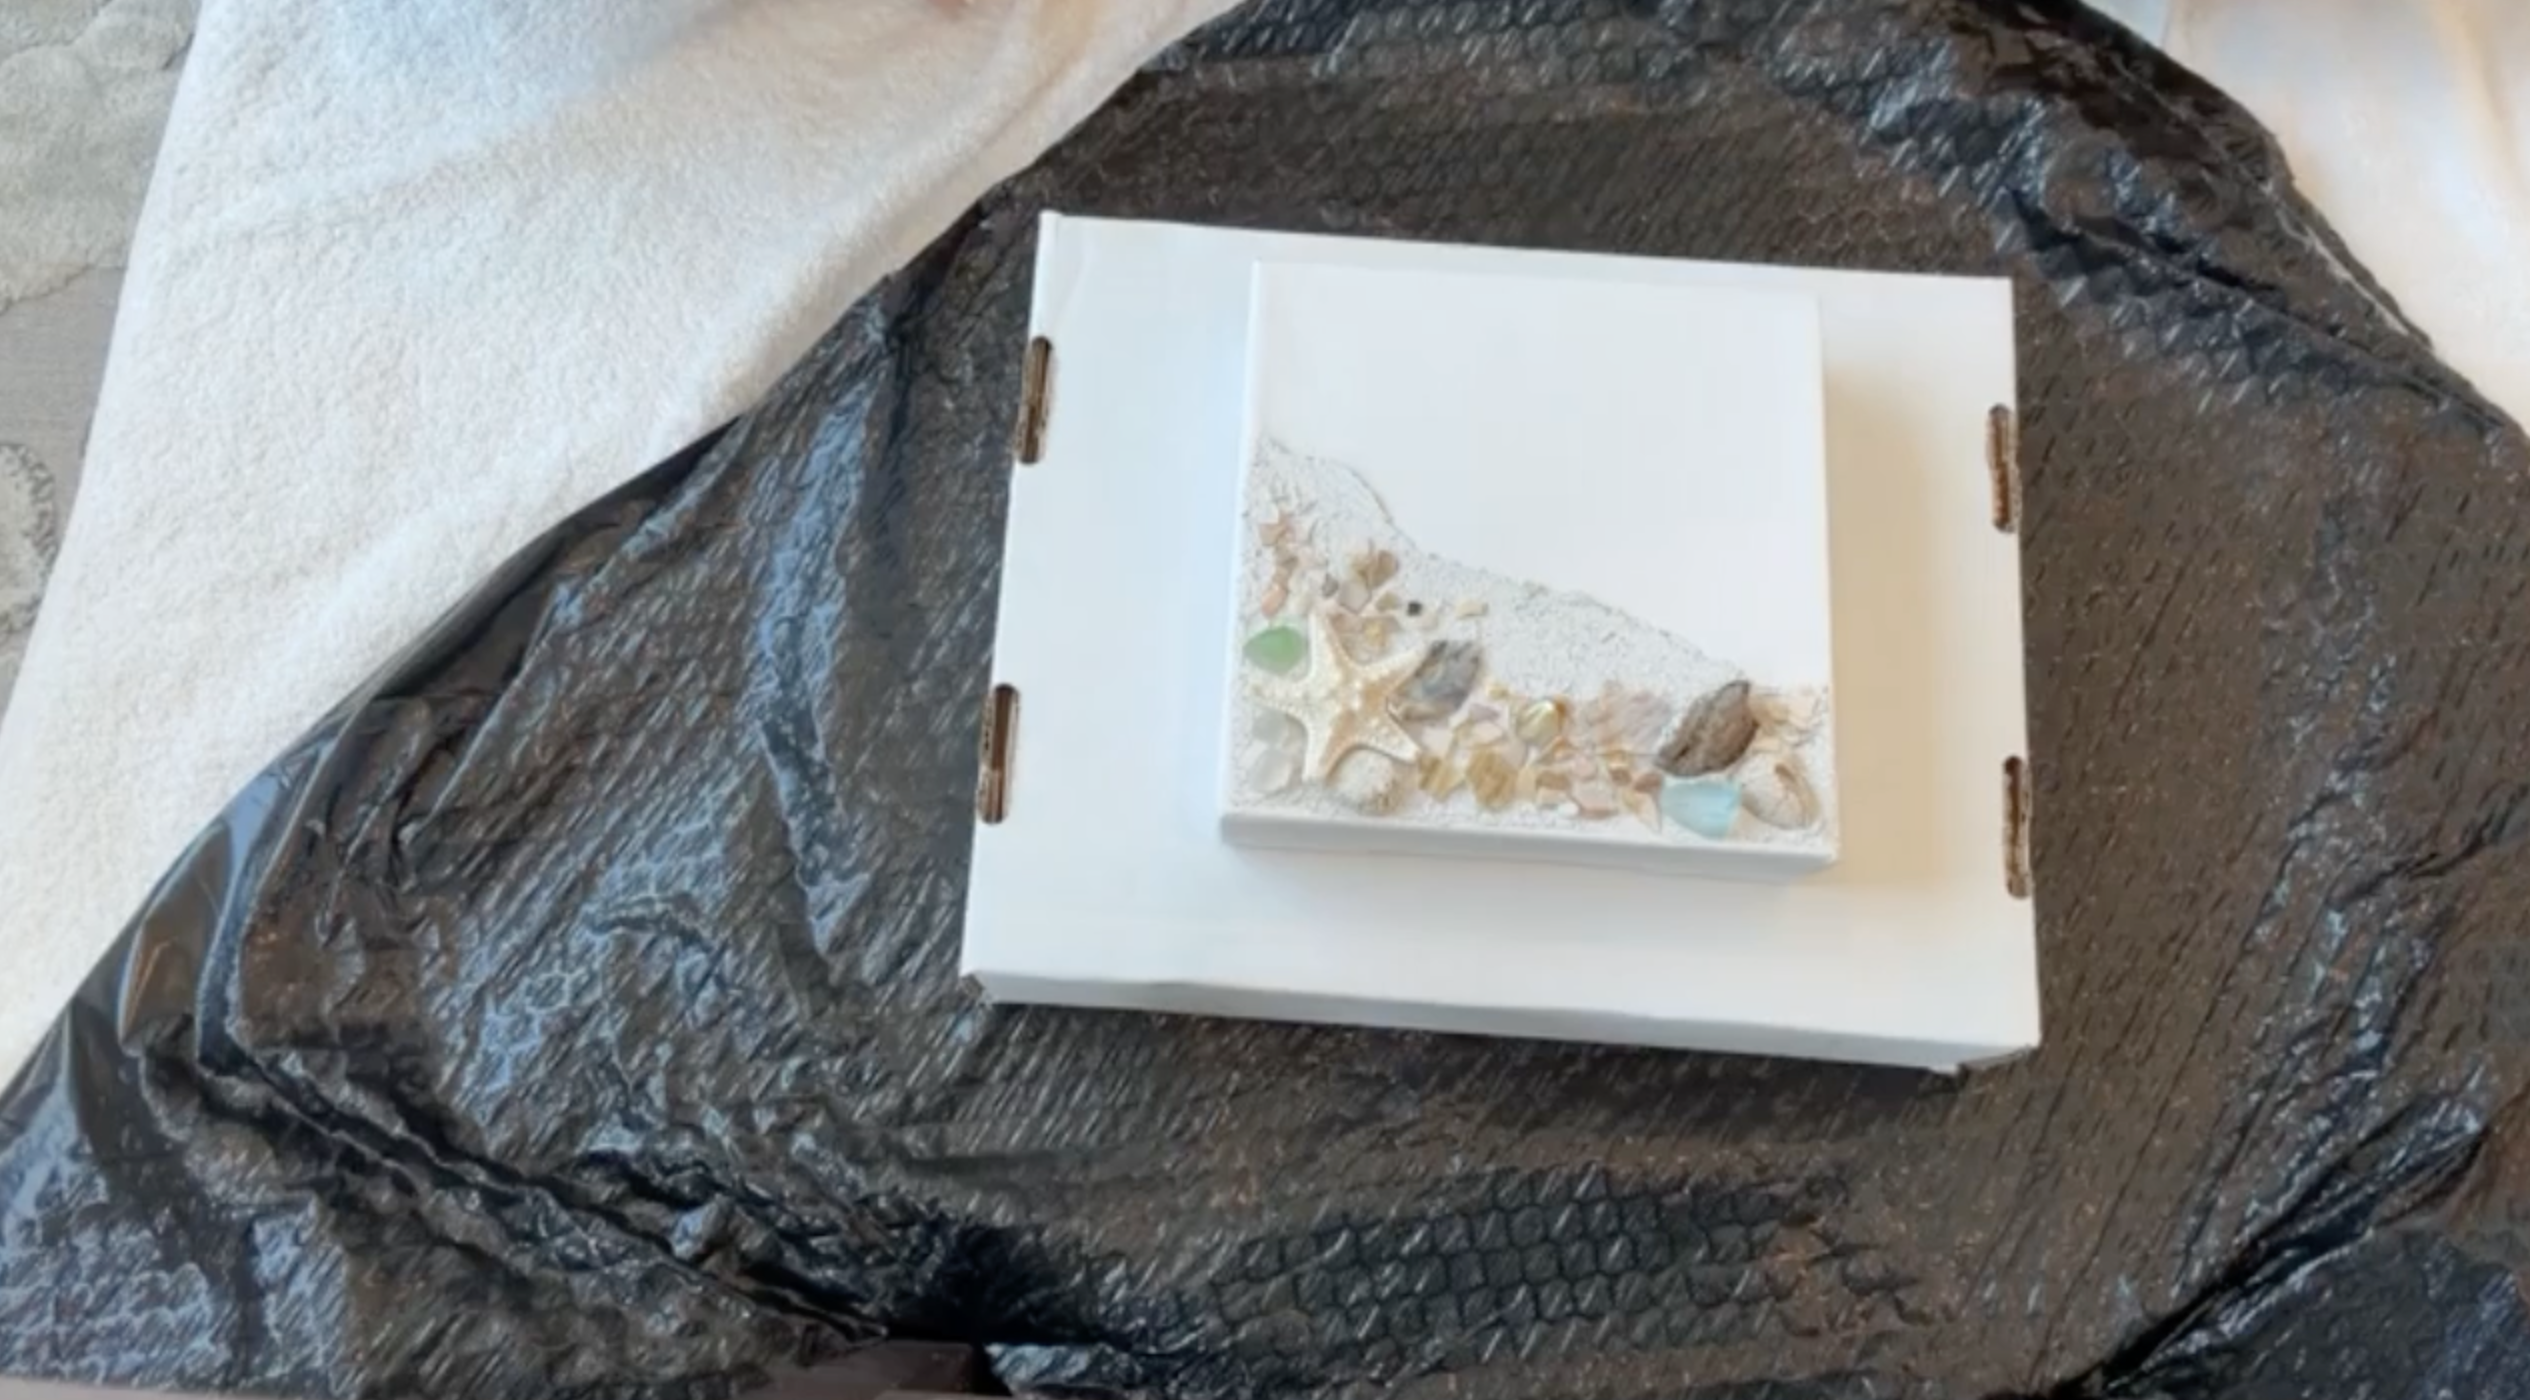
Step 1: Create the Sandy Shoreline
Begin by applying Liquitex Coarse Texture Medium to the lower portion of the canvas with a palette knife. Work the medium at a slight angle so the shoreline feels organic rather than perfectly straight.
If you want a warmer sand color, mix a tiny amount of beige acrylic paint into the texture medium before applying it. The texture medium can also be used straight from the container if you prefer its natural color.
Step 2: Press in the Beach Elements
While the texture medium is still wet, press in your small shells, sea glass, driftwood, and starfish. Push each piece firmly enough that it becomes embedded in the texture medium and will stay put once everything dries.
There’s no need to arrange these perfectly. Let them feel like little treasures that have naturally collected along the shoreline.
Step 3: Build Up the Shoreline Edge
As you apply the texture medium, create a slightly raised ridge where the sand meets the future glass “water.”
This raised edge can help contain the resin later and create a more obvious separation between the beach and ocean sections. Just keep in mind that resin will still move and self-level, so it may travel slightly onto the sand. Allow the texture medium to dry completely before moving on.
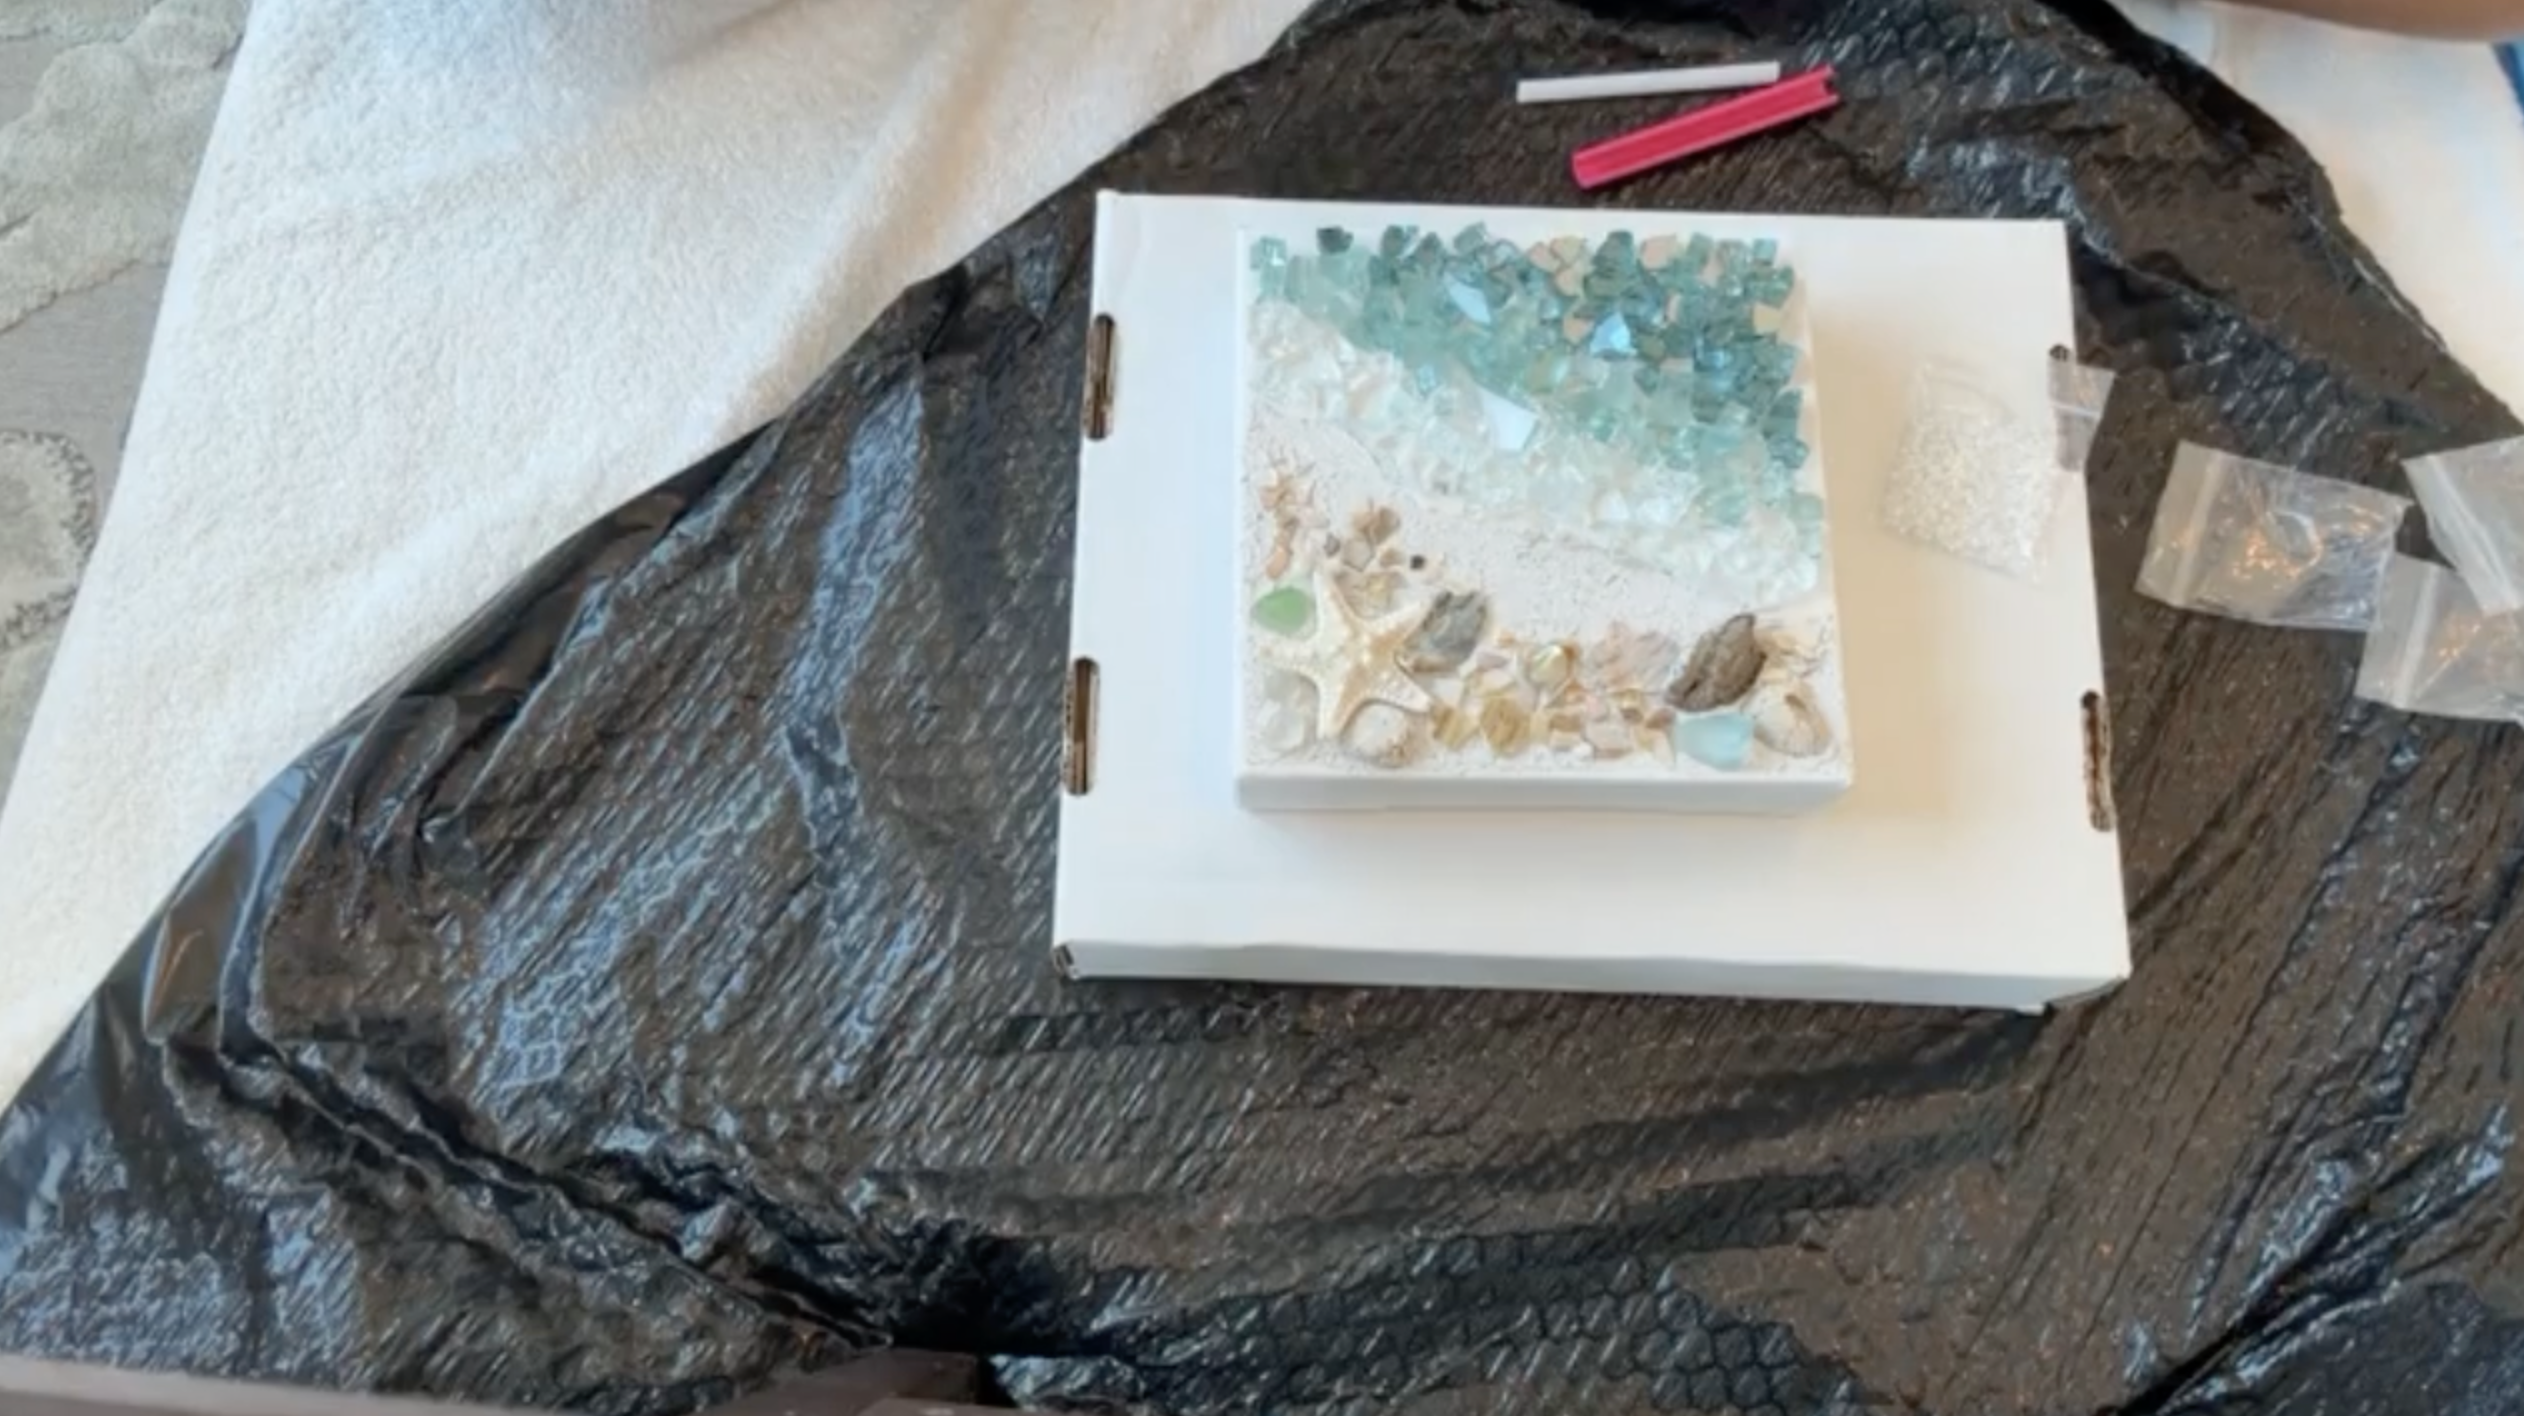
Step 4: Add the Lightest Glass Near the Shore
Begin the ocean section with clear crushed glass closest to the shoreline. Spread it loosely across the canvas rather than packing it into a perfectly even layer. The clear glass creates a soft transition that feels like shallow water near the sand.
Step 5: Add Solex Glass
Next, layer Solex glass above the clear section. This blue-green shade creates the middle tone in the ocean and helps bridge the transition between the lighter shore area and the deeper blue at the top. Again, keep the placement organic and slightly uneven.
Step 6: Add Azuria Reflective Glass
Finish the ocean with Azuria Reflective glass across the upper section of the canvas. This darker reflective shade gives the piece depth and creates the look of deeper water.
The original project used about 1 ounce of each glass color, for roughly 3 ounces total on a 6x6 canvas.
Step 7: Mix the Resin
For this small canvas, prepare approximately 1 ounce of mixed resin.
The original tutorial used a 2-ounce burst pack containing 1 ounce of resin and 1 ounce of hardener, then mixed the two parts together for three full minutes. Since the entire pack was more than needed, only about half was used on the artwork.
If you’re mixing from bottles instead, follow the manufacturer’s directions for your specific resin.
Step 8: Resin the Darkest Glass First
Start by drizzling resin over the Azuria Reflective glass at the top of the canvas. Work from one side to the other so you can keep track of which areas have already been coated.
Make sure the resin reaches between the glass pieces and contacts the canvas underneath so everything is securely attached.
Step 9: Resin the Middle and Light Glass
Continue downward, coating the Solex and clear glass sections. Try to keep the resin concentrated over the glass if you want the sandy area to stay more matte. If some resin flows onto the sand, don’t stress. The texture will still show through beautifully.
Step 10: Add Resin Along the Waterline
Drizzle a small amount of resin along the edge where the glass meets the sand. This helps secure the lower pieces of glass and creates a wet shoreline effect. You do not need to resin the entire sandy section unless you want a fully glossy finish.
Step 11: Add Seed Bead “Sea Foam”
While the resin is still wet, sprinkle White Ceylon and Crystal Luster seed beads along the shoreline. Concentrate most of the beads where the glass meets the sand to create the look of foamy waves washing onto the beach. You can also scatter a few beads higher into the water if you want a little extra sparkle.
Step 12: Elevate the Canvas
Place the canvas on small cups, blocks, or resin risers so any drips can fall freely underneath. Avoid leaving the wet canvas flat on paper, cardboard, or another surface it could permanently stick to.
Step 13: Let the Resin Cure
Allow the artwork to cure according to the resin manufacturer’s instructions. For the resin used in the tutorial, the piece was expected to be dry to the touch in about 8 hours and fully cured in about 72 hours. Once fully cured, sign the piece and it’s ready to display.
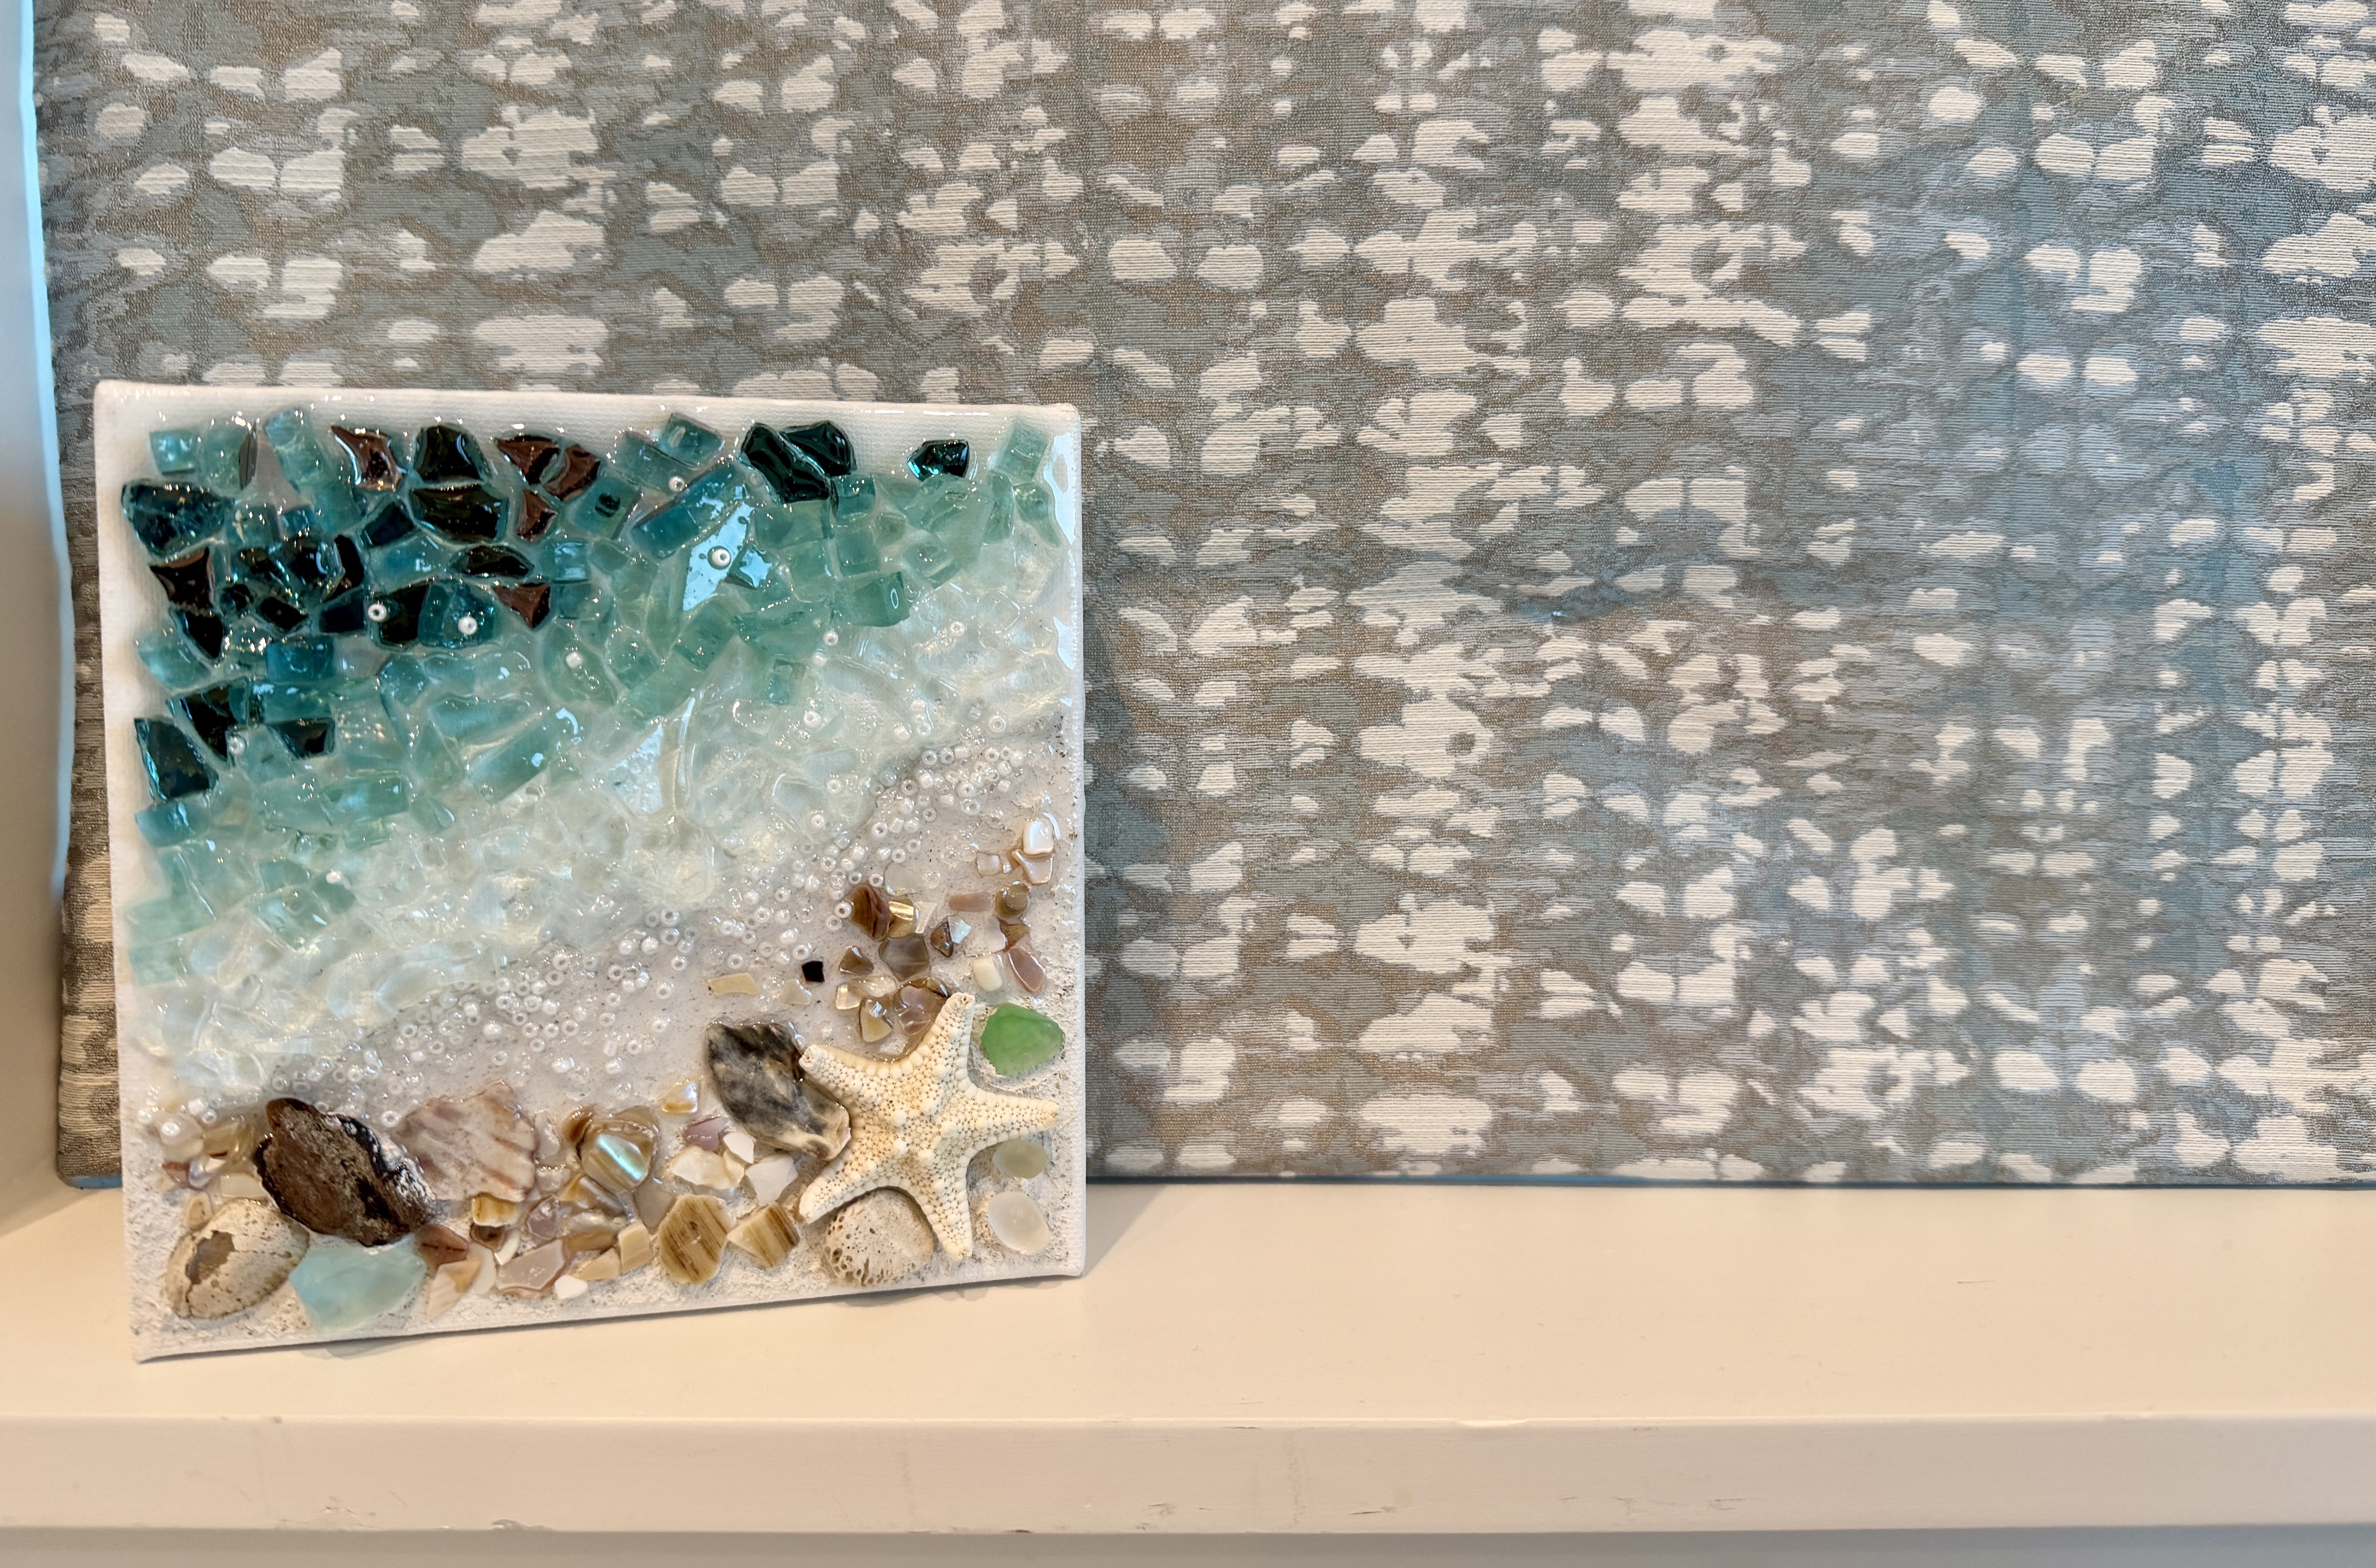
This beach glass canvas proves you don’t need a large surface or complicated painting techniques to create something beautiful. The coarse sand texture, shells, sea glass, starfish, layered blue crushed glass, and tiny seed bead “foam” do all the work.
It’s especially fun for coastal decorating, gifts for beach lovers, or using up little shells and glass pieces from your stash. You could also customize it with different shades of blue, shells collected from a favorite trip, or larger pieces of sea glass to make the piece feel even more personal.
If you're a member of The Shattered Circle, you'll find this tutorial in your classroom under Art Shattered Weekly Facebook Lives, search for "Destin Ocean Art".
If you don’t want to miss my Facebook LIVE art instruction, make sure you are on my texting list. I always text 10 minutes before I’m going to go LIVE, so you won’t ever miss it. You can text “Hey Cindy” to 901-519-2923.
Want more inspiration and artwork?
- My website artshattered.com with resources, shop, and more!
- My creative membership The Shattered Circle, where you can explore the world of glass art with online workshops, a supportive community, and more!
- My mini creative membership Just A ‘Lil Bit Monthly Glass Art Club, where you’ll get a new quick and easy online tutorial for just a lil' bit of sparkle in your life!
- My Facebook page where I share free LIVE tutorials and inspiration
- My YouTube channel which has tons of free art lessons right at your fingertips.
