
Gnome Pumpkin 🍂
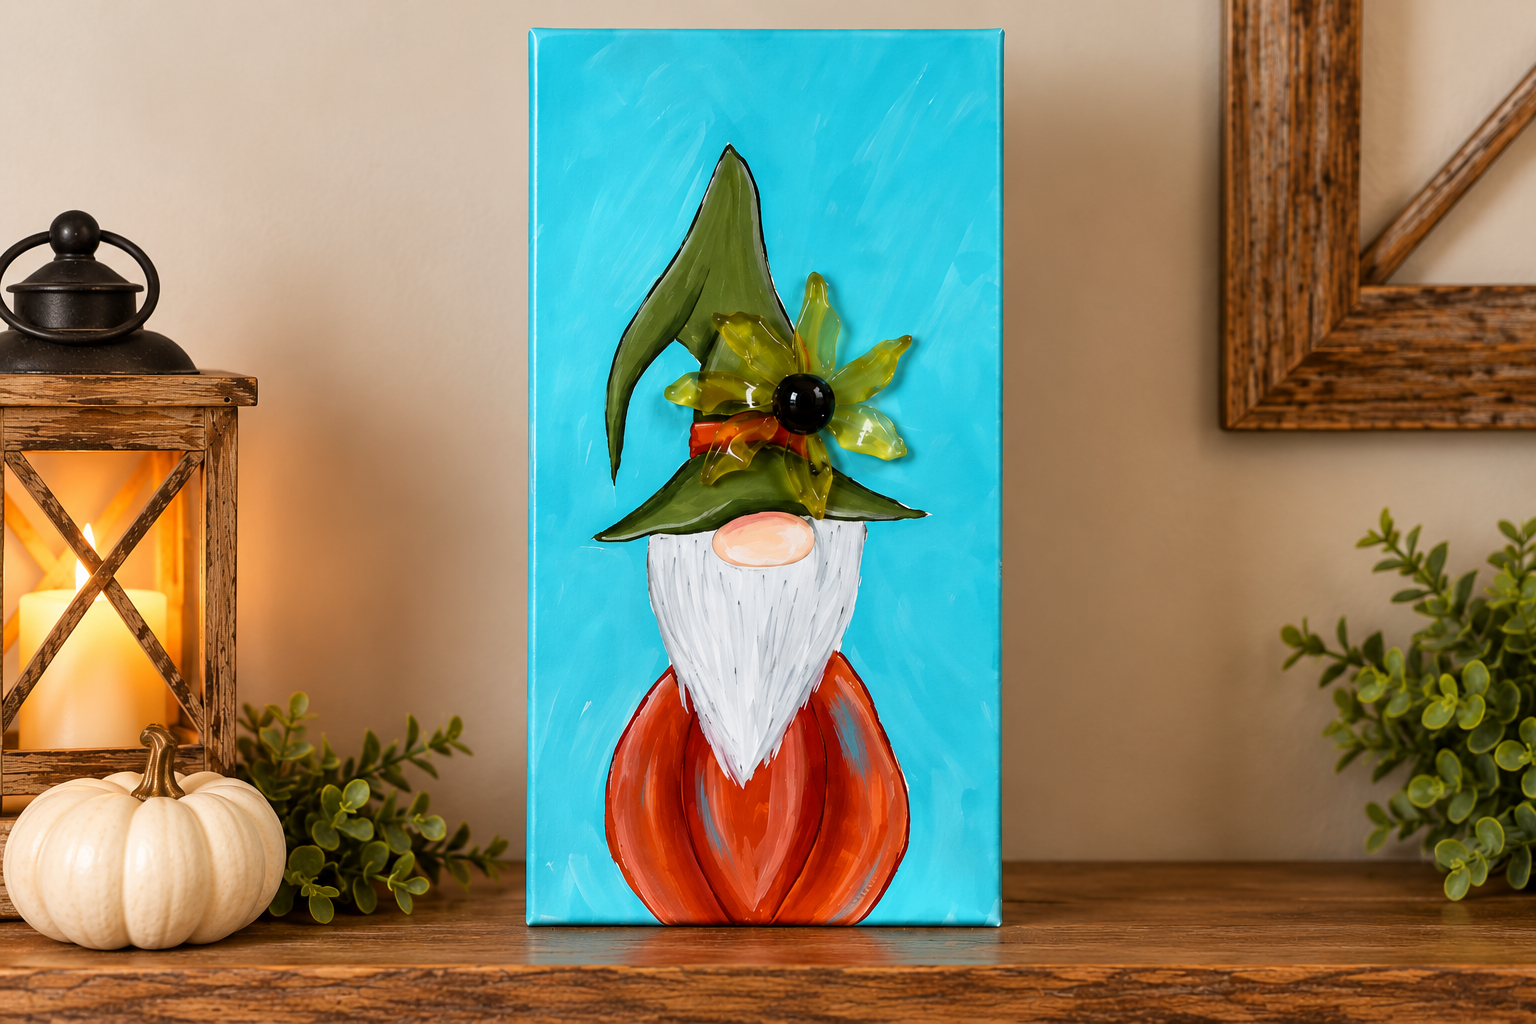
Pumpkins and gnomes in one project? Yes, please! This little guy has a pumpkin-shaped body, floppy green hat, fluffy white beard, and the cutest dimensional glass sunflower tucked into his hat. We’re using a tall, narrow canvas for this project and combining acrylic painting with hand-cut glass and resin. The loose brushstrokes, little black details, and handmade glass flower are what give him his personality!
Step 1: Transfer the Gnome to the Canvas
Position your pumpkin gnome tracer on the canvas and secure it with a little tape. Slide graphite paper underneath the tracer and use a stylus to trace the entire design - the hat, nose, beard, and pumpkin-shaped body. Don’t worry if every line transfers perfectly. You can easily adjust the shapes as you paint.
Step 2: Paint the Pumpkin Body
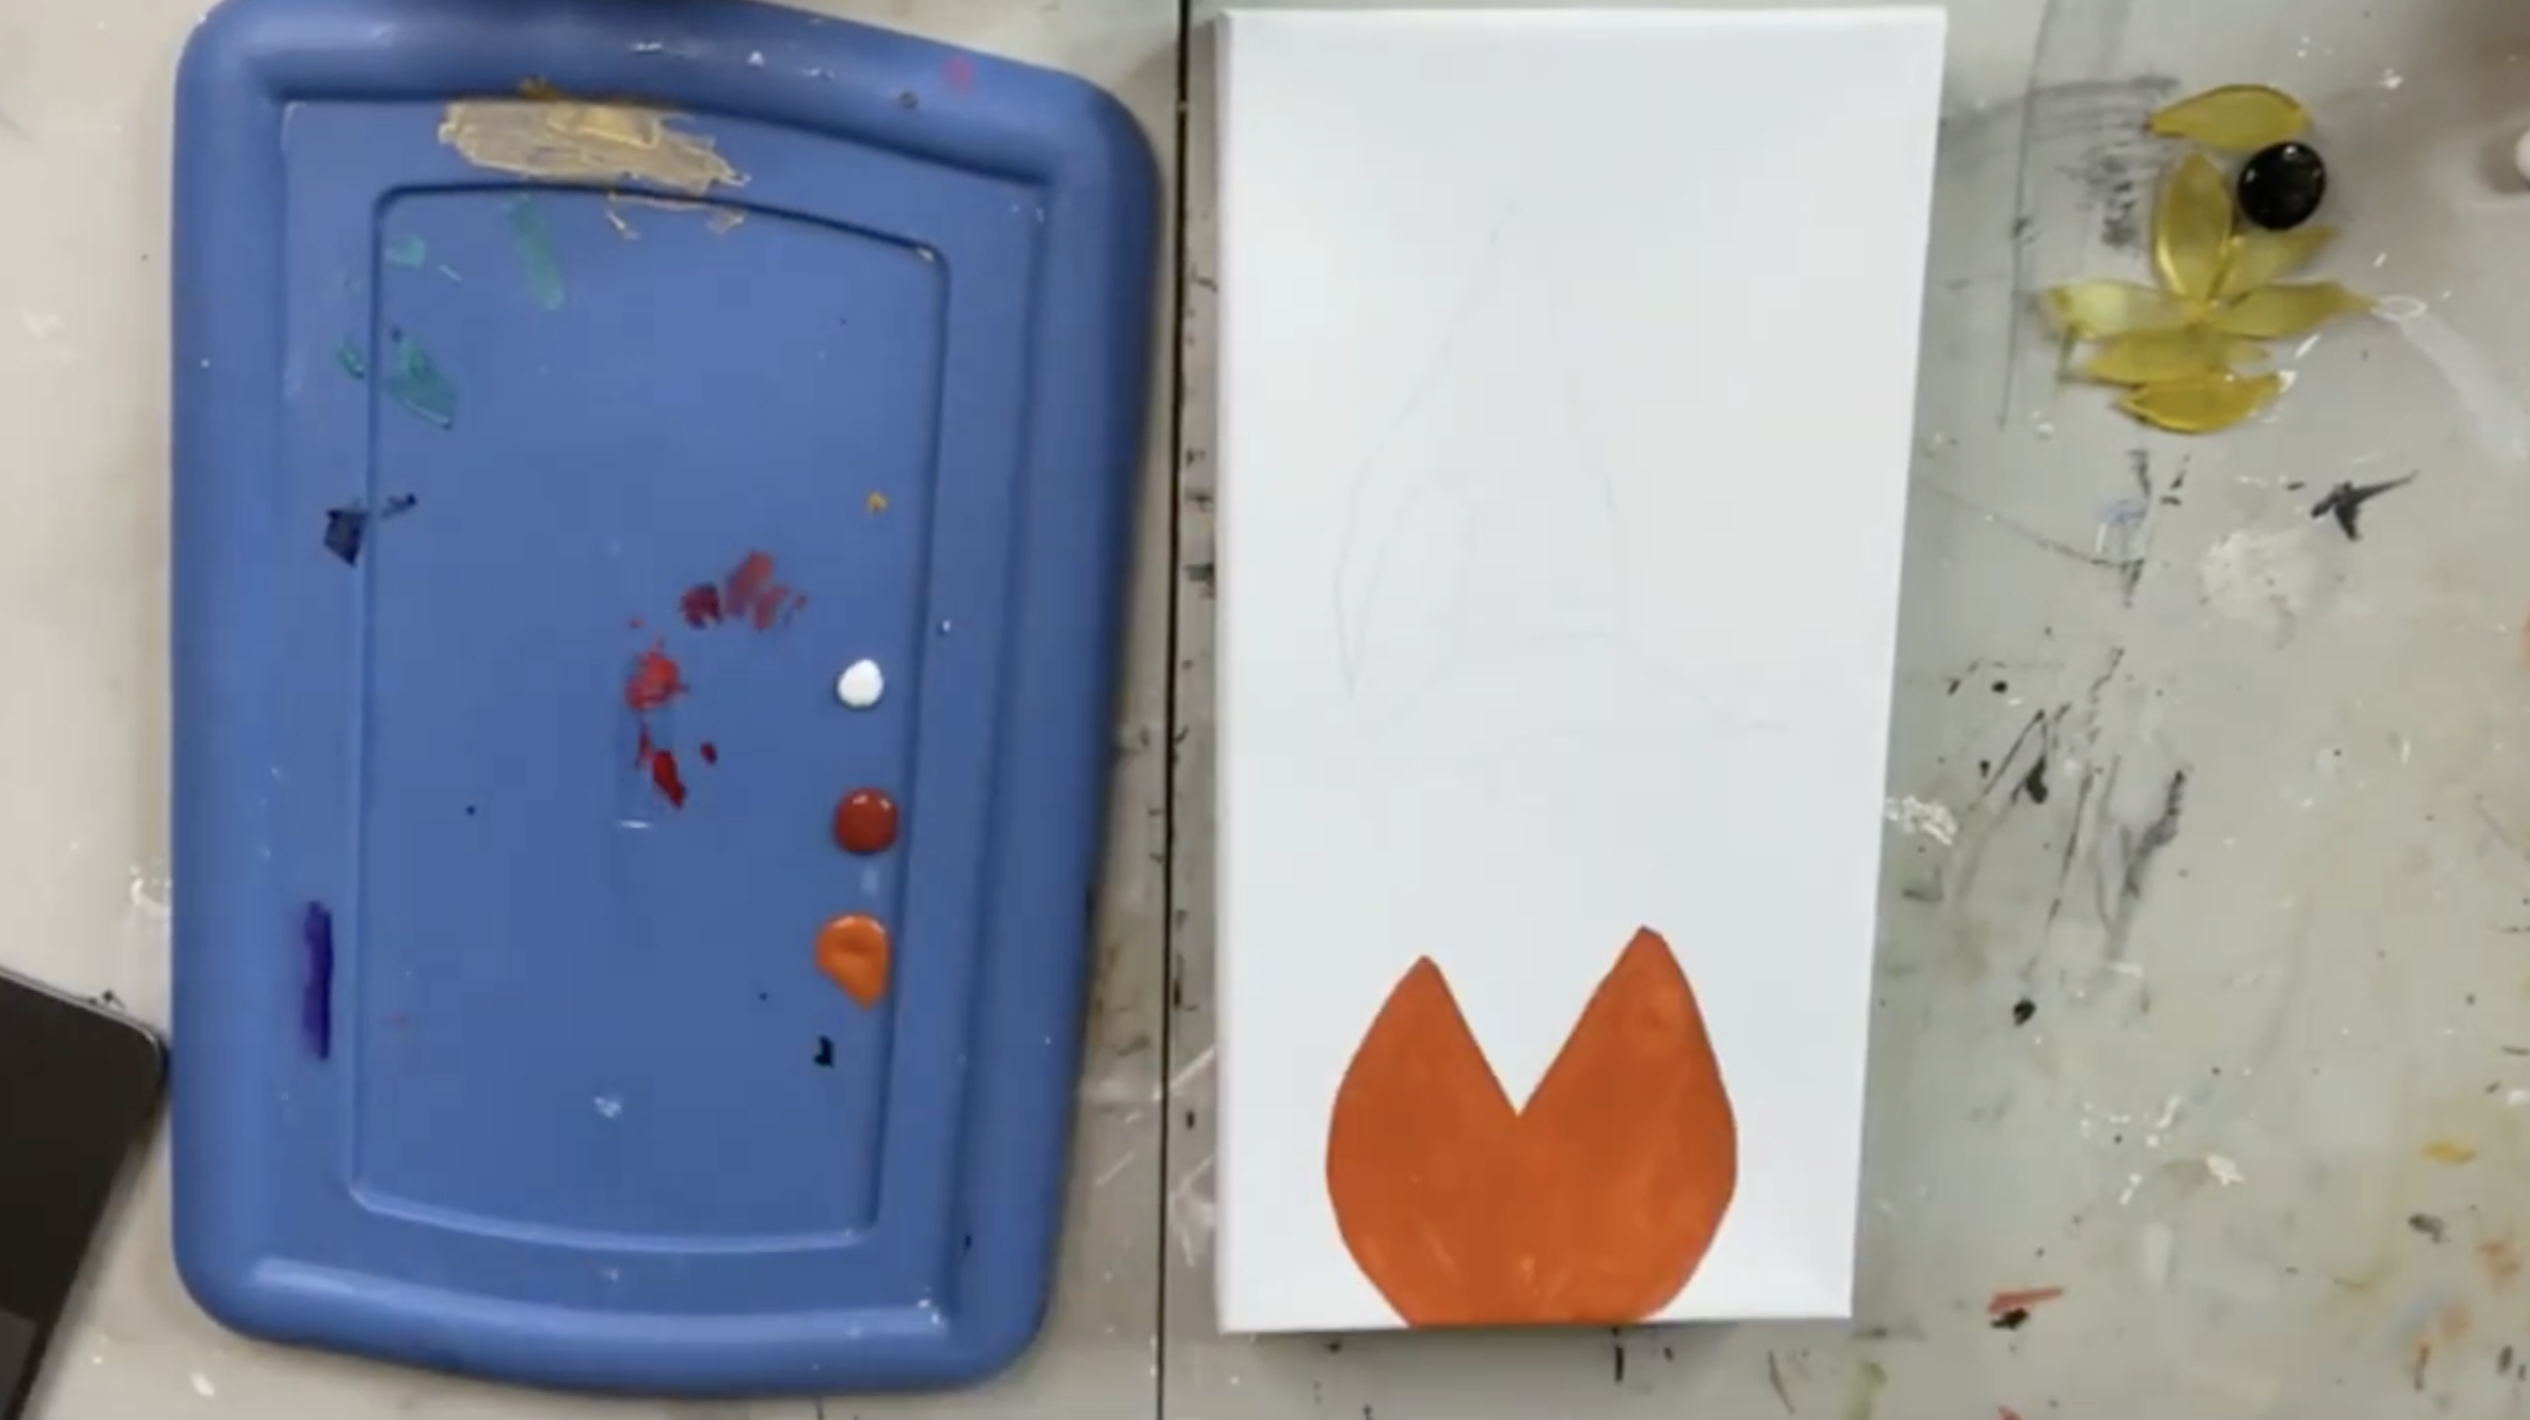
Start with Burnt Orange and fill in the entire pumpkin-shaped body. Work carefully around the beard since we’ll eventually be painting that area white and gray. Keeping most of the orange out now will save you from having to cover it later. Once the pumpkin has a good base coat, we can start giving it some dimension.
Step 3: Shade the Pumpkin
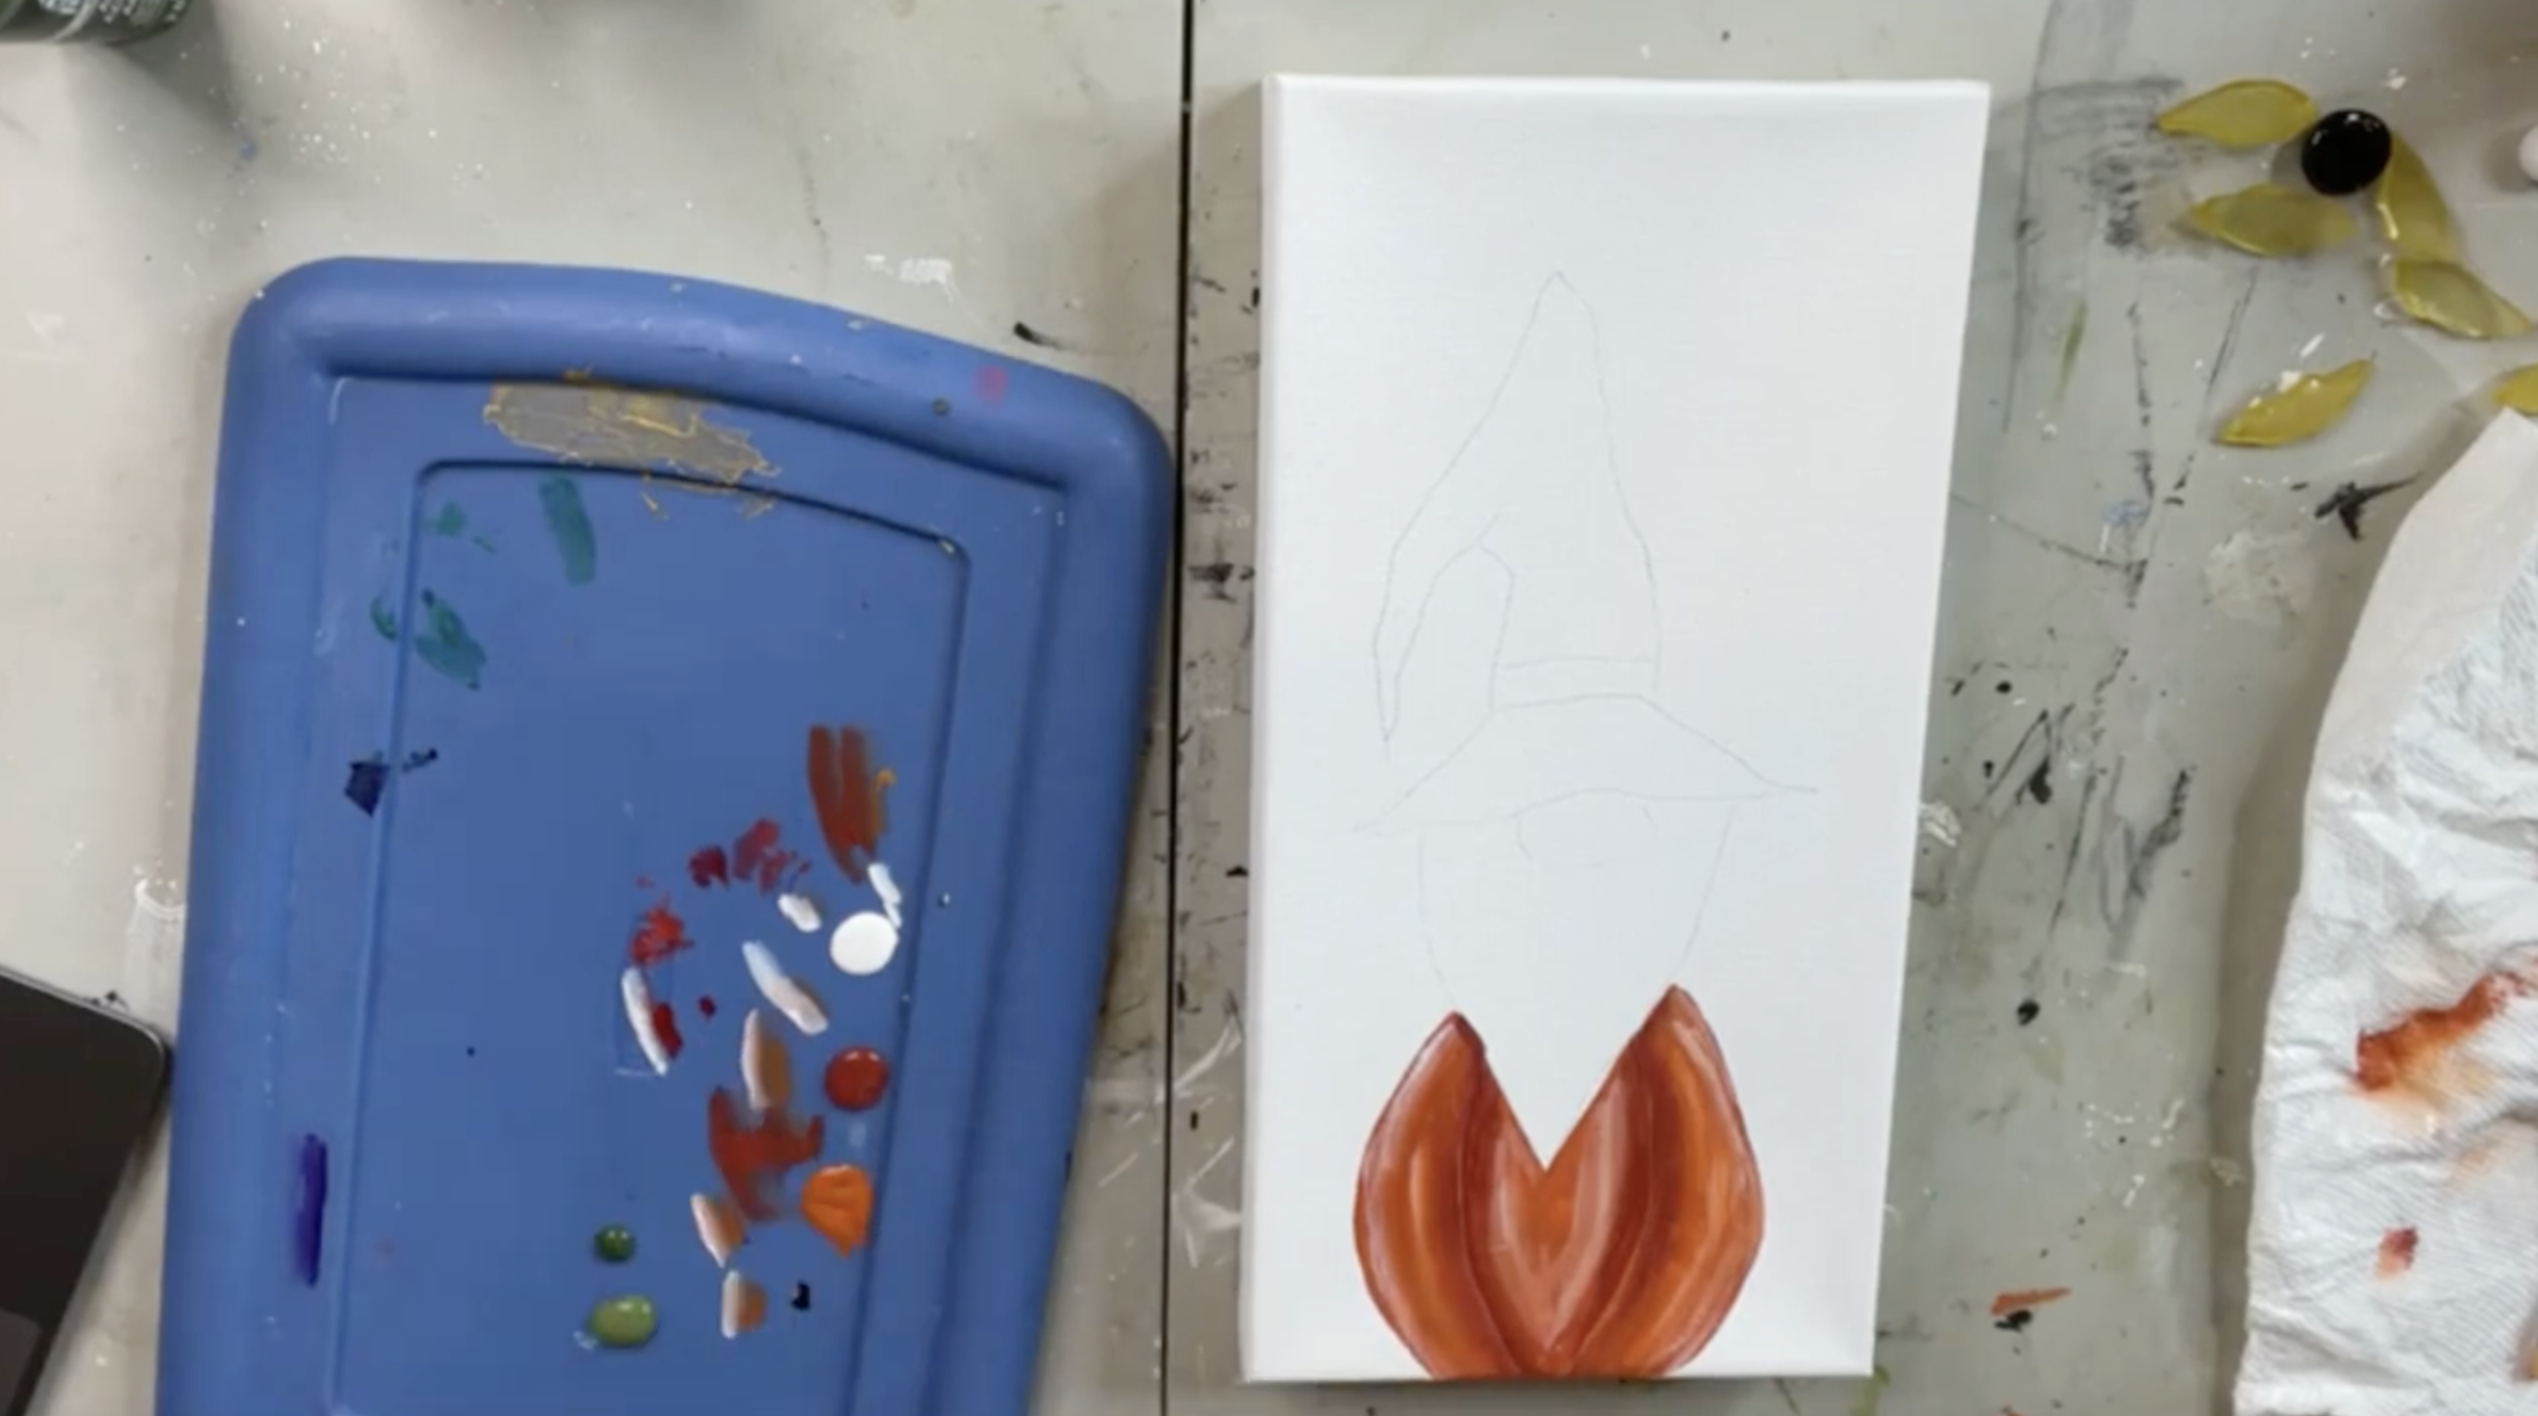
Dip just the corner of your brush into Heritage Brick. Use the original tracer lines as a guide and brush the darker reddish-orange along the curves of the pumpkin. Add some shading around the beard as well.
You don’t need heavy lines. Blend the Heritage Brick back into the Burnt Orange so it creates subtle shadows and begins making those pumpkin sections look rounded.
Step 4: Add White Pumpkin Highlights
Clean your brush and pick up a little white. Add white along the opposite edges of the pumpkin sections and softly blend it into the orange.
Go back and forth between your red shading and white highlights as needed. These don't need to be perfectly blended...the variation is what gives our little pumpkin body its dimension.
Step 5: Paint the Green Gnome Hat
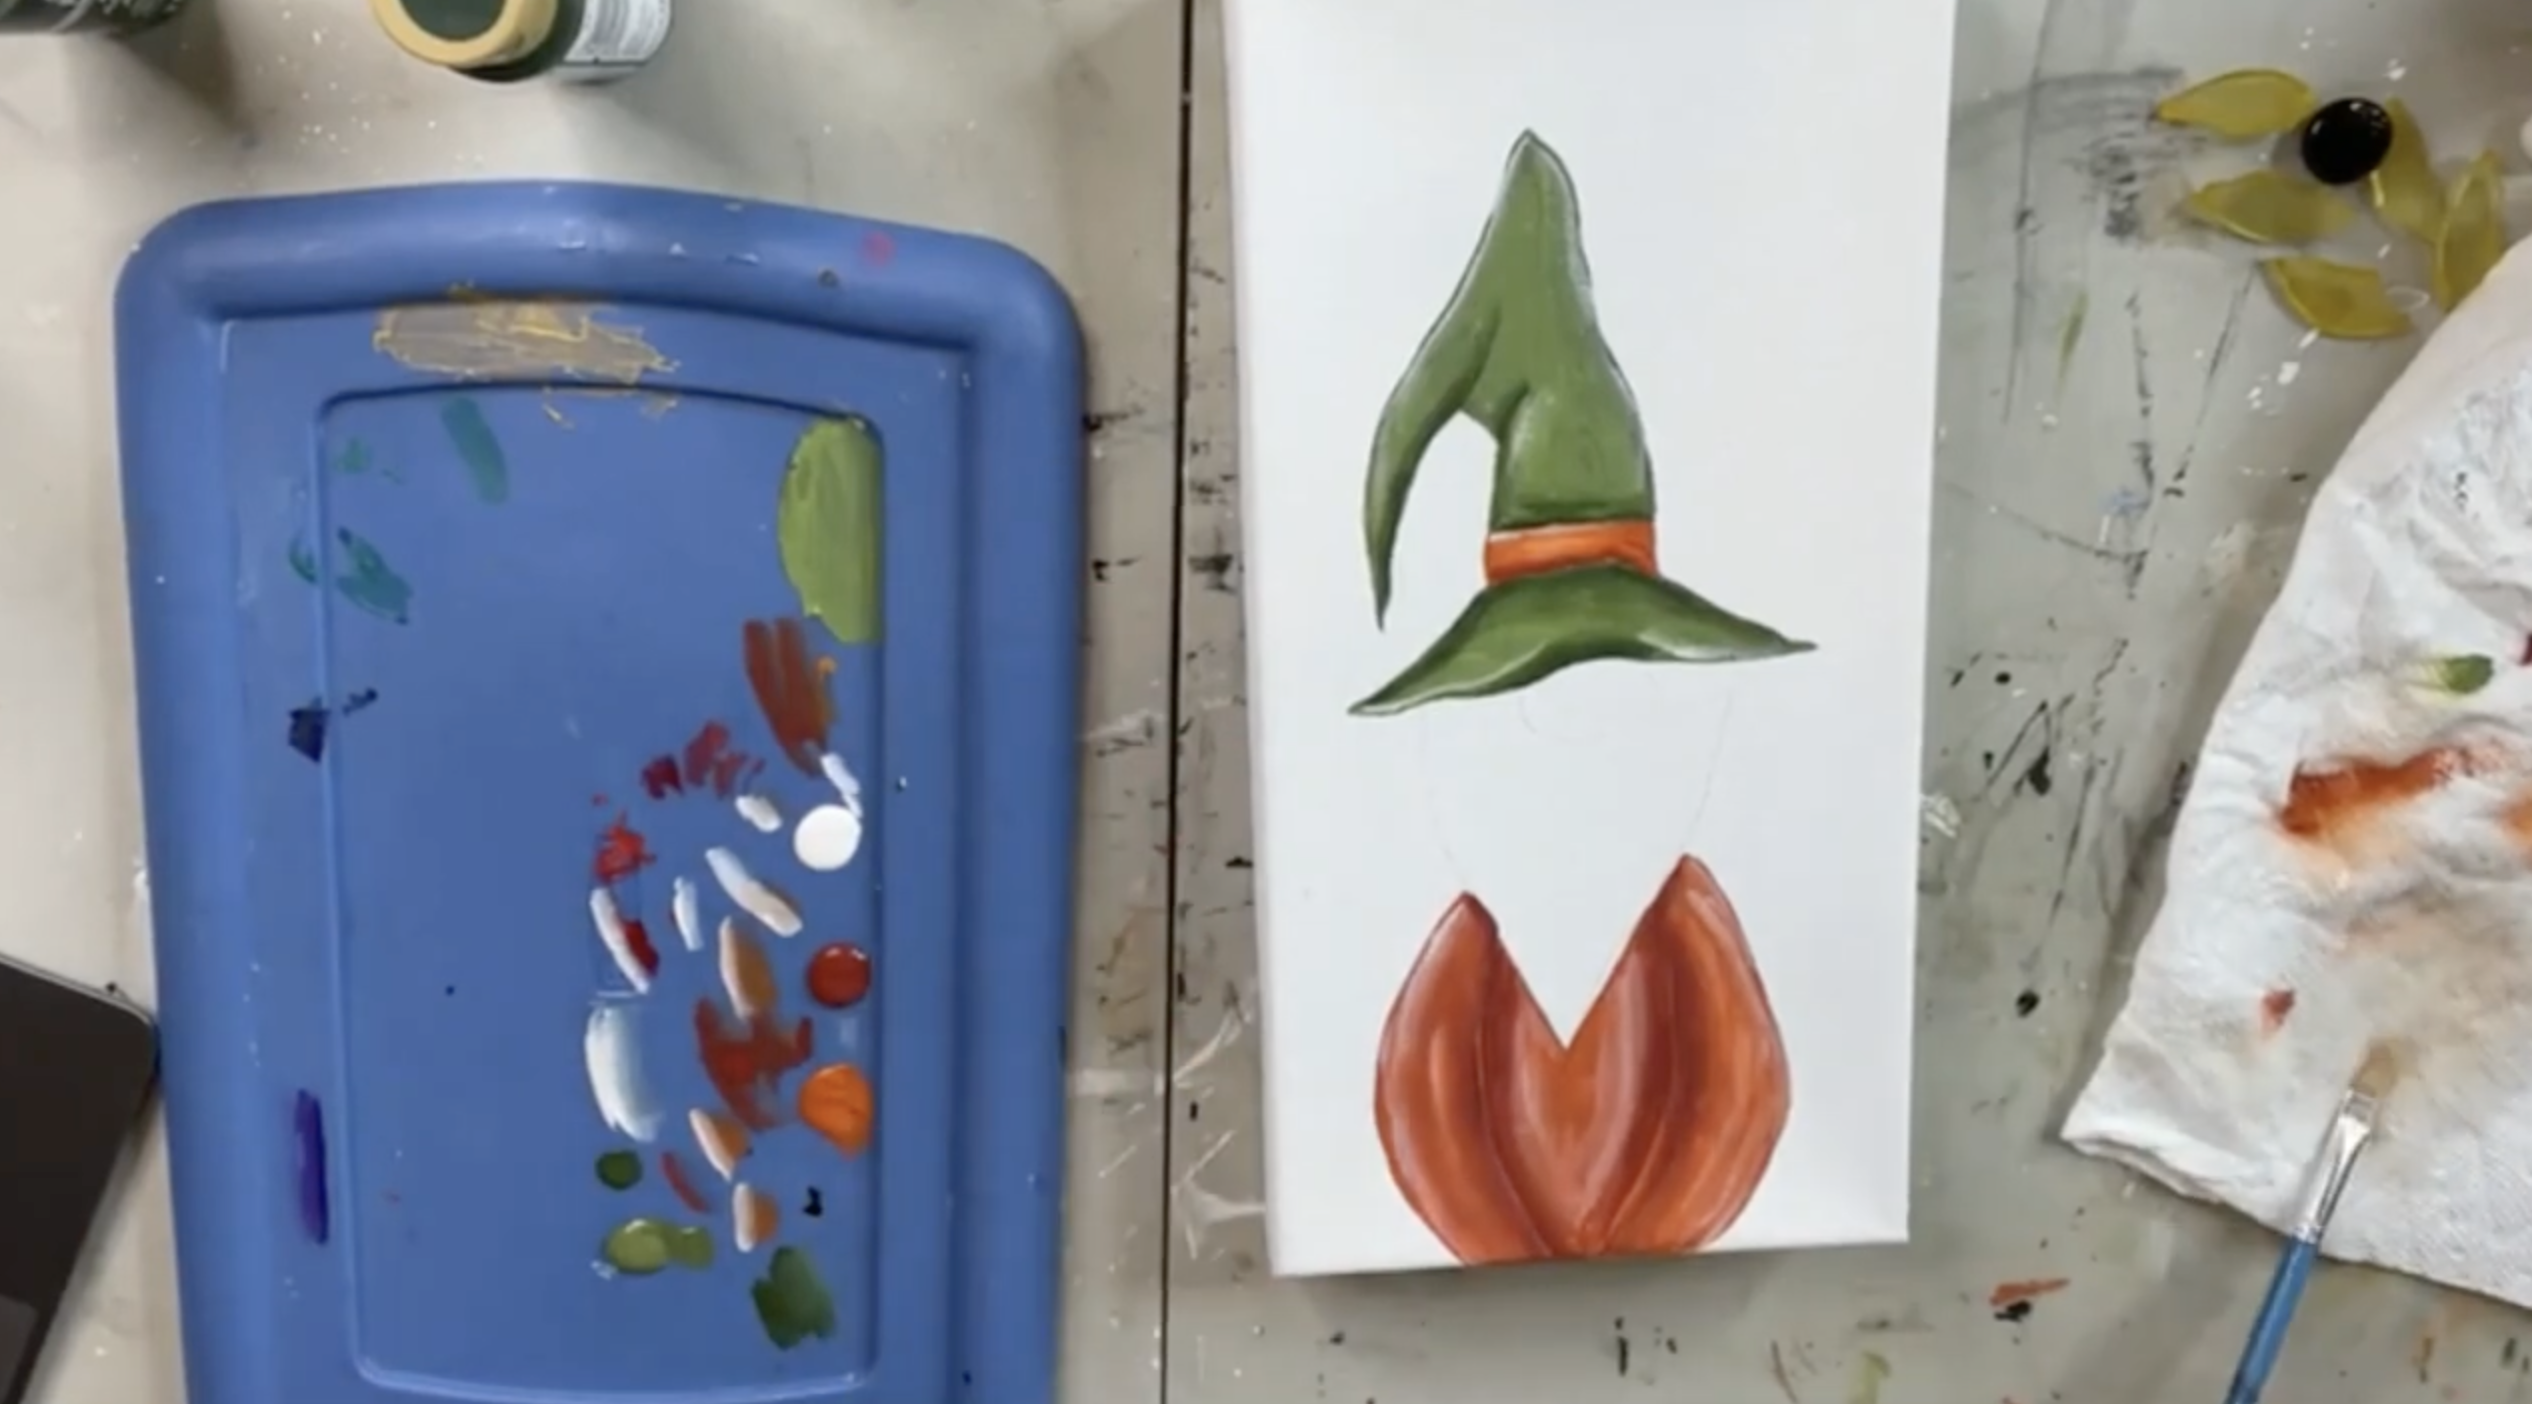
Now move up to that big floppy hat. Start with Crocodile Green and fill in the main hat and brim, leaving the narrow hat band unpainted for now.
Then blend in some Hauser Light Green to brighten up portions of the hat. You can substitute similar greens if you don't have these exact colors. We want several shades showing rather than one perfectly flat green.
Step 6: Shade and Highlight the Hat
Pick up a little Plantation Pine and add shadows along the bent portion of the hat, around the hat band, and into some of the wrinkles. These darker areas help emphasize the bends and folds. Then add small amounts of white to the opposite side of the hat and along the brim for highlights.
You should now have a fun combination of light, medium, and dark greens that gives the hat plenty of movement.
Step 7: Paint the Orange Hat Band
Use Burnt Orange to paint the narrow band around the hat. Shade the lower portion with a little Heritage Brick, just as we did on the pumpkin. Then add a tiny bit of white along the upper portion for a highlight. It's a small detail, but bringing that pumpkin color up into the hat helps tie everything together.
Step 8: Paint the Gnome's Beard
Paint the entire beard white first. Next, mix the tiniest amount of black into white to create a light gray. You can also use a premixed gray if you have one.
Use loose downward strokes of gray throughout the white beard. Don't completely blend them out - we want to see those individual wispy strokes so the beard has some texture.
Step 9: Paint His Nose
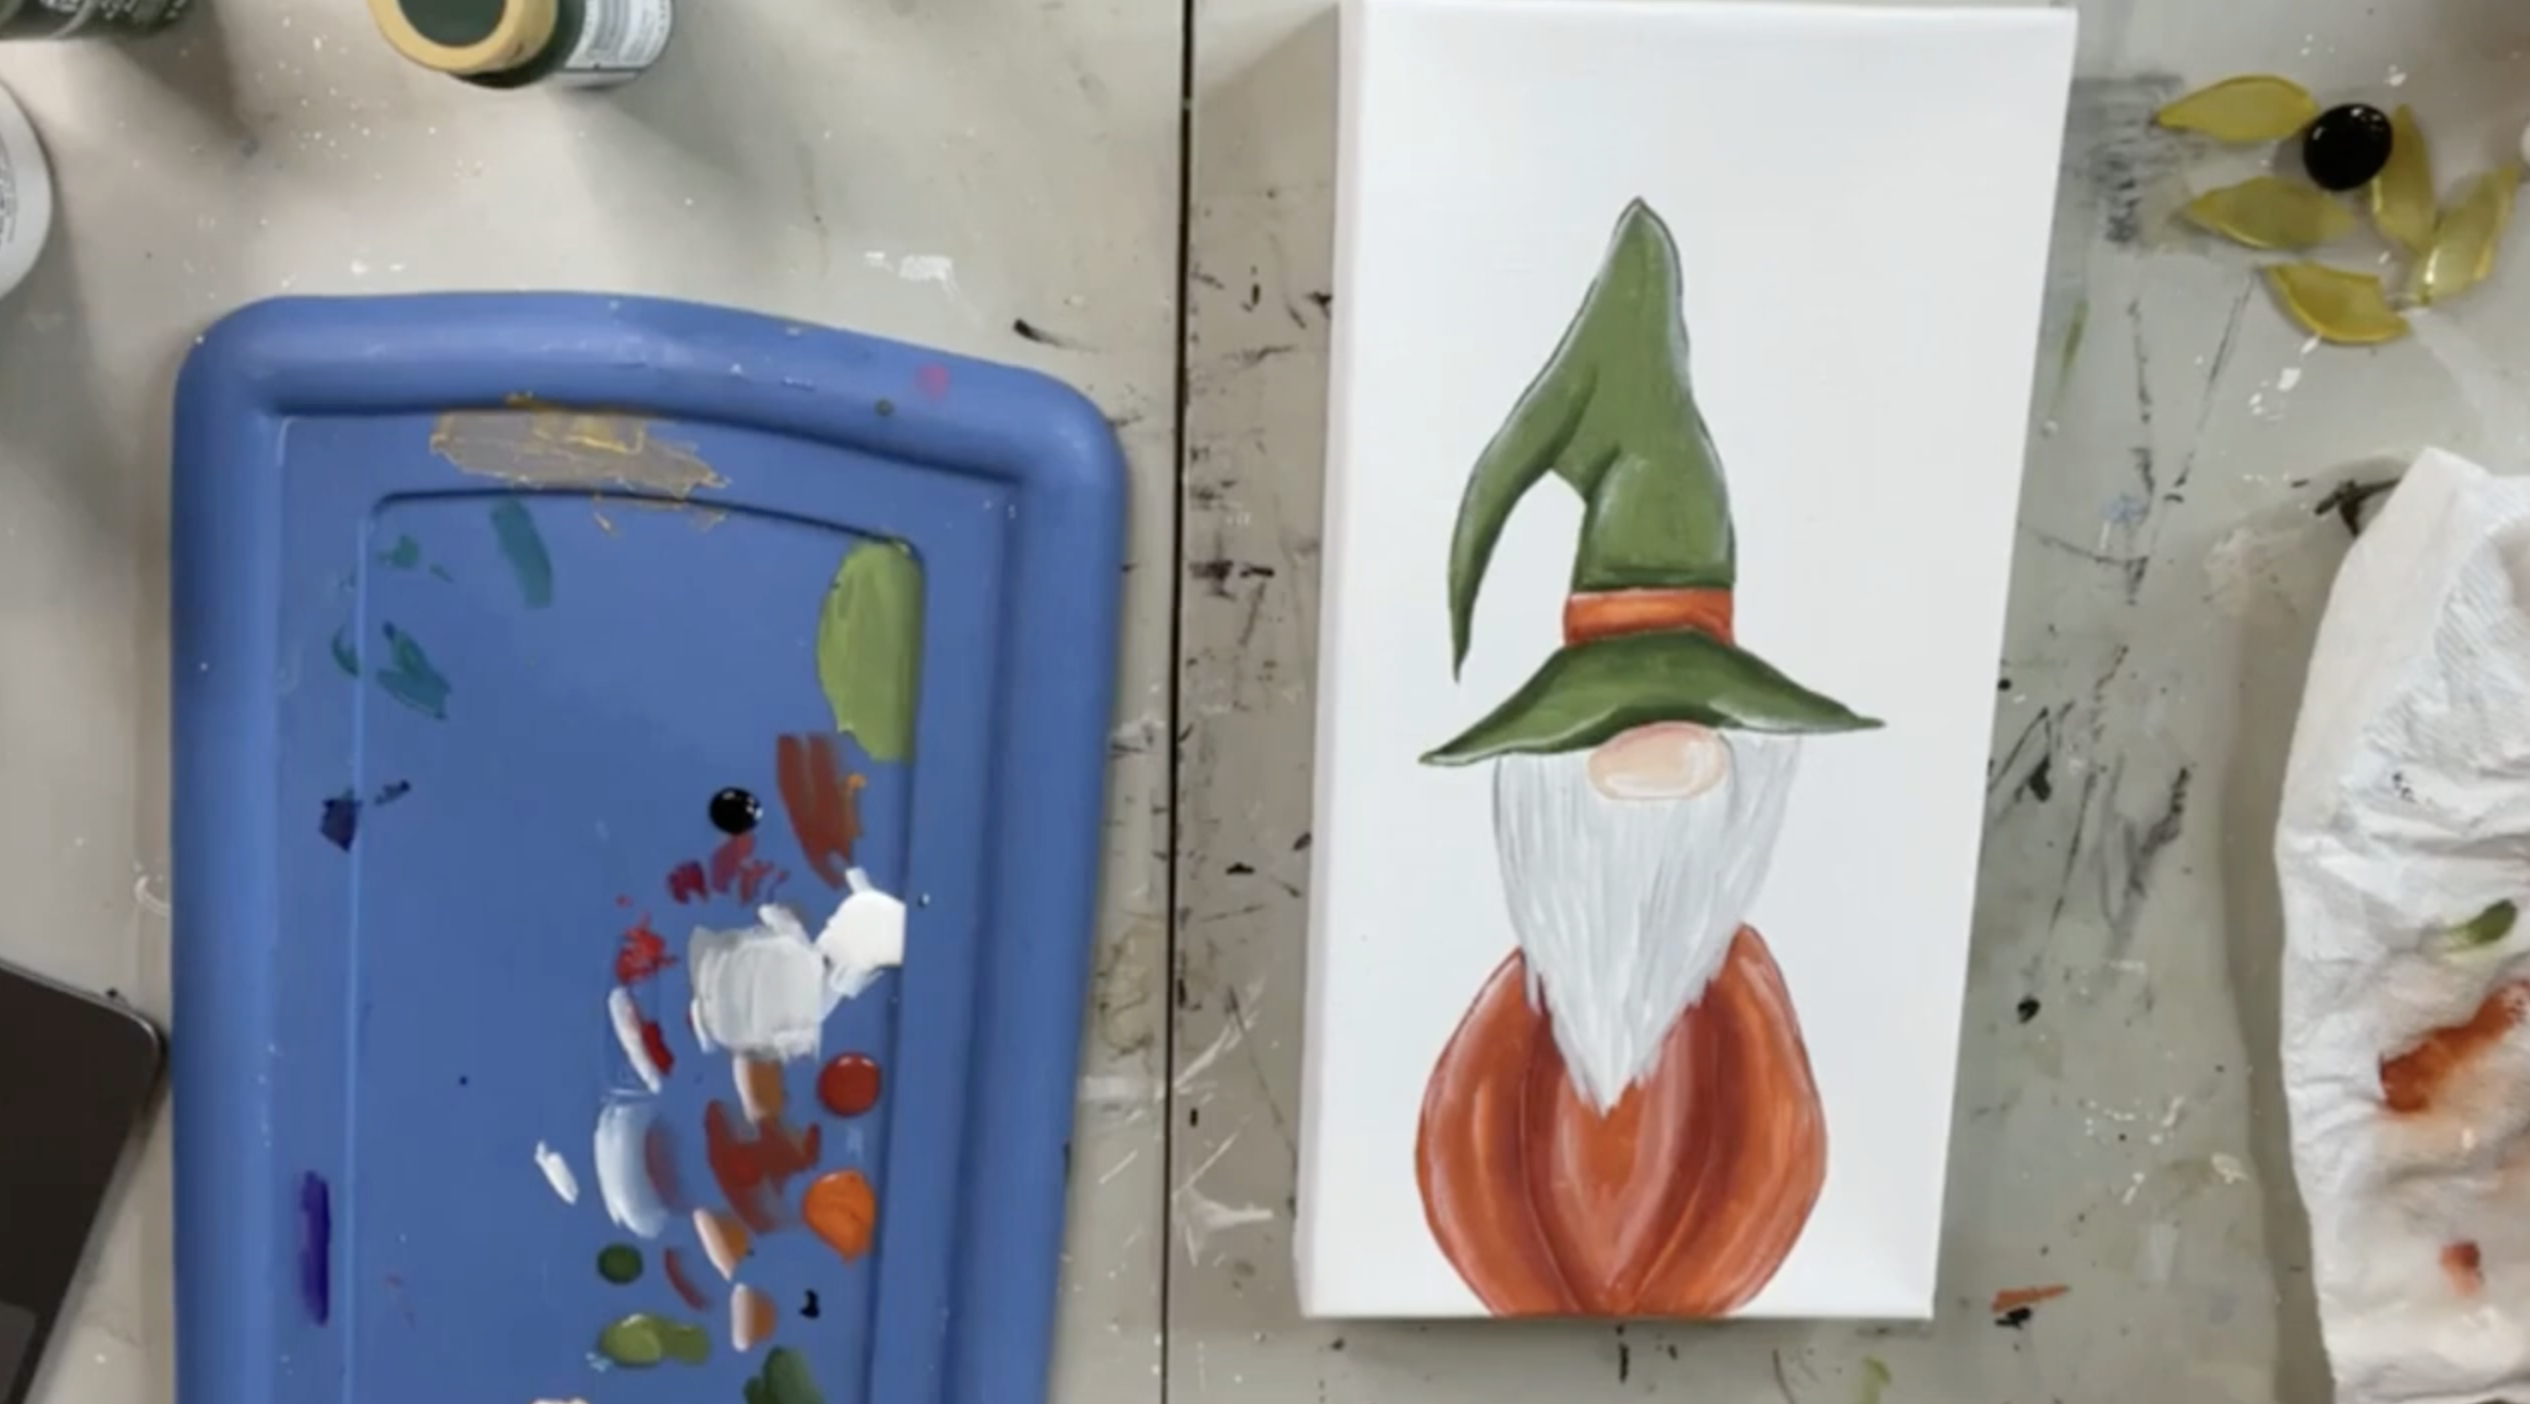
Fill in the gnome's nose with Warm Beige. Then pick up the tiniest amount of Heritage Brick or red and brush it across the top of the nose to give him a little blush. Clean your brush and add a small white highlight along the bottom. Those two little touches are enough to make his nose look rounded instead of flat.
Step 10: Add Loose Black Details
Once the paint is dry, grab a fine black graphic pen. Add loose little strokes around the pumpkin, hat band, beard, and other areas where you'd like more definition. Don't try to create one heavy, perfect outline. A few sketchy marks here and there give the whole gnome a little extra punch and personality.
Step 11: Paint the Aqua Background
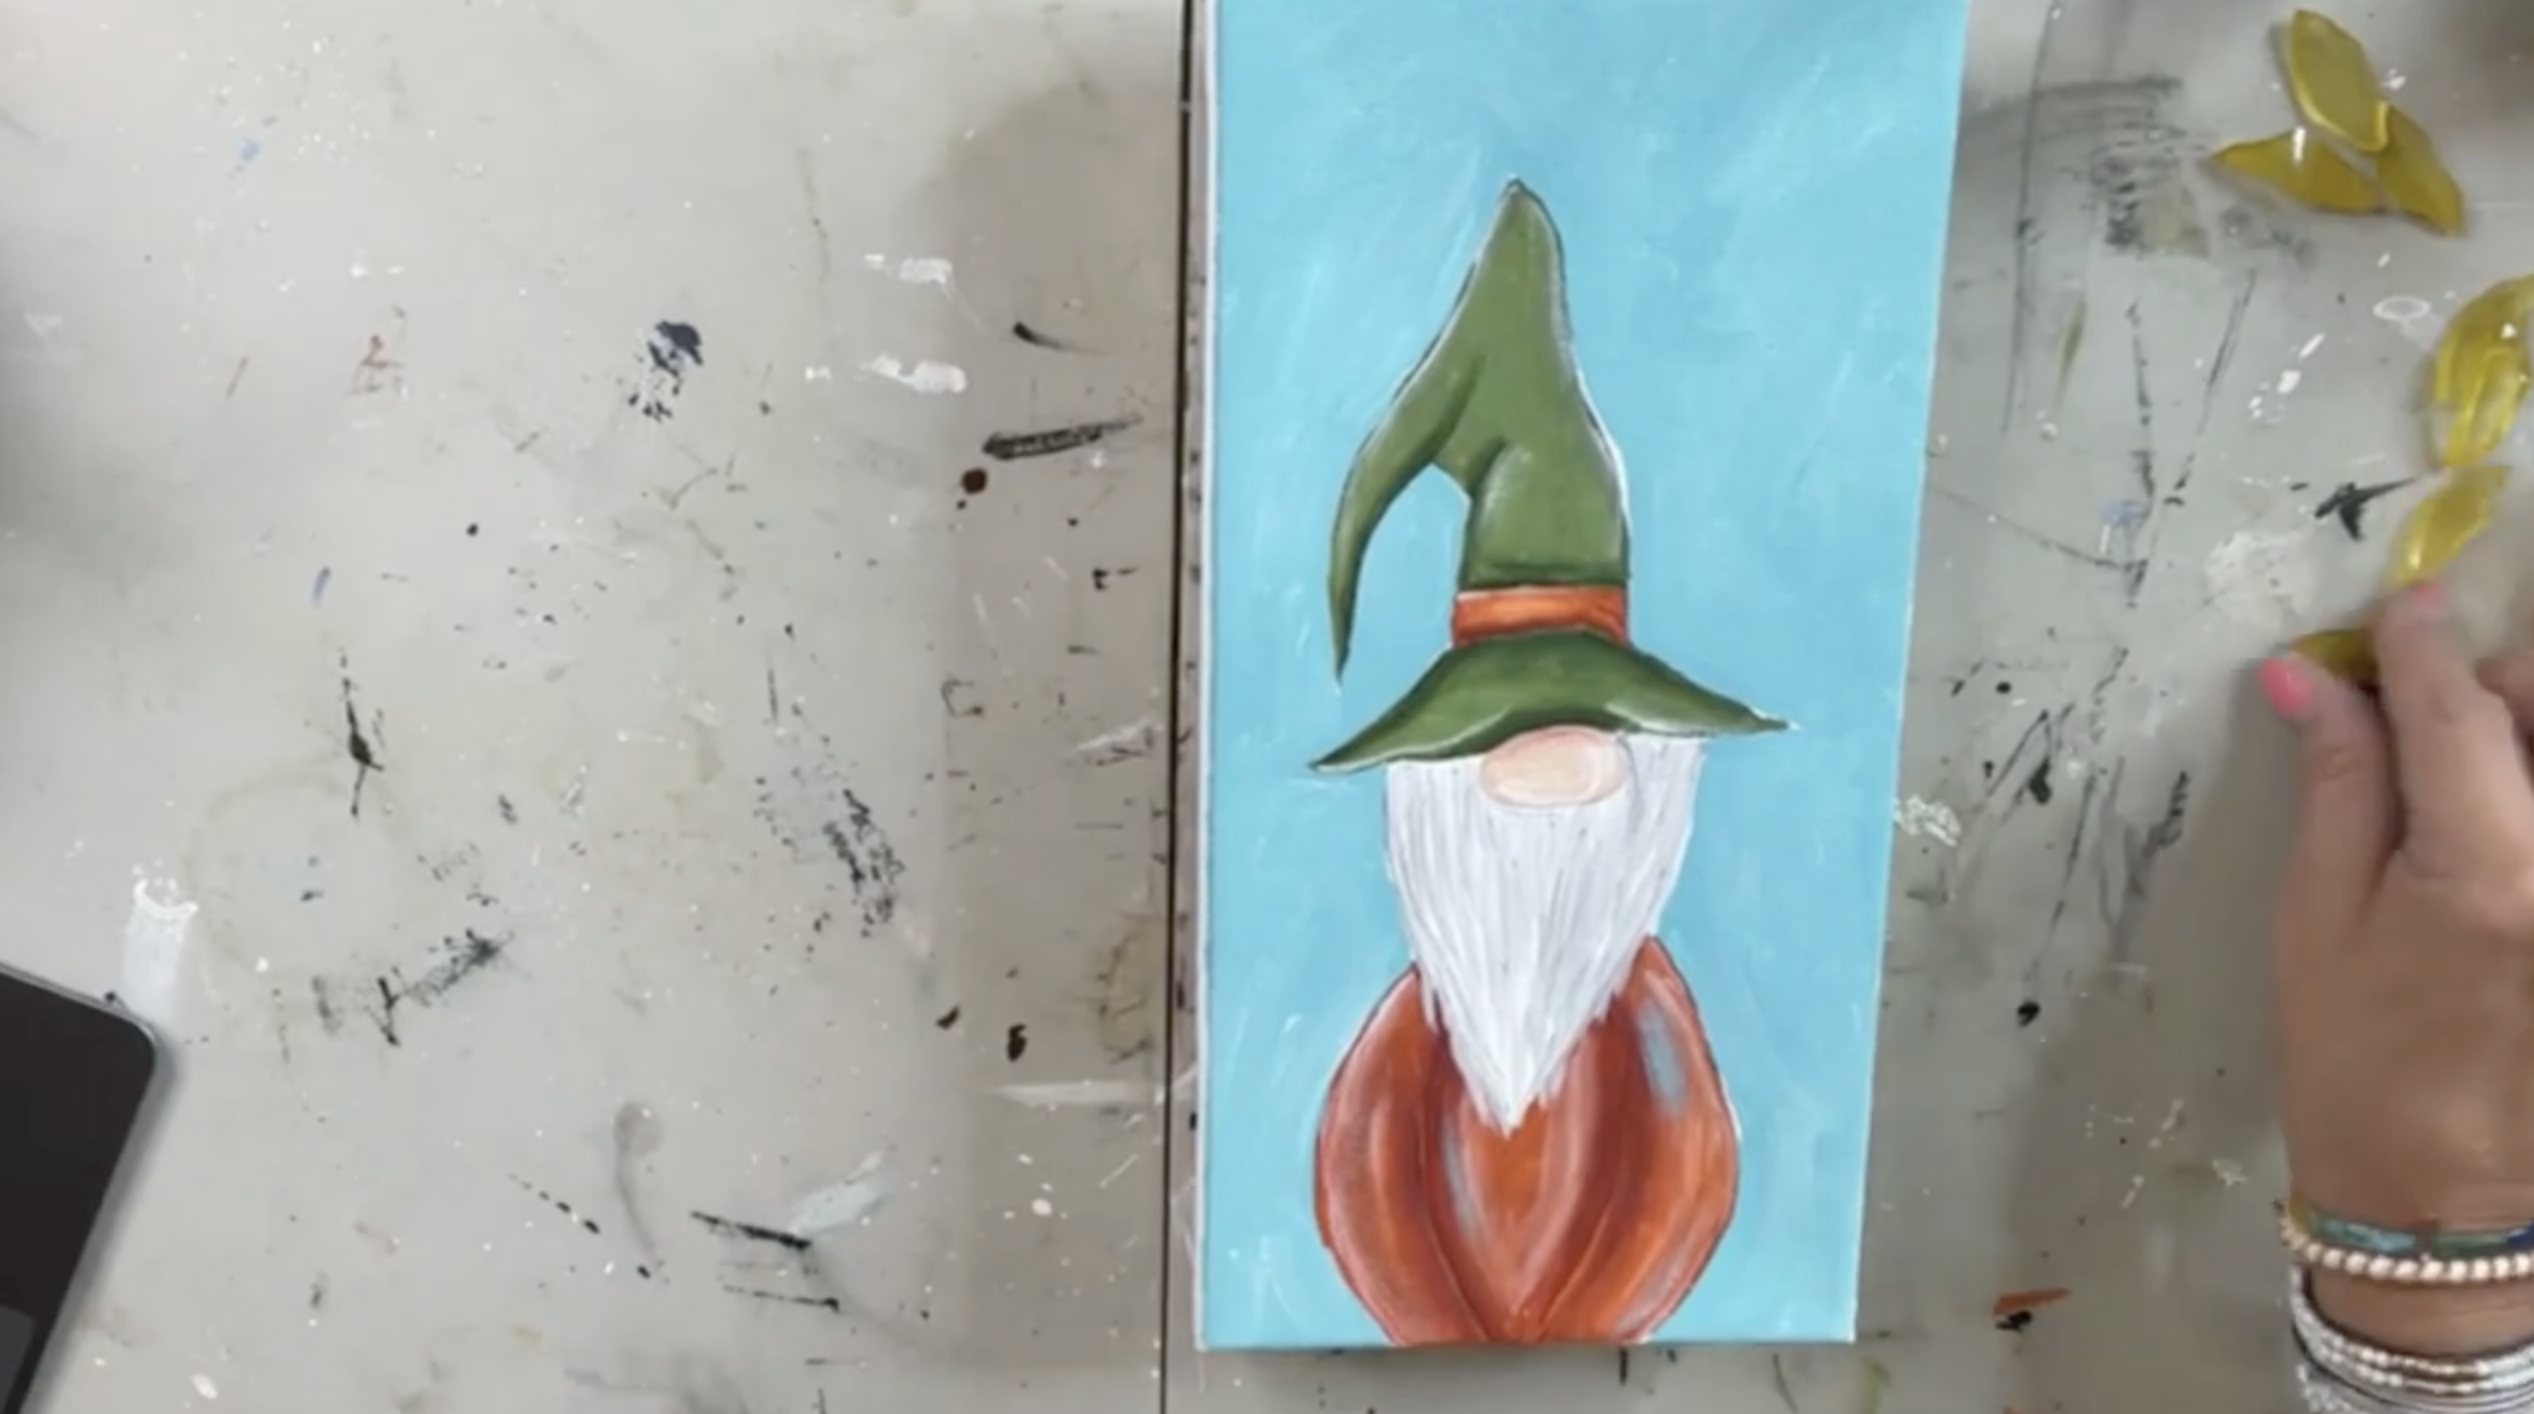
Now for the color that really changes this project! Paint around the gnome using Aqua Sky.
Normally, it would be easier to paint your background first. In this project, though, the background color wasn't chosen until after the gnome was painted, and that's okay!
While the Aqua Sky is still wet, dab a little white into selected areas. Keep the brushwork loose so you get subtle variations and texture rather than one completely flat blue background.
Step 12: Add a Touch of Blue to the Pumpkin
Before putting the blue paint away, offload most of it from your brush. Very lightly brush a few touches of Aqua Sky onto the orange pumpkin. You only need a little. Bringing some of that background color onto the gnome helps the whole painting feel more connected. Dry the painting completely before moving on to the glass and resin.
Step 13: Create the Glass Sunflower
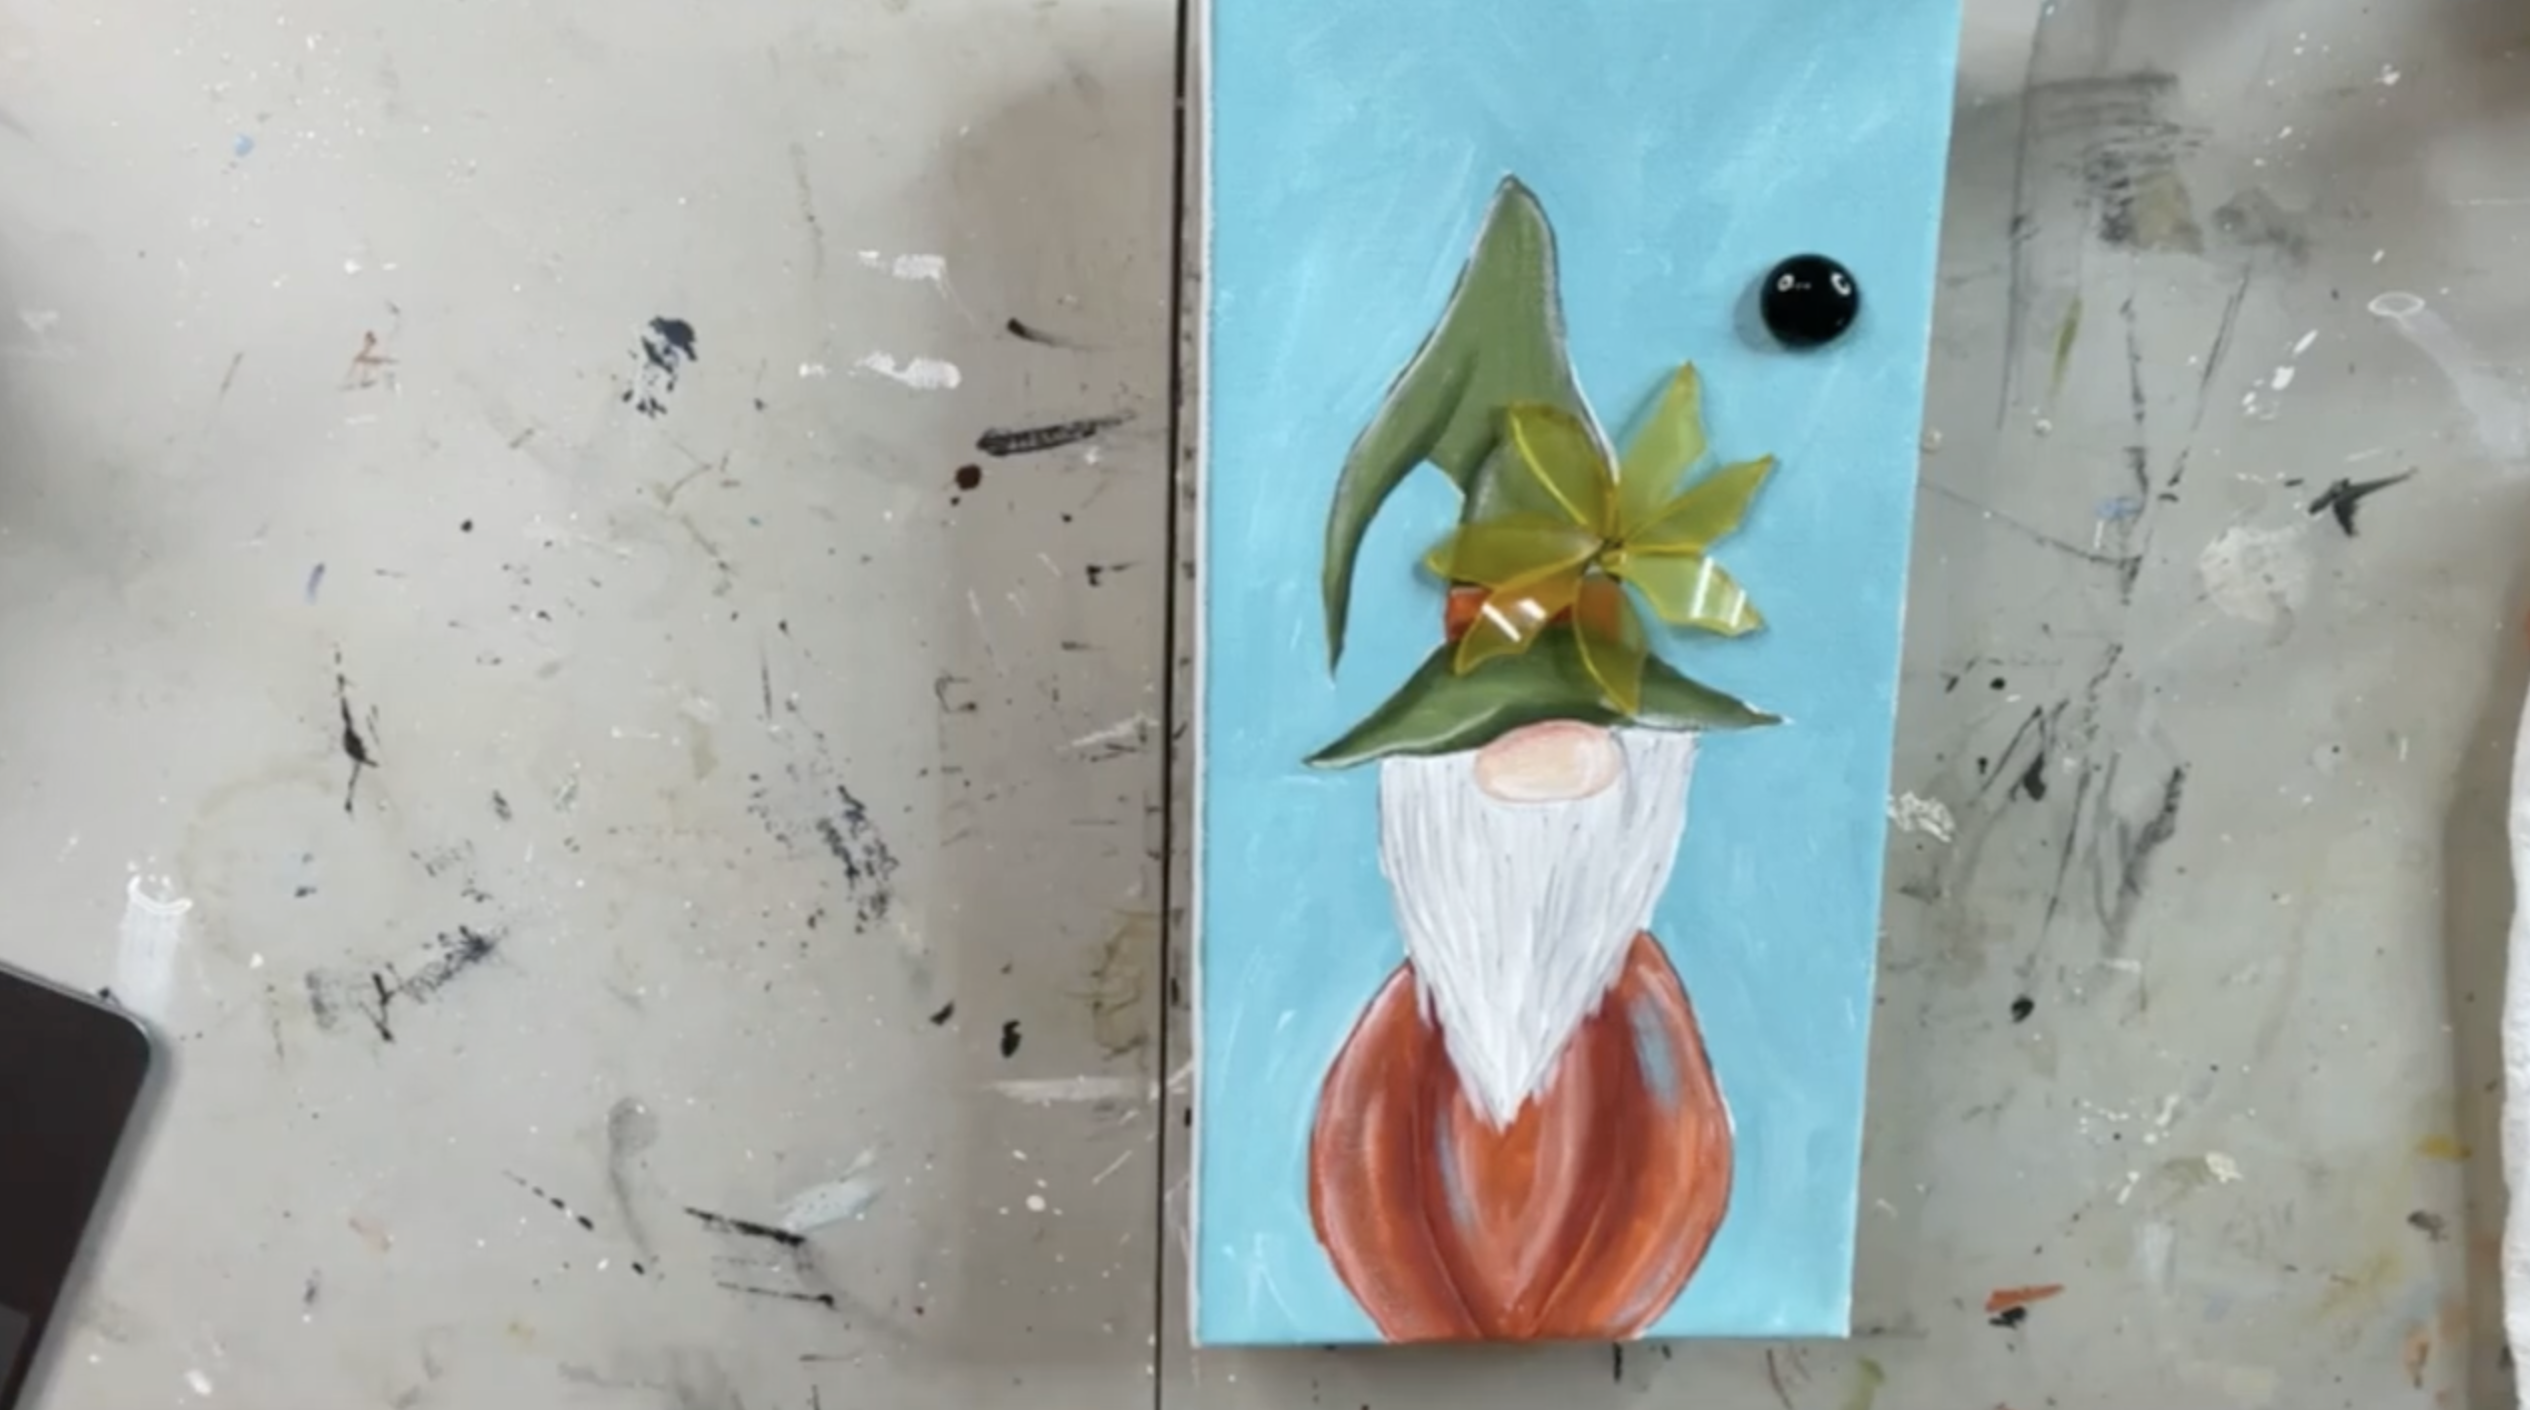
The sunflower is what gives this project that Art Shattered touch. For the original flower, a small inexpensive yellow glass votive was broken and then nipped into individual petal shapes. Seven pieces were used to create the flower.
If you're cutting your own glass, smooth any particularly sharp points with a honing stone before using the pieces. Always handle cut glass carefully and wear appropriate hand and eye protection.
Arrange your petals on one side of the gnome's hat, making sure they don't cover his nose. I like using an odd number of petals, so seven works beautifully here.
Place a black flat floral bead in the center to see how everything will look, but remove the center temporarily before adding resin.
Step 14: Elevate the Canvas
Place the canvas onto risers before mixing your resin. Since the sides aren't painted yet, be especially careful about resin running over the edges. The sides can be painted Aqua Sky after the resin has cured. Arrange your seven glass petals one more time and make any final adjustments.
Step 15: Mix ½ Ounce of Resin
Put on your gloves and prepare a small batch of resin.
For the ArtResin used in the original project, mix:
- ¼ ounce resin
- ¼ ounce hardener
This gives you ½ ounce total. Measure carefully and mix thoroughly according to your resin manufacturer's directions. Accurate measuring and complete mixing are especially important for proper curing.
Step 16: Resin the Glass Sunflower
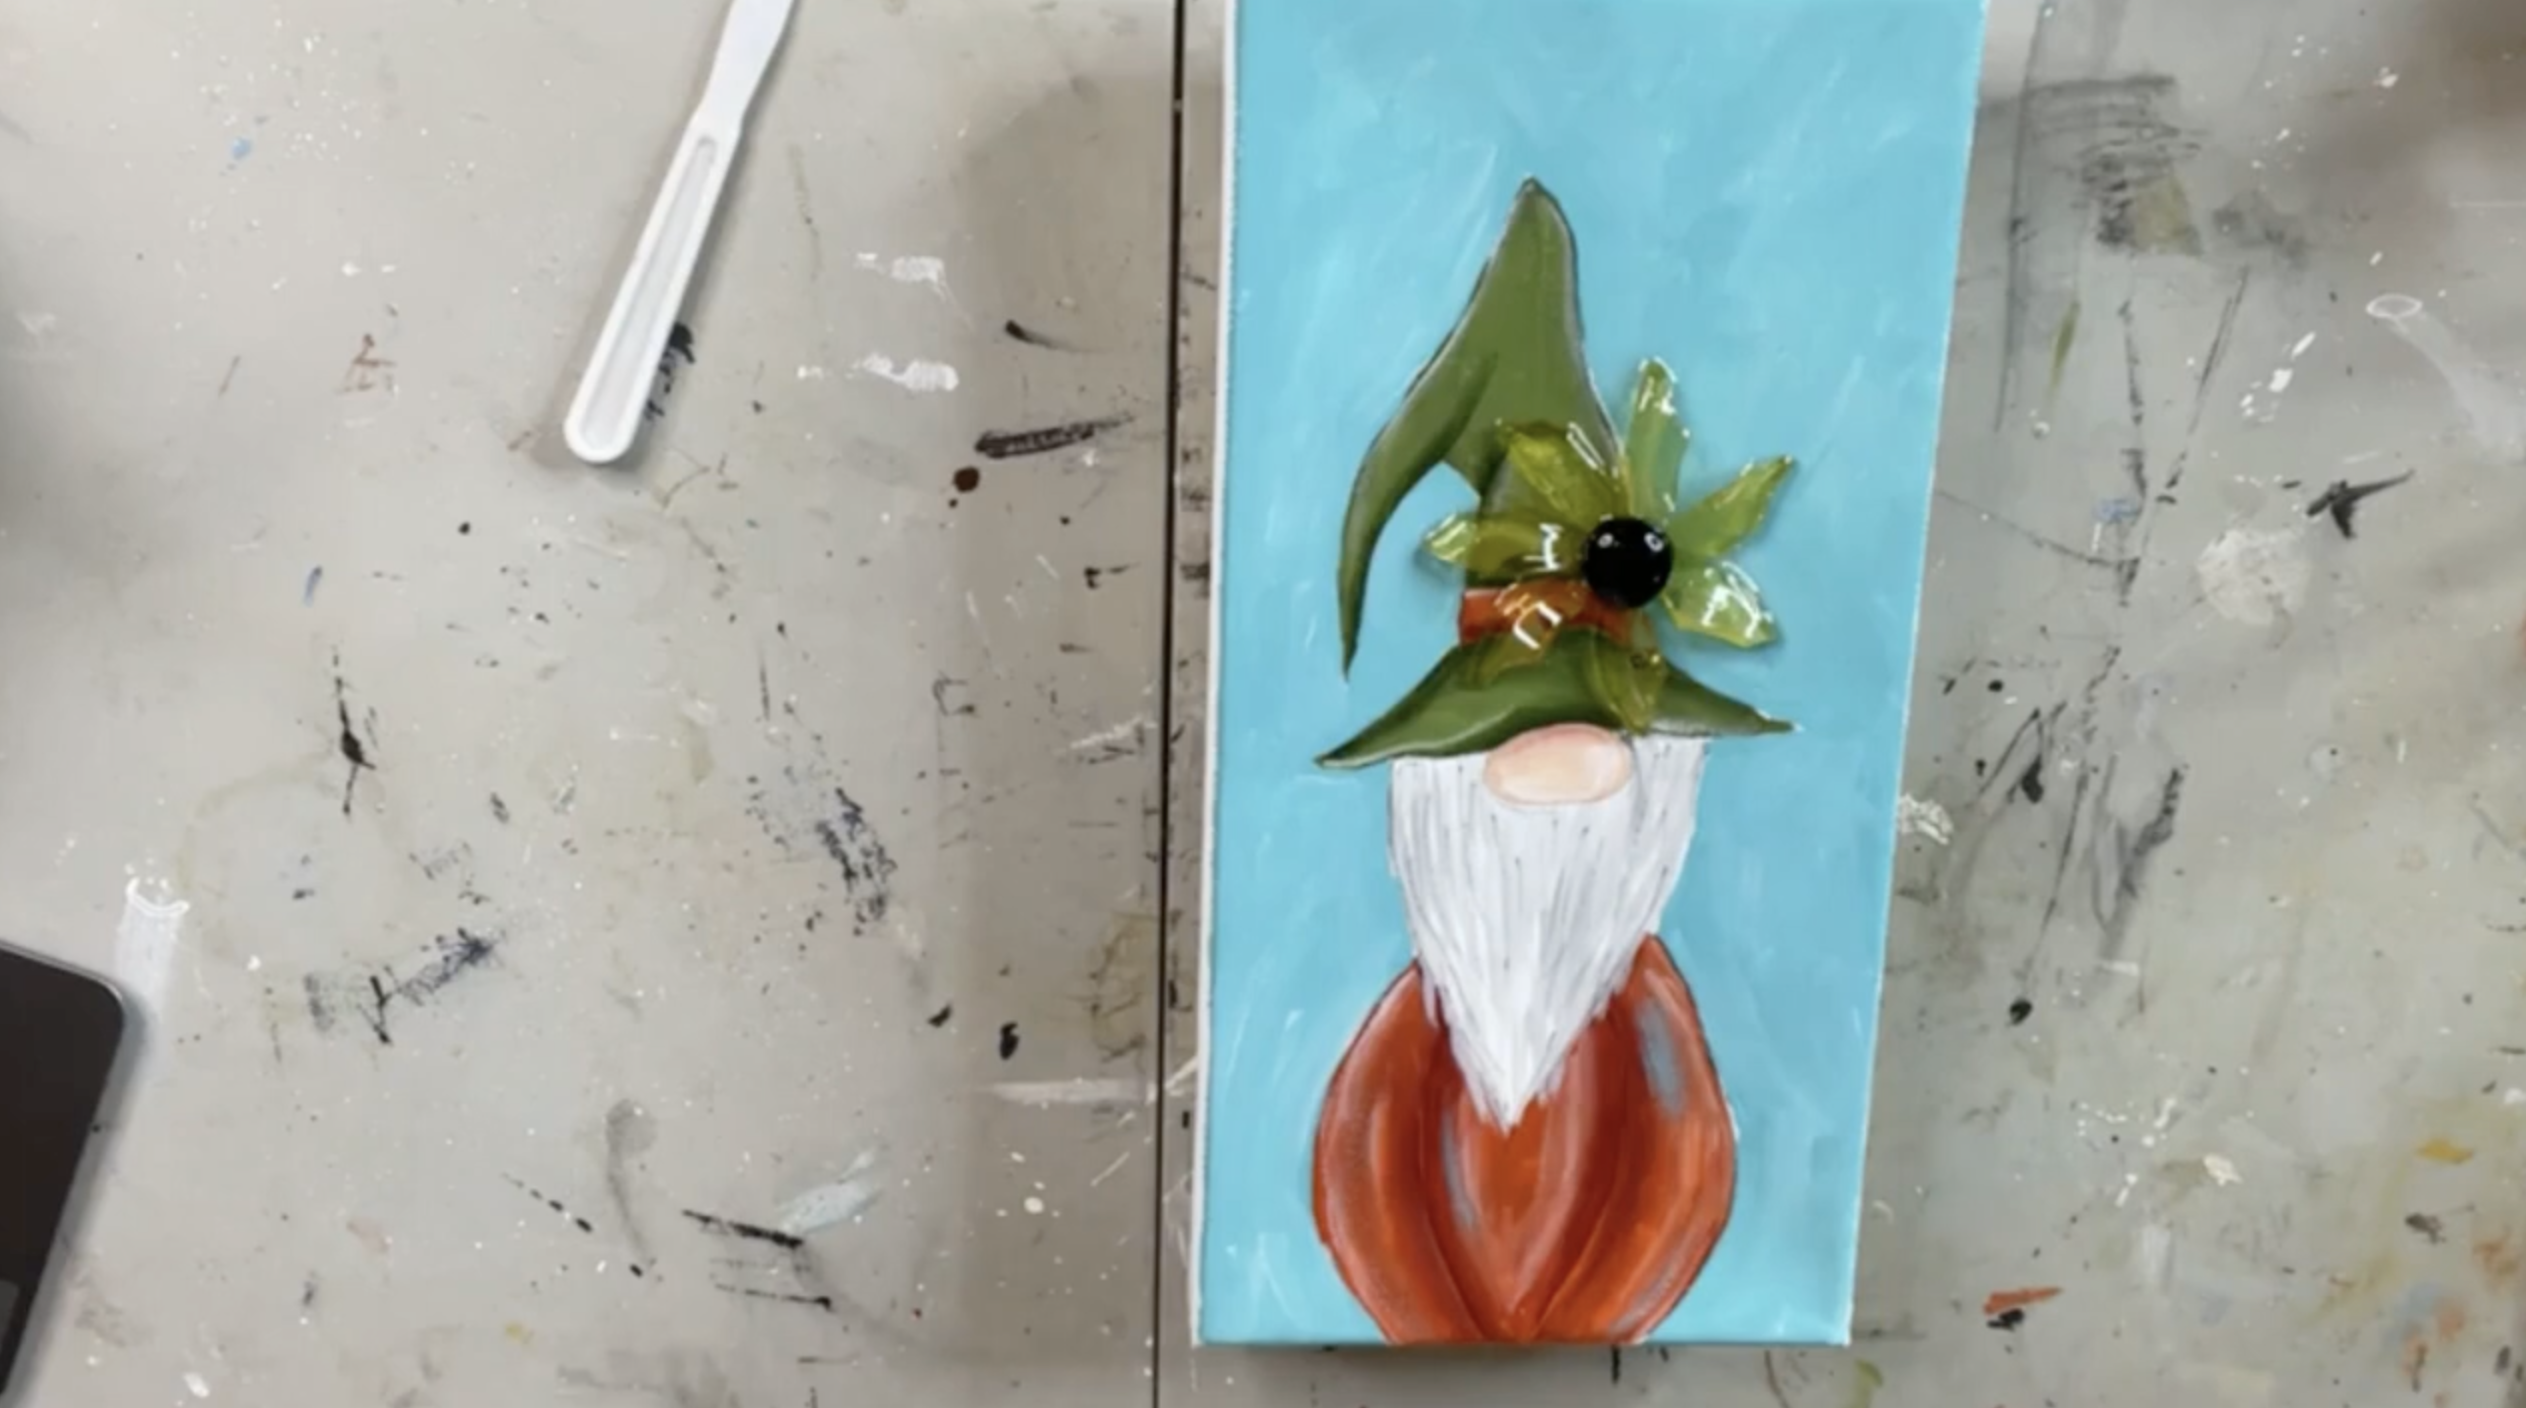
Start by drizzling resin over all seven glass petals. Work a little resin underneath the pieces as well so they're securely attached to the canvas. Adjust your petals if they've shifted, making sure you're happy with the flower shape before moving on.
Step 17: Resin the Canvas
Pour the remaining resin over the painted canvas.
Spread it into a thin, even layer, working all the way to the edges. You can use gloved hands, a palette knife, stir stick, or silicone tool - whatever method you prefer.
The resin really intensifies the colors at this stage, especially that bright Aqua Sky against the orange pumpkin. Once the flower petals are coated, place the black floral bead in the center of the sunflower and add a small dab of resin to secure it.
Step 18: Pop the Bubbles
Check the surface for resin bubbles. Use a heat gun or torch briefly to pop them, always following the safety directions for your resin and heat tool. Keep the heat moving rather than concentrating it in one area.
Then leave your artwork flat and undisturbed to cure according to your resin manufacturer's directions.
Your Pumpkin Gnome Is Finished!
How cute is this little guy?
I love the combination of the orange pumpkin body, floppy green hat, bright turquoise background, and dimensional glass sunflower. The colors aren't your typical muted fall palette, which is exactly what makes this one so fun.
And that sunflower is a great reminder to look at glass a little differently. An inexpensive yellow votive became seven flower petals, and one simple floral bead became the center.
Change the background. Give him a different colored hat. Create your flower from another shade of glass. Once you have the basic pumpkin gnome, there are so many ways to make him your own.
If you're a member of The Shattered Circle, you'll find this tutorial in your classroom under Art Shattered Weekly Facebook Lives, search for "Pumpkin Gnome".
If you don’t want to miss my Facebook LIVE art instruction, make sure you are on my texting list. I always text 10 minutes before I’m going to go LIVE, so you won’t ever miss it. You can text “Hey Cindy” to 901-519-2923.
Want more inspiration and artwork?
- My website artshattered.com with resources, shop, and more!
- My creative membership The Shattered Circle, where you can explore the world of glass art with online workshops, a supportive community, and more!
- My mini creative membership Just A ‘Lil Bit Monthly Glass Art Club, where you’ll get a new quick and easy online tutorial for just a lil' bit of sparkle in your life!
- My Facebook page where I share free LIVE tutorials and inspiration
- My YouTube channel which has tons of free art lessons right at your fingertips.
