
Hay Scarecrow 🍂
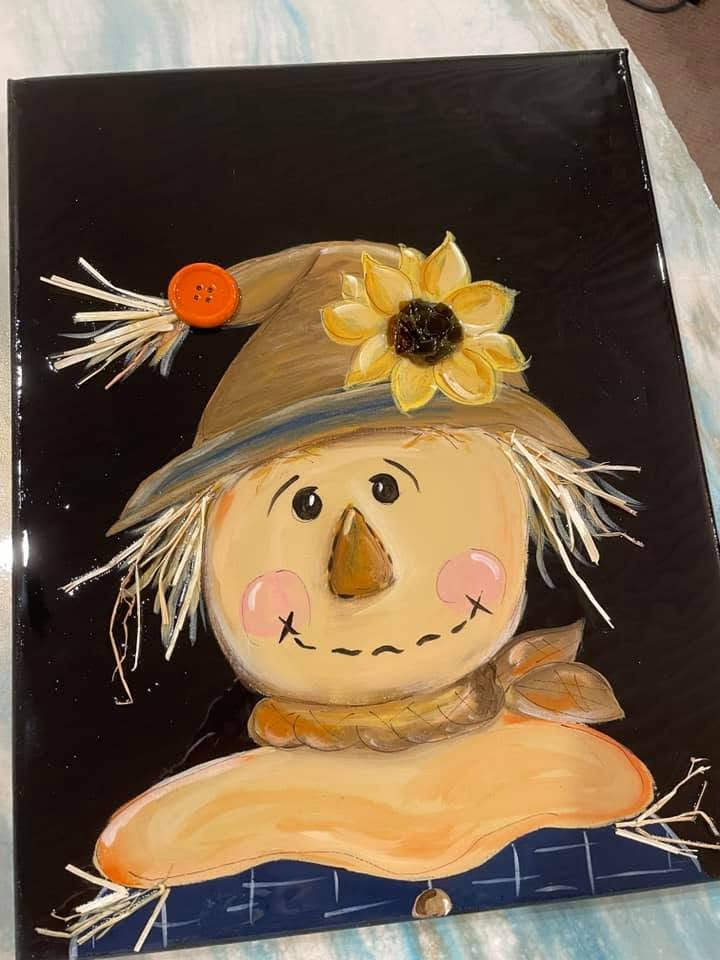
This scarecrow is such a fun fall project because it mixes painting with some unexpected dimensional details. We’re starting with an 11x14 canvas painted black, then building this sweet scarecrow with warm fall colors, a sunflower, glass, a wooden button, and (my favorite part!) real straw tucked right into the resin!
Step 1: Prepare the Canvas
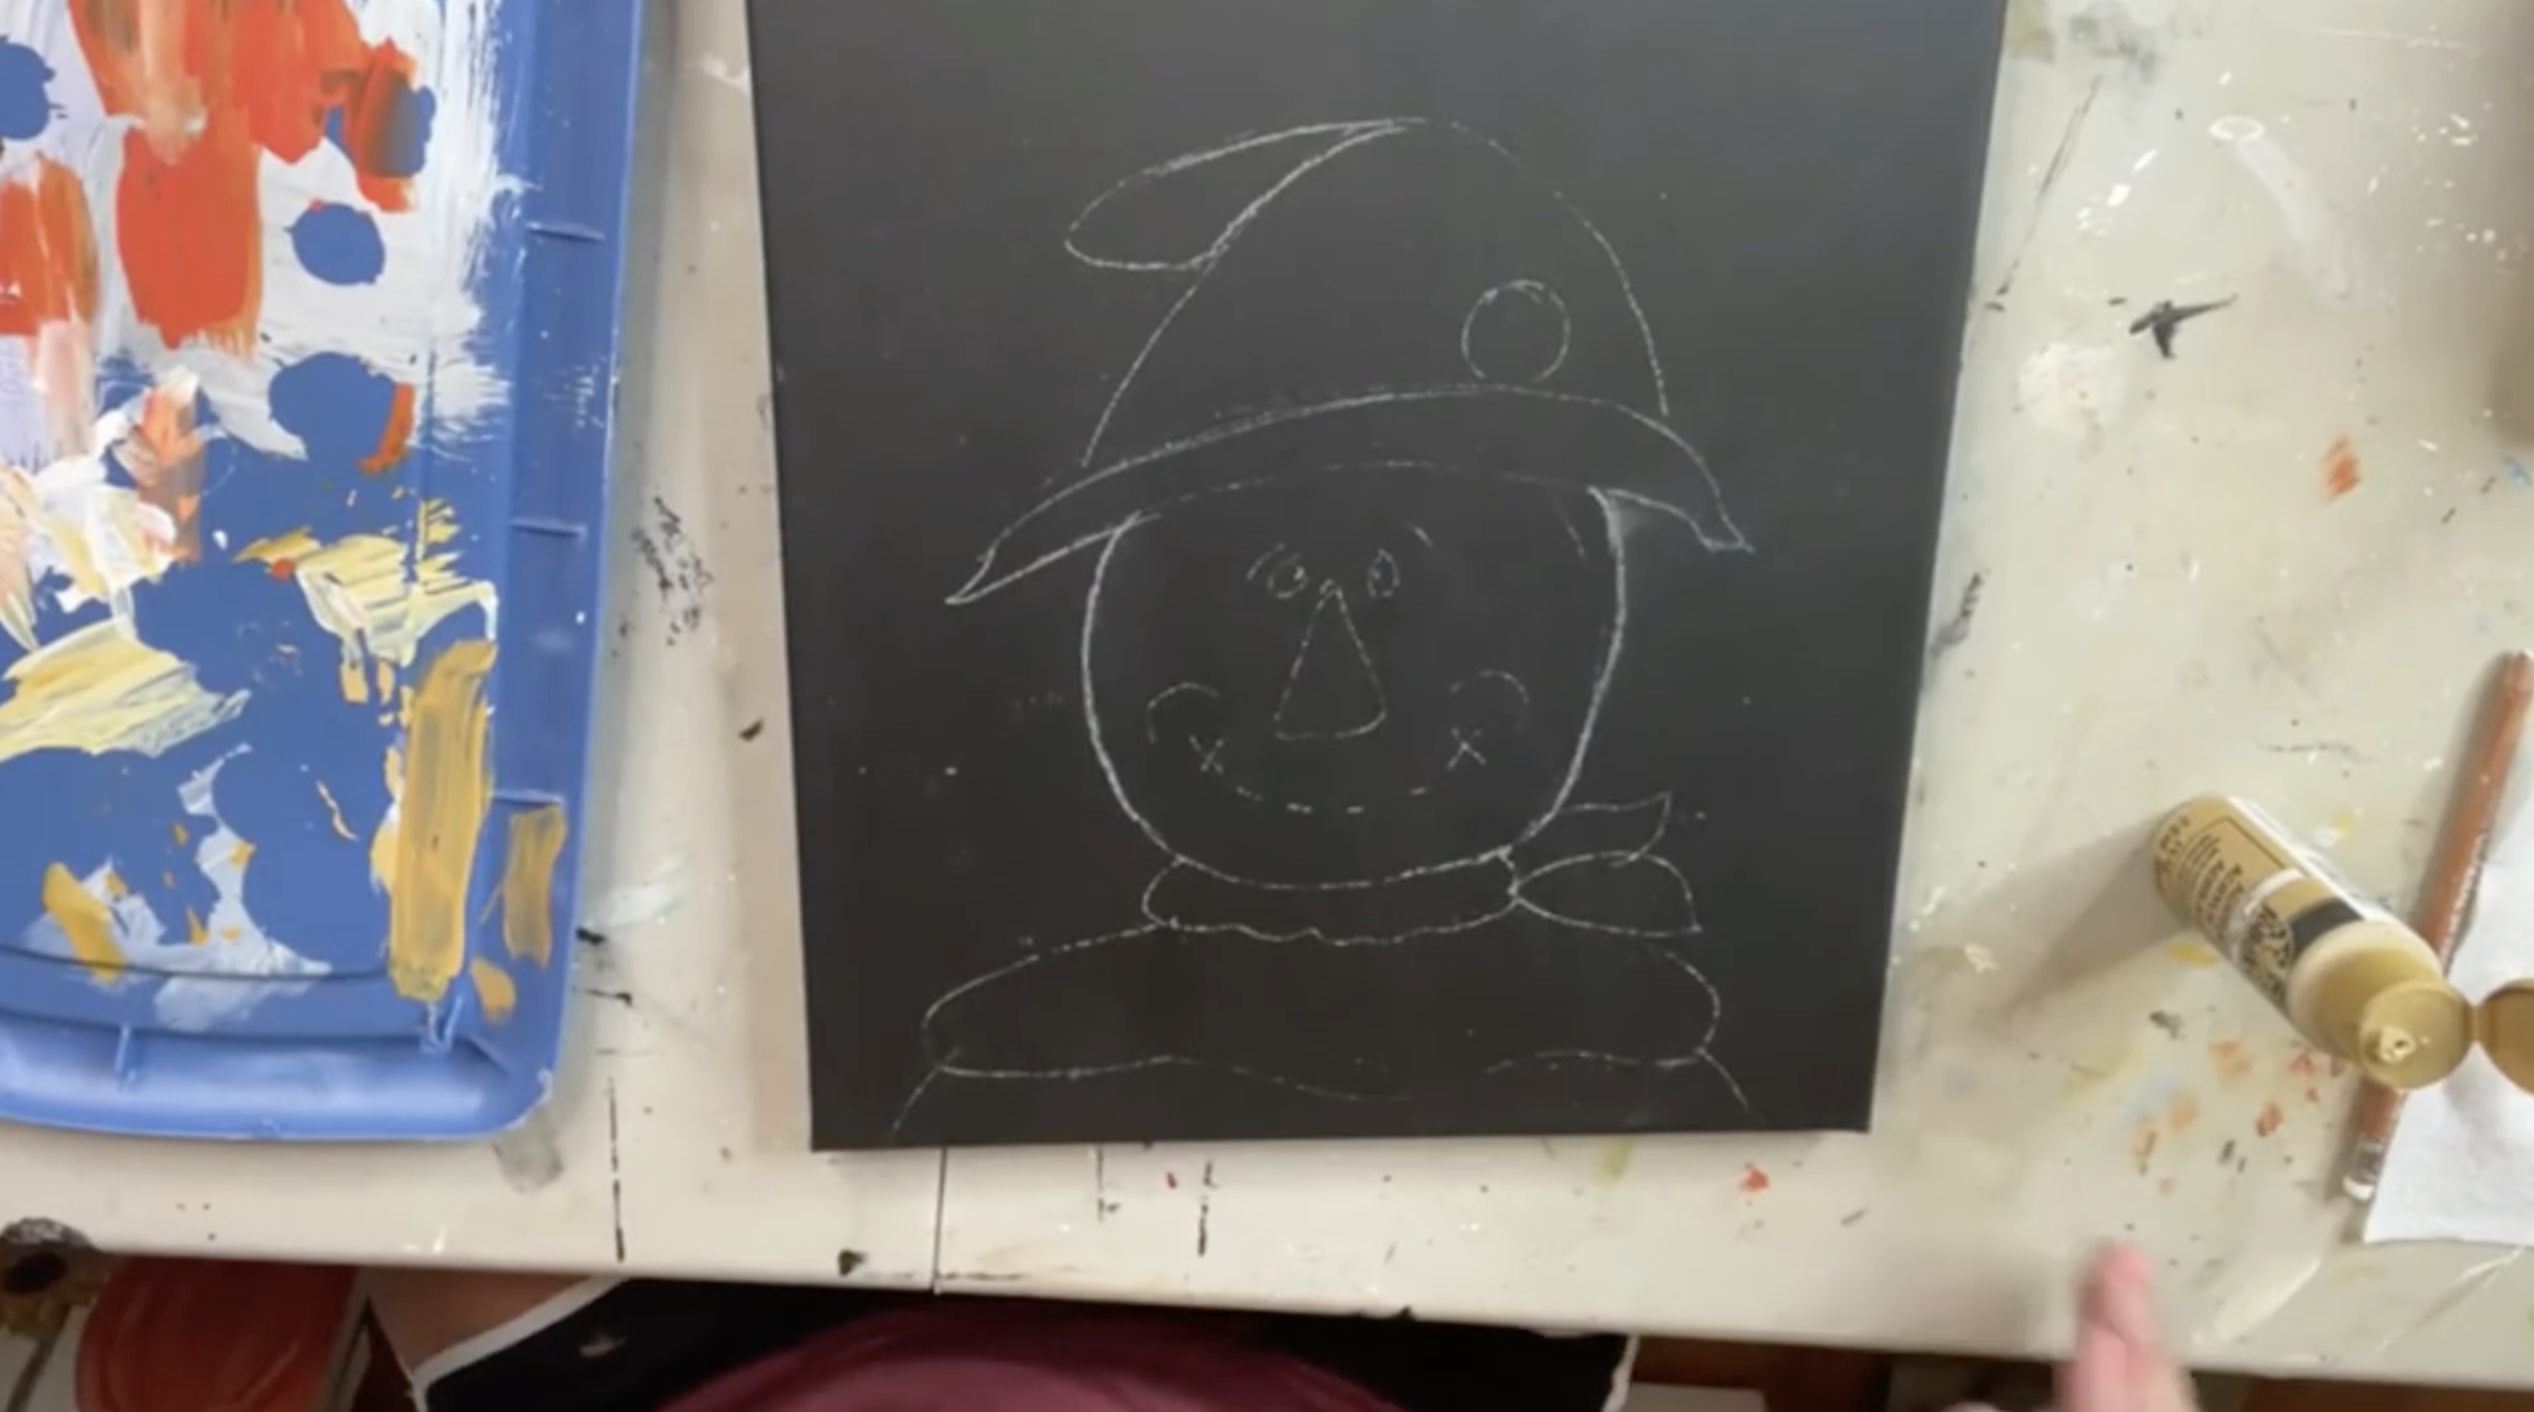
Start with an 11x14 canvas and give the entire surface two coats of black acrylic paint. Let it dry completely.
Next, use a chalk pencil to sketch your scarecrow onto the canvas. You can draw yours freehand or use a tracer to make this step easier. The design doesn’t need to be perfectly symmetrical. This guy is supposed to be a little whimsical and ragamuffin-looking!
Step 2: Base Coat the Scarecrow
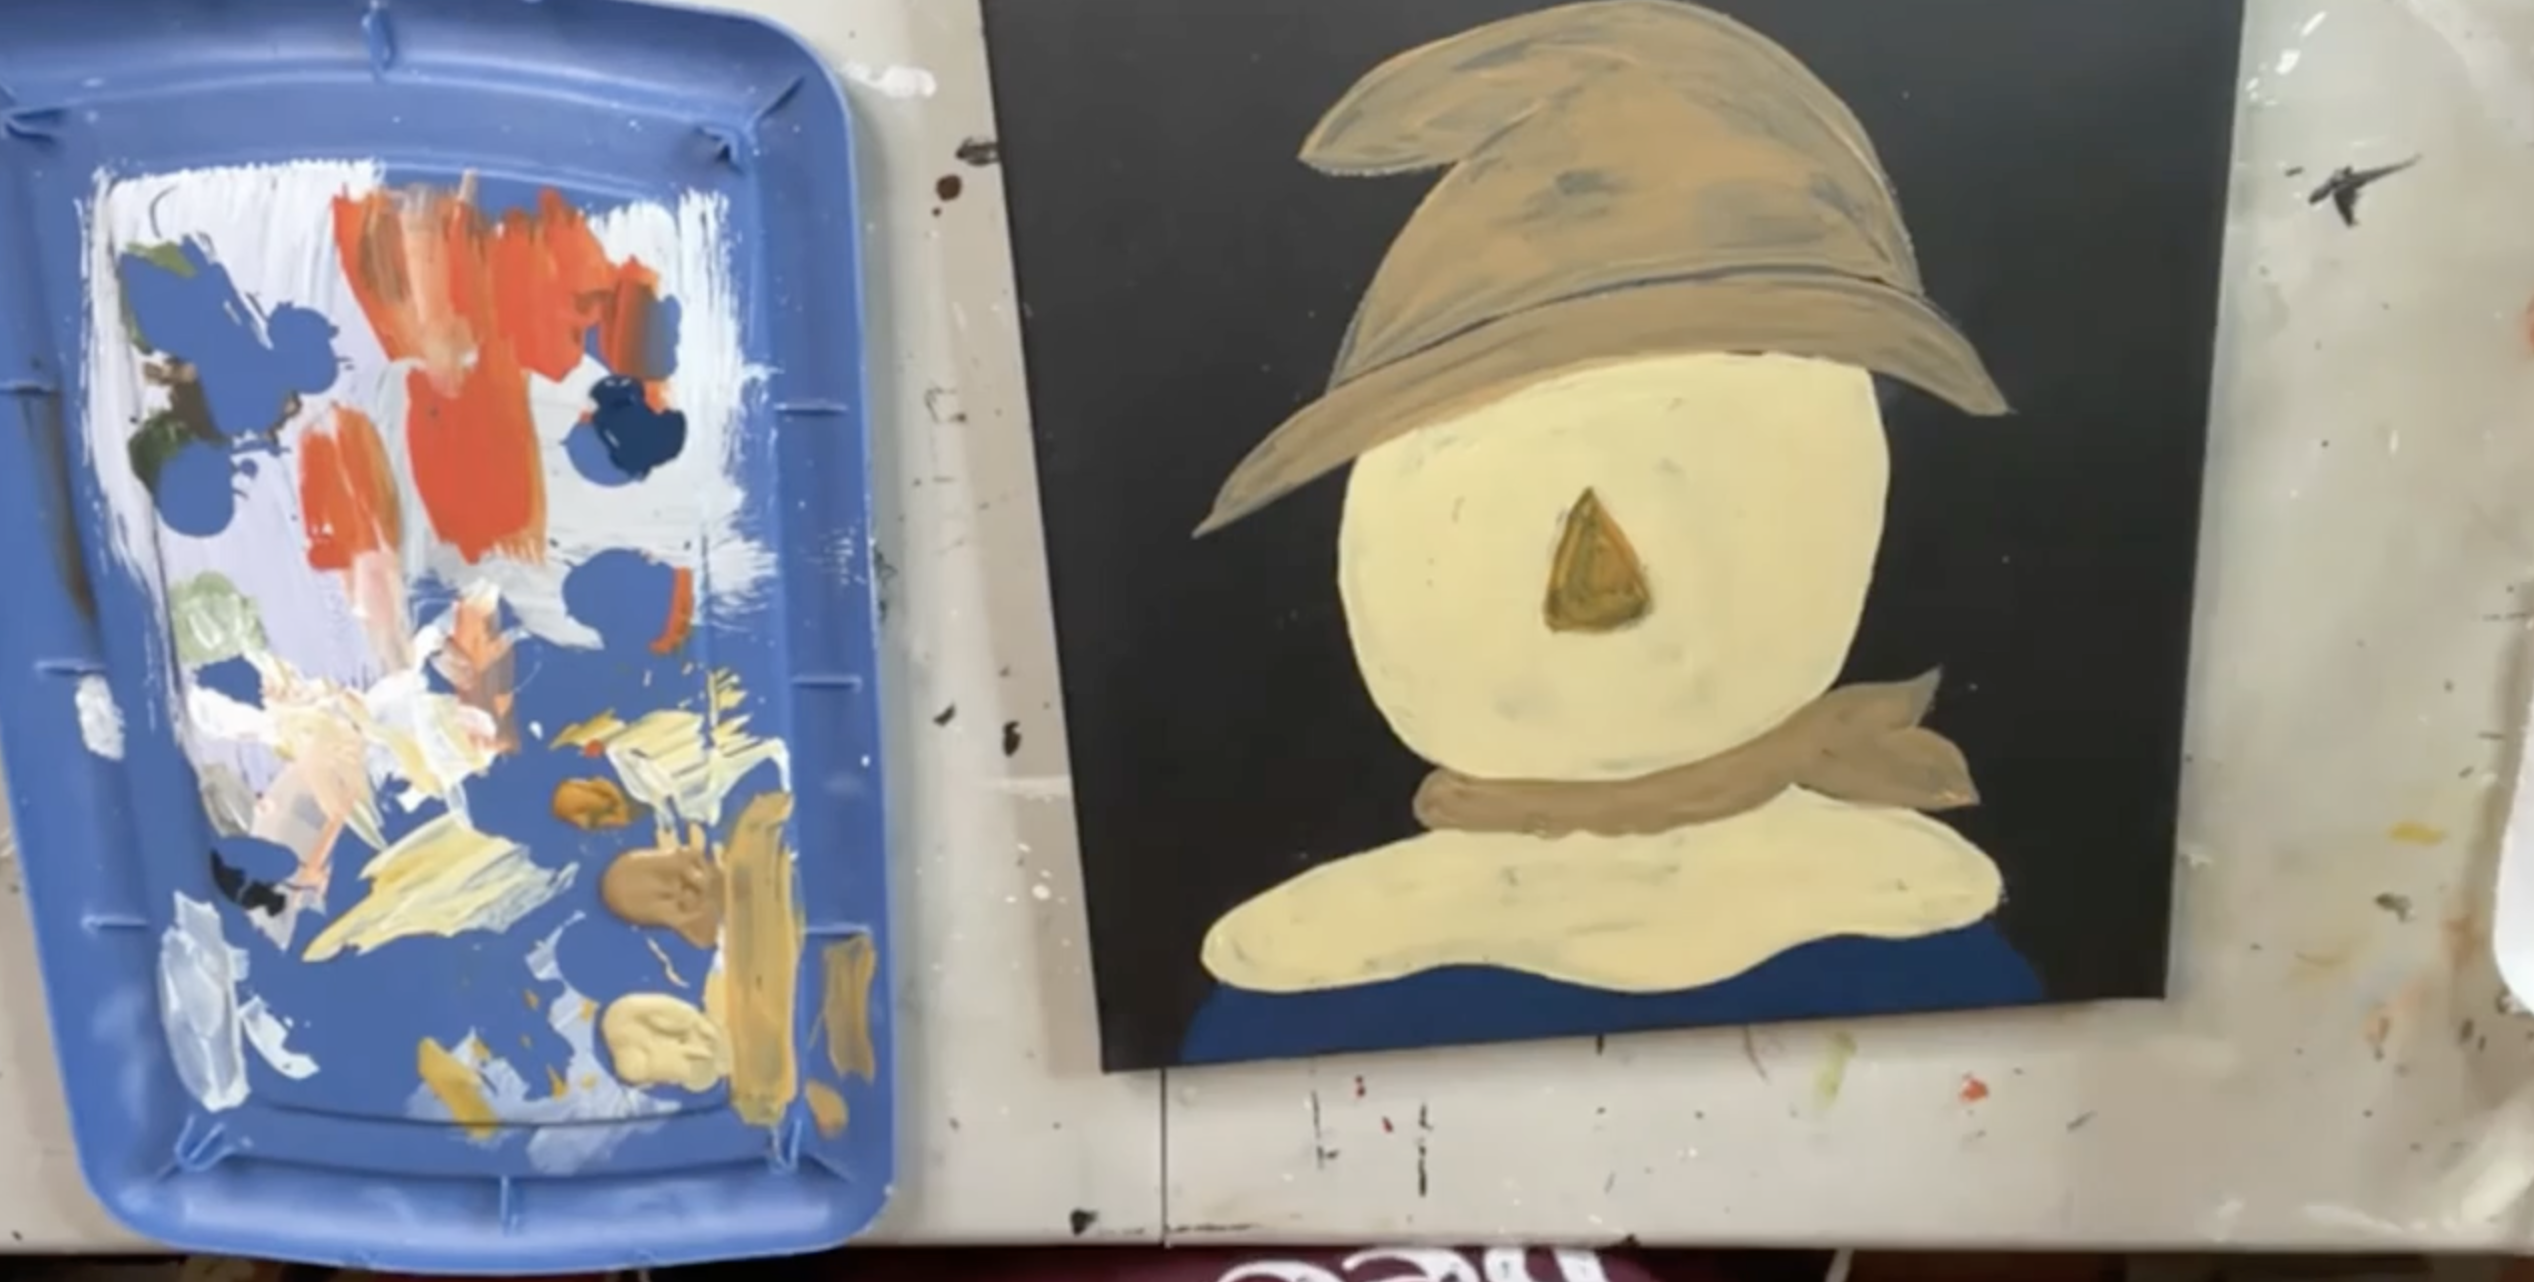
Use FolkArt Camel and a flat brush to fill in the scarecrow’s face. Paint carefully around the nose so you can still see your original sketch. Use the same Camel color for the small neck area beneath his face. Don’t worry if your first coat isn’t completely opaque. You can build up the color as you add the shading.
Base coat the scarecrow’s hat with Rusted Pipe, a warm light brown or nutmeg-like color. Paint both the floppy upper portion of the hat and the brim. You may need more than one coat, especially when painting lighter colors over the black background.
Use Cinnamon or another warm pumpkin-orange color to fill in the scarecrow’s nose.
Fill in the bottom portion of the scarecrow with navy blue. The dark blue still shows up beautifully against the black canvas and gives us a nice contrast with all the warm fall colors we’ll be adding throughout the rest of the piece.
Step 3: Shade the Face
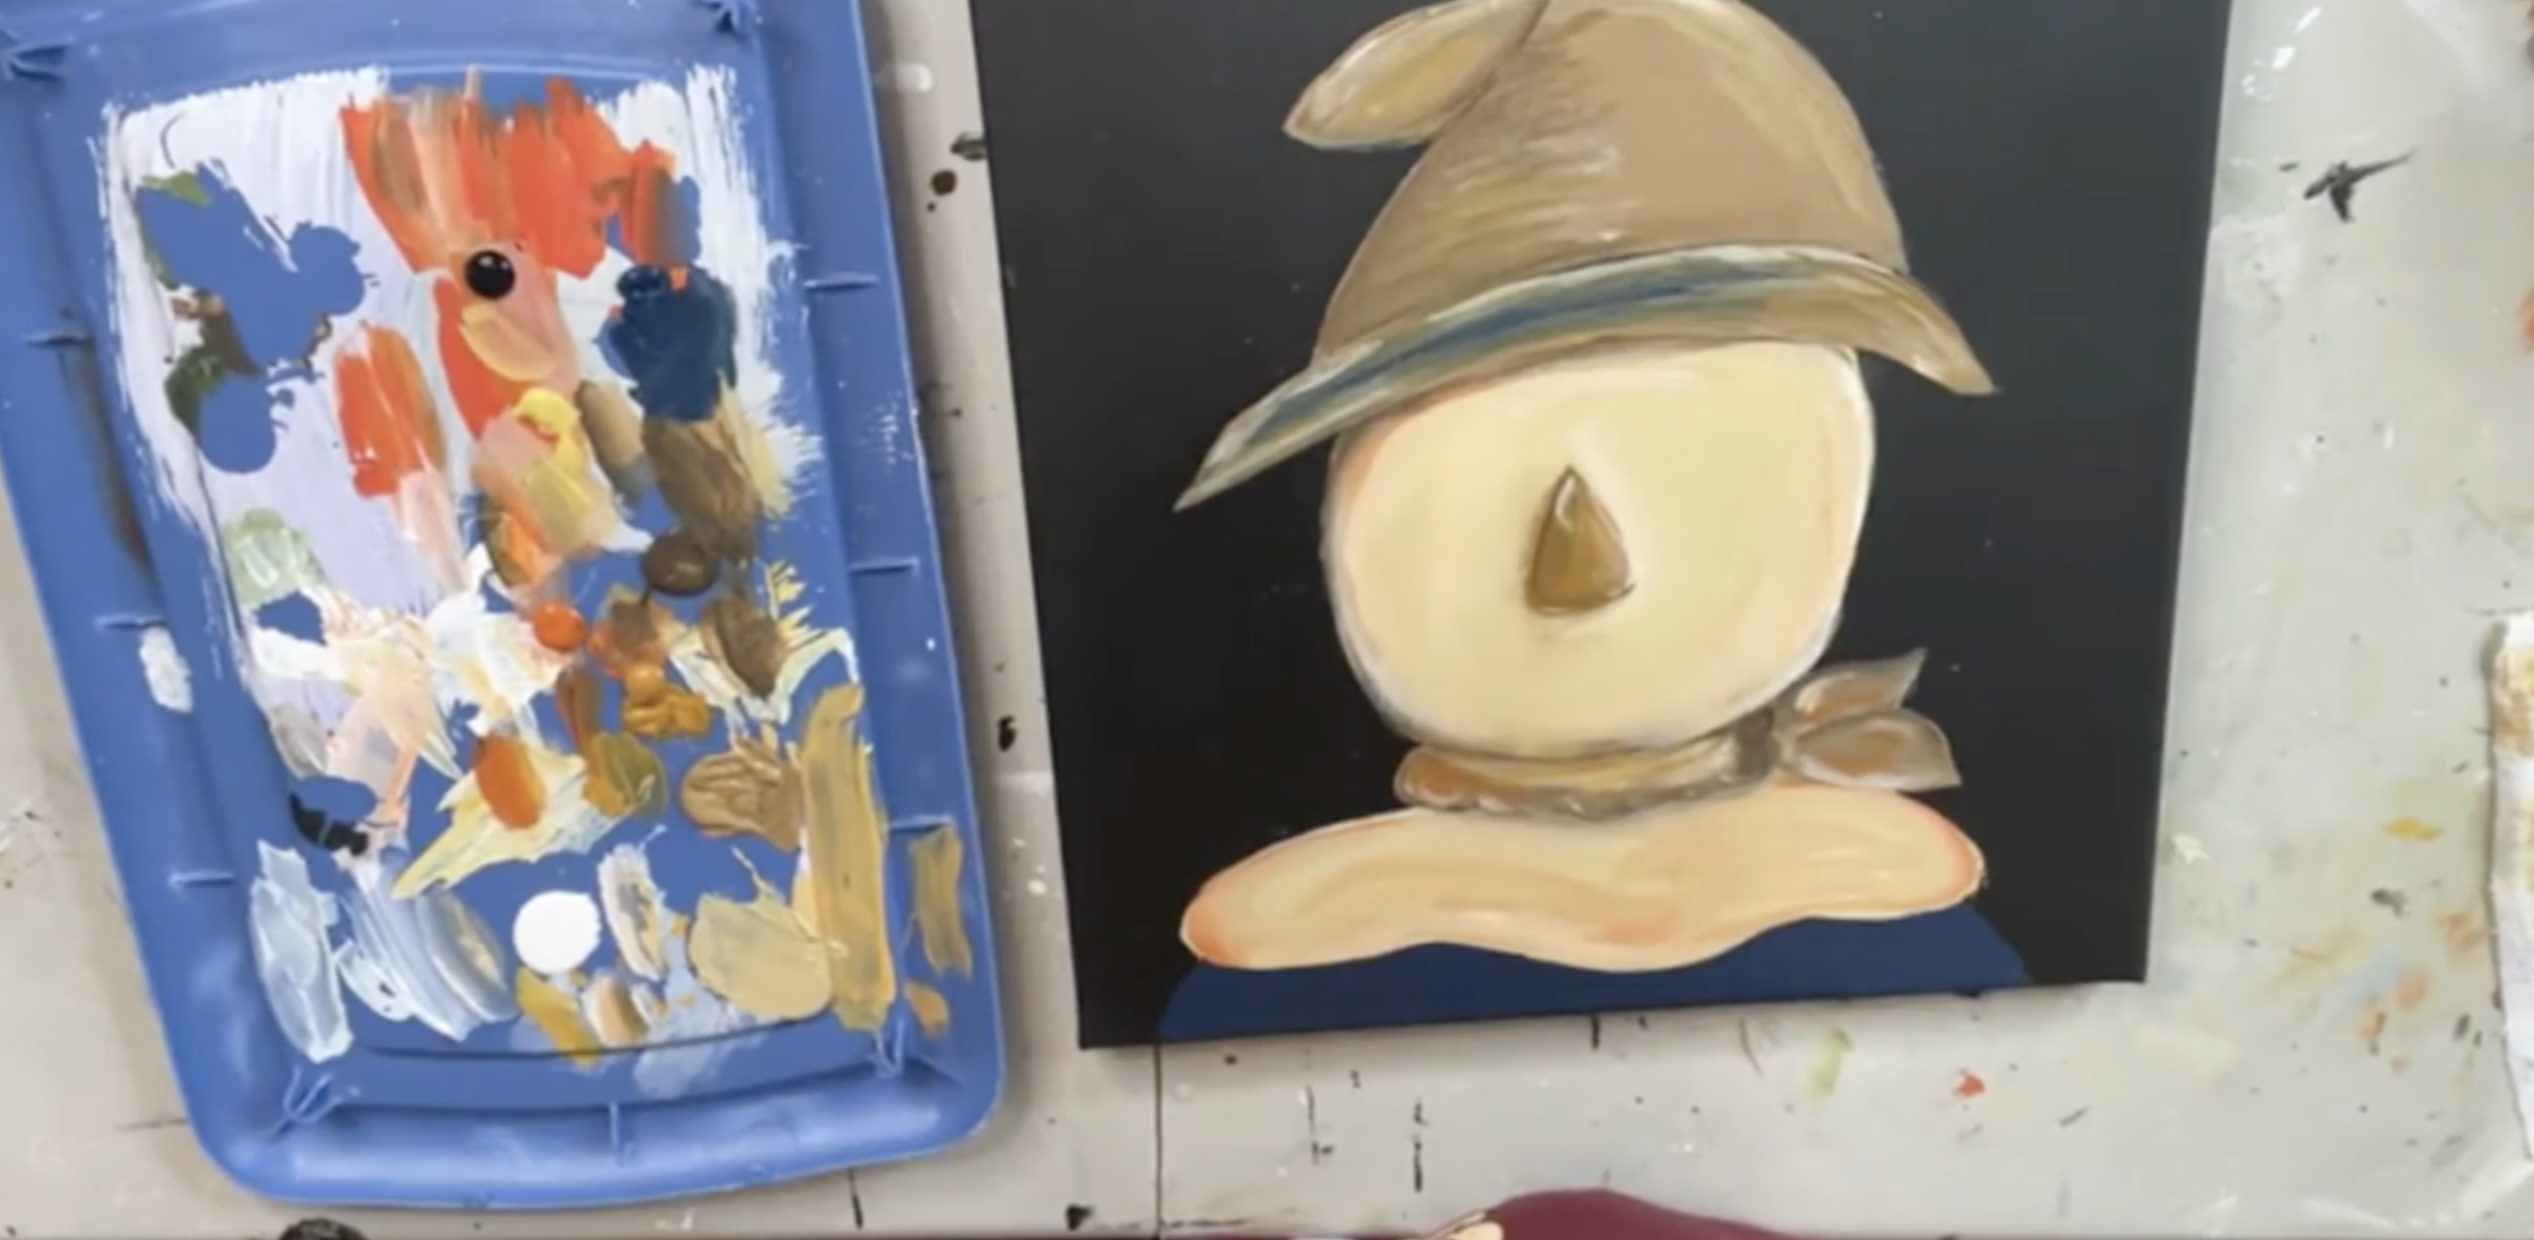
Give the face another coat of Camel and work while the paint is still wet.
Pick up a little Raw Umber on your brush and add shading:
- Underneath the hat
- Around the outside of the face
- Around the nose
- Near the bottom of the face
Blend the brown gently into the Camel rather than creating a hard outline. Then add a little white along selected areas of the face for highlights.
Step 4: Add Color to the Neck Scarf
Use Rusted Pipe as the base for the scarf and begin layering in other fall colors.
Add Raw Umber for shadows, Golden Straw for a warm yellow highlight, and touches of orange and white.
Step 5: Shade the Hat
Give the hat another coat of Rusted Pipe where needed. Add Raw Umber around the edges and underneath the folded areas to create shadows. A little Golden Straw and white can be added for highlights. The brim can also get a touch of navy to connect it visually to the shirt below.
Keep layering and playing with the colors until you like the worn, weathered look.
Step 6: Finish the Nose
Come back to the nose and strengthen the orange if needed. Add a little Raw Umber around the edge for shadow and a tiny touch of white near the tip for a highlight. That small highlight helps the nose pop right off the dark canvas.
Step 7: Paint the Scarecrow’s Face
Use black paint and a small round brush to create two simple button-like eyes. Next, thin a little pink paint with water and lightly brush it onto each cheek. You want a soft wash of pink rather than two solid circles. Add a tiny white highlight to each eye.
Finish his expression with:
- Simple black eyebrows
- Little X-shaped stitches
- Loose squiggly lines connecting the stitches to form his mouth
Now he has some personality!
Step 8: Paint Some Straw Details
Before adding the real straw, paint a few straw-like lines onto the canvas. That way, you’ll still have plenty of texture even if the dimensional straw doesn’t cover every area.
Use a liner brush with Camel and make loose strokes coming out from:
- Under the hat
- The tip of the hat
- Around the neck
Add a few additional strokes with Cinnamon and white for variation.
Step 9: Add a Simple Plaid Pattern to the Shirt
Use white paint and a small brush to add loose vertical and horizontal lines over the navy shirt. Don’t worry about measuring or making a perfectly even plaid. A few imperfect stripes fit the whimsical style of the scarecrow. Add a small Rusted Pipe button near the bottom if you’d like.
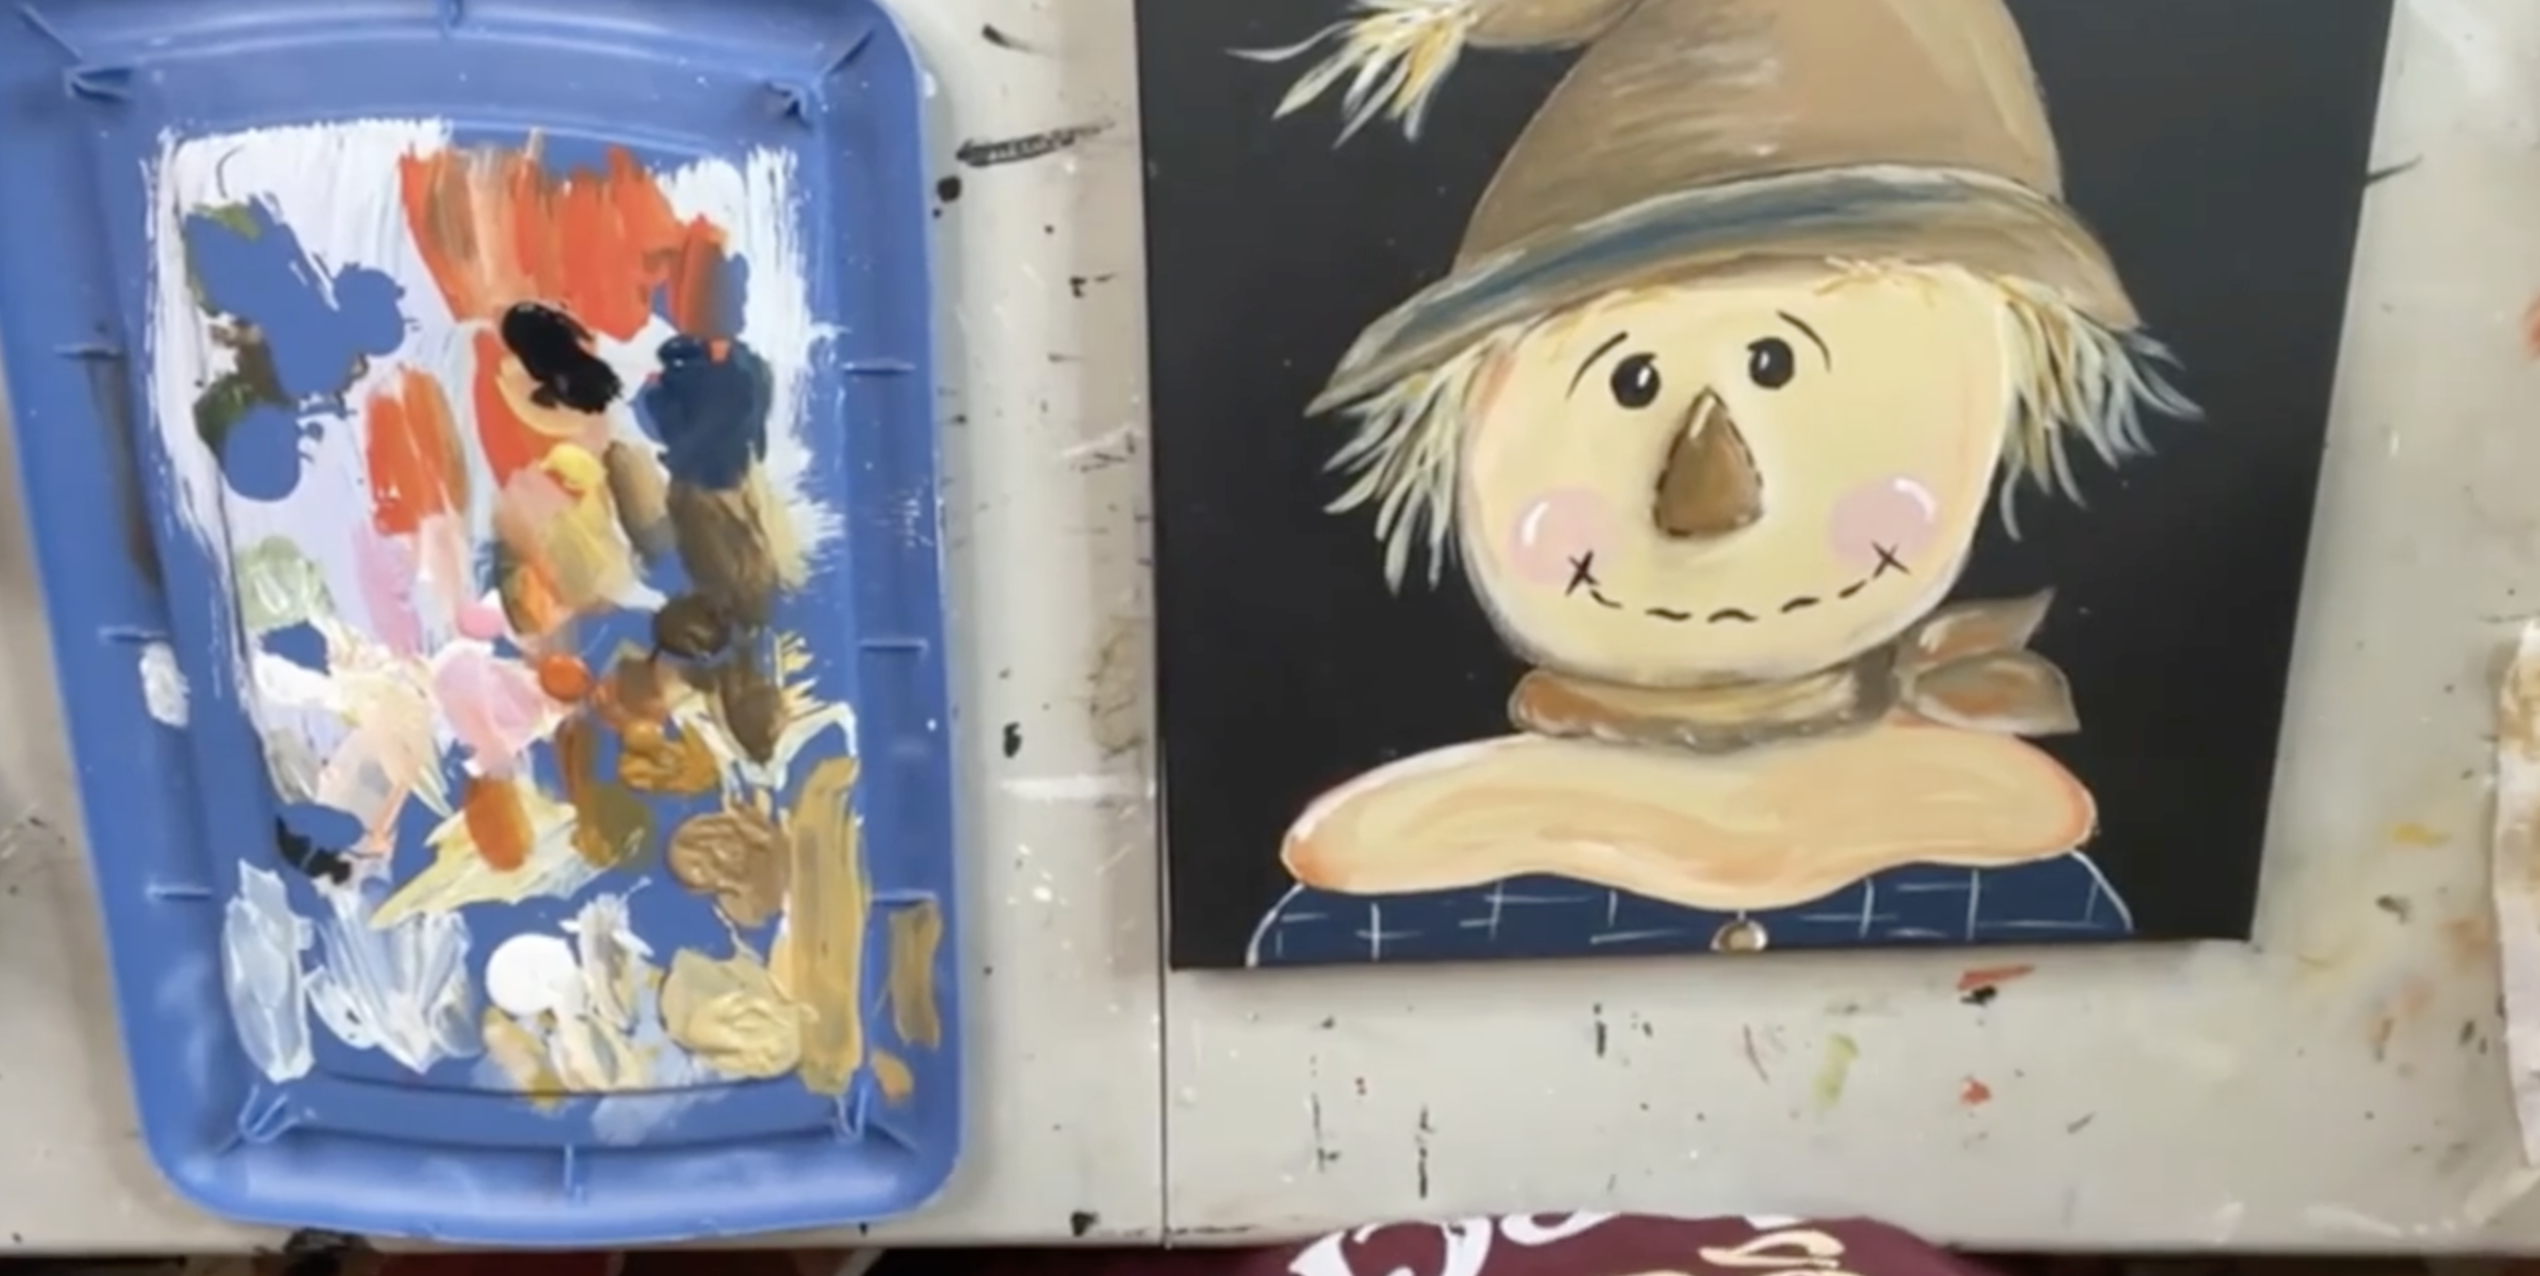
Step 10: Paint the Sunflower
Sketch a small sunflower onto the scarecrow’s hat. Start the petals with Golden Straw, keeping them loose and slightly uneven. While the paint is still wet, add Cinnamon to portions of each petal. Follow with Camel and a touch of white to create more variation. Fill the center with Raw Umber and pounce in a little Avocado Green if you’d like some additional color underneath the glass we’ll be adding later.
Step 11: Paint the Wooden Button
Paint a small wooden craft button bright orange. This will eventually sit near the tip of the scarecrow’s hat with pieces of straw coming out from underneath it. It’s a tiny addition, but that pop of orange looks so cute against all the earthy colors in the hat.
Step 12: Add Loose Black Line Work
Once your paint is dry, use an archival-quality black graphic pen to add loose details throughout the piece.
Add broken, sketchy lines:
- Around the face
- Around the cheeks
- Around the nose
- Across the scarf
- Around the sunflower
- Among some of the painted straw
You can also add little crosshatches and scribbles.
The key is to keep these marks loose rather than outlining everything perfectly. These tiny lines make a surprisingly big difference in the finished artwork.
Be sure to use an archival-quality pen so the ink won’t run when the resin goes over it.
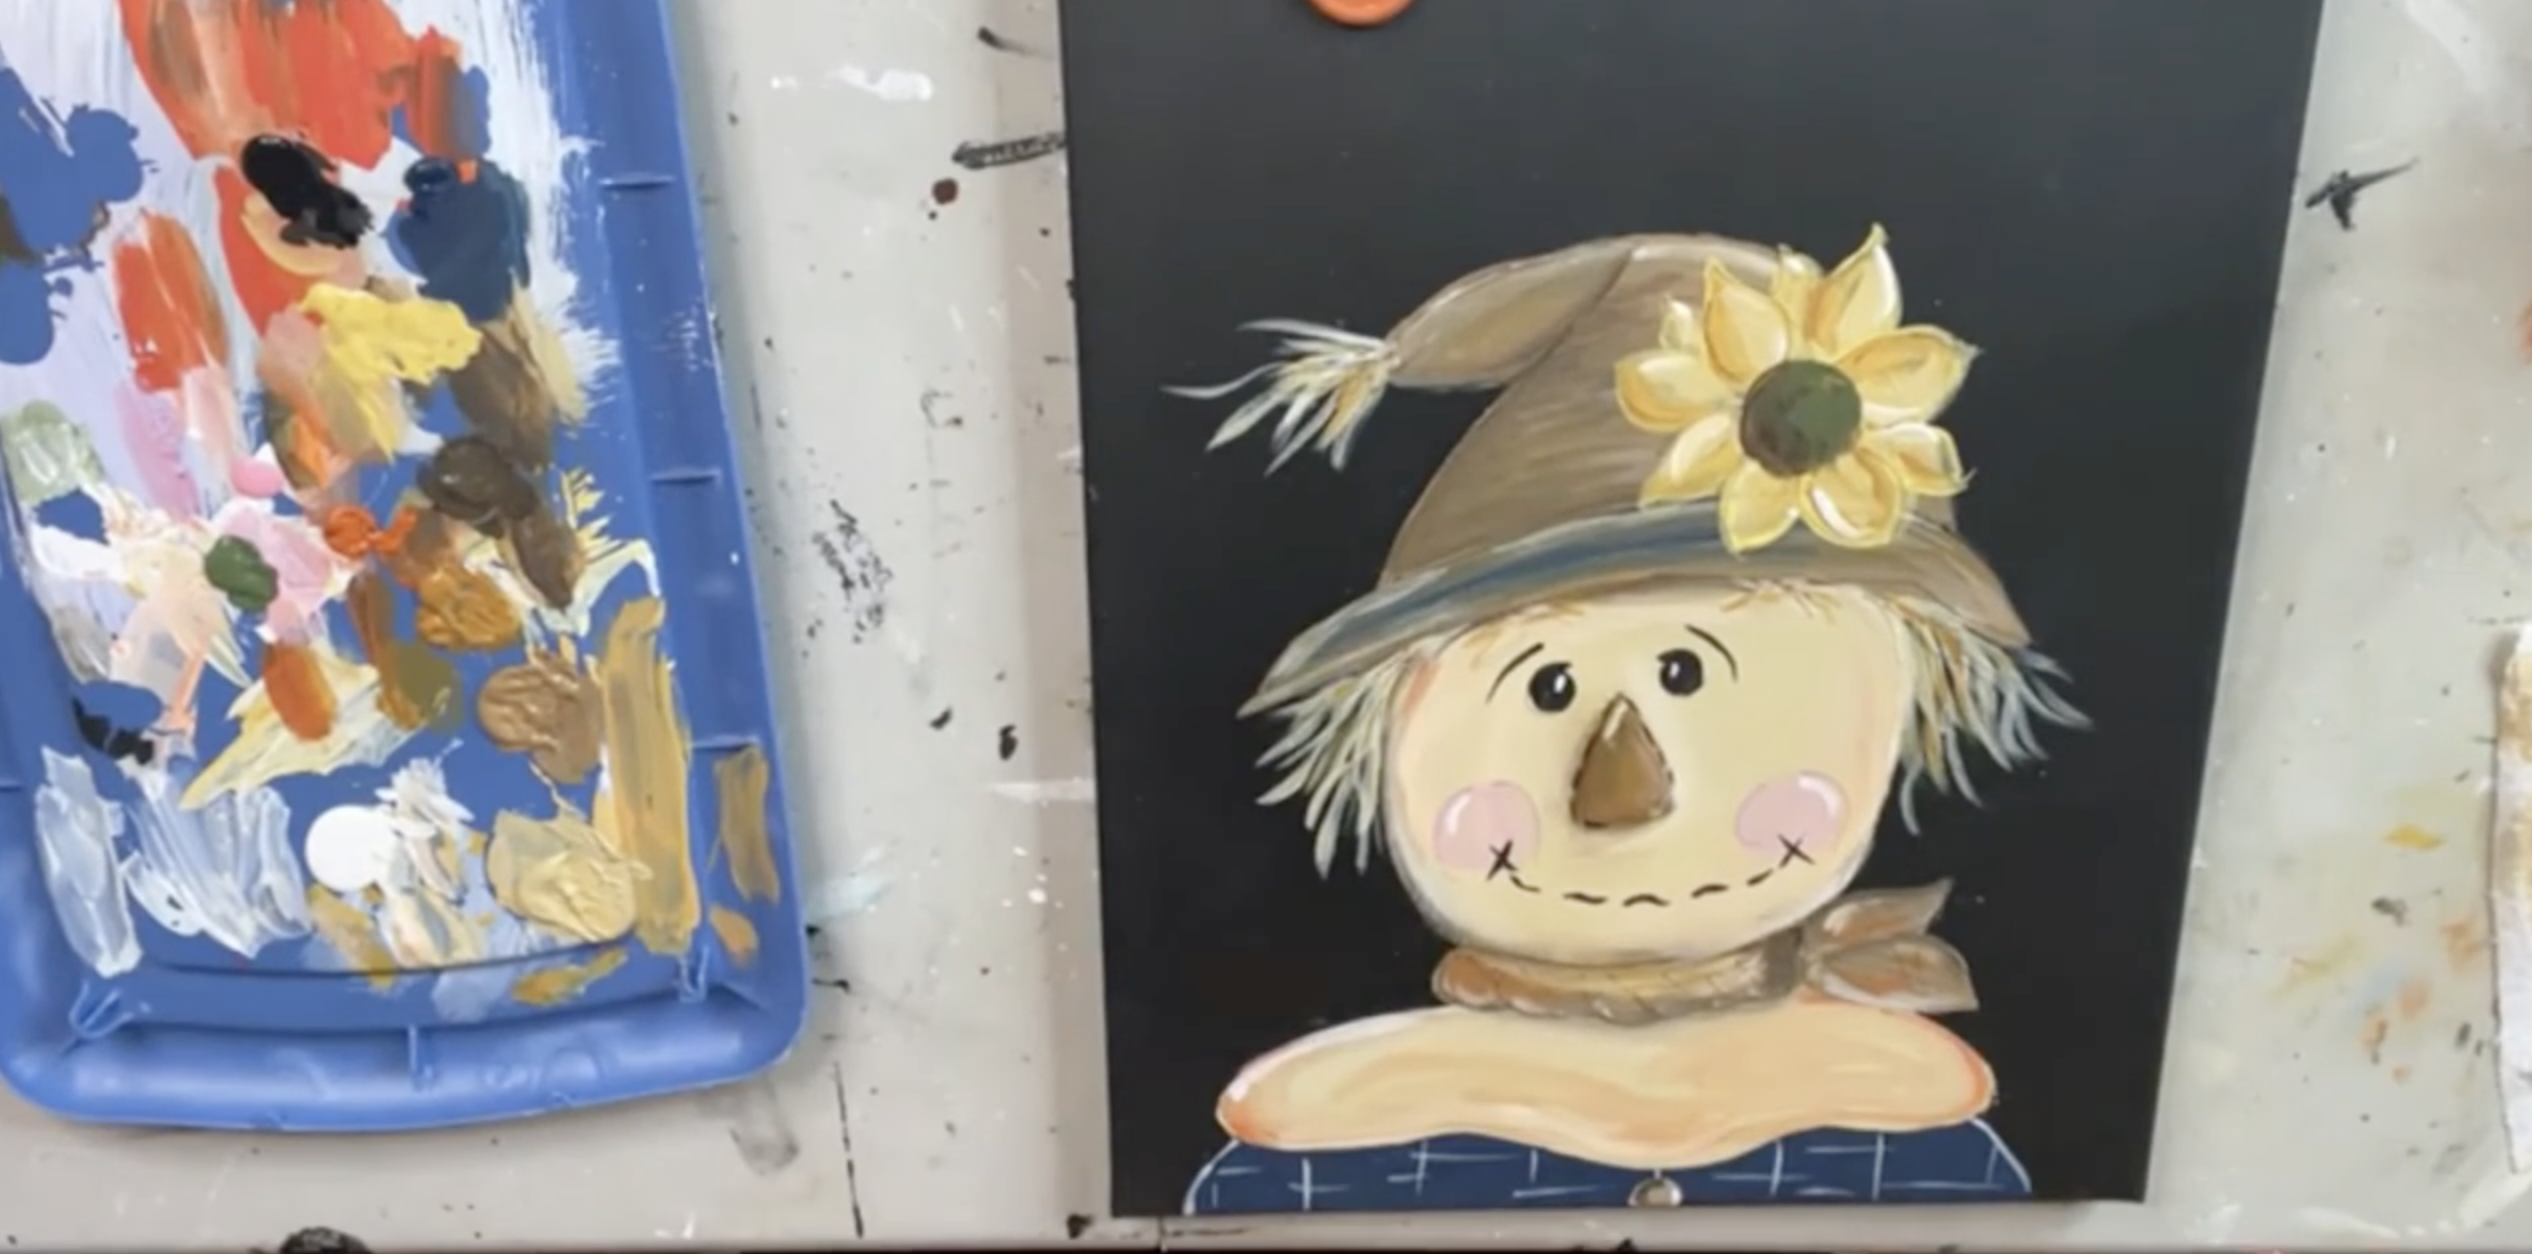
Step 13: Add Glass to the Sunflower
Add small pieces of brown glass to the center of the sunflower. For this project, the glass came from an old brown bottle, but you can use whatever brown glass you have available. Arrange smaller pieces until you have a dimensional center that you like.
Step 14: Mix the Resin
For this 11x14 canvas, mix approximately 1 ounce of resin total. Combine equal amounts of resin and hardener—in this case, ½ ounce of each. Stir thoroughly for three minutes, scraping the sides and bottom of the mixing cup as you go.
Step 15: Apply the Resin
Start by adding resin over the glass in the sunflower center. Then pour the remaining resin onto the canvas and spread it evenly across the surface.
Be sure to get good coverage along the edges and corners without spreading the resin paper-thin. Resin is self-leveling, but an overly thin coat can leave skipped areas or little divots.
Step 16: Pop the Bubbles BEFORE Adding Straw
This part is important! Use your heat gun or small torch to pop bubbles before you add the real straw. You don't want to apply direct heat once loose, uncovered straw is sitting on the canvas.
Step 17: Add Real Straw to the Hat
Now for the fun part!
Break or shred your straw into skinny pieces and begin laying them directly into the wet resin at the tip of the hat. Use a stylus or similar tool to gently push the ends of the straw into the resin so they're securely touching it. You don't want to completely coat the straw with resin. Leaving portions raised above the surface gives the finished scarecrow much more texture and dimension.
Step 18: Add the Orange Button
Place the orange wooden button over the straw at the tip of the hat. Drizzle a small amount of resin over the button to secure it firmly in place. The straw should look like it's sticking right out from underneath the button.
Step 19: Add More Straw Around the Face
Continue adding skinny pieces of straw underneath both sides of the hat. Vary the lengths and directions so it looks naturally messy.
Use your stylus to make sure at least one portion of each piece is touching the wet resin, but allow some of the ends to stick up and away from the canvas. That's what creates all that wonderful dimension.
Step 20: Add Straw Around the Neck
Finish with a few shorter pieces of straw coming out from each side of the neck scarf. Again, gently press the ends into the resin to secure them while allowing the rest of the straw to remain raised.
Elevate your canvas on risers so any resin that reaches the edges doesn't glue your artwork to your work surface.
Then leave everything alone and allow the resin to cure according to your resin manufacturer's directions.
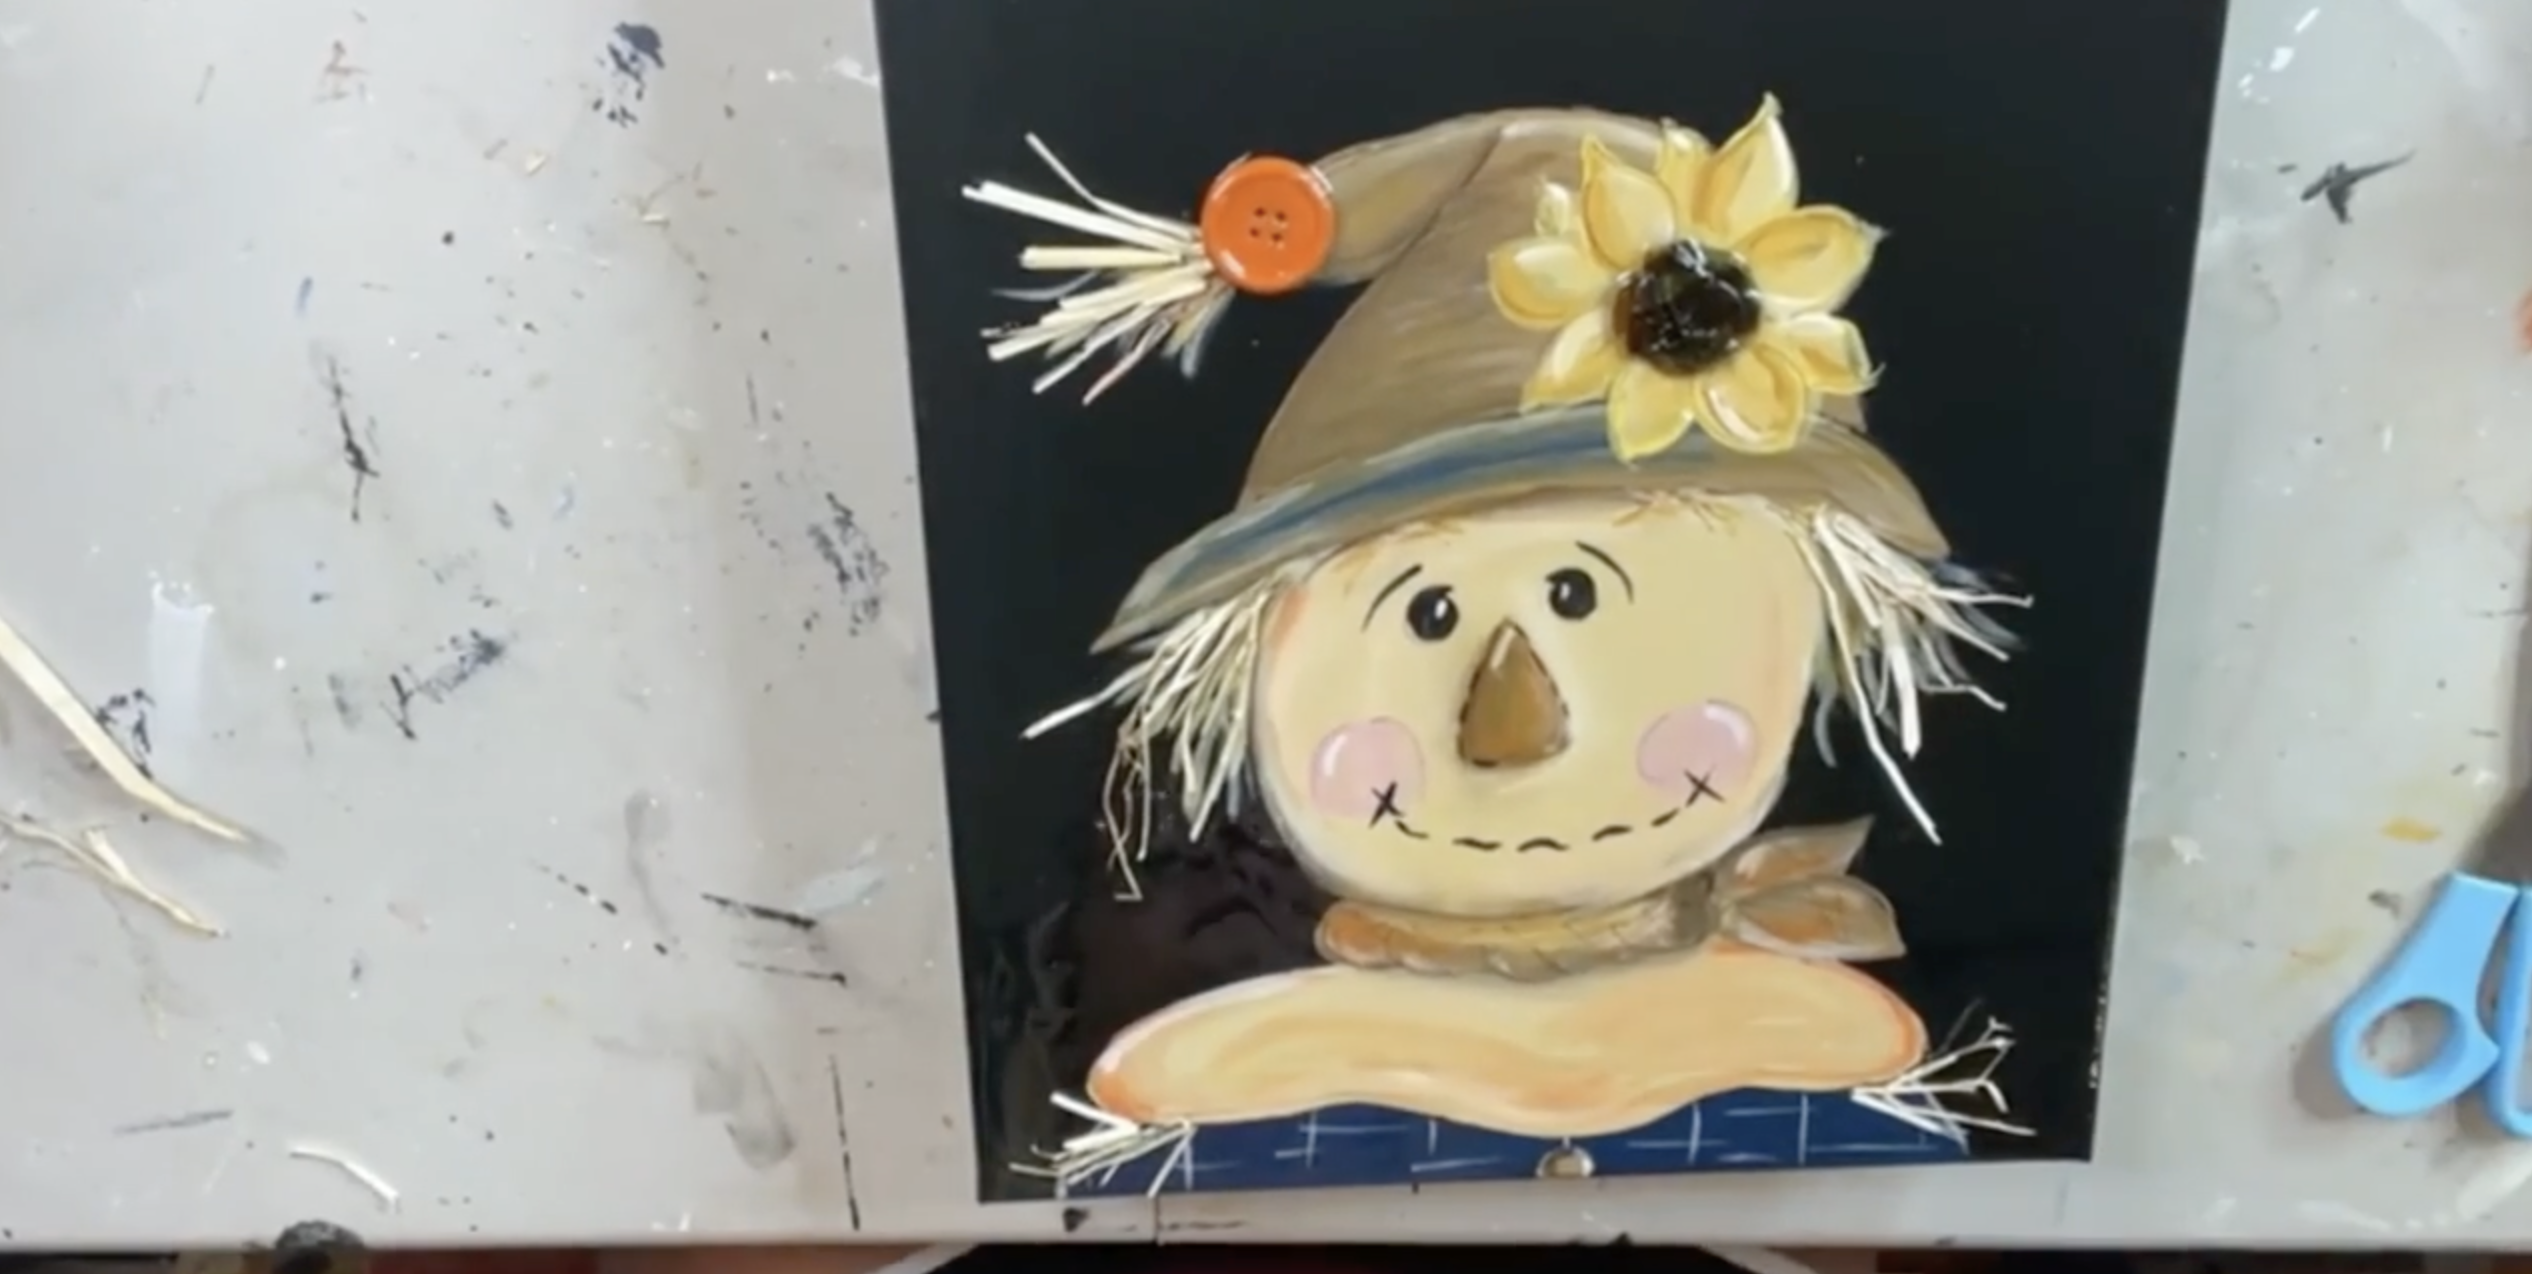
The straw sticking out from his hat and scarf gives him so much personality and dimension, especially alongside the shiny resin, brown glass sunflower center, orange button, and all those loose painted details!
If you're a member of The Shattered Circle, you'll find this tutorial in your classroom under Art Shattered Weekly Facebook Lives, search for "Hay Scarecrow".
If you don’t want to miss my Facebook LIVE art instruction, make sure you are on my texting list. I always text 10 minutes before I’m going to go LIVE, so you won’t ever miss it. You can text “Hey Cindy” to 901-519-2923.
Want more inspiration and artwork?
- My website artshattered.com with resources, shop, and more!
- My creative membership The Shattered Circle, where you can explore the world of glass art with online workshops, a supportive community, and more!
- My mini creative membership Just A ‘Lil Bit Monthly Glass Art Club, where you’ll get a new quick and easy online tutorial for just a lil' bit of sparkle in your life!
- My Facebook page where I share free LIVE tutorials and inspiration
- My YouTube channel which has tons of free art lessons right at your fingertips.
