
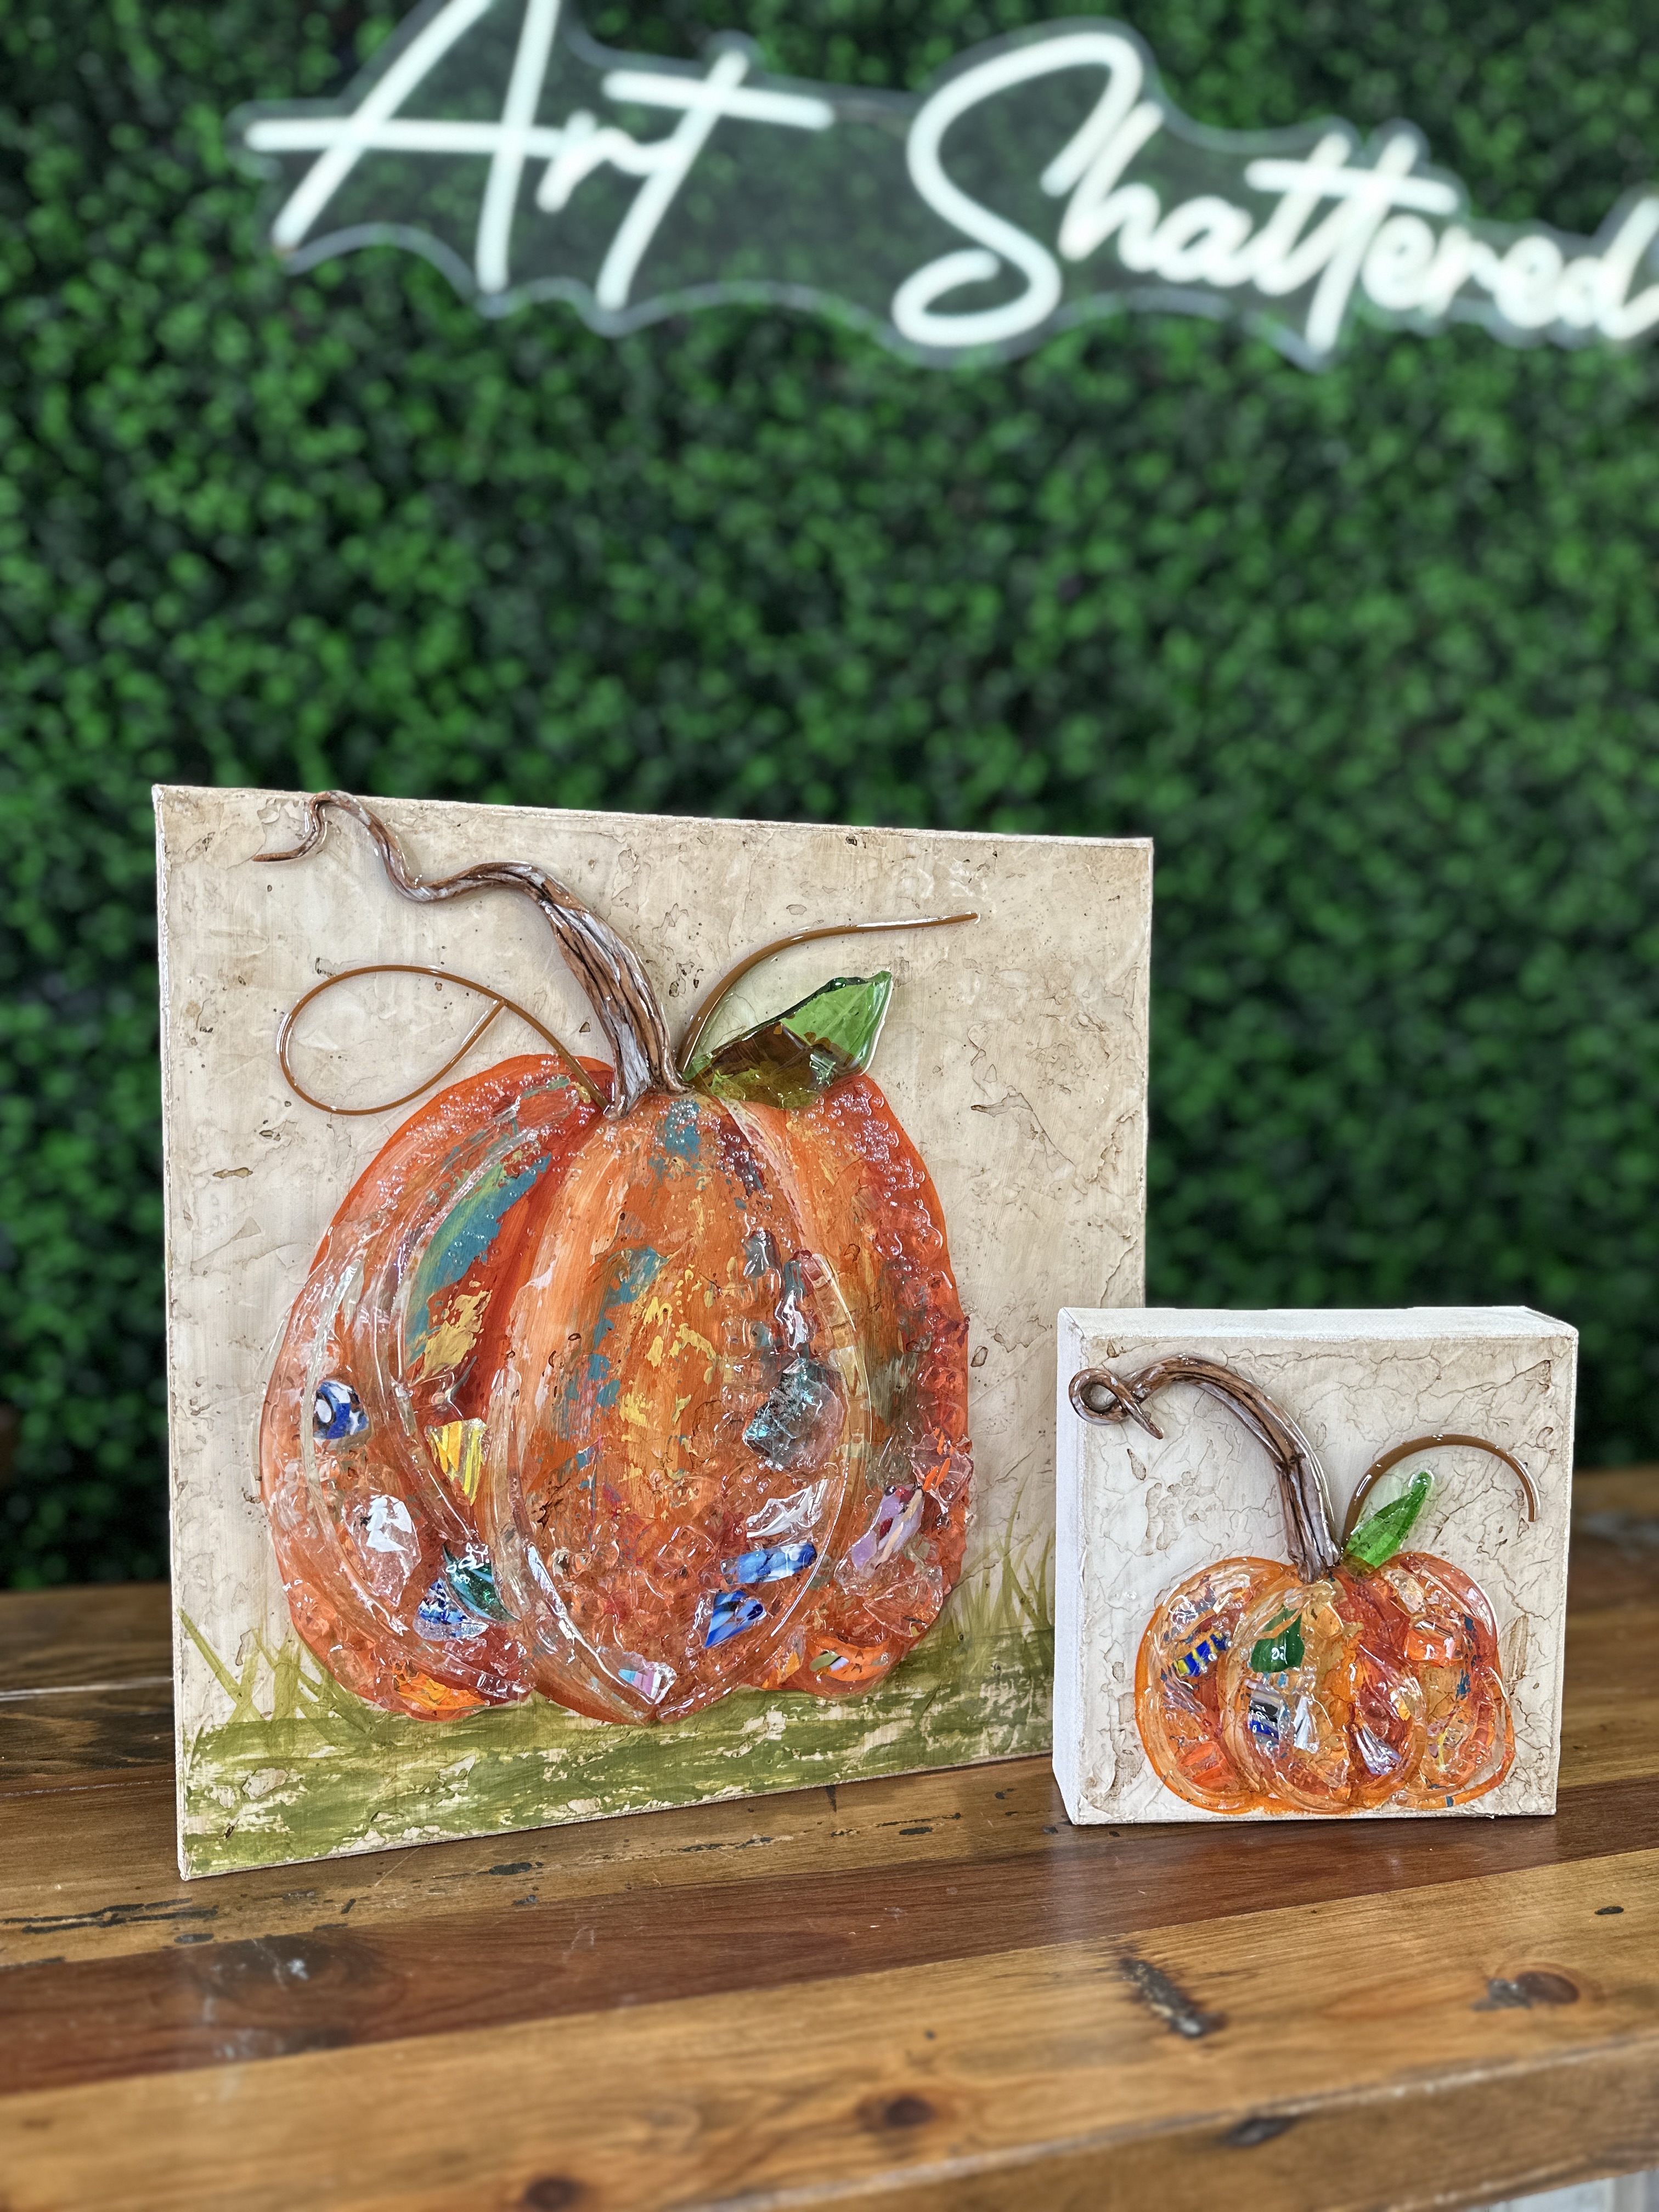
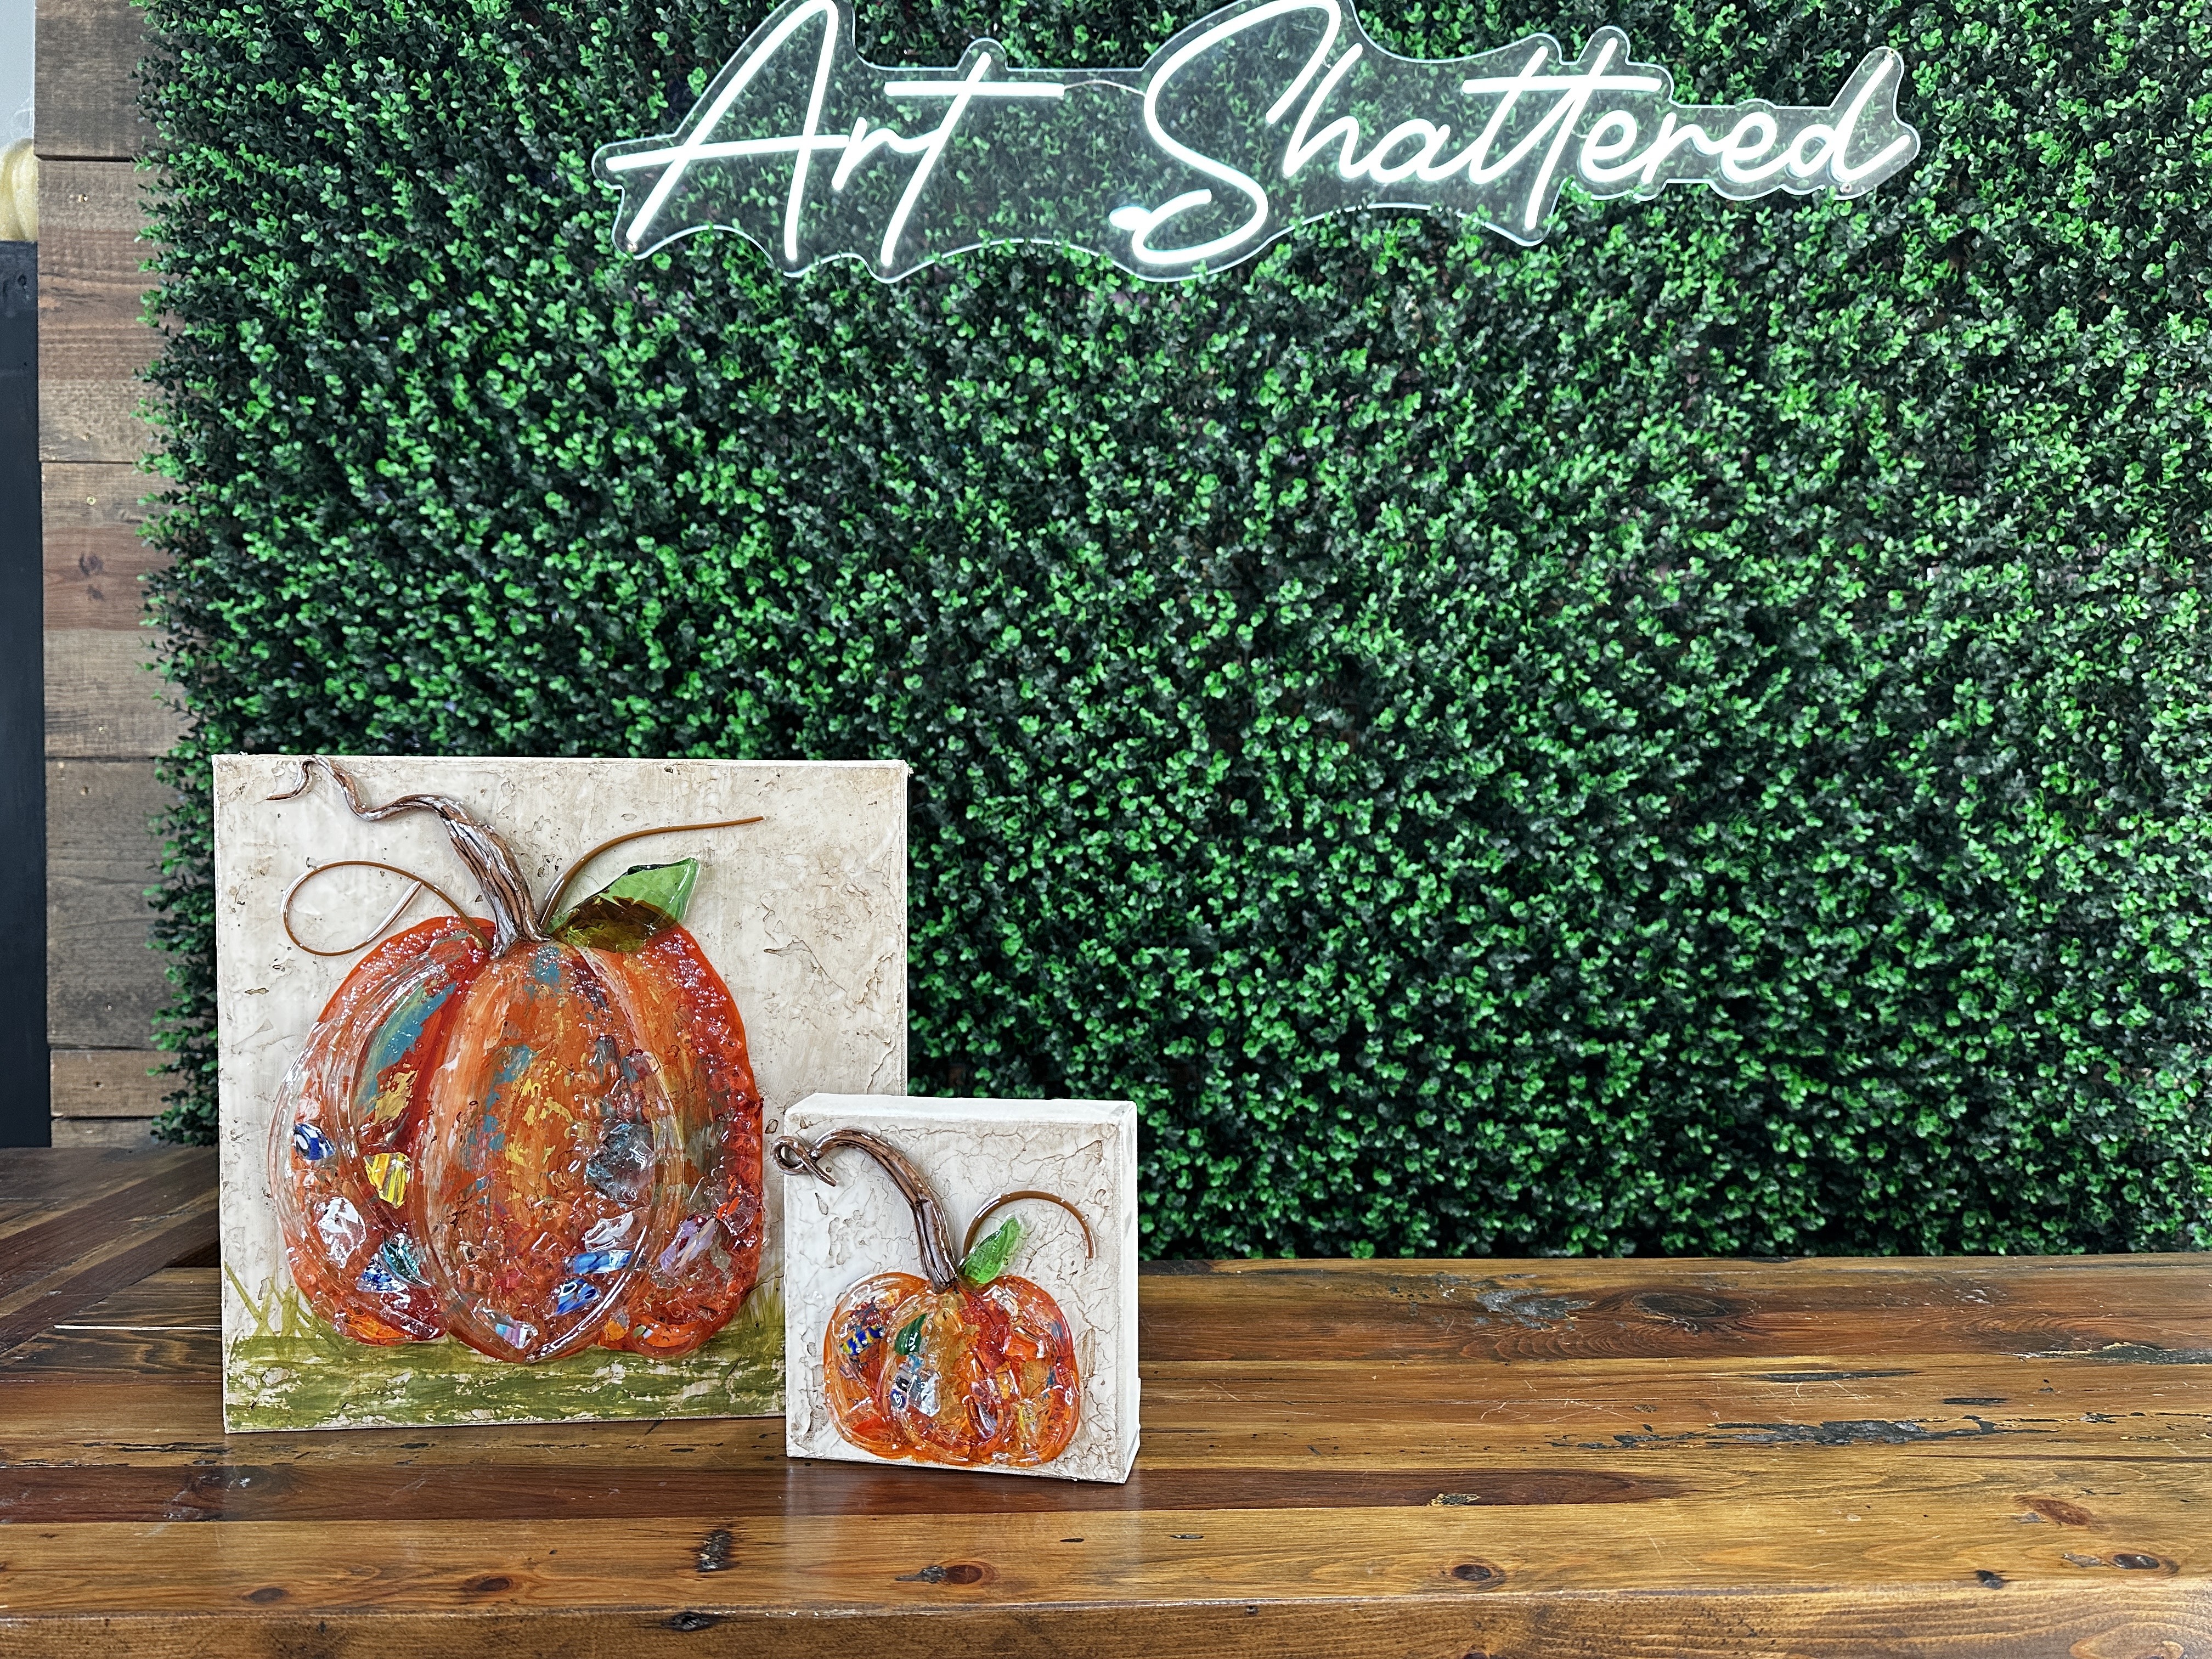
How to Cut a Vase for Curved Glass Pumpkin Embellishments ✨
Turn broken vases into beautiful pumpkin embellishments! In this tutorial, you'll learn how to cut curved glass pieces perfect for fall mixed media art, glass projects, or seasonal decor. We'll walk you through each step, from scoring and tapping the glass to safely honing and arranging it in your design. No need for fancy equipment - just a few basic tools, some safety gear, and a little patience.
Step 1: Prep Your Workspace and Safety Gear
Before you begin cutting any glass, set up a safe work area. Use a glass-cutting grid or tray to catch shards and wear cut-resistant gloves, safety goggles, and a mask to protect yourself from glass dust. Gather your tools: scoring tool, breaking pliers, wheeled nippers, and a honing stone. Have a paper towel nearby to clean off glass dust.
If you have a broken vase (or one you don’t mind repurposing), use it! In this case, I used a large thick vase that cracked in half. To make it manageable, gently tap the large piece with a hammer to break it into smaller, workable sections. Don’t throw away broken glass- repurpose it!
Step 2: Score the Concave Side for Curved Pieces
Identify a section of the vase that has a natural curve. That curvature will give you beautiful "glass smile" shapes for pumpkin embellishments. Place the concave side facing up, and using a scoring tool, press down hard and draw a continuous line (no starting and stopping) along the curve. Scoring on the concave side is key to success.
Step 3: Tap and Break Along the Score
Flip the glass over to the convex side and tap gently along the score line using your tapping tool. You should begin to see a visible break traveling across the glass. Keep tapping until the piece separates cleanly along your score line. You’ll be left with a beautiful arched shard ready for art.
Step 4: Hone the Sharp Edges
Using a honing stone, gently rub the sharp edge of your cut glass to smooth it out. This helps prevent cuts and also prepares the glass for resin. Be thorough, especially with thick or jagged edges. If you don’t have a honing stone, a brick or piece of concrete will work in a pinch. Always wear gloves and a dust mask during this step.
Step 5: Wipe Down the Pieces
Use a dry paper towel to wipe off any dust or residue left behind from honing. If you're working with multiple pieces (like for multiple pumpkins), sort and stack your glass neatly on a clean surface or tray.
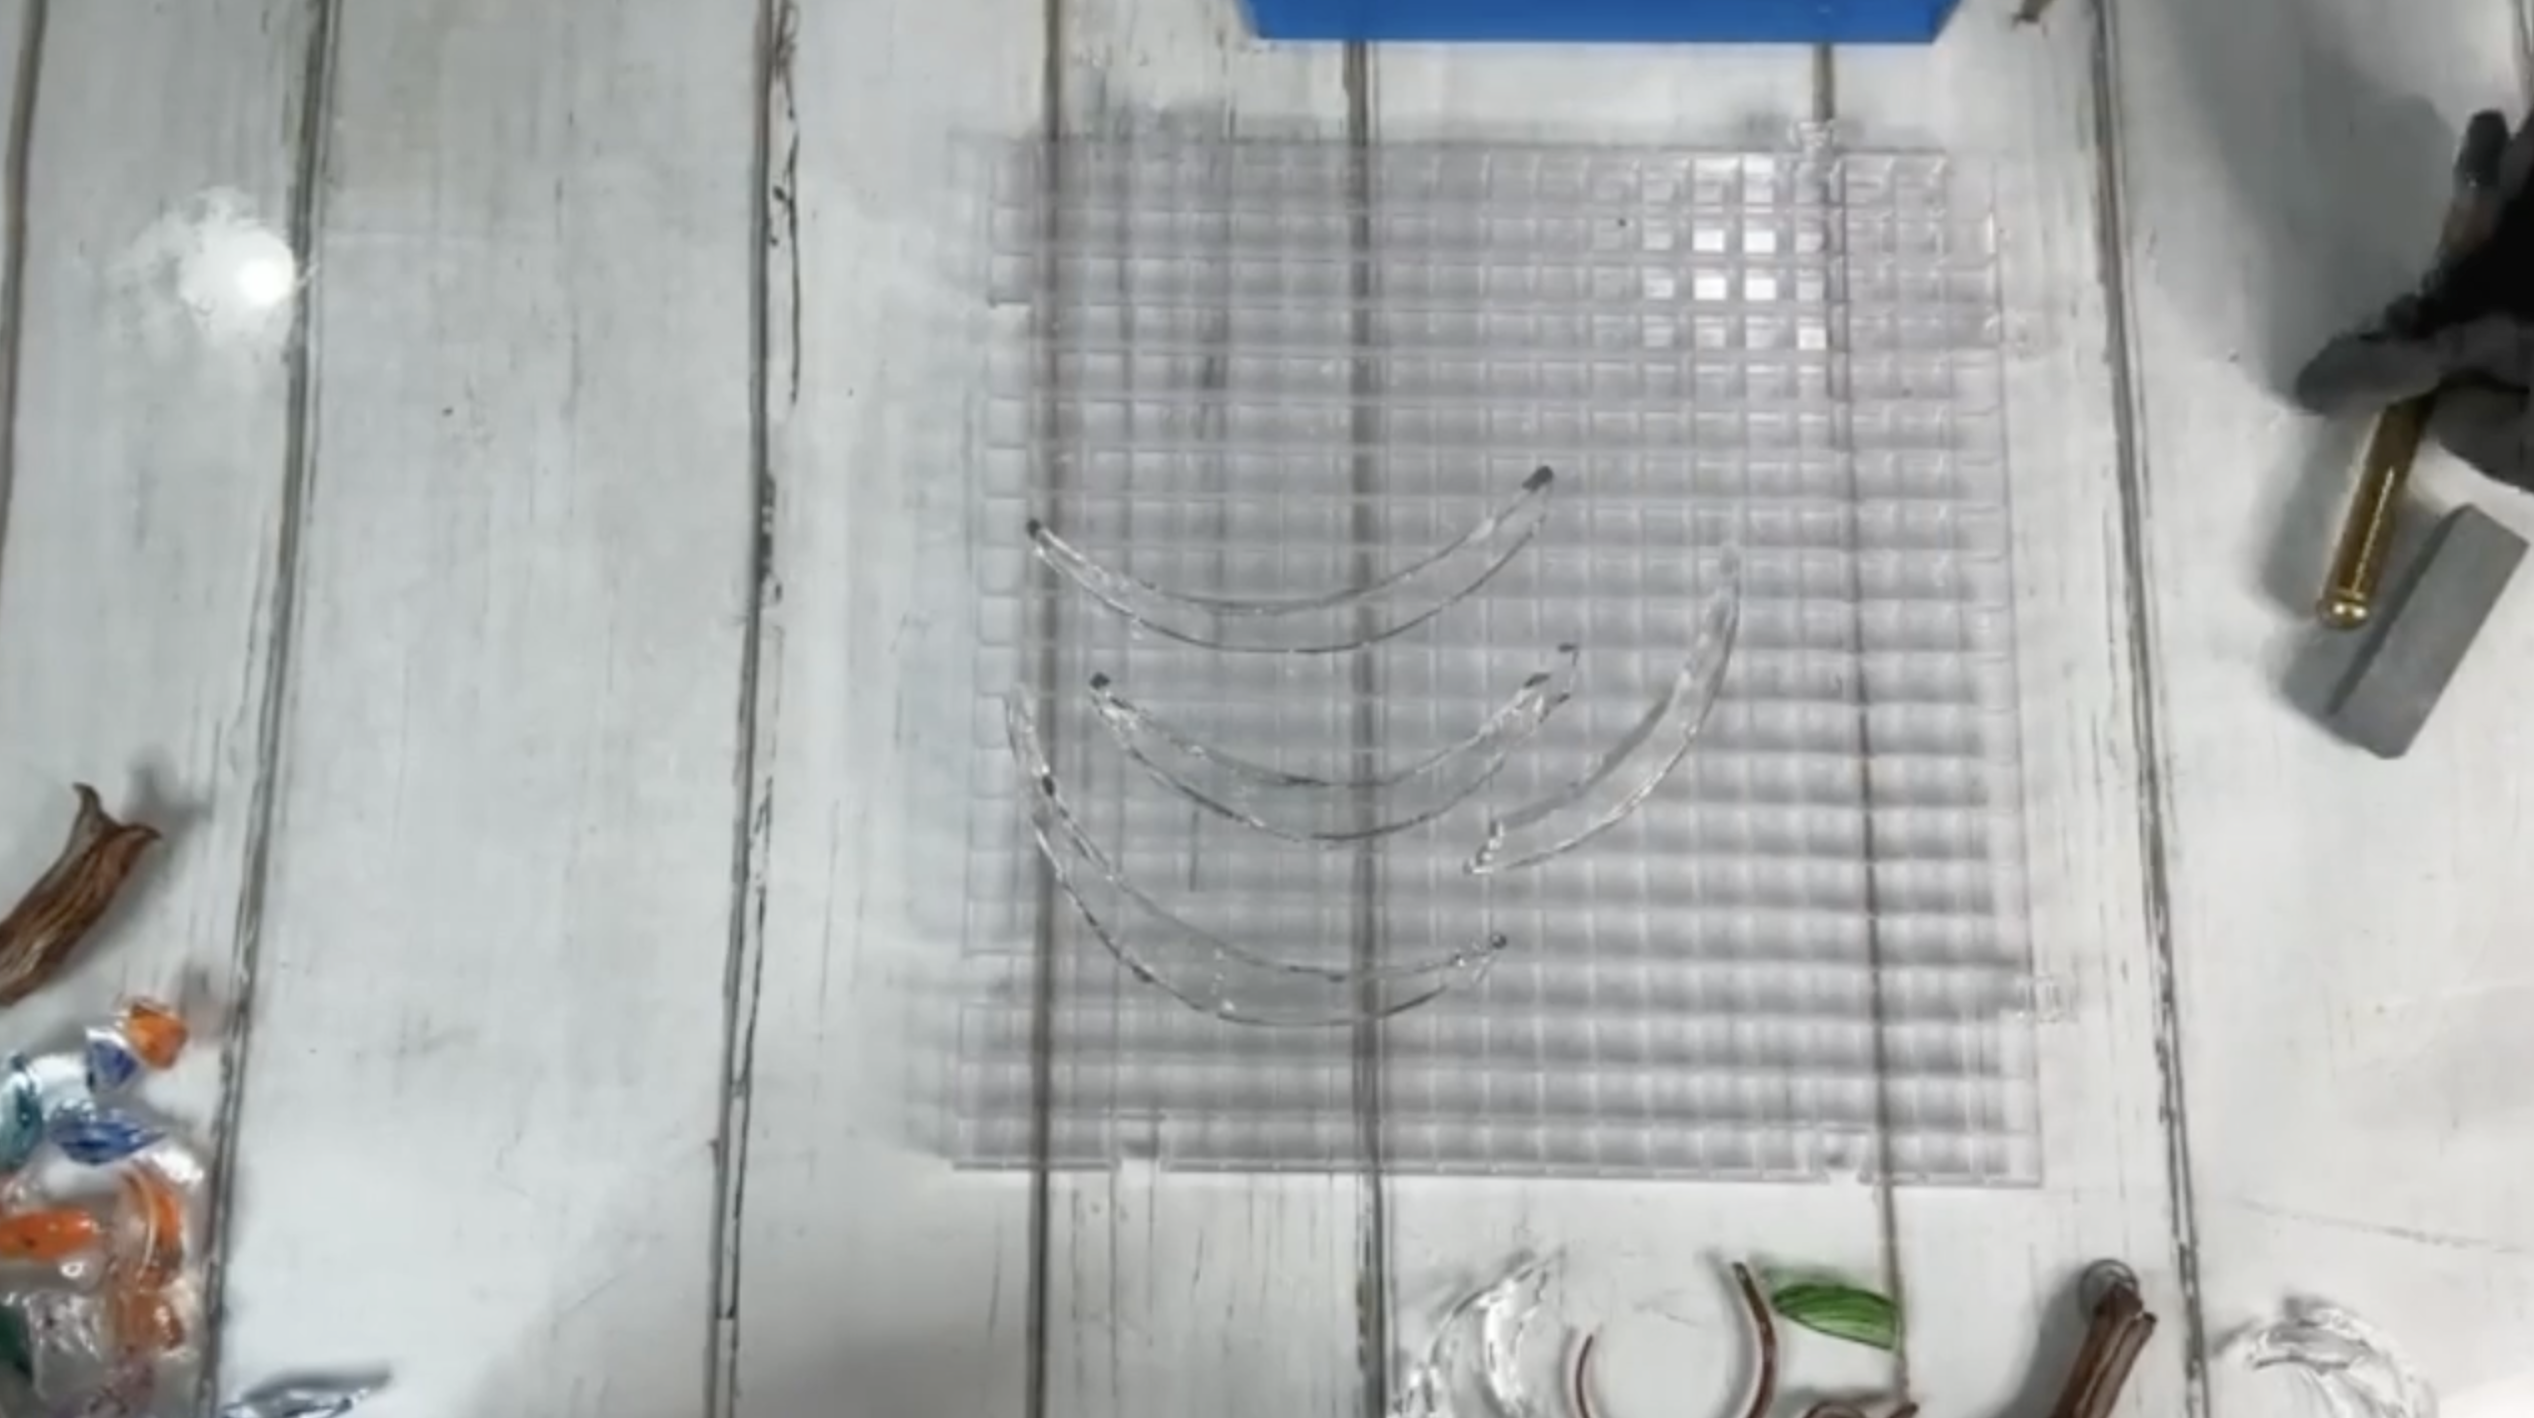
Step 6: Cut Smaller Pieces for Detail Work
For smaller pumpkins or finer detailing, use thinner glass like votive holders. Nip these into smaller pieces with wheeled nippers and hone the edges carefully. Again, wipe them down before setting aside.
Step 7: Arrange and Apply Glass to Your Pumpkin Art
Now you’re ready to use your curved glass! Whether you're creating a whimsical pumpkin art piece or another mixed-media project, lay out your glass curves along the sections of the pumpkin. Add in vitrigraph pieces, green bottle shards as leaves, and other decorative elements as desired. I also add Starfire glass and colored glass chips.
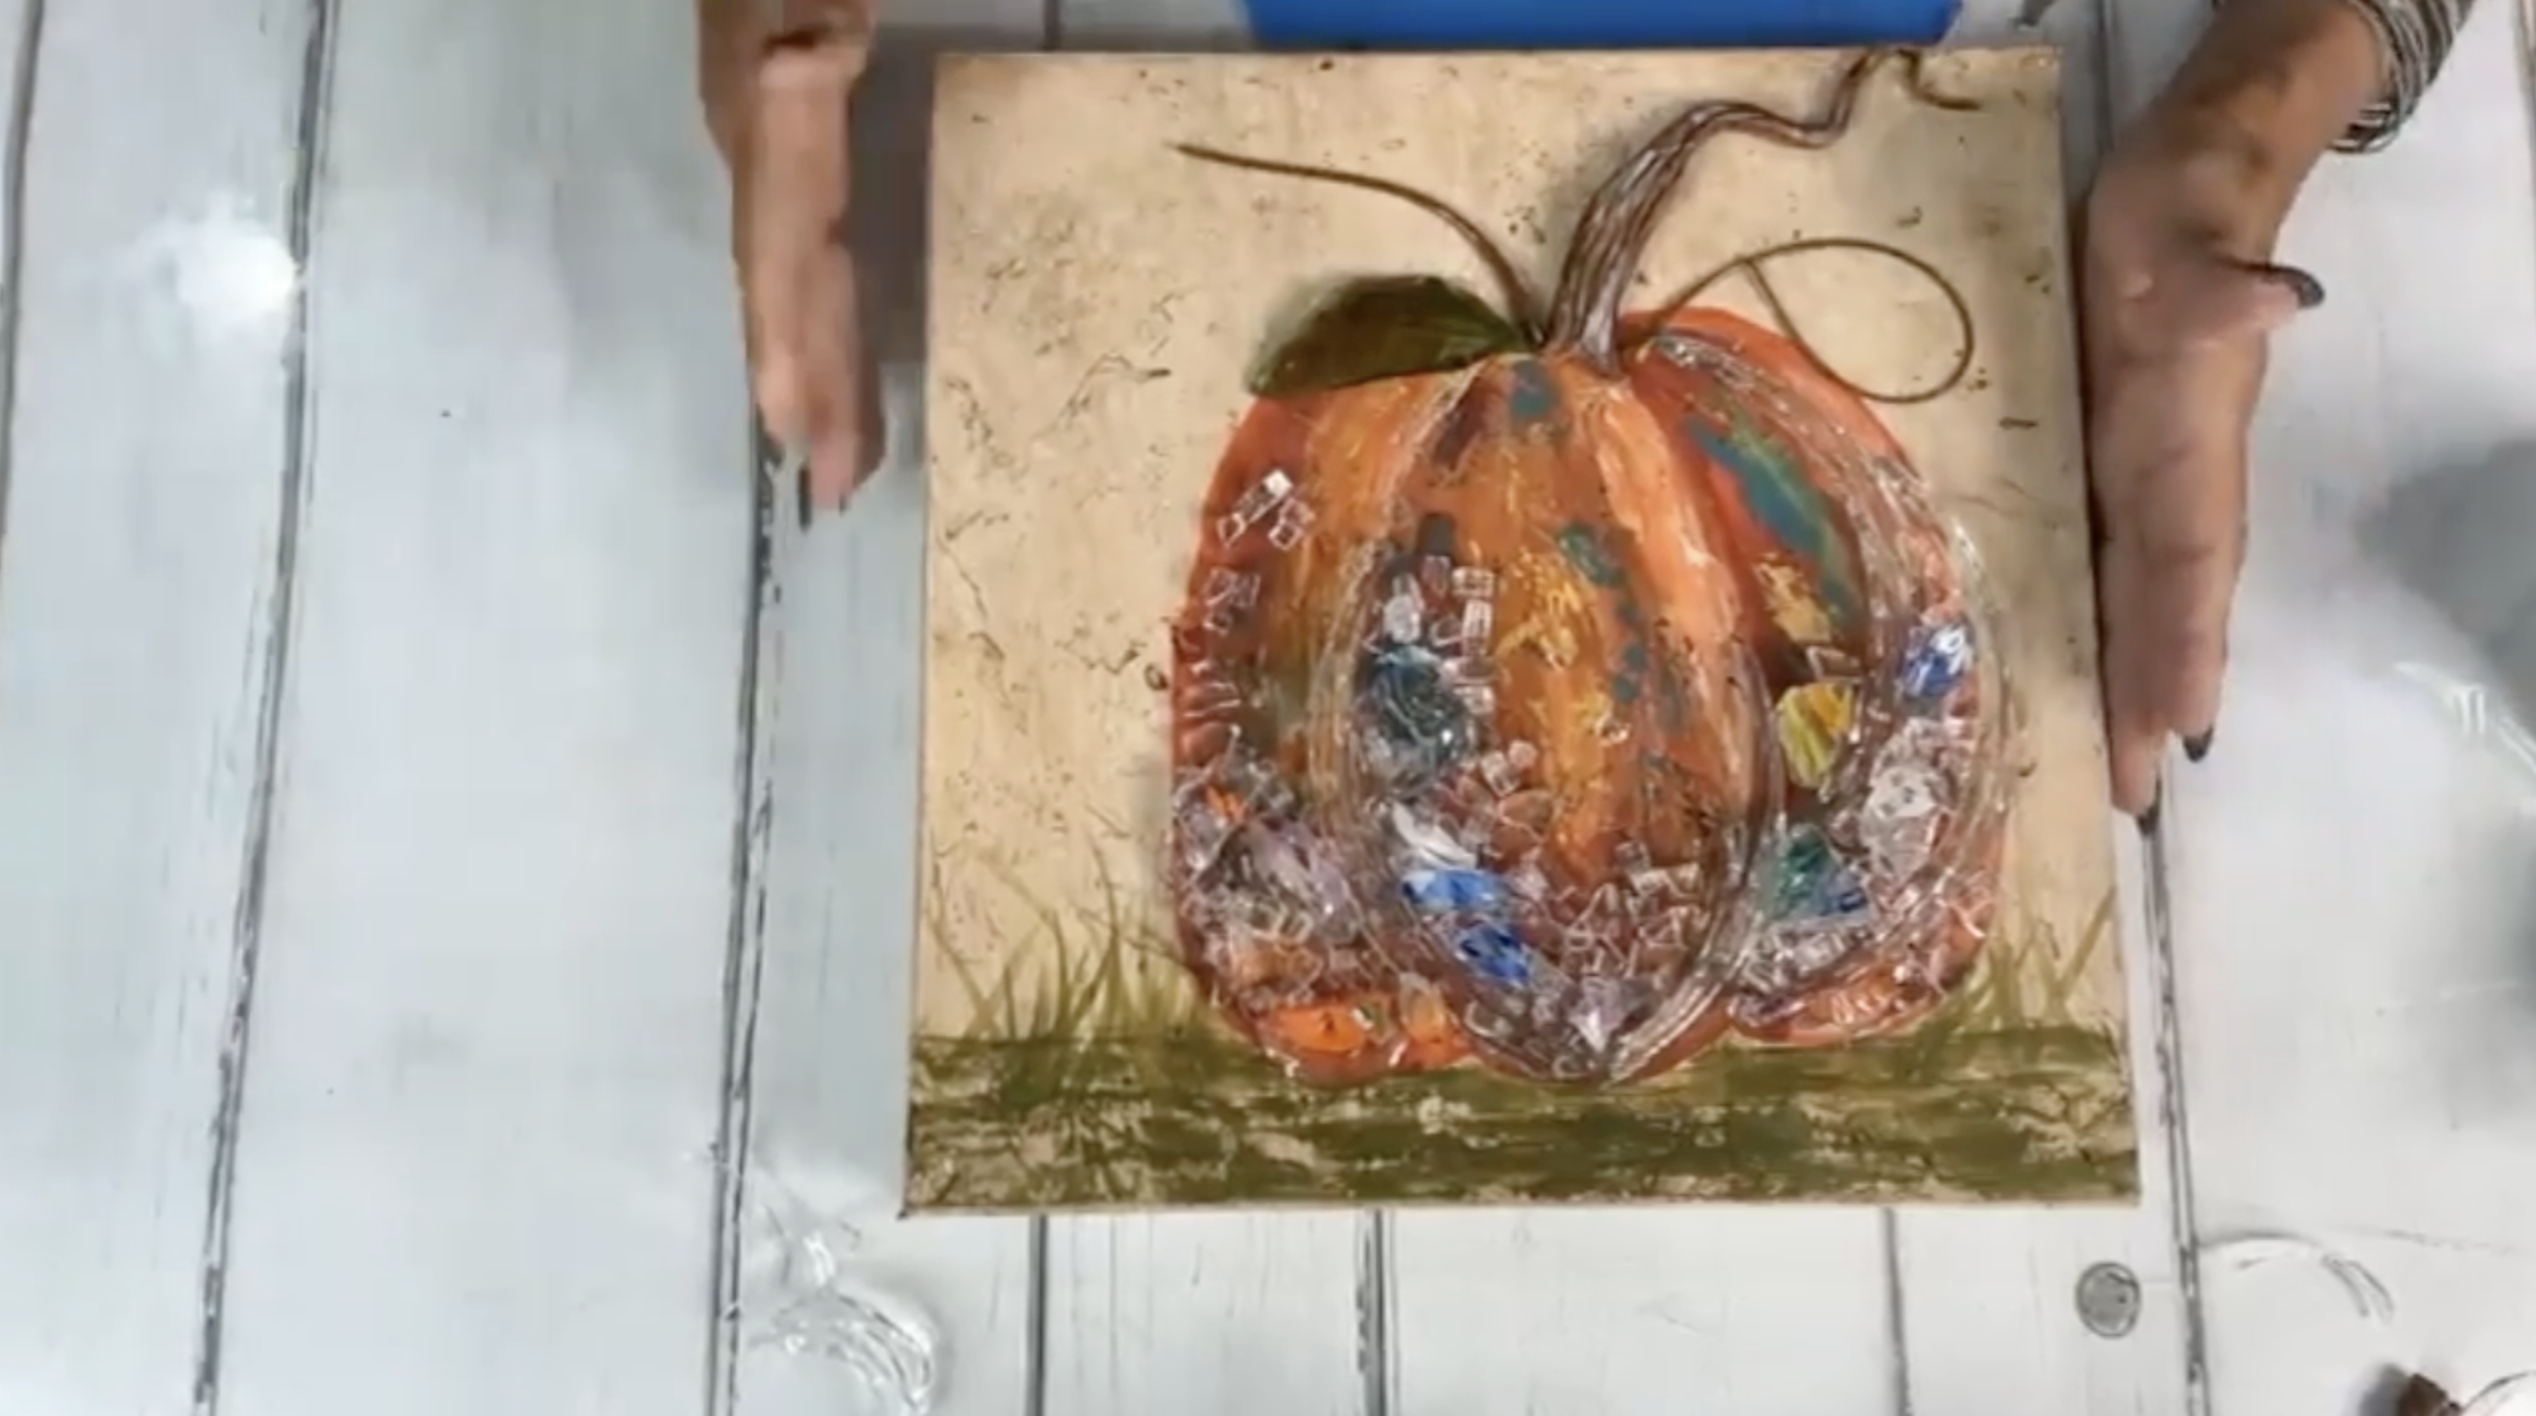
Step 8: Finish with Resin
Once all your glass is arranged on your pumpkin canvas, seal it with resin for a glossy, durable finish. Be sure all glass is well covered, and use a heat gun to pop any bubbles. Optional: sprinkle with seed beads for a shimmery touch.
Cutting your own glass embellishments from a broken vase isn’t just a creative way to upcycle - it adds gorgeous, custom elements to your fall decor. With the right tools and safety steps, you'll be creating beautiful, glass pumpkin canvases in no time!
If you don’t want to miss my Facebook LIVE art instruction, make sure you are on my texting list. I always text 10 minutes before I’m going to go LIVE, so you won’t ever miss it. You can text “Hey Cindy” to 901-519-2923.
Want more inspiration and artwork?
- My website artshattered.com with resources, shop, and more!
- My creative membership The Shattered Circle, where you can explore the world of glass art with online workshops, a supportive community, and more!
- My mini creative membership Just A ‘Lil Bit Monthly Glass Art Club, where you’ll get a new quick and easy online tutorial for just a lil' bit of sparkle in your life!
- My Facebook page where I go LIVE every Wednesday night.
- My YouTube channel which has tons of free art lessons right at your fingertips.
