
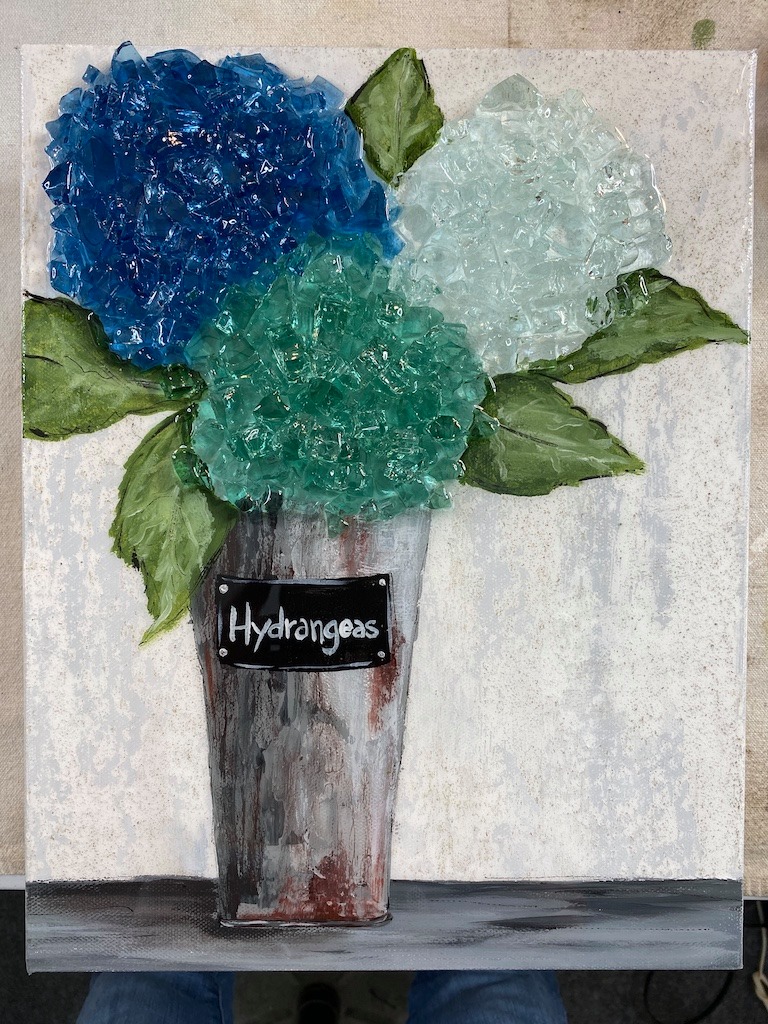
Hydrangea Bucket 🌸
If you love hydrangeas and textured mixed media art, this project is such a fun one to create. This piece combines a softly textured background, a painted metal flower bucket, layered leaves, and chunky glass hydrangea blooms. For this project, I worked on an 11x14 canvas and built the piece in layers. The result is a hydrangea arrangement that feels full, bright, and beautifully dimensional!
Step 1: Paint the Background
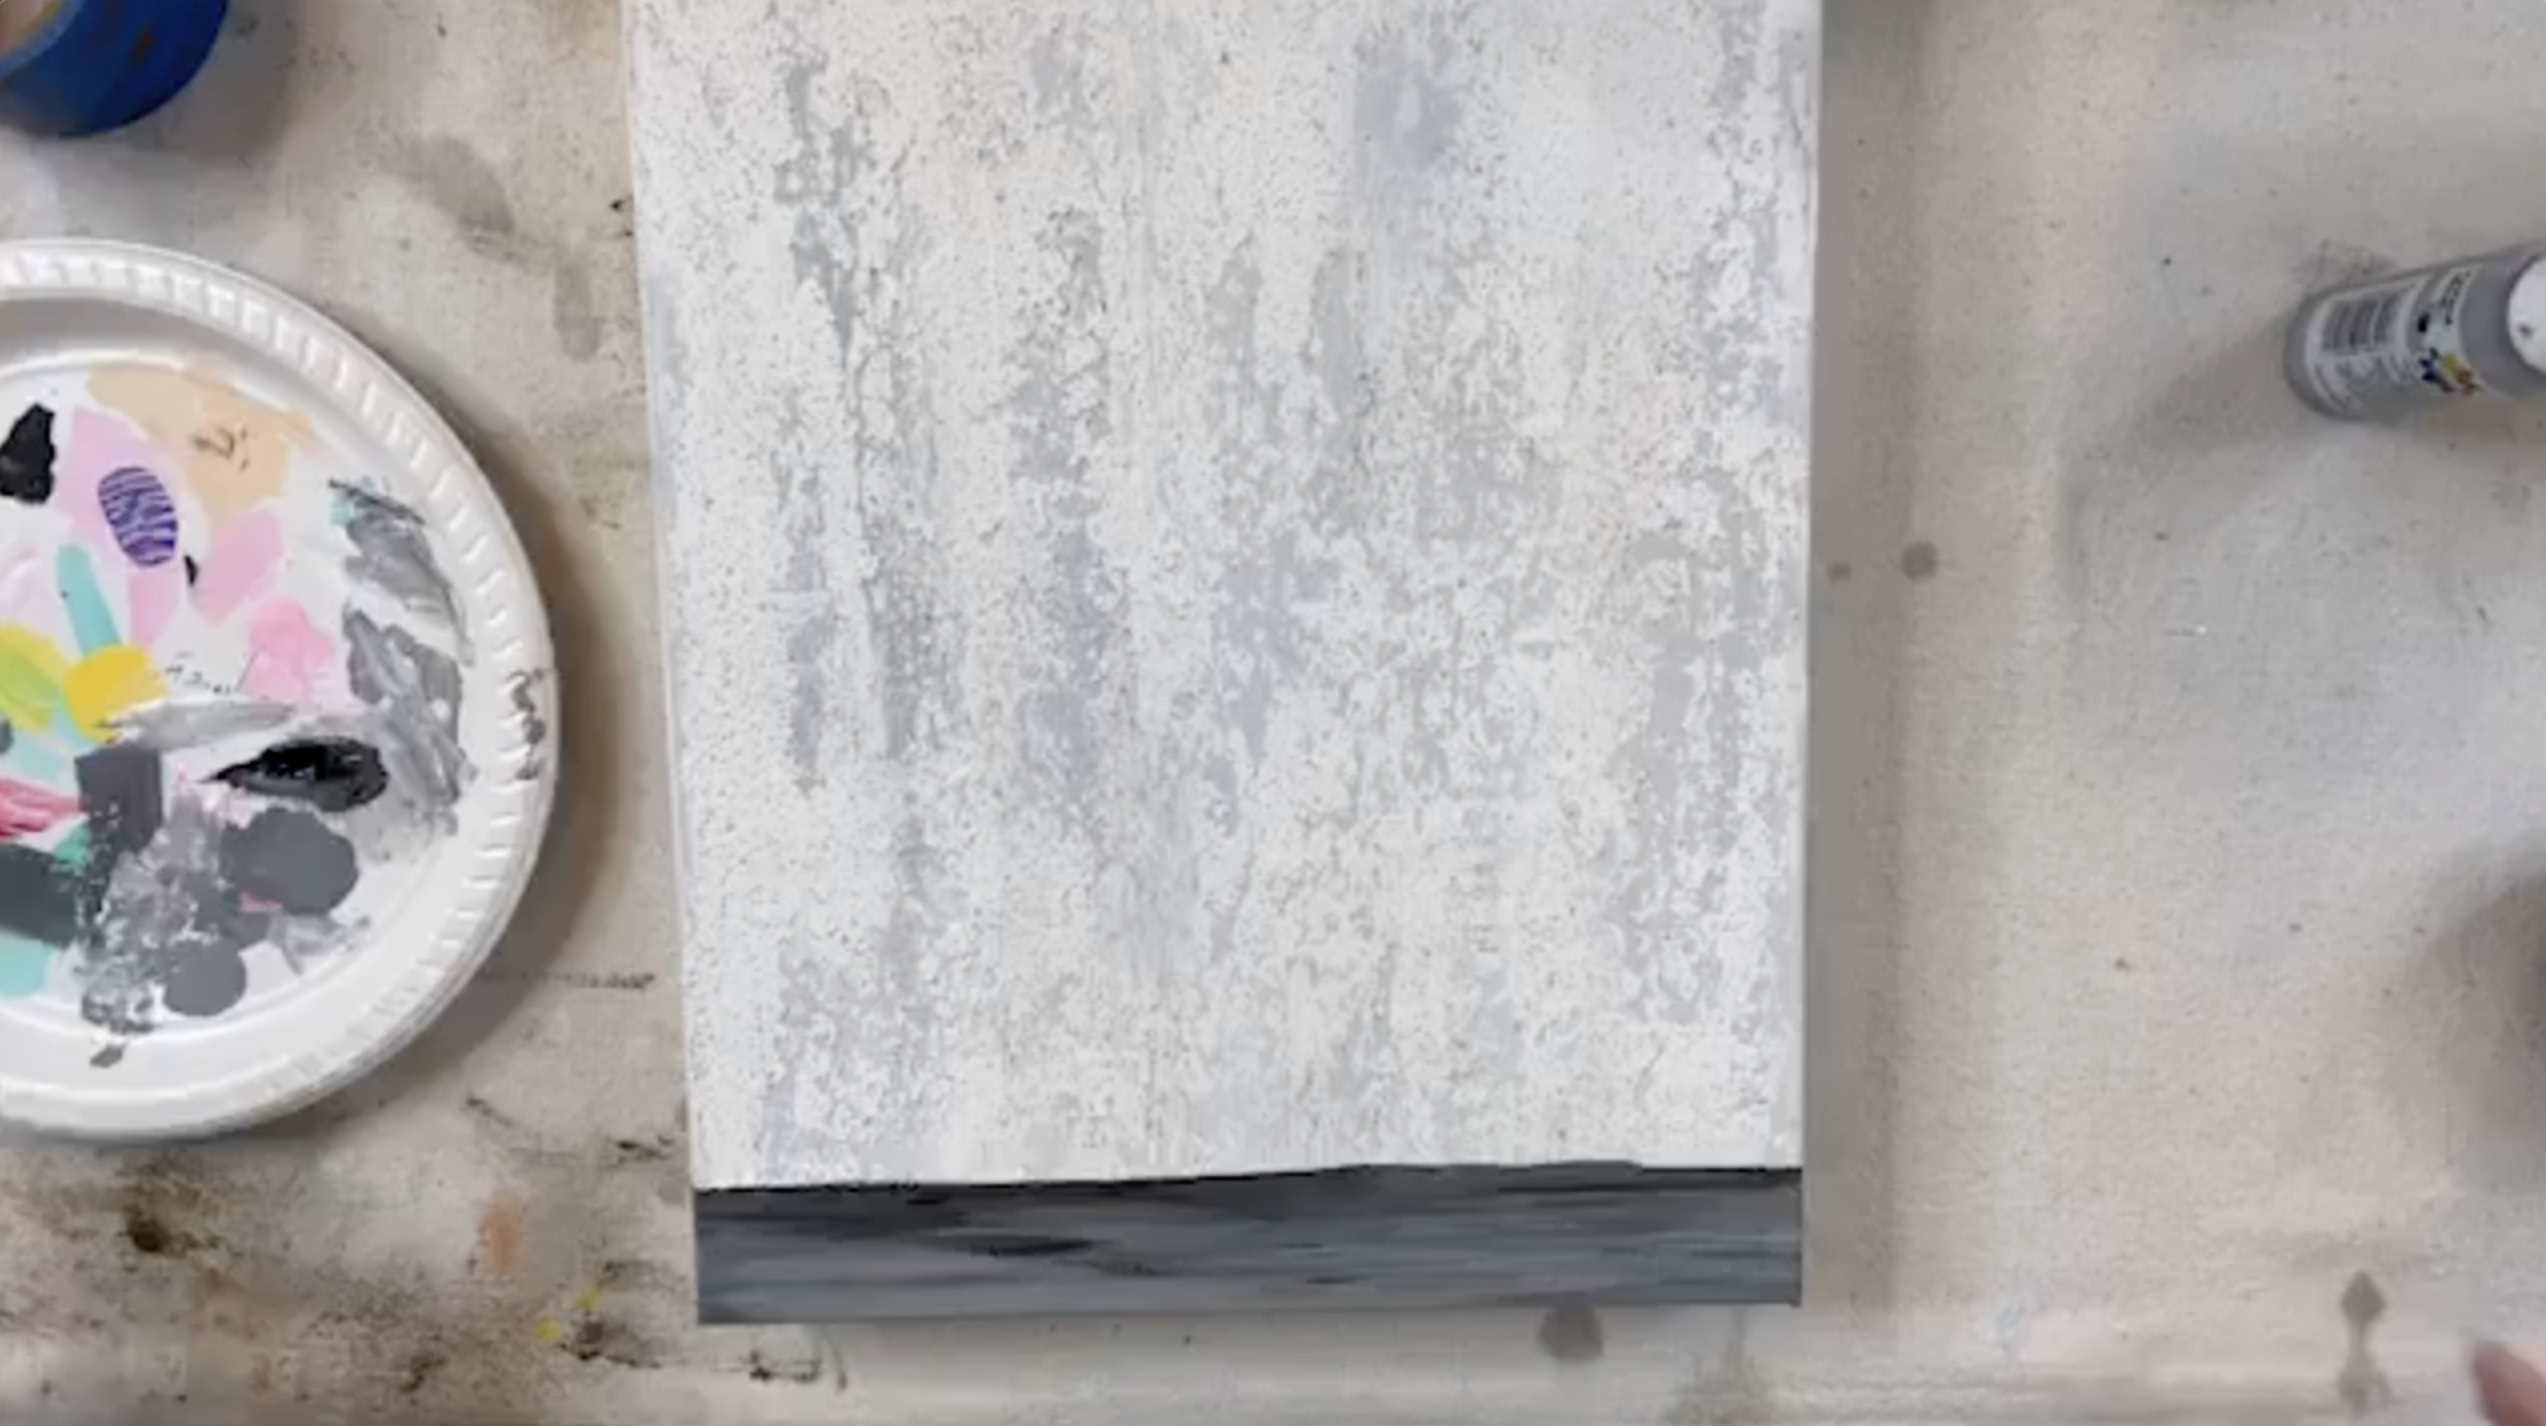
Start with your 11x14 canvas and brush on a thin coat of white acrylic paint. This is not meant to be a fully finished base coat. It simply softens the brightness of the raw canvas and helps mute the gray background color that comes next. While that white is still slightly wet, brush in a soft light gray over the canvas. Blend it out so you end up with a subtle gray-and-white base rather than a flat, solid coat of gray. Once the canvas is covered, dry it completely with a heat gun or blow dryer.
Use painter’s tape to mask off the bottom section of the canvas where your “table” will be. Leave about an inch to an inch and a half at the bottom untextured. On the upper portion of the canvas, use a palette knife to apply the sandstone texture vertically. Add the product in a hit-or-miss manner rather than covering the entire surface. You want some of the gray background still peeking through.
Work from top to bottom in loose vertical pulls. If you get a line that feels too harsh, pull back through it with the knife to soften it. The goal is to create a distressed wallpaper or plaster-like background with texture, but not full coverage. Once you like the look, let it set.
With the bottom section still taped off from the textured background, paint in your table area using a mid-tone gray like French Gray. Cover the full bottom section, then deepen the upper edge of that “table” with a darker gray such as Gray Storm. Add a touch of black if you want more contrast near the back edge where the bucket will sit.
Then lighten the lower portion of the table with a pale gray and some white. This variation gives the table more dimension and keeps it from feeling flat. For extra character, use a palette knife to skim a little white across the surface, then add a mix of white and cocoa-toned paint to create distressed streaks. This gives the table a weathered, rustic finish that works beautifully with the flower bucket.
Once you like the table, dry it and remove the tape.
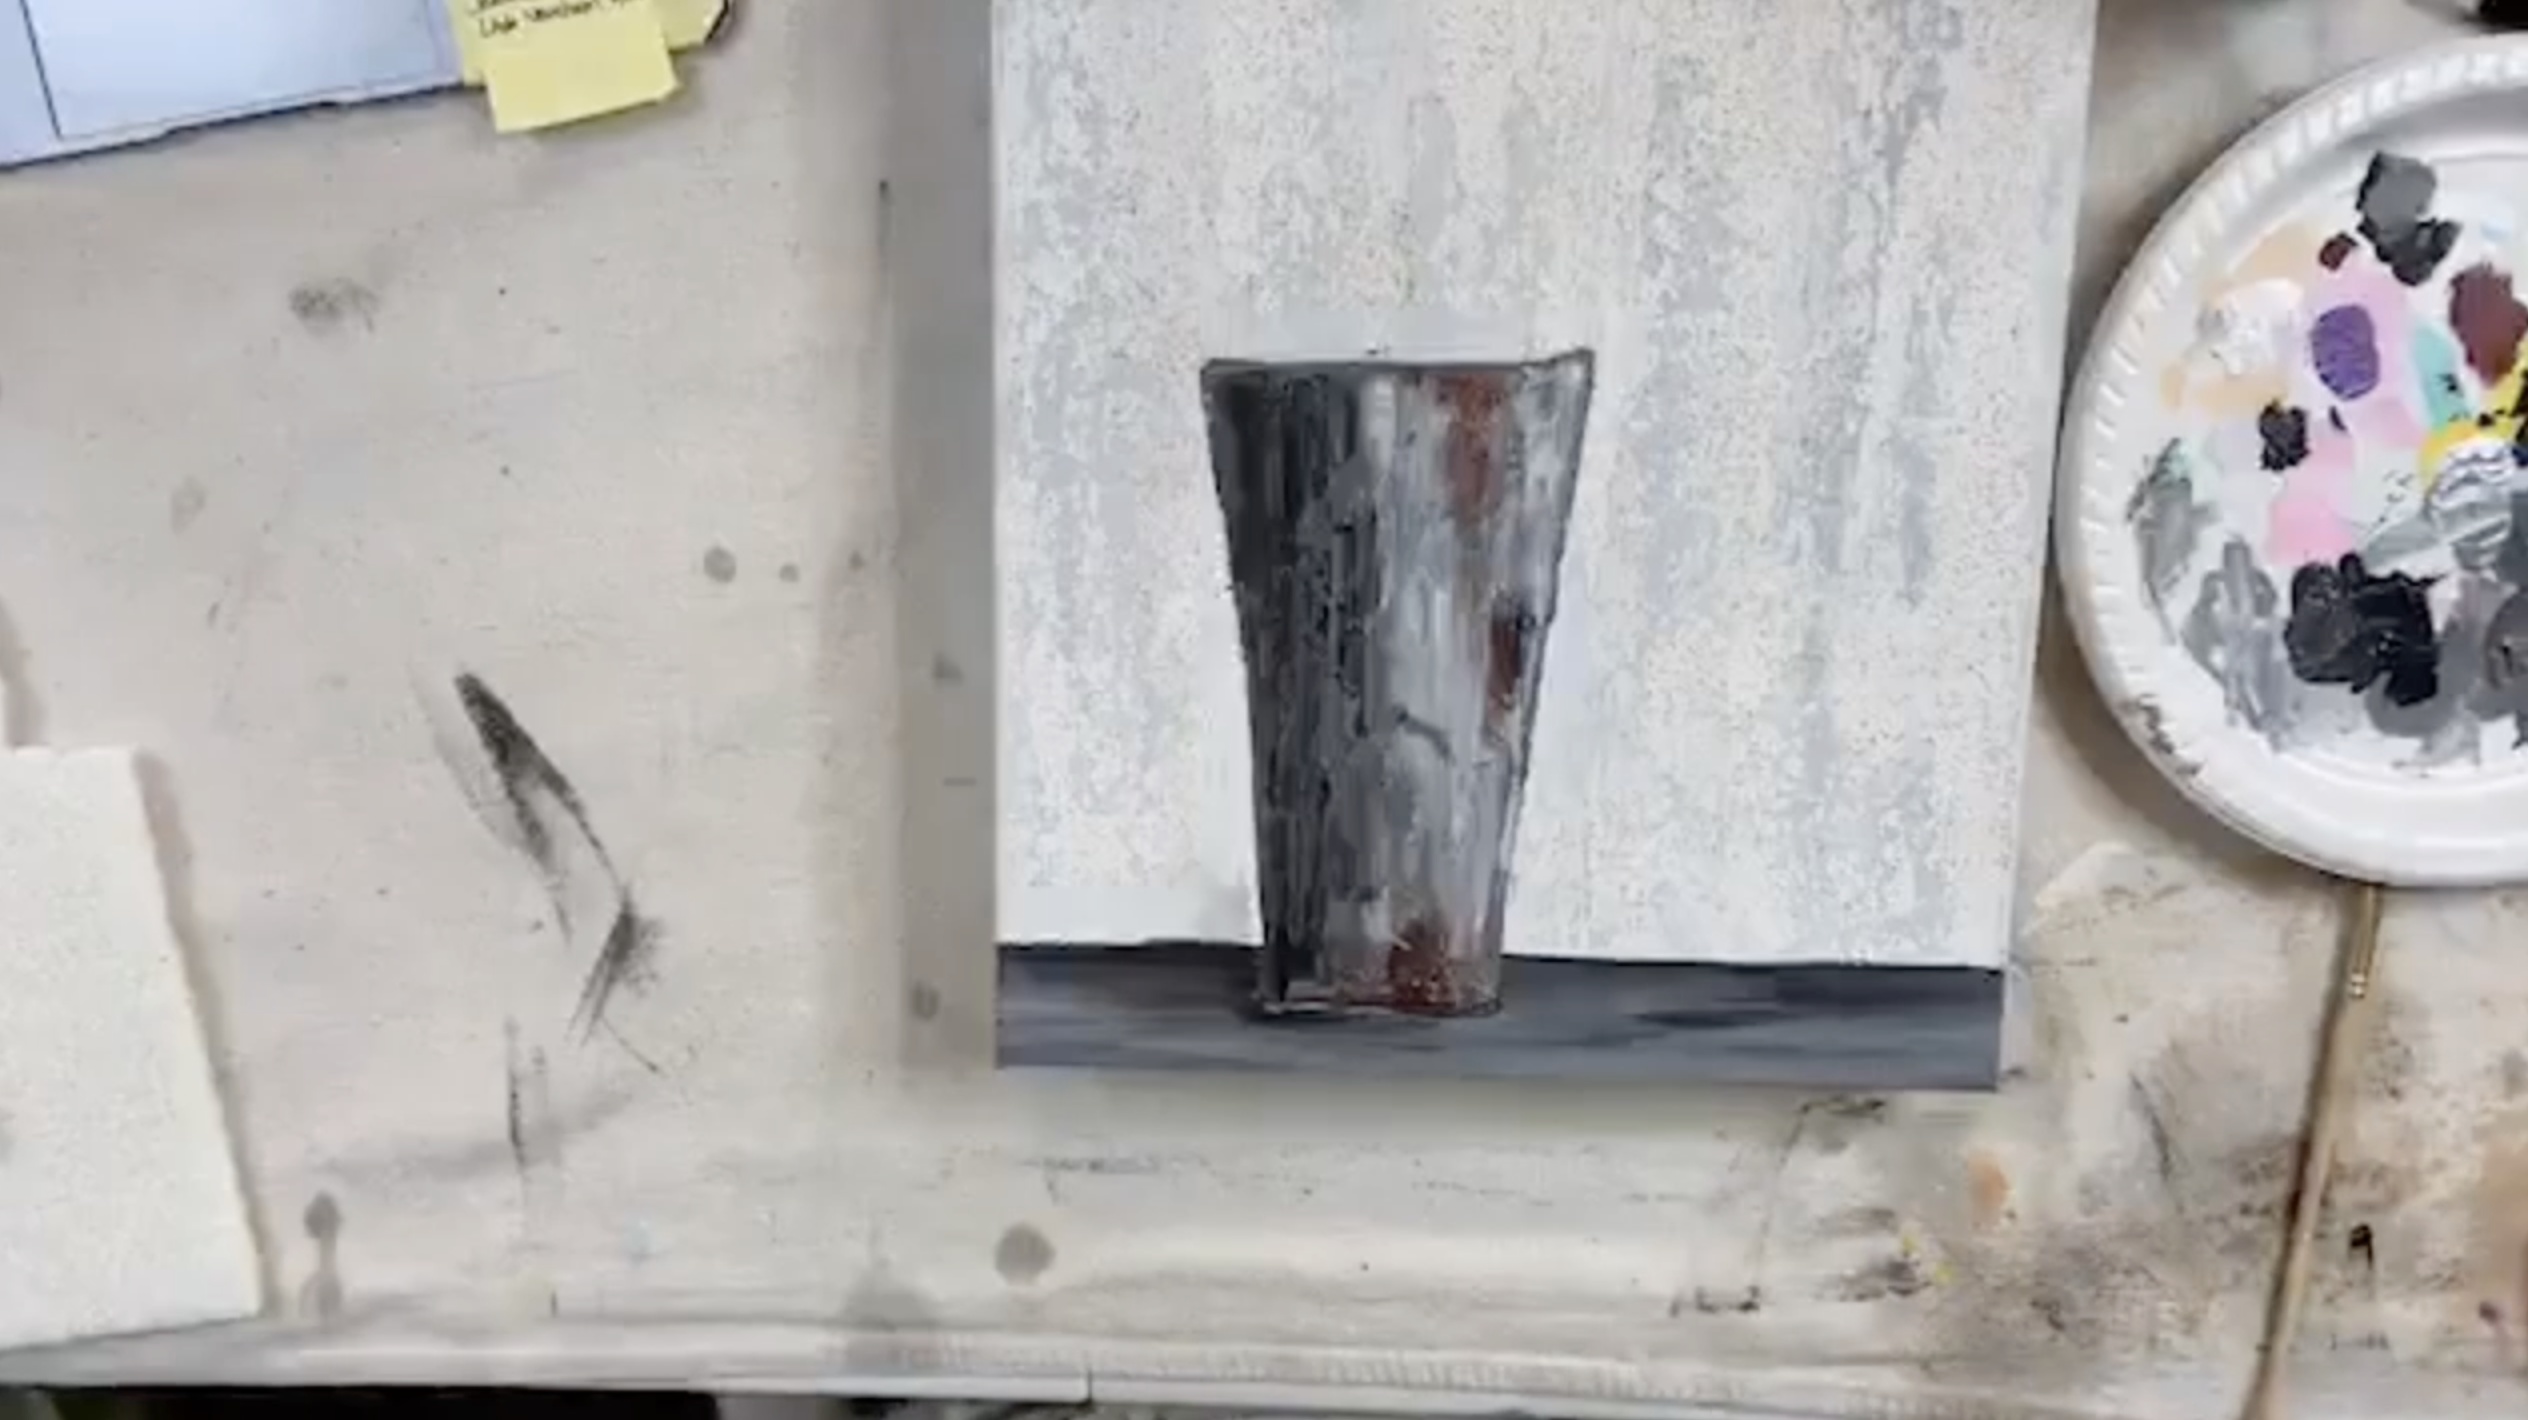
Step 2: Sketch and Paint the Flower Bucket
Lightly sketch the shape of a tall metal flower bucket onto the center of the canvas. If you’re in the Shattered Circle and using a tracer, you can transfer the bucket shape that way. Because the textured background is already in place, begin by covering the bucket area with a heavy body neutral gray paint. This helps fill in the grit of the background texture so the bucket has a smoother painted surface.
After the base coat is in, begin building dimension. Add a darker gray mixed with a little black along one side to create shadow. Then add metallic silver on the opposite side for a reflective metal highlight. Use a palette knife to lightly skim these colors on rather than brushing them solidly in. That keeps the metal look organic and layered.
To make the bucket feel aged and weathered, mix a rusty color using Heritage Brick, Anita’s Wine, and a tiny bit of black. Add this rust tone around the bottom edge and in a few random places on the body of the bucket. Smudge some of it softly with your finger or brush so it feels natural instead of overly placed. Add a few white highlights on the brighter side to help sell the curved metal effect.
Finish the shape by adding the bottom lip of the bucket and a little shadow on the table surface underneath it.
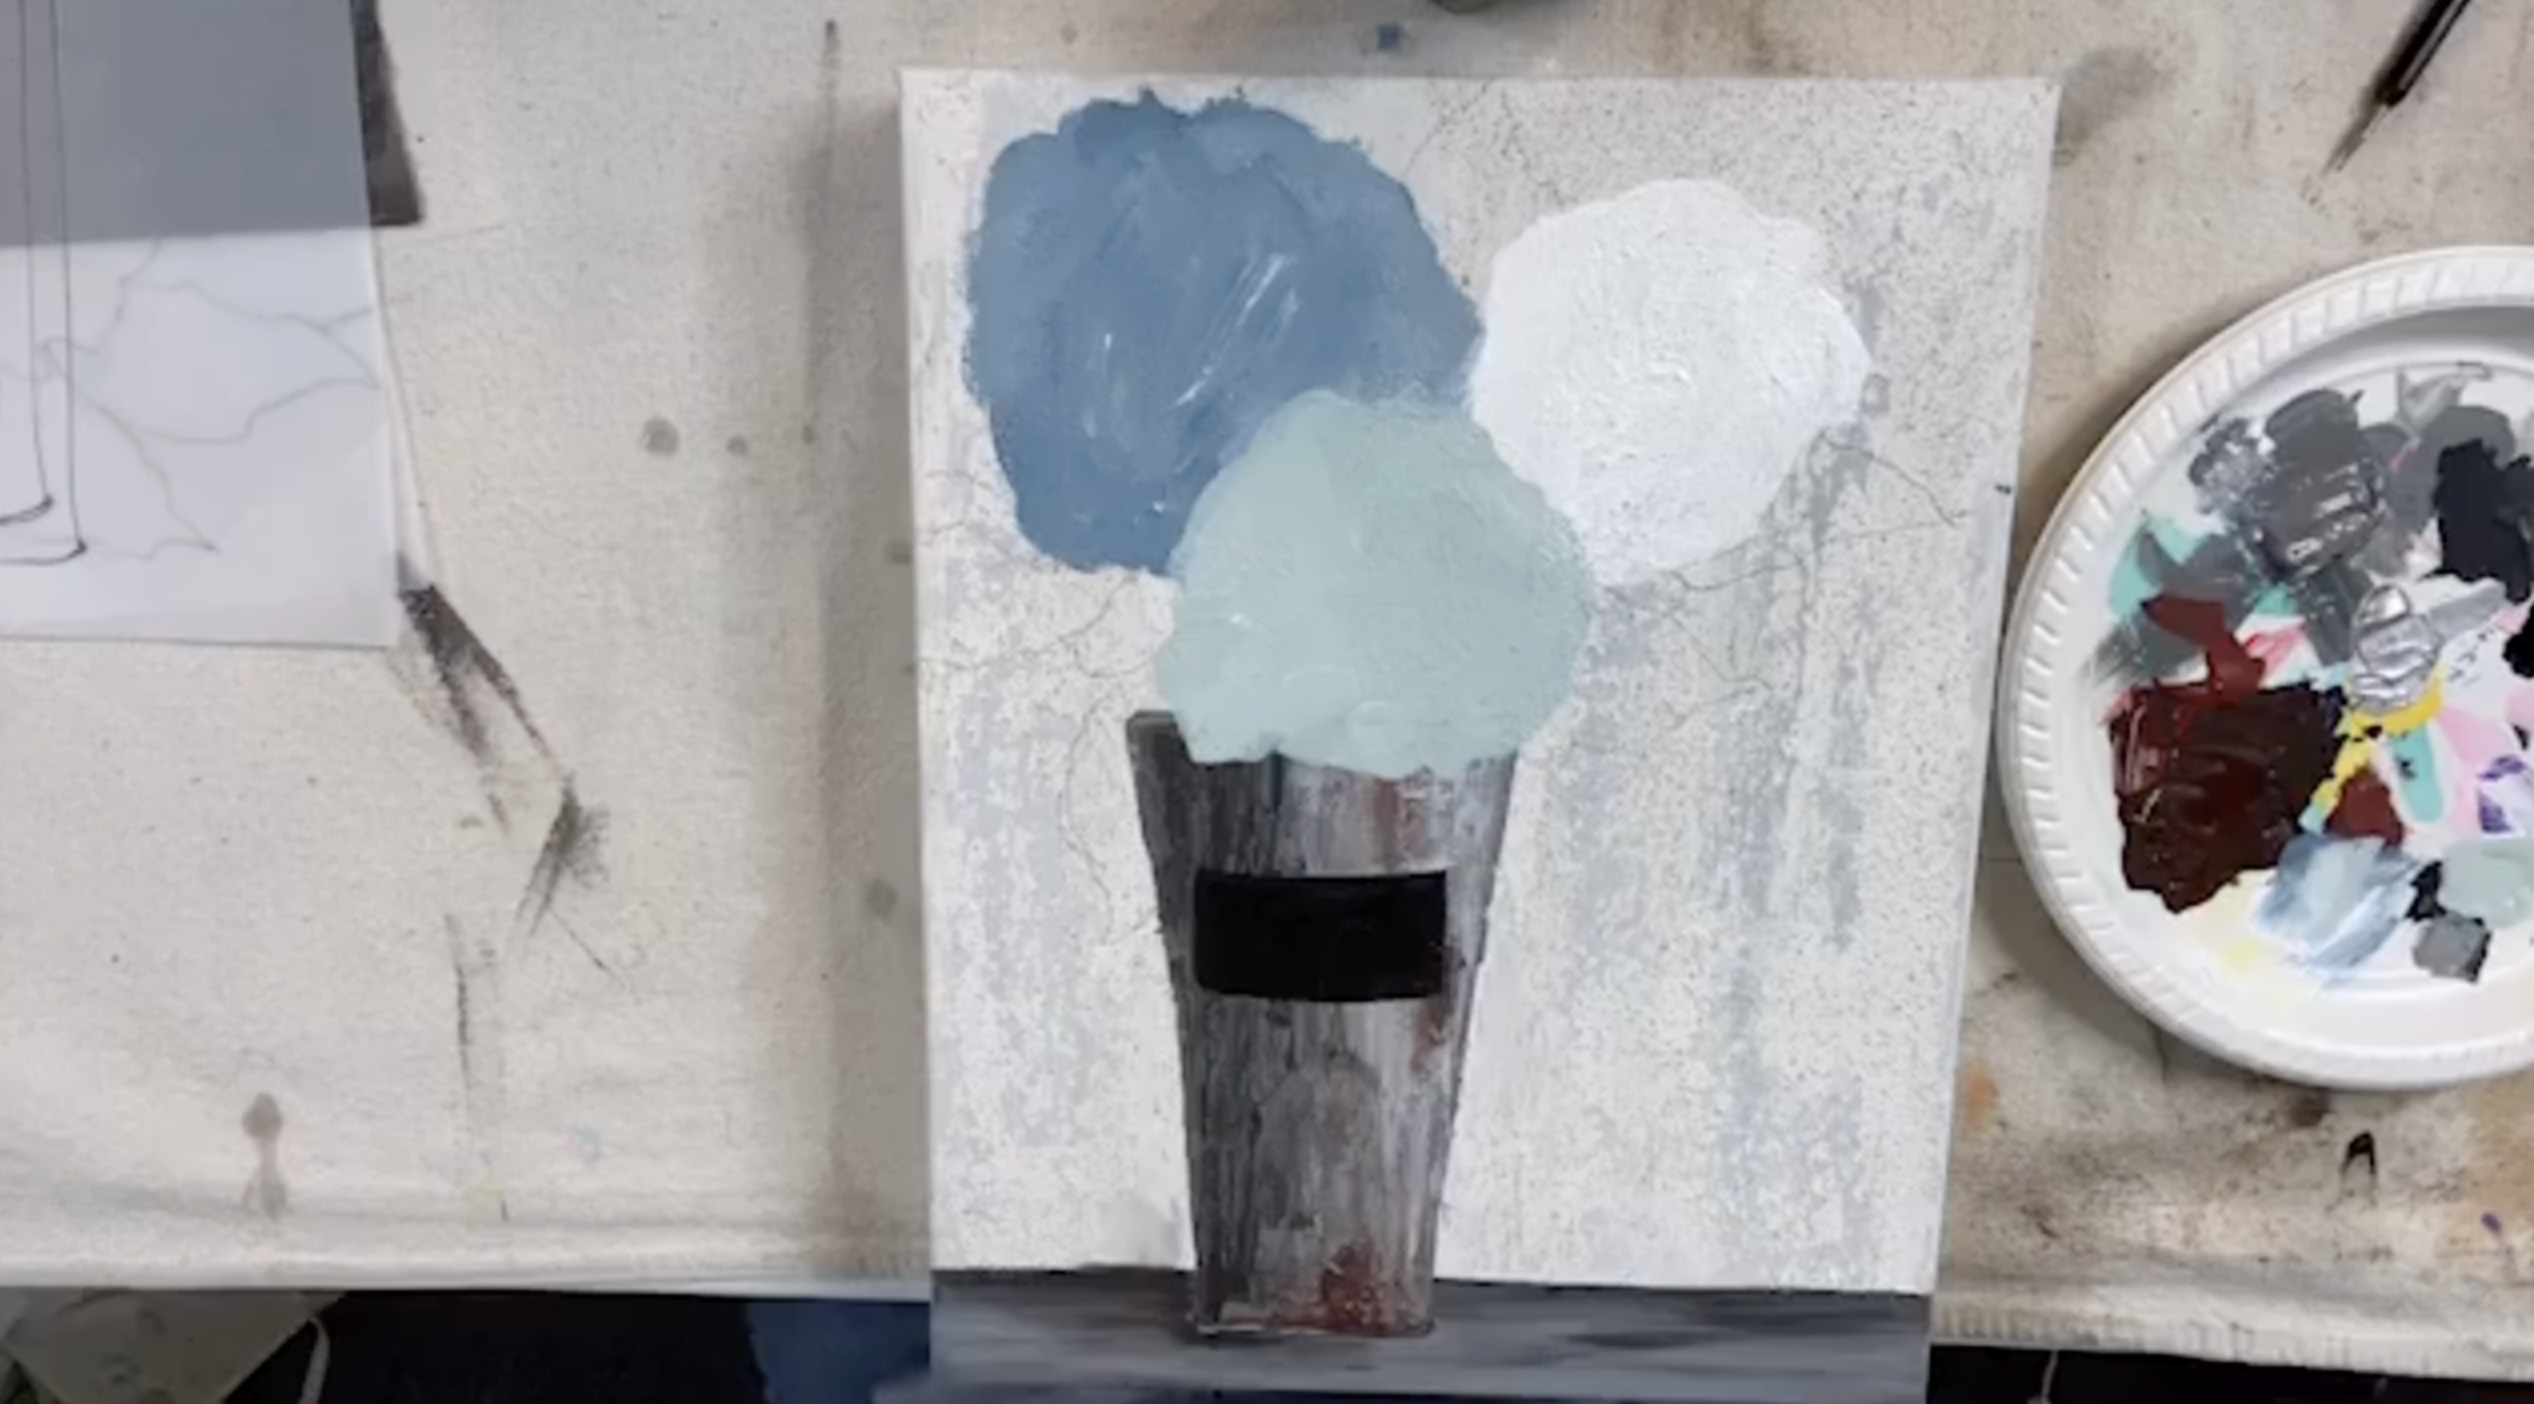
Step 3: Add the Bucket Label
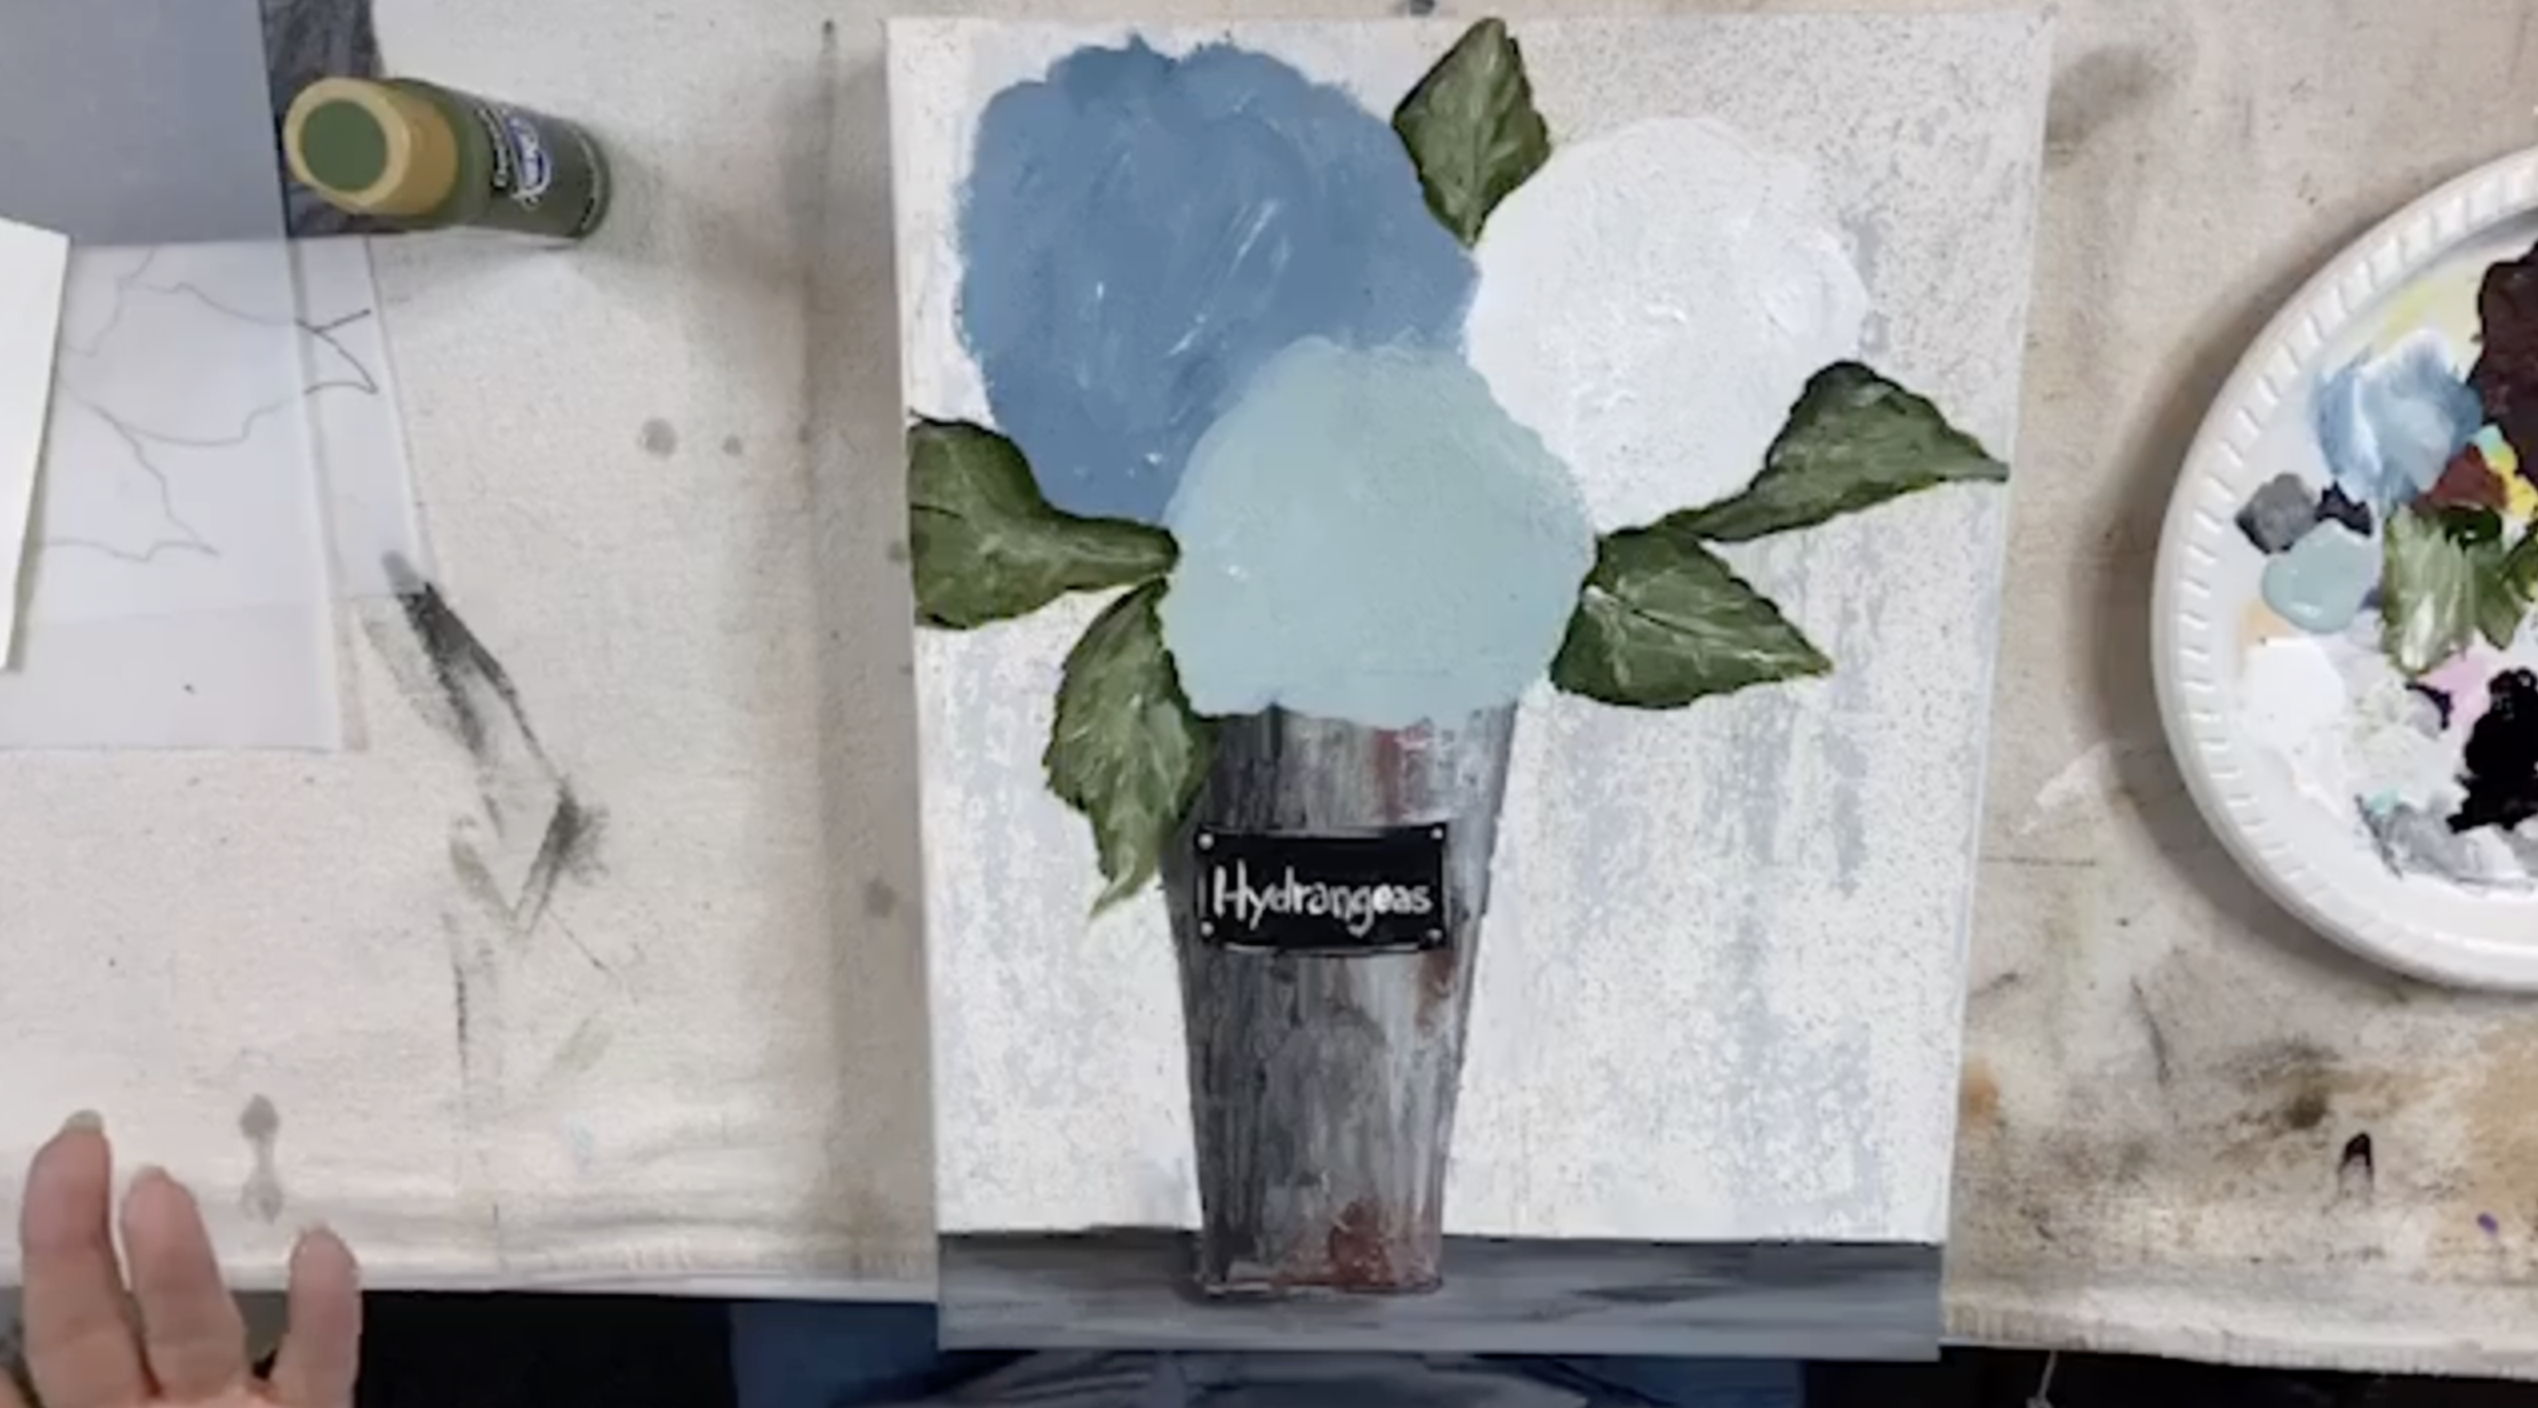
Transfer or sketch the word “Hydrangeas” across the front of the bucket where a little chalkboard label will go. Paint a black label shape first, keeping the top and bottom slightly curved so it follows the rounded shape of the bucket. Once dry, use a liner brush and white paint to letter “Hydrangeas” across the front.
This little detail adds so much charm and gives the piece that sweet market-bucket look.
Step 4: Paint the Flower Bases
Now it’s time to block in the areas where your glass flowers will sit. One flower will be white or clear, one will be medium blue, and one will be aqua/seafoam. Use white paint under the flower that will get clear or pale glass so the textured gray background doesn’t show through. For the blue flower, use a medium blue like Skyline. For the aqua flower, use a seafoam or soft blue-green tone.
These painted flower bases do not need to be perfect circles. Just create rough, organic bloom shapes where your hydrangea clusters will sit. Some of the bucket should be covered by the front bloom, so let that lower flower overlap the bucket slightly.
Step 5: Paint the Leaves
Using a medium green as your base, paint in the leaves around the flowers. Let some leaves tuck behind the blooms and extend off the edge of the canvas if you like. Once the green base is dry enough to work into, add a darker green where the leaves tuck under flowers or overlap each other. This creates instant shadow and depth.
Then add a little white on a liner brush to create the center vein and faint leaf lines. Keep these details soft and organic. The leaves do not need to be perfect or botanical. They just need enough variation and structure to support the glass blooms.
Use a graphic pen to add short, quick strokes outlining the leaves and adding detail lines.
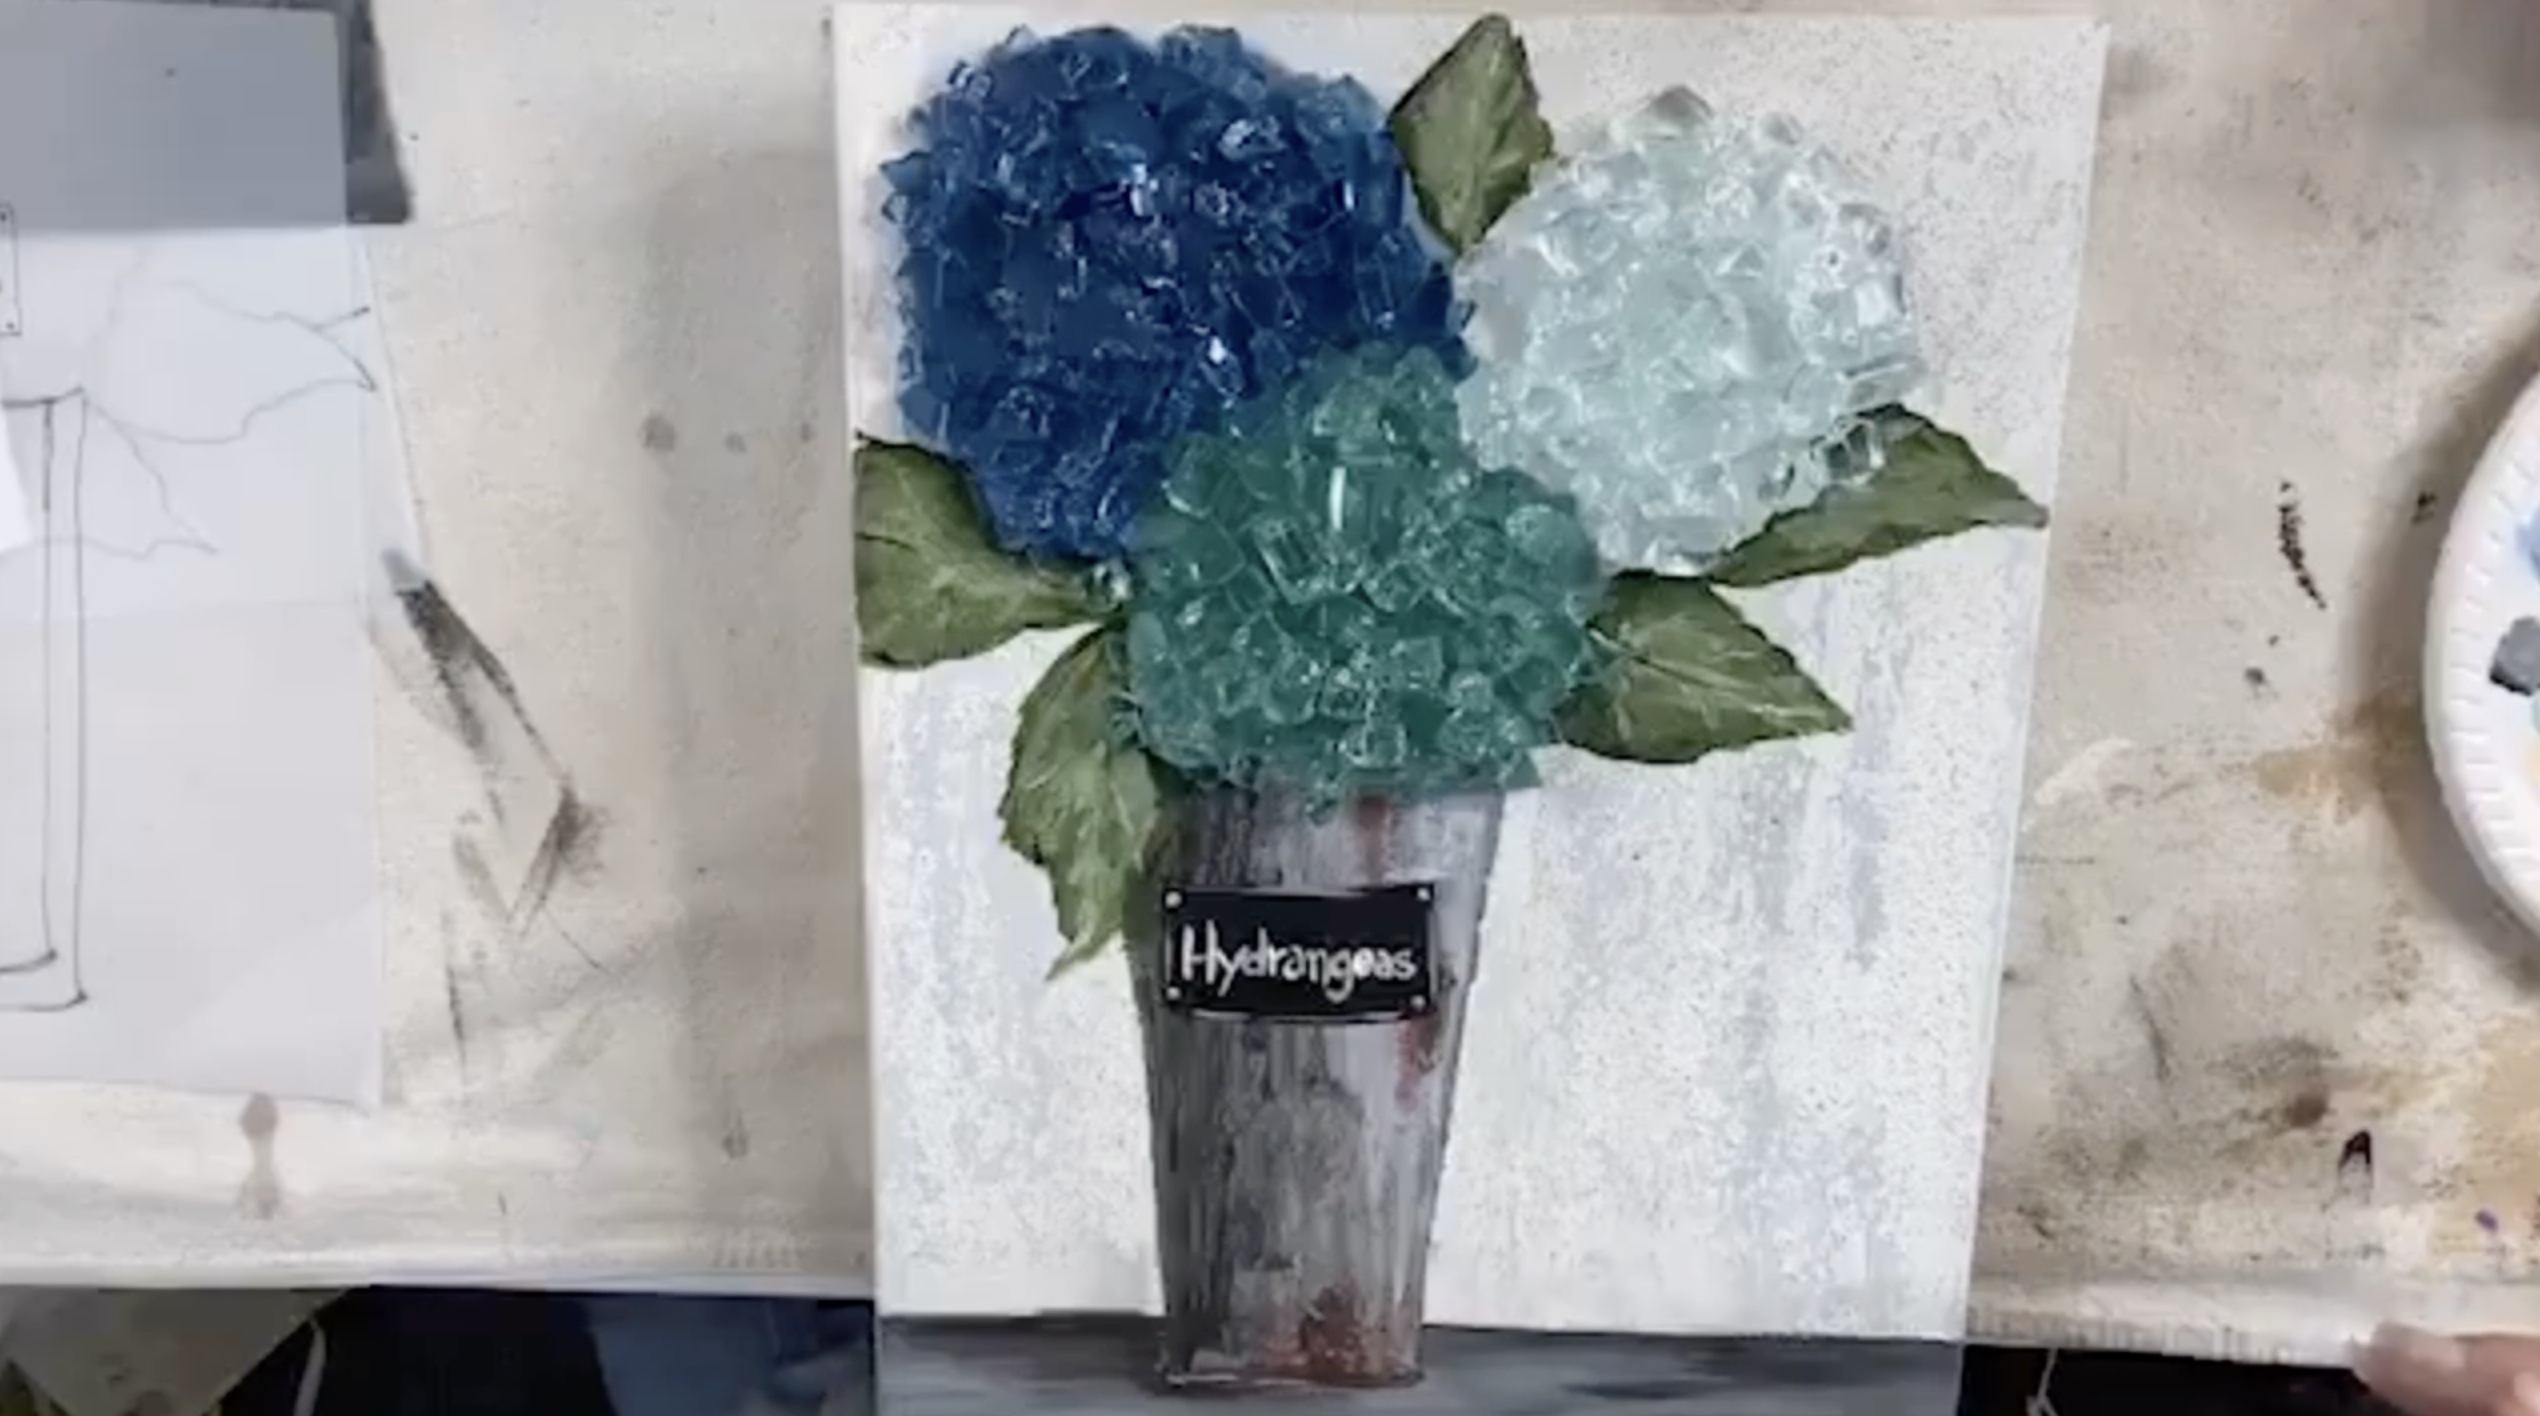
Step 6: Place the Glass Hydrangea Blooms
Once all the painted flower bases are dry, begin laying out your chunky glass for each hydrangea bloom. Use the white or clear glass over the white-painted flower, medium blue glass over the blue-painted flower, and aqua or solex-toned glass over the seafoam-painted flower. The paint underneath helps the glass color feel richer and more intentional.
Cluster the glass pieces so the blooms feel full and rounded, like hydrangeas naturally do. Let the three blooms overlap slightly and feel lush. Because hydrangeas are full flowers, chunky glass works especially well here.
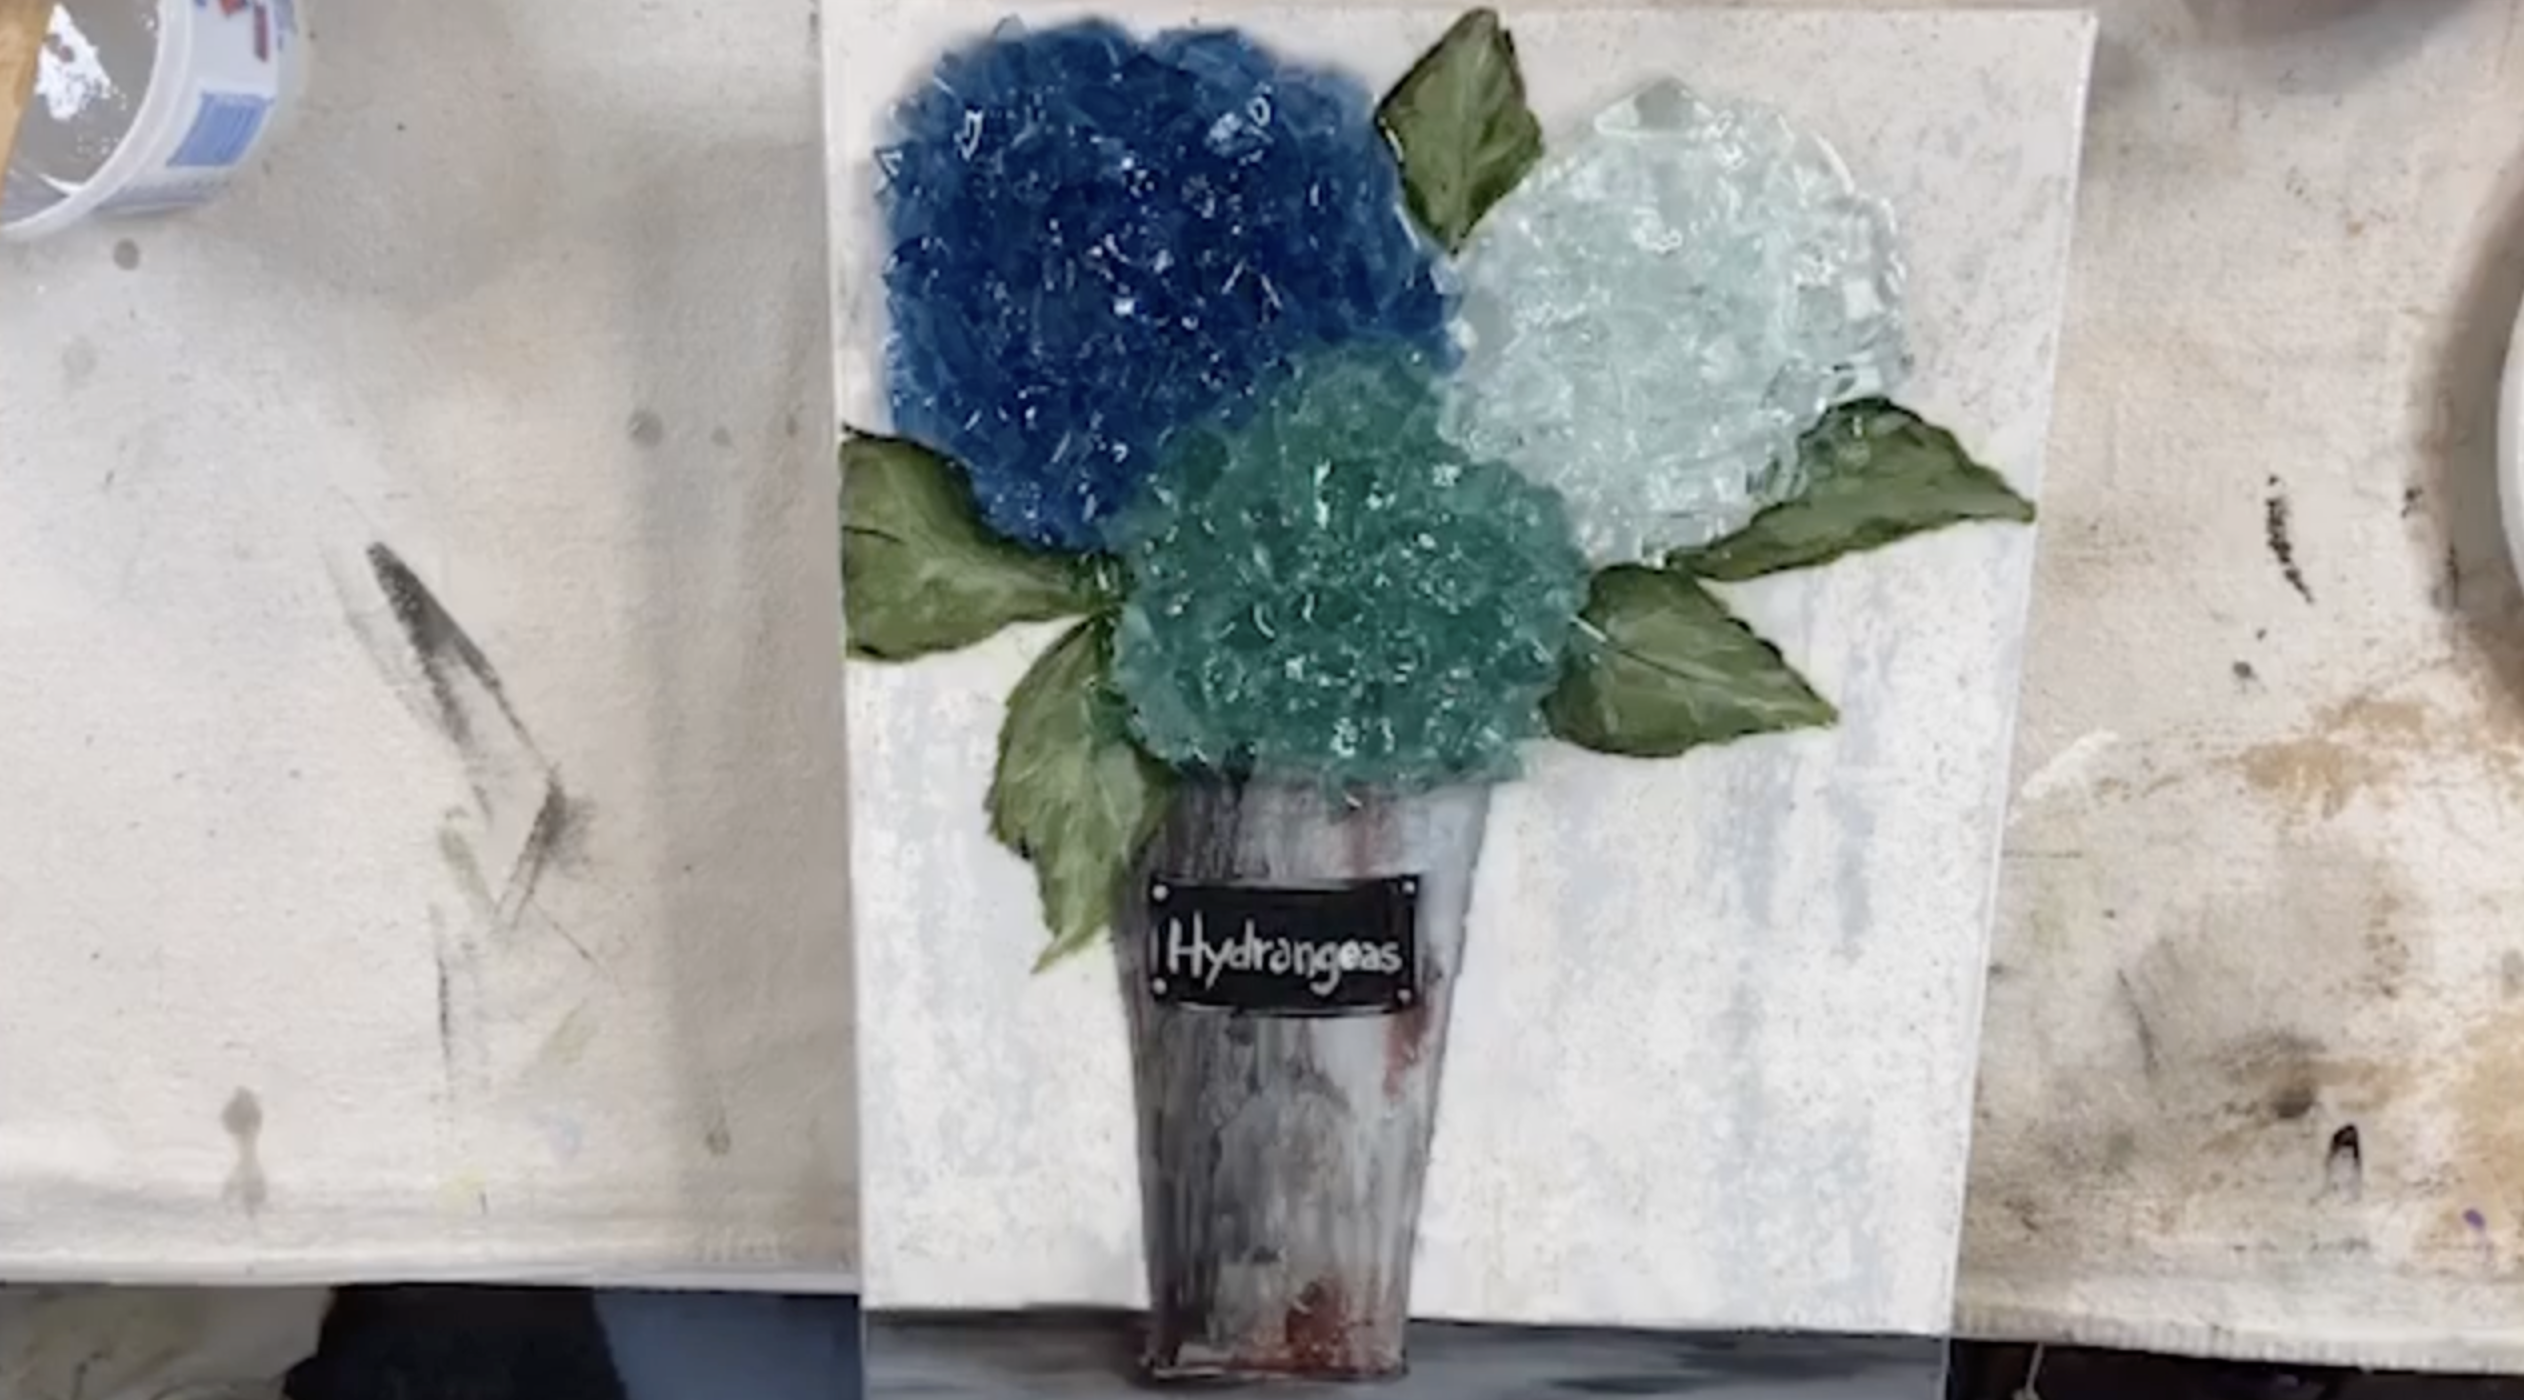
Step 7: Resin the Piece
To finish the piece, mix equal parts resin and hardener according to your resin’s directions. In my project, I mixed 6 ounces of resin.
Stir the resin thoroughly for a full three minutes, scraping the sides and bottom of the cup so everything is mixed evenly.
Apply resin over the entire finished piece according to your usual process. Make sure the glass flowers are fully coated so they sparkle and hold securely in place. The resin is what really brings the hydrangeas to life, deepening the paint colors and making the glass look luminous.
Let the piece cure fully before moving or displaying it.
If you're a member of The Shattered Circle, you'll find this tutorial in your classroom under Art Shattered Weekly Facebook Lives, search for "Hydrangea Bucket".
If you don’t want to miss my Facebook LIVE art instruction, make sure you are on my texting list. I always text 10 minutes before I’m going to go LIVE, so you won’t ever miss it. You can text “Hey Cindy” to 901-519-2923.
Want more inspiration and artwork?
- My website artshattered.com with resources, shop, and more!
- My creative membership The Shattered Circle, where you can explore the world of glass art with online workshops, a supportive community, and more!
- My mini creative membership Just A ‘Lil Bit Monthly Glass Art Club, where you’ll get a new quick and easy online tutorial for just a lil' bit of sparkle in your life!
- My Facebook page where I go LIVE every Wednesday night.
- My YouTube channel which has tons of free art lessons right at your fingertips.
