
Orange Glass Pumpkin 🎃
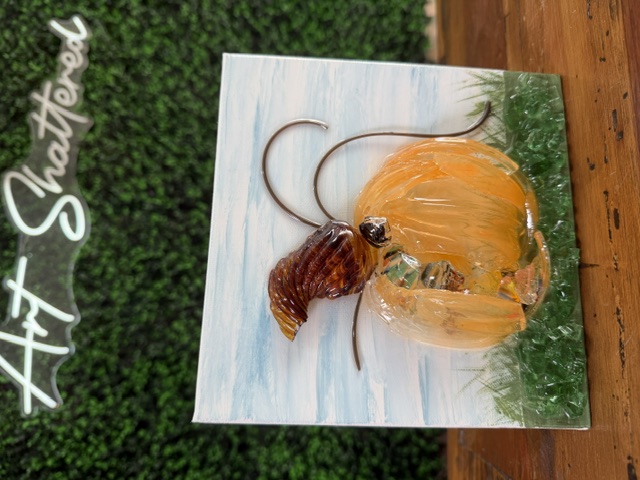
For this project, we're skipping the traditional painted pumpkin and making one entirely out of glass! We're using pieces of broken orange vases, glass pumpkins, and other orange glass scraps to build a dimensional pumpkin right on an 8x8 canvas. And the best part? You don't need to paint a pumpkin shape or follow a pattern. We're just arranging glass pieces until they start looking like a pumpkin!
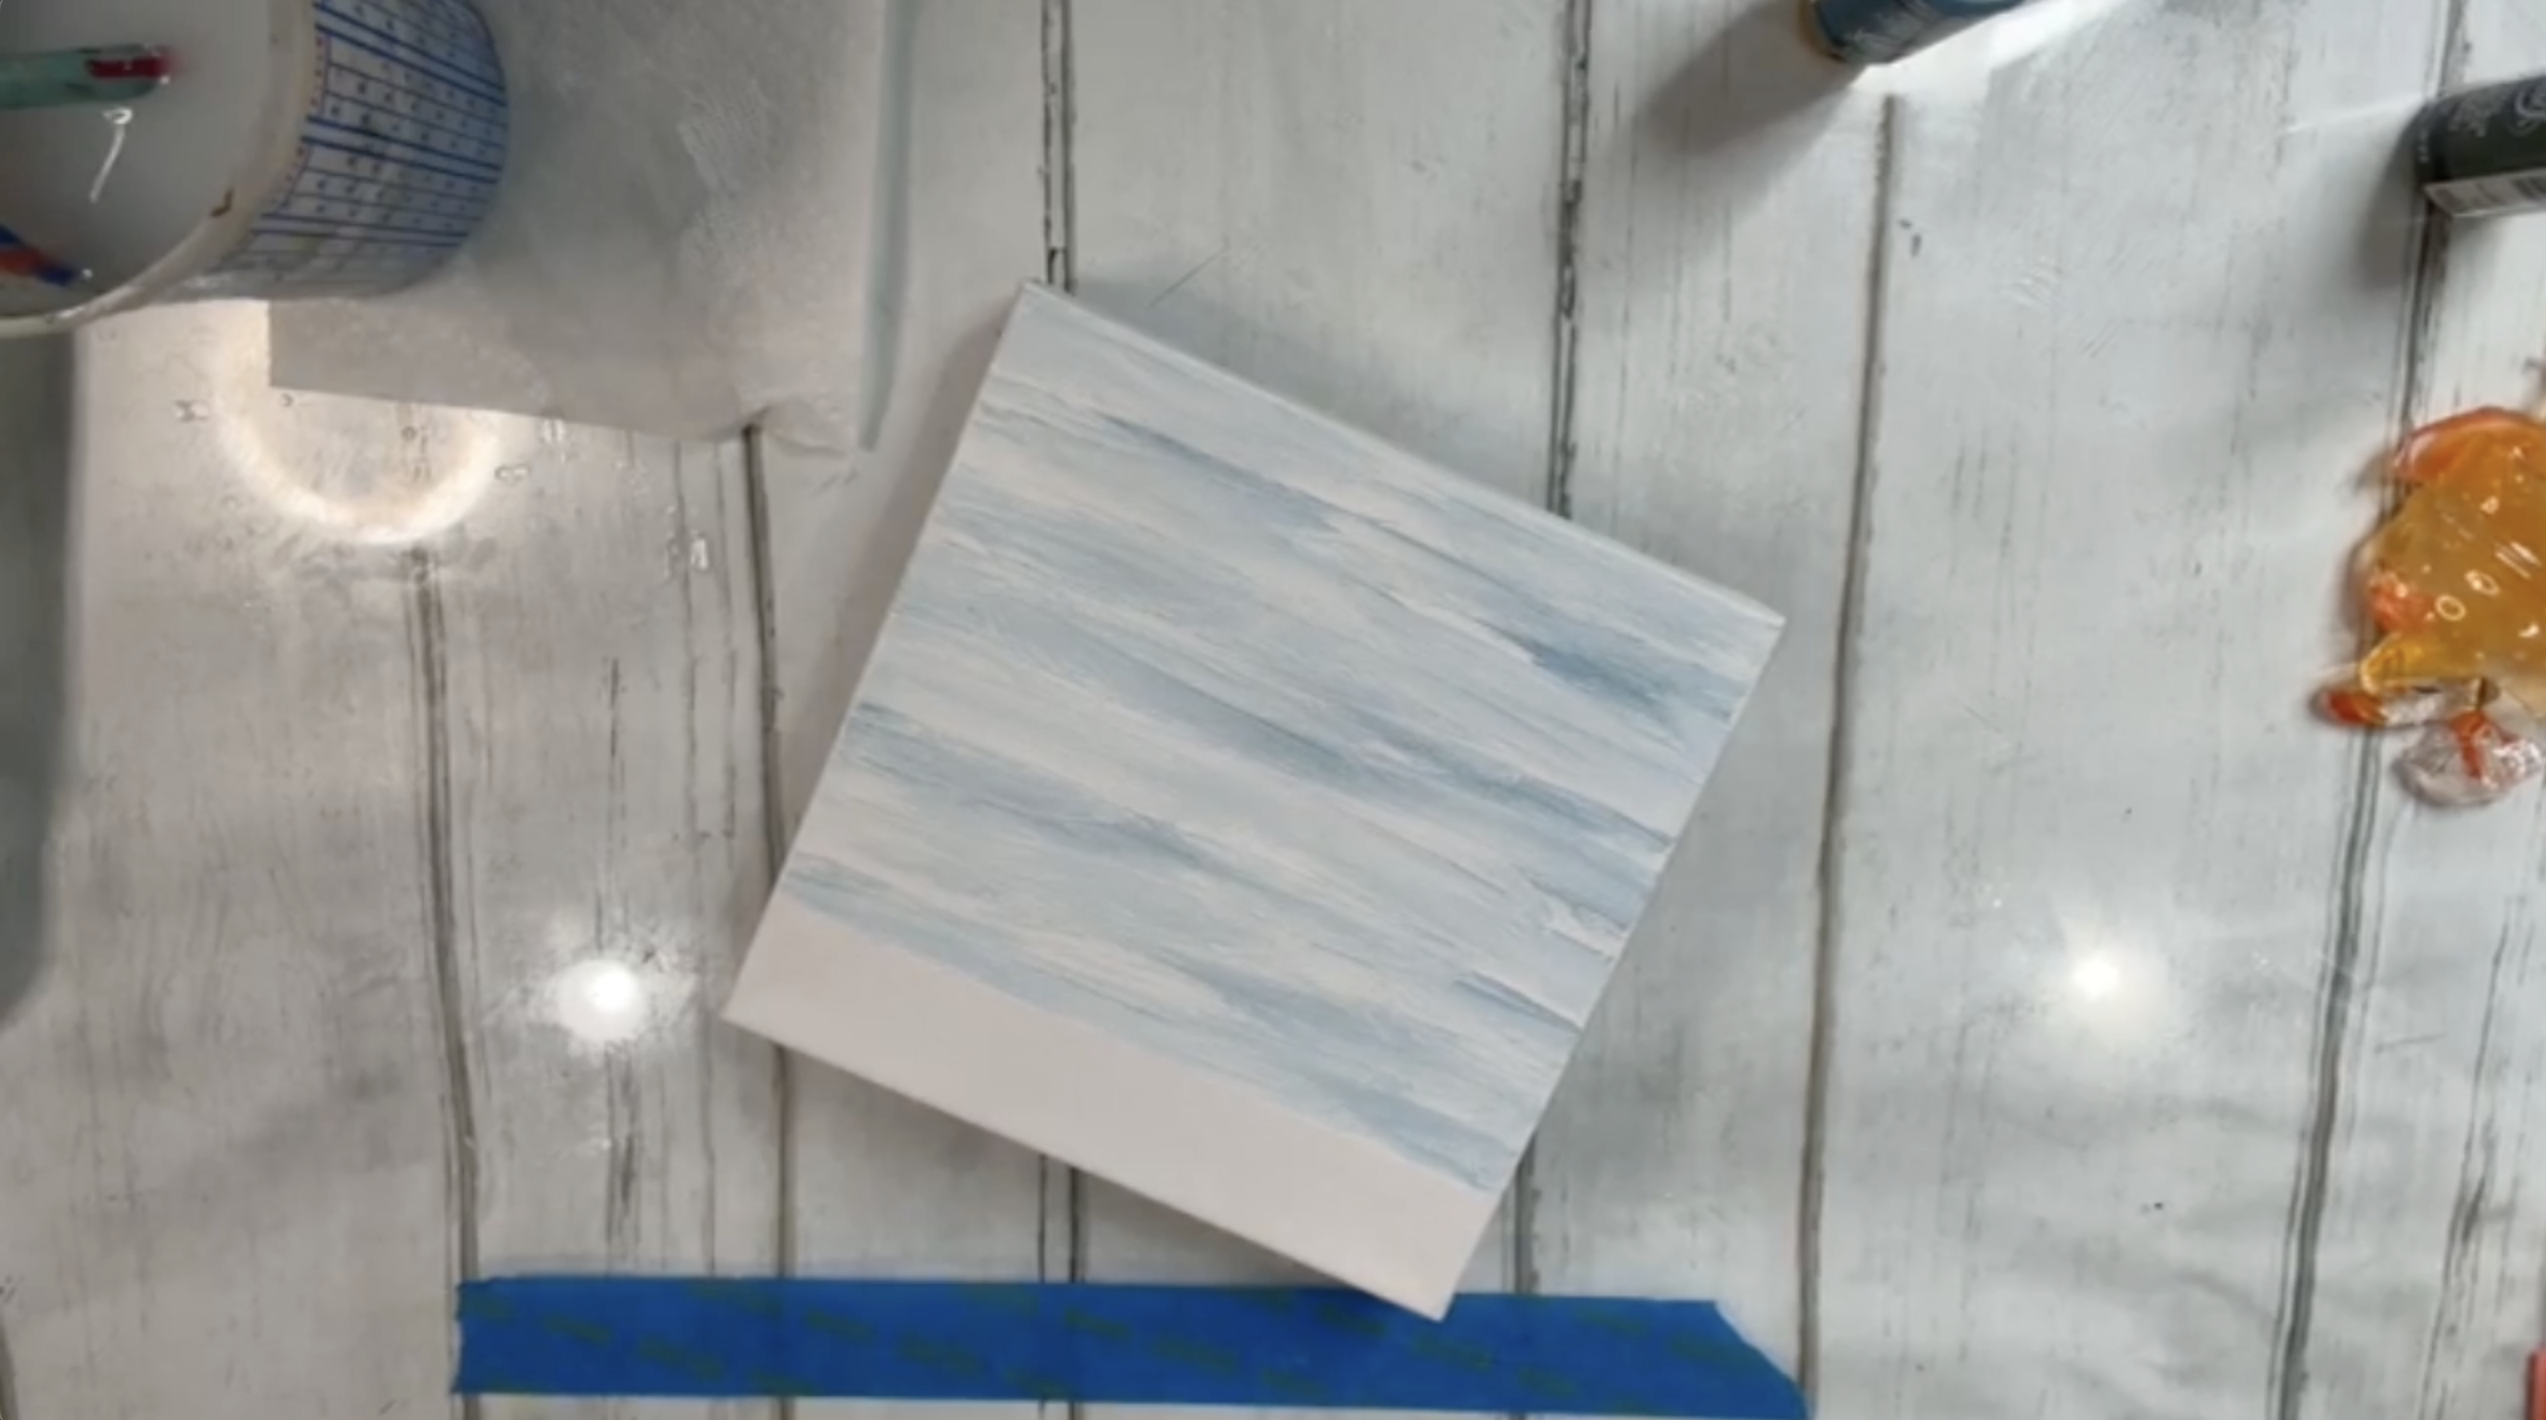
Step 1: Tape Off the Grass Area
We're going to start with a really simple painted background. Nothing fancy, because our glass pumpkin is going to be the star of the show! Take a piece of painter's tape and place it across the bottom of your 8x8 canvas, about 1½ inches from the bottom. This will separate our sky from our grass and keep the blue paint out of the green area.
Step 2: Paint a Soft Blue Sky
Start by adding some white acrylic paint to the upper portion of your canvas and spreading it around with a flat brush. You don't need a super thick coat, so if you've added too much paint, just scrape or brush a little off. While the white is still wet, add a small amount of Moody Blue paint to your palette. Wipe the excess white paint off your brush, pick up a little blue, and begin brushing it horizontally across the canvas.
Keep your brush almost parallel to the surface and use loose, side-to-side strokes. The blue will blend naturally into the wet white paint, creating a soft, streaky sky. Don't worry about making everything perfectly smooth. I actually like seeing the different shades of blue and white! You don't have to use Moody Blue, either. Desert Turquoise or another warm blue will work just fine.
Step 3: Dry the Sky and Remove the Tape
Once you're happy with your sky, grab your heat gun or hair dryer and dry the paint. Pay special attention to the area right above the painter's tape so the colors don't mix when we move on to the grass. When the paint is dry, carefully peel off the tape to reveal the unpainted strip at the bottom of your canvas.
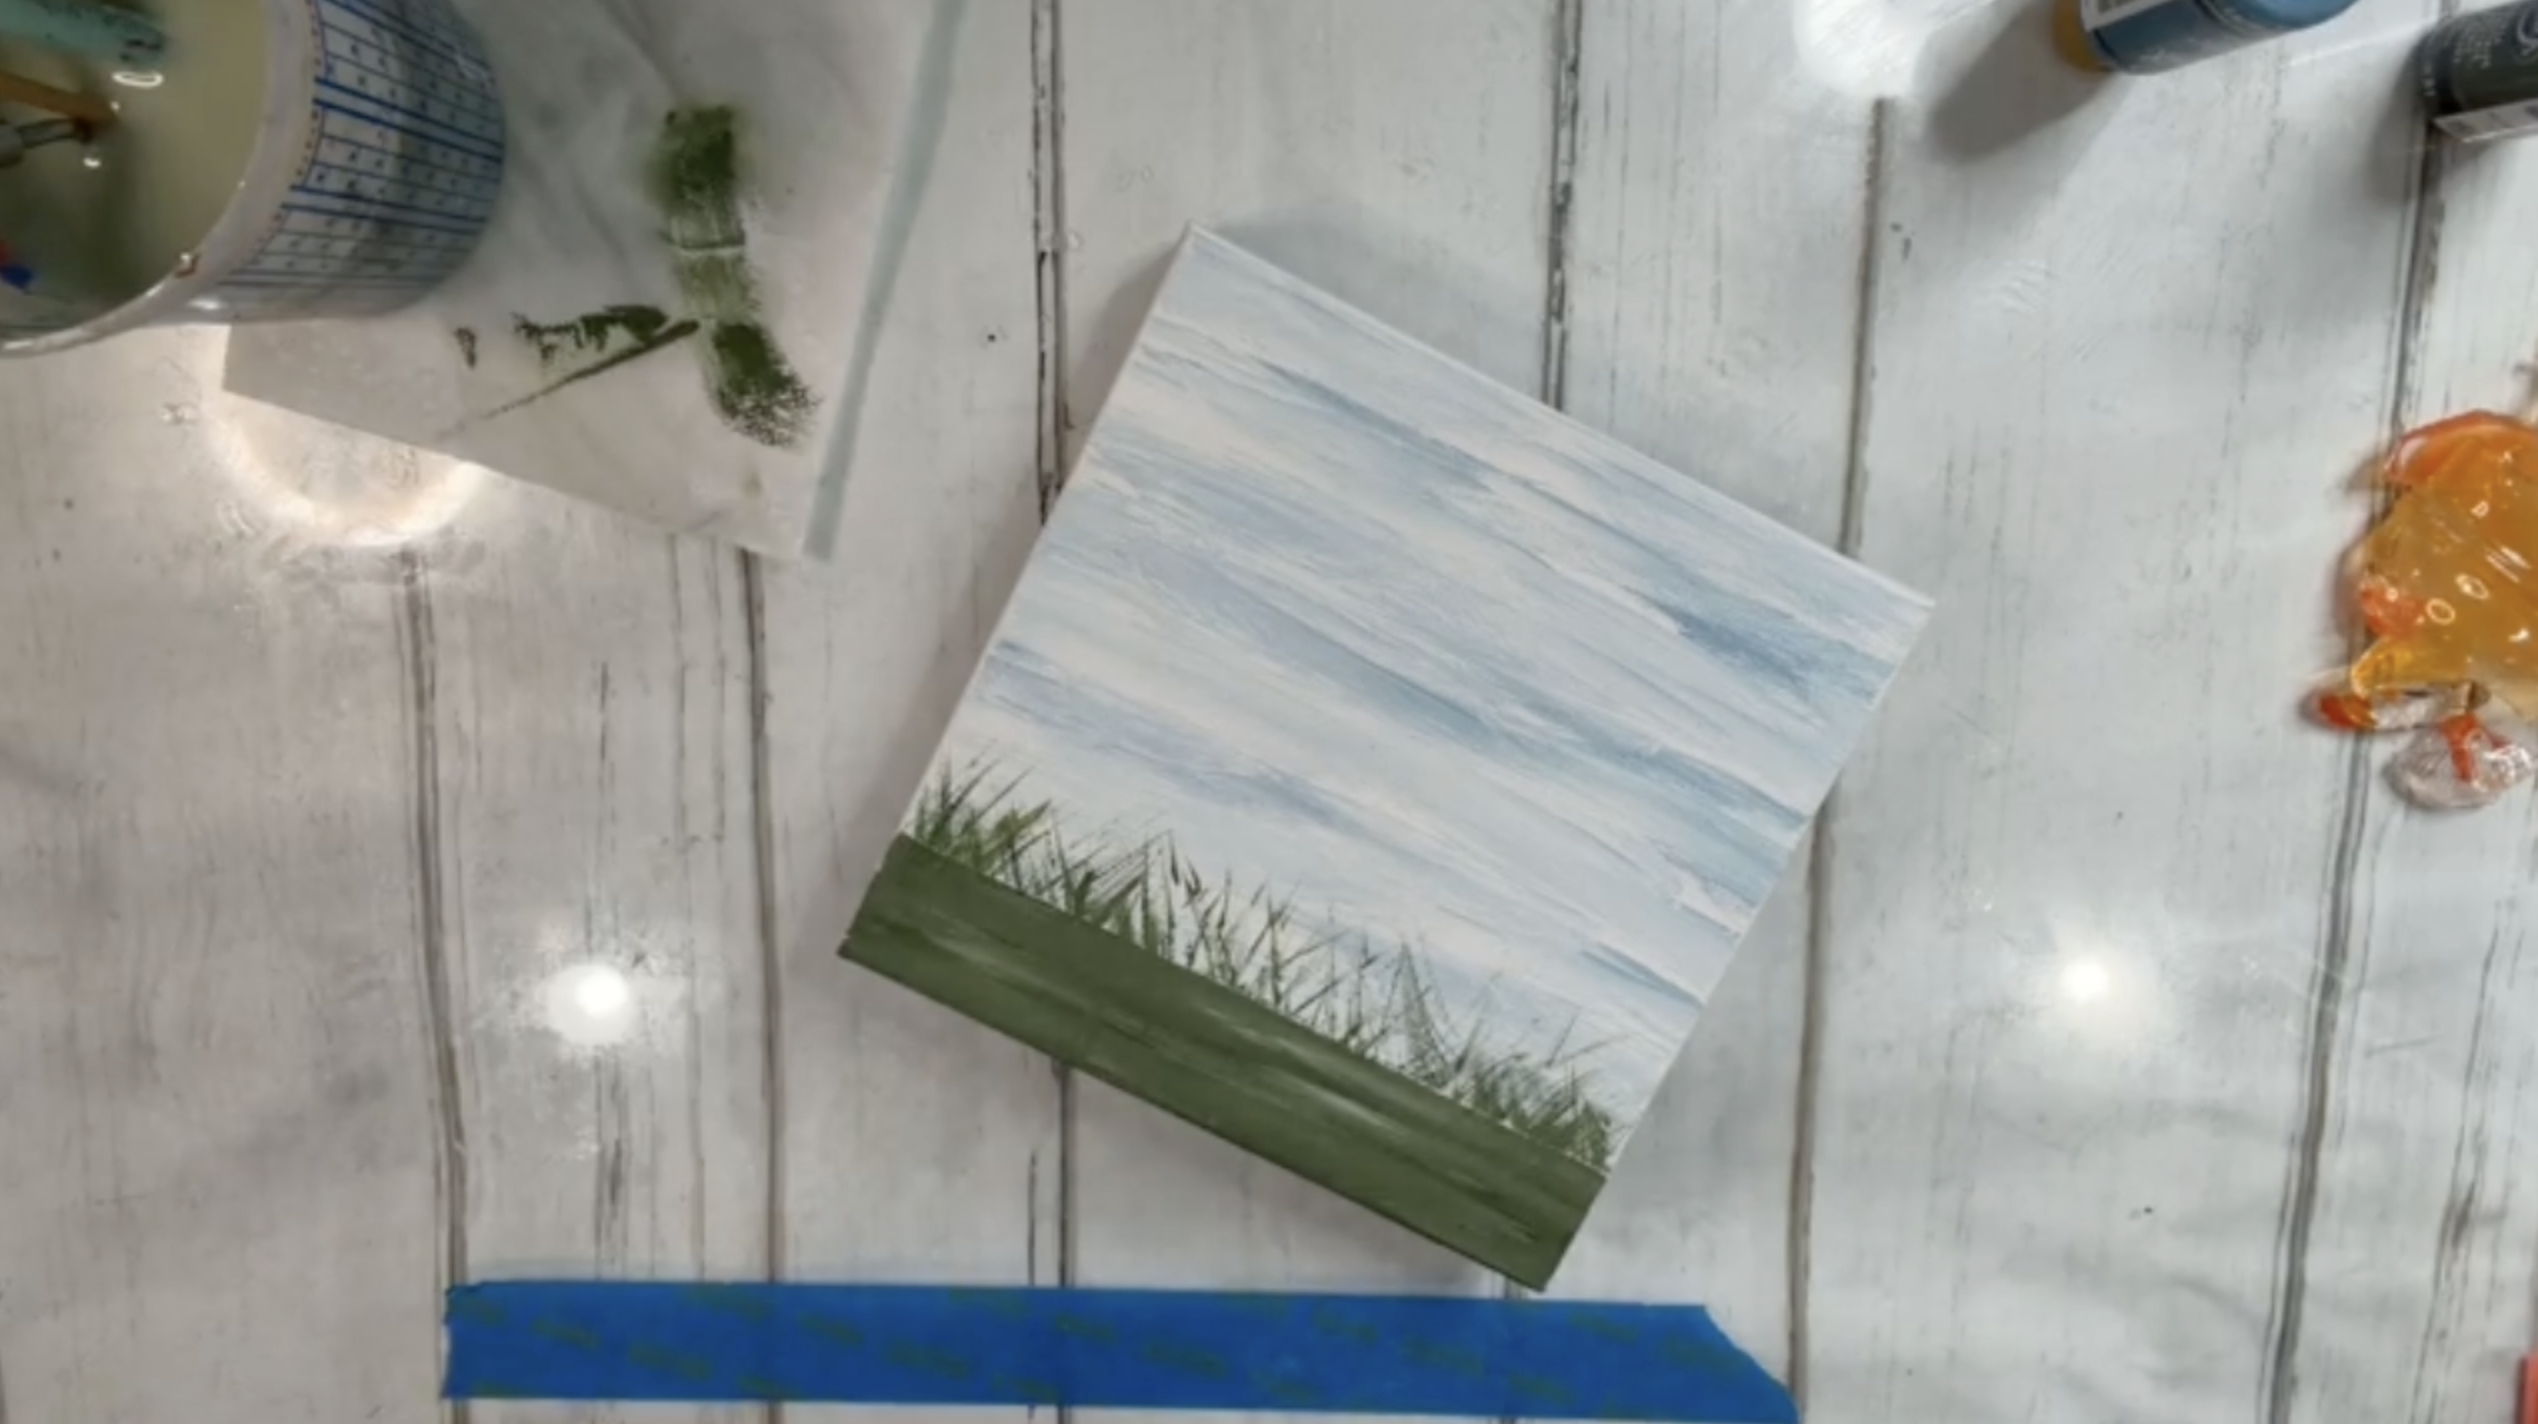
Step 4: Paint the Green Grass
Using Avocado Green acrylic paint, cover the bottom portion of your canvas. I like to add a little white while the green is still wet to create some variation in color. Rather than painting one solid green strip, let the colors blend together. This gives the grass a little more depth and keeps the background from looking flat. You can also bring the green paint around the bottom edge of your canvas. And don't worry about keeping the top of the grass perfectly straight. We're about to add some texture!
Step 5: Add Grass Details
There are a few different ways to create grass, so use whichever tool you feel most comfortable with. I started with a fan brush, dipping the tips into Avocado Green and using short upward strokes to create little blades of grass. Change the direction of your strokes as you work so everything looks a little more natural.
You can also use a palette knife! Just pick up a little green paint on the thin edge and make short upward marks across the grass. A regular paintbrush works just as well if that's what you have. I like mixing a few thicker blades with thinner ones for a little variety. Remember, we're going to cover a good portion of this area with our glass pumpkin, so don't spend too much time making the grass perfect. Once you're finished, dry the entire canvas before adding your glass.
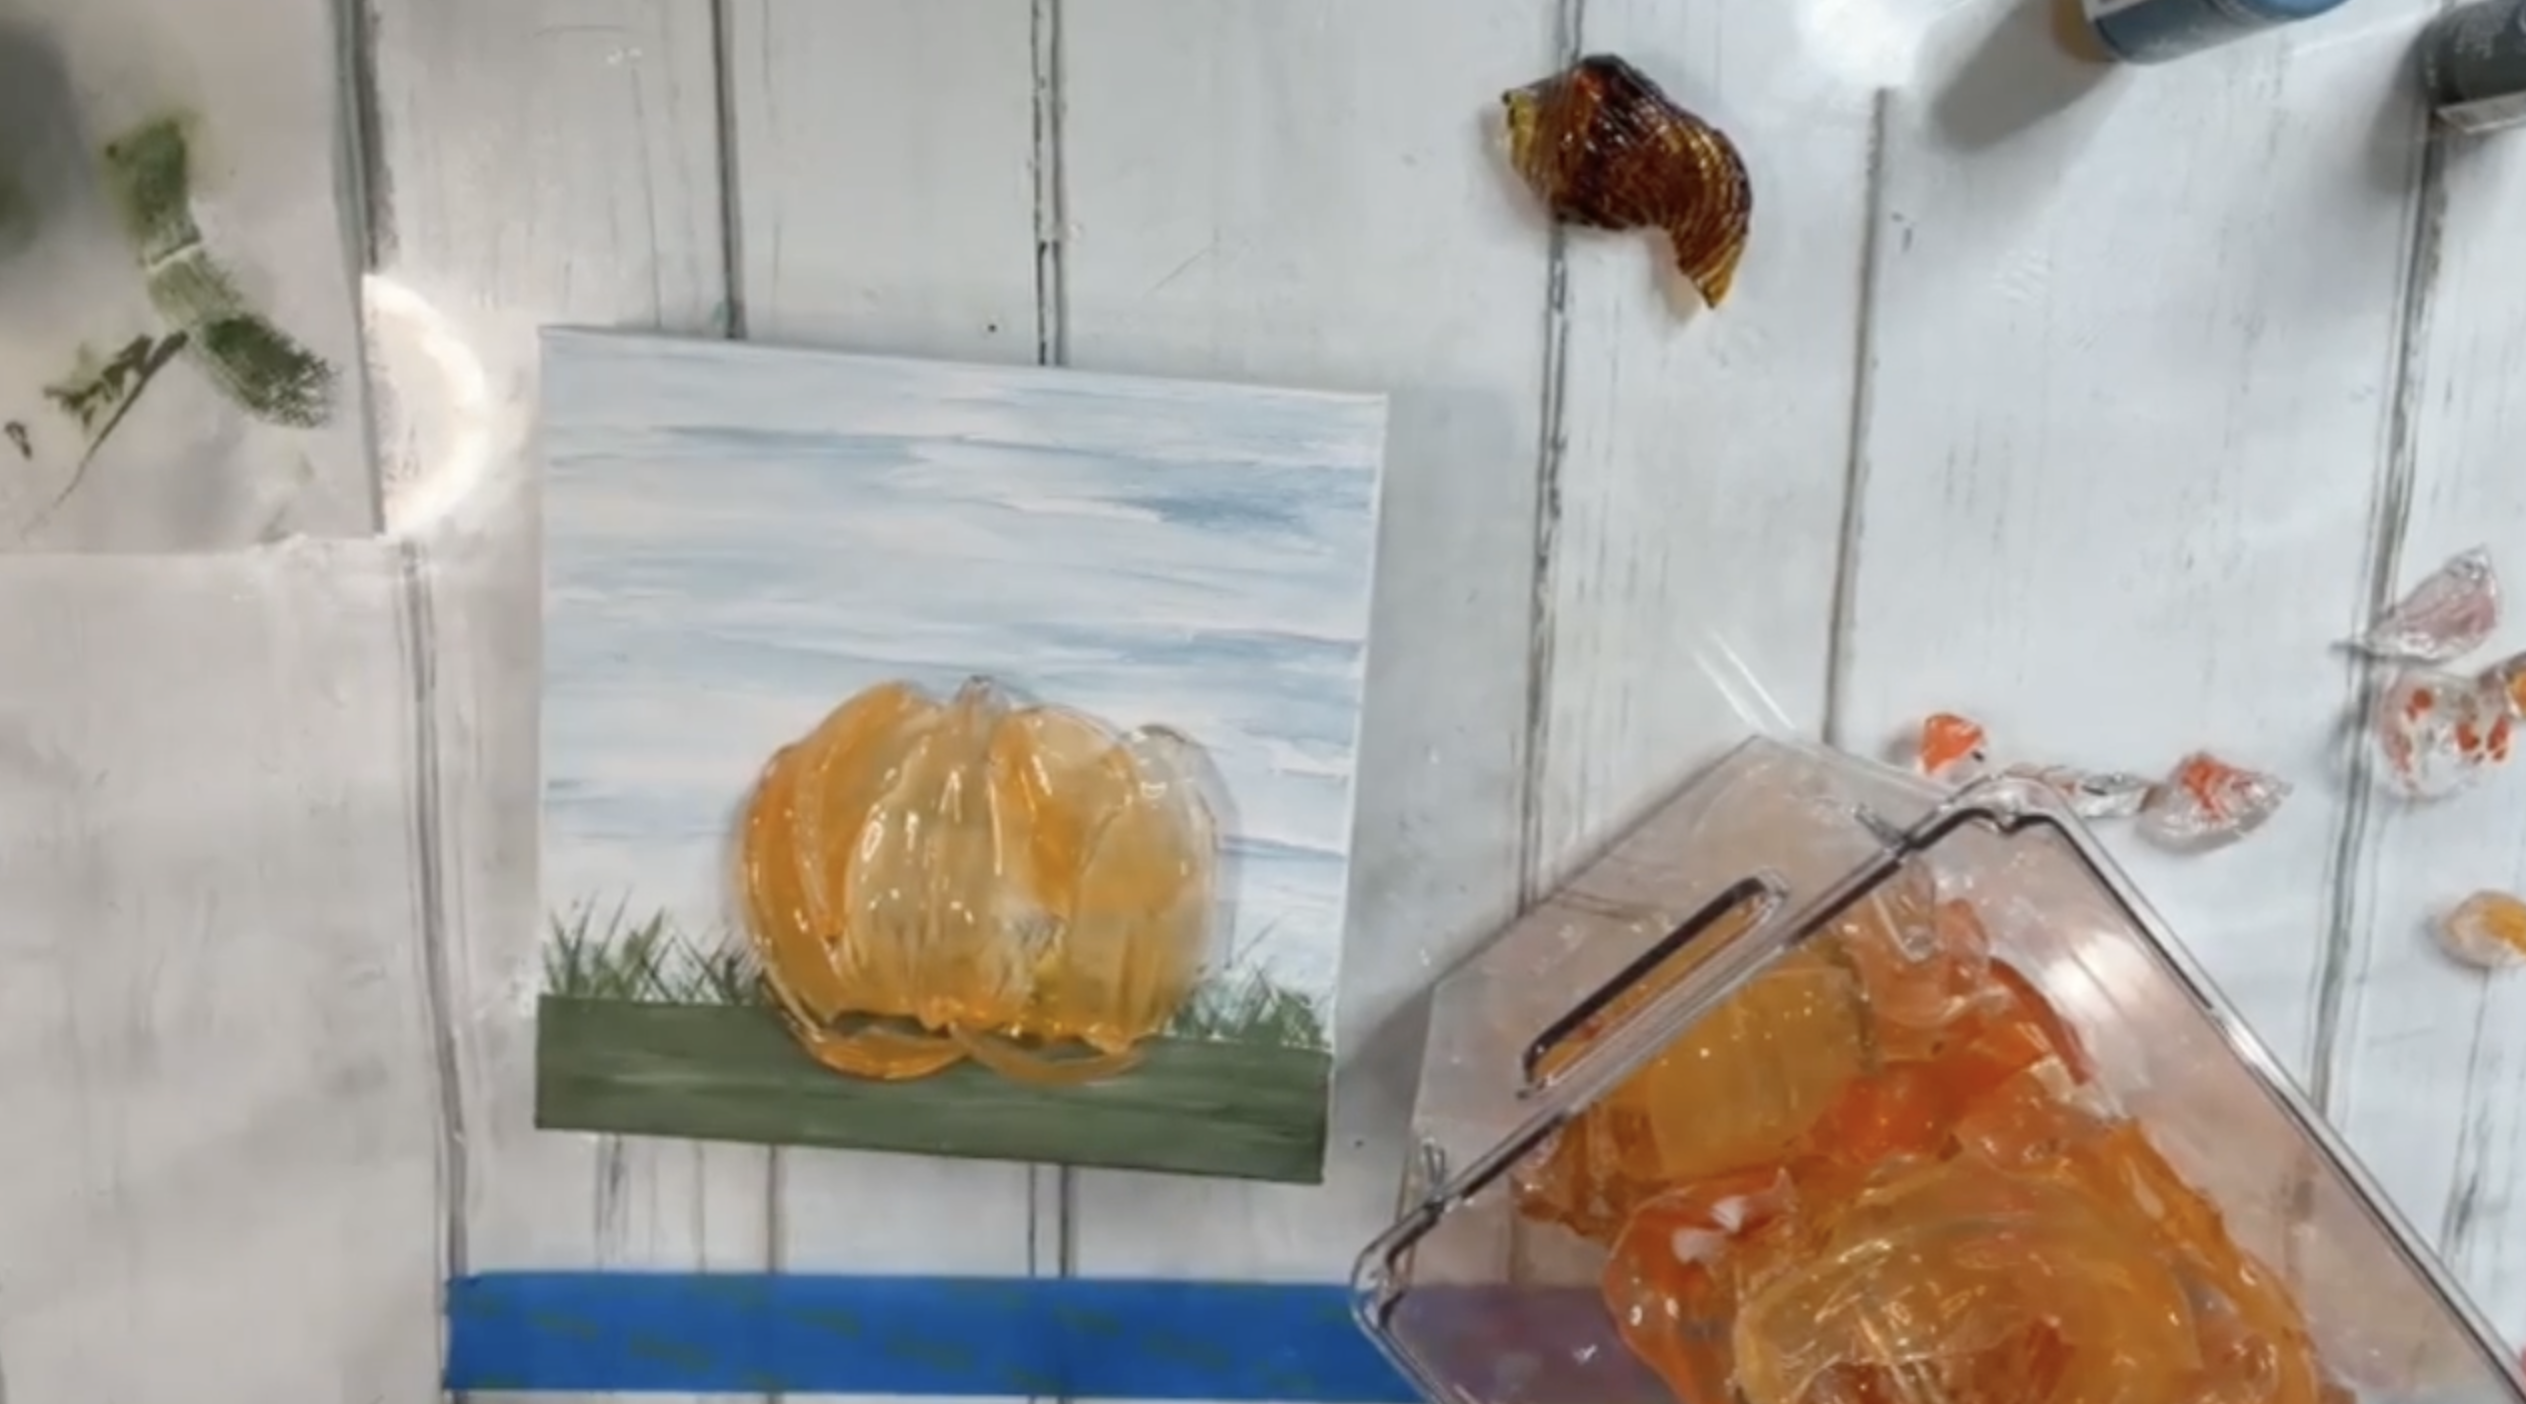
Step 6: Start Building Your Glass Pumpkin
Now for the fun part! Instead of painting a pumpkin, we're going to create the entire shape using broken orange glass. For this project, I'm using pieces from broken orange vases, glass pumpkins, and other orange glass scraps. Start placing your larger pieces of glass onto the canvas to form a rounded pumpkin shape.
I like to begin with the main body of the pumpkin and work my way around the outside. As you arrange the pieces, look for different shapes that fit together naturally. Some pieces will overlap, and that's okay! That layering is what gives our pumpkin its dimensional look. Don't worry about getting everything right on the first try. Move pieces around, tuck smaller pieces into gaps, and keep adjusting until you like the shape.
Step 7: Shape the Bottom of the Pumpkin
Once you've formed the main body, pay attention to the bottom. Pumpkins usually have a little rounded or slightly tucked-in area at the base, so look for a piece of glass that helps create that shape. You may need to move a few pieces around to make everything fit. I like having some larger glass pieces mixed with smaller ones because it makes the pumpkin look more interesting. Keep working until you have a nice, rounded pumpkin silhouette.
Step 8: Add Decorative Glass Chips
This step is optional, but I couldn't resist adding a few extra glass chips! These are small chunks of decorative glass that come in all kinds of colors. I picked through mine and found a few pieces with bronze, blue, and other interesting tones. Tuck them into the pumpkin wherever you want a little extra color or dimension.
You definitely don't have to add these. The orange glass is beautiful on its own. But if you have some interesting glass pieces sitting in your stash, this is a fun place to use them.
Step 9: Add Green Glass Around the Bottom
Before we resin everything, let's add a little more dimension to the grass. Take some Green Classic crushed glass and sprinkle it along the bottom of the pumpkin, concentrating the glass around the base where the pumpkin meets the painted grass. This helps the pumpkin look like it's sitting in the grass rather than floating on top of the canvas. You don't need to cover the entire grass area. Just add enough to give it some sparkle and texture.
Step 10: Position the Glass Pumpkin Stem
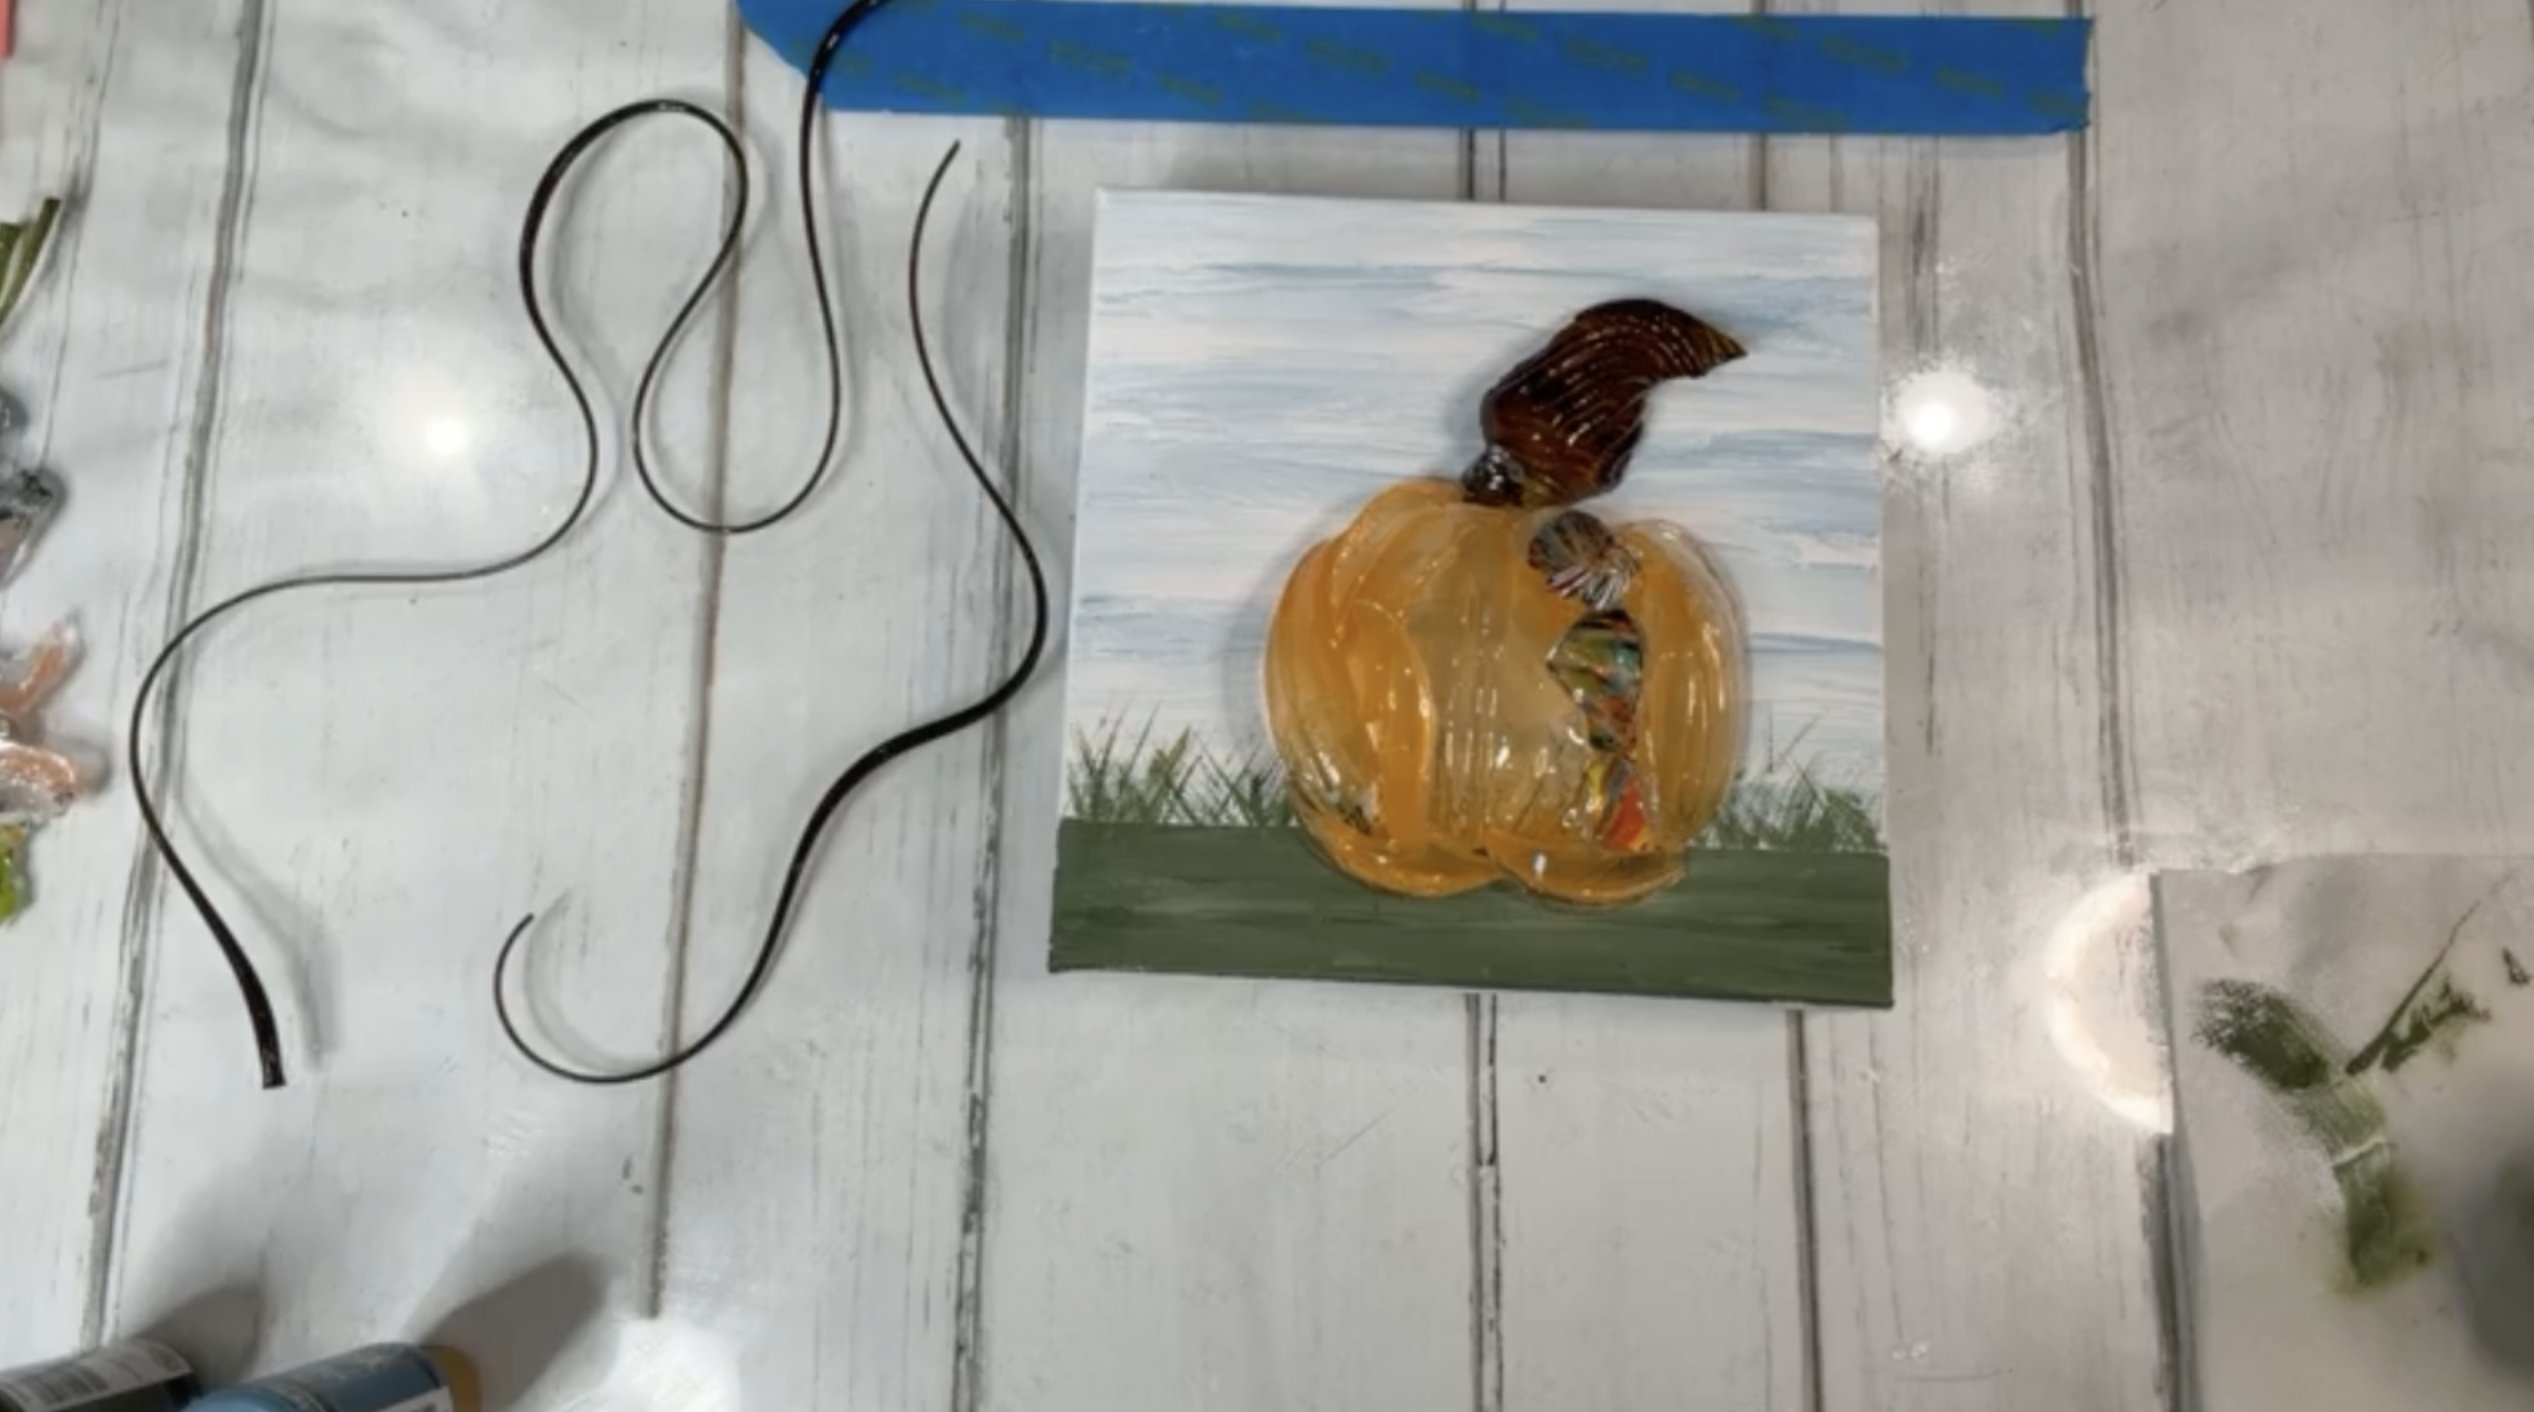
One of my favorite parts of this project is the stem! I'm using a beautiful curved glass stem that came from a collection of glassblower scraps. It's already shaped like a pumpkin stem, so it works wonderfully with our glass pumpkin.
Position the stem at the top of your pumpkin and see how it looks. You may need to adjust the orange glass pieces underneath it to make room. We're going to secure the stem with resin in the next steps, so for now, just make sure you know where you want it. If you don't have a glassblower's stem, you can experiment with other decorative glass pieces that give you a similar look.
Step 11: Mix Your Resin
Now we're ready to bring everything together with resin. For this 8x8 canvas, I mixed approximately 2 ounces of ArtResin using 1 ounce of resin and 1 ounce of hardener. ArtResin uses a 1:1 mixing ratio by volume, so measure each component carefully according to the manufacturer's instructions.
Pour both parts into a larger mixing cup and stir gently for 3 minutes, making sure you're scraping the sides and bottom of your cup as you mix. You want everything thoroughly combined, but don't whip the resin too aggressively or you'll introduce extra bubbles. For this project, I ended up using the entire 2 ounces.
Step 12: Apply Resin to the Glass Pumpkin
With your gloves on, begin drizzling resin over the glass pieces. I like to start around the bottom of the pumpkin and the green glass in the grass, then work my way up through the orange glass. Because some of these pieces are large and stacked on top of one another, make sure the resin gets down into the gaps.
The important thing is that the resin reaches the areas where the glass touches the canvas. That's what will help hold everything in place once it cures. You may need to gently move a few smaller pieces to get resin underneath them, then put them back where they belong. Take your time and make sure all those beautiful glass pieces are getting secured.
Step 13: Secure the Glass Stem
Add a little resin to the area where your pumpkin stem will sit, then carefully position the glass stem at the top of the pumpkin. Make sure the base of the stem is touching the resin so it will be secured when everything cures. You can also add a little resin around the smaller glass chips you tucked into the pumpkin earlier. At this point, you should really start seeing those colors come to life! The resin makes the orange glass look even richer and gives everything a beautiful shine.
Step 14: Spread Resin Across the Canvas
Once you've covered the pumpkin and grass, use your gloved fingers or a suitable spreading tool to distribute the remaining resin across the canvas. Make sure you cover the painted background and work the resin around the edges of the glass. I also like to cover the curved edges of the canvas so everything has a consistent finish. Check around the larger glass pieces to make sure there aren't any dry areas where the resin hasn't reached.
Step 15: Add Curly Vitrigraph Glass
Now let's add the finishing detail that really makes this pumpkin special! Vitrigraph is decorative glass that looks like thin, curved strings or curls. For this project, I'm using brown vitrigraph to complement the glass pumpkin stem.
Carefully break or trim a few pieces of vitrograph to the lengths you want, then position them around the top of the pumpkin, allowing the curls to extend outward from the stem. I started with a couple of pieces and then decided it needed one more! The third piece gave the pumpkin a little extra movement and personality. Use a stir stick to gently press the ends of the vitrograph into the wet resin, making sure each piece has enough contact with the resin to stay secure. If your vitrograph is thicker, use glass nippers rather than trying to snap it by hand.
Step 16: Remove Bubbles and Check for Debris
Once all your glass is in place, carefully inspect the canvas. Use your heat gun briefly, following the resin manufacturer's guidance, to help release surface bubbles. Avoid overheating the resin or directing heat at fragile glass.
Look closely for any dust, hair, or other debris that may have landed in the wet resin. You can use a small picking tool or tweezers to carefully remove anything you find. This is also a good time to make sure your glass stem and vitrograph curls are positioned exactly where you want them.
Step 17: Let Your Pumpkin Cure
Now comes the hardest part - leaving it alone! Place your canvas on a level, protected surface where it won't be disturbed. For the ArtResin used in this project, the approximate curing times discussed in the video were 8–10 hours to become dry to the touch, depending on conditions, and 72 hours to fully cure.
Always follow the current instructions for your specific resin, since temperature, humidity, and other conditions can affect curing. Avoid wrapping or handling the artwork unnecessarily until the resin has fully cured. Once it's finished, your glass pumpkin is ready to display!
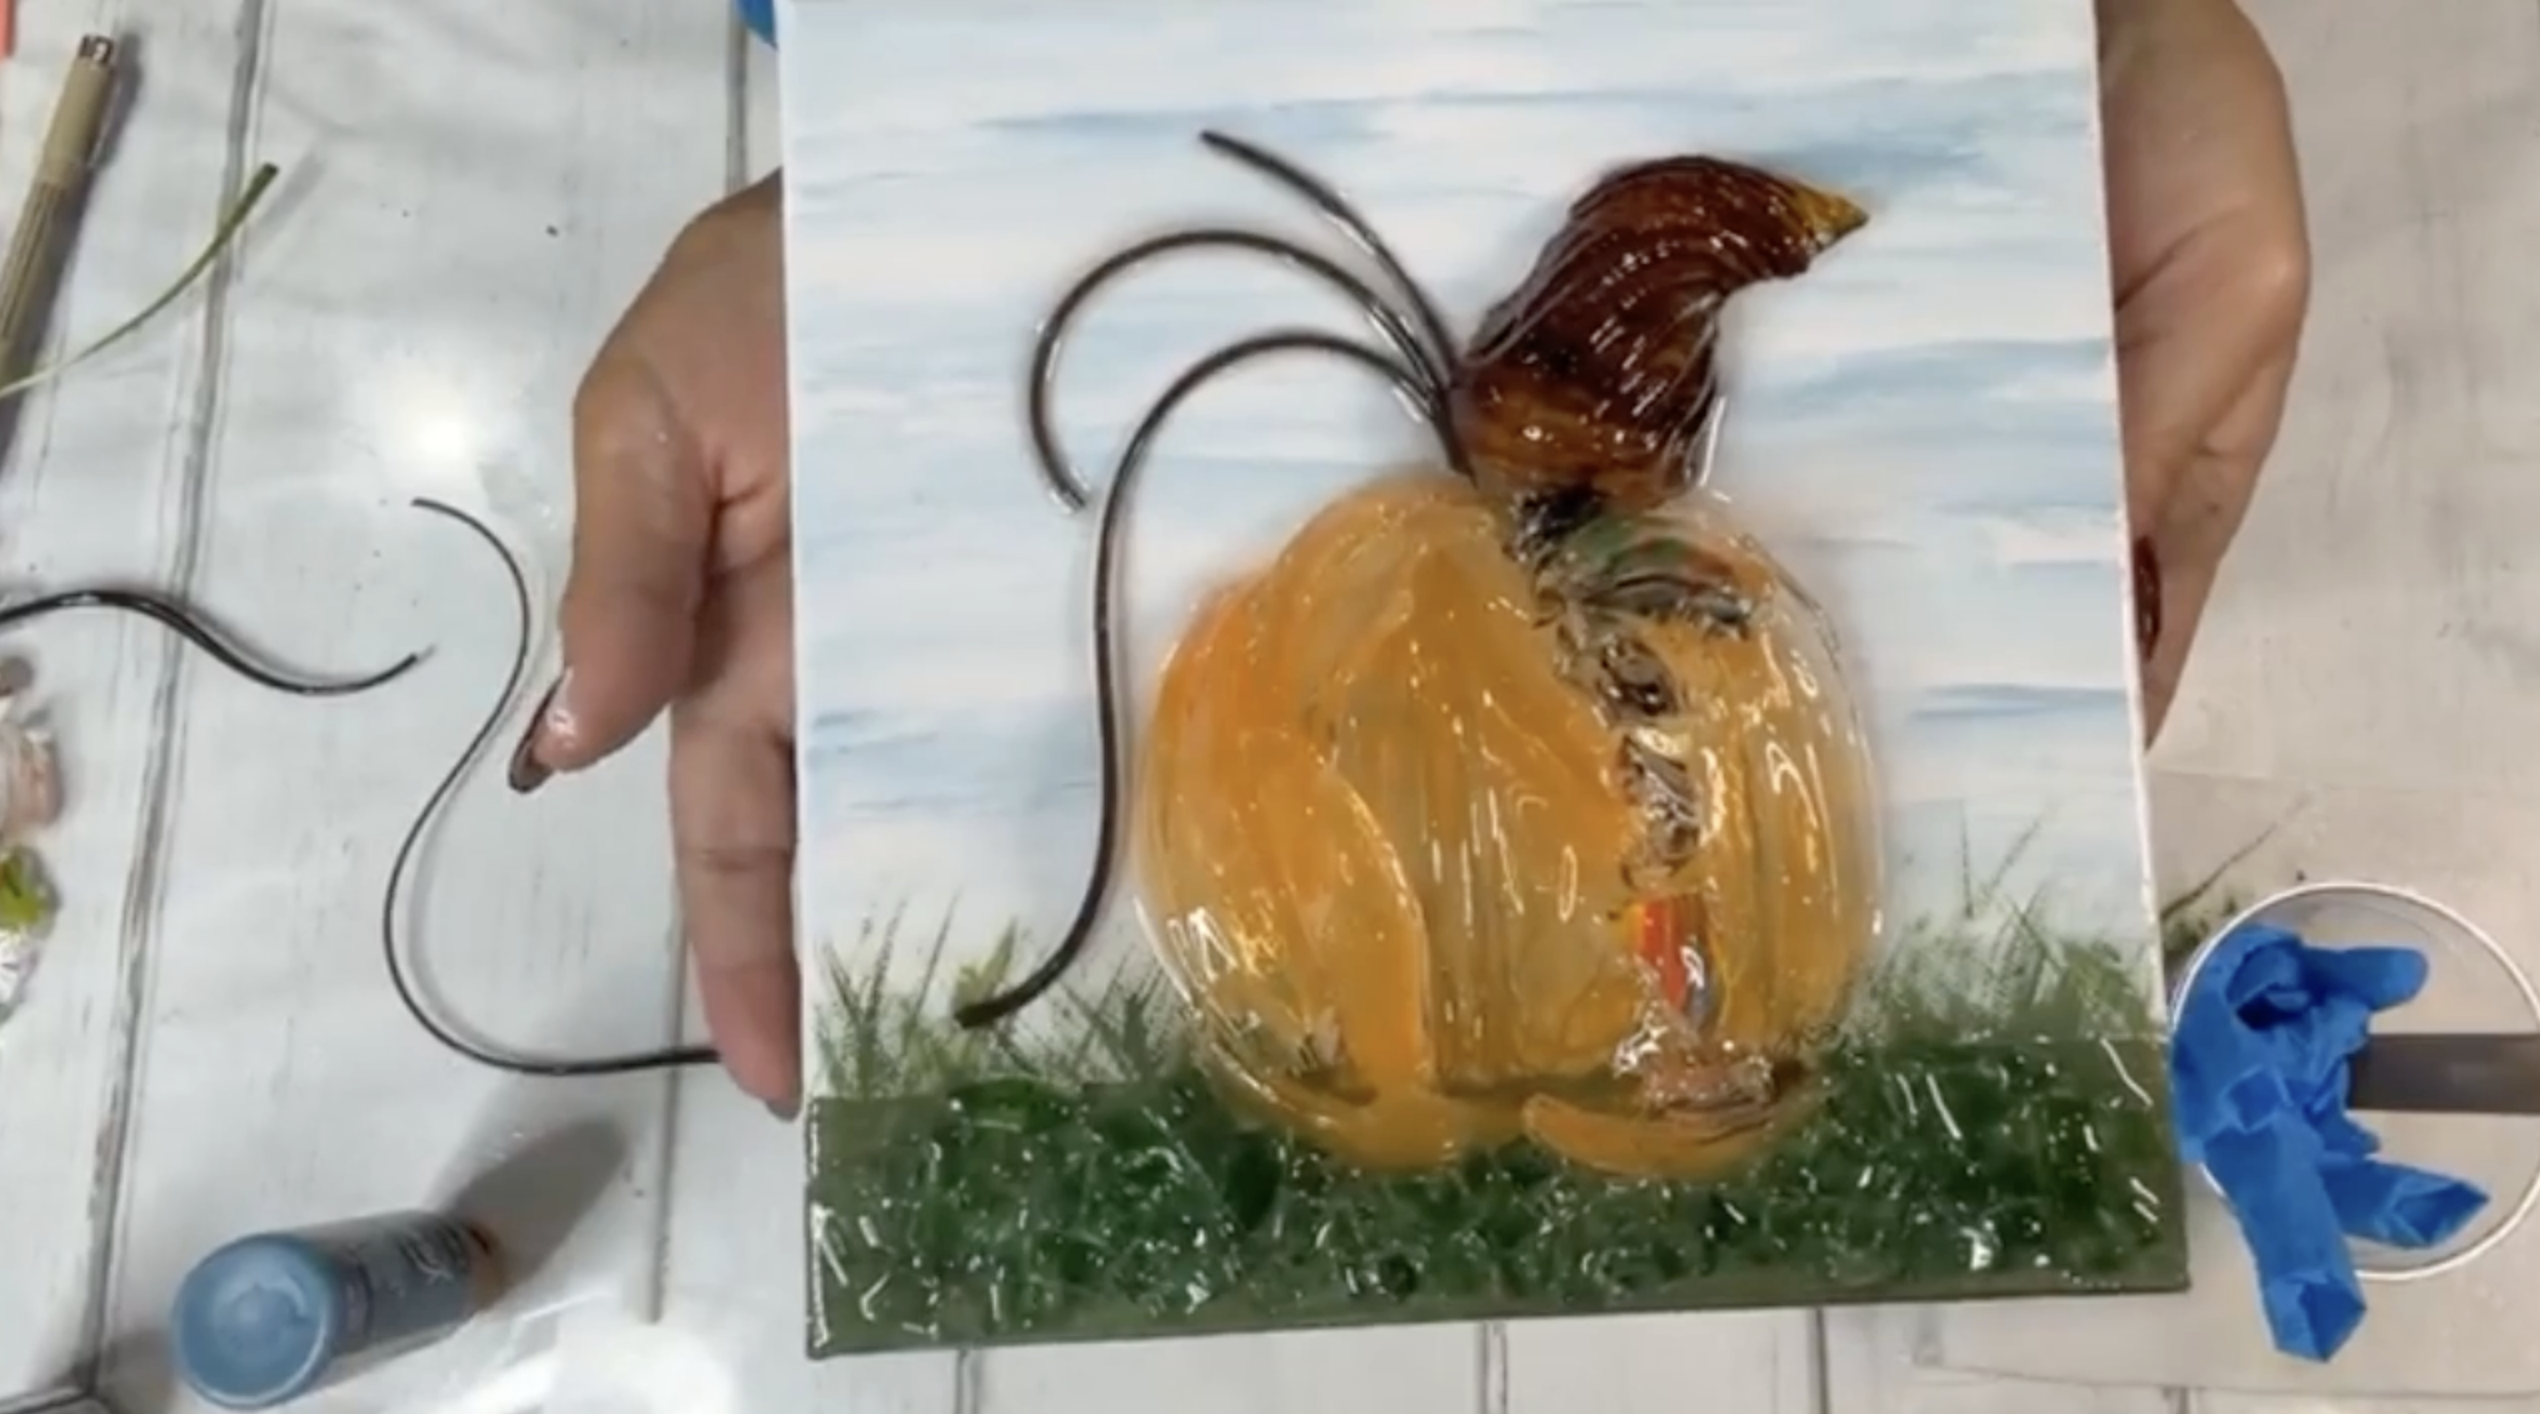
I just love how this little pumpkin turned out! We started with a simple painted sky and grass, then used broken orange glass to create the entire pumpkin. No detailed painting, no complicated tracing, and no trying to make every piece fit perfectly.
The different shades of orange glass give the pumpkin so much dimension, and that curly brown vitrigraph is such a fun finishing touch.
This is also a great reminder that broken glass doesn't have to go to waste! A chipped vase, leftover glass scraps, or pieces from another project might be exactly what you need to create something new.
If you don’t want to miss my Facebook LIVE art instruction, make sure you are on my texting list. I always text 10 minutes before I’m going to go LIVE, so you won’t ever miss it. You can text “Hey Cindy” to 901-519-2923.
Want more inspiration and artwork?
- My website artshattered.com with resources, shop, and more!
- My creative membership The Shattered Circle, where you can explore the world of glass art with online workshops, a supportive community, and more!
- My mini creative membership Just A ‘Lil Bit Monthly Glass Art Club, where you’ll get a new quick and easy online tutorial for just a lil' bit of sparkle in your life!
- My Facebook page where I share free LIVE tutorials and inspiration
- My YouTube channel which has tons of free art lessons right at your fingertips.
