
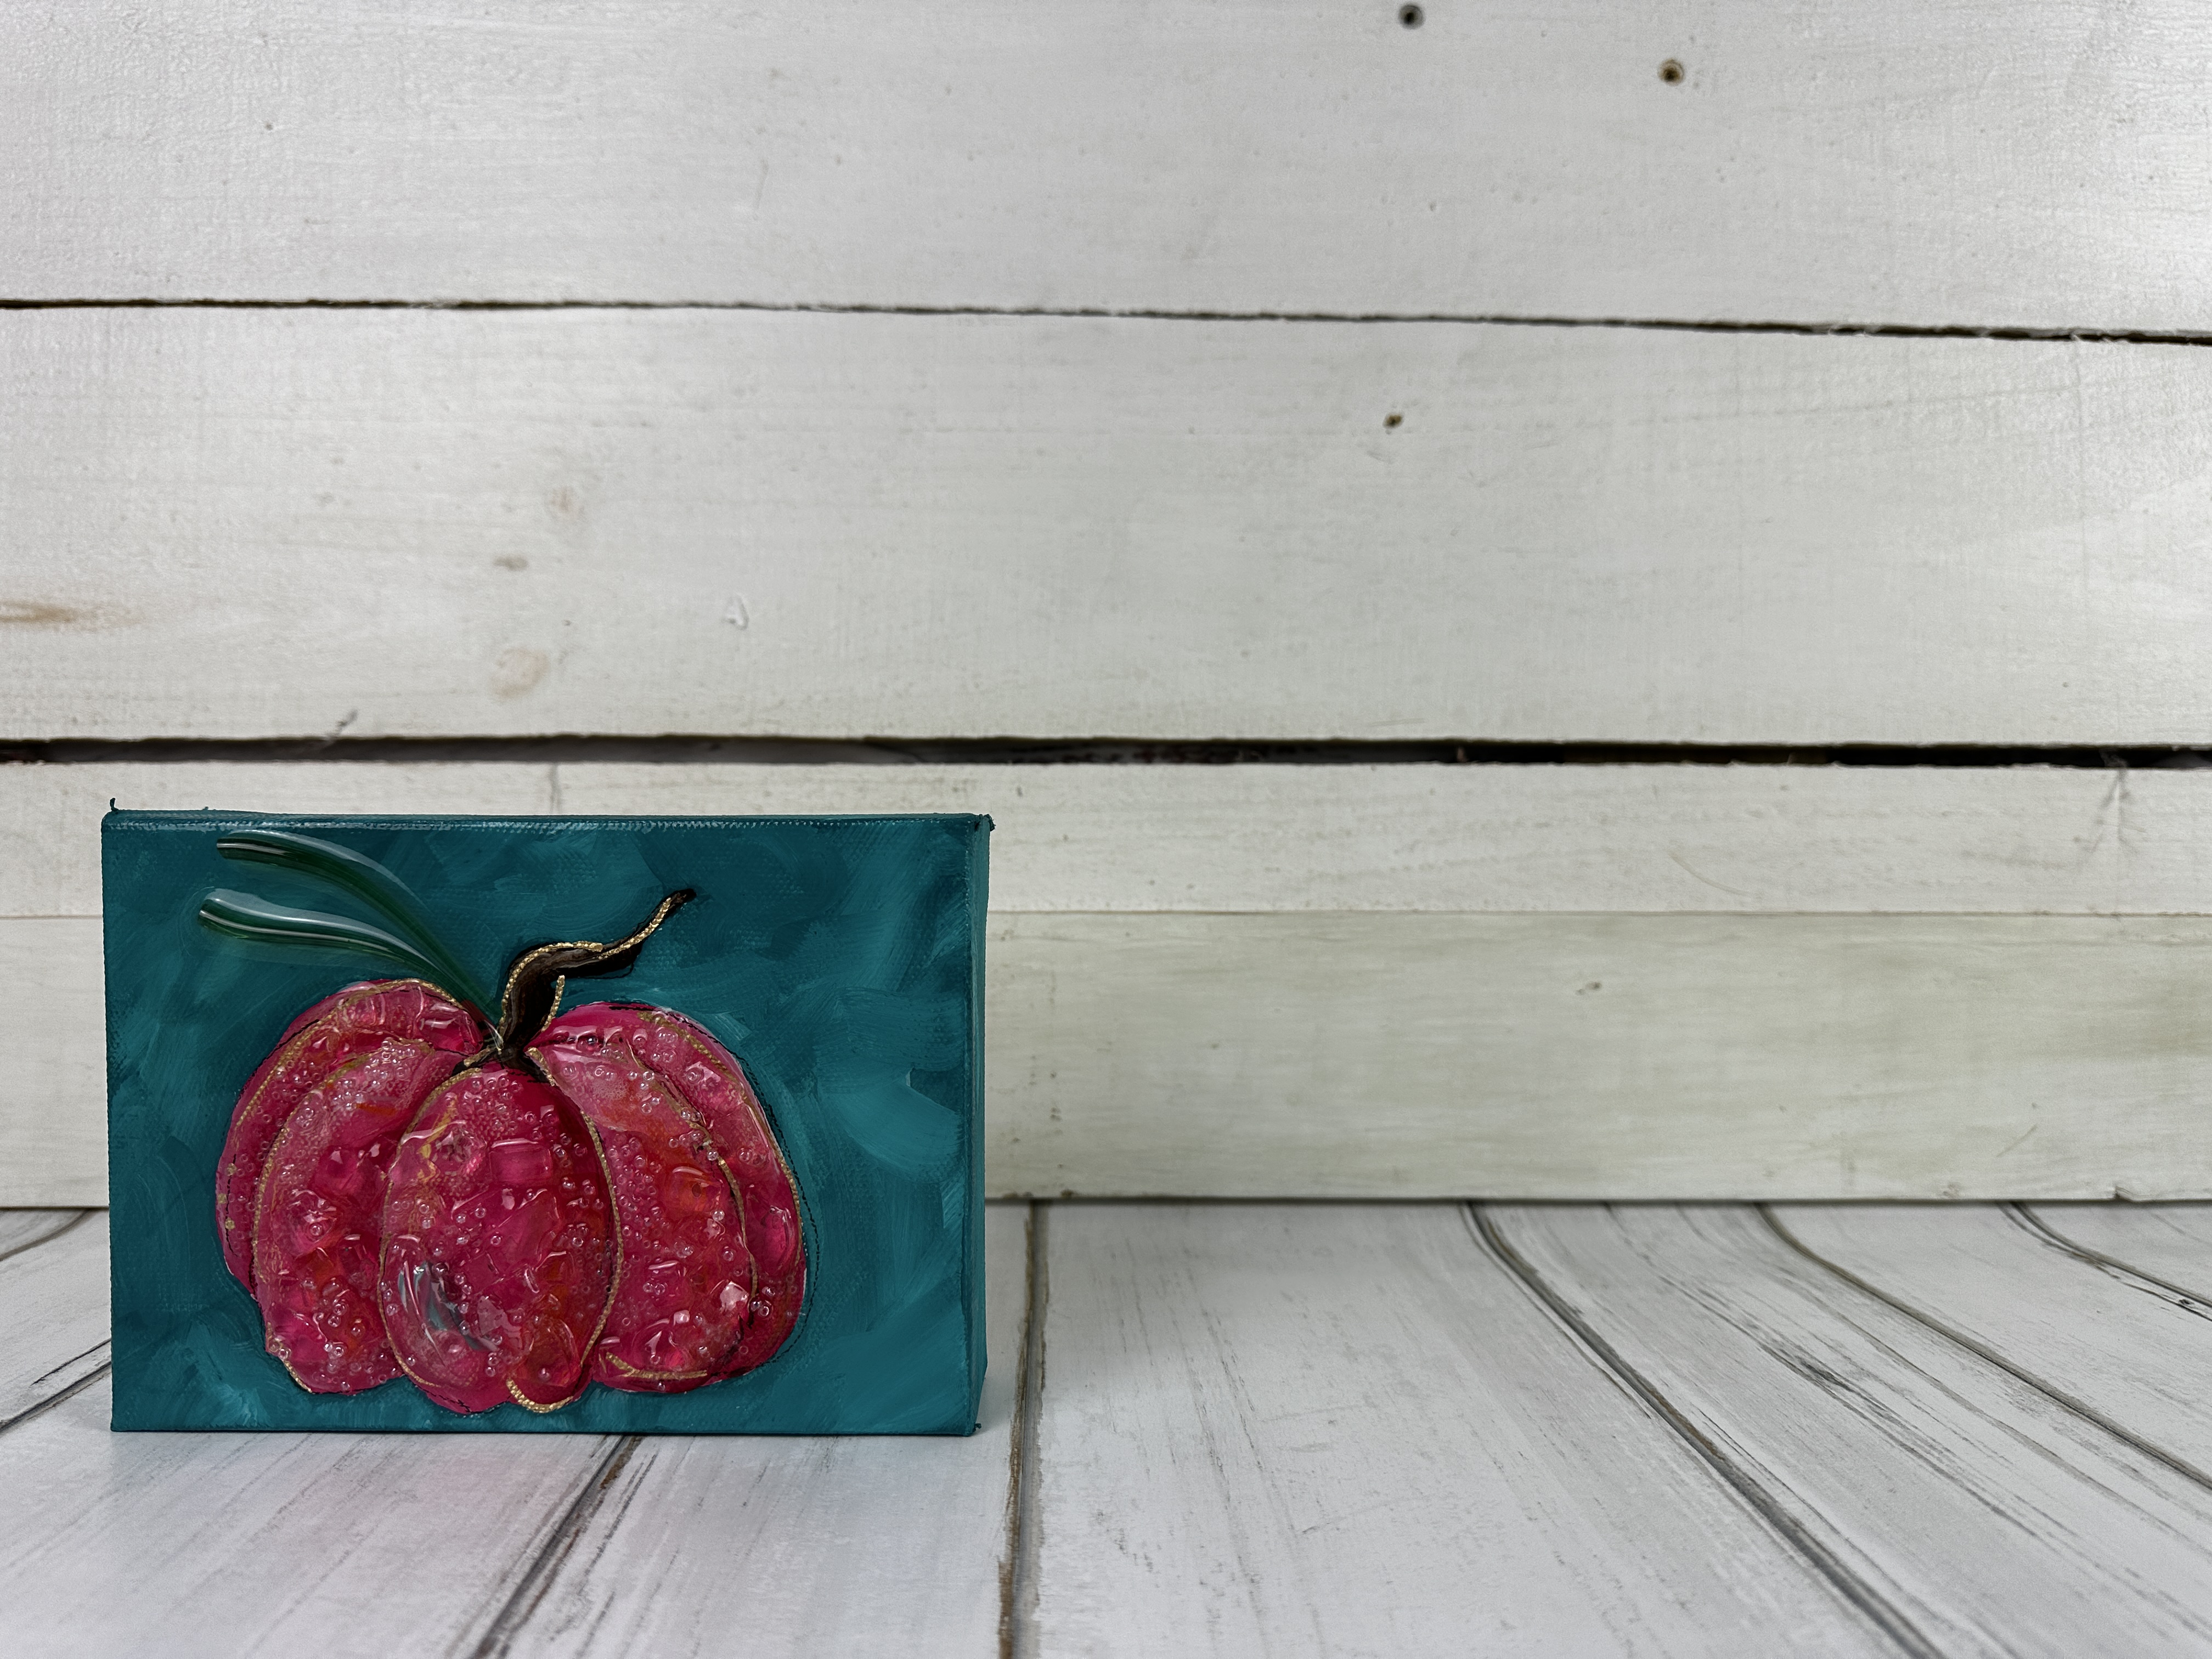
Pink & Teal Pumpkin 💕
This isn't your typical fall pumpkin - this one's pink, sparkly, and packed with personality! In this tutorial, you’ll learn how to add shading and highlights using directional light, master wet-on-wet blending, and finish your piece with glass, seed beads, and glossy resin. We even topped it off with a little gold pen detail and green vitrigraph for extra flair!

Understanding Highlights & Shadows
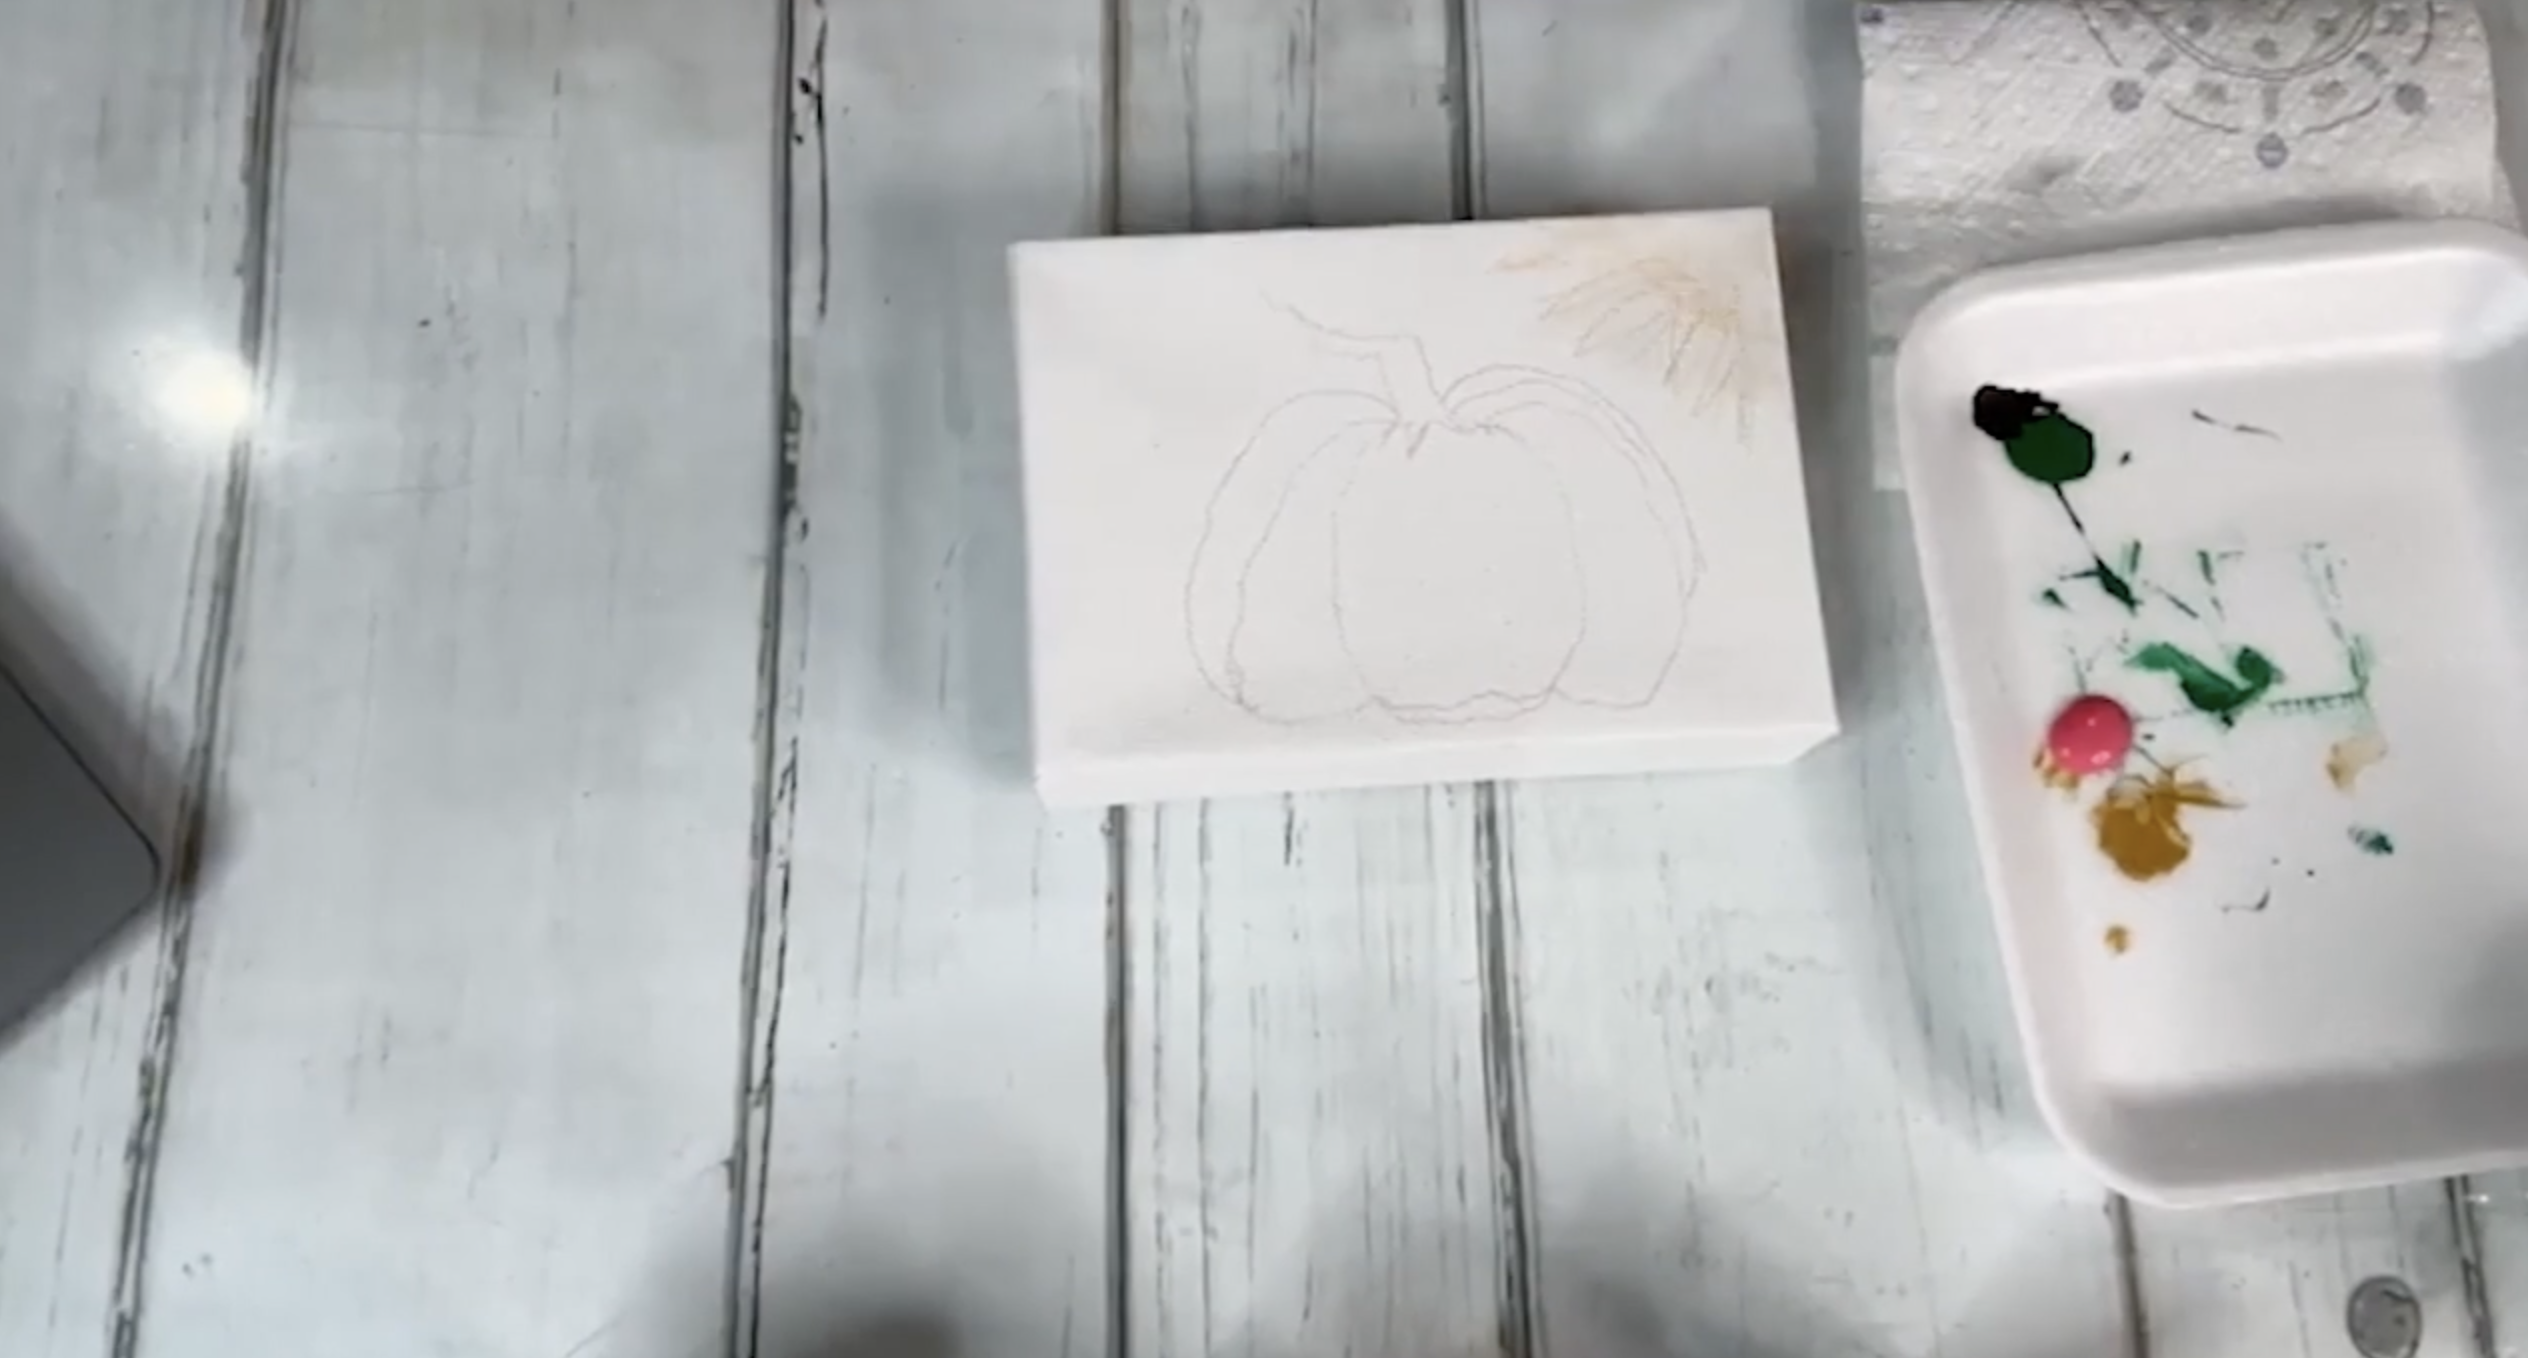
Before we ever touched the paint, we walked through a basic but important concept: light source and directional shading. To add dimension to a flat shape, like a circle or pumpkin, you need to decide where your light is coming from. We placed a sketch of a sun on the top left of our canvas to guide us throughout the painting process. This way, each pumpkin section could be shaded and highlighted appropriately based on where the "sunlight" would hit.
Step 1: Sketching the Pink Pumpkin
Using a pencil, we loosely sketched a squatty pumpkin with a curly stem and marked out individual pumpkin ridges using parentheses-like curves. Pumpkins aren’t perfect, so it’s okay if yours is wonky! We also added the sun sketch to help visualize highlights and shadows as we painted.
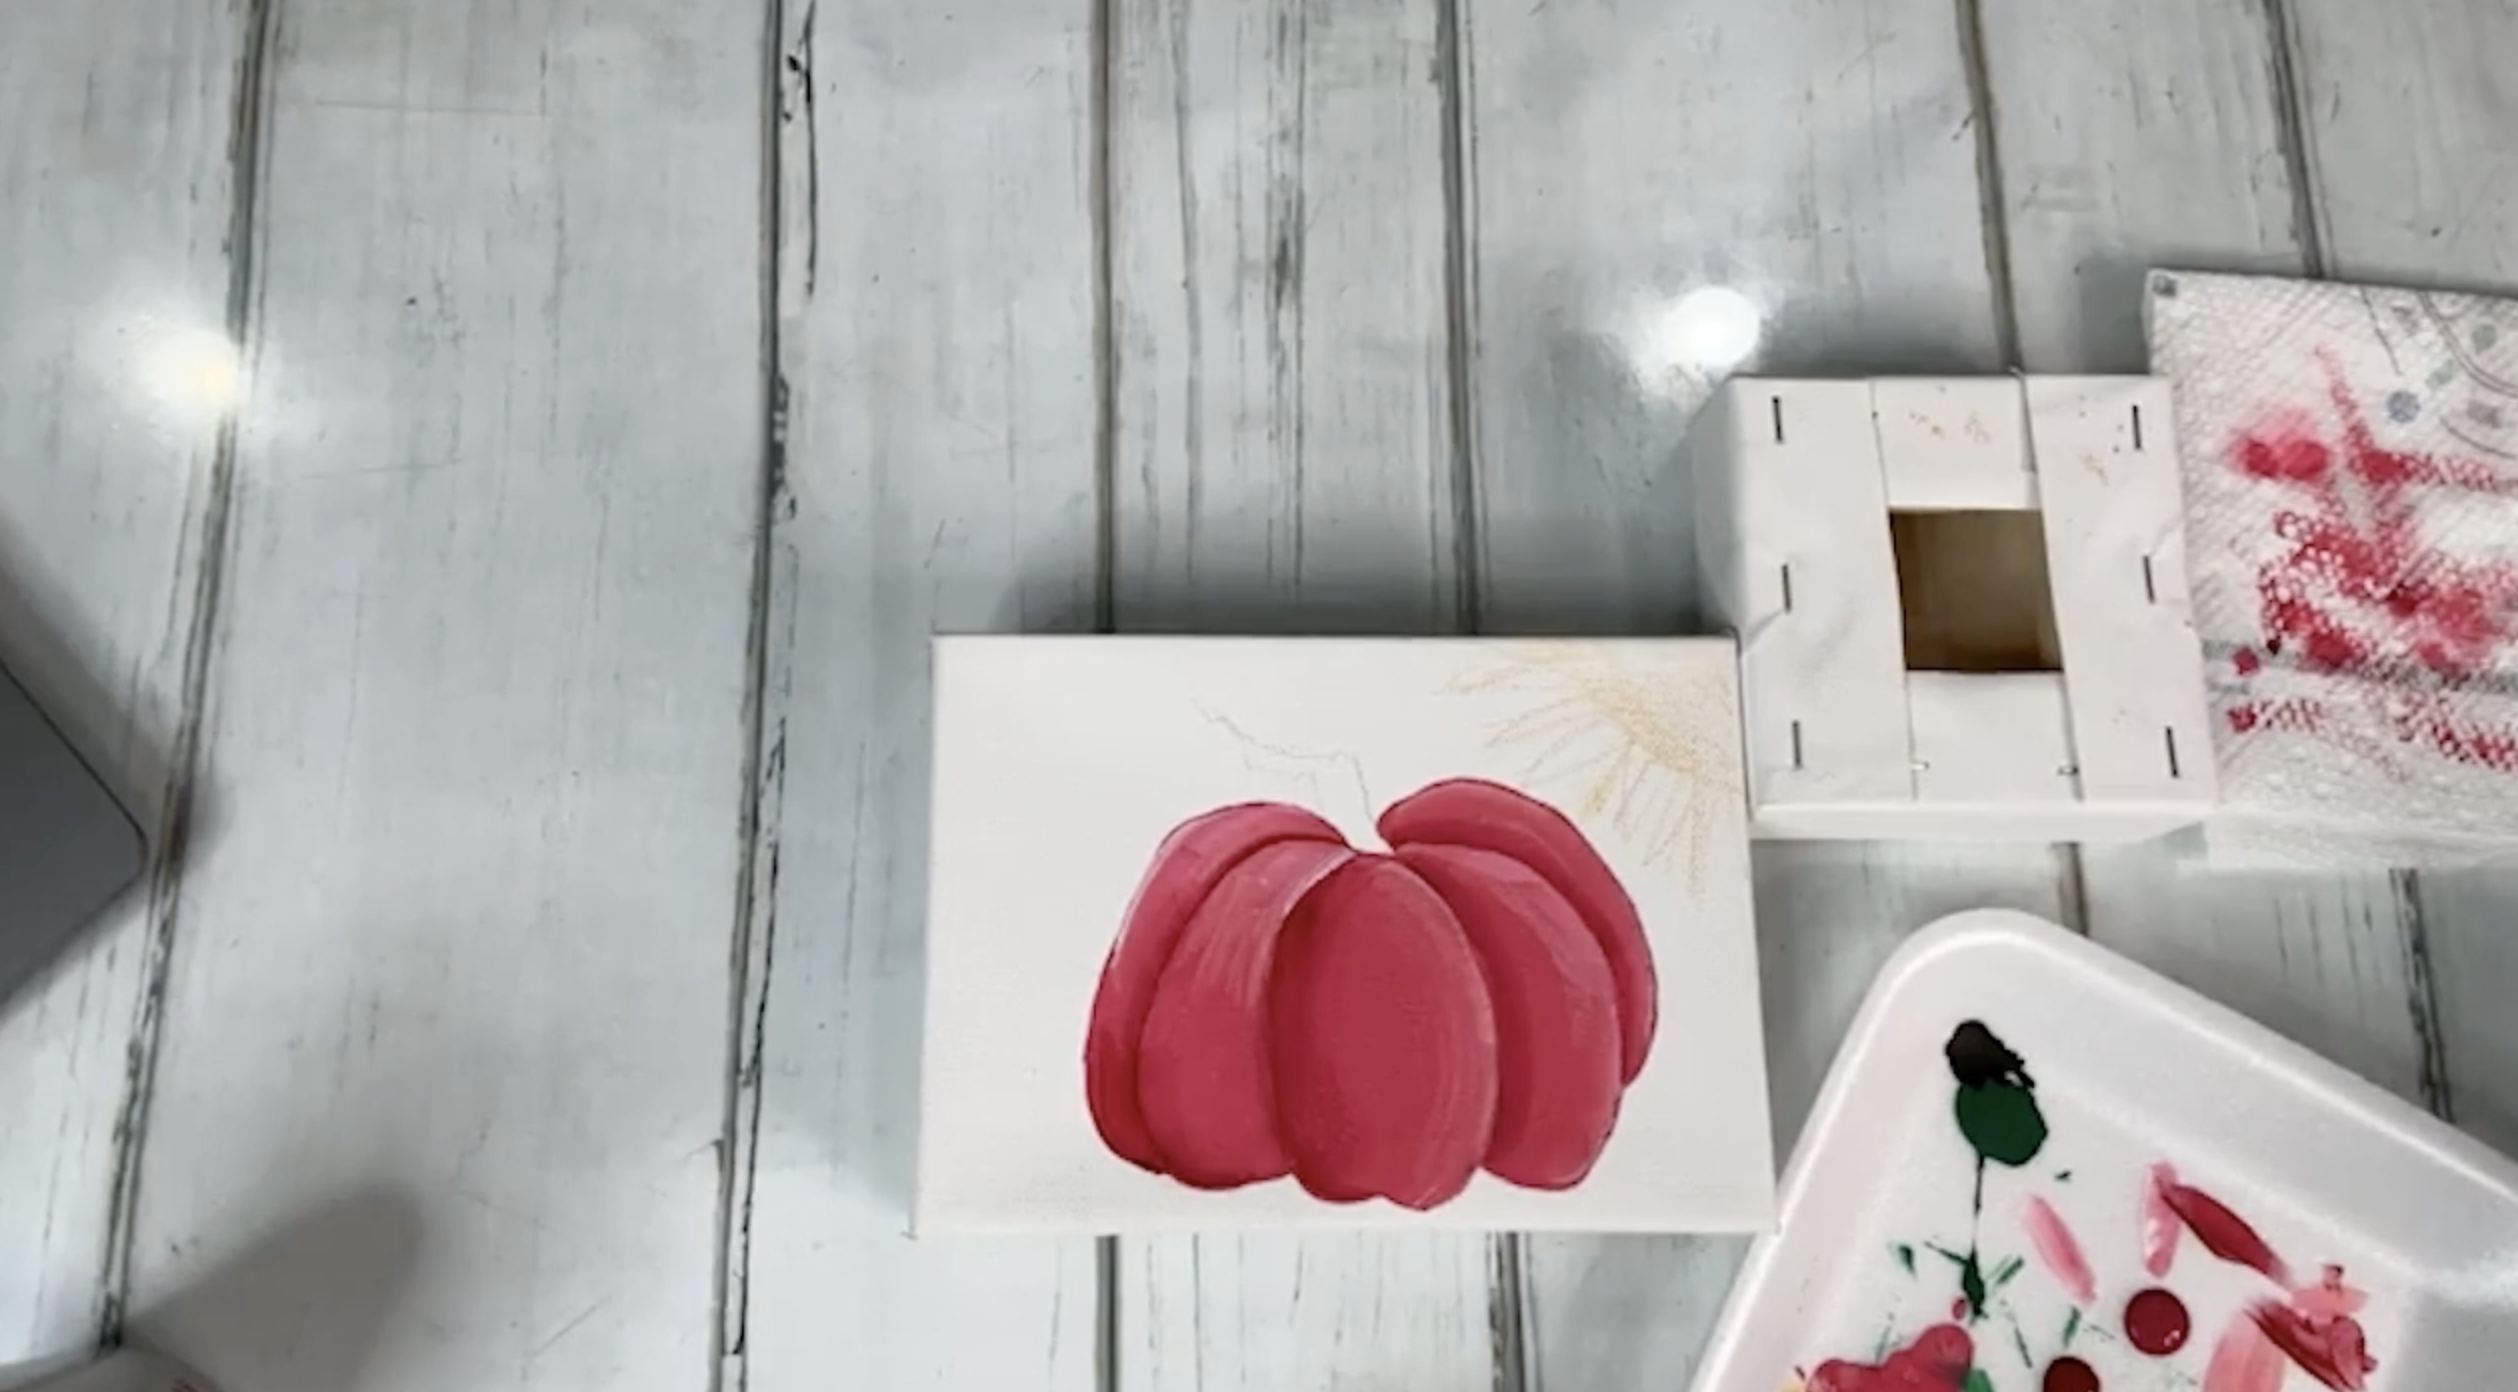
Step 2: Painting the Pumpkin
We worked with three pinks: Dragon Fruit – medium base tone, Alizarin Crimson – dark shadow color, and Light pink or white – for highlights. You can mix your own light pink by adding white to your base color if needed!
We painted the entire pumpkin in Dragon Fruit first. Then, section by section, we repainted with the base color and immediately used a flat brush to blend in highlights and shadows while it was still wet.
To add highlights, we dipped just the corner of our brush into the lighter color and used the swish-swish method: brushing right-left-right-left to blend the color smoothly across the edge of each section. For shadows, we used the same method with Alizarin Crimson on the opposite side of the light source.
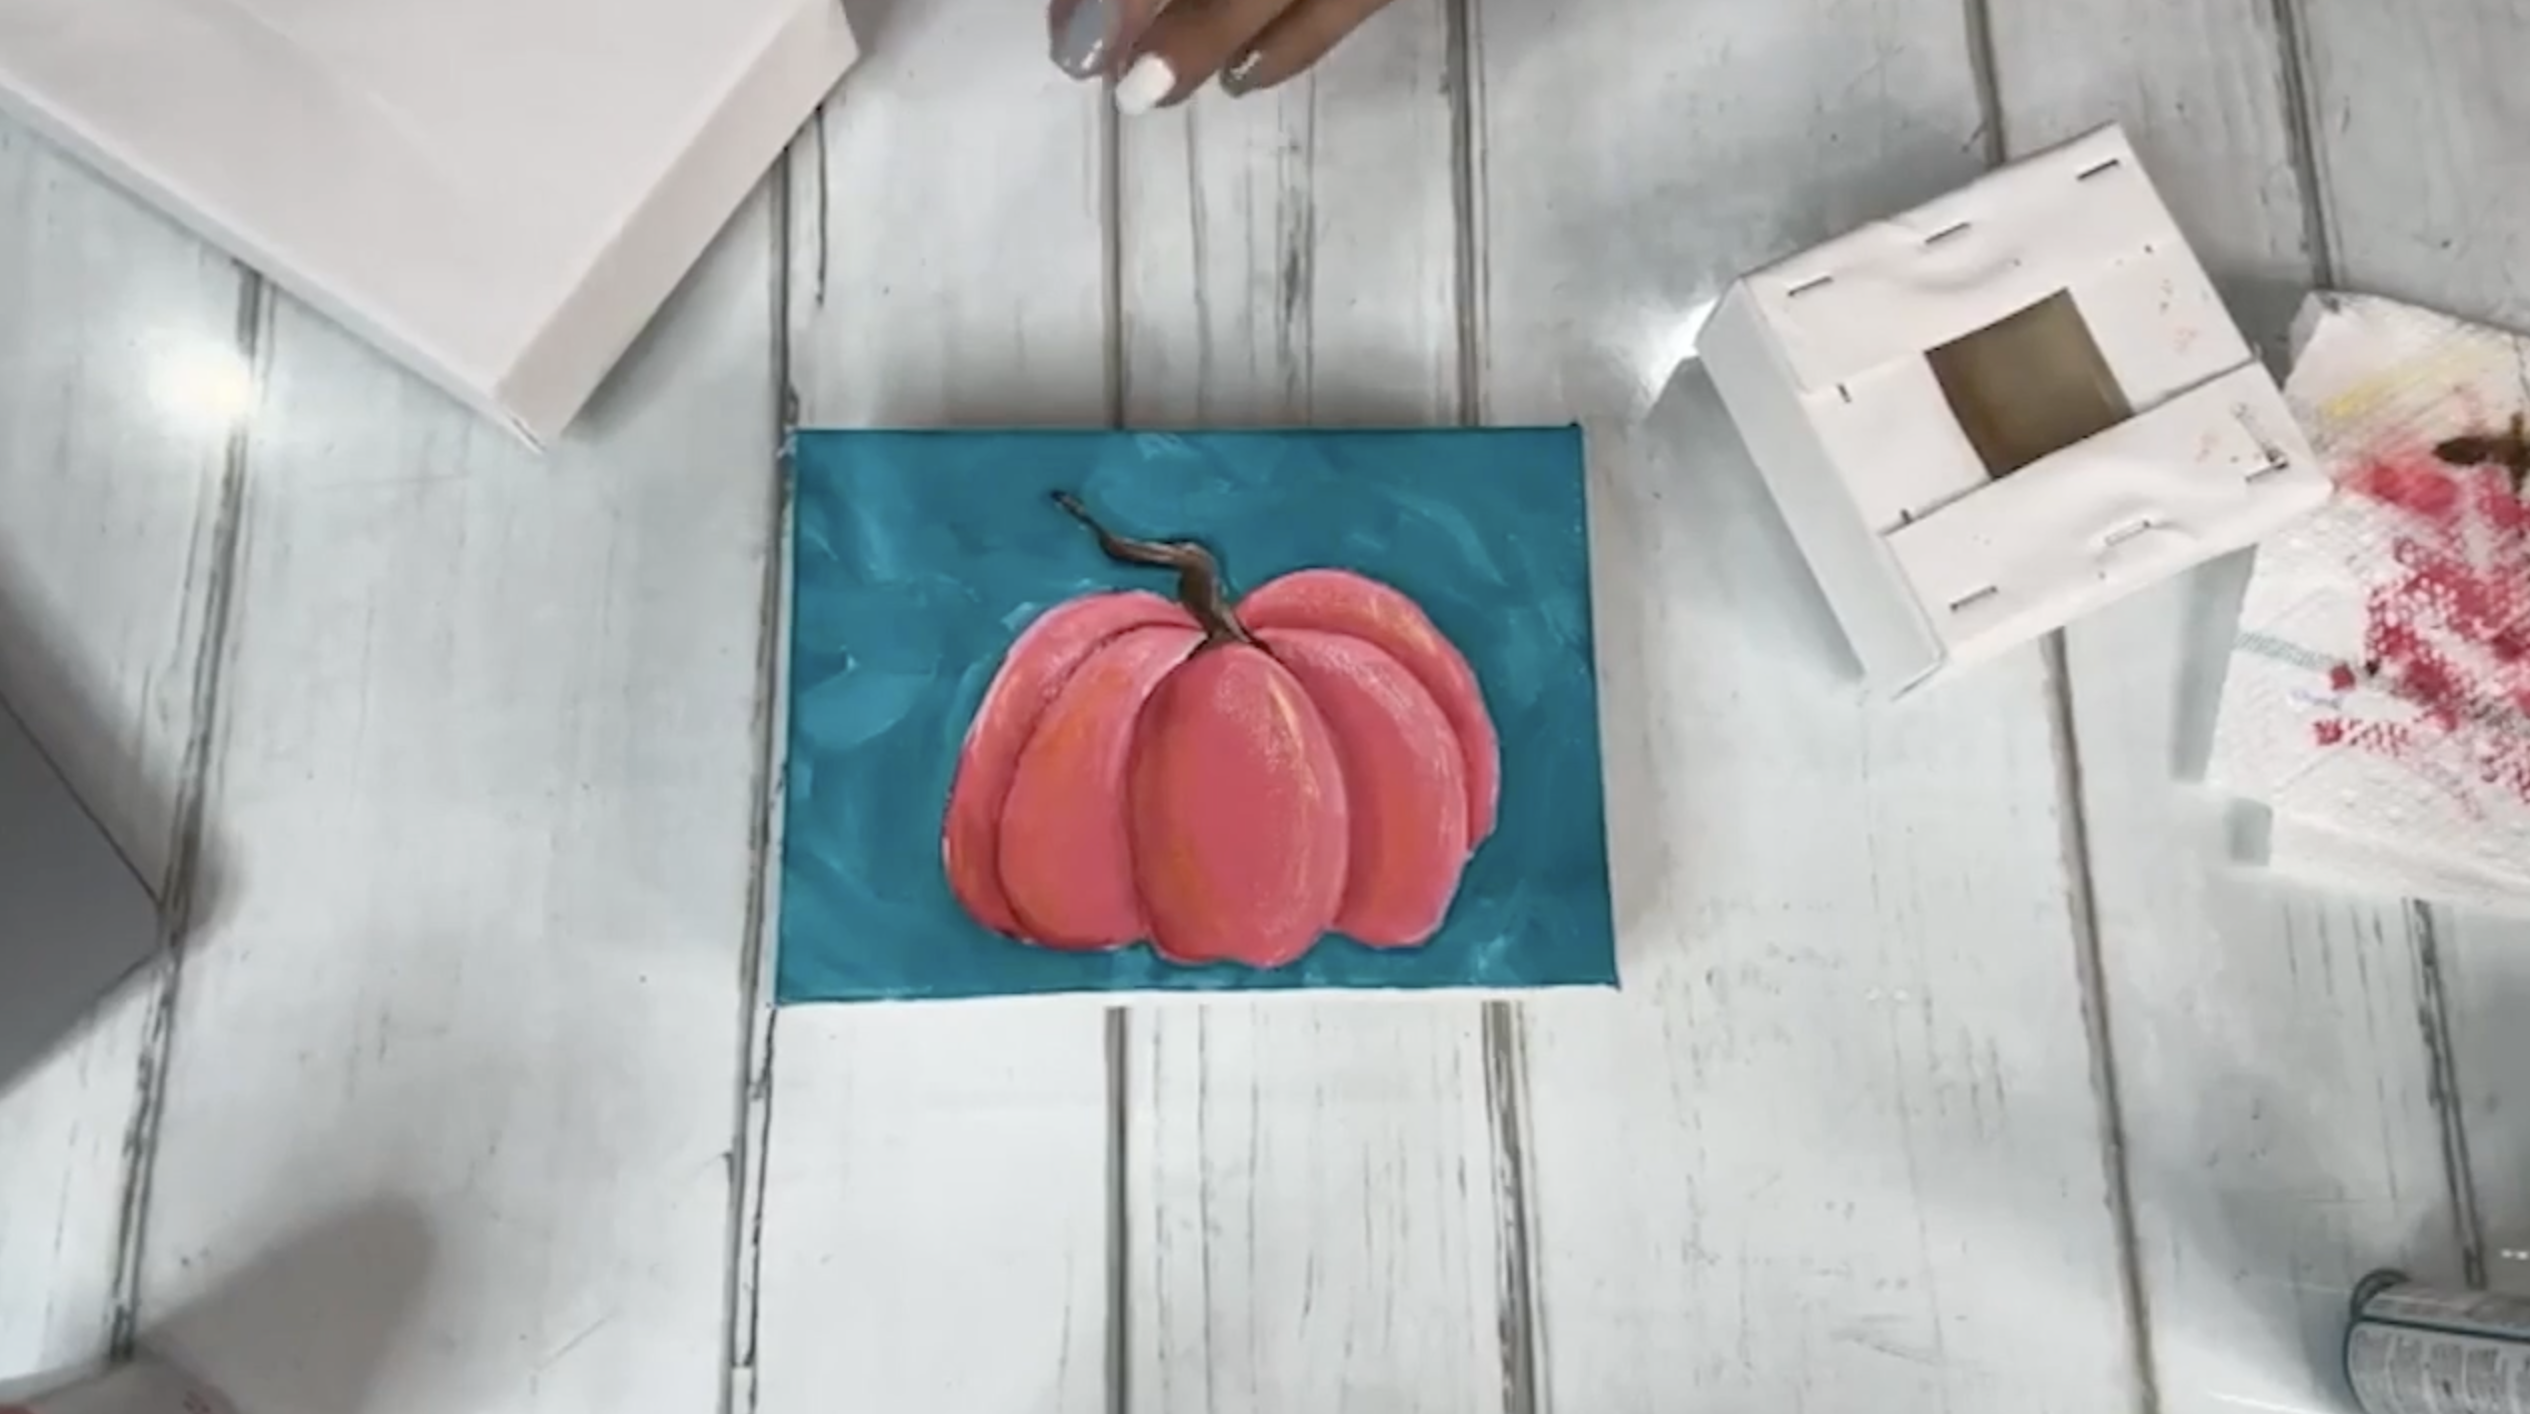
Step 3: Adding the Stem
We painted the stem with Burnt Umber and added a highlight using white blended with brown to reflect the same light direction. Don’t forget to add highlights to your stem - real stems have texture too! I also added a hint of yellow and orange to the top of the pumpkin to give it some extra warmth and contrast!
Step 4: Painting the Background
Once the pumpkin was complete, we filled in the background using Mermaid Tail, a gorgeous teal. We carefully painted around the pumpkin and then added brushy strokes of white to create a textured, layered look that felt lively and full of movement.
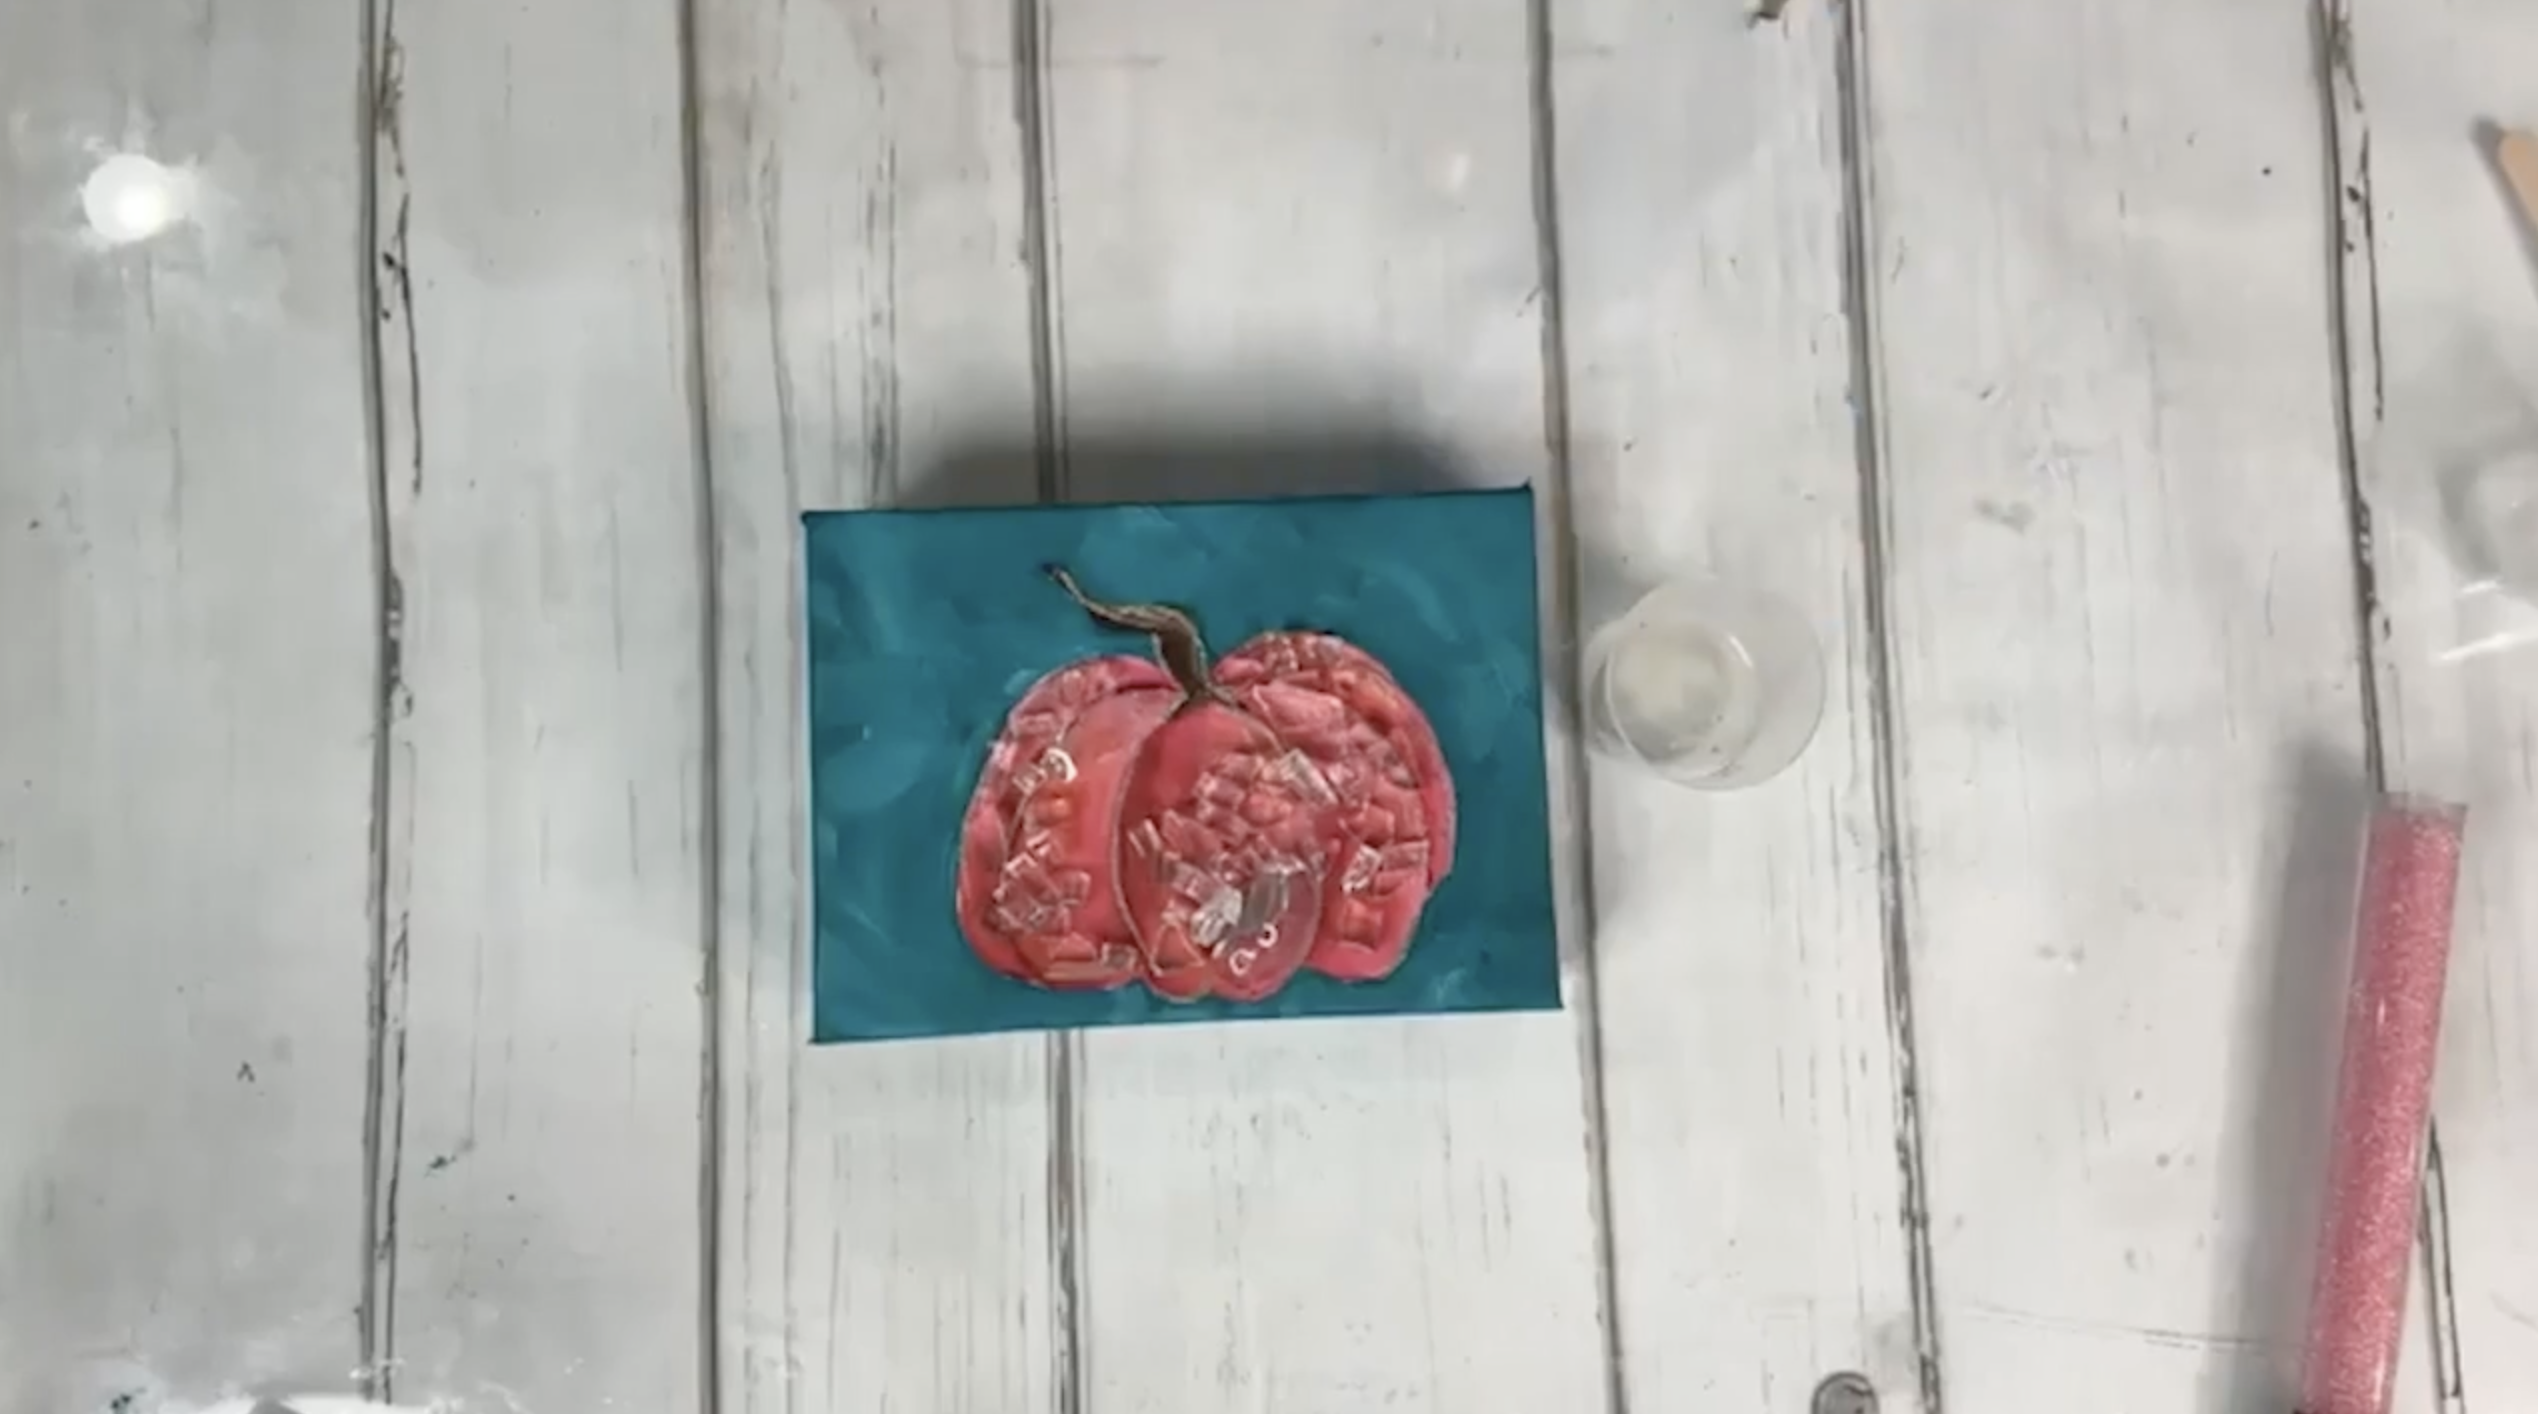
Step 5: Finishing Details with Pen and Paint
To make the pumpkin pop, we added black pen outlines using short, sketchy strokes with an illustration pen. Then we added dots and accents with a gold DecoColor metallic pen, because a little gold always makes things better.
Step 6: Adding Glass & Embellishments
For a bit of shimmer, we carefully placed just a few pieces of Starfire glass (clear, to let the pink shine through). We didn’t want to cover the whole pumpkin - just a few pieces for texture and sparkle.
Step 7: Mixing and Pouring Resin
We used ArtResin, a 1:1 ratio two-part epoxy. One ounce was more than enough for this 5x7 canvas. After mixing for three minutes, we drizzled resin over the glass and background, working from top to bottom to ensure everything was coated. Any leftover resin can be used for a second piece or disposed of safely.
Use a heat gun, hair dryer (high heat, low airflow), or a mist of isopropyl alcohol to pop any surface bubbles after pouring.
Before leaving your piece to cure, elevate it using small blocks or triangles to avoid sticking. Make sure your surface is level. Your piece will be dry to the touch in 12 hours, and fully cured in 72.
Optional: Add More Sparkle!
After pouring the resin, we added the final touches:
- Pink luster seed beads (from Hobby Lobby)
- Glass chips (cut into smaller pieces with nippers)
- Green vitrigraph (to mimic leafy vines)
If you don’t want to miss my Facebook LIVE art instruction, make sure you are on my texting list. I always text 10 minutes before I’m going to go LIVE, so you won’t ever miss it. You can text “Hey Cindy” to 901-519-2923.
Want more inspiration and artwork?
- My website artshattered.com with resources, shop, and more!
- My creative membership The Shattered Circle, where you can explore the world of glass art with online workshops, a supportive community, and more!
- My mini creative membership Just A ‘Lil Bit Monthly Glass Art Club, where you’ll get a new quick and easy online tutorial for just a lil' bit of sparkle in your life!
- My Facebook page where I go LIVE every Wednesday night.
- My YouTube channel which has tons of free art lessons right at your fingertips.
