
Pretty Blue Sunflower 💙
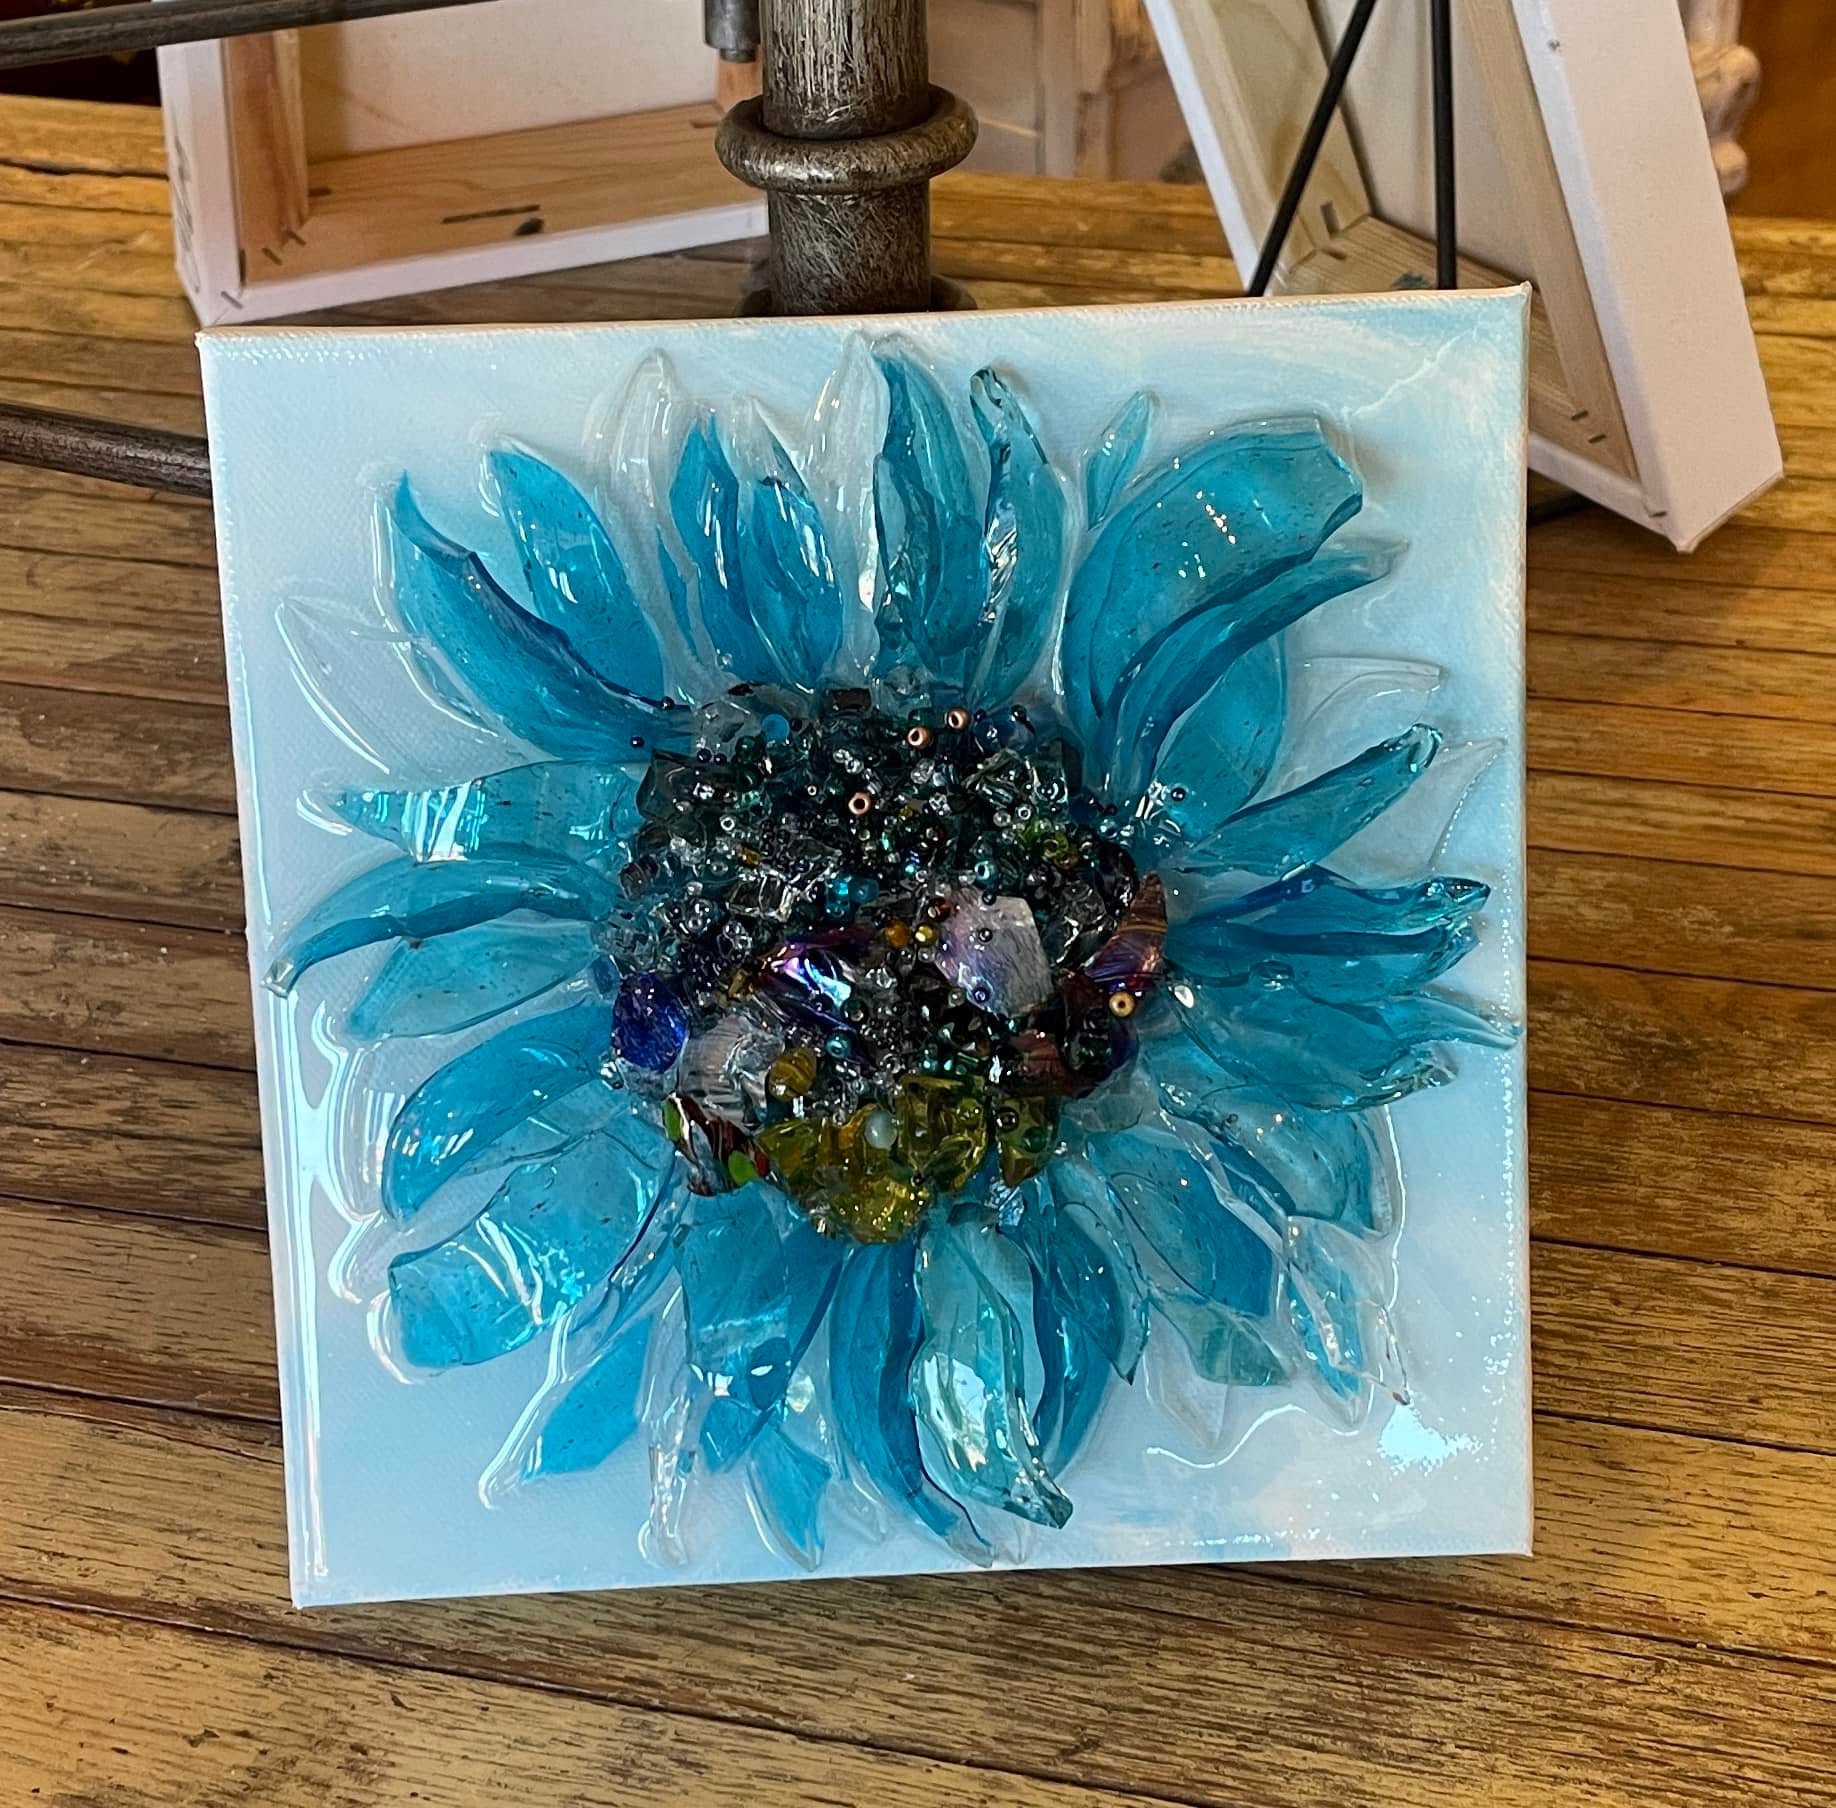
This blue glass sunflower is a beautiful example of turning something broken into something completely new. The petals were created from a blue drinking glass that broke in the dishwasher, then carefully nipped into curved petal shapes and layered around a colorful glass center. With a simple painted background, a mix of crushed glass colors, seed beads, and resin, the finished piece has incredible depth and texture without requiring detailed painting!
Step 1: Paint the Background
Begin by covering the entire 8" x 8" canvas with white acrylic paint. While the white is still wet, add a small amount of Mermaid Blue and blend it in loosely using X-shaped brushstrokes. Keep the color soft and light so the background adds interest without competing with the flower.
The goal is not to create a perfect blend. A little variation and visible brush movement will give the background subtle texture while keeping the sunflower as the focal point. Allow the paint to dry completely before moving on.
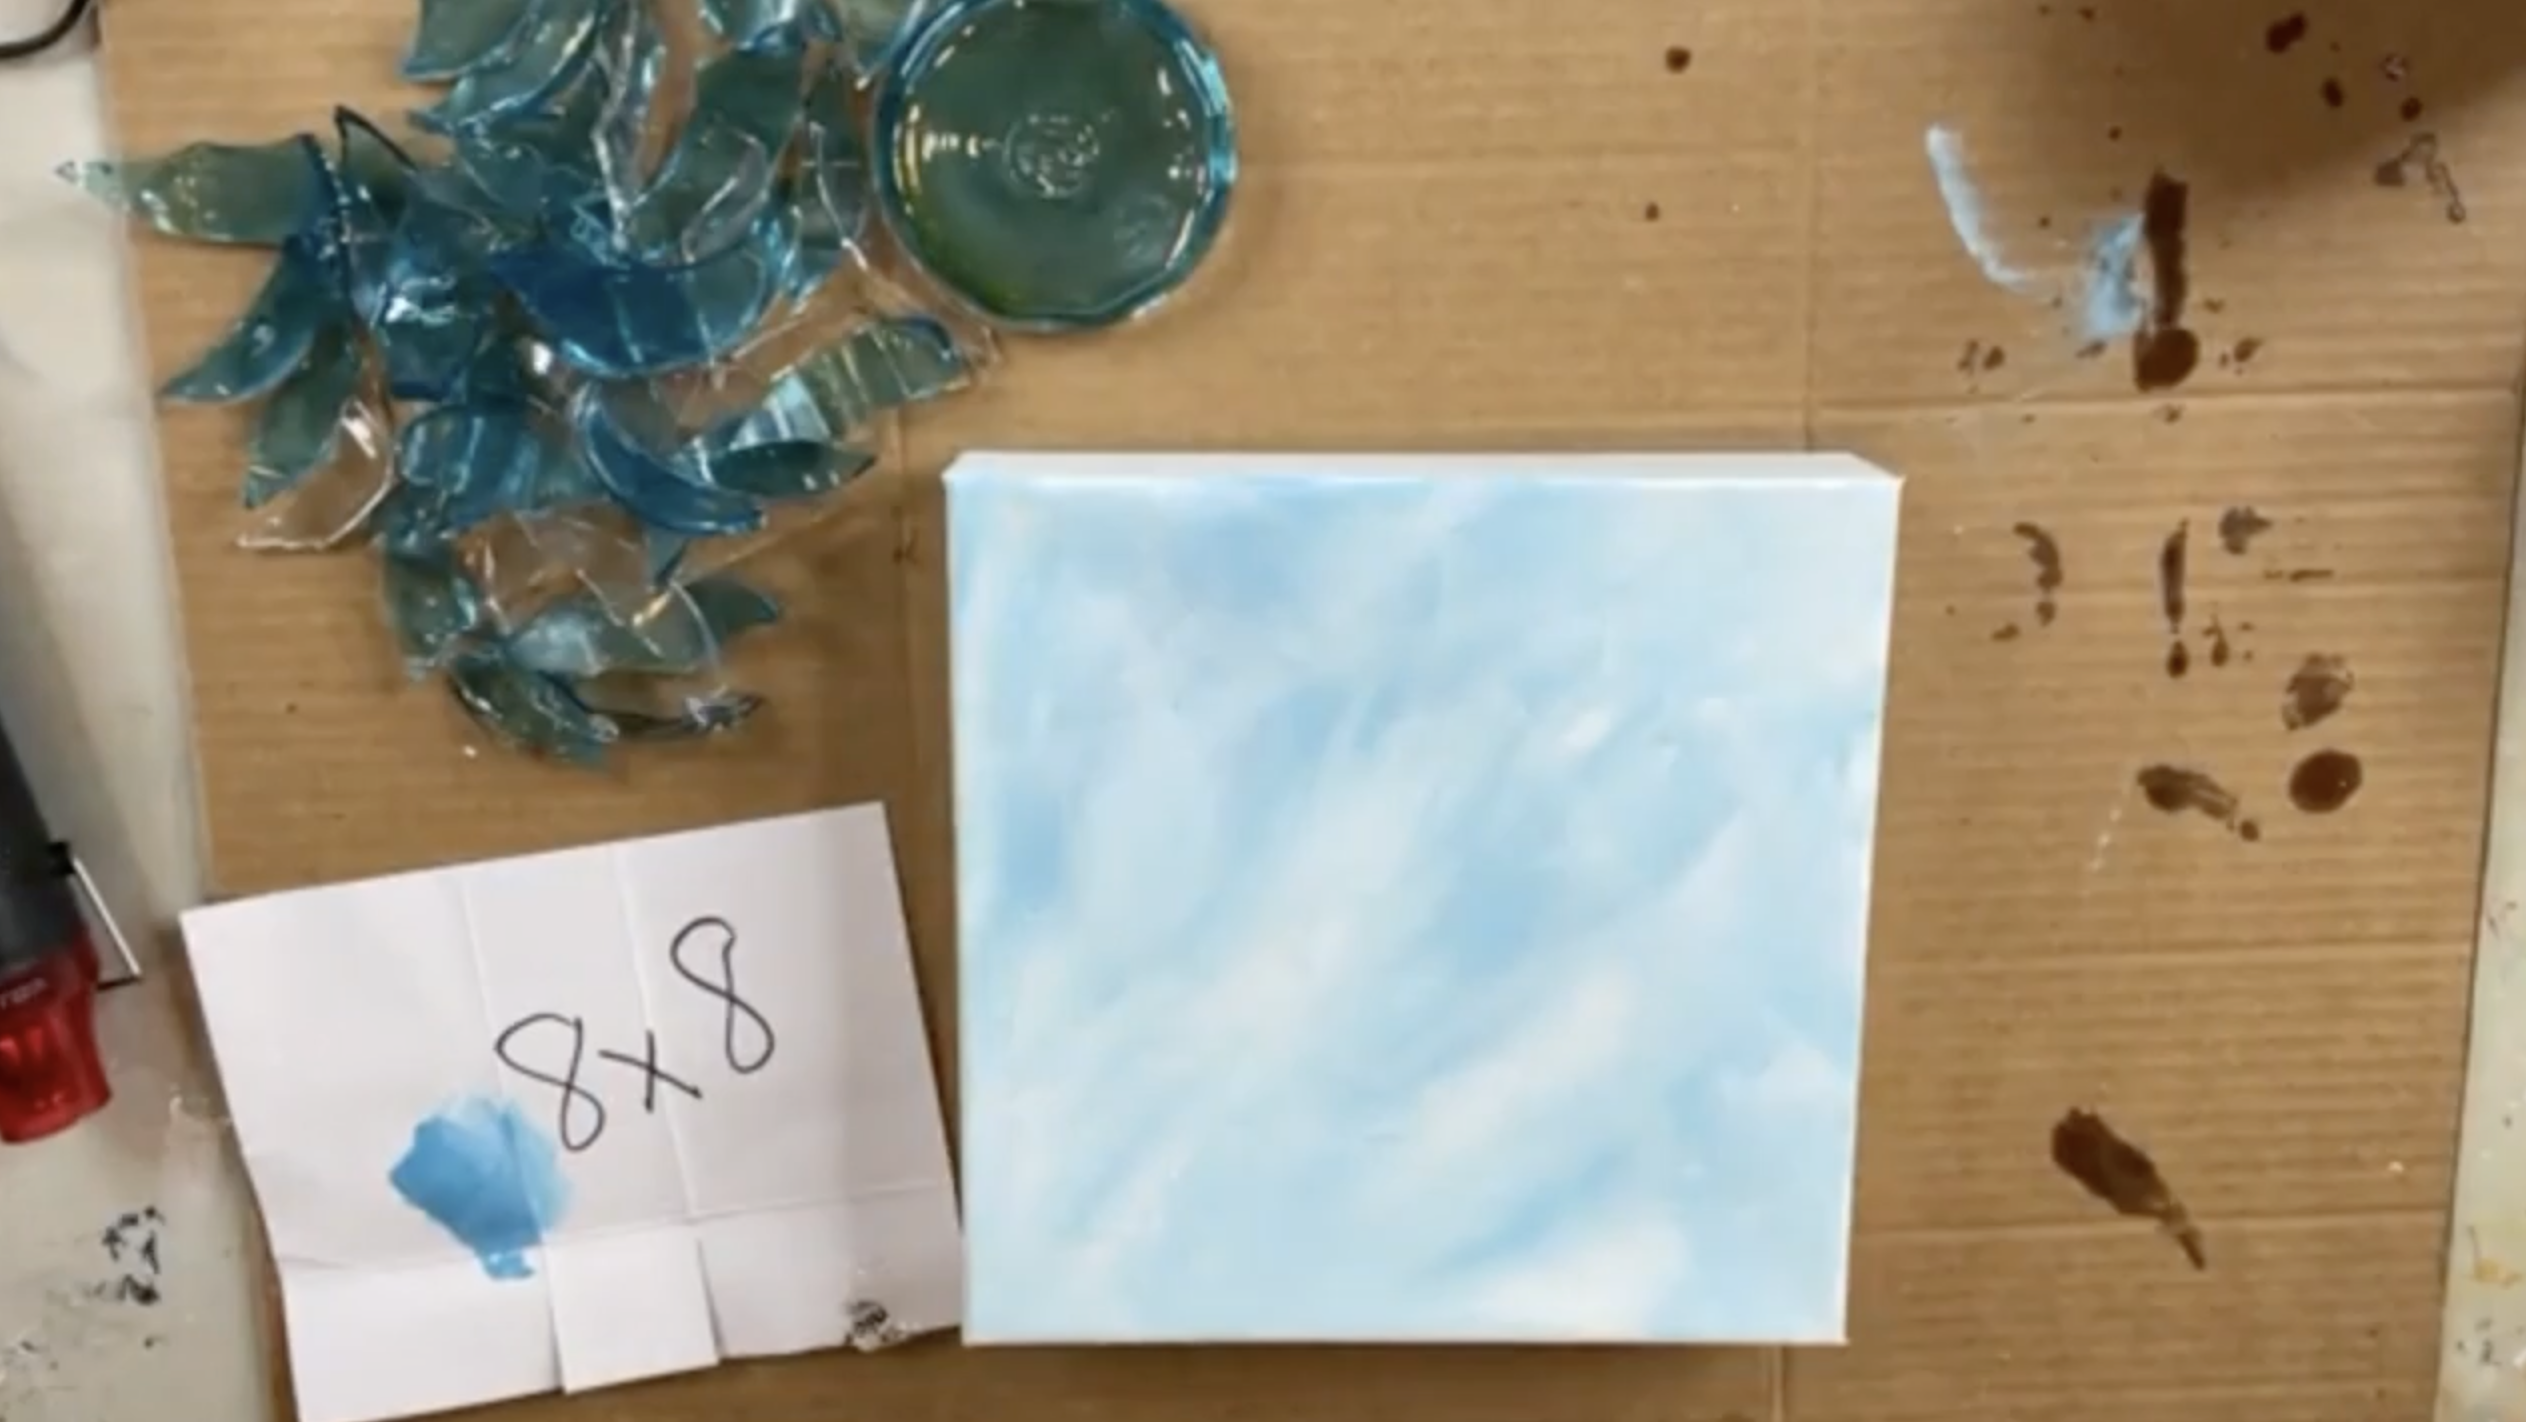
Step 2: Mark the Center of the Sunflower
Place the bottom of a drinking glass or another circular object in the center of the canvas and lightly trace around it with a pencil. This circle will act as a guide for the inside edge of the sunflower petals and help keep the overall flower shape balanced.
The circle does not need to be dark or perfect. It simply gives you a reference point as you begin layering the larger glass petals around the center.
Step 3: Prepare the Glass Petals
The petals in this project were made from a blue drinking glass that broke in the dishwasher. The broken glass was carefully nipped into long, curved petal shapes, then the sharp edges were smoothed before use.
If you are working with repurposed glass, make sure every piece is safe to handle before placing it on the canvas. The pieces should be large enough to create the dramatic petal shape, but varied enough that the flower does not look too uniform.
Step 4: Lay Out the Largest Petals First
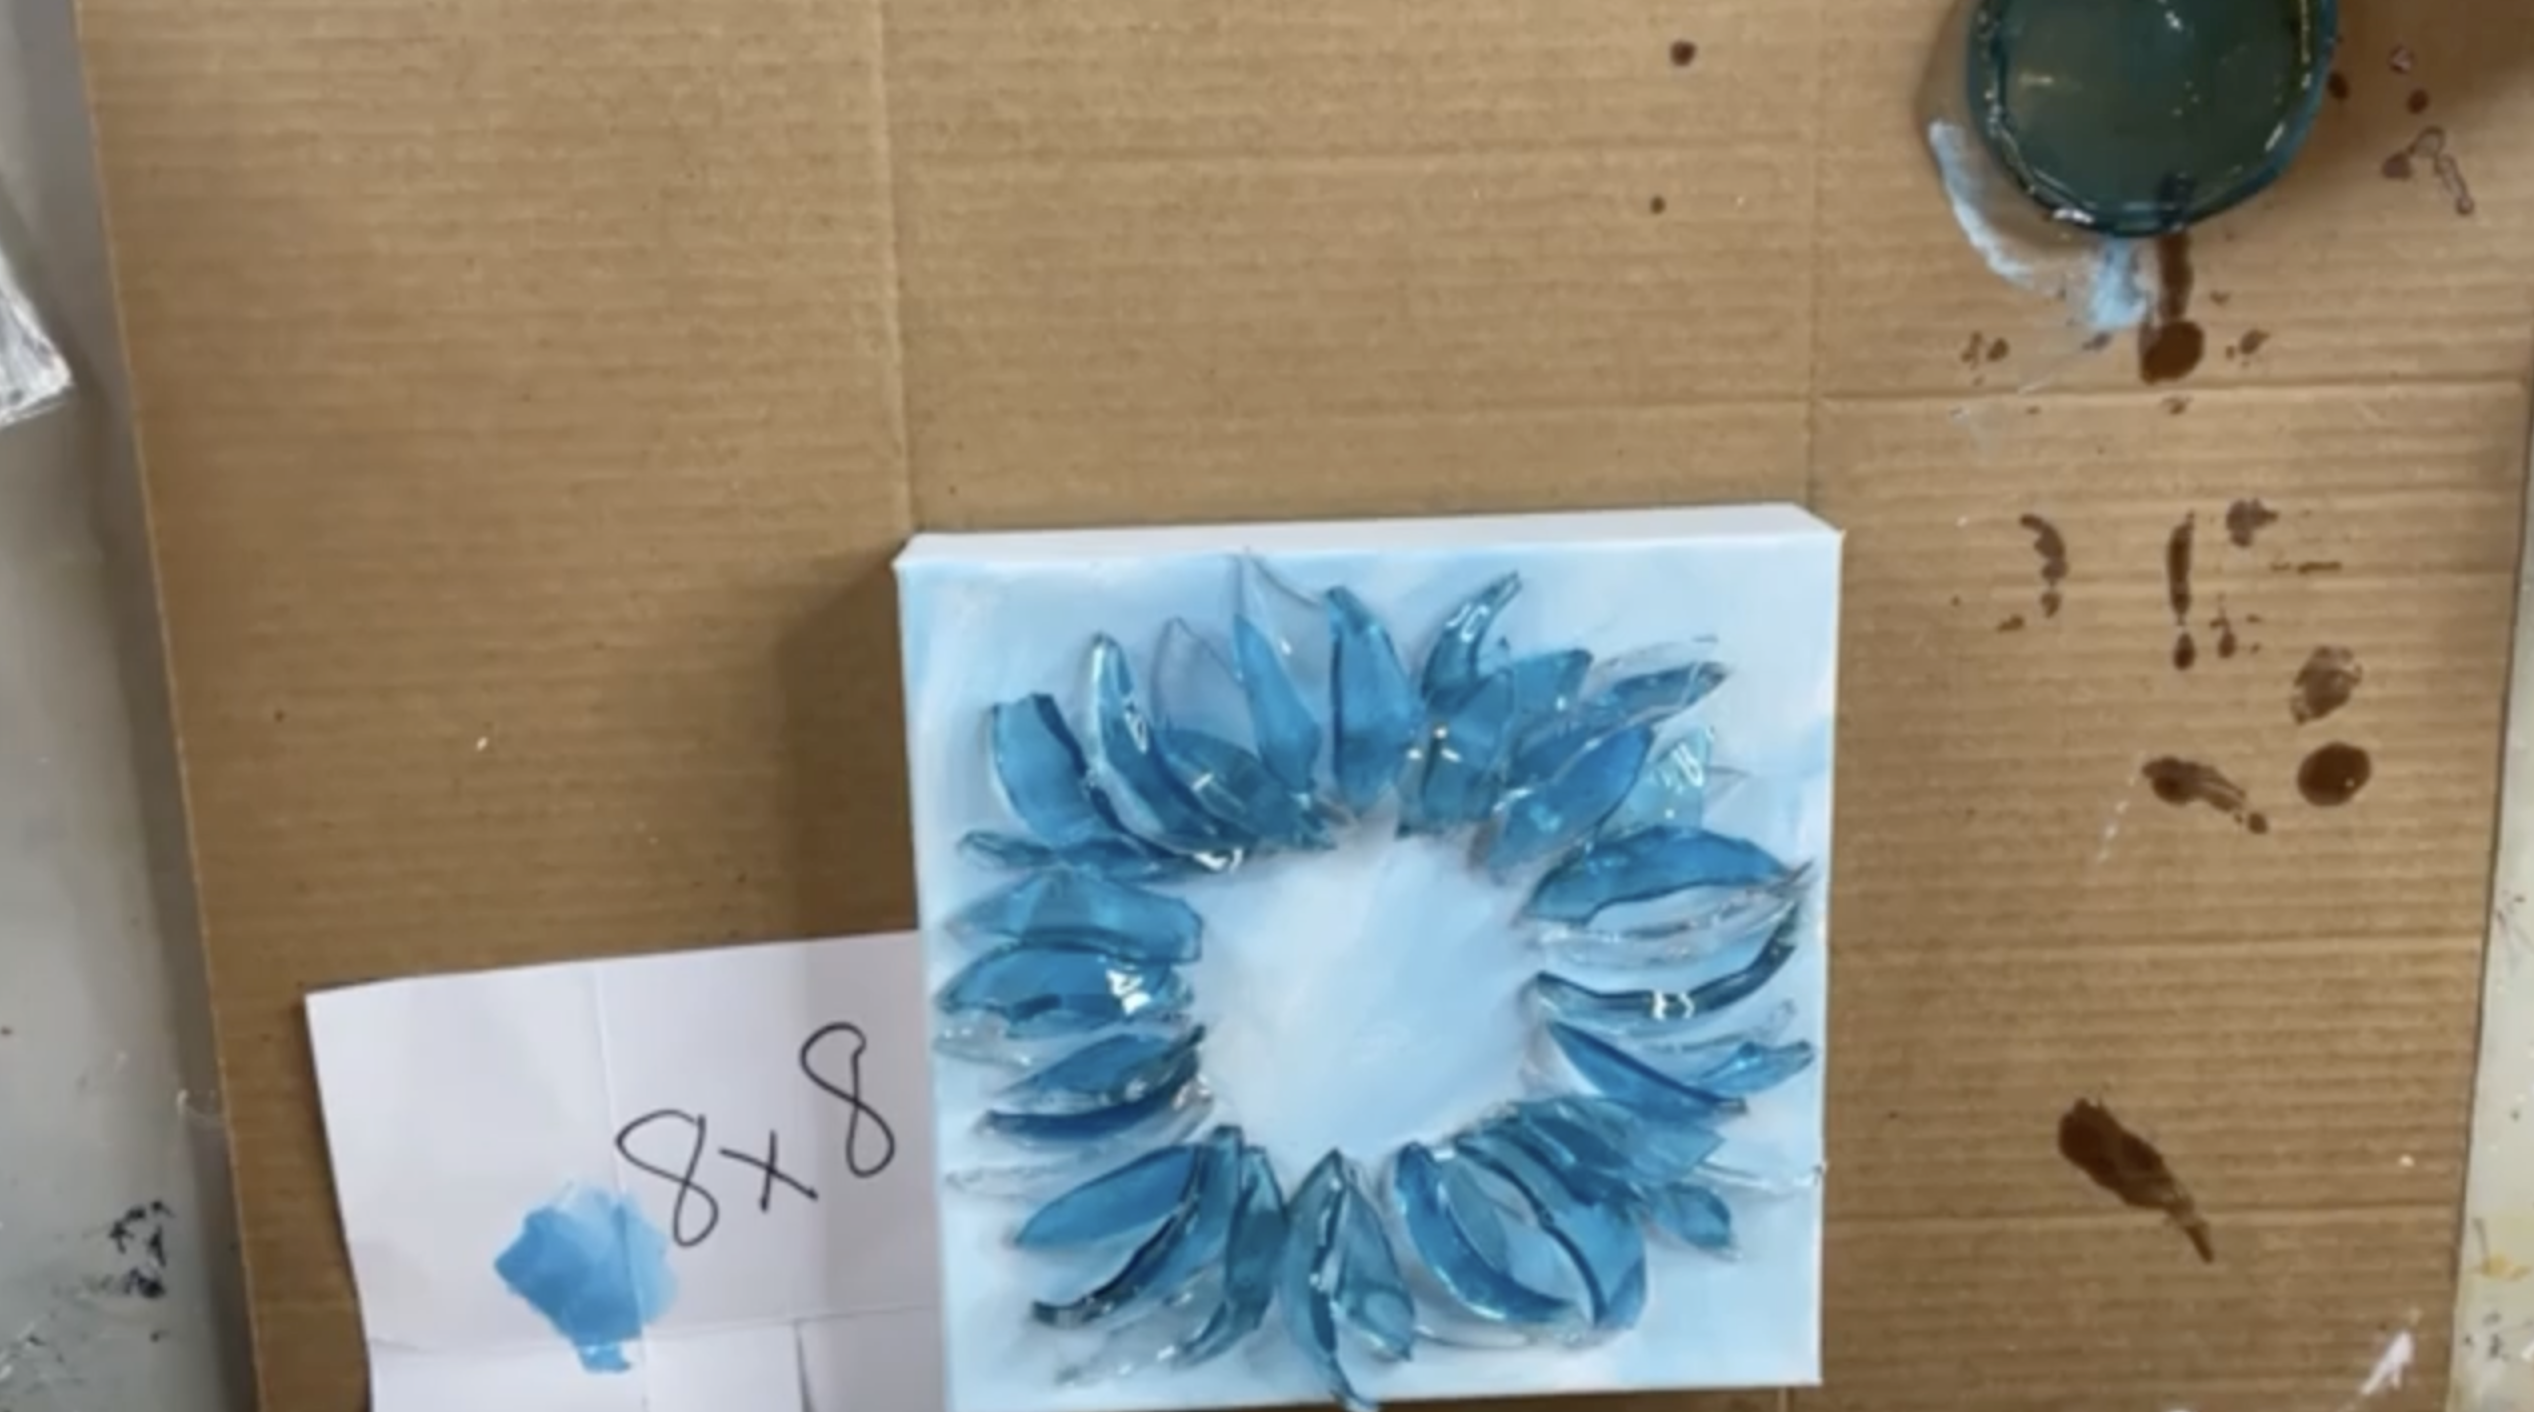
Begin by placing the largest curved glass pieces around the outside of the traced circle. Start with petals at the top, bottom, left, and right, then gradually fill in the spaces between them.
Let some petals lean to the left, some to the right, and some sit flatter against the canvas. The variation in angle will help the flower feel much more dimensional.
Do not worry if some pieces overlap or extend slightly toward the canvas edge. The layered look is what gives this project its dramatic texture.
Step 5: Layer Additional Petals
Continue adding more blue glass petals around the flower, working your way around the entire circle. Instead of placing each petal side by side in one flat row, allow some pieces to overlap and stack slightly on top of one another.
This layered placement is important. A single ring of glass would look much flatter, while overlapping petals create the fullness and movement of a real flower.
If you run short on blue glass, add a few clear glass pieces between the blue petals. The clear glass blends in beautifully while still adding texture.
Step 6: Build the Center with Glass
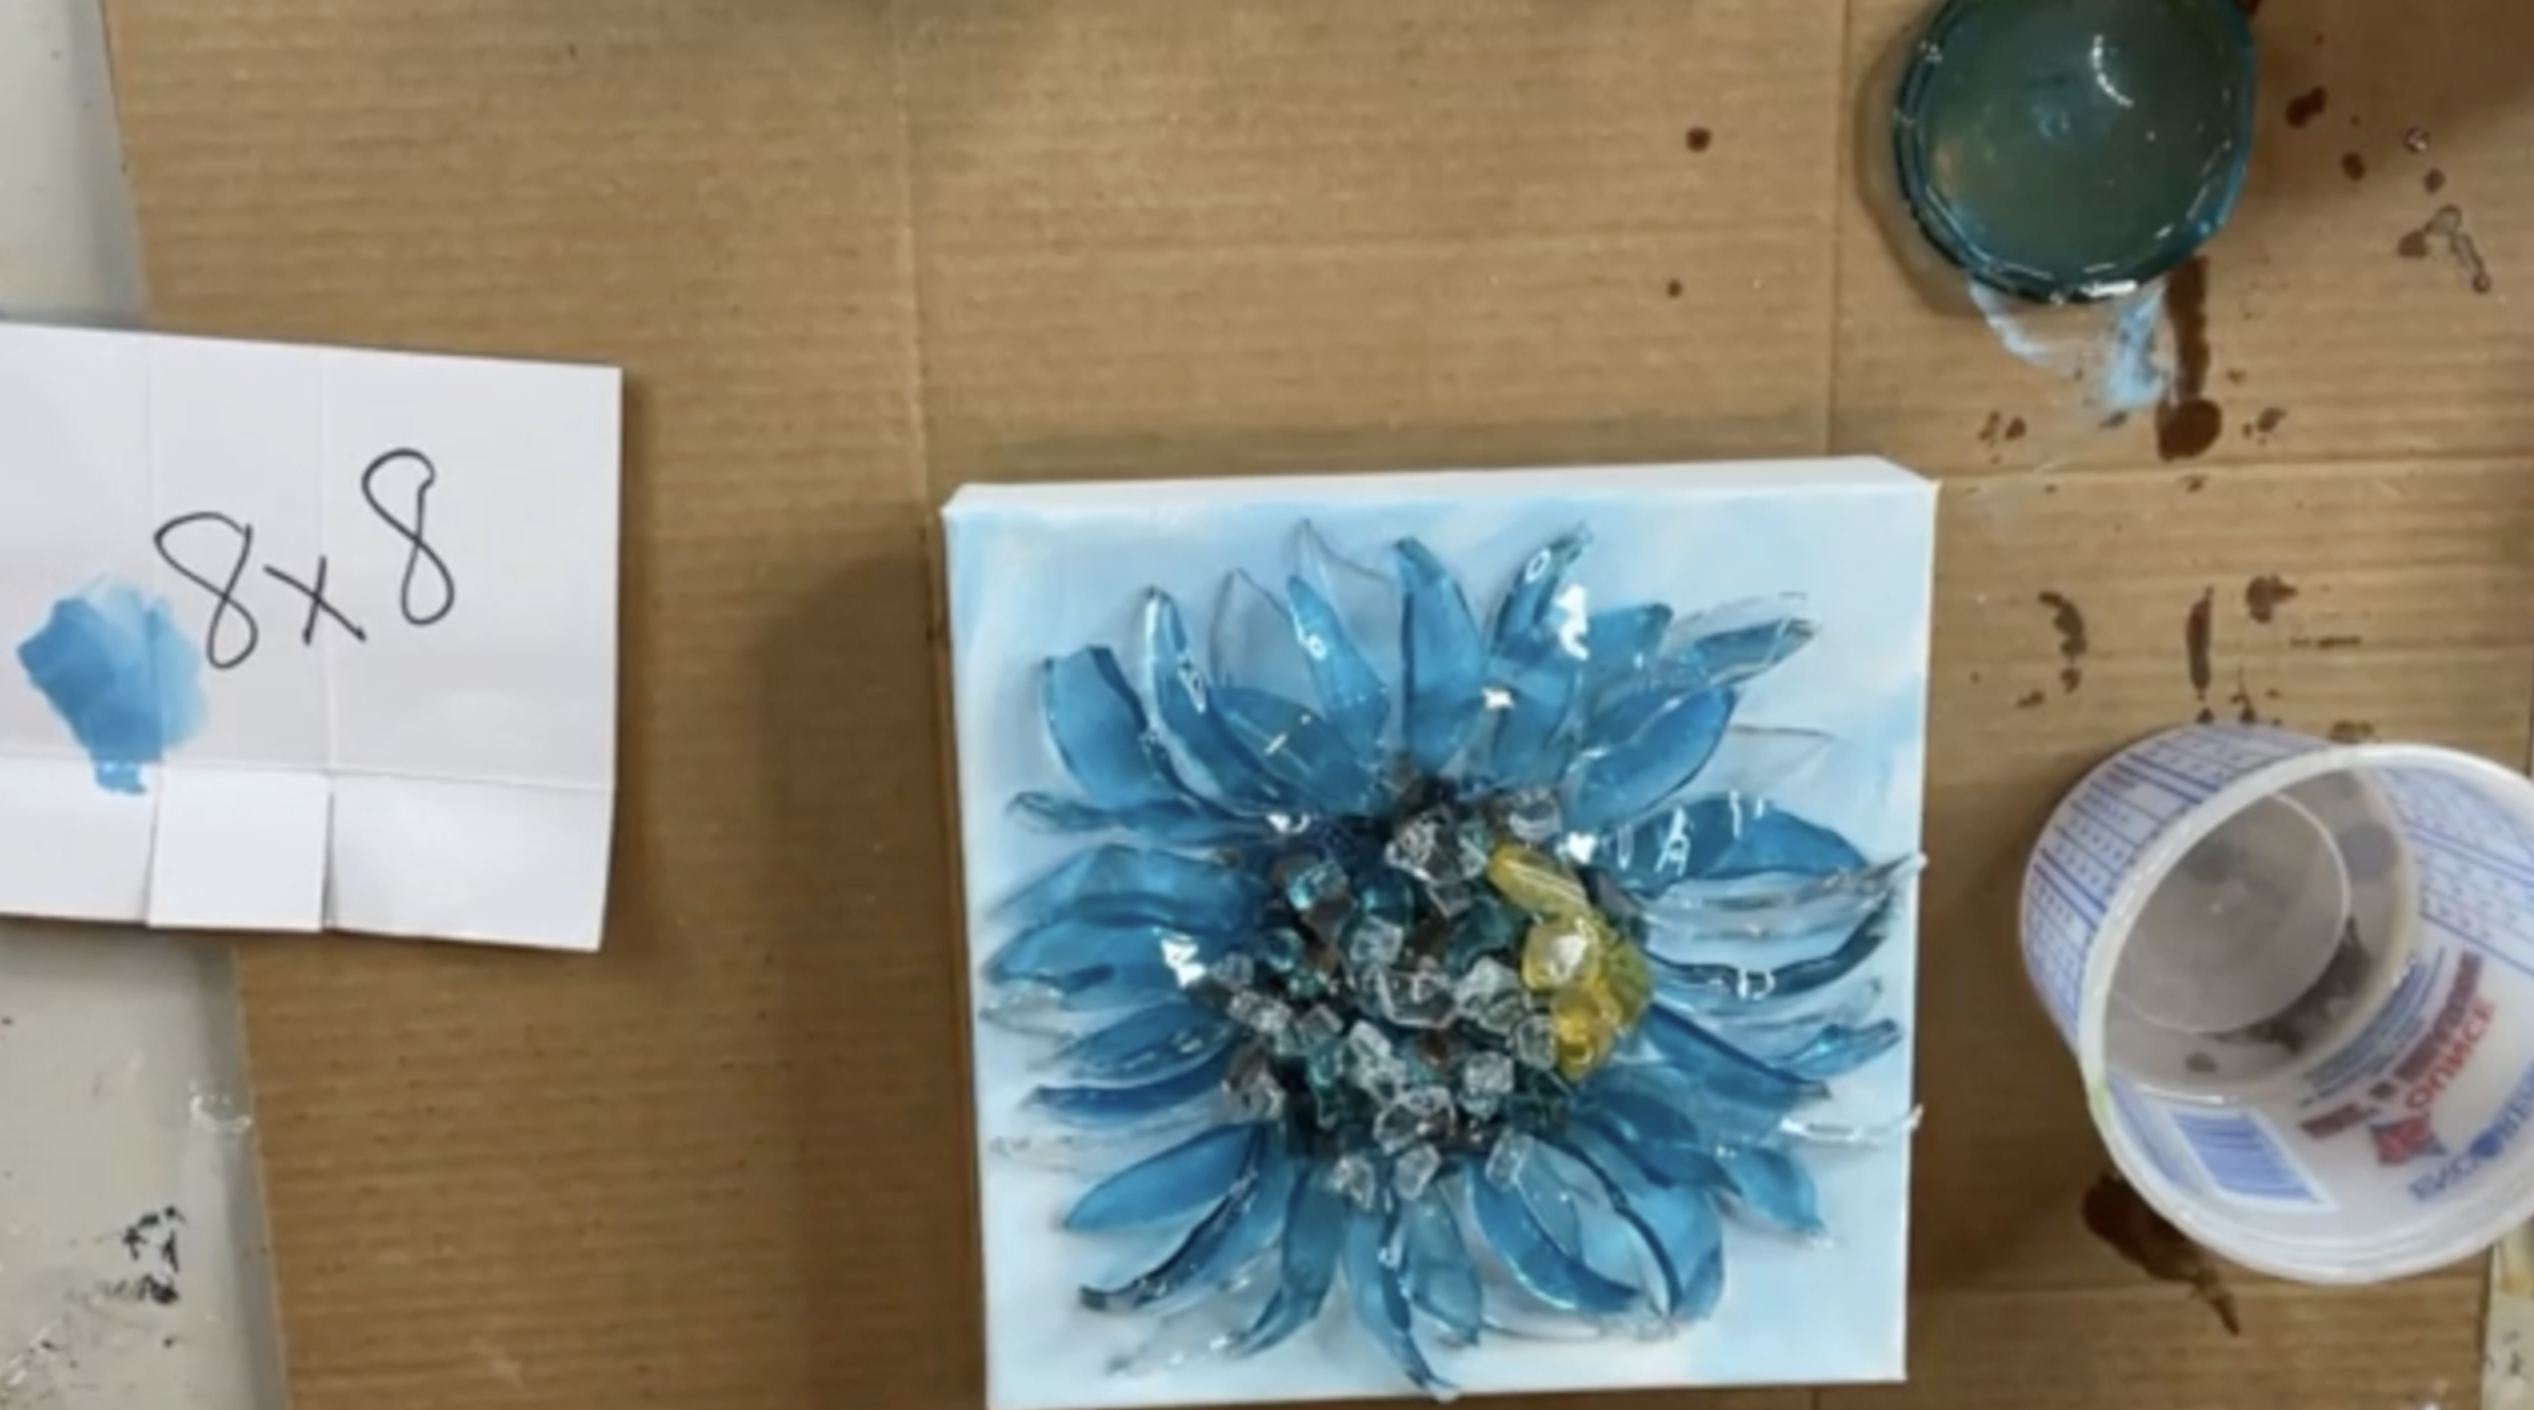
Begin filling the center of the sunflower with a layer of gray crushed glass. Add enough to cover a good portion of the middle, but do not completely fill the circle yet.
Layer Pacific Blue Reflective glass over portions of the gray. Sprinkle it unevenly rather than creating a solid layer so the different colors remain visible.
Sprinkle a small amount of bronze crushed glass into the center. Keep this layer lighter than the blue and gray.
Add Caribbean Blue crushed glass next, followed by a little clear glass for extra depth.
Continue layering rather than mixing everything together completely. The individual colors should still be visible so the center feels textured and dimensional.
You can also add a few yellow glass pieces to one side if you want a subtle sunflower-inspired color accent.
Step 7: Elevate the Canvas
Before mixing resin, place the canvas on risers. Since the flower contains a large amount of dimensional glass, resin may run toward the edges or drip over the sides.
Elevating the canvas keeps it from sticking to your work surface and makes cleanup much easier.
Step 8: Mix the Resin
Mix approximately four ounces of Art Resin using equal parts resin and hardener.
Stir slowly for three full minutes, scraping the sides and bottom of the cup as you work. Avoid whipping the resin, which can introduce unnecessary bubbles.
The original project used approximately three ounces, leaving about one ounce extra, so you may not need the full amount depending on how much glass you use.
Step 9: Add Resin
Begin by drizzling resin over the center of the sunflower. Work in a circular motion so you can keep track of which areas have already been coated.
Make sure the resin reaches between the layers of gray, blue, bronze, and clear glass. Since the center is thick and dimensional, be generous enough that the resin flows through the glass and makes contact with the canvas underneath.
Continue around the flower, drizzling resin over each petal. Work in order around the circle rather than jumping from one area to another so you do not accidentally miss a piece.
Pay special attention to raised petals and overlapping areas. Because some pieces sit higher than others, you may need to rotate the canvas and inspect the flower from multiple angles to ensure every petal is coated.
Use the remaining resin to cover the exposed painted areas of the canvas. Spread it all the way to the edges using a gloved finger or silicone spreader.
If resin runs down the sides, simply wipe it away. If you expect a large amount of runoff, taping the underside of the canvas before beginning can help keep the back clean.
Step 10: Add Glass Chips to the Center
While the resin is still wet, add a few larger glass chips or nuggets to the sunflower center.
These pieces add even more dimension and can help fill any areas that feel too flat. Place them sparingly so they do not overwhelm the smaller crushed glass underneath.
Drizzle a little additional resin over any newly added pieces if needed.
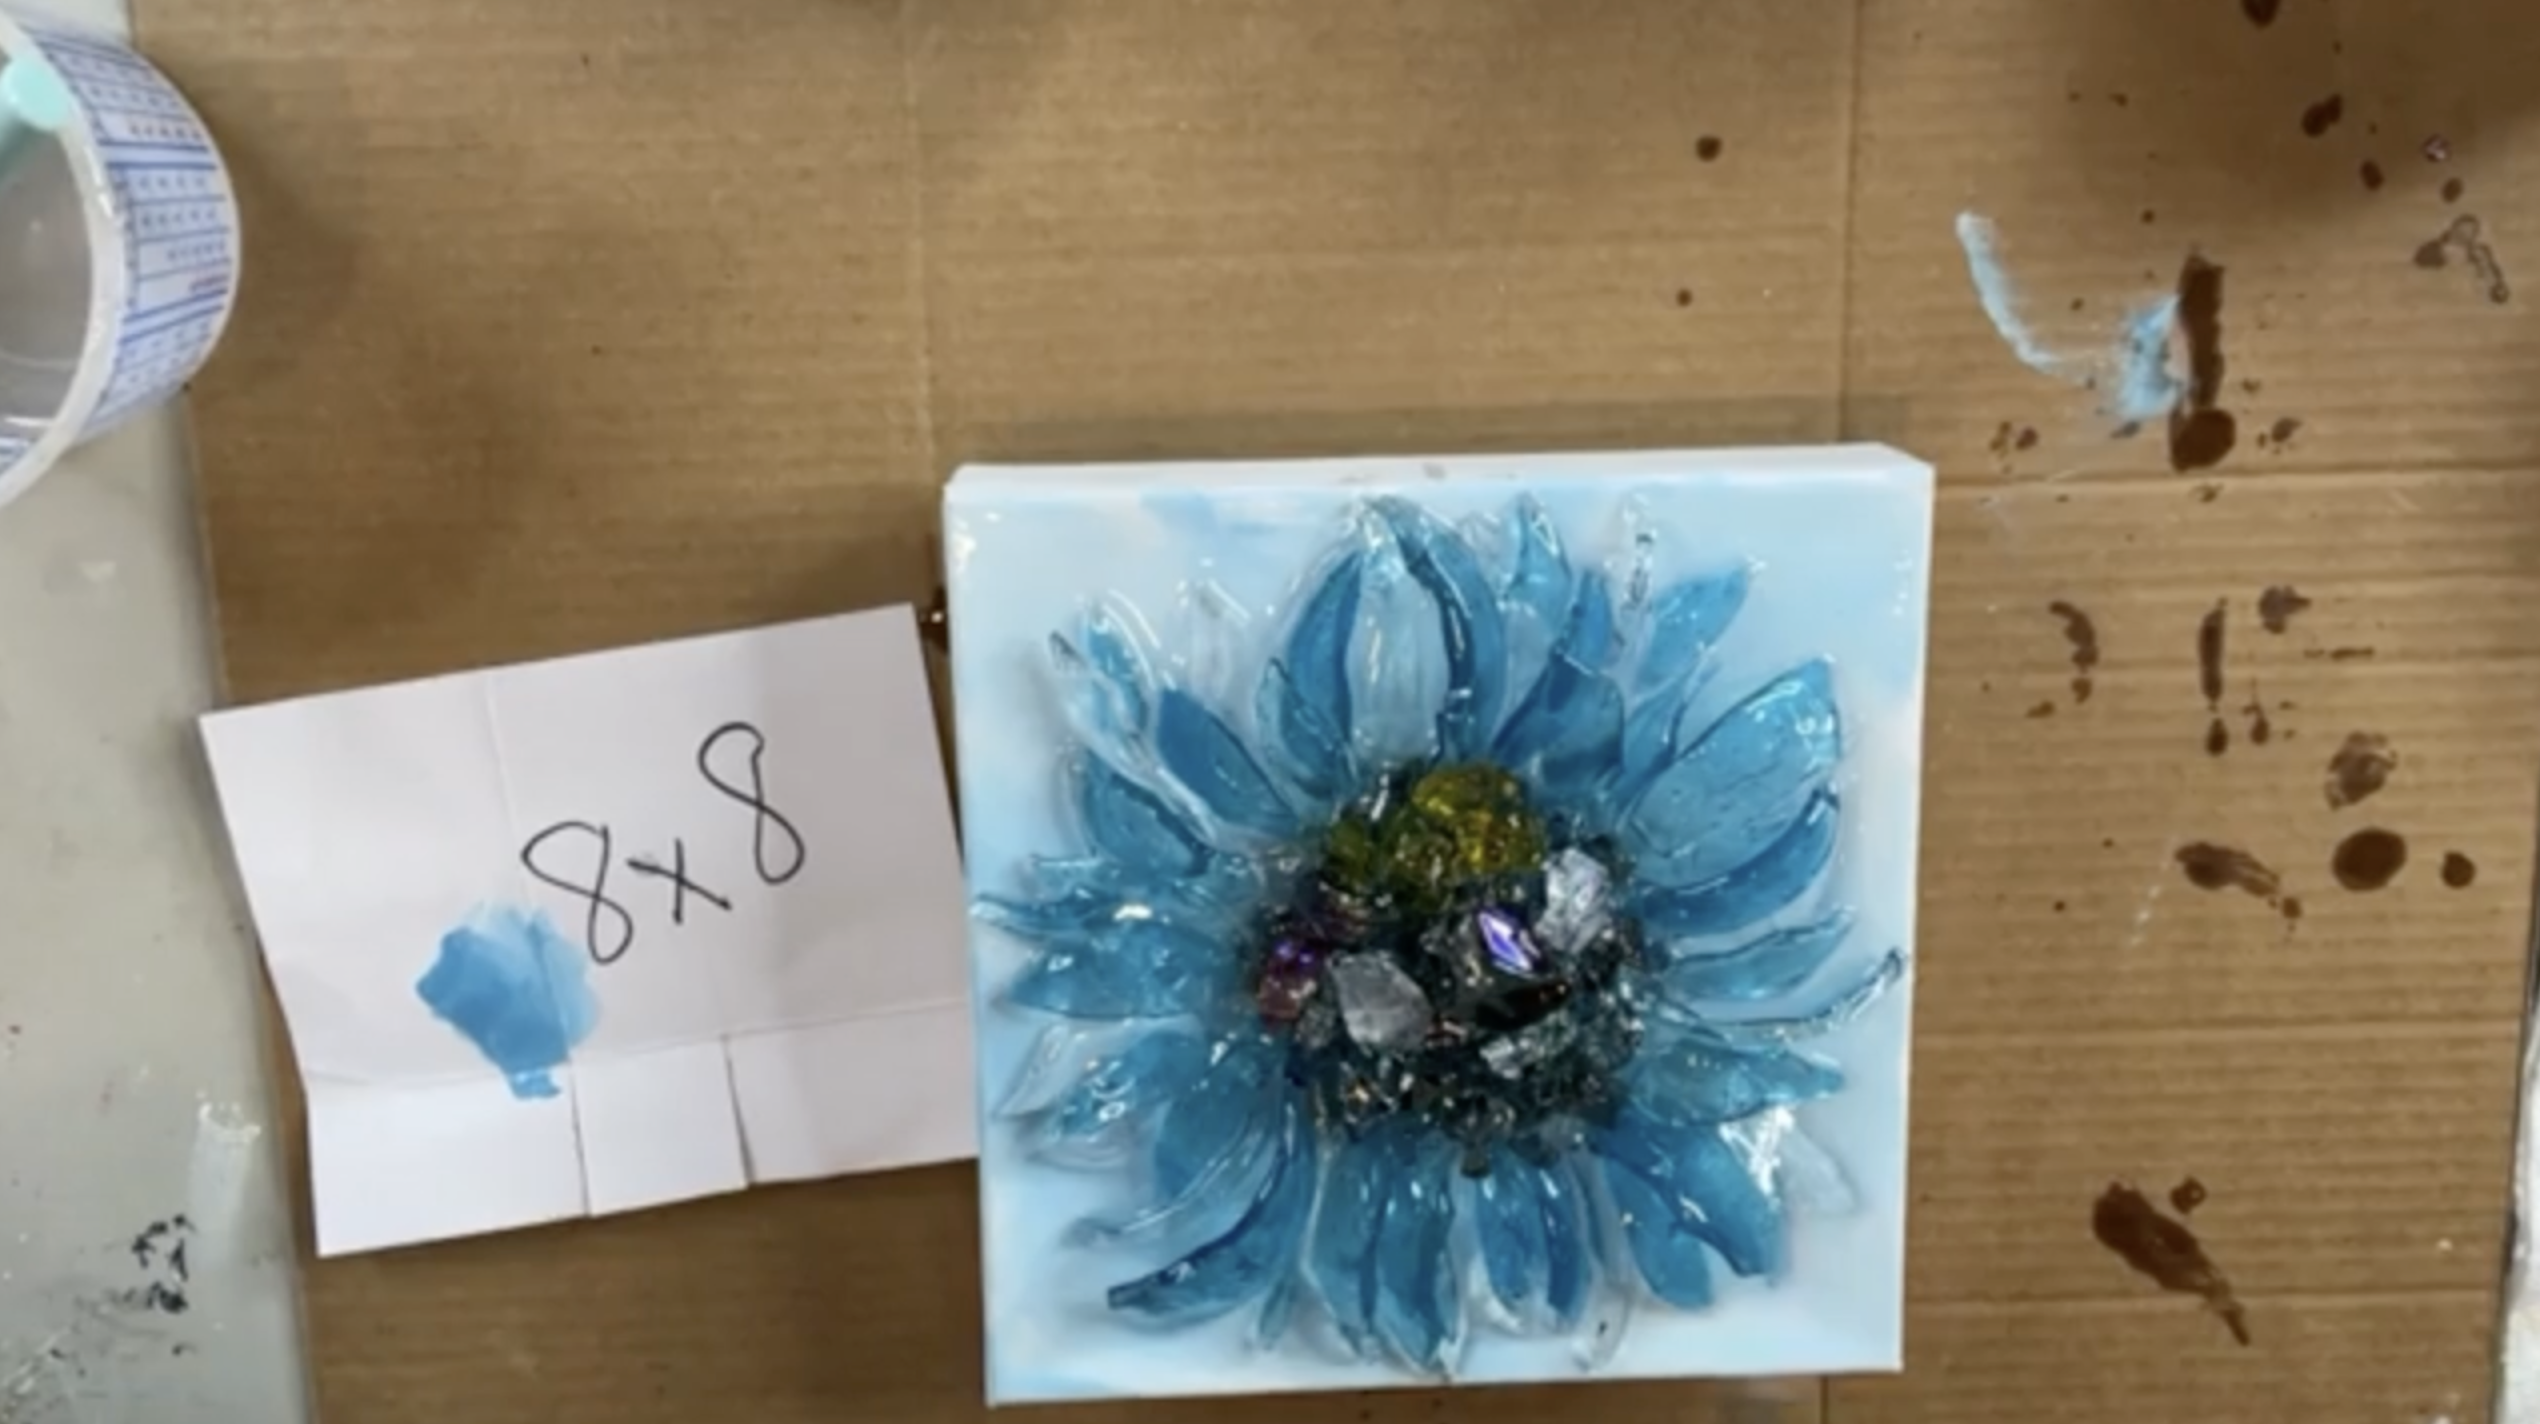
Step 11: Add the Beads
Sprinkle a small amount of Sea seed beads into the center. Adding them after the resin is poured helps keep the tiny beads from rolling underneath the larger glass and disappearing.
Add a few Amethyst Iris seed beads throughout the center. Sprinkle a few clear seed beads over the flower center as a final accent.
Step 12: Pop the Bubbles
Use a heat gun or torch to remove bubbles from the resin. If using a torch, keep the flame above the surface and allow only the heat to reach the resin.
Move continuously and do not hold the heat in one place for too long.
Step 13: Allow the Artwork to Cure
Place the canvas on a level surface and allow the resin to cure completely according to the manufacturer's instructions.
Keep the artwork protected from dust and avoid moving it while the resin is still soft.
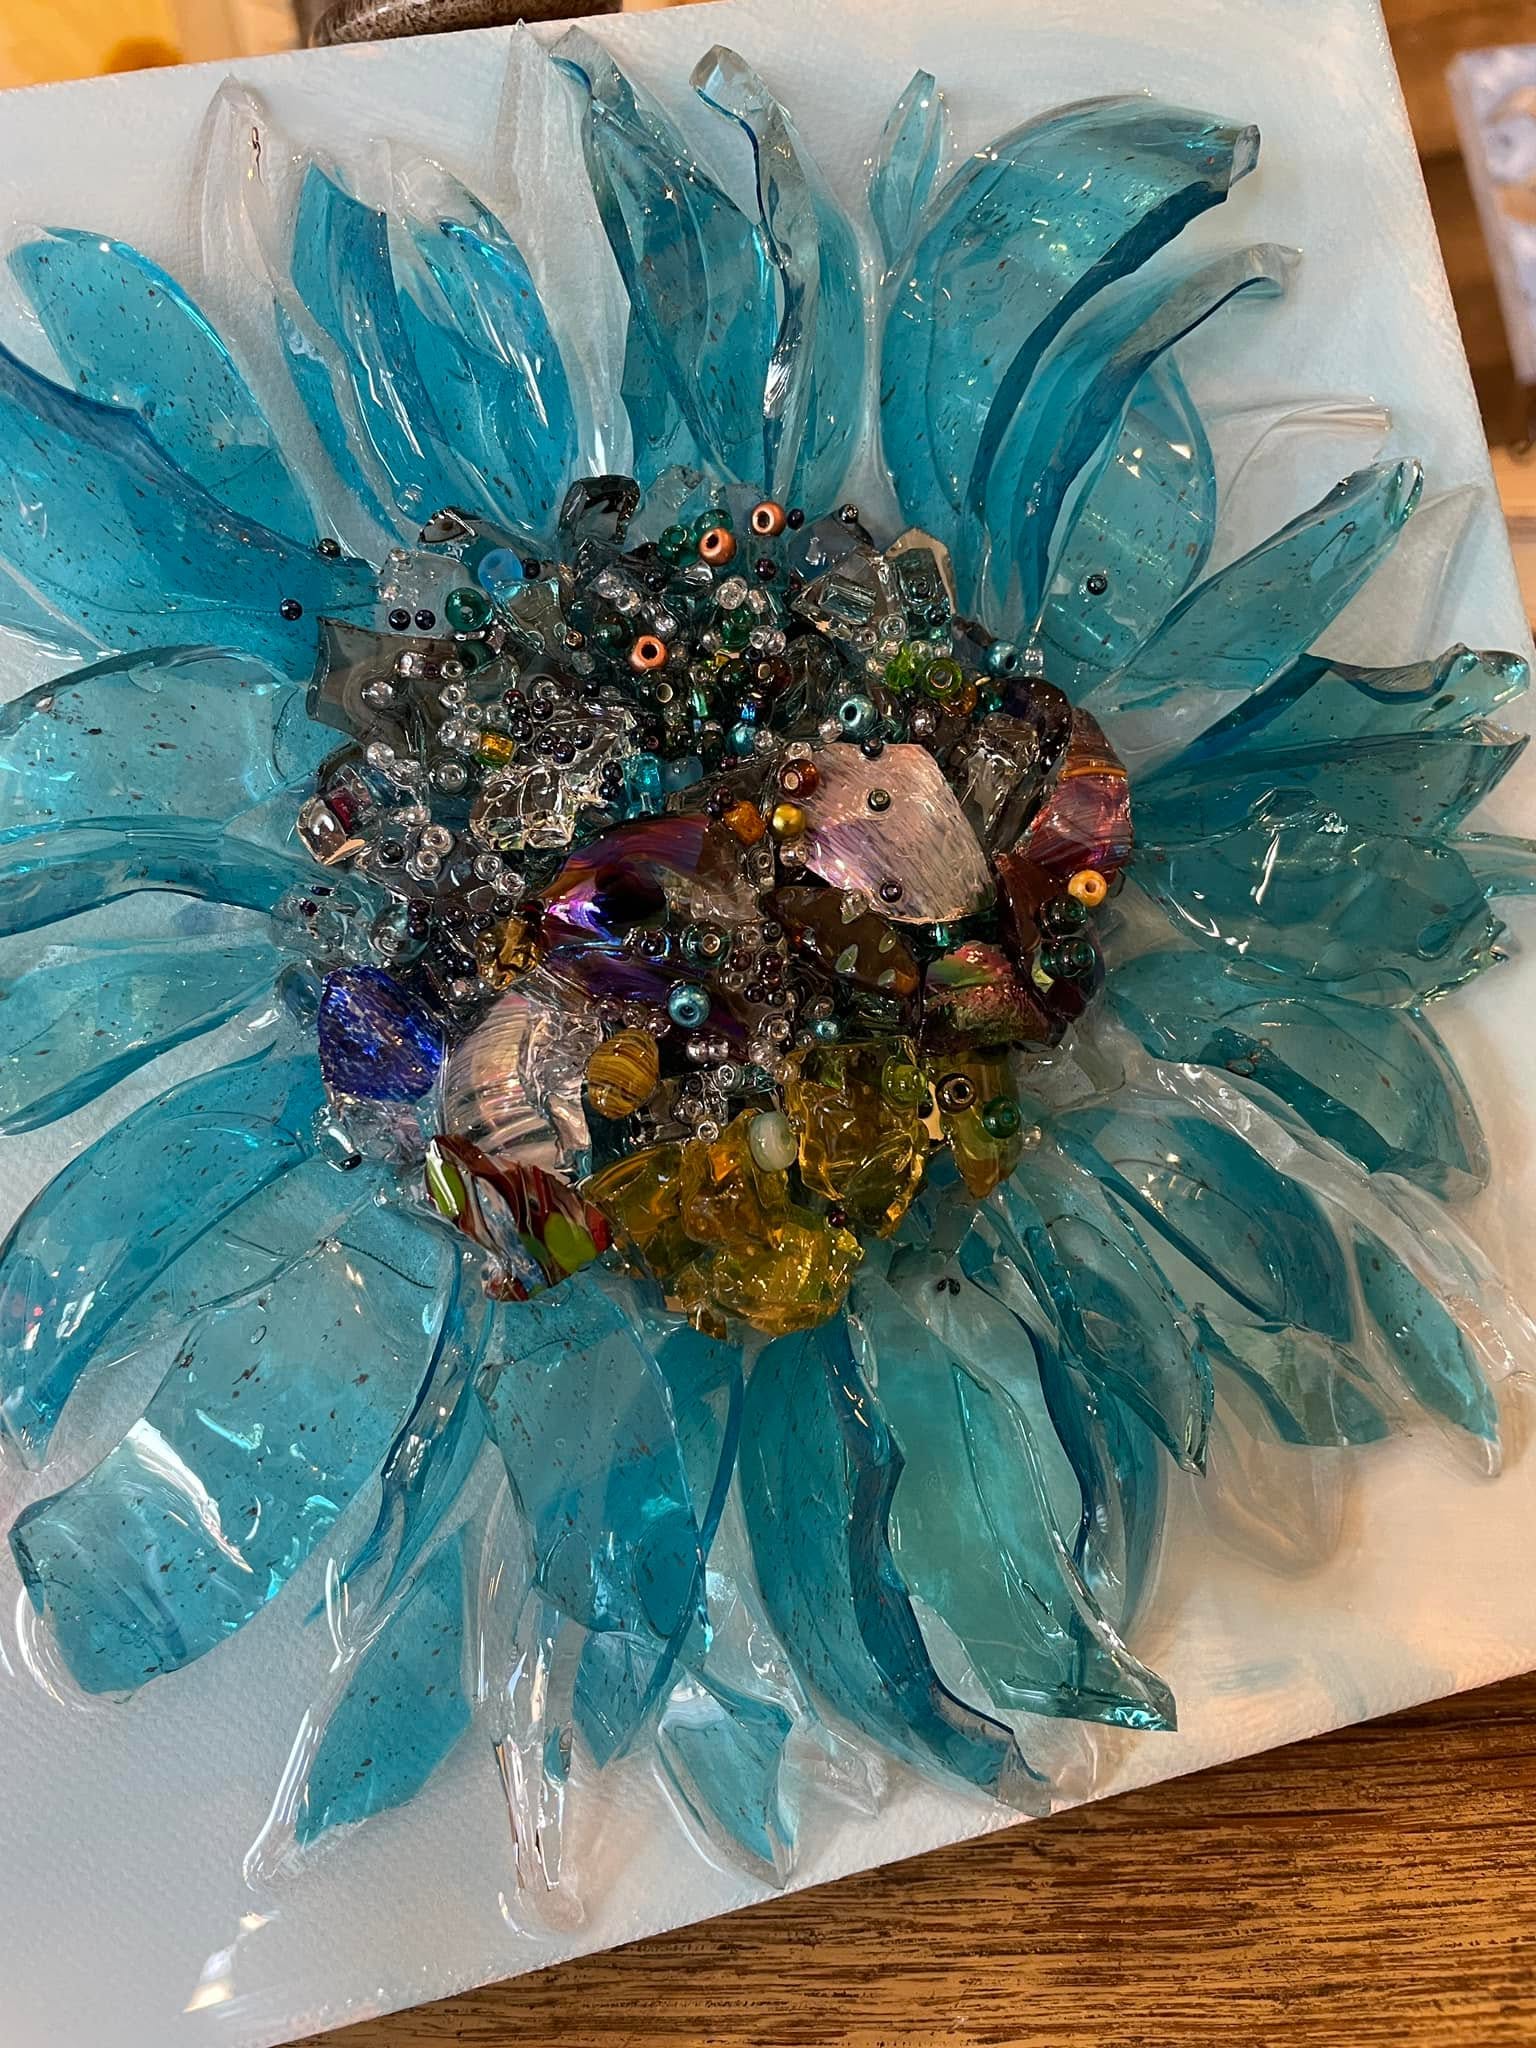
This blue glass sunflower is all about layering texture, color, and unexpected materials. A broken drinking glass becomes the petals, while crushed glass, reflective pieces, seed beads, and resin turn the center into a rich mix of color and shine.
It is also a great reminder that glass art does not always require perfectly matched supplies. Repurposed glass, leftover pieces, and small beads can all work together to create something completely original.
If you're a member of The Shattered Circle, you'll find this tutorial in your classroom under Art Shattered Weekly Facebook Lives, search for "Pretty Blue Sunflower".
If you don’t want to miss my Facebook LIVE art instruction, make sure you are on my texting list. I always text 10 minutes before I’m going to go LIVE, so you won’t ever miss it. You can text “Hey Cindy” to 901-519-2923.
Want more inspiration and artwork?
- My website artshattered.com with resources, shop, and more!
- My creative membership The Shattered Circle, where you can explore the world of glass art with online workshops, a supportive community, and more!
- My mini creative membership Just A ‘Lil Bit Monthly Glass Art Club, where you’ll get a new quick and easy online tutorial for just a lil' bit of sparkle in your life!
- My Facebook page where I share free LIVE tutorials and inspiration
- My YouTube channel which has tons of free art lessons right at your fingertips.
