
Strawberry Daiquiri Snow Cone 🍓
This strawberry daiquiri snow cone project is such a fun summer mixed media piece. Using an 8x10 canvas, acrylic paint, glass, and resin, you’ll create a colorful snow cone with a juicy orange slice and a dimensional glass topping that looks sparkly, icy, and delicious!
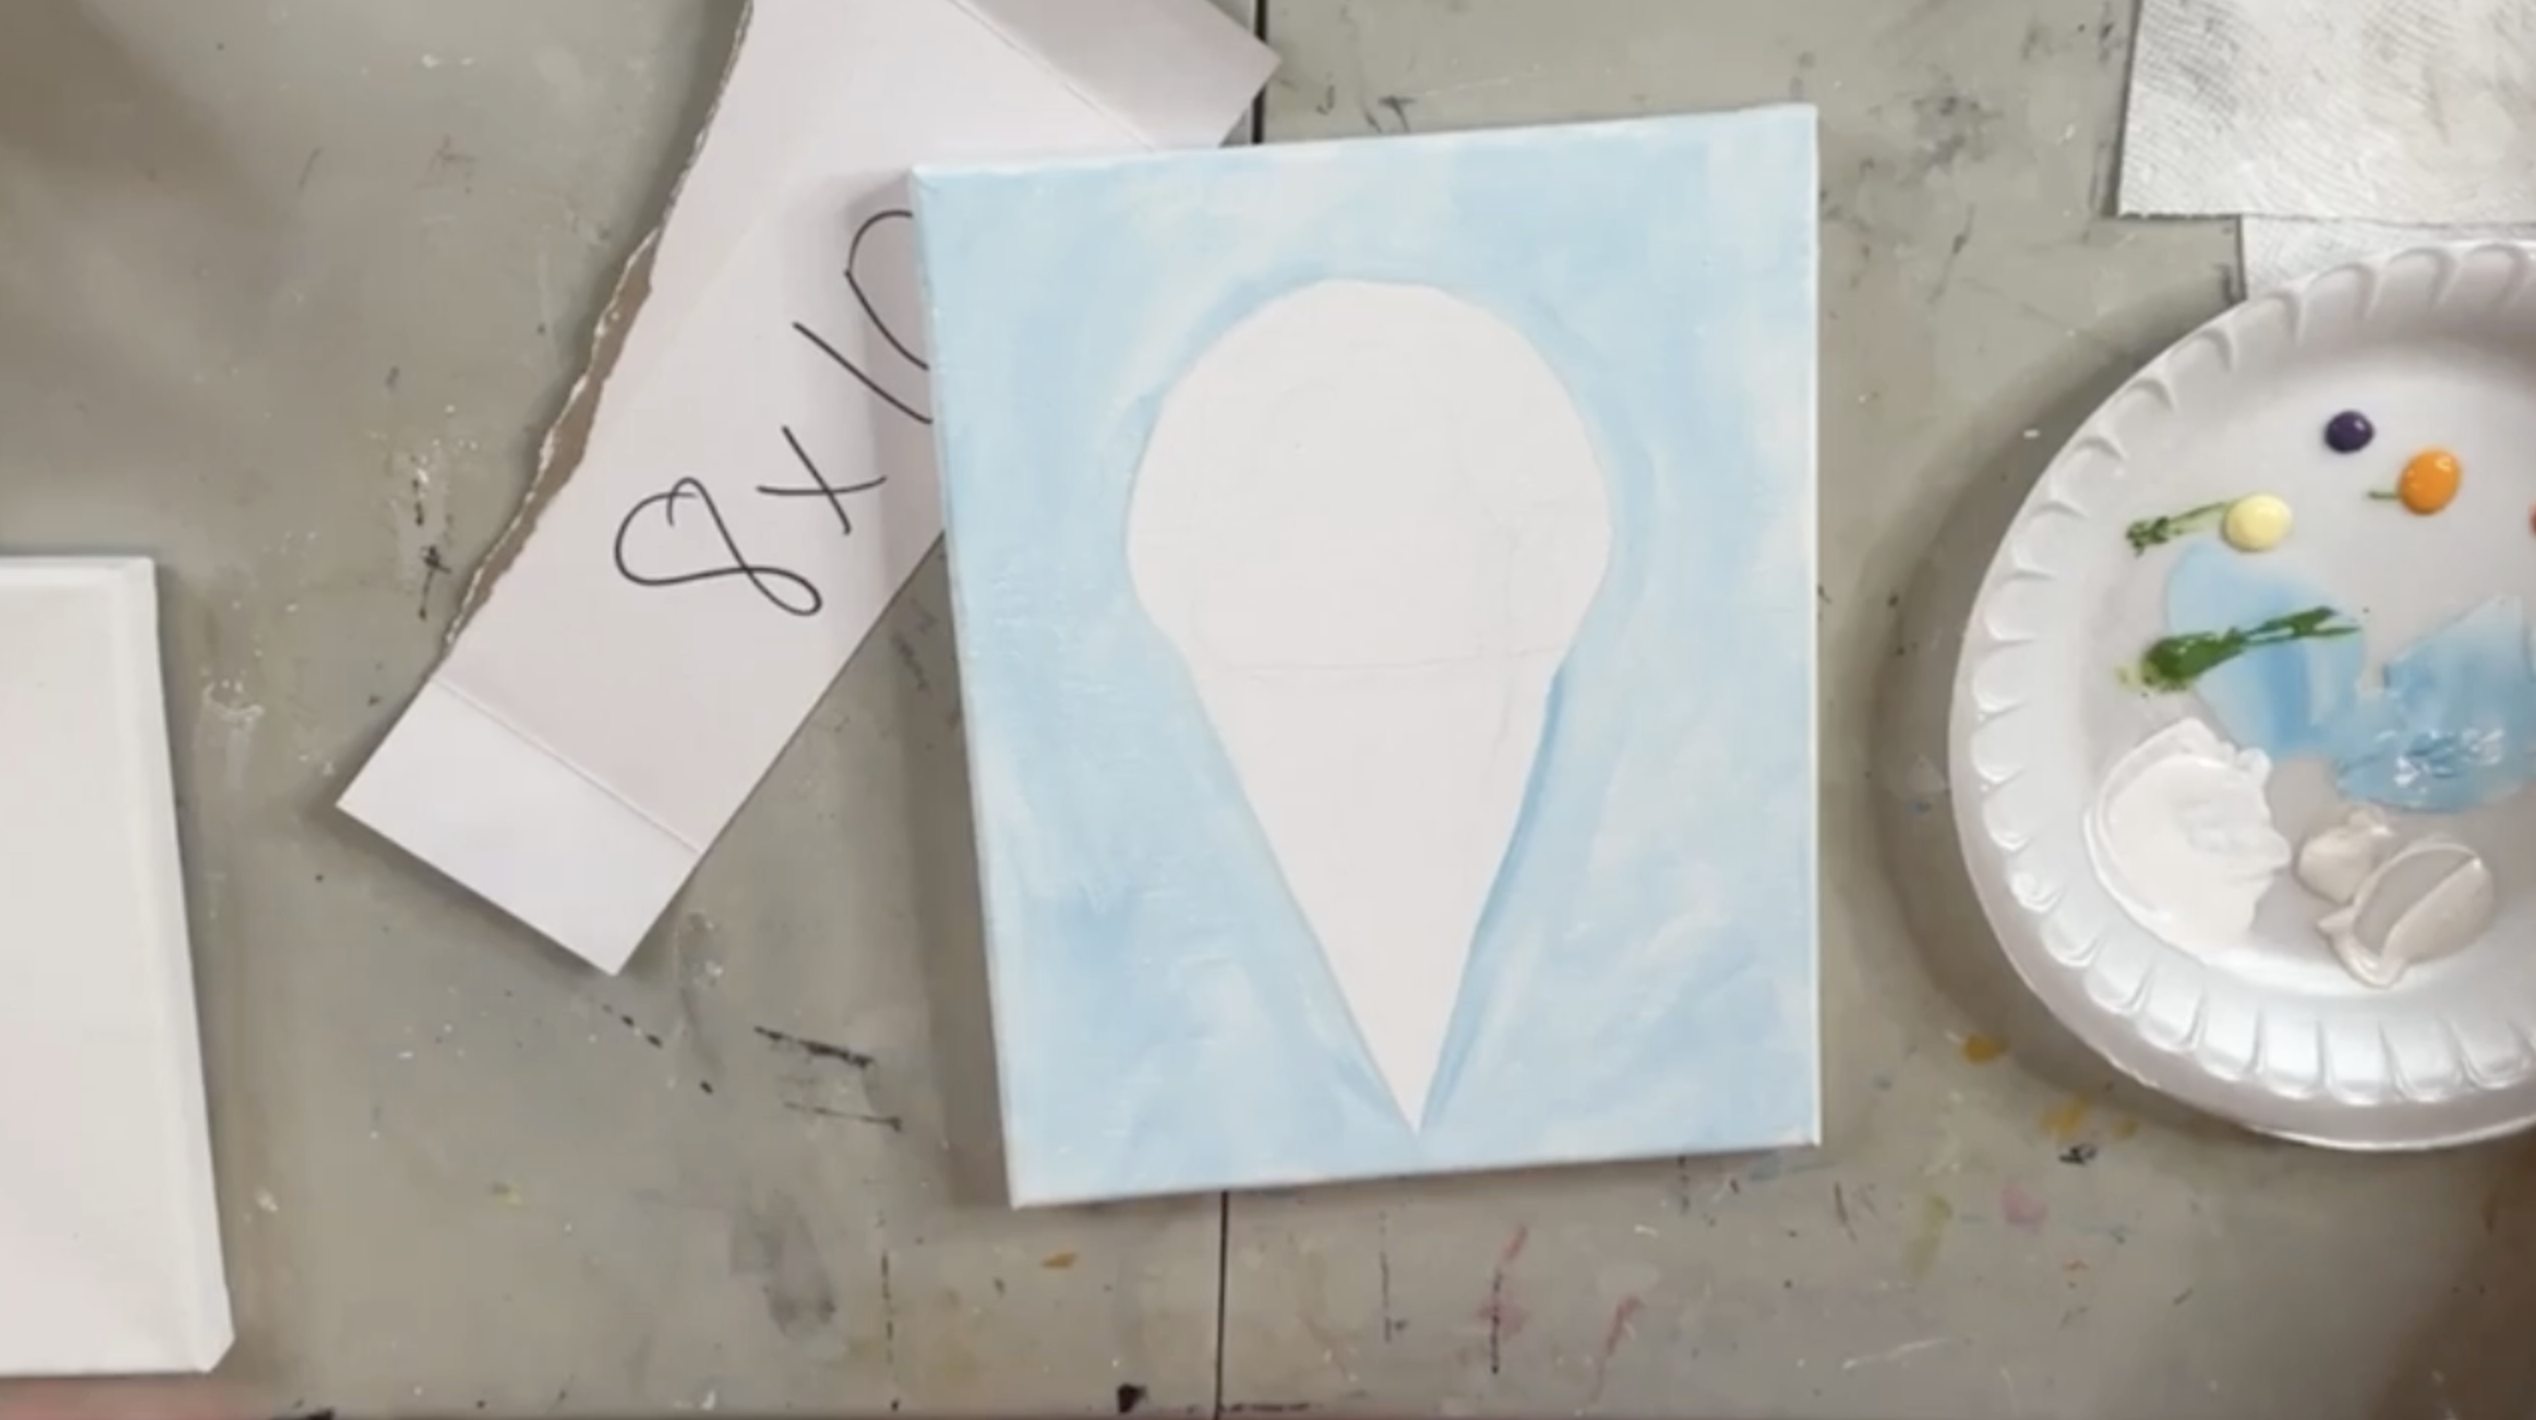
Step 1: Trace the Snow Cone Design
Start by placing your snow cone tracer on the 8x10 canvas. Slide transfer paper underneath the tracer and carefully trace the cone shape and the icy snow cone top. You do not need to trace the orange slice at this point because that will be positioned and painted later. Before moving on, lift one edge of the paper and check that your design transferred clearly.
Step 2: Paint the Background
Use white acrylic paint and Indian Turquoise to create a soft, blended background. Begin by painting one side of the canvas white around the snow cone shape. While the white paint is still wet, dip into a small amount of Indian Turquoise and blend it around the outside edge of the snow cone.
Use loose crisscross or crosshatch brushstrokes to blend the blue into the white. Repeat the same process on the other side of the canvas. The goal is a light, summery background with movement, not a perfectly solid color. Let dry.
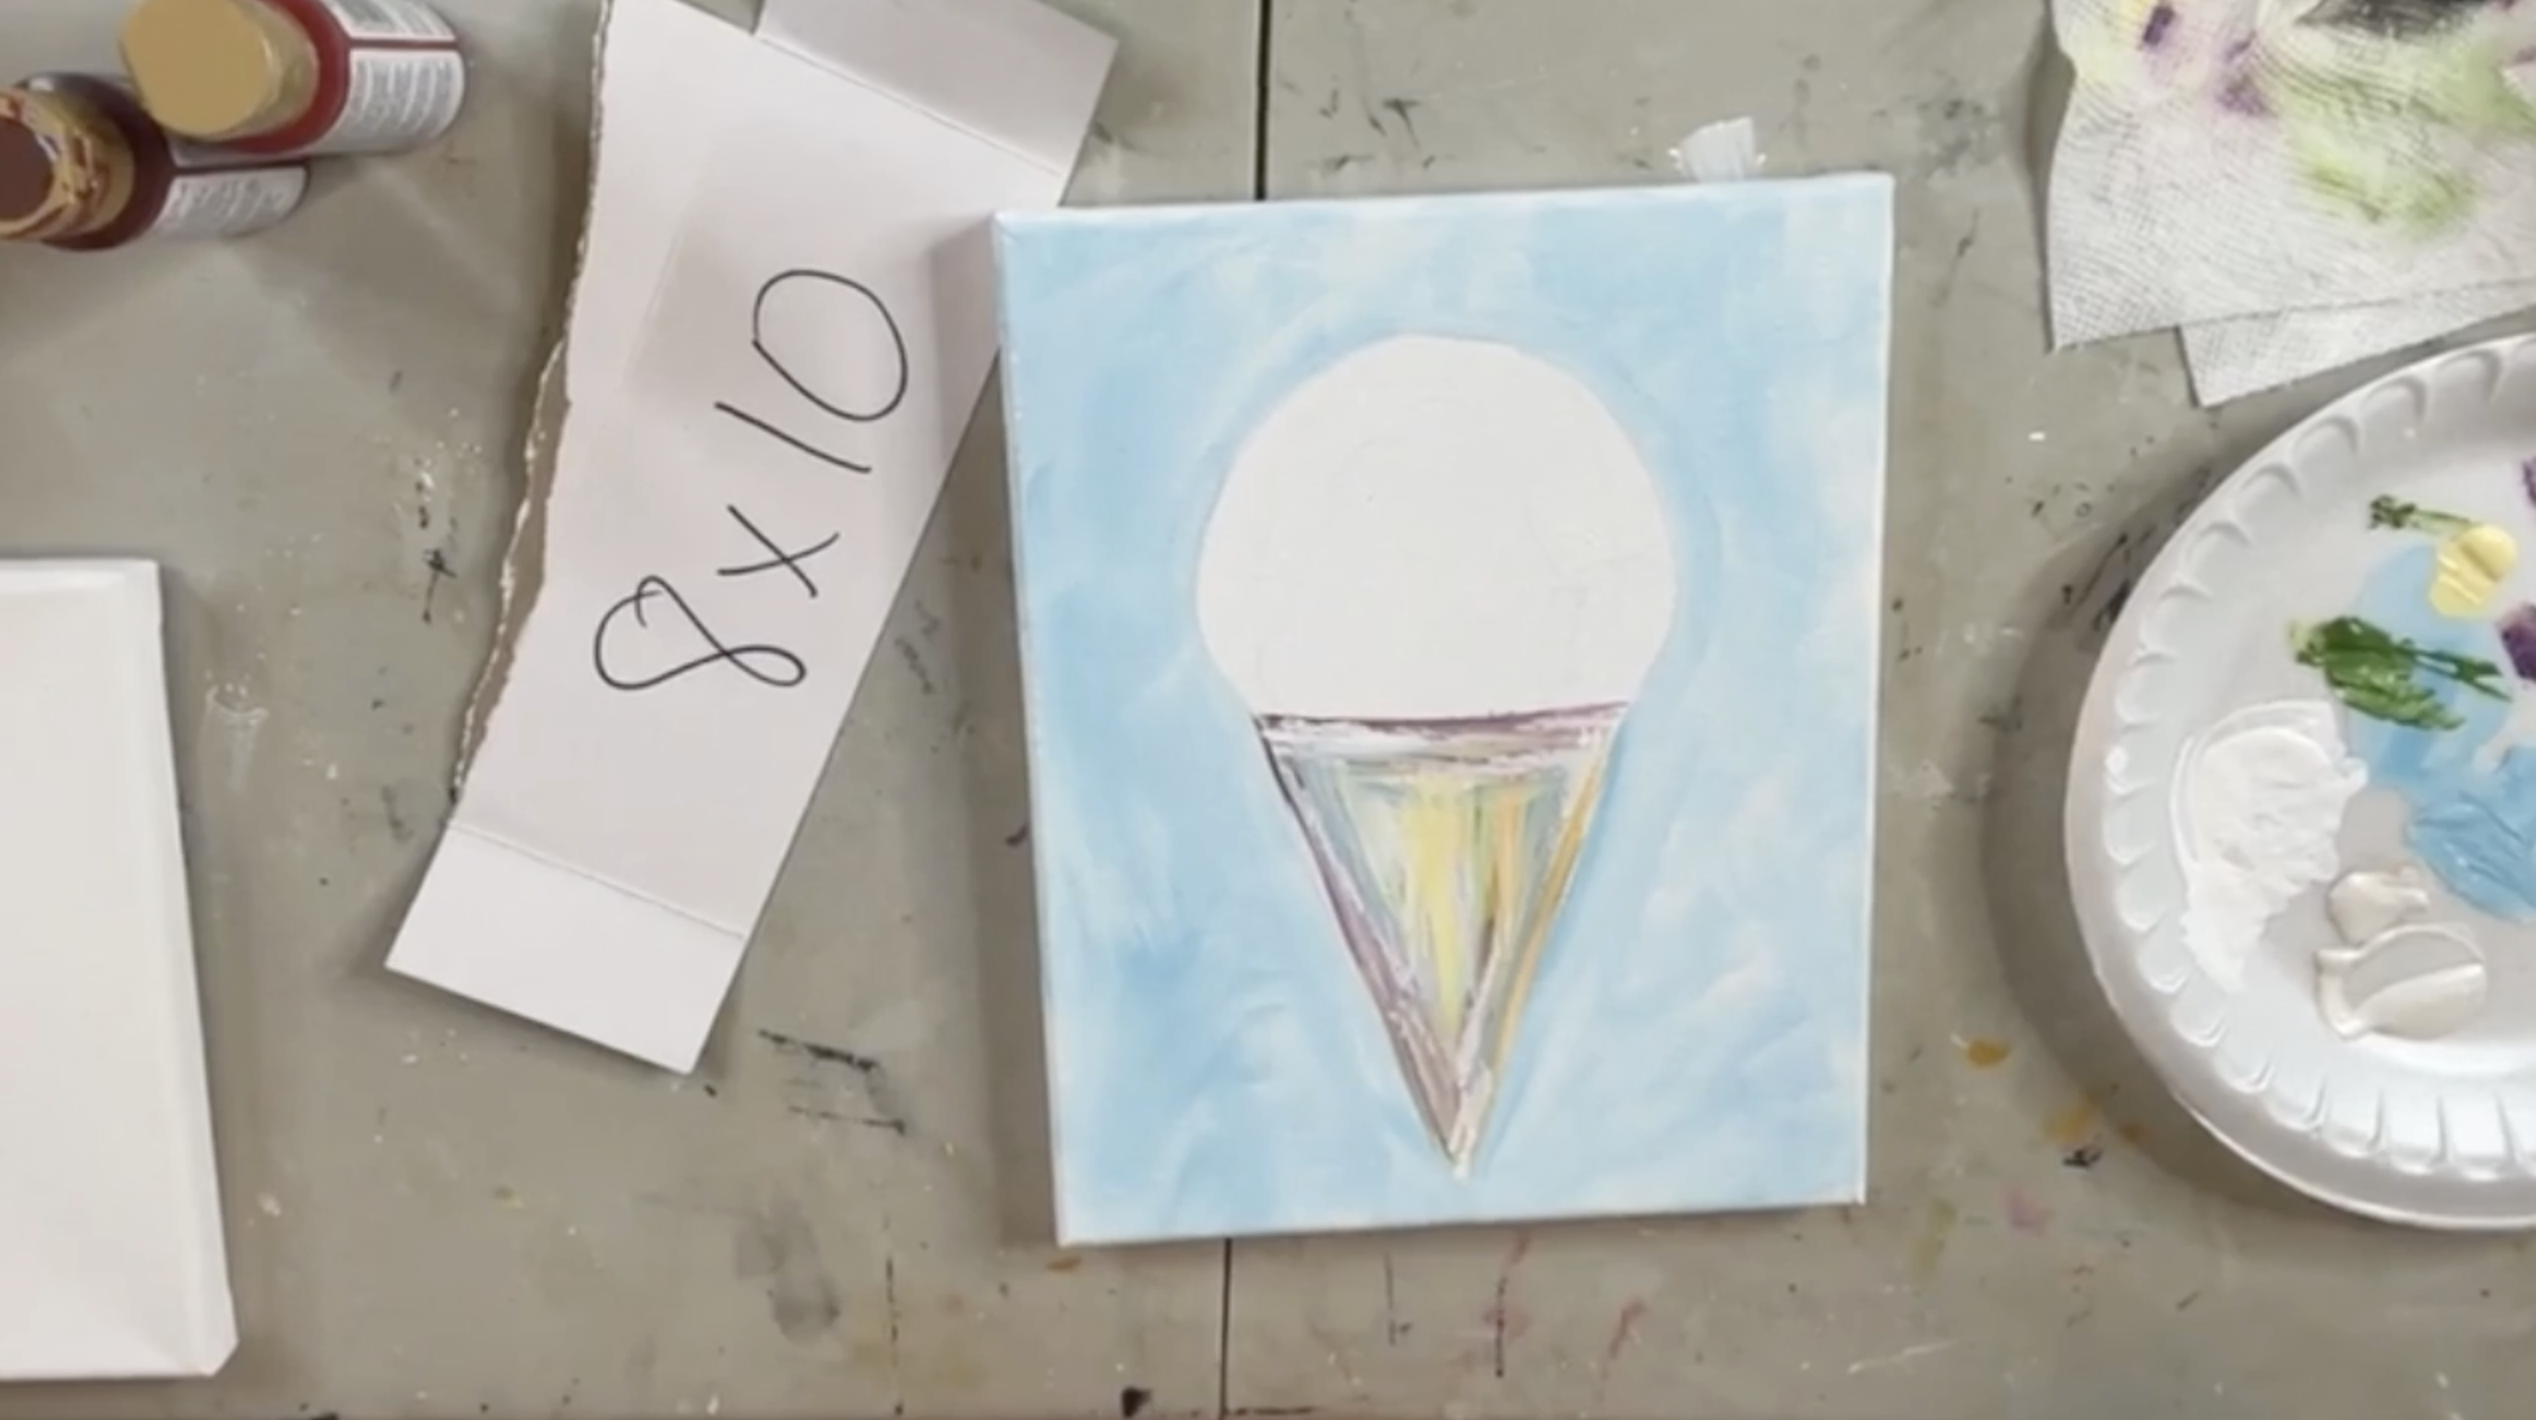
Step 3: Paint the Snow Cone Cup
Paint the cone or cup area with white first. While the white is still wet, begin adding fun summer colors into the cup. Use small touches of Grass Green, Indian Turquoise, Lemonade Yellow, Pumpkin Orange, and purple.
Blend the colors loosely into the white, allowing them to overlap without becoming too muddy. This creates a colorful, playful snow cone cup with a watercolor-inspired look. If the colors start blending too much, dry the area with a heat gun before adding more paint.
Once the first layer is dry, add a little more white over any areas that feel too bold or muddy. Use a light touch and blend gently so the colors soften without disappearing completely.
The cup does not need to match any previous version perfectly. Every snow cone canvas will turn out a little different, and that is part of the charm.
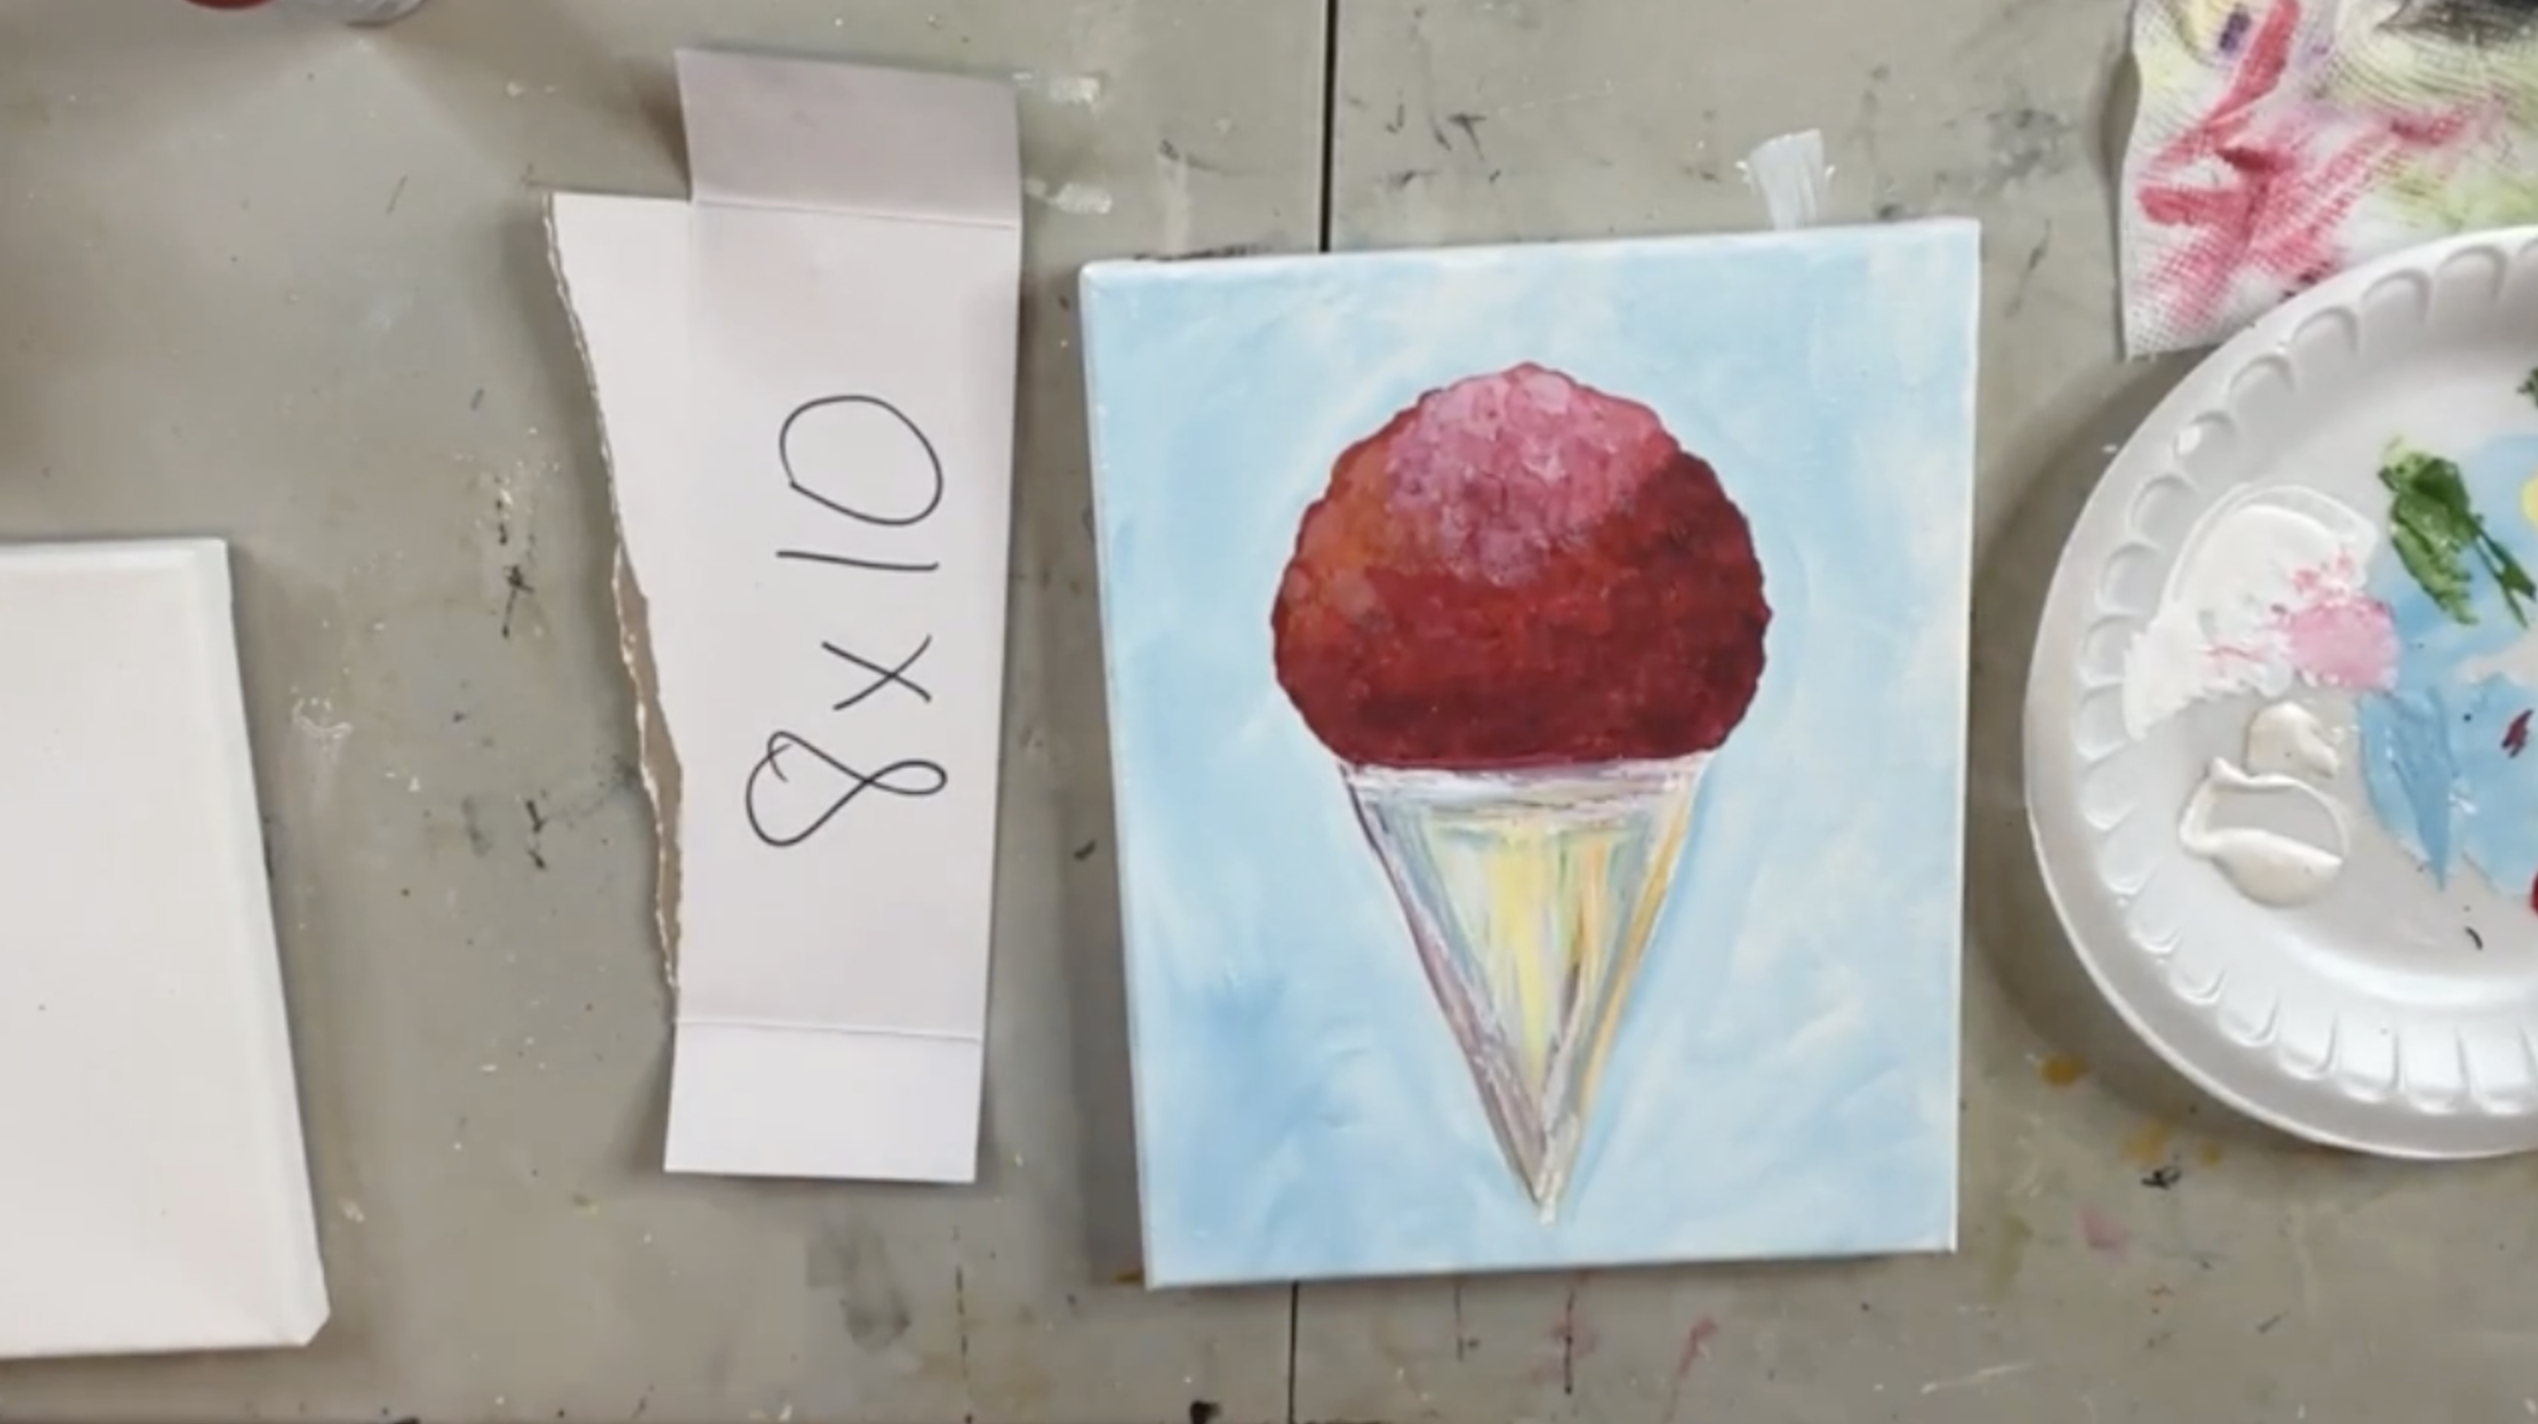
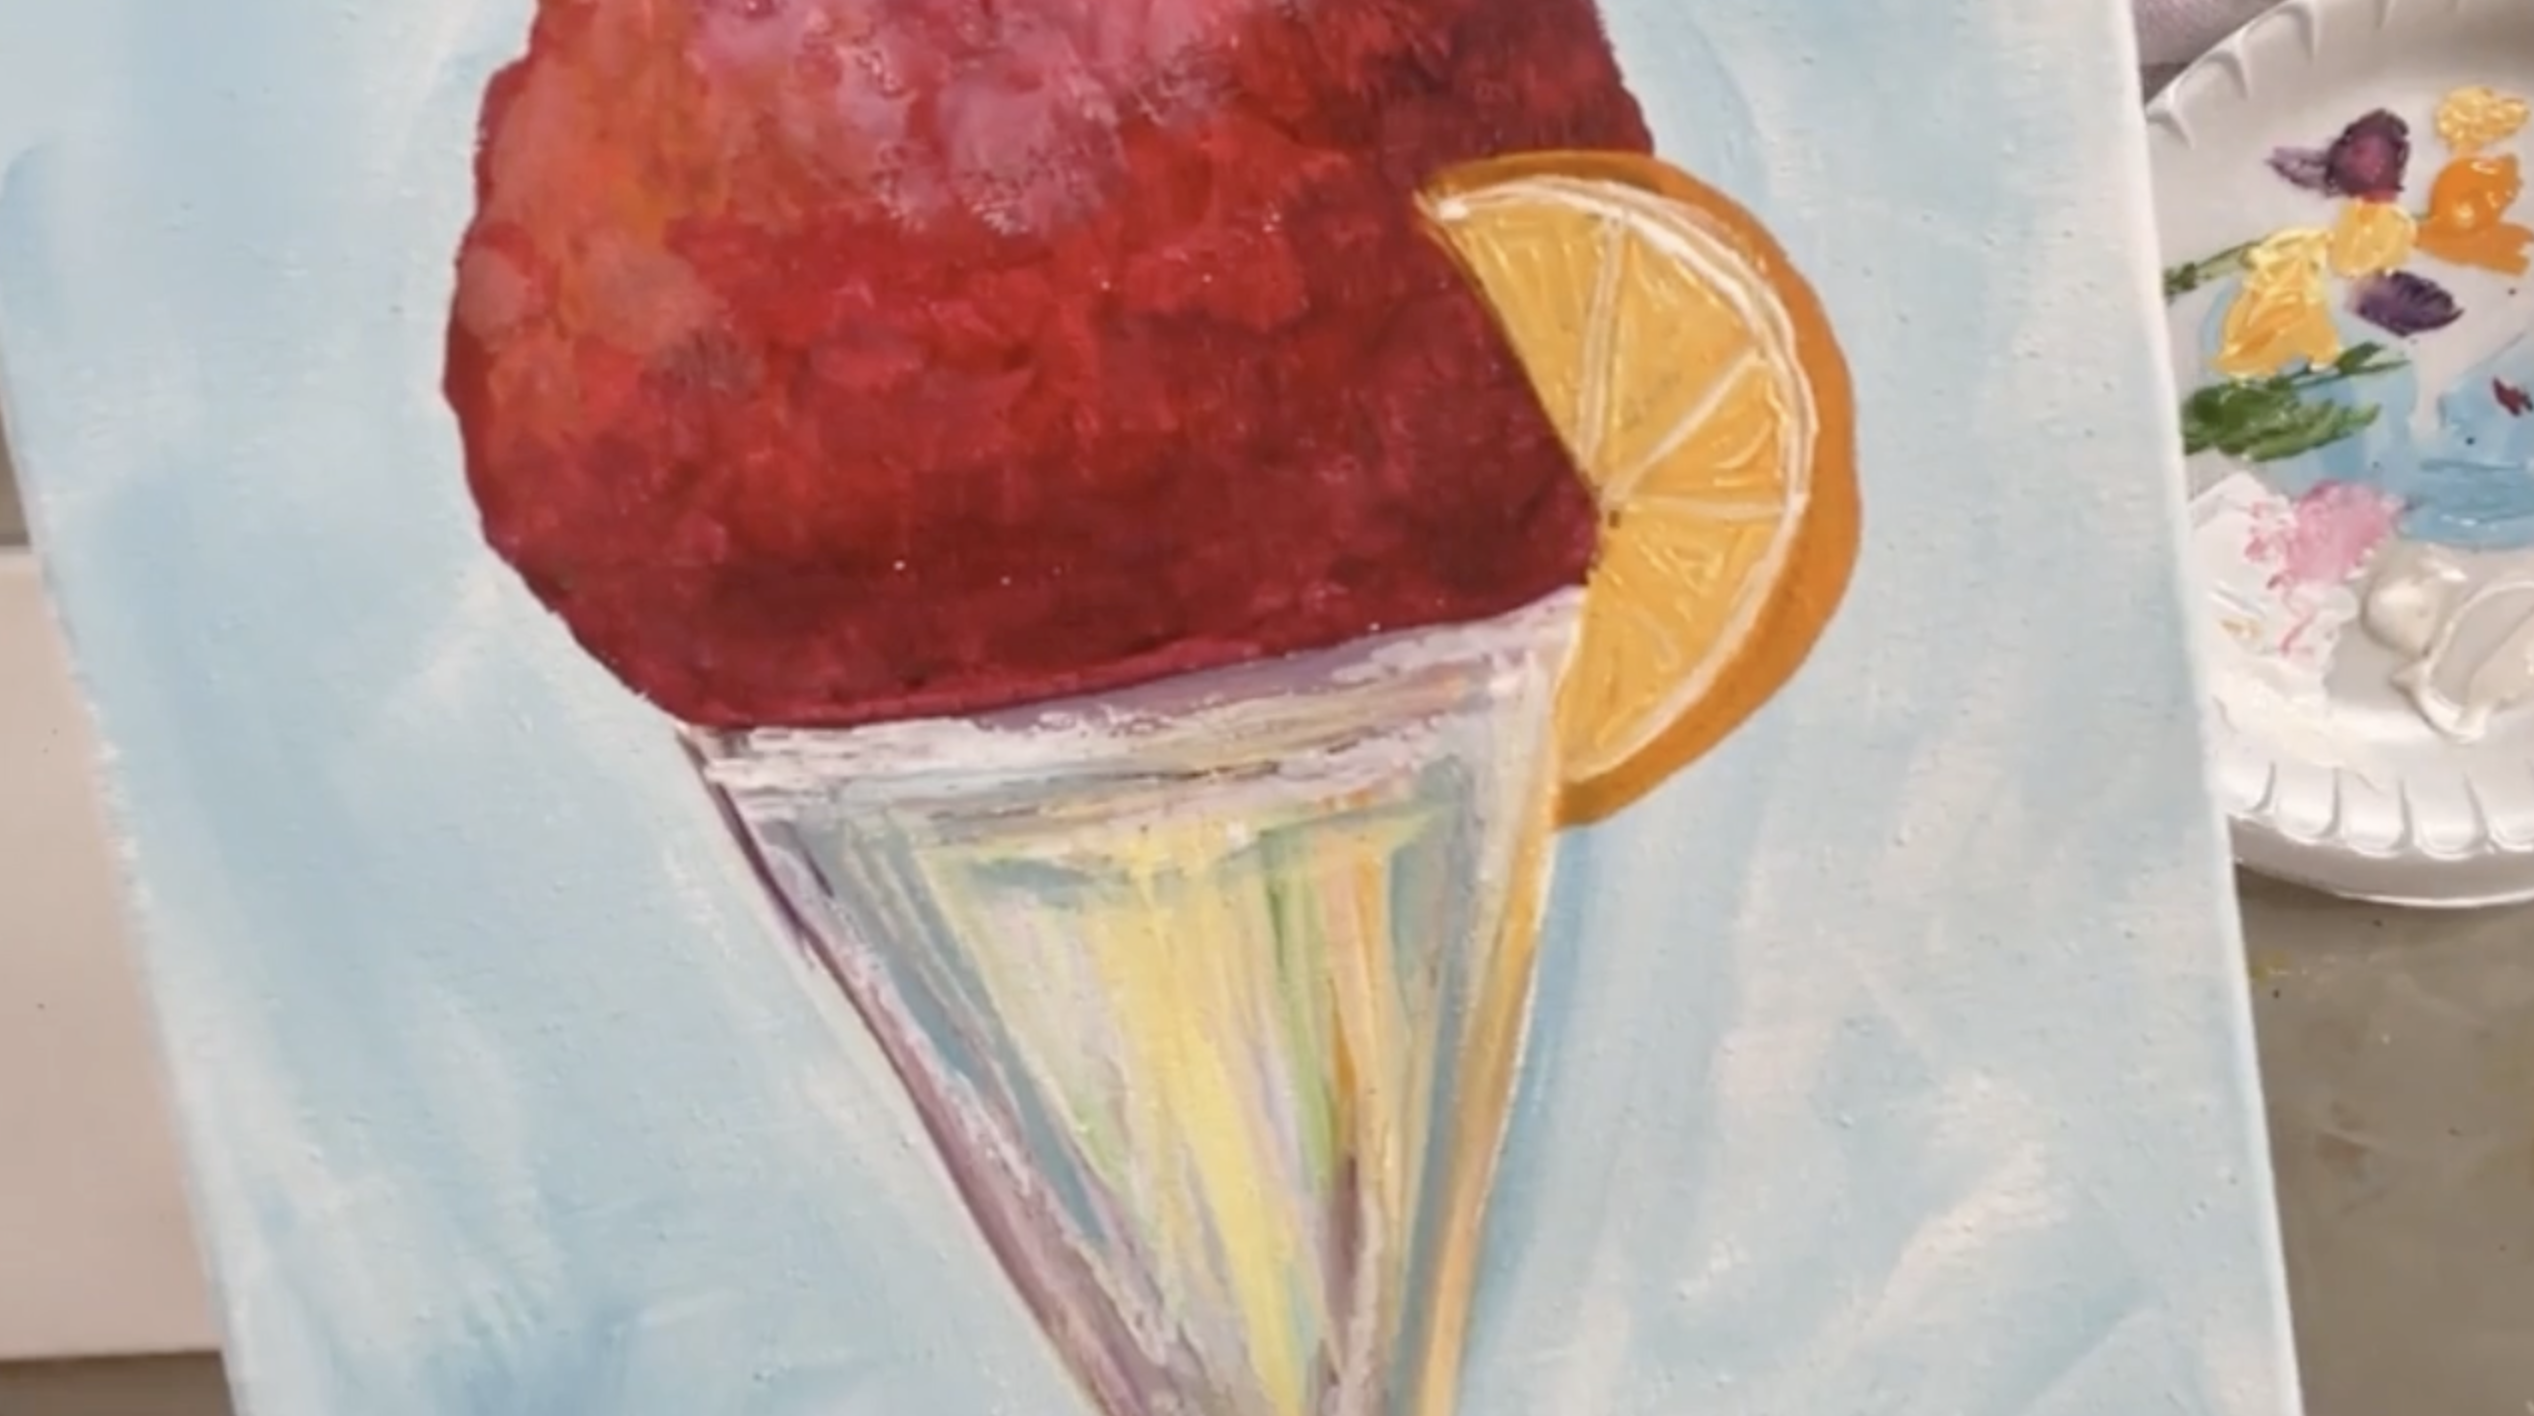
Step 4: Paint the Strawberry Snow Cone
For the icy snow cone top, use Cherry Red and Napa Red. Start with Napa Red near the bottom of the snow cone where the syrup would be darkest and richest. Blend Cherry Red above it, then add small touches of orange and purple for extra depth.
At the top of the snow cone, mix Cherry Red with a little white to create a lighter pinkish-red. This gives the effect of syrup draining down through the ice, with the lighter snowy area at the top and the deeper color at the bottom.
Step 5: Add Light Highlights
Dry the snow cone area briefly with a heat gun, then add small touches of white near the top. Blend the white gently into the red so it looks icy and slightly melted.
Do not worry too much about perfection here because glass will be added over the painted snow cone later.
Step 6: Sketch and Paint the Orange Slice
Place the orange slice near the side of the snow cone and lightly sketch where it should sit. Begin with Pumpkin Orange to block in the main shape. Then mix in Lemonade Yellow to brighten the inside of the slice.
Use white to paint the thin line under the orange peel and to create the triangular citrus segments inside the slice. Add a couple of small seeds with a mix of white and orange. Finish by adding a darker orange around a few edges to give the slice more definition.
Step 7: Add Pen Details
Once the paint is dry, use a graphic needle drawing pen to add loose line work. Use short strokes rather than perfect outlines.
Add sketchy details around the cone, the orange slice, the citrus segments, and the outside edge of the snow cone. These small pen details help the painted shapes pop and give the project a whimsical mixed media look.
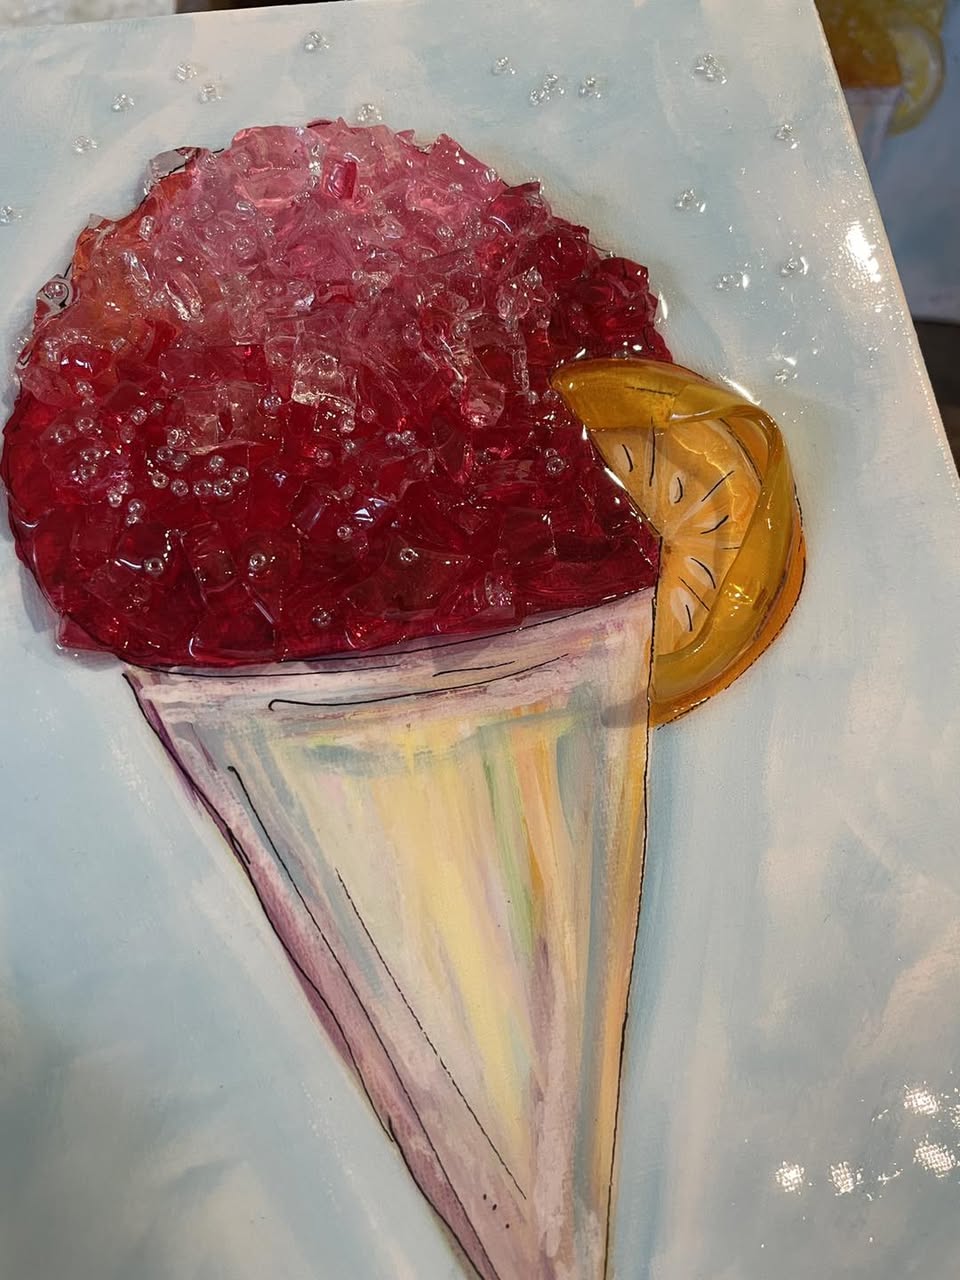
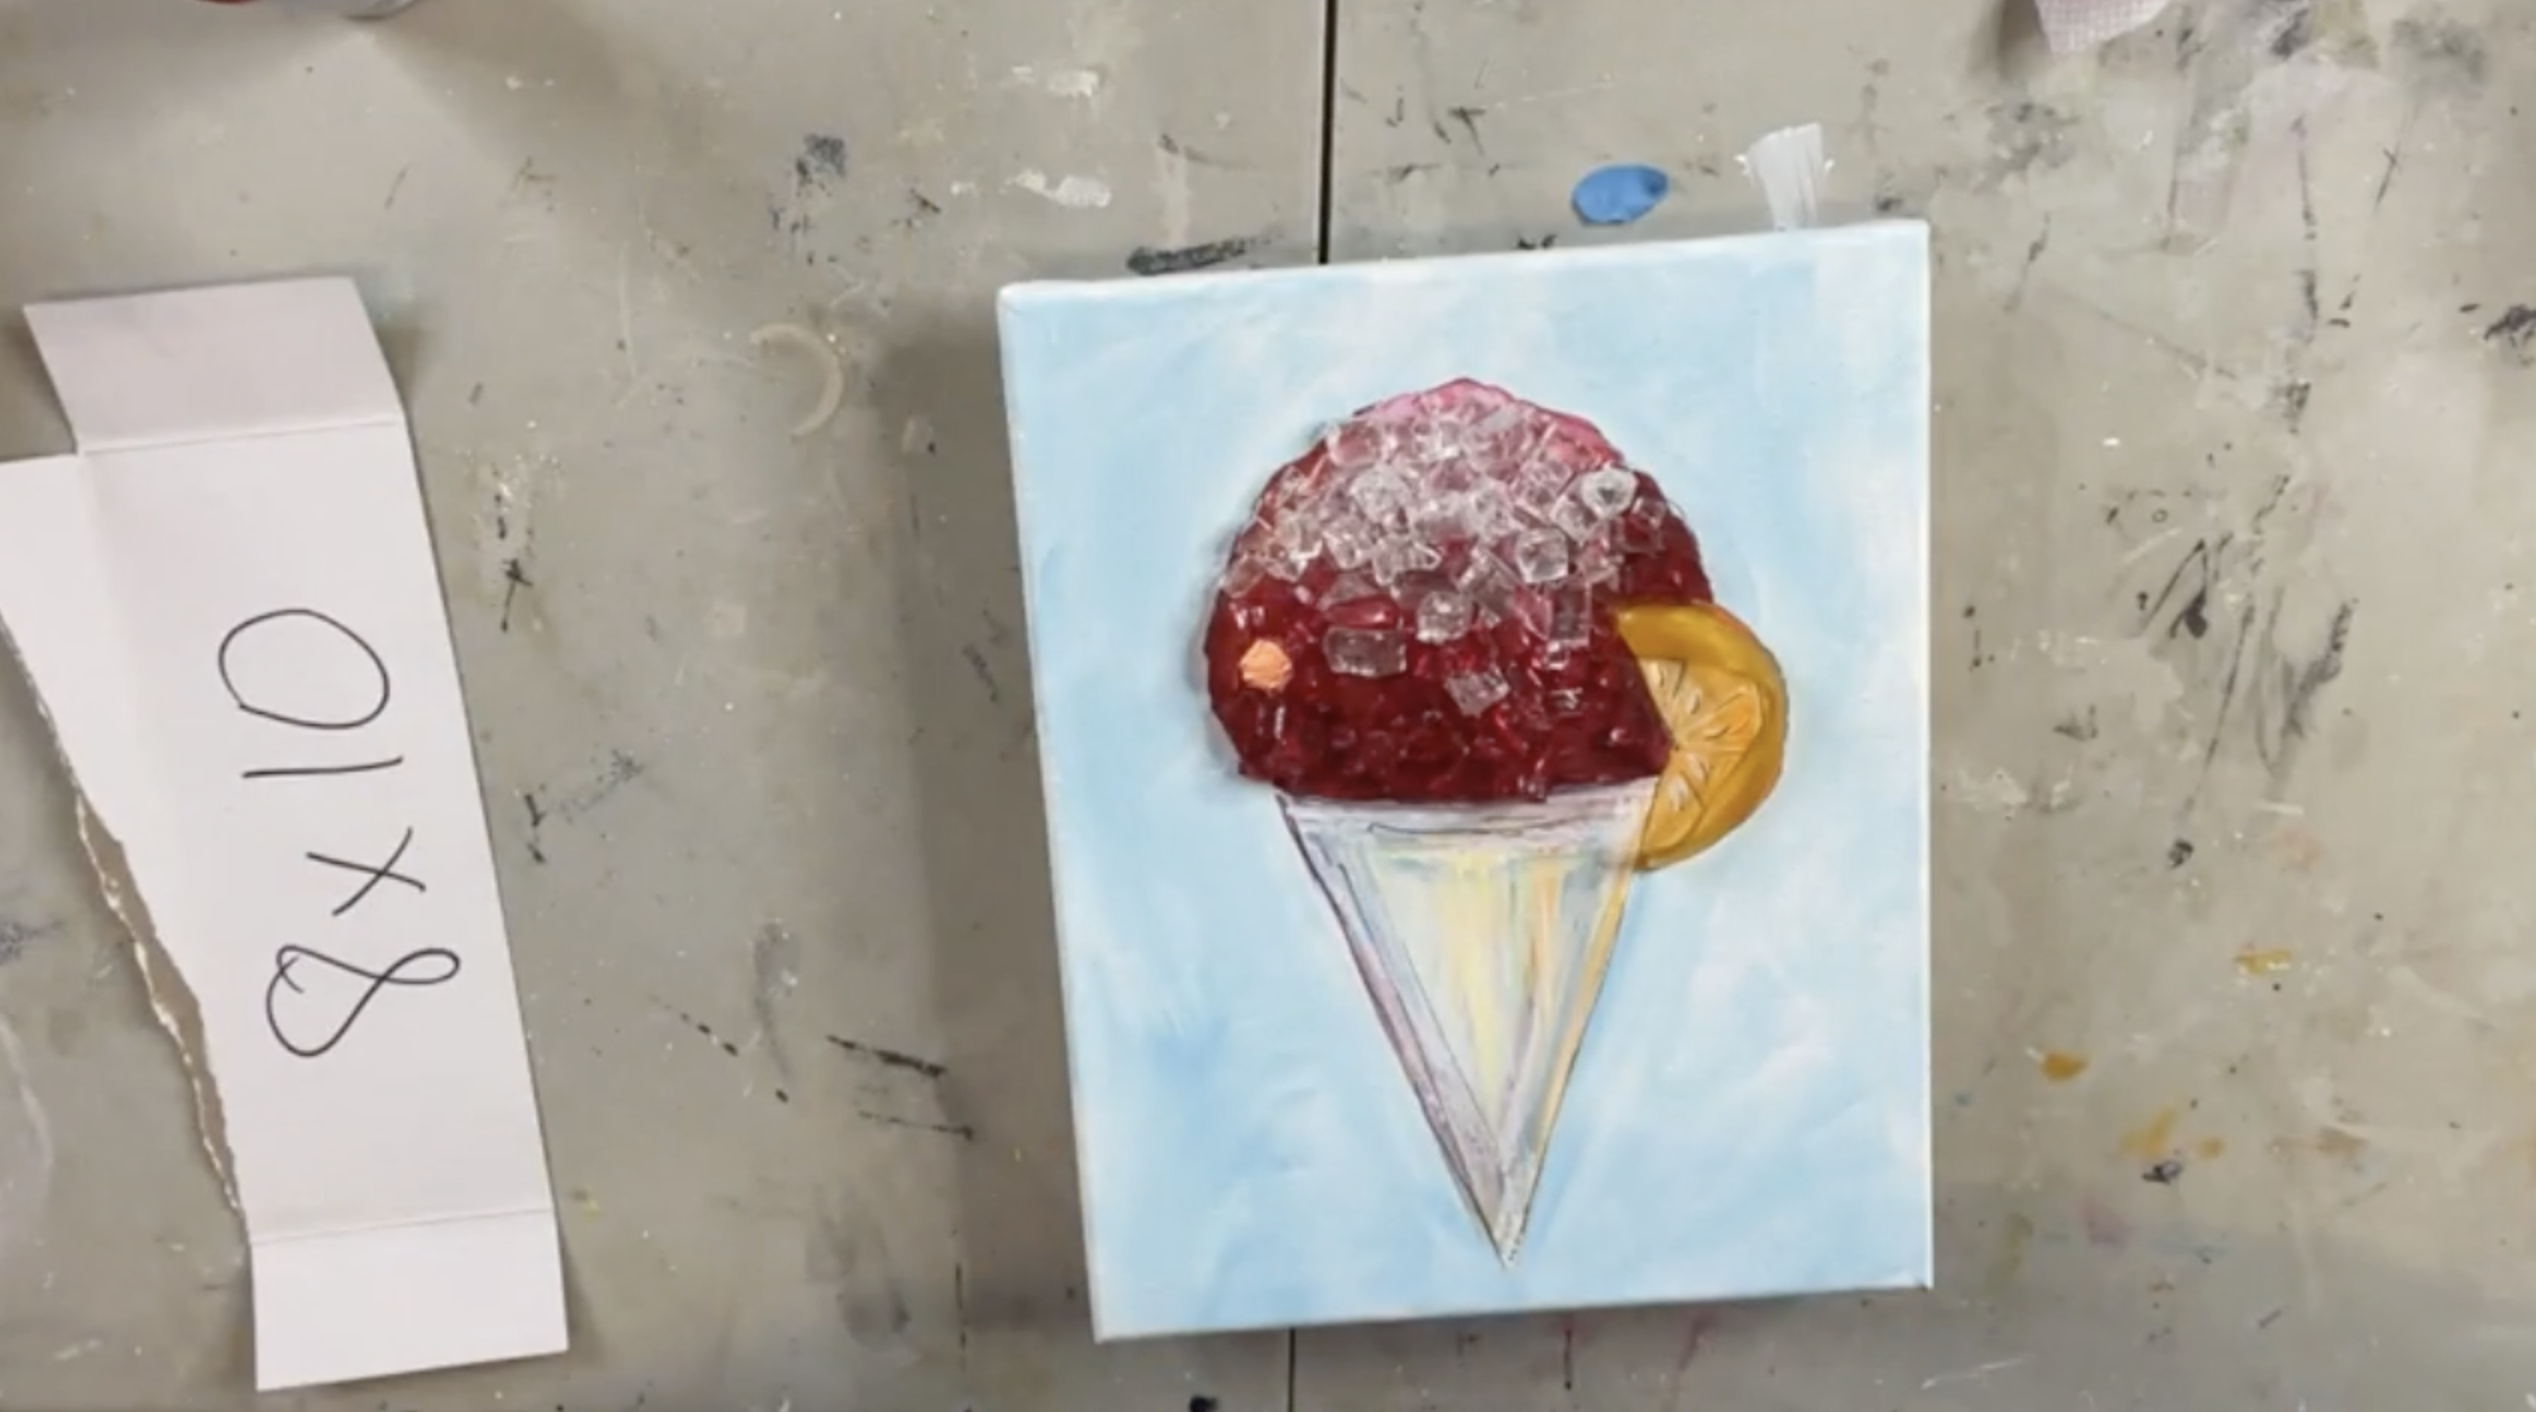
Step 8: Add Glass to the Snow Cone
Now it’s time to make the snow cone sparkle. Add red-tinted glass to the darker red areas at the bottom of the snow cone. This red glass was made by lightly spray painting clear Starfire glass with red spray paint and letting it dry completely.
Next, add clear Starfire glass toward the top of the snow cone. Blend a little clear glass down into the red and a little red glass up into the clear so the transition feels natural. Layer the glass slightly so the snow cone looks chunky, icy, and dimensional.
Step 9: Mix the Resin
Place your canvas on risers or small blocks before adding resin. This keeps the canvas lifted off the table and allows any excess resin to move freely without sticking the canvas to your work surface.
Put on your rubber gloves. Mix 1 ounce total of ArtResin using 1/2 ounce resin and 1/2 ounce hardener. Pour both parts into one cup and stir slowly for three full minutes, scraping the sides and bottom as you mix.
ArtResin is mixed by volume, so make sure both parts are measured evenly.
Step 10: Apply Resin
Before coating the full canvas, add a small amount of resin underneath the orange slice area and press the glass orange piece into place if you are using one. Then drizzle resin over the top so it is fully secured.
Drizzle resin over all of the glass on the snow cone. Make sure every piece is covered so the resin can run over the glass and secure it to the canvas.
After the glass is coated, drizzle the remaining resin over the flat painted areas of the canvas. Use a gloved hand to spread resin evenly across the entire canvas surface. Work carefully around the glass pieces and the orange slice so everything stays in place.
Run your finger around the canvas edges to make sure the resin reaches the edges. You do not have to resin the sides unless you prefer that look.
Check the resin surface for dust, fuzz, or tiny debris. Use a toothpick to remove anything you see before the resin begins curing. Then use a heat gun on low to pop bubbles. Keep the heat moving across the surface and do not hold it in one place too long.
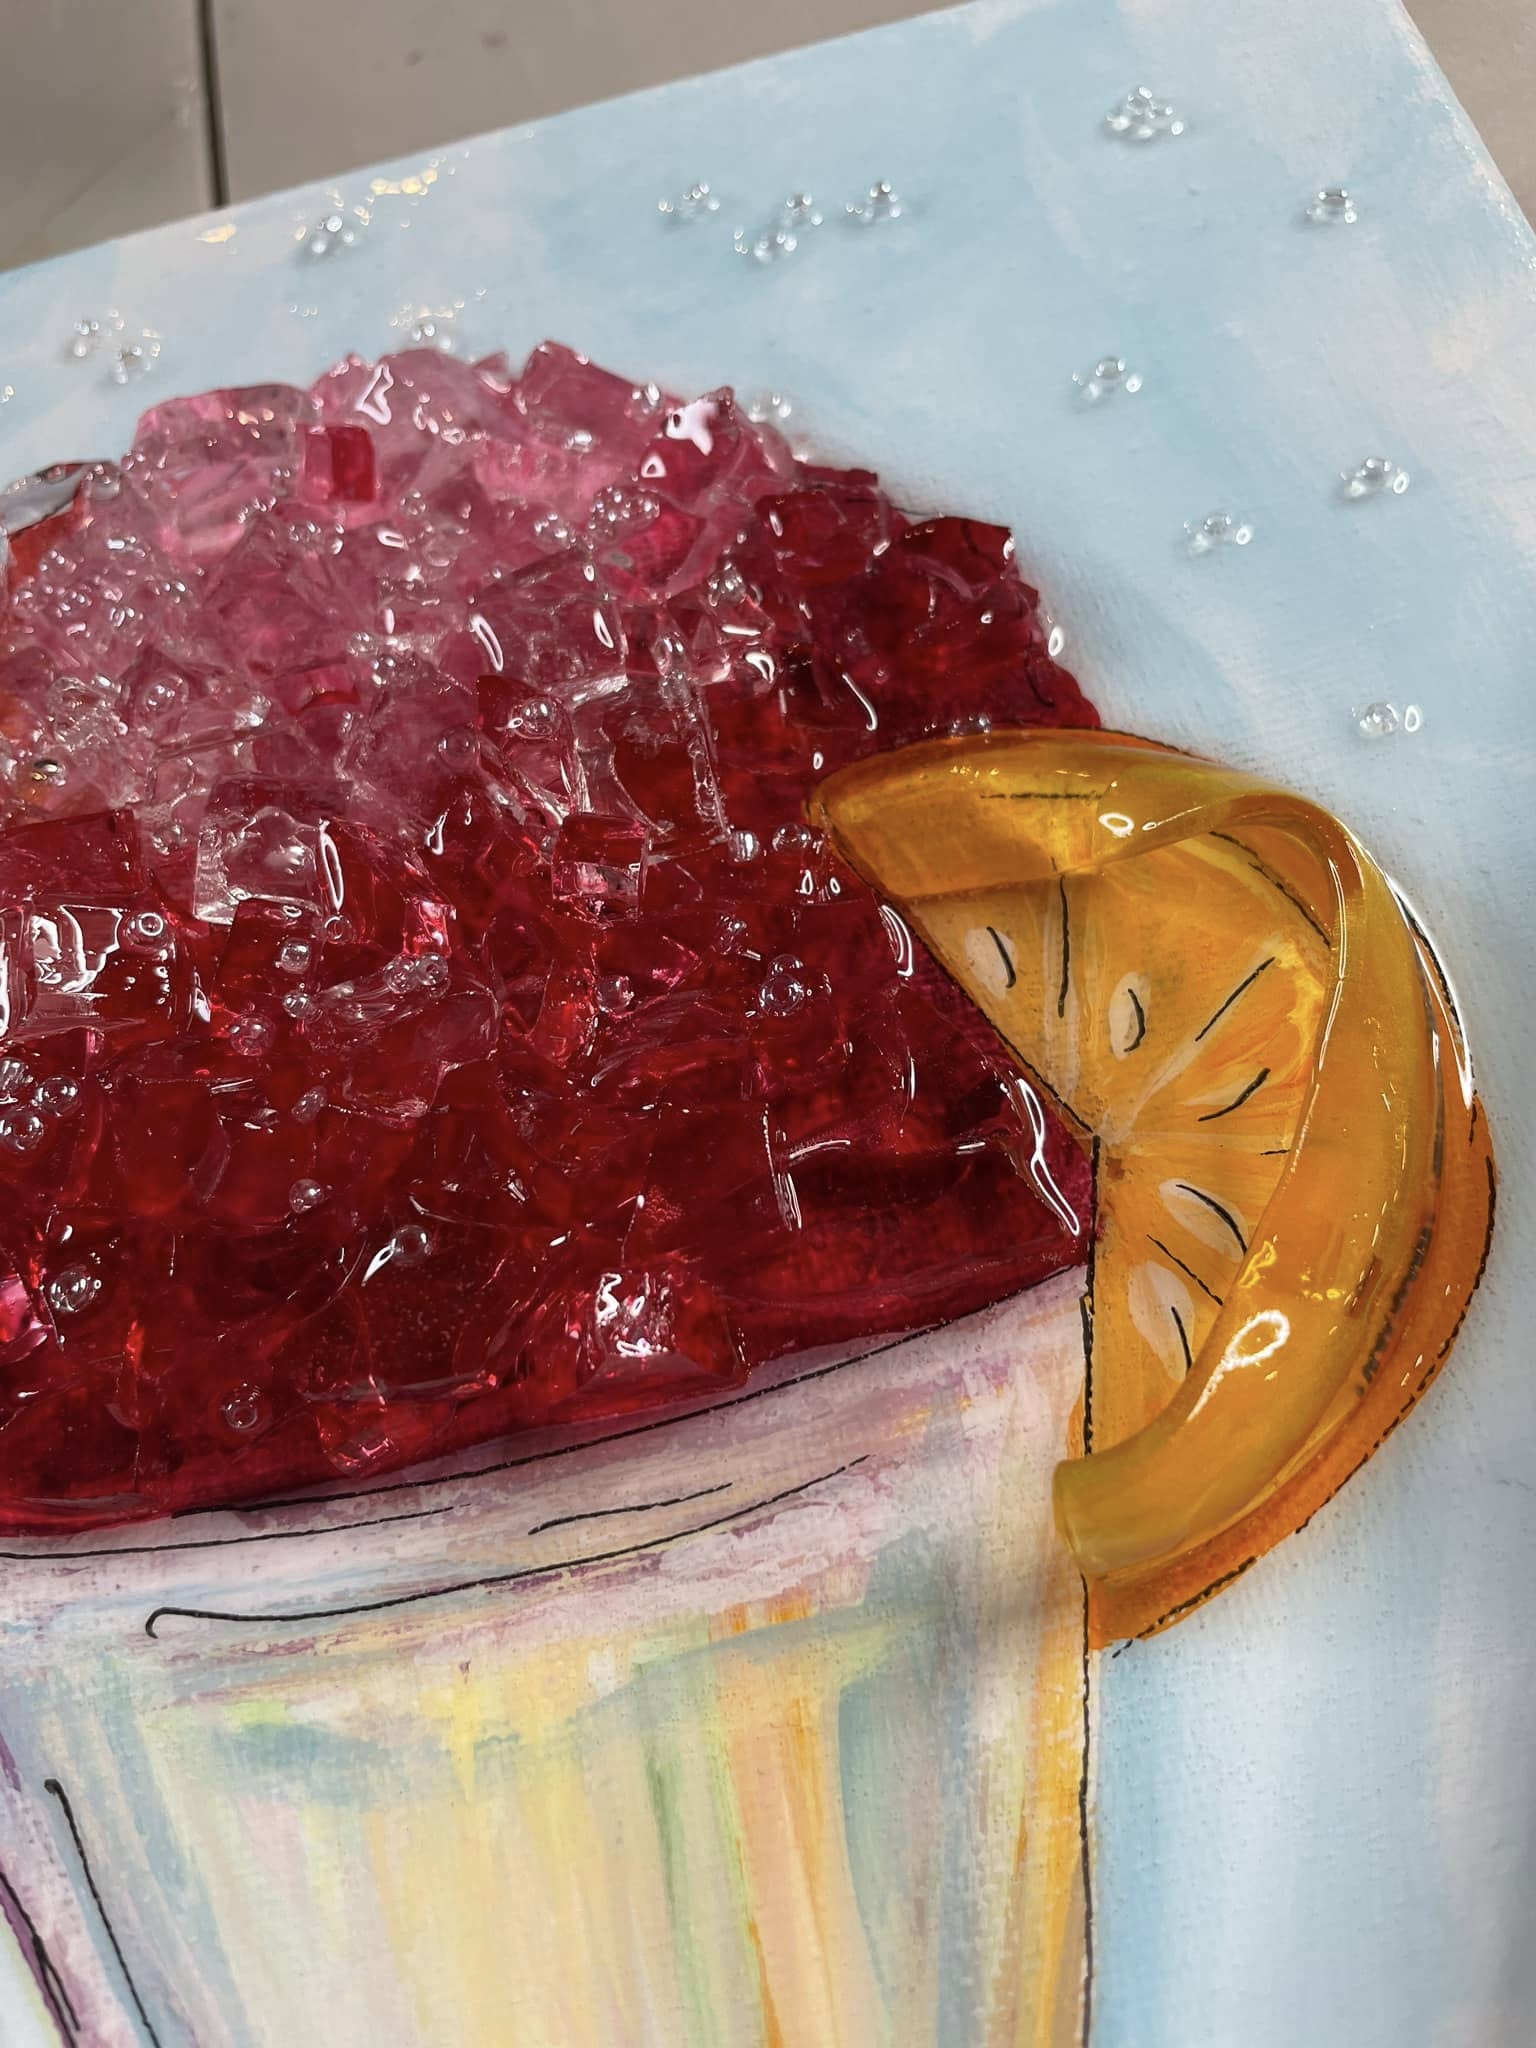
This strawberry snow cone glass and resin canvas is bright, playful, and perfect for summer. The painted background keeps the piece soft and colorful, while the red and clear glass make the snow cone look icy and dimensional. The orange slice adds the cutest finishing touch and makes the whole project feel like a sweet summer treat!
This would be a fun piece to display as part of a summer art collection, kitchen decor, bar cart styling, or seasonal gallery wall.
If you're a member of The Shattered Circle, you'll find this tutorial in your classroom under Art Shattered Weekly Facebook Lives, search for "Strawberry Daiquiri Snow Cone".
If you don’t want to miss my Facebook LIVE art instruction, make sure you are on my texting list. I always text 10 minutes before I’m going to go LIVE, so you won’t ever miss it. You can text “Hey Cindy” to 901-519-2923.
Want more inspiration and artwork?
- My website artshattered.com with resources, shop, and more!
- My creative membership The Shattered Circle, where you can explore the world of glass art with online workshops, a supportive community, and more!
- My mini creative membership Just A ‘Lil Bit Monthly Glass Art Club, where you’ll get a new quick and easy online tutorial for just a lil' bit of sparkle in your life!
- My Facebook page where I go LIVE every Wednesday night.
- My YouTube channel which has tons of free art lessons right at your fingertips.
