
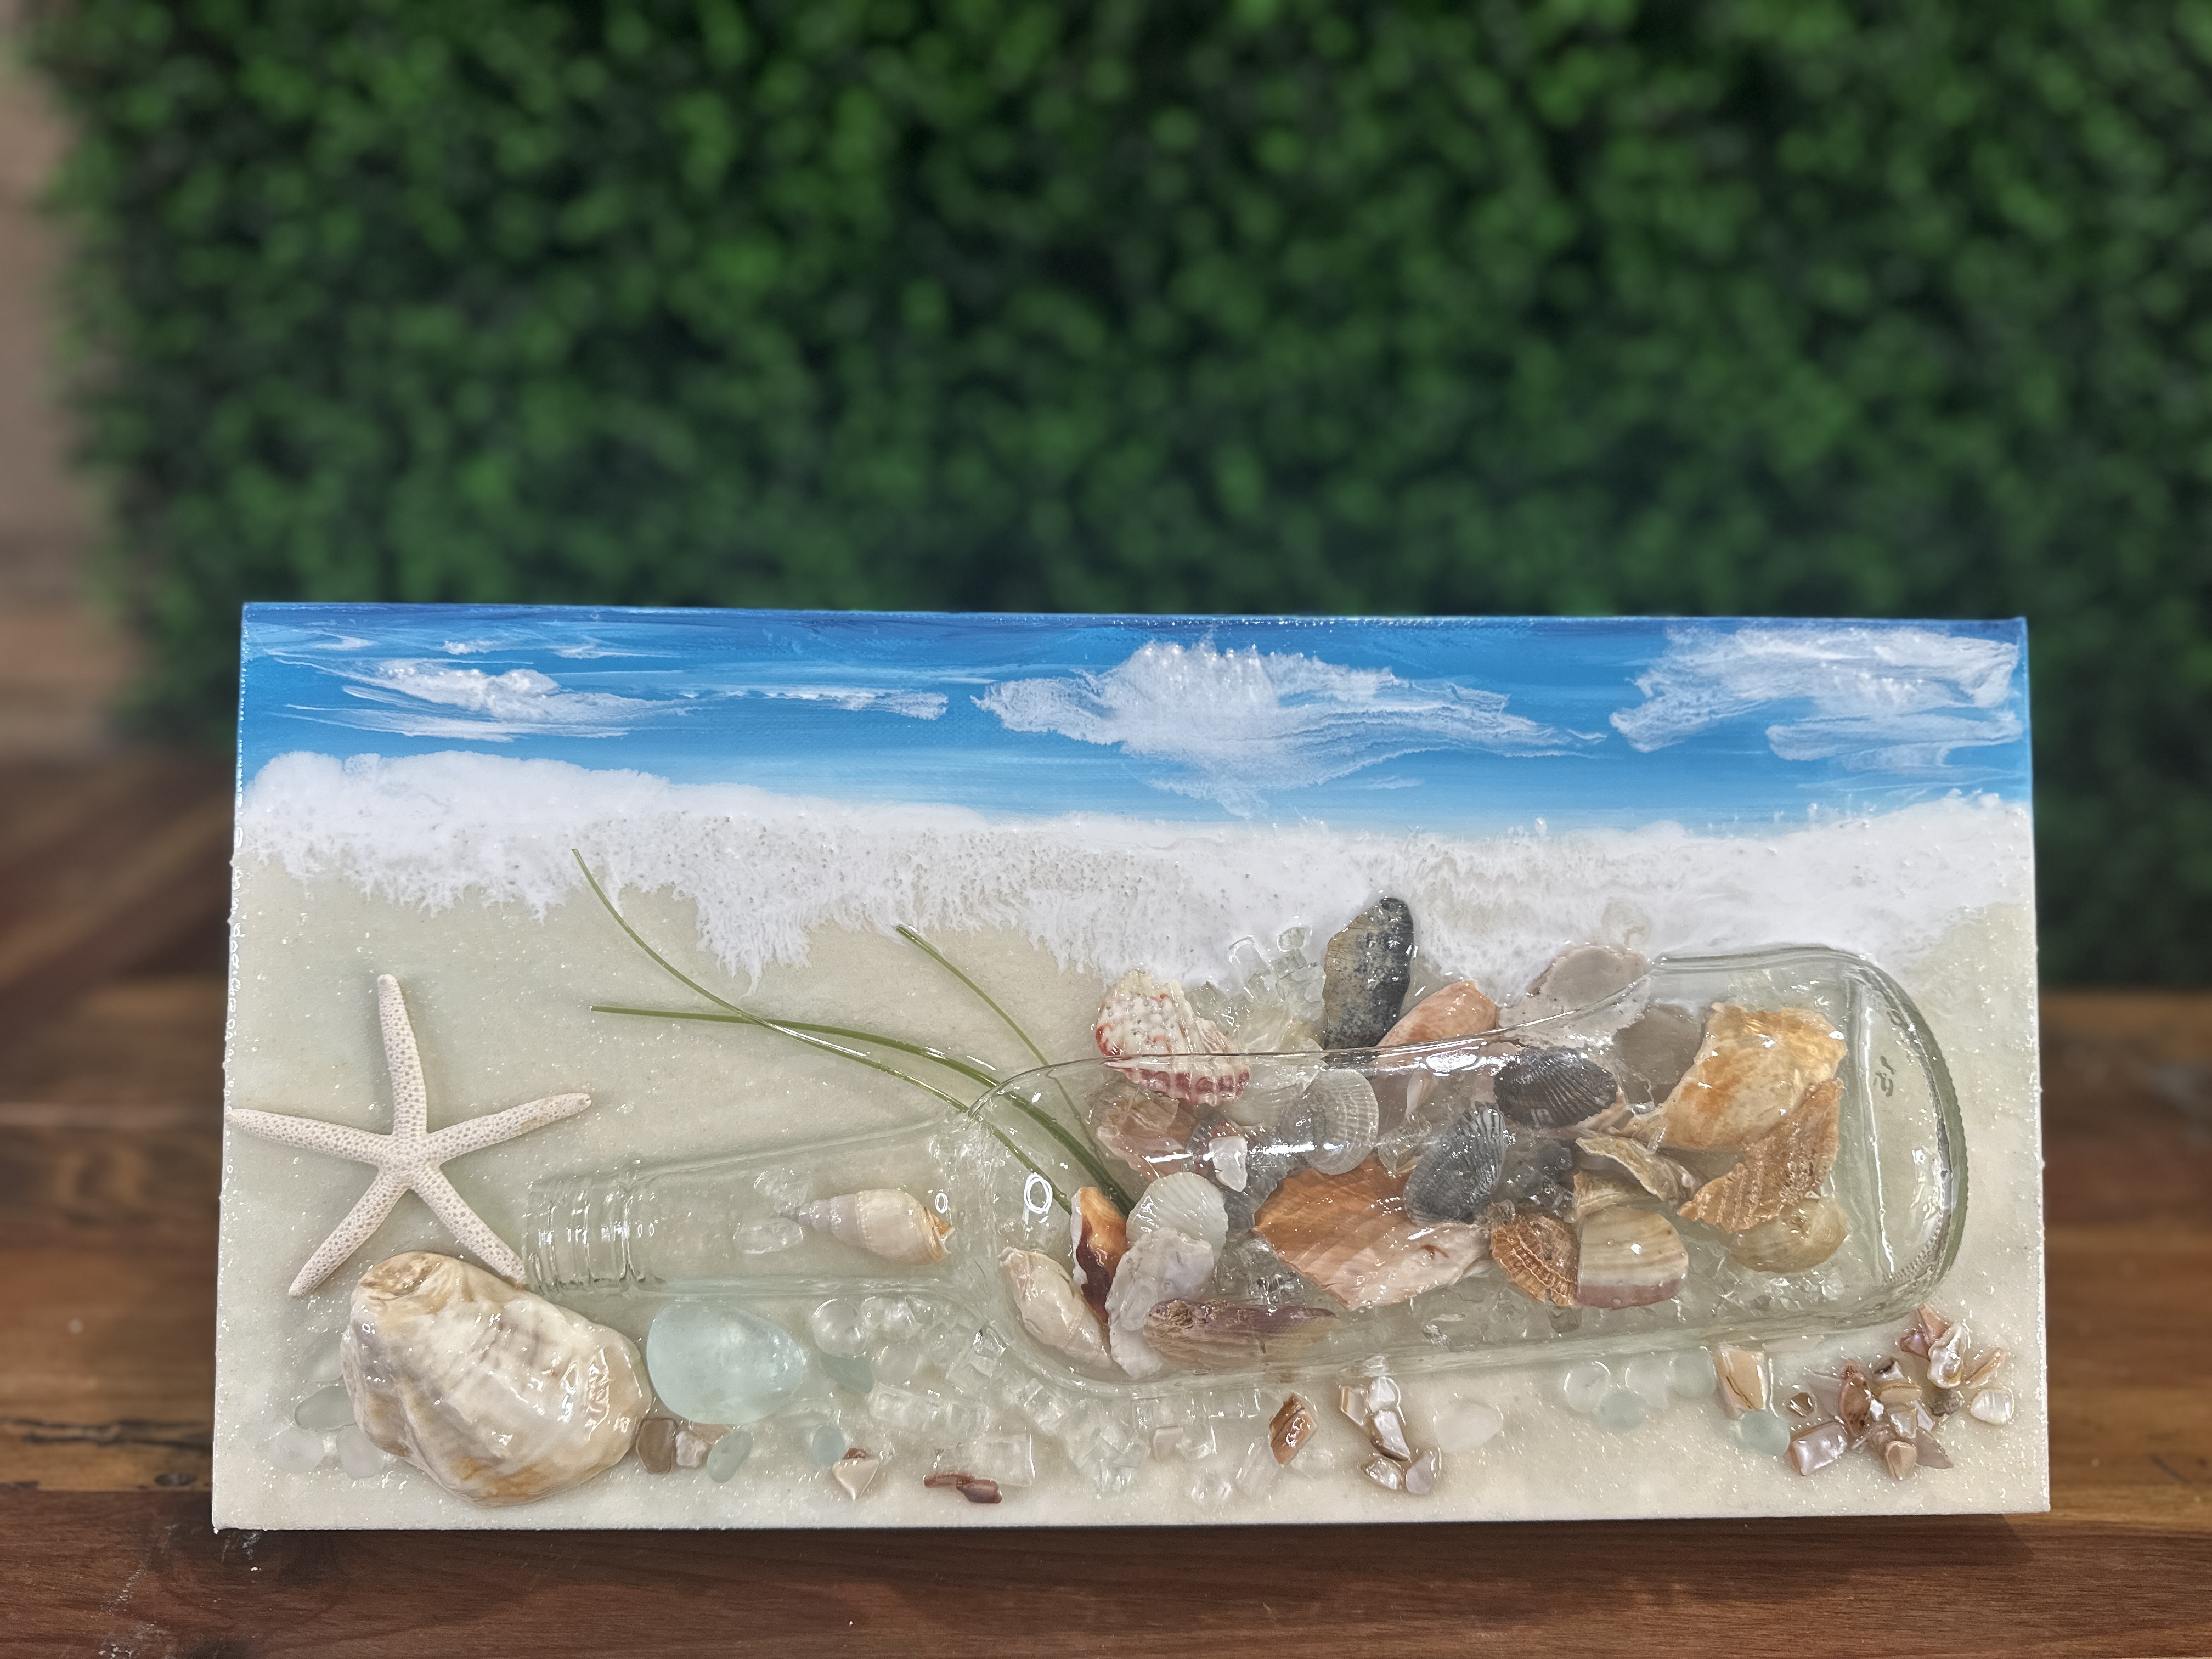
Tides Treasure 🐚
Got a broken bottle sitting around? Don’t toss it... turn it into a stunning mixed media art piece that captures the spirit of the ocean! In this tutorial, we’re creating a coastal-inspired canvas with a reclaimed glass bottle, resin, sea glass, and real shells. It’s the perfect project for beach lovers, shell collectors, and anyone who wants to transform “trash” into treasure.
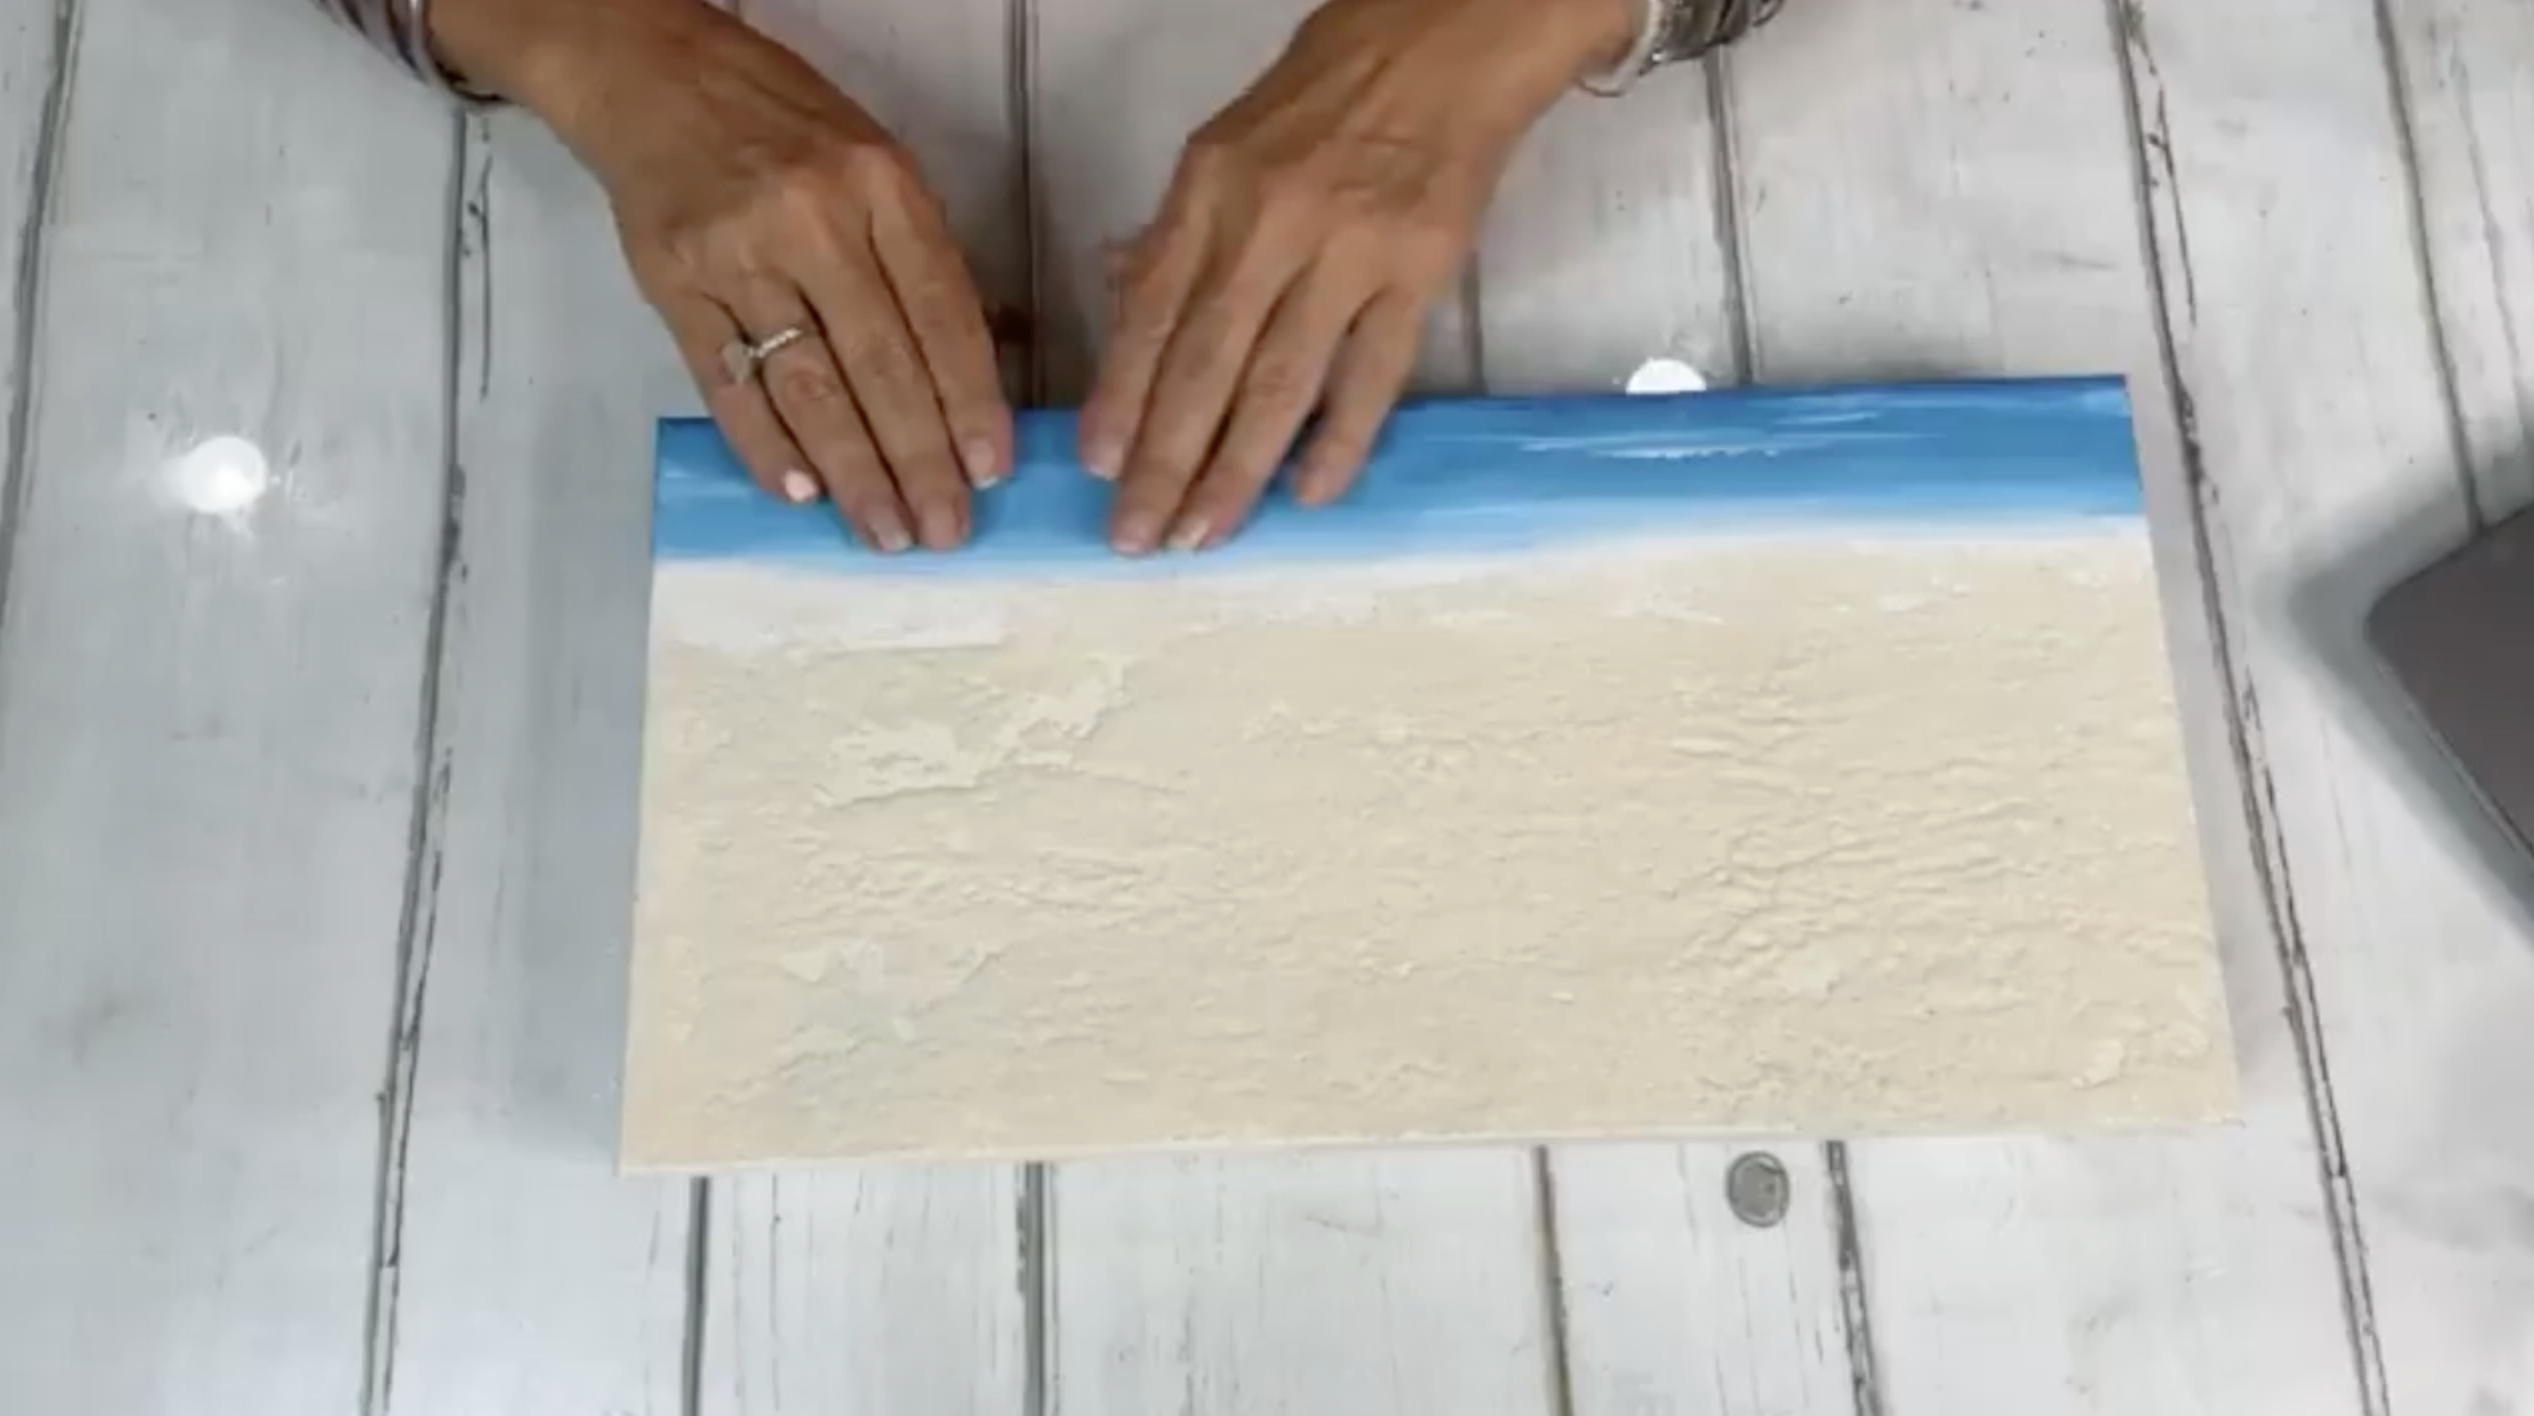
Step 1: Prep Your Canvas
We’re working on an 8x16 canvas. To start, I prepped the background by painting the top portion with a soft ocean blue, blending in white acrylic paint to mimic the look of distant waves. For the sandy shoreline, I used a color called Oyster Beige and topped it with Coarse Texture Gel to give it a beachy, gritty finish just like real sand.
Let your background dry completely before moving on to the resin layers.
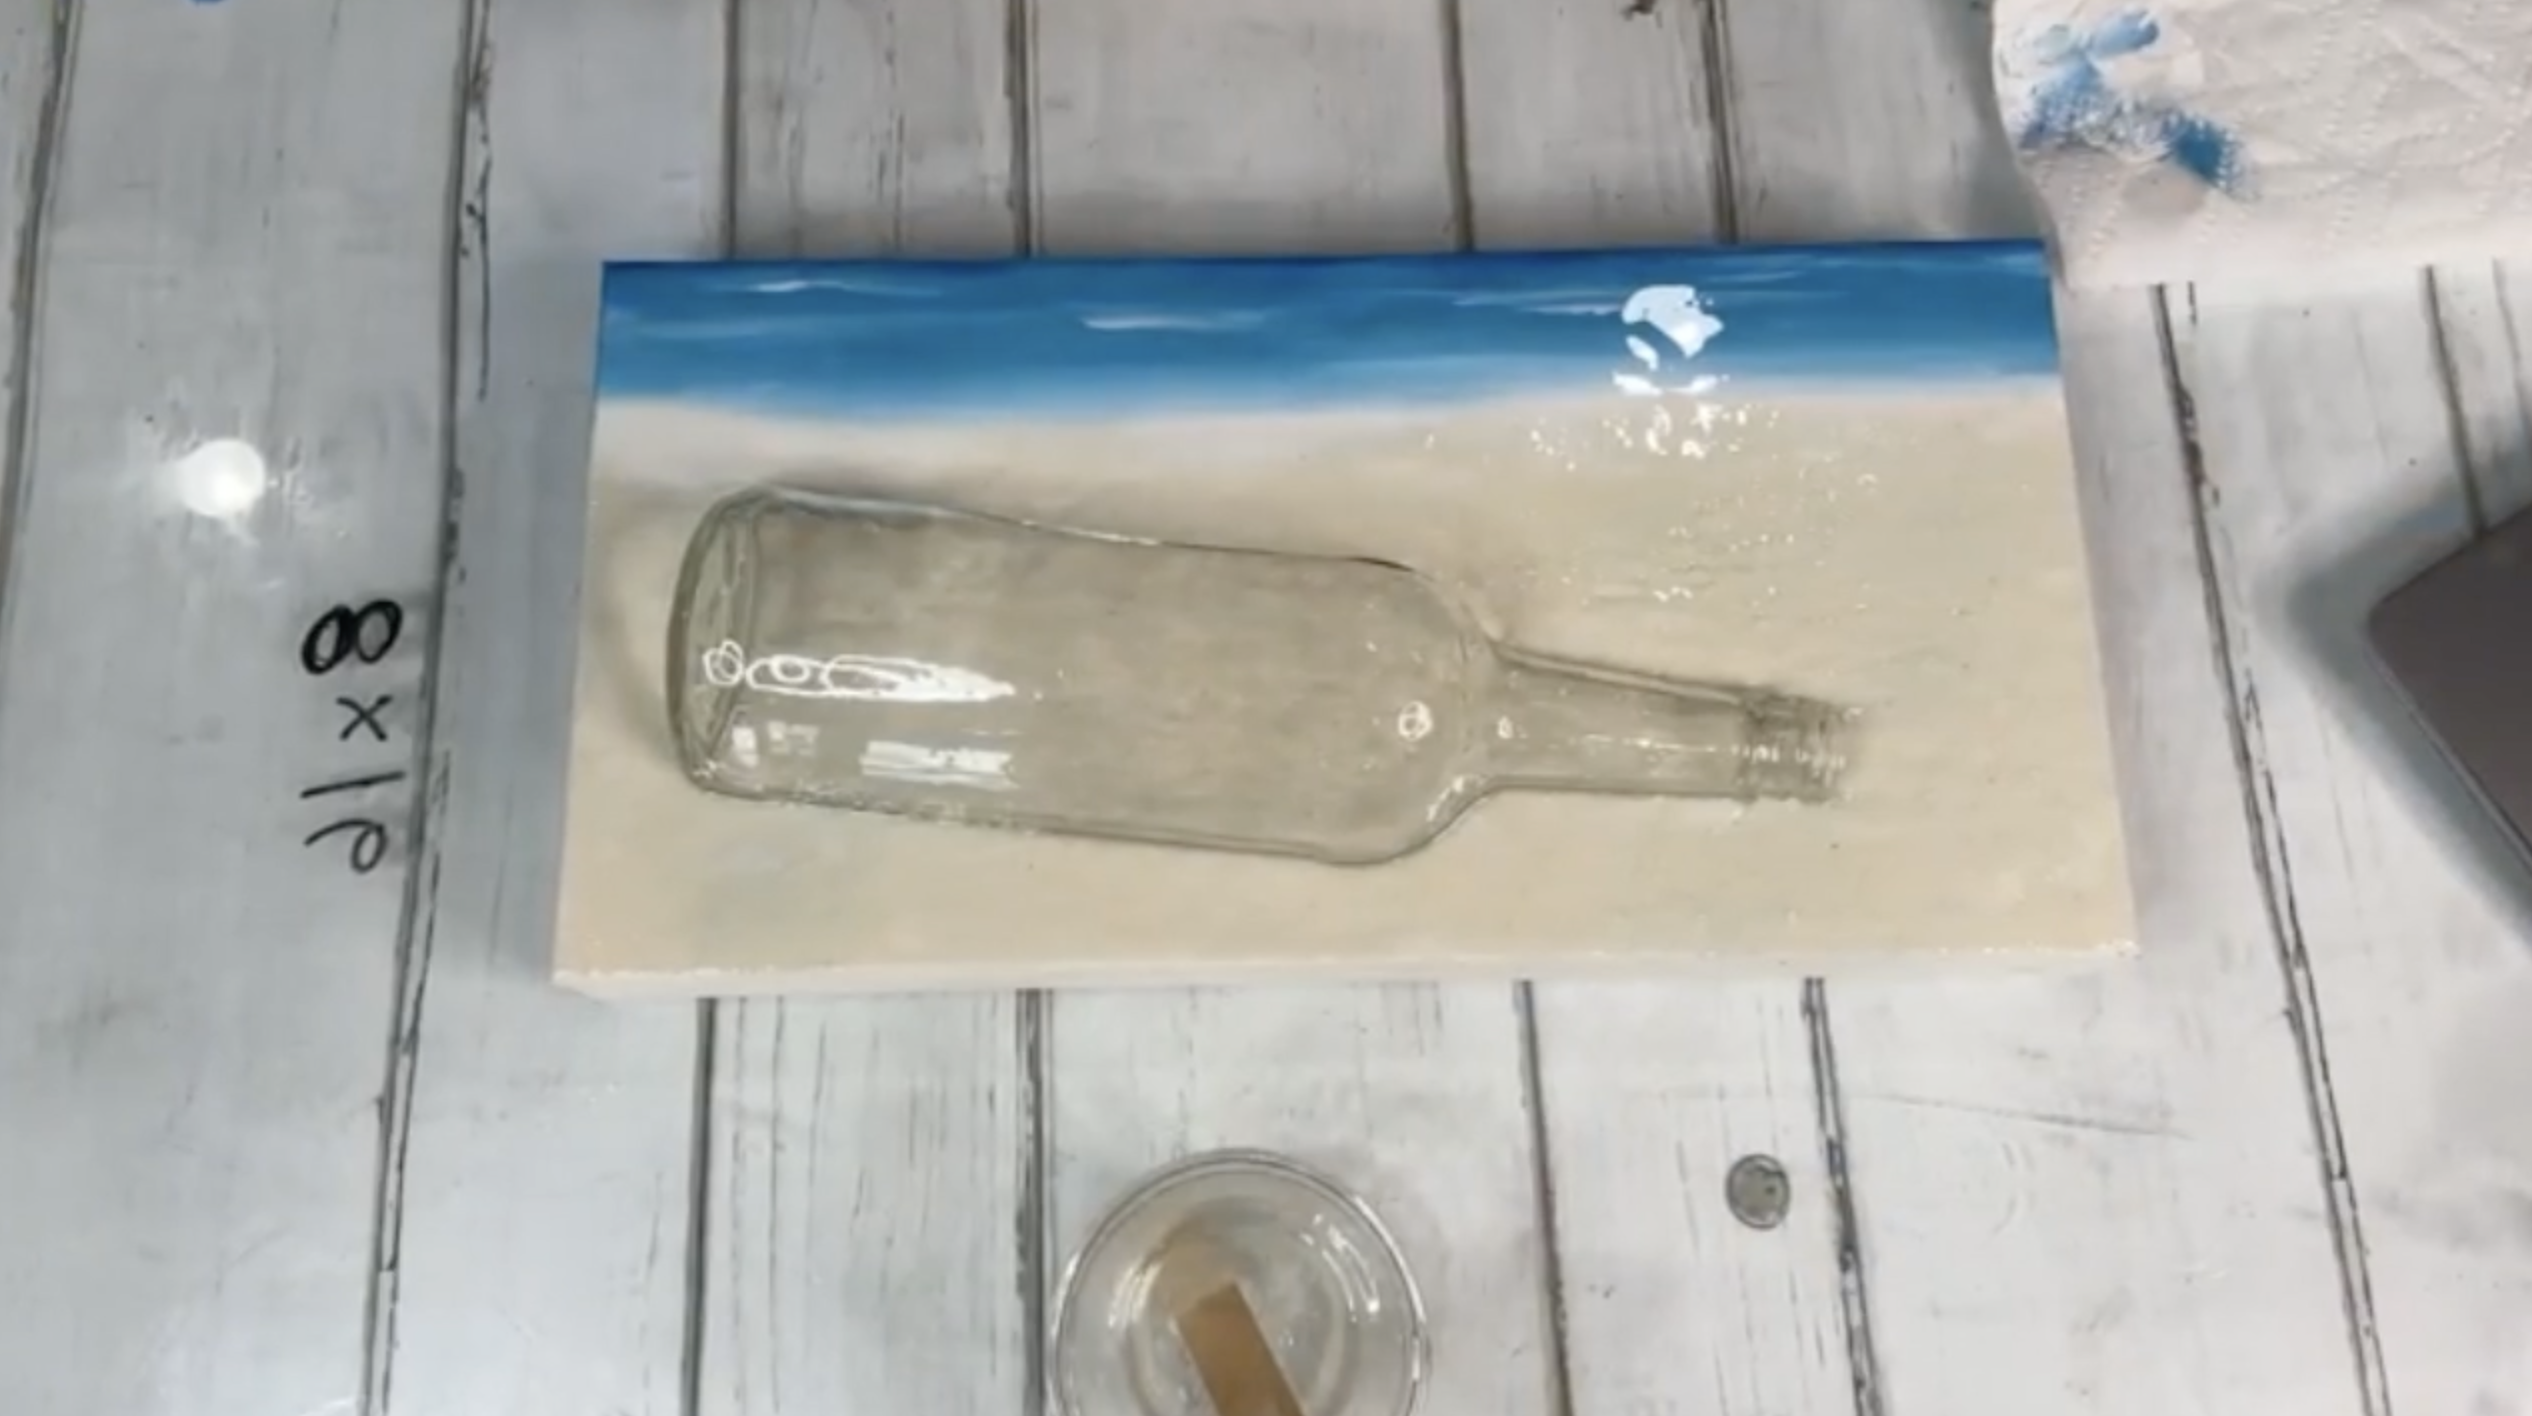
Step 2: Choose and Clean Your Bottle
For this piece, I chose a broken bottle that had a sliver missing but still looked beautiful and safe once honed down. If your bottle is dirty, give it a good wash and dry it completely. You want to start with clean, smooth glass, especially if you’re embedding it in resin.
Pro tip: A broken bottle angled in the sand adds a beautiful, storytelling feel like a message in a bottle that washed ashore.
Step 3: Lay Down a Resin Base
Mix about 3 ounces of resin (1.5 oz resin + 1.5 oz hardener) using a clean stir stick and cup. Mix slowly for three minutes, scraping the sides and bottom to ensure it’s fully combined.
Pour a thin layer across the canvas, especially where your bottle will go. Use a gloved hand or stick to spread it out evenly. Brush a bit onto the outside edges of the bottle, too, to help it adhere securely.
Set your bottle at a slight downward angle near the lower half of the canvas so it looks like it’s nestled into the sandy shoreline.
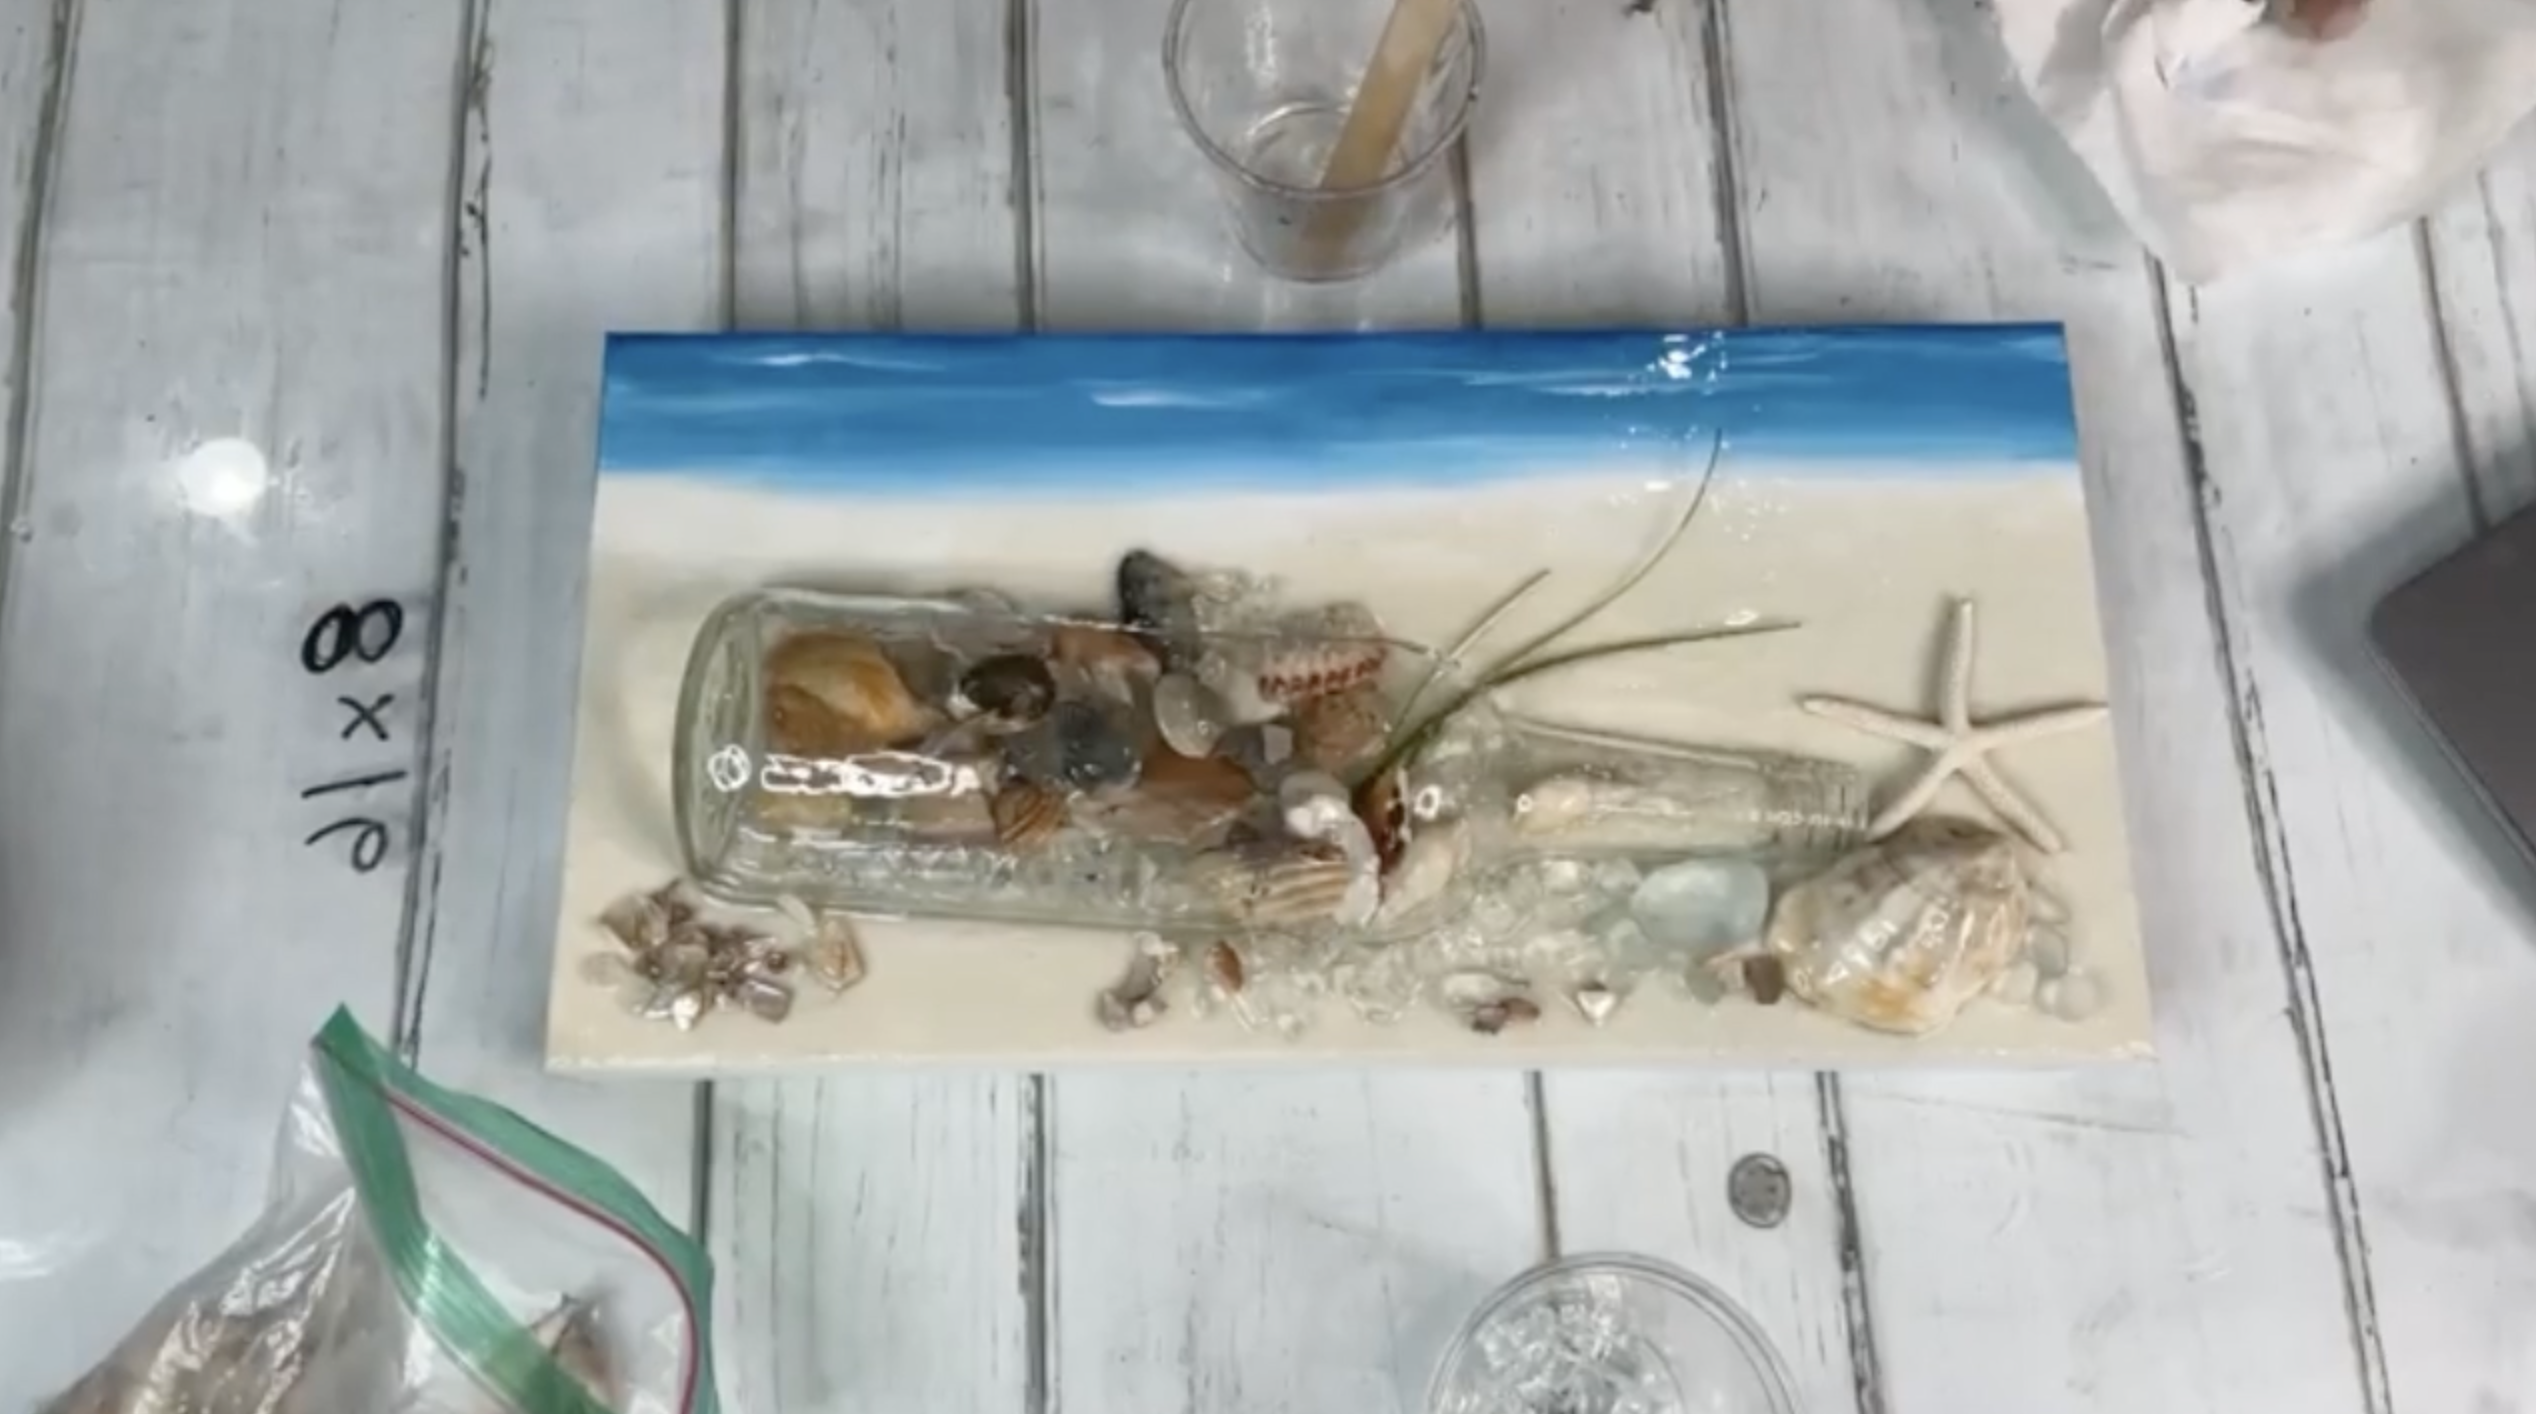
Step 4: Fill the Bottle with Treasures
Now the fun begins - filling your bottle with all those beachy treasures! Drop in small bits of glass, crushed shells, and tiny seashells, layering them in gradually. Add resin between layers to hold everything in place.
Once your bottle is mostly filled, sprinkle a few shells or glass pieces spilling out of the opening and onto the canvas. You can also embed items like an oyster shell or even a starfish just outside the bottle.
Build around the base of your bottle by adding more sea glass, shells, or crushed shell filler. This helps transition from “bottle” to “beach” and gives it a natural, cohesive look. Add a bit of resin to secure everything in place.
Optional but beautiful: tuck in a few strands of vitrigraph glass or a small piece of driftwood (if you have it) to mimic seaweed or add height and texture.
Step 5: Create the Ocean Foam
This is the magic moment: adding realistic white ocean foam! Instead of using white paint, I tried a white resin pigment paste (CEY brand) and mixed a tiny dab into a bit of leftover resin to make a soft white.
Drizzle this white resin at the edge where your blue ocean meets the beige sand. Then use a heat gun or straw to blow it gently toward the shore. This mimics the look of foamy waves washing up on the sand.
It takes just a few swirls to transform your piece into a full-on beach scene.
Let it cure undisturbed for 24 hours!

If you don’t want to miss my Facebook LIVE art instruction, make sure you are on my texting list. I always text 10 minutes before I’m going to go LIVE, so you won’t ever miss it. You can text “Hey Cindy” to 901-519-2923.
Want more inspiration and artwork?
- My website artshattered.com with resources, shop, and more!
- My creative membership The Shattered Circle, where you can explore the world of glass art with online workshops, a supportive community, and more!
- My mini creative membership Just A ‘Lil Bit Monthly Glass Art Club, where you’ll get a new quick and easy online tutorial for just a lil' bit of sparkle in your life!
- My Facebook page where I go LIVE every Wednesday night at 6:00 PM CST.
- My YouTube channel which has tons of free art lessons right at your fingertips.
