
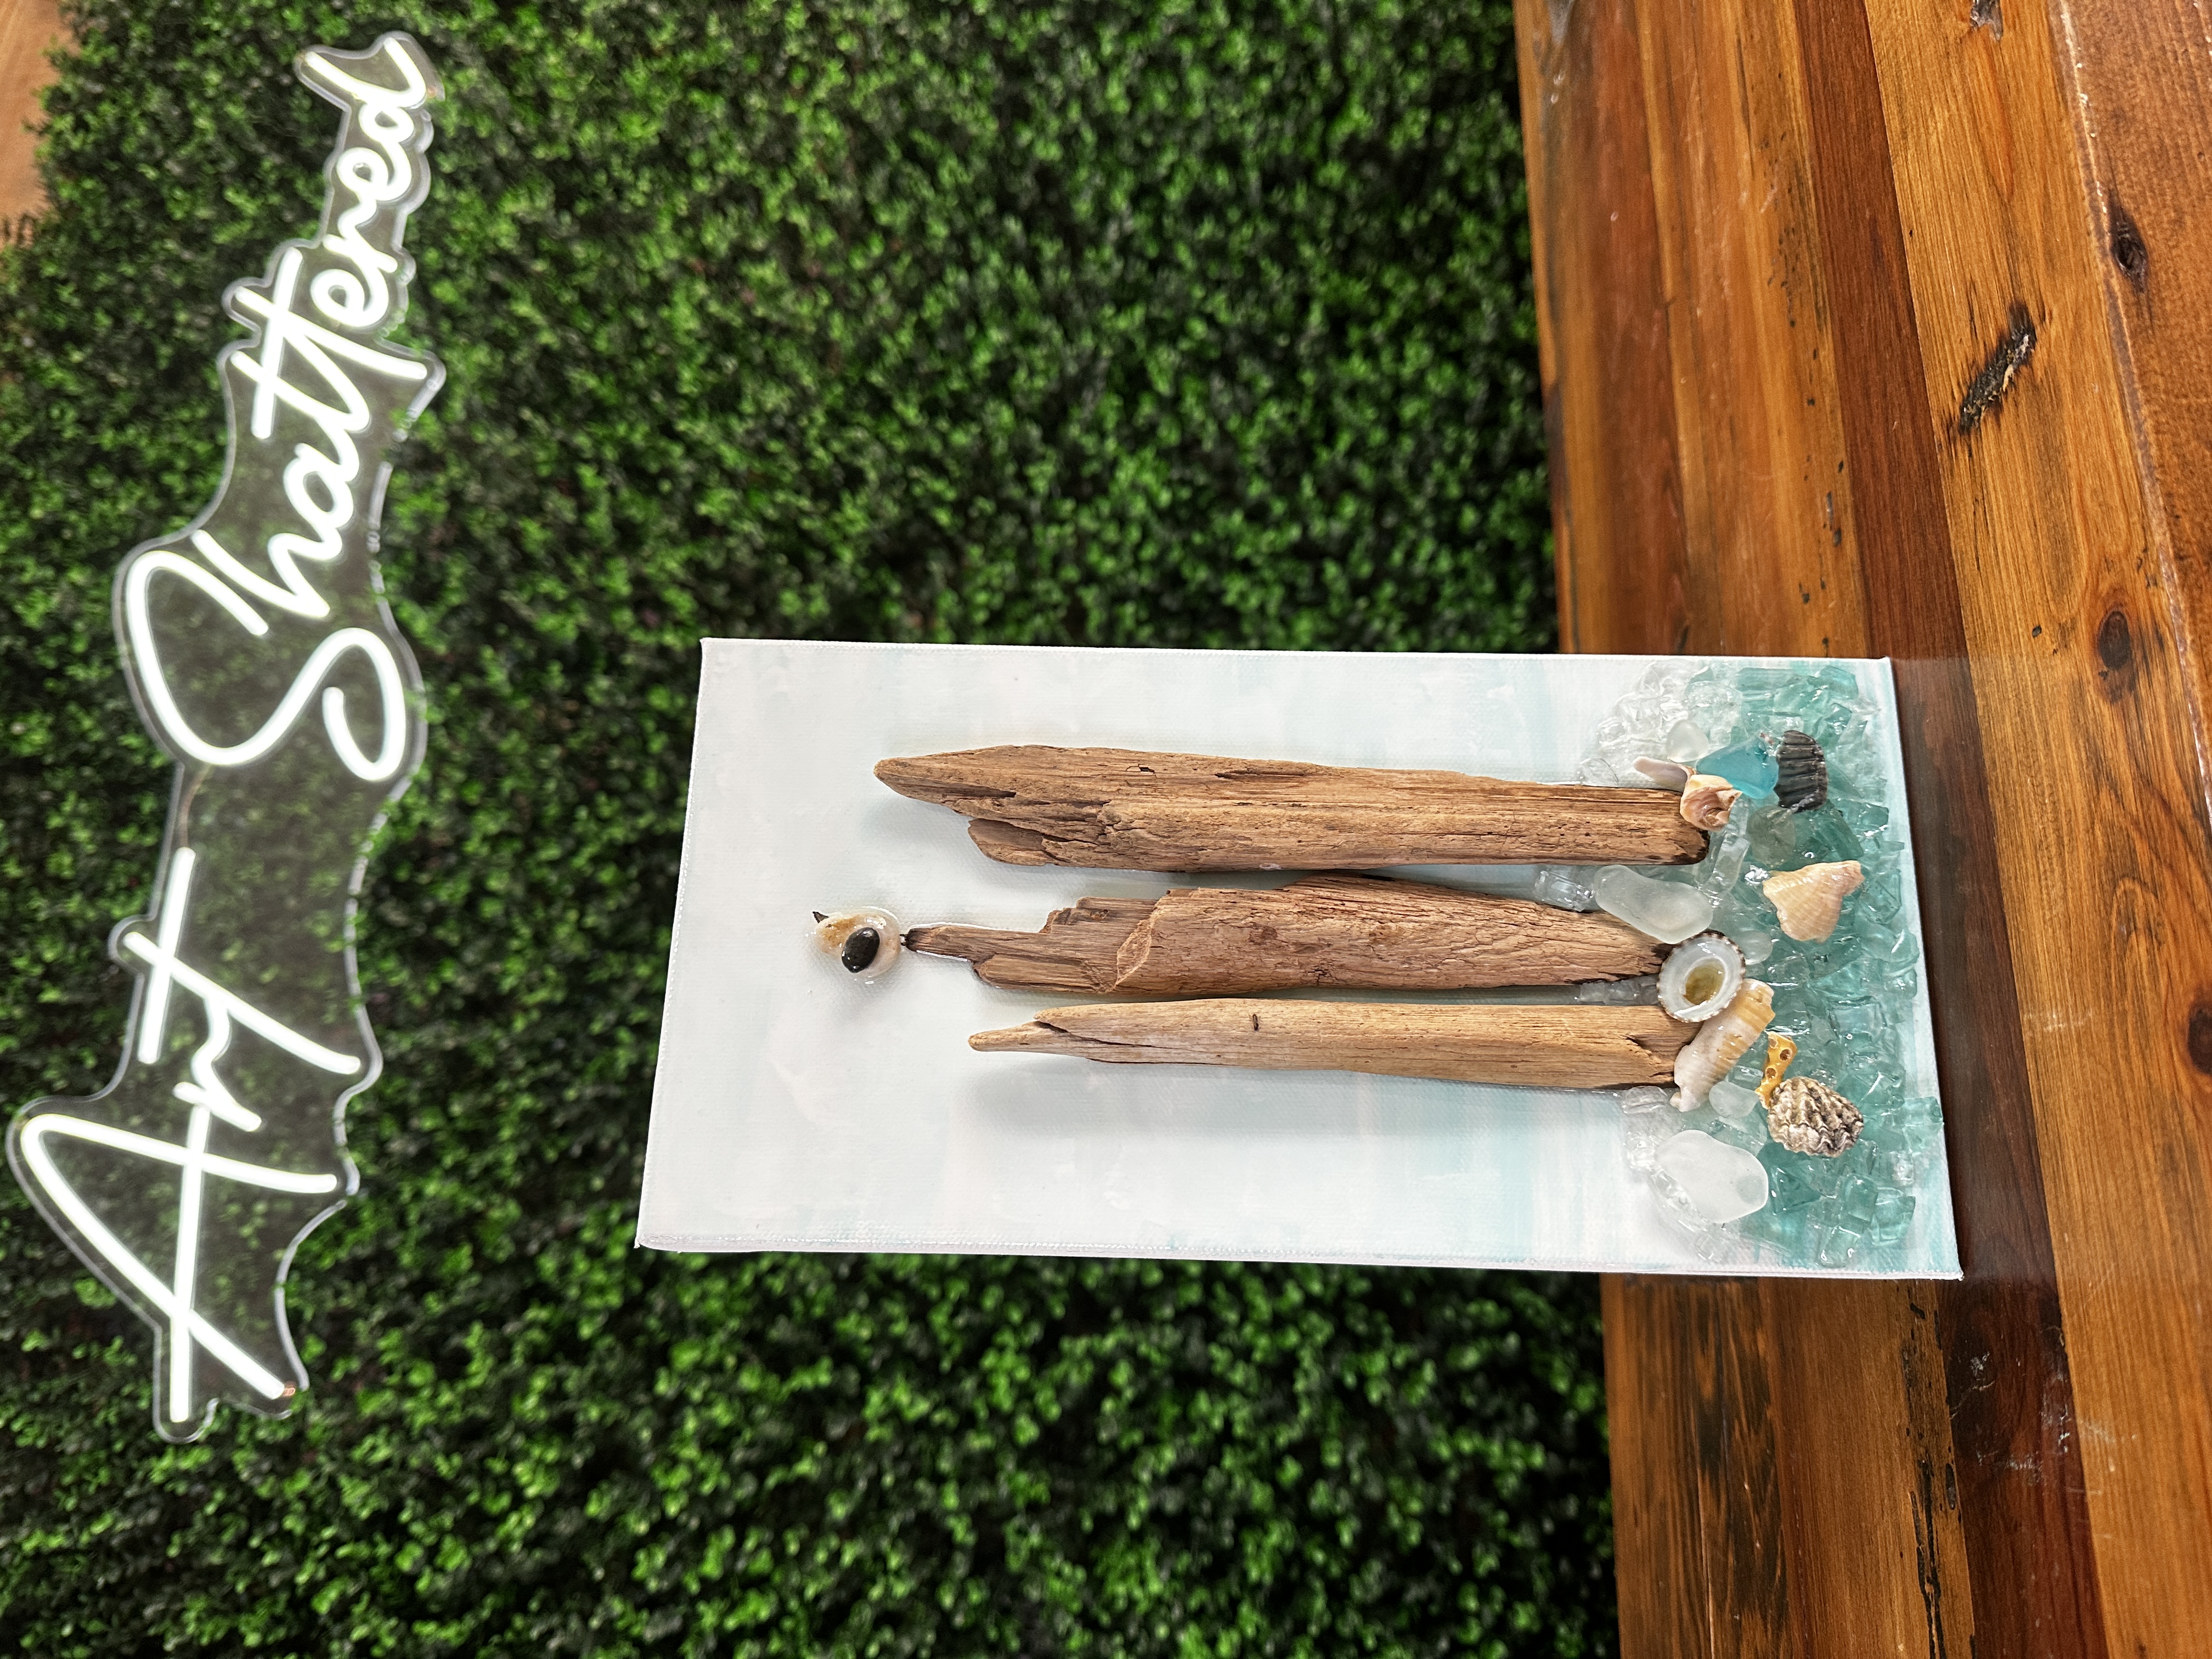
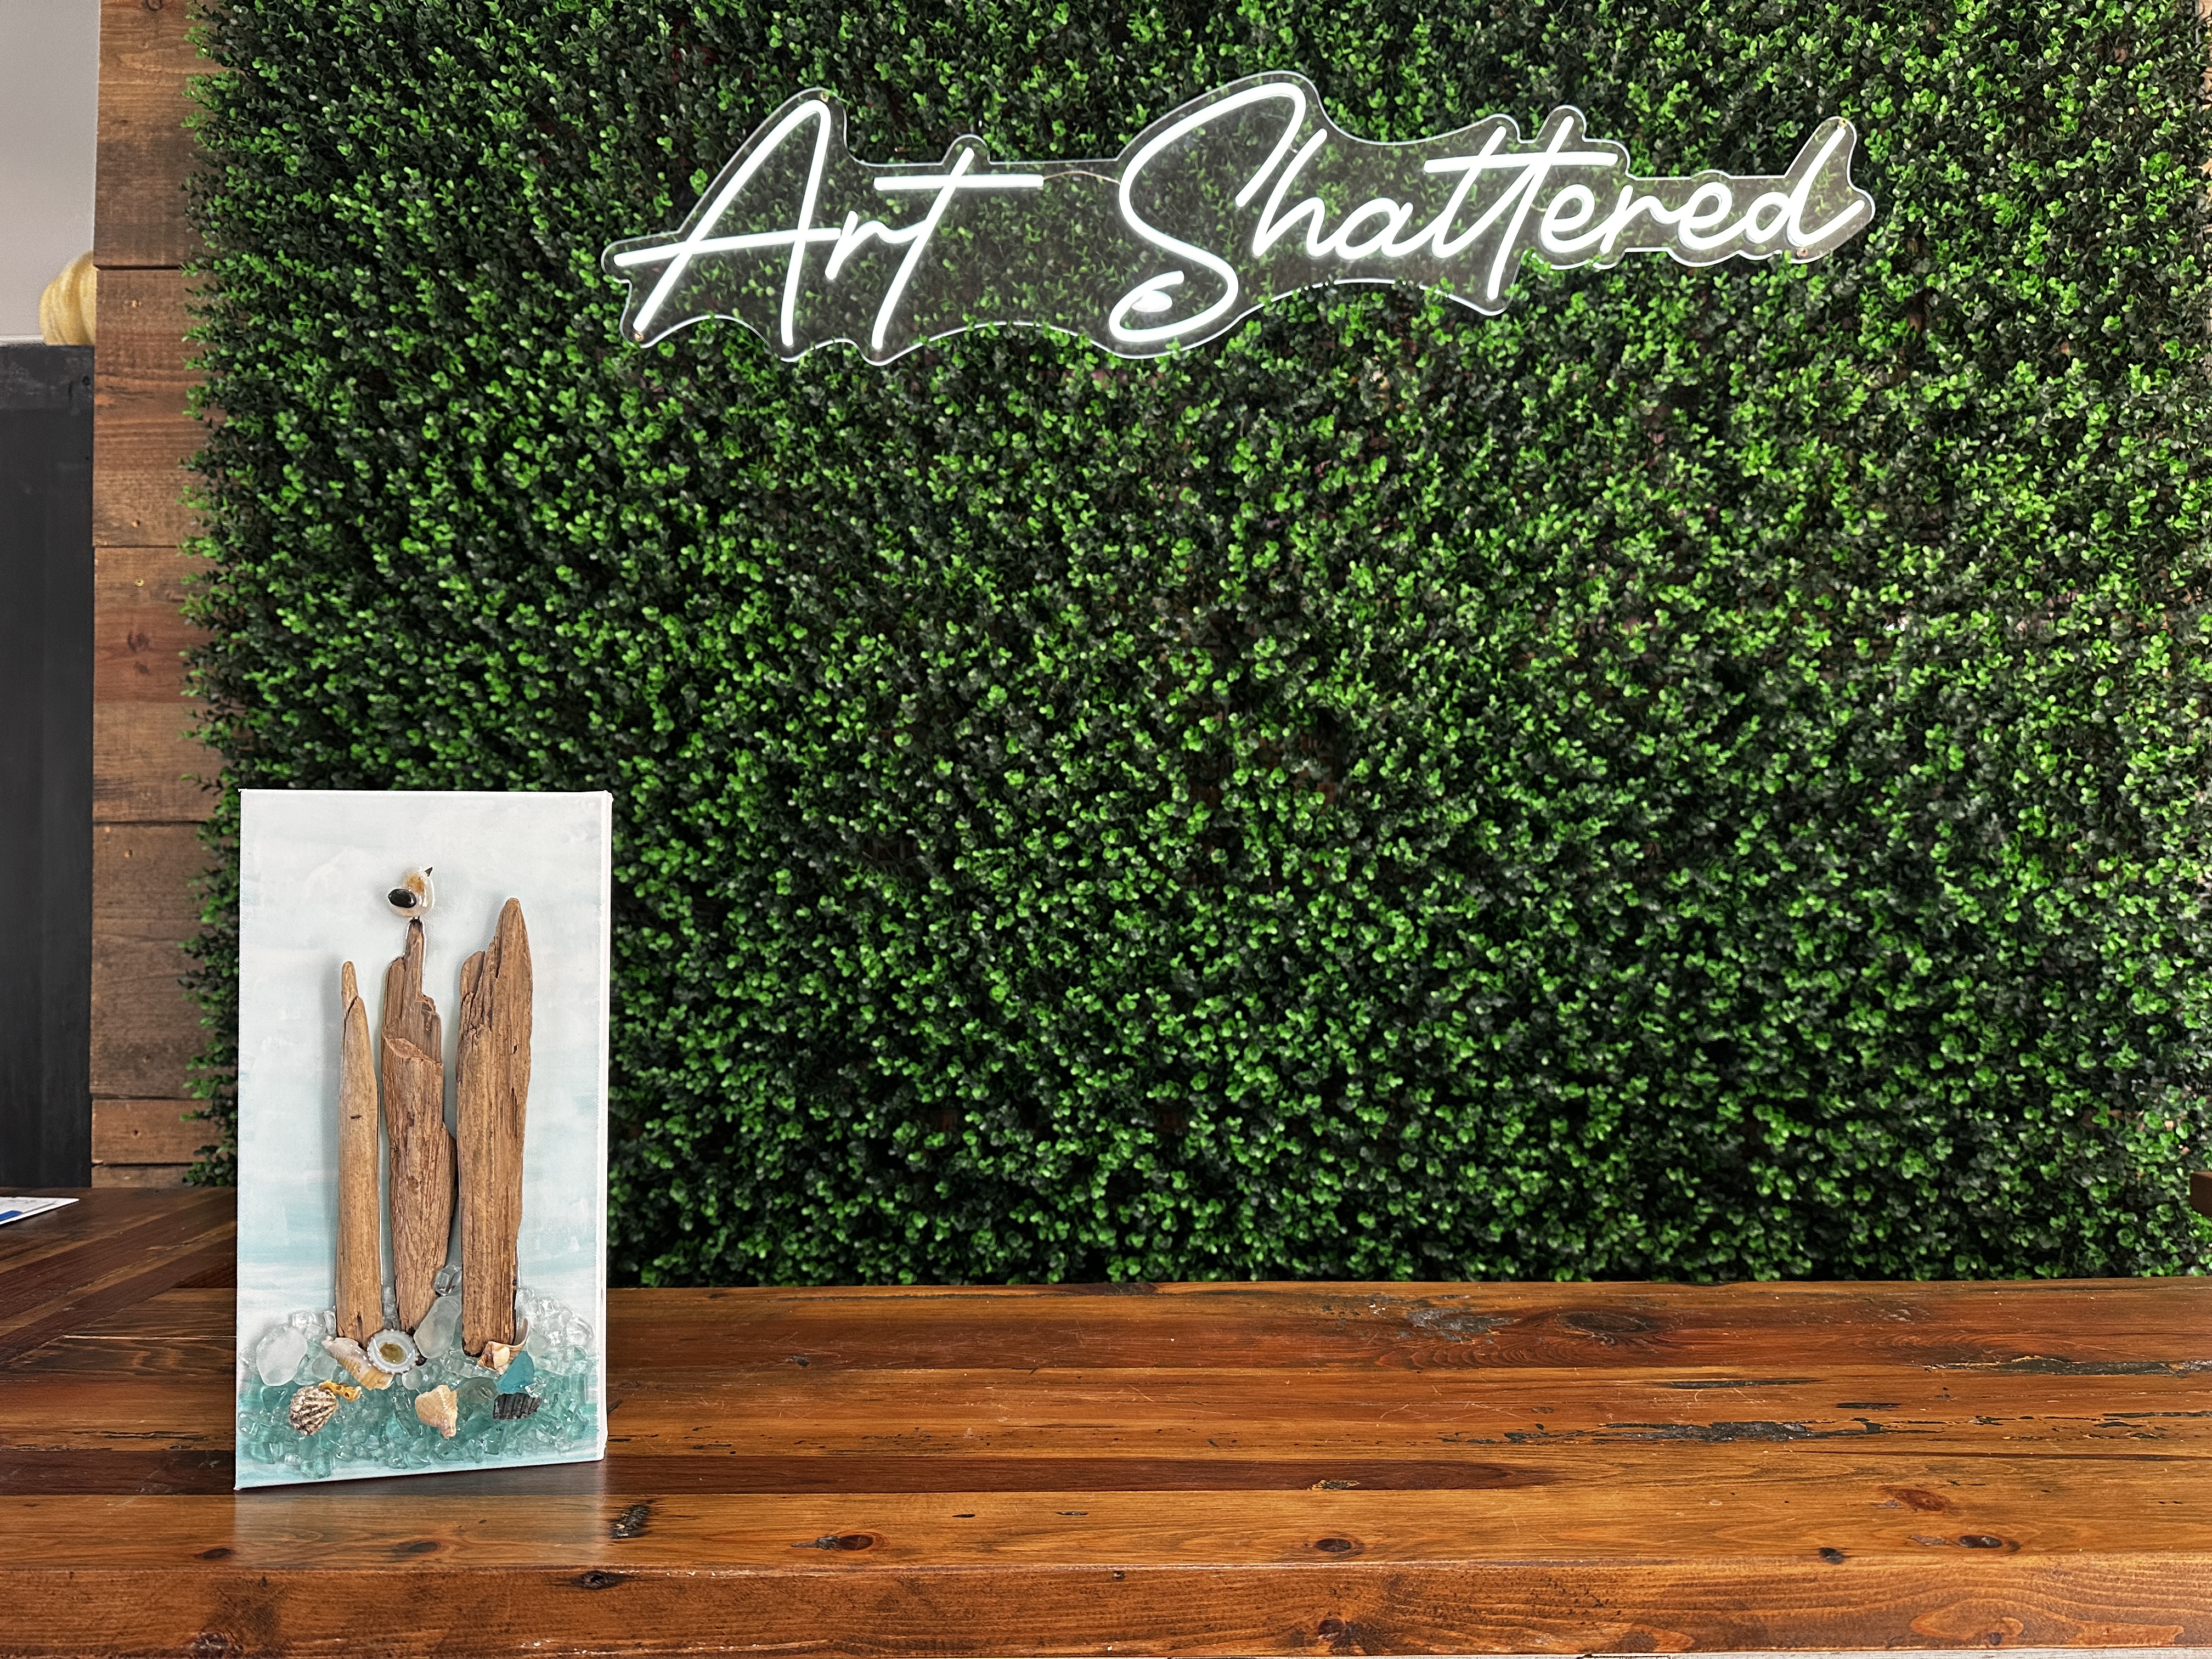
Coastal Driftwood Bird 🌊
If you’re looking for a fresh and simple way to bring a coastal vibe into your home, you’ll love this charming driftwood and seashell art piece. In this tutorial, I’ll walk you through how to paint a minimal beachy background, layer driftwood, glass, shells, and even a sweet little bird, all finished with resin for a beautiful glossy look.
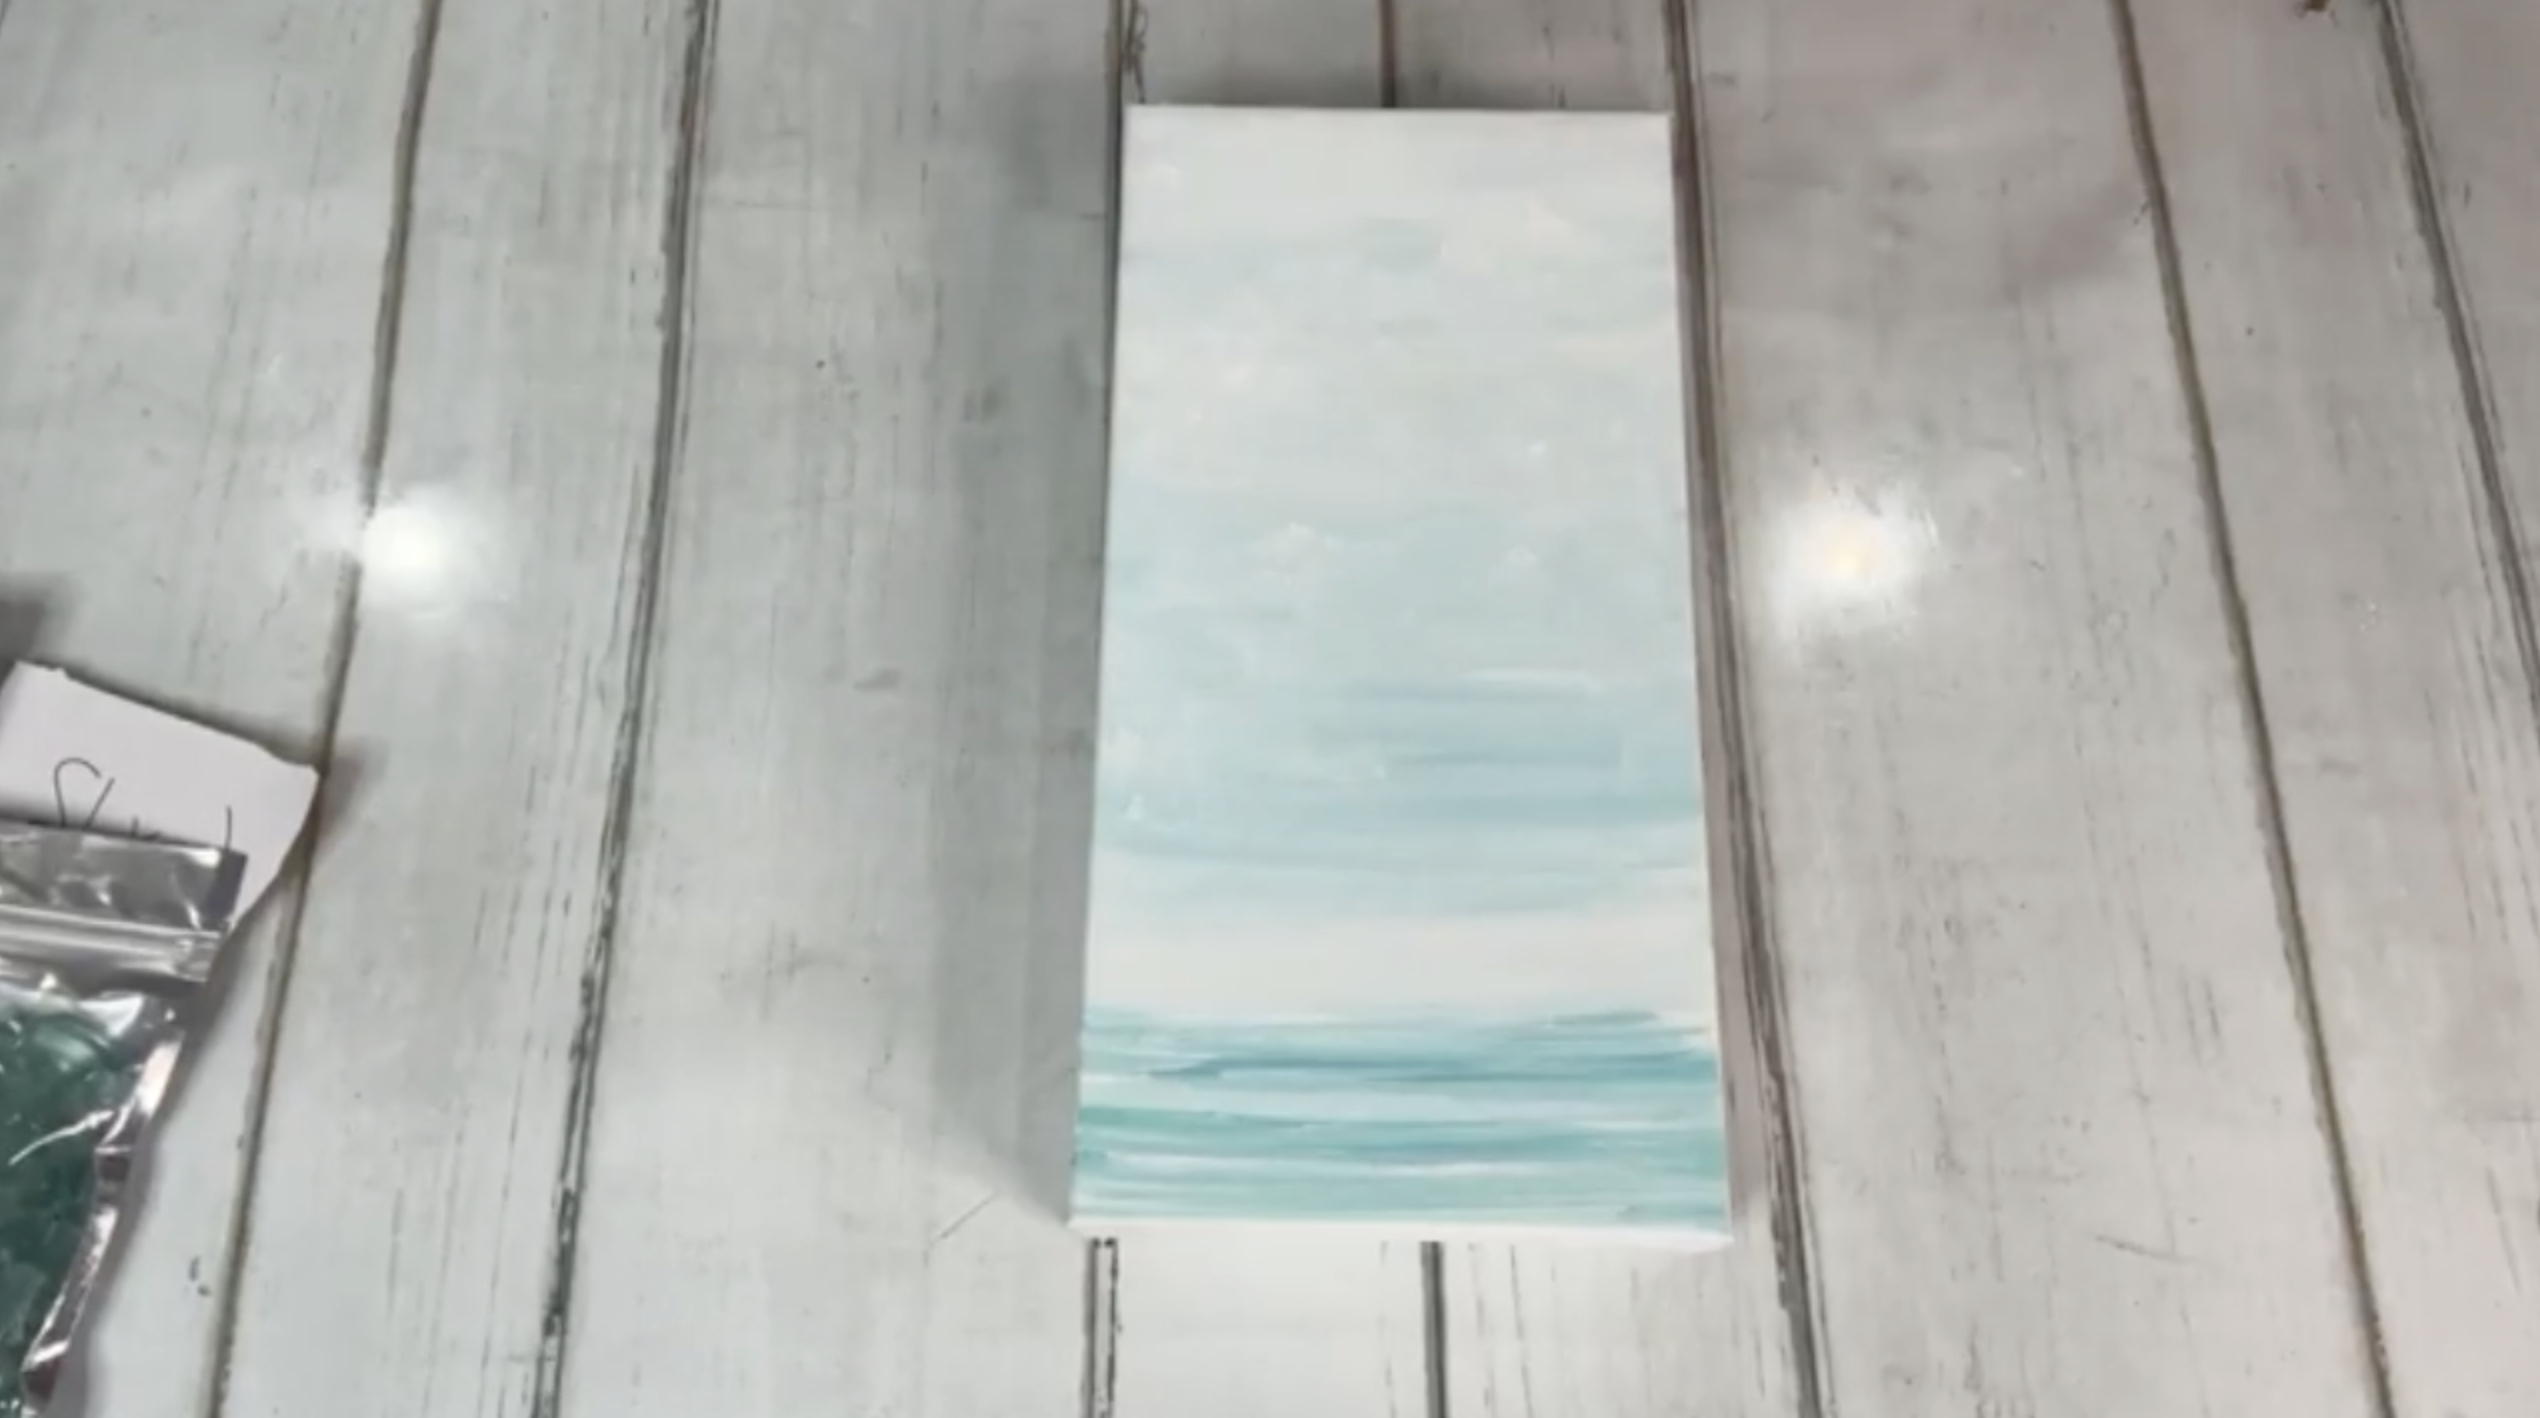
Step 1: Create the Beachy Background
I started with a simple canvas and chose a few soothing beach-inspired paint colors: Bahama Blue, Sea Breeze, and white.
First, I loaded a 1-inch brush with white paint and brushed it across the bottom third of the canvas to mimic ocean water. I blended a little Sea Breeze and Bahama Blue for extra dimension, working left to right using a flat brush for gentle horizontal strokes. I left “skippies” (small unpainted gaps) here and there for a natural look, and even added a few extra streaks of white on top to simulate seafoam.
Moving up the canvas, I used white as the base for the sky with just a bit of Bahama Blue added for a subtle wash of color. Holding my brush flat, I lightly smudged in a few horizontal areas of blue, then broke up the lines by tapping in some extra white to make simple, airy clouds. The whole background stayed very soft and minimal - that way, our driftwood and shells would really stand out.
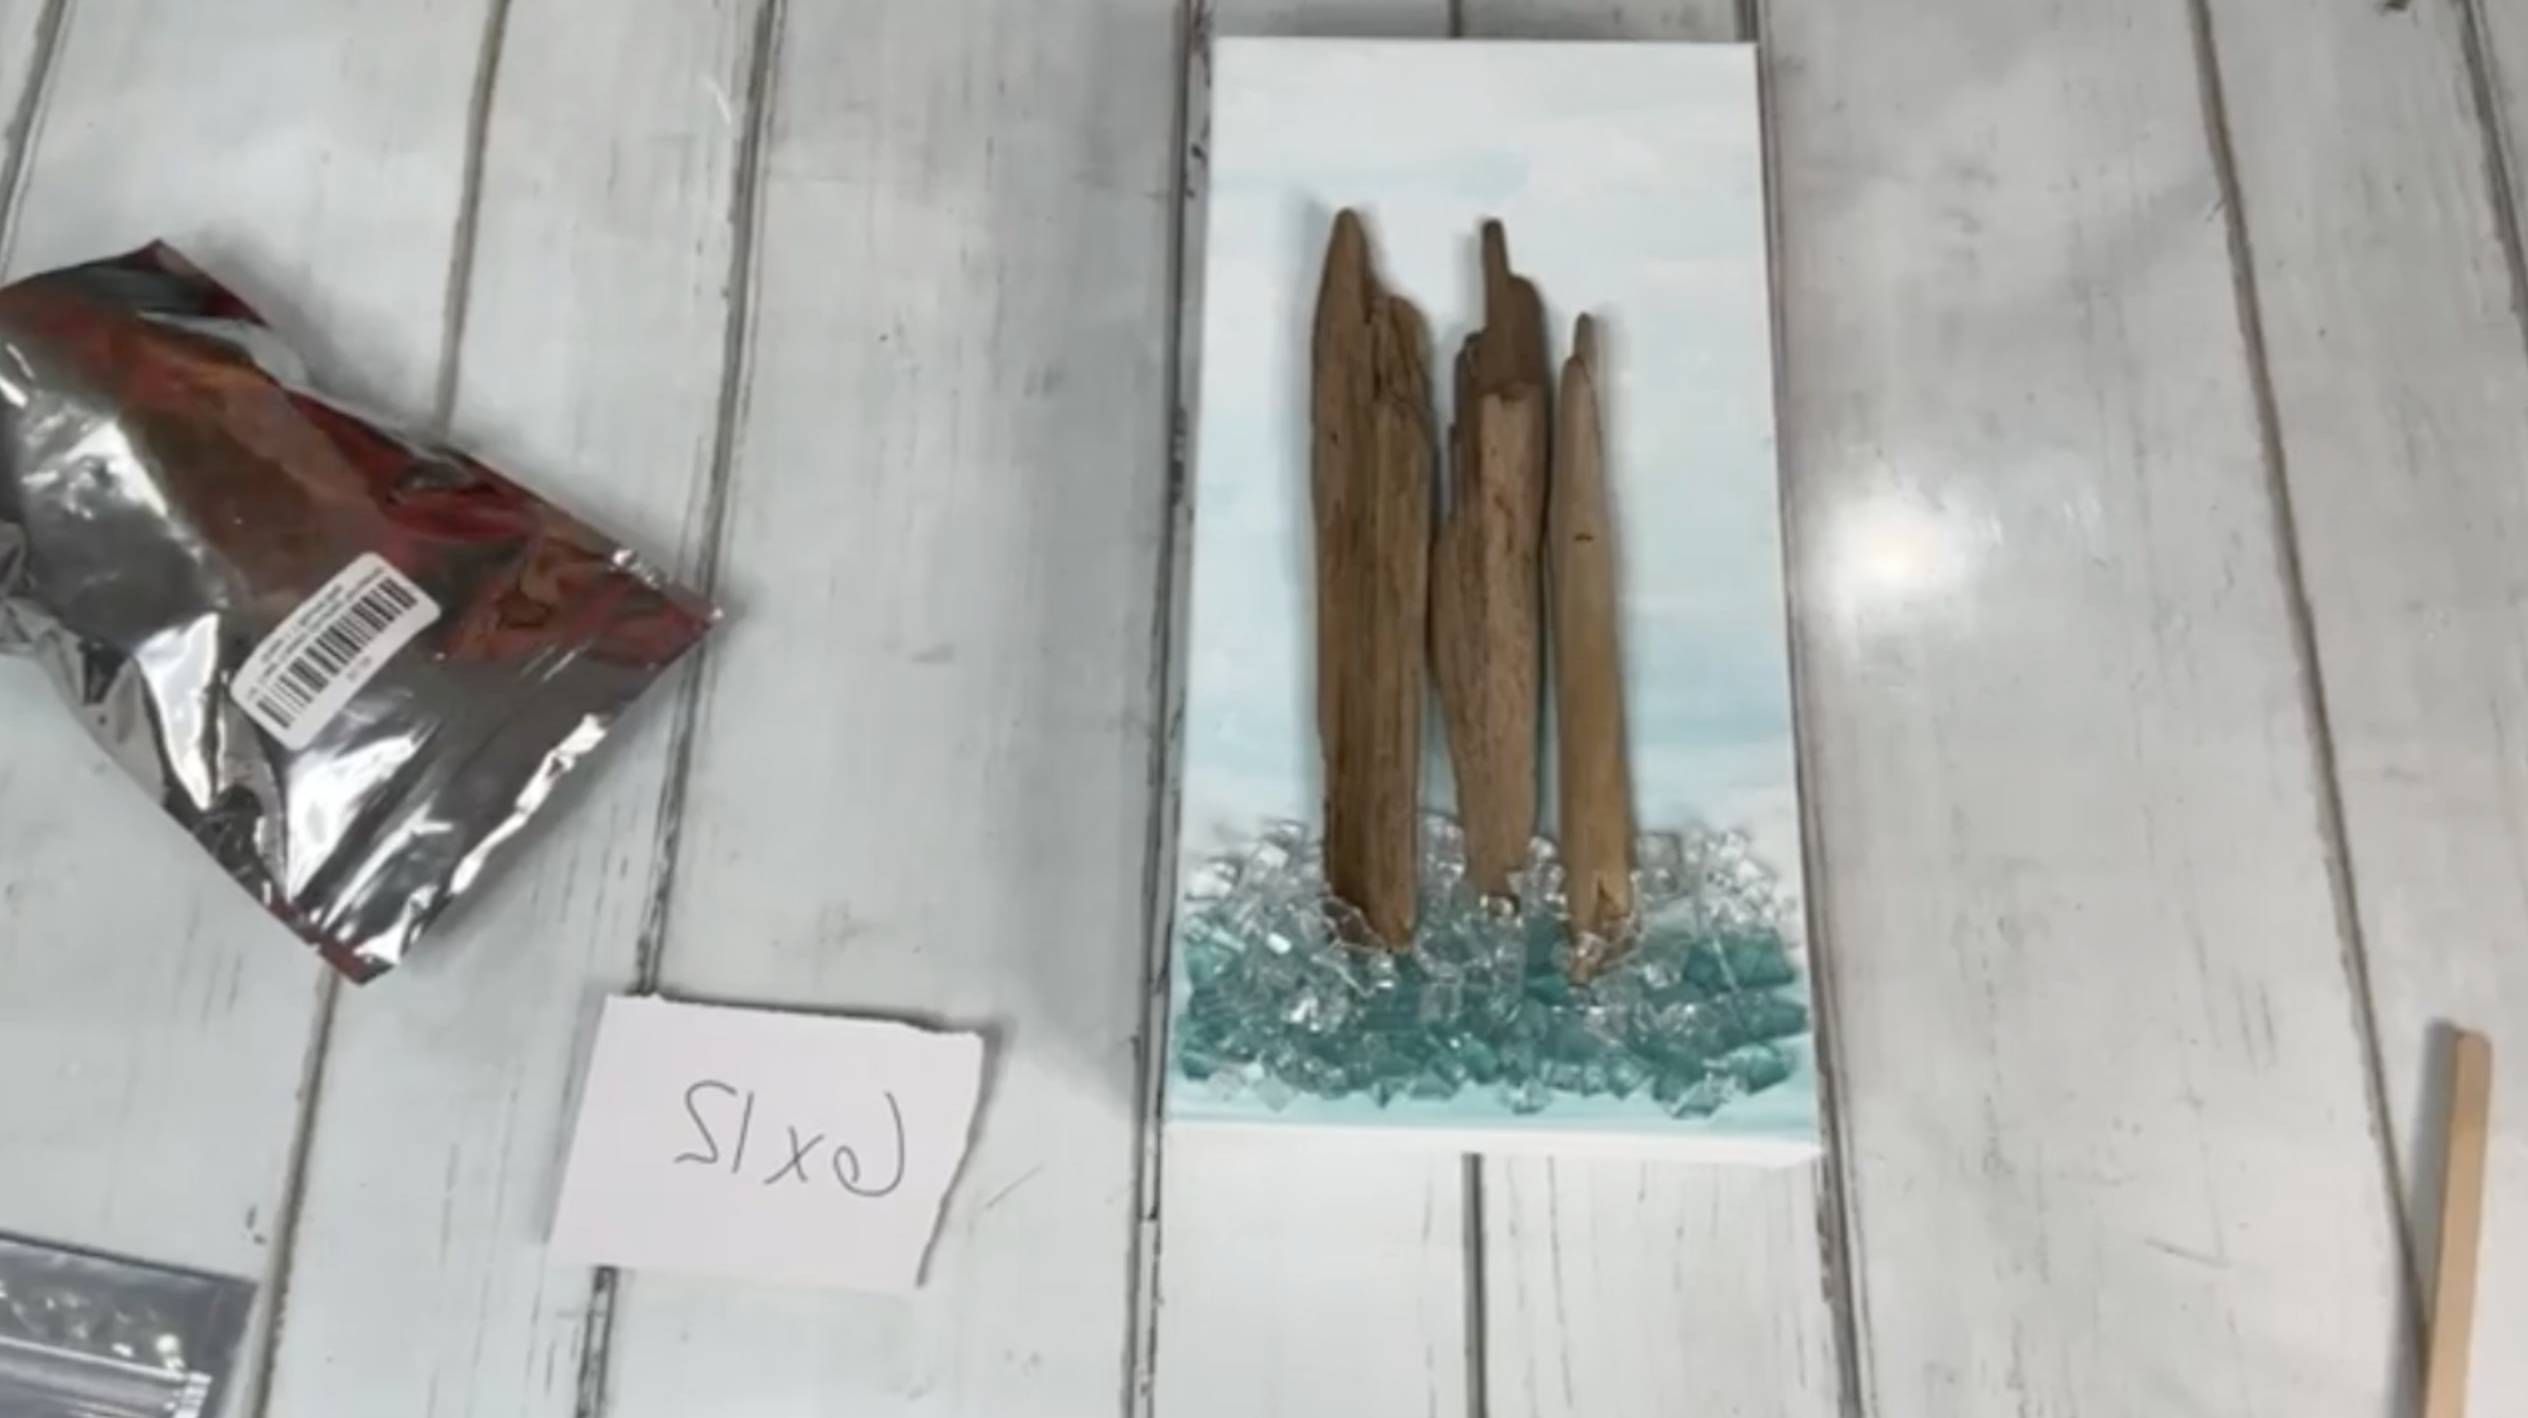
Step 2: Arrange Driftwood & Glass
After the background dried, I selected three small pieces of driftwood to act as the focal point. I made sure they were fairly flat so they’d sit nicely on the canvas.
Before permanently attaching them, I placed them temporarily where I wanted, then added a sprinkle of Solex crushed glass (which has a light blue-green tint) along the water area and in between the driftwood. I also mixed in a little clear crushed glass to add a subtle sparkle.
Step 3: Add Shells, Sea Glass & a Cute Little Bird
To make the scene even more interesting, I dug into my bin of tiny shells and bits of coral. I tucked small shells around the base of the driftwood, covering any visible cut ends to make the piece look more natural.
Next, I found a sweet, tiny black rock to turn into a bird perched on top of the center driftwood. For the bird’s wing, I used a small flat charcoal-colored stone, attached with a dab of glue. Then I drew on a tiny beak, legs, and an eye with a paint pen for a simple but adorable bird detail.
To keep that classic frosted sea glass look, I waited to add my sea glass until after pouring resin, placing a few light blue and green pieces on top for the final touch.
Step 4: Resin & Final Assembly
When everything was in place, I mixed up 1.5 ounces of Art Resin (half resin, half hardener), stirring for 3 minutes. I drizzled resin over the glass and shells first, then smoothed a thin coat across the canvas, avoiding the driftwood. Once the resin was down, I gently set the driftwood pieces back into place and pressed them into the wet resin.
Finally, I added the sea glass on top of the resin, along with a few last shells and beads for extra sparkle. After checking for any stray bubbles and giving it a quick pass with the heat gun to pop them, I let the whole piece cure undisturbed for about 8 hours.
If you don’t want to miss my Facebook LIVE art instruction, make sure you are on my texting list. I always text 10 minutes before I’m going to go LIVE, so you won’t ever miss it. You can text “Hey Cindy” to 901-519-2923.
Want more inspiration and artwork?
- My website artshattered.com with resources, shop, and more!
- My creative membership The Shattered Circle, where you can explore the world of glass art with online workshops, a supportive community, and more!
- My mini creative membership Just A ‘Lil Bit Monthly Glass Art Club, where you’ll get a new quick and easy online tutorial for just a lil' bit of sparkle in your life!
- My Facebook page where I go LIVE every Wednesday night at 6:00 PM CST.
- My YouTube channel which has tons of free art lessons right at your fingertips.
