
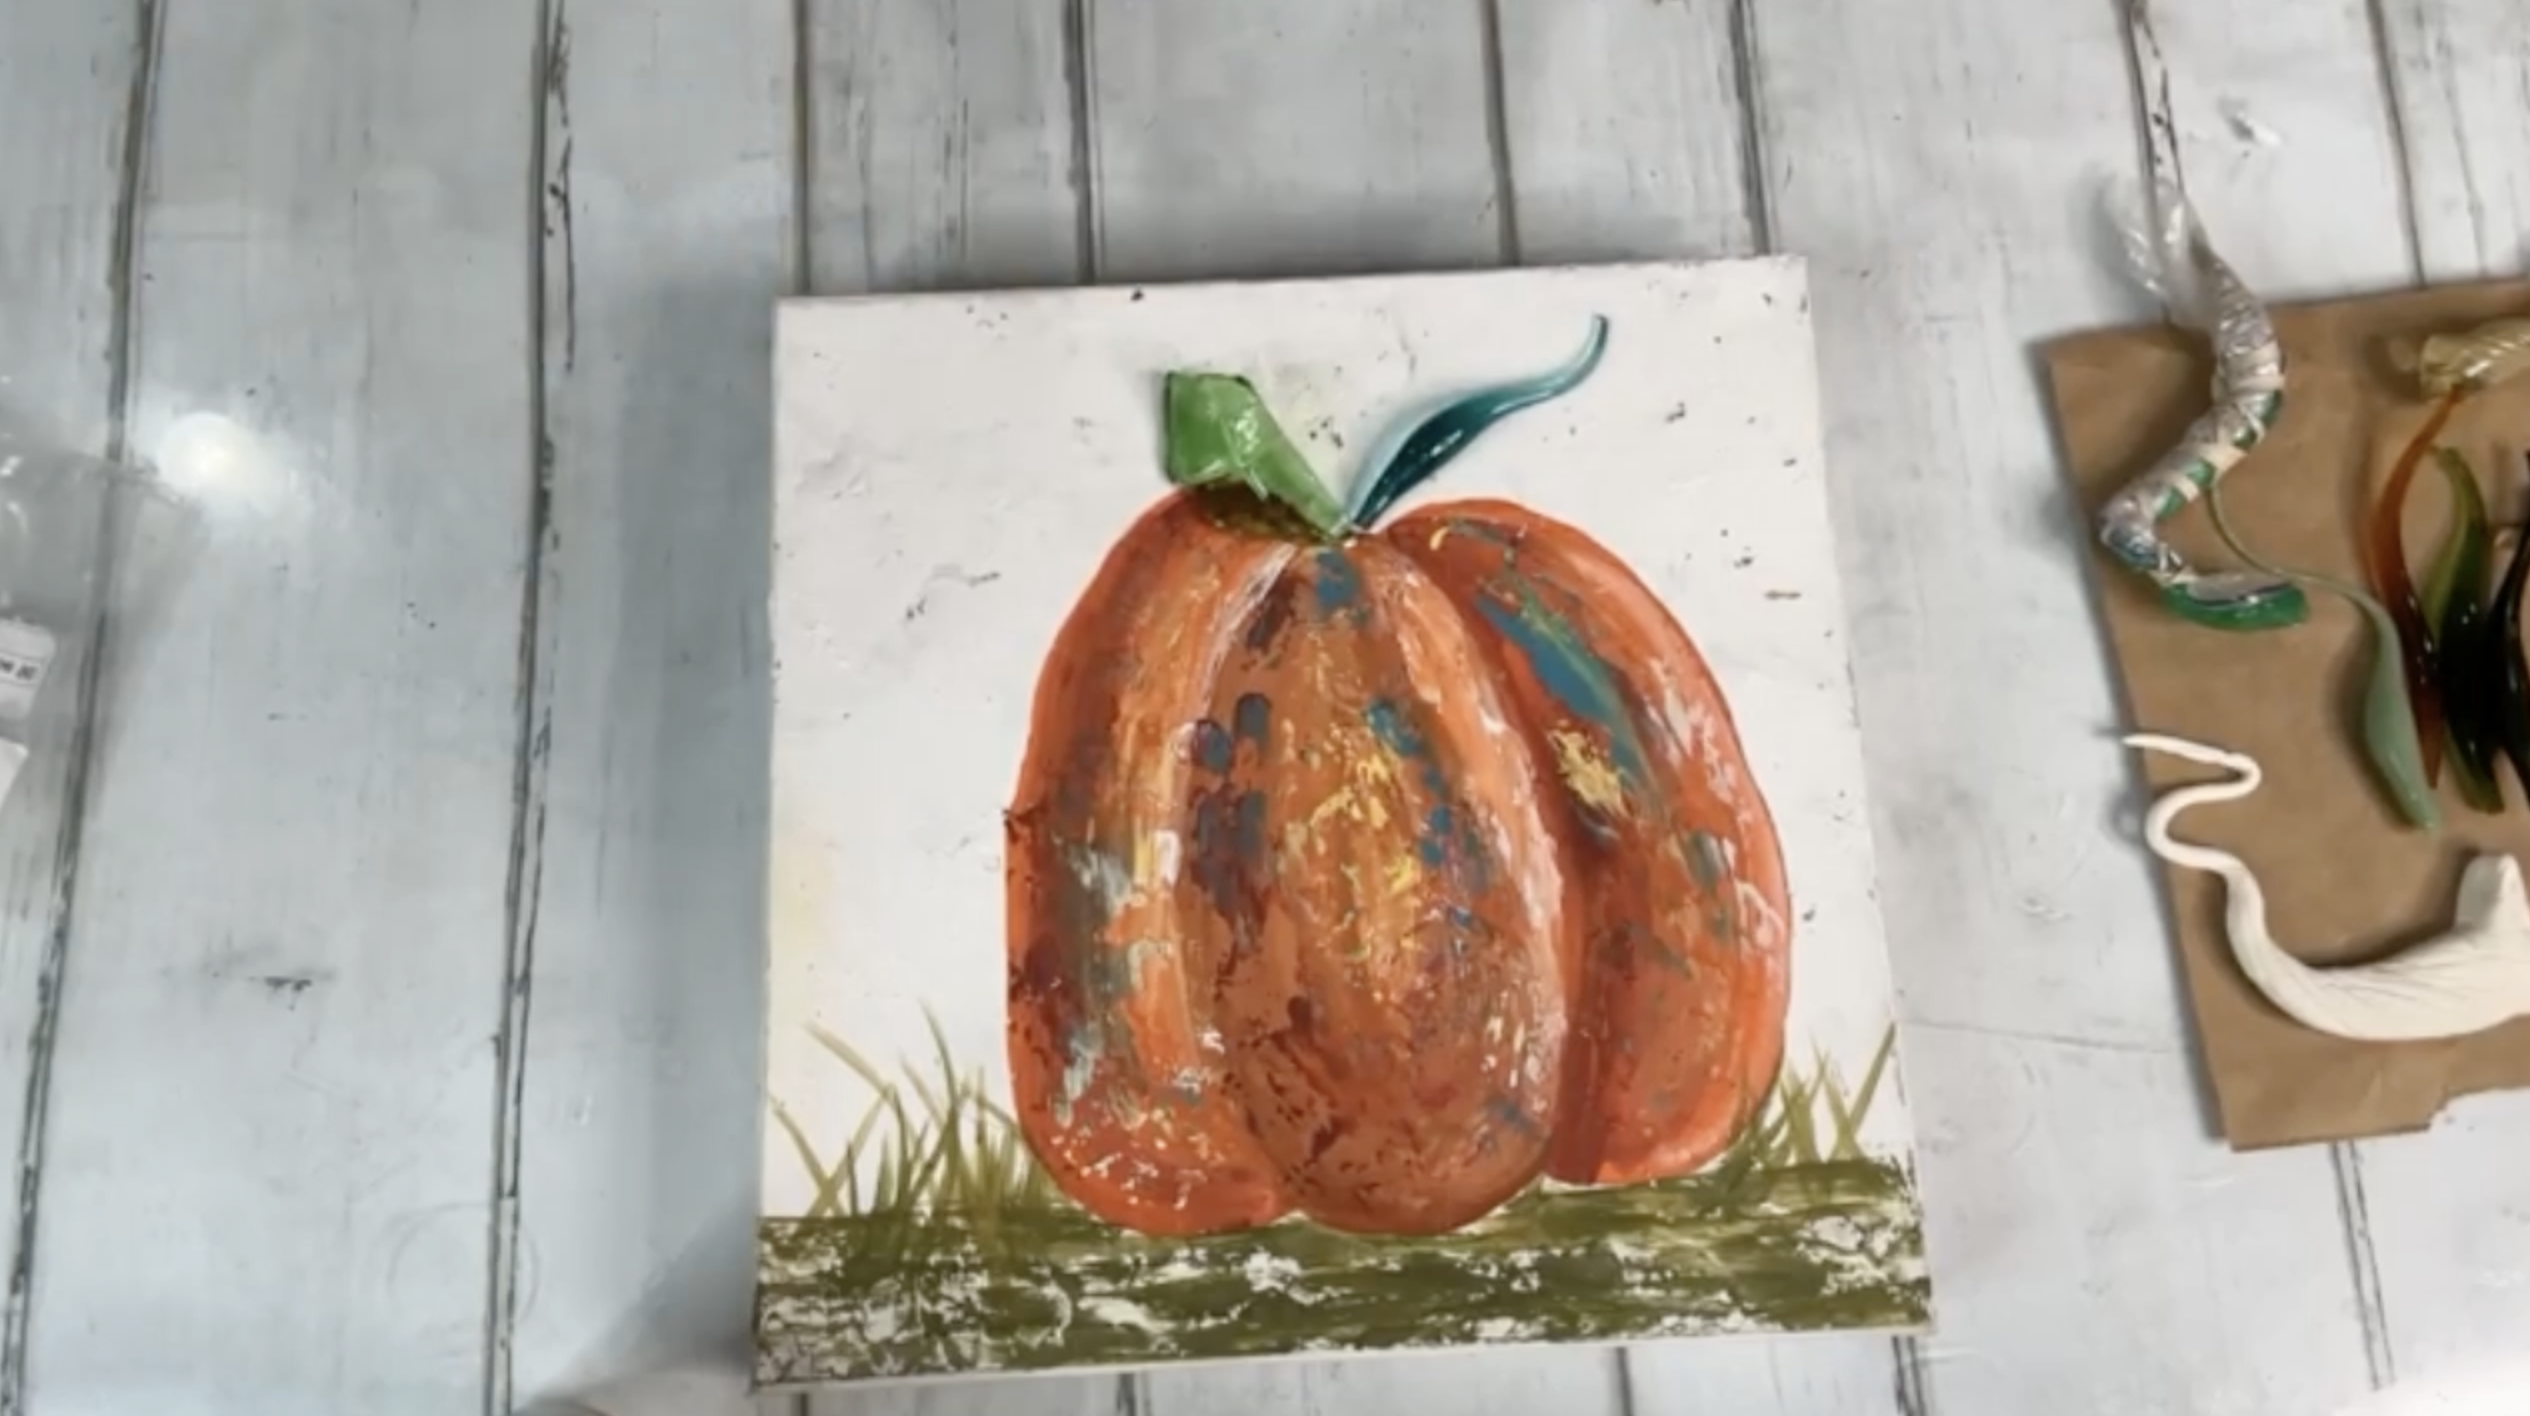
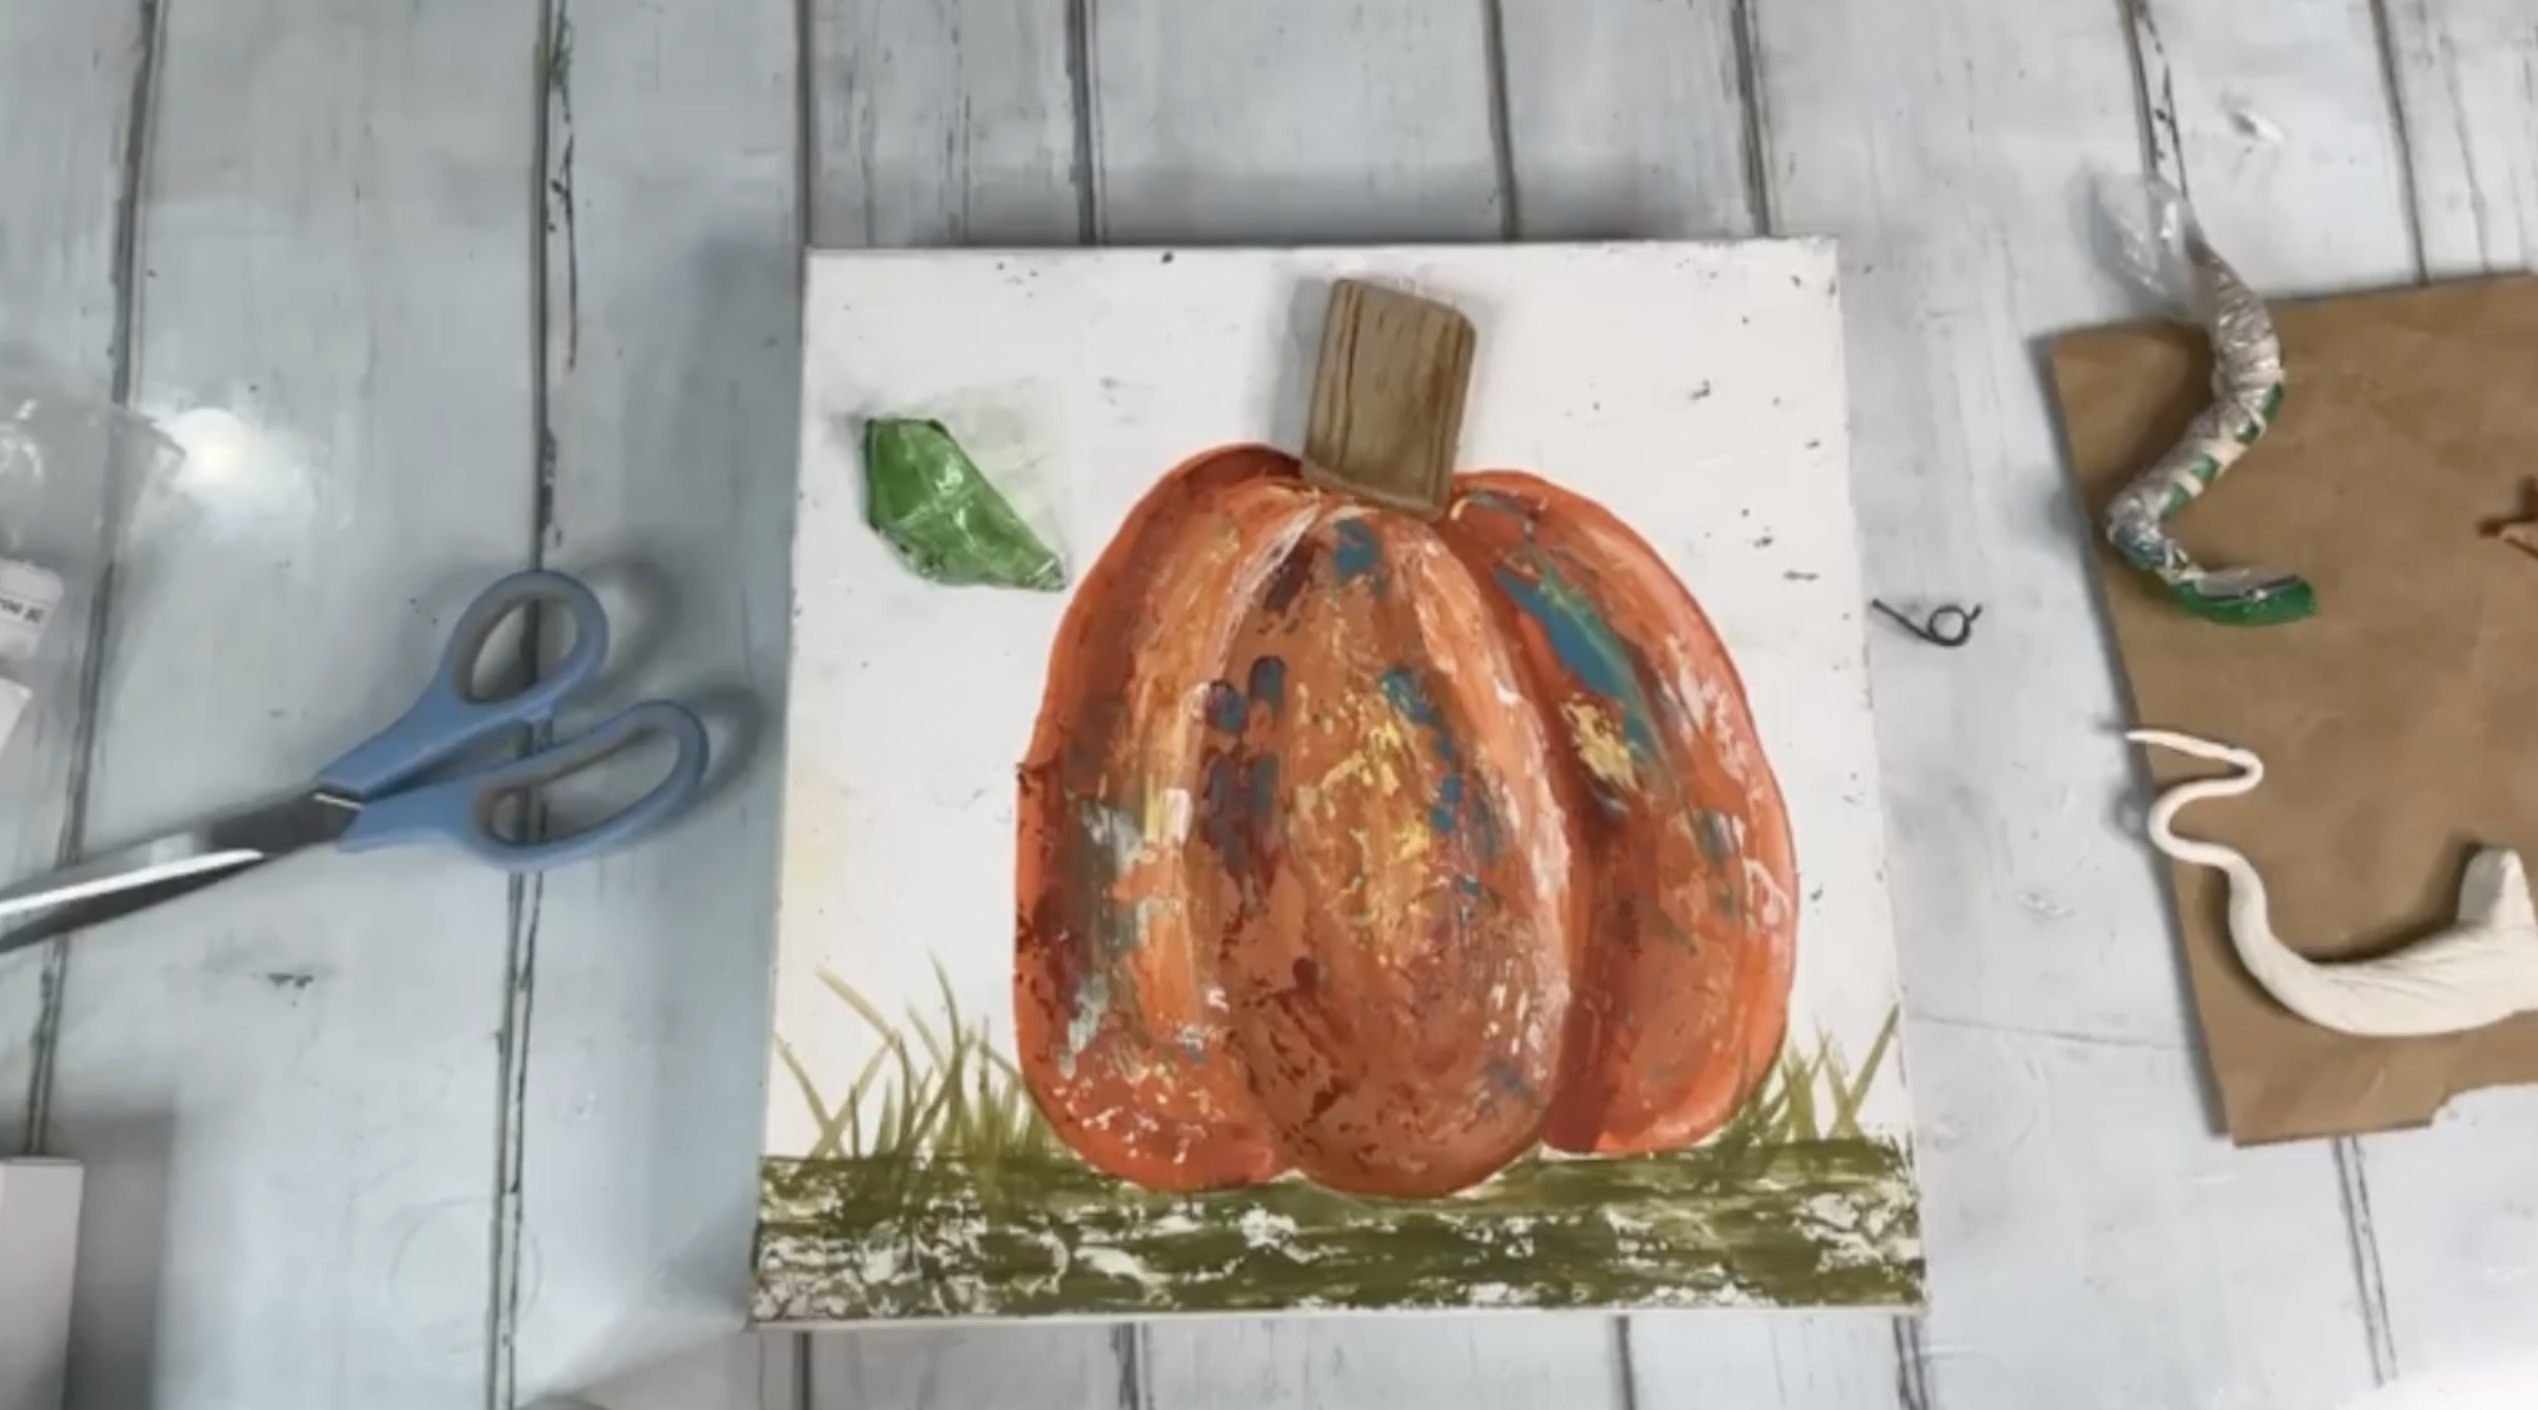
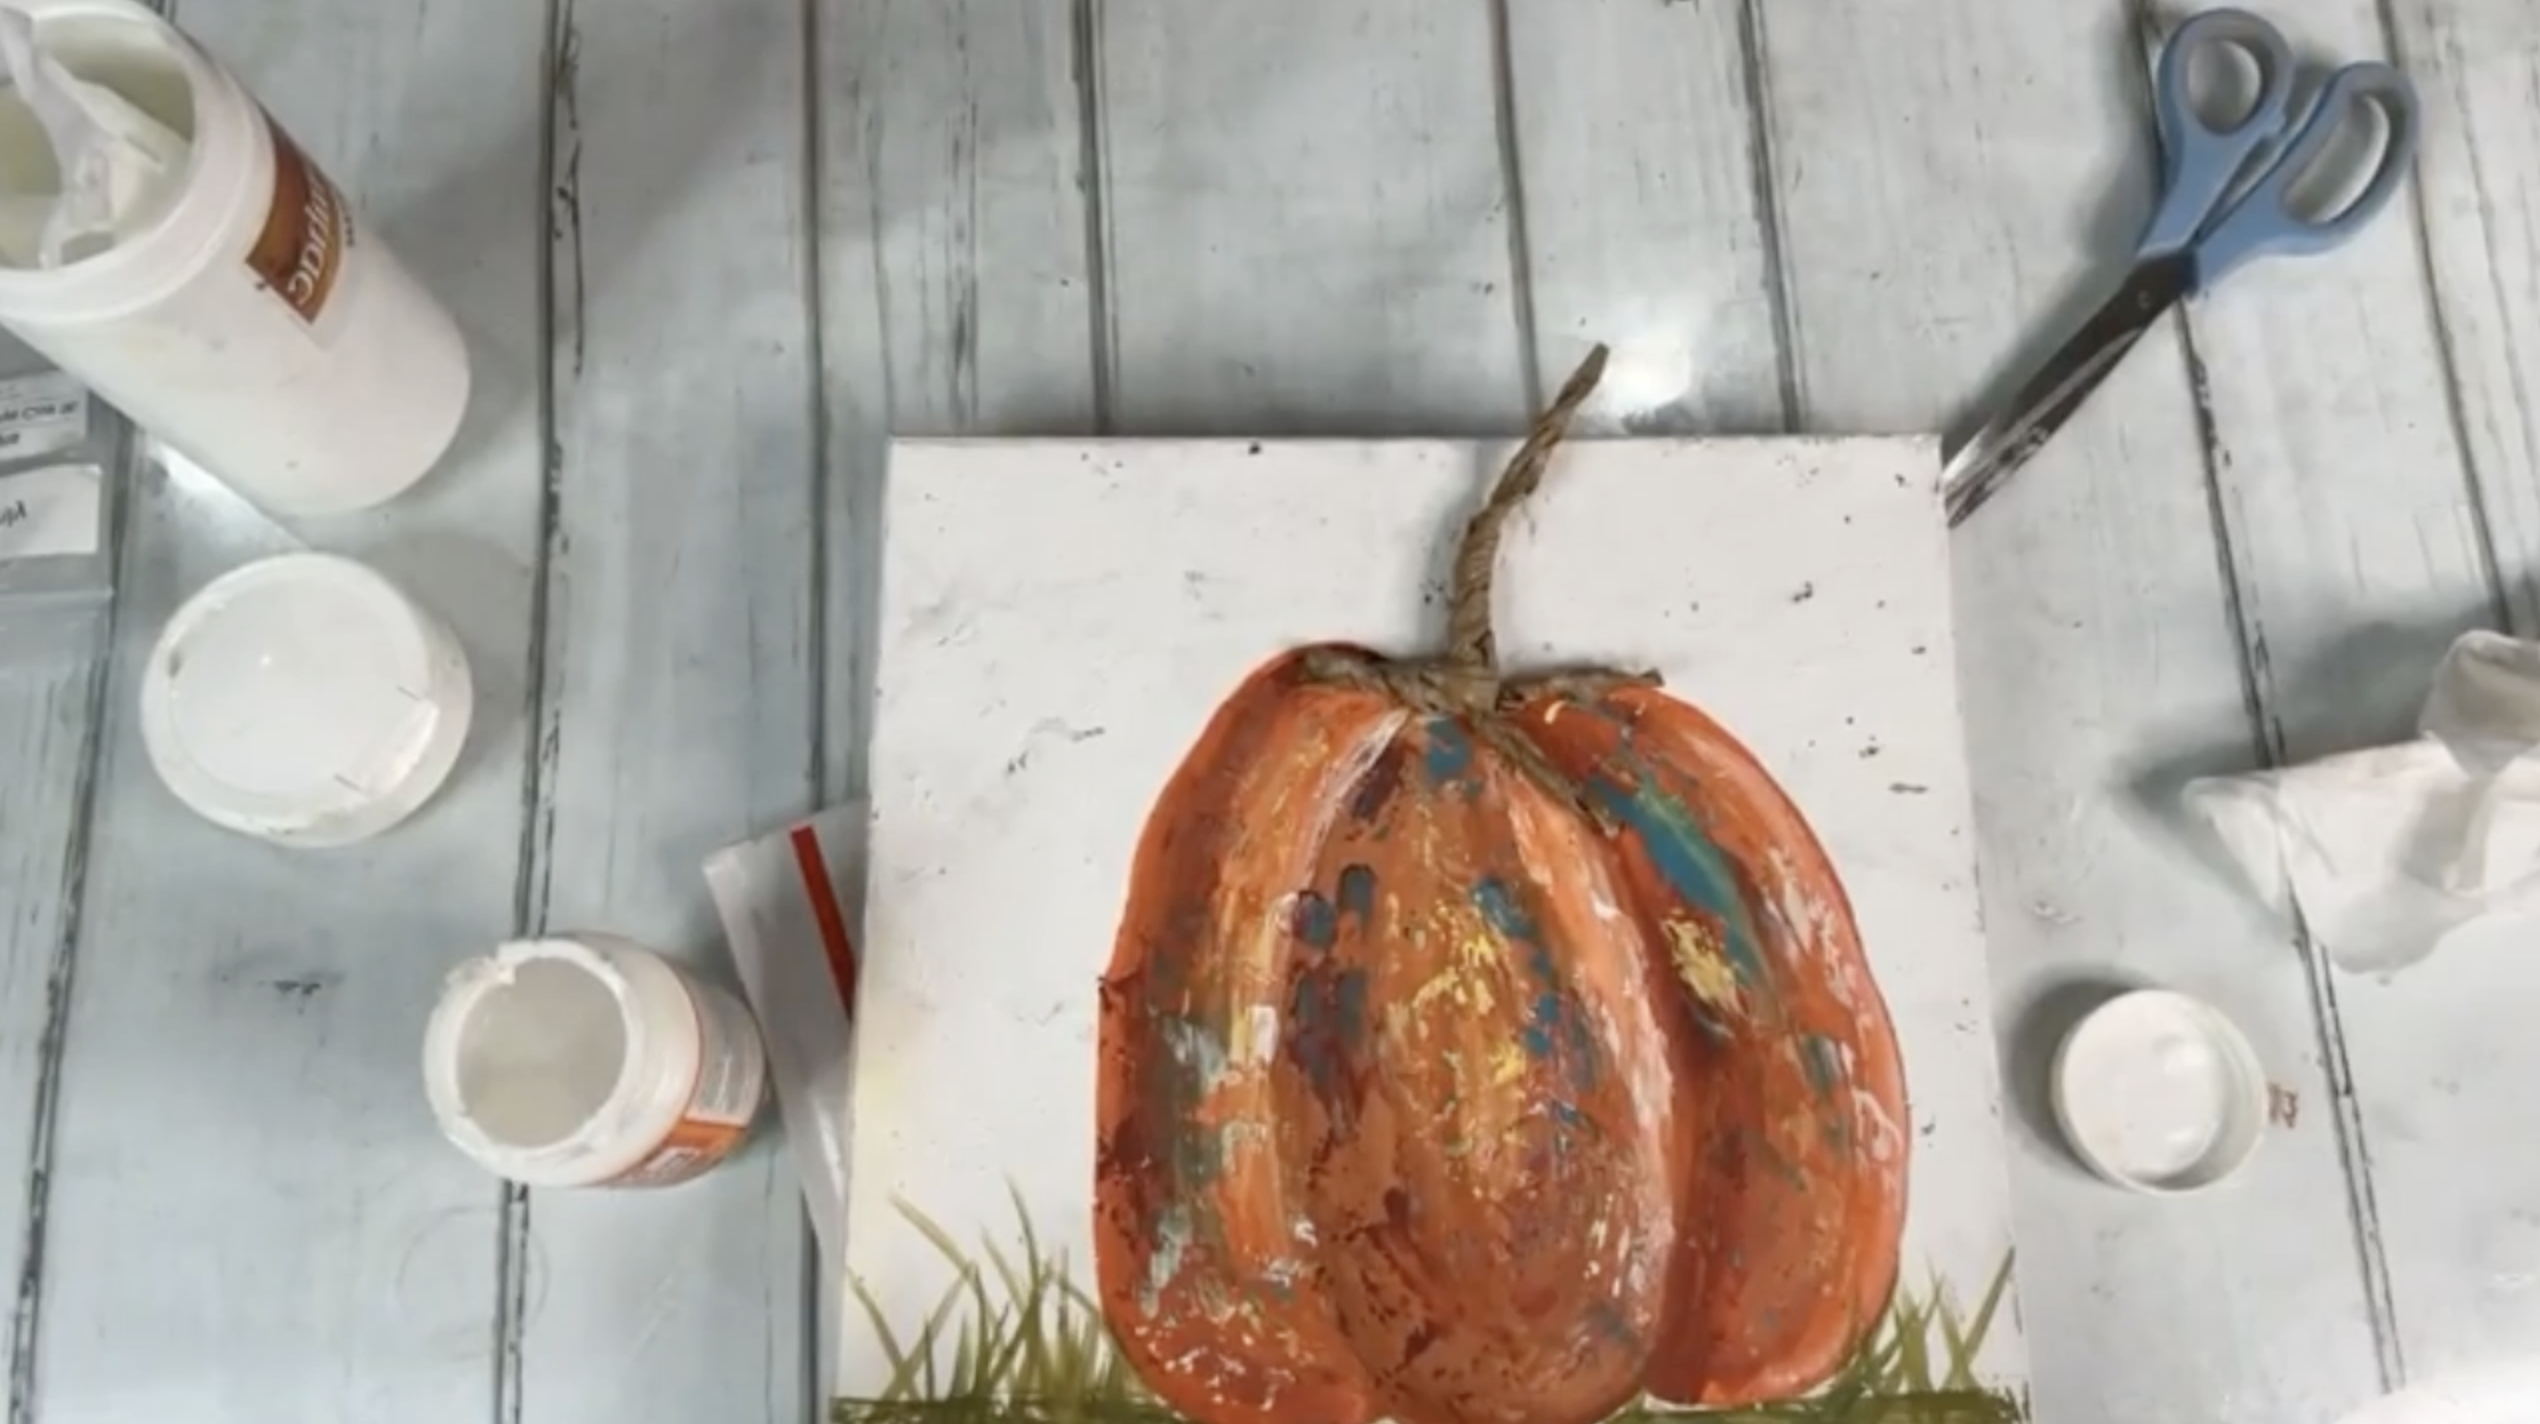
When you’re working on your pumpkin fall art projects, the stem can really make or break the look. Sure, you could paint one on, but why not take it up a notch with something more dimensional? Today I’m sharing seven creative ways to make pumpkin stems using everything from glass to clay to everyday materials you already have around the house.
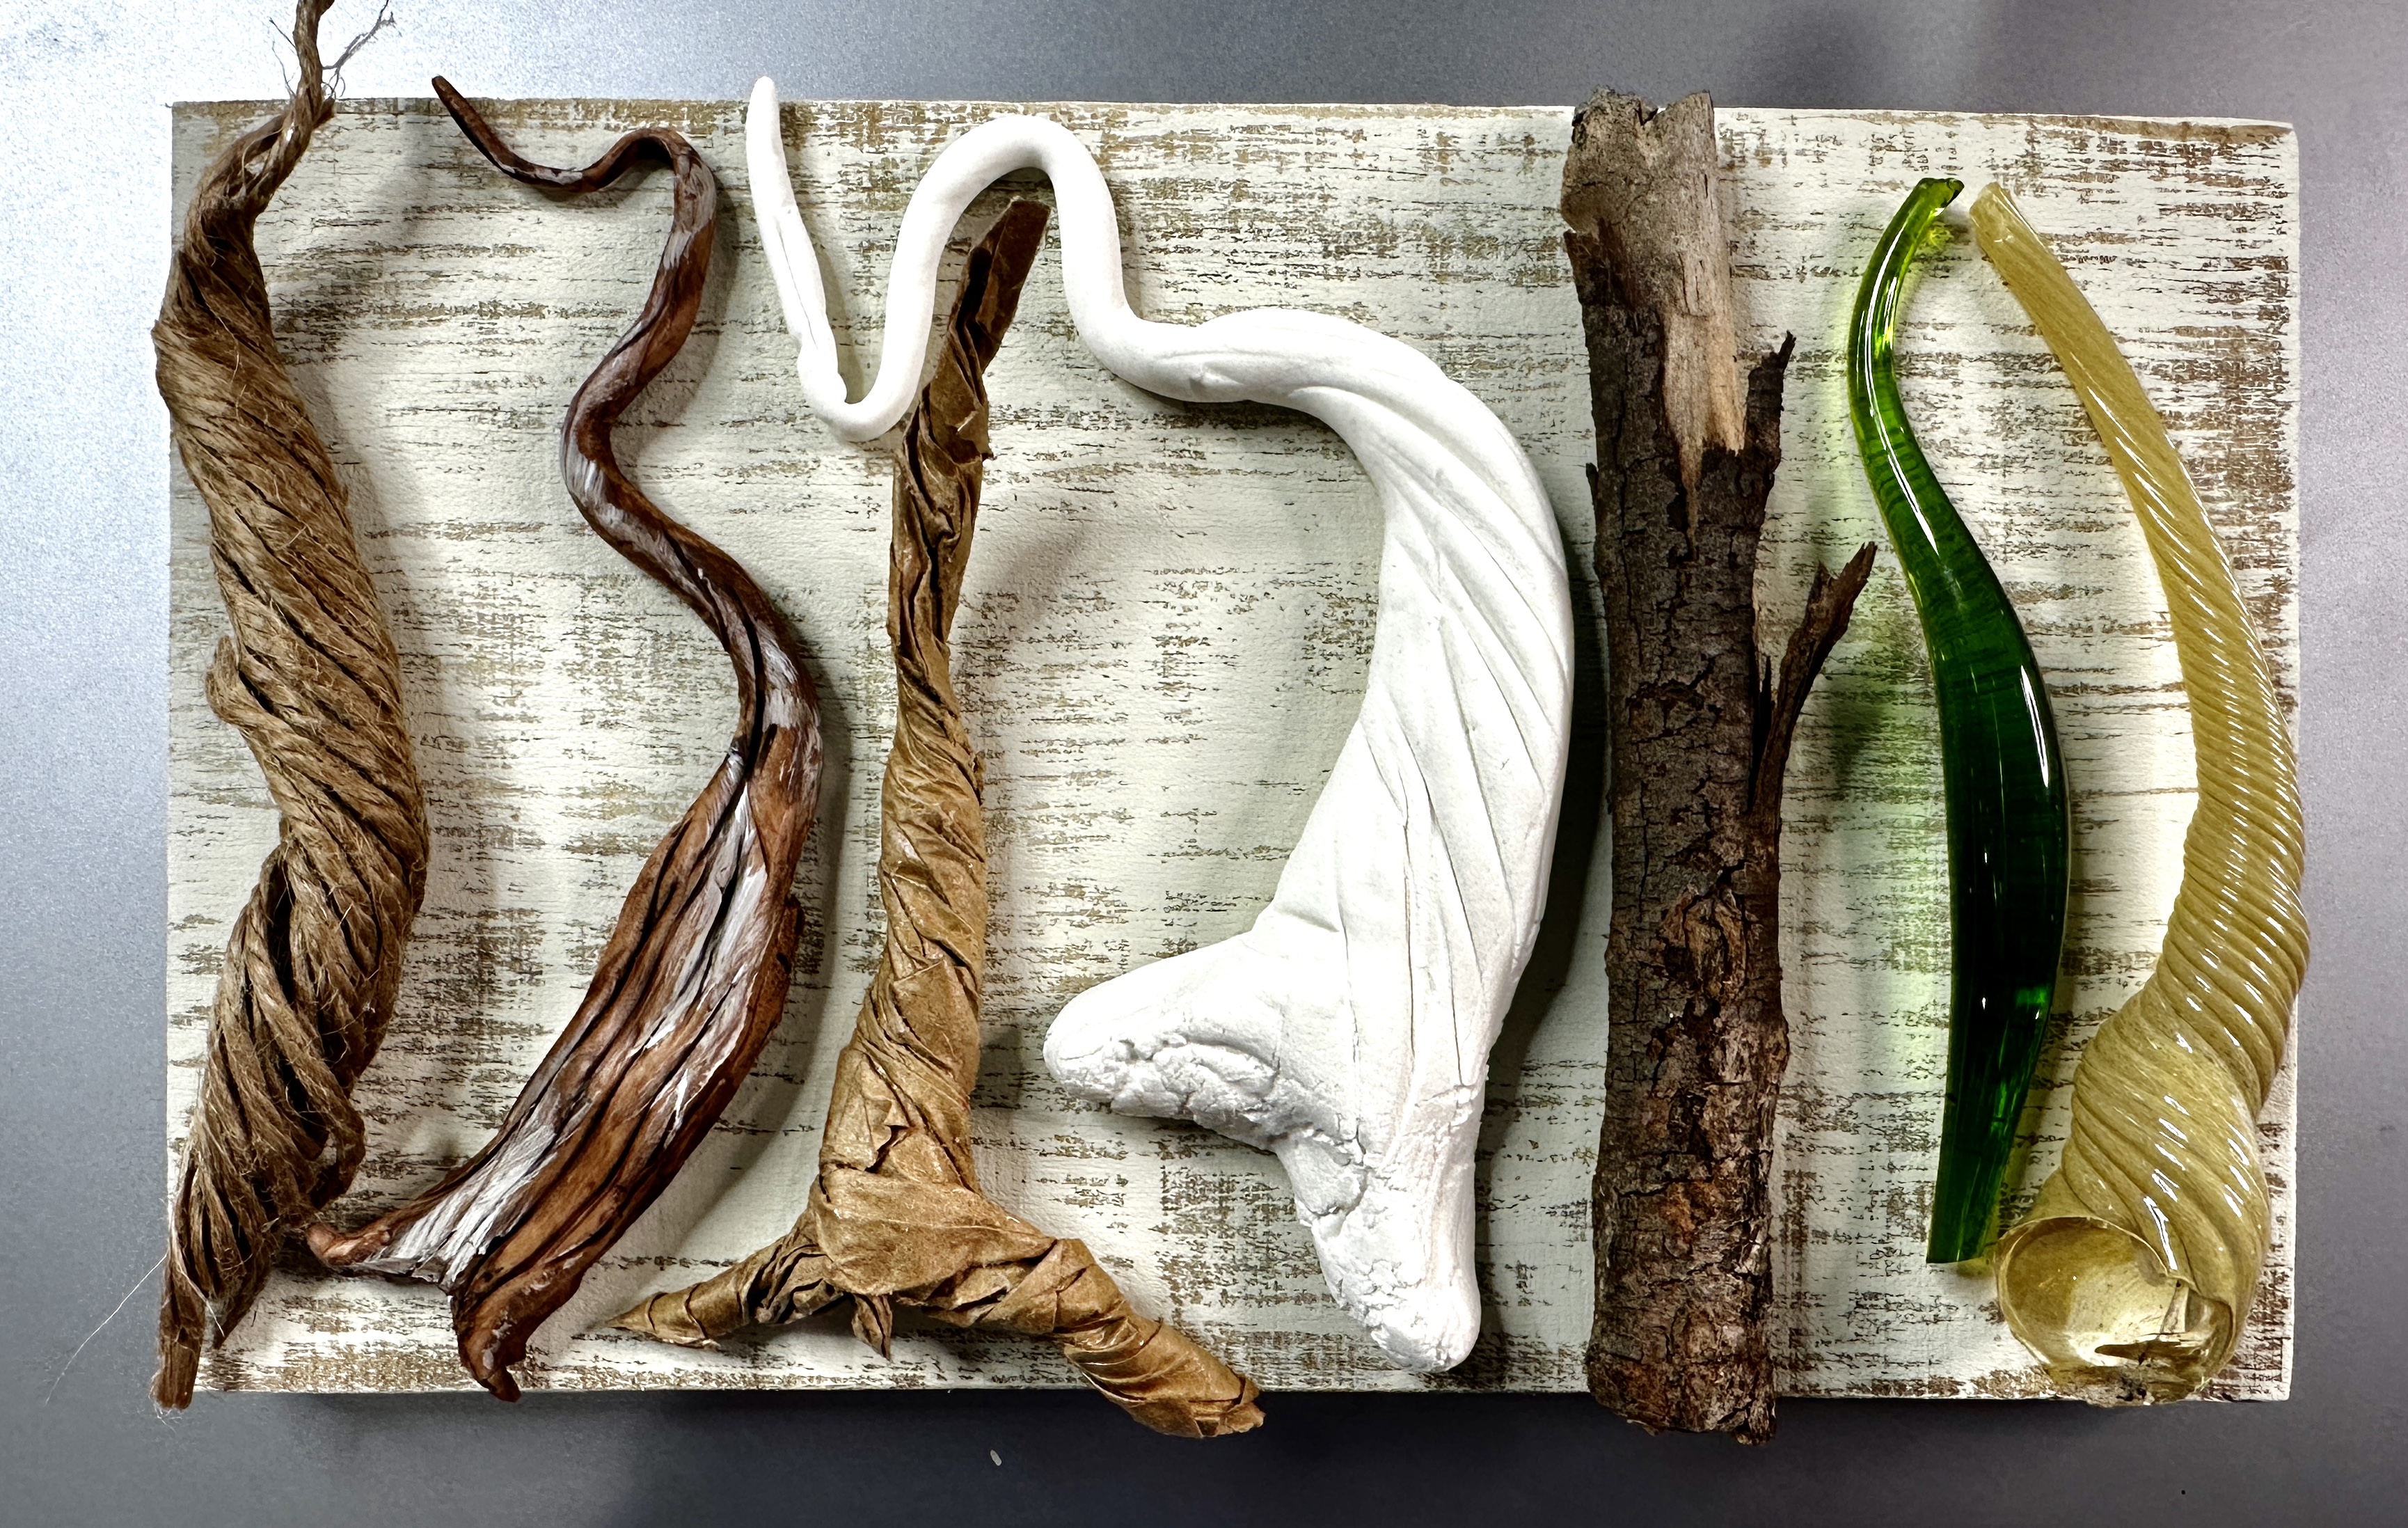
Option 1: Scrap Glass from a Glass Blower
One of my favorite options is to use real glass stems. If you’re lucky enough to live near a glass blower, ask if they have scraps you can buy (or sometimes they’ll even give them away). These chunky, swirled pieces are full of character and resin beautifully onto your canvas pumpkin.
Option 2: Chubbies from JL Glass
Another fantastic option is “Chubbies” from JL Glass. These come in greens, amber, and even blue, and they’re perfect for whimsical pumpkins. You can find them on JL Glass’s Etsy shop or website. Pair them with a cut piece of glass “leaf” and you’ve got yourself a professional-looking pumpkin in minutes.
Option 3: Sticks and Covered Wire
Don’t have specialty glass? No problem. Head outside and grab a stick! A simple twig can make a rustic, farmhouse-style stem. Wrap it with paper-covered floral wire and twist it around a pencil to create curly vines. A cinnamon stick also makes a great (and great-smelling!) alternative.
Option 4: Driftwood
For a more weathered, natural look, use driftwood. A chunky piece makes the perfect topper for a rustic pumpkin, while a tall, skinny piece works beautifully on elongated canvases. You can find driftwood at craft stores, Etsy, Amazon, or even your favorite beach walk.
Option 5: Bits from Floral Picks
Don’t toss out old fall floral picks! The wired stems from Hobby Lobby bundles (the ones that hold pinecones, acorns, and leaves) make surprisingly convincing pumpkin stems. Just snip one off, bend it, and glue it into place.
Option 6: Seashells for Beachy Pumpkins
Want a coastal vibe? Use a pointy shell as your pumpkin stem. It instantly turns your fall décor into a beachy statement piece—perfect for those who decorate with coastal themes year-round.
Option 7: Sculpted Clay or Paper
If you love to create from scratch, try polymer clay (Sculpey) or Model Magic. Roll, twist, and shape your clay into a stem, carve a few lines with a palette knife, and bake (for Sculpey, about 250°F for 15 minutes). Once hardened, paint it with Burnt Umber, add white highlights, and it looks just like wood.
You can also twist strips of jute string (sealed with Mod Podge) or craft paper into rustic stems. These take longer to dry but are budget-friendly and give your pumpkin a handmade charm.
From glass Chubbies to sticks, driftwood, seashells, or handmade clay, there’s no limit to how creative you can get with pumpkin stems. Think outside the box, mix in a little imagination, and you’ll have a pumpkin that’s truly one-of-a-kind.
Pro Tip: Keep a stash of extra materials like twigs, floral wires, shells, or clay. That way, no matter the style of pumpkin you’re working on, you always have a stem option ready to go.
If you don’t want to miss my Facebook LIVE art instruction, make sure you are on my texting list. I always text 10 minutes before I’m going to go LIVE, so you won’t ever miss it. You can text “Hey Cindy” to 901-519-2923.
Want more inspiration and artwork?
- My website artshattered.com with resources, shop, and more!
- My creative membership The Shattered Circle, where you can explore the world of glass art with online workshops, a supportive community, and more!
- My mini creative membership Just A ‘Lil Bit Monthly Glass Art Club, where you’ll get a new quick and easy online tutorial for just a lil' bit of sparkle in your life!
- My Facebook page where I go LIVE every Wednesday night.
- My YouTube channel which has tons of free art lessons right at your fingertips.
