
When you’re working on your pumpkin fall art projects, the stem can really make or break the look. Sure, you could paint one on, but why not take it up a notch with something more dimensional? Today I’m sharing seven creative ways to make pumpkin stems using everything from glass to clay to everyday materials you already have around the house.
Option 1: Scrap Glass from a Glass Blower
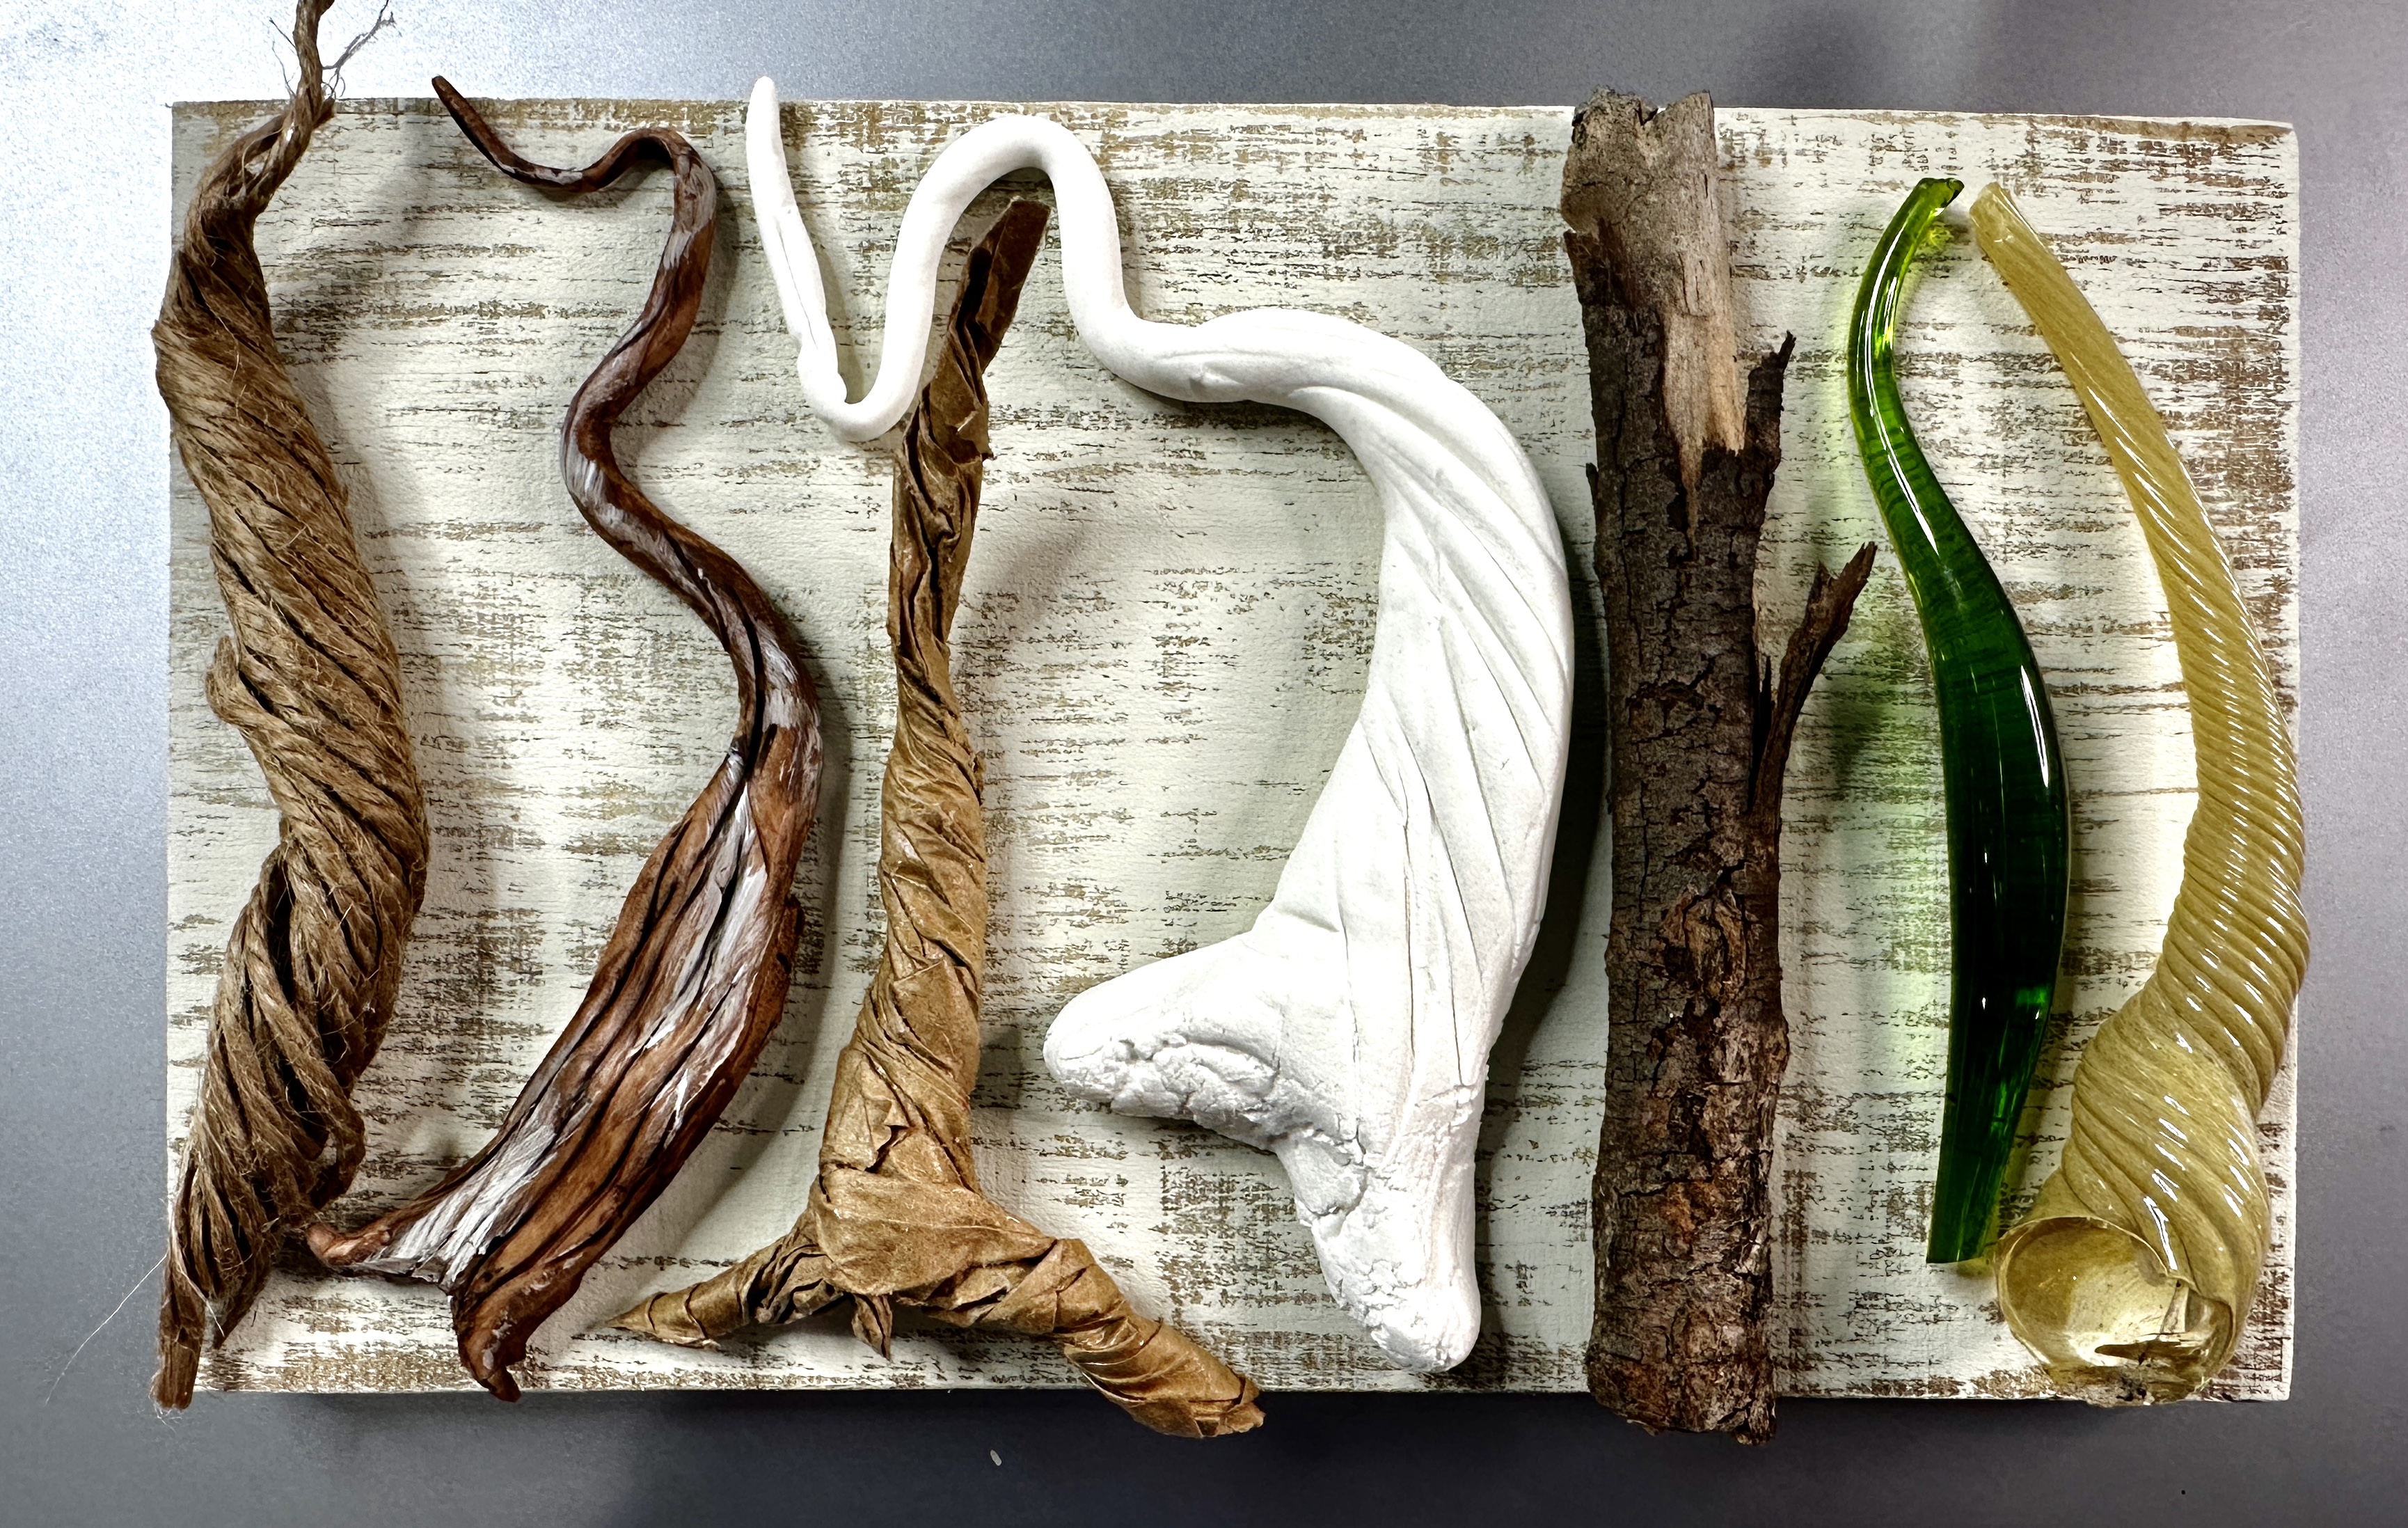
One of my favorite options is to use real glass stems. If you’re lucky enough to live near a glass blower, ask if they have scraps you can buy (or sometimes they’ll even give them away). These chunky, swirled pieces are full of character and resin beautifully onto your canvas pumpkin.
Option 2: Chubbies from JL Glass
Another fantastic option is “Chubbies” from JL Glass. These come in greens, amber, and even blue, and they’re perfect for whimsical pumpkins. You can find them on JL Glass’s Etsy shop or website. Pair them with a cut piece of glass “leaf” and you’ve got yourself a
...


