
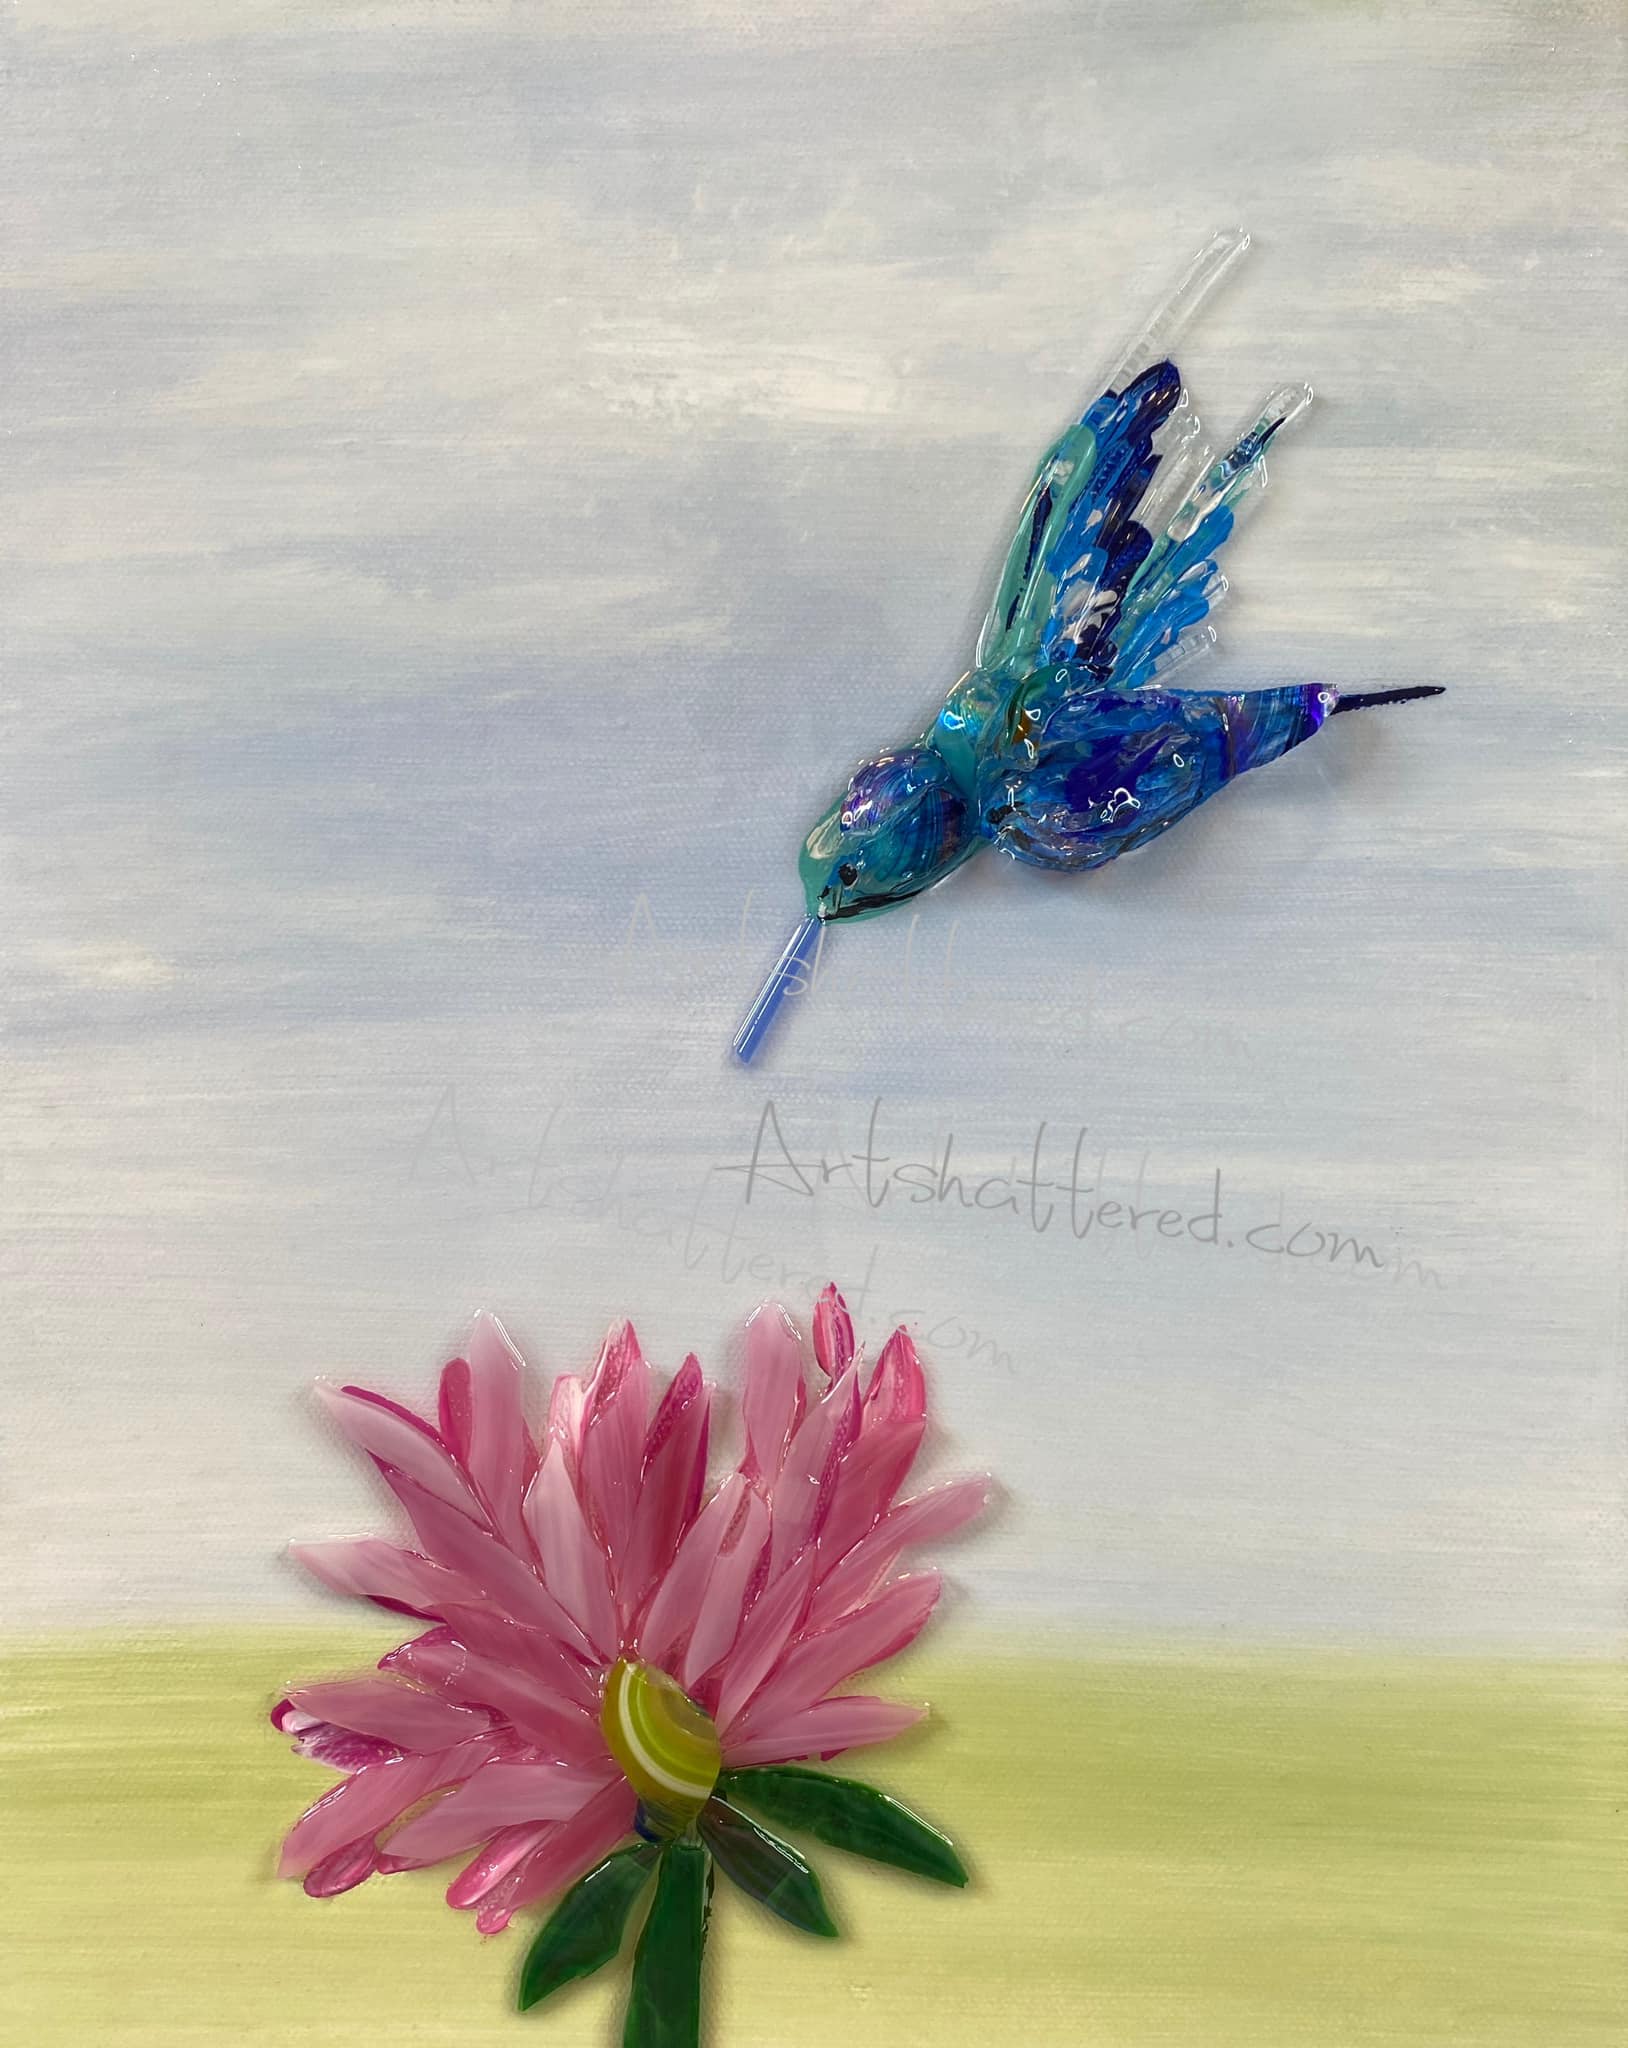
Hummingbird 🌸
If you’re in the mood to create something soft, pretty, and full of movement, this hummingbird project is such a fun one to make! This project is a great example of how painted details and glass can work together beautifully. You do not need to overpaint every single detail, because the glass does a lot of the visual work in the finished piece. That makes this a really approachable mixed media project, even if birds feel a little intimidating at first!
Step 1: Paint the Background and Sketch
Paint your background with a light green in the bottom portion of the canvas and some blue and white on the top portion of the canvas to create a grass and sky compositon. Let dry.
Begin by lightly sketching your hummingbird onto the canvas with watercolor pencils. You could also use a tracer. The sketch does not need to be overly detailed, but it should give you the general shape of the head, body, wings, tail, and beak placement. Add a simple flower near the bottom of the canvas as well. This flower will act as the focal point for the hummingbird and helps balance the composition.
Because glass will be layered on top later, the sketch is really there just to help with placement and direction. You do not need to stress over making it perfect.
Step 2: Paint the Hummingbird Base
Using a small palette knife, begin adding color to the hummingbird. Start with Viridian or a teal-toned color and build the shape of the head and upper body. Then blend in some lighter blue along the belly area. Continue working with darker blue tones through the body and tail, adding just a little at a time.
The goal here is not to create a perfectly detailed painted bird. Instead, you are laying down color that will peek through the glass later. Think of this as a painted underlayer. The palette knife gives the paint a soft, sculpted look that works beautifully under resin and glass, so keep your application loose and organic.
Step 3: Add Highlights and Shadow to the Bird
Once the basic bird shape is painted in, add a few small touches of white for highlight. These can go along the body, wings, and areas where you want a little more contrast. Add a little bit of black or a very dark blue under the belly and in the tail area to deepen the shape.
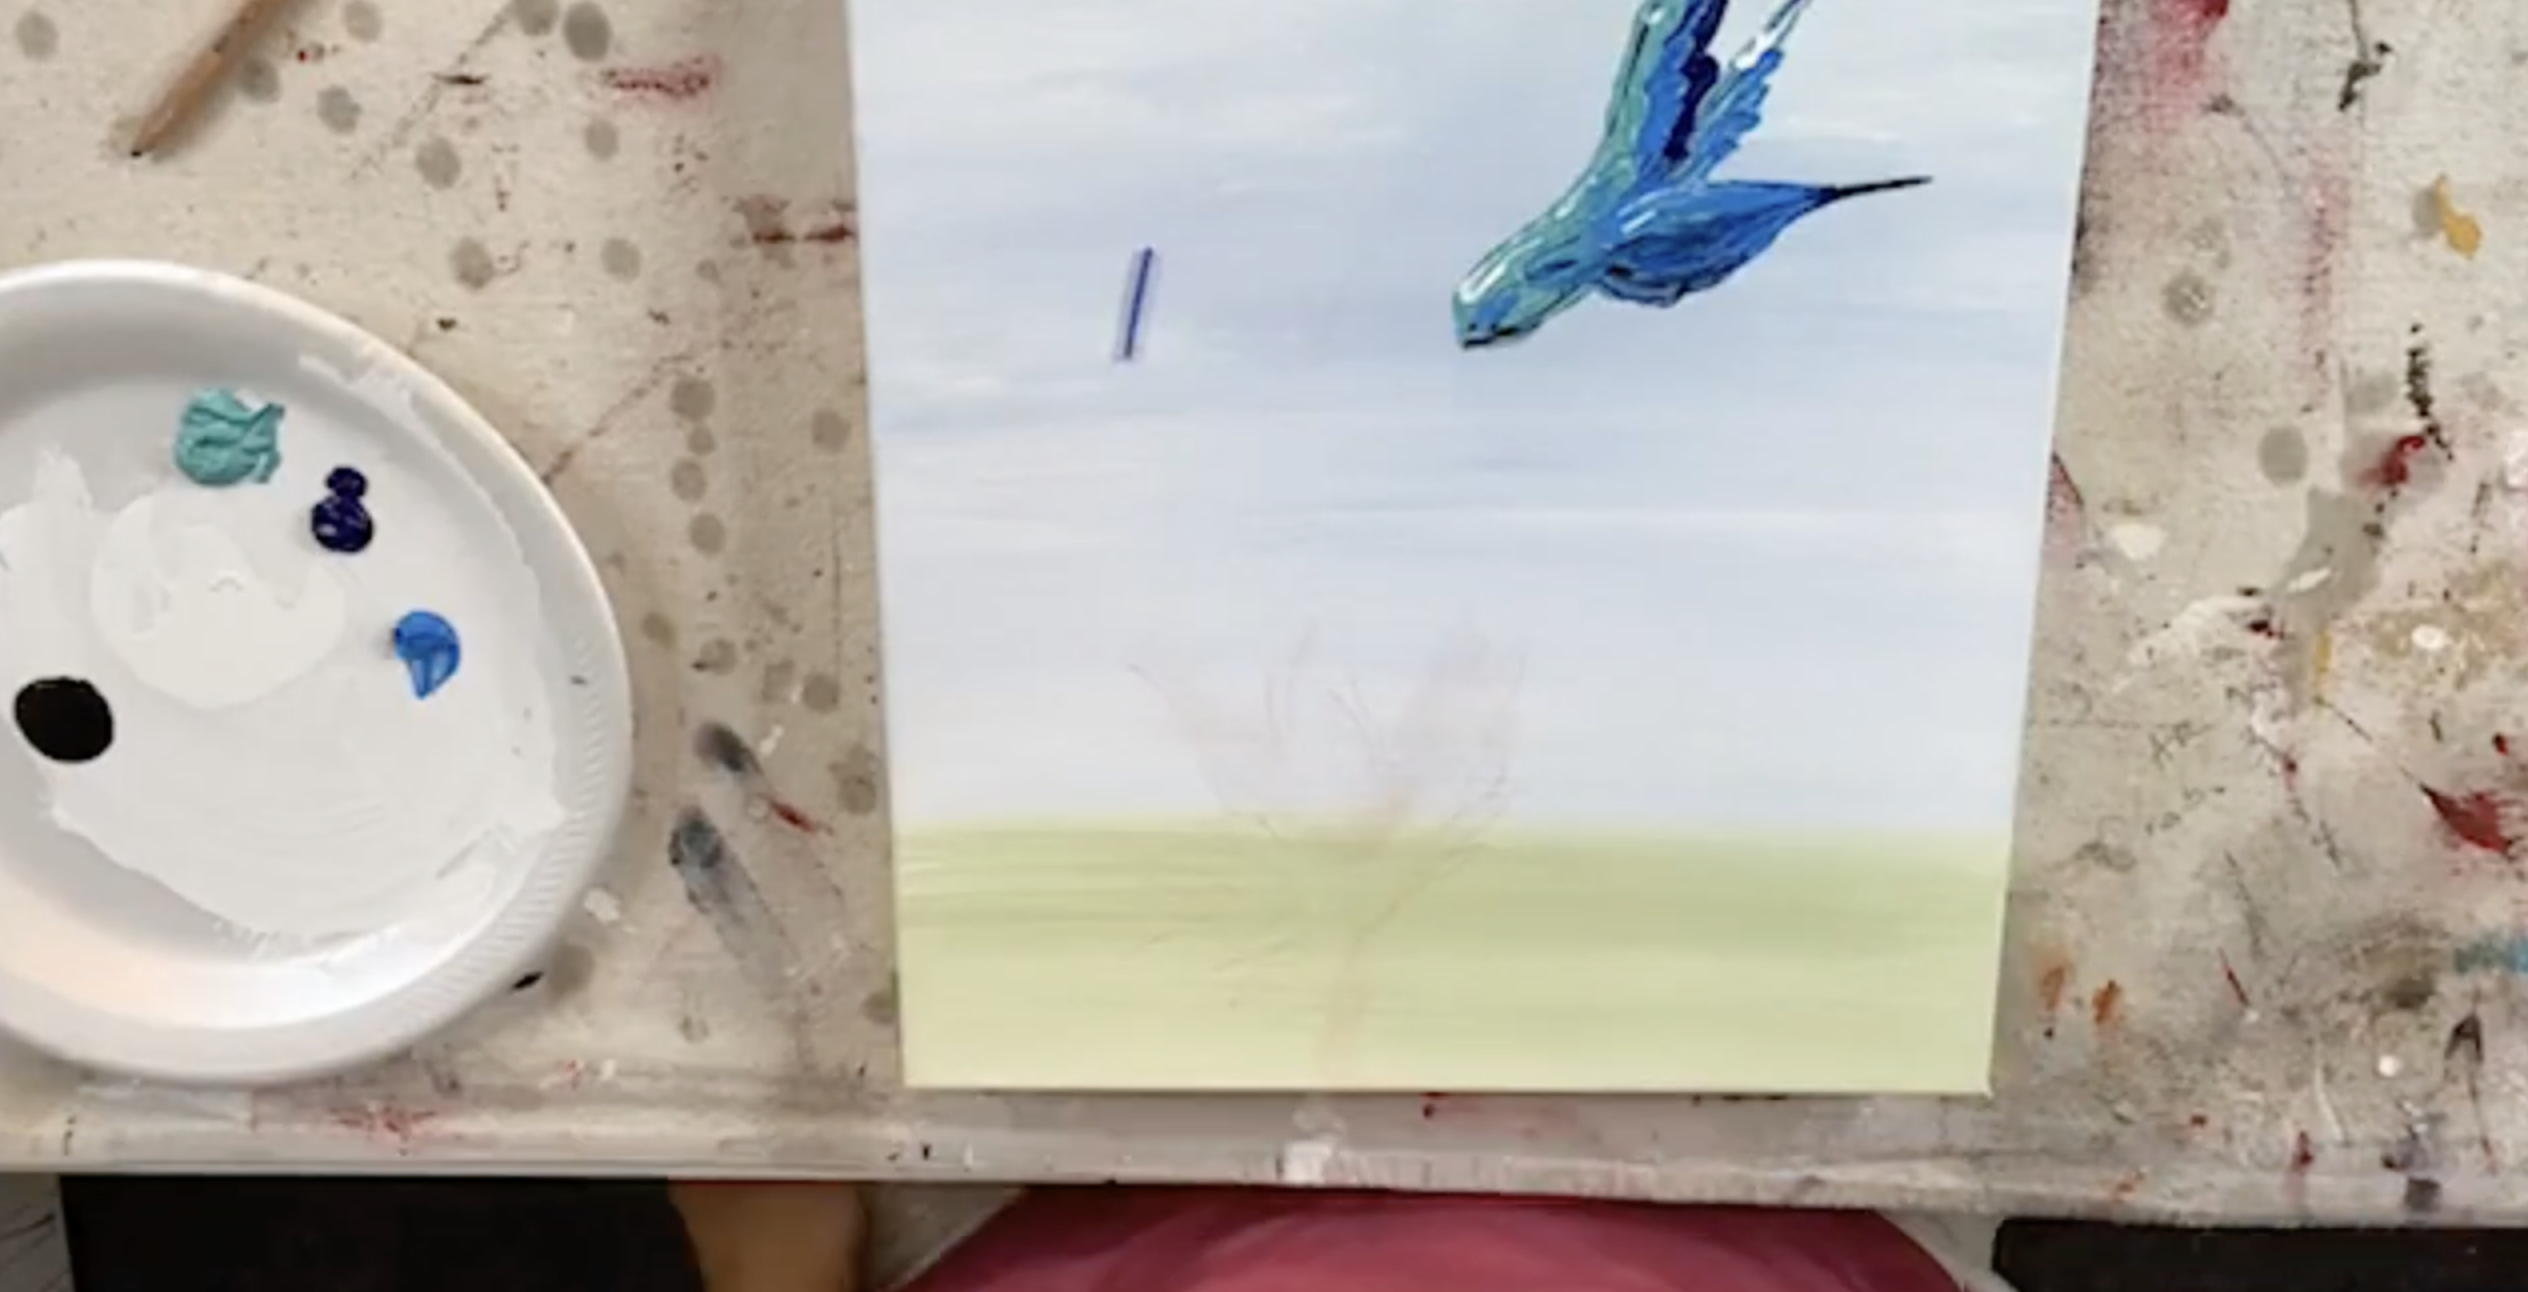
Step 4: Create and Attach the Beak
For the hummingbird beak, cut a narrow sliver from a piece of glass using wheeled nippers. A small straight piece works beautifully here and adds a delicate, elegant touch to the finished bird. Once cut, set it aside until the painted bird is complete.
Later, add a tiny bit of clear tacky glue and place the glass beak where the sketched beak would be. This keeps it in place before you add resin.
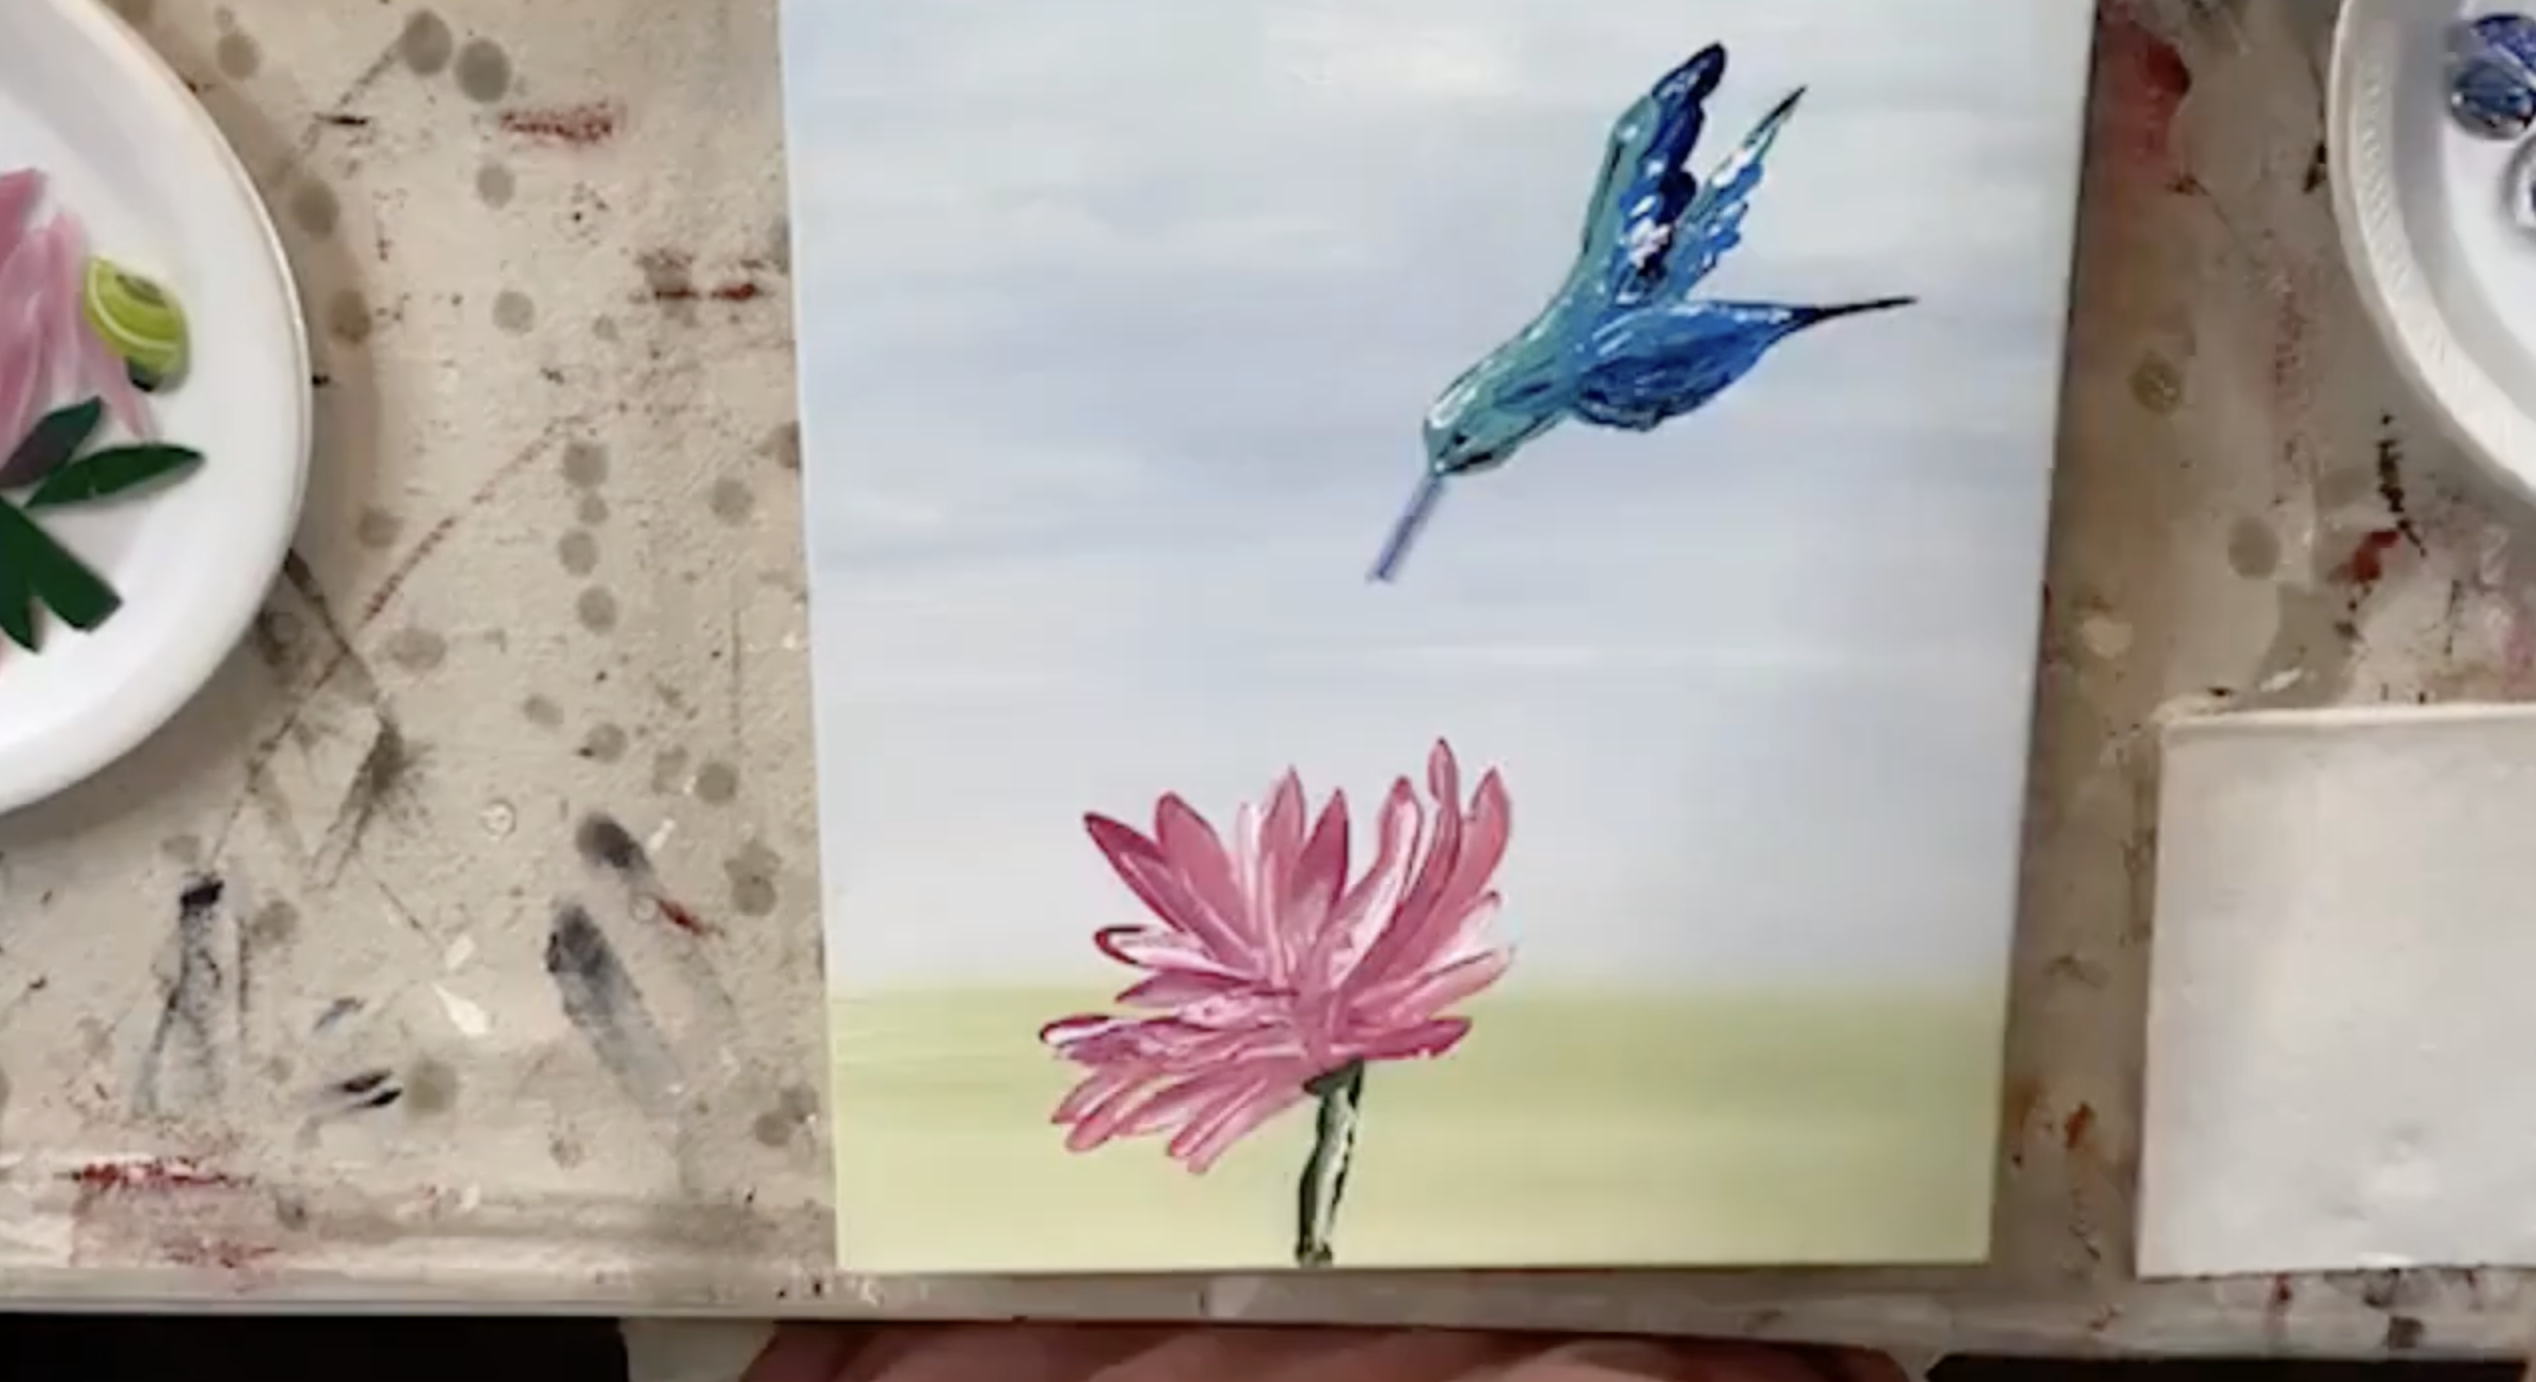
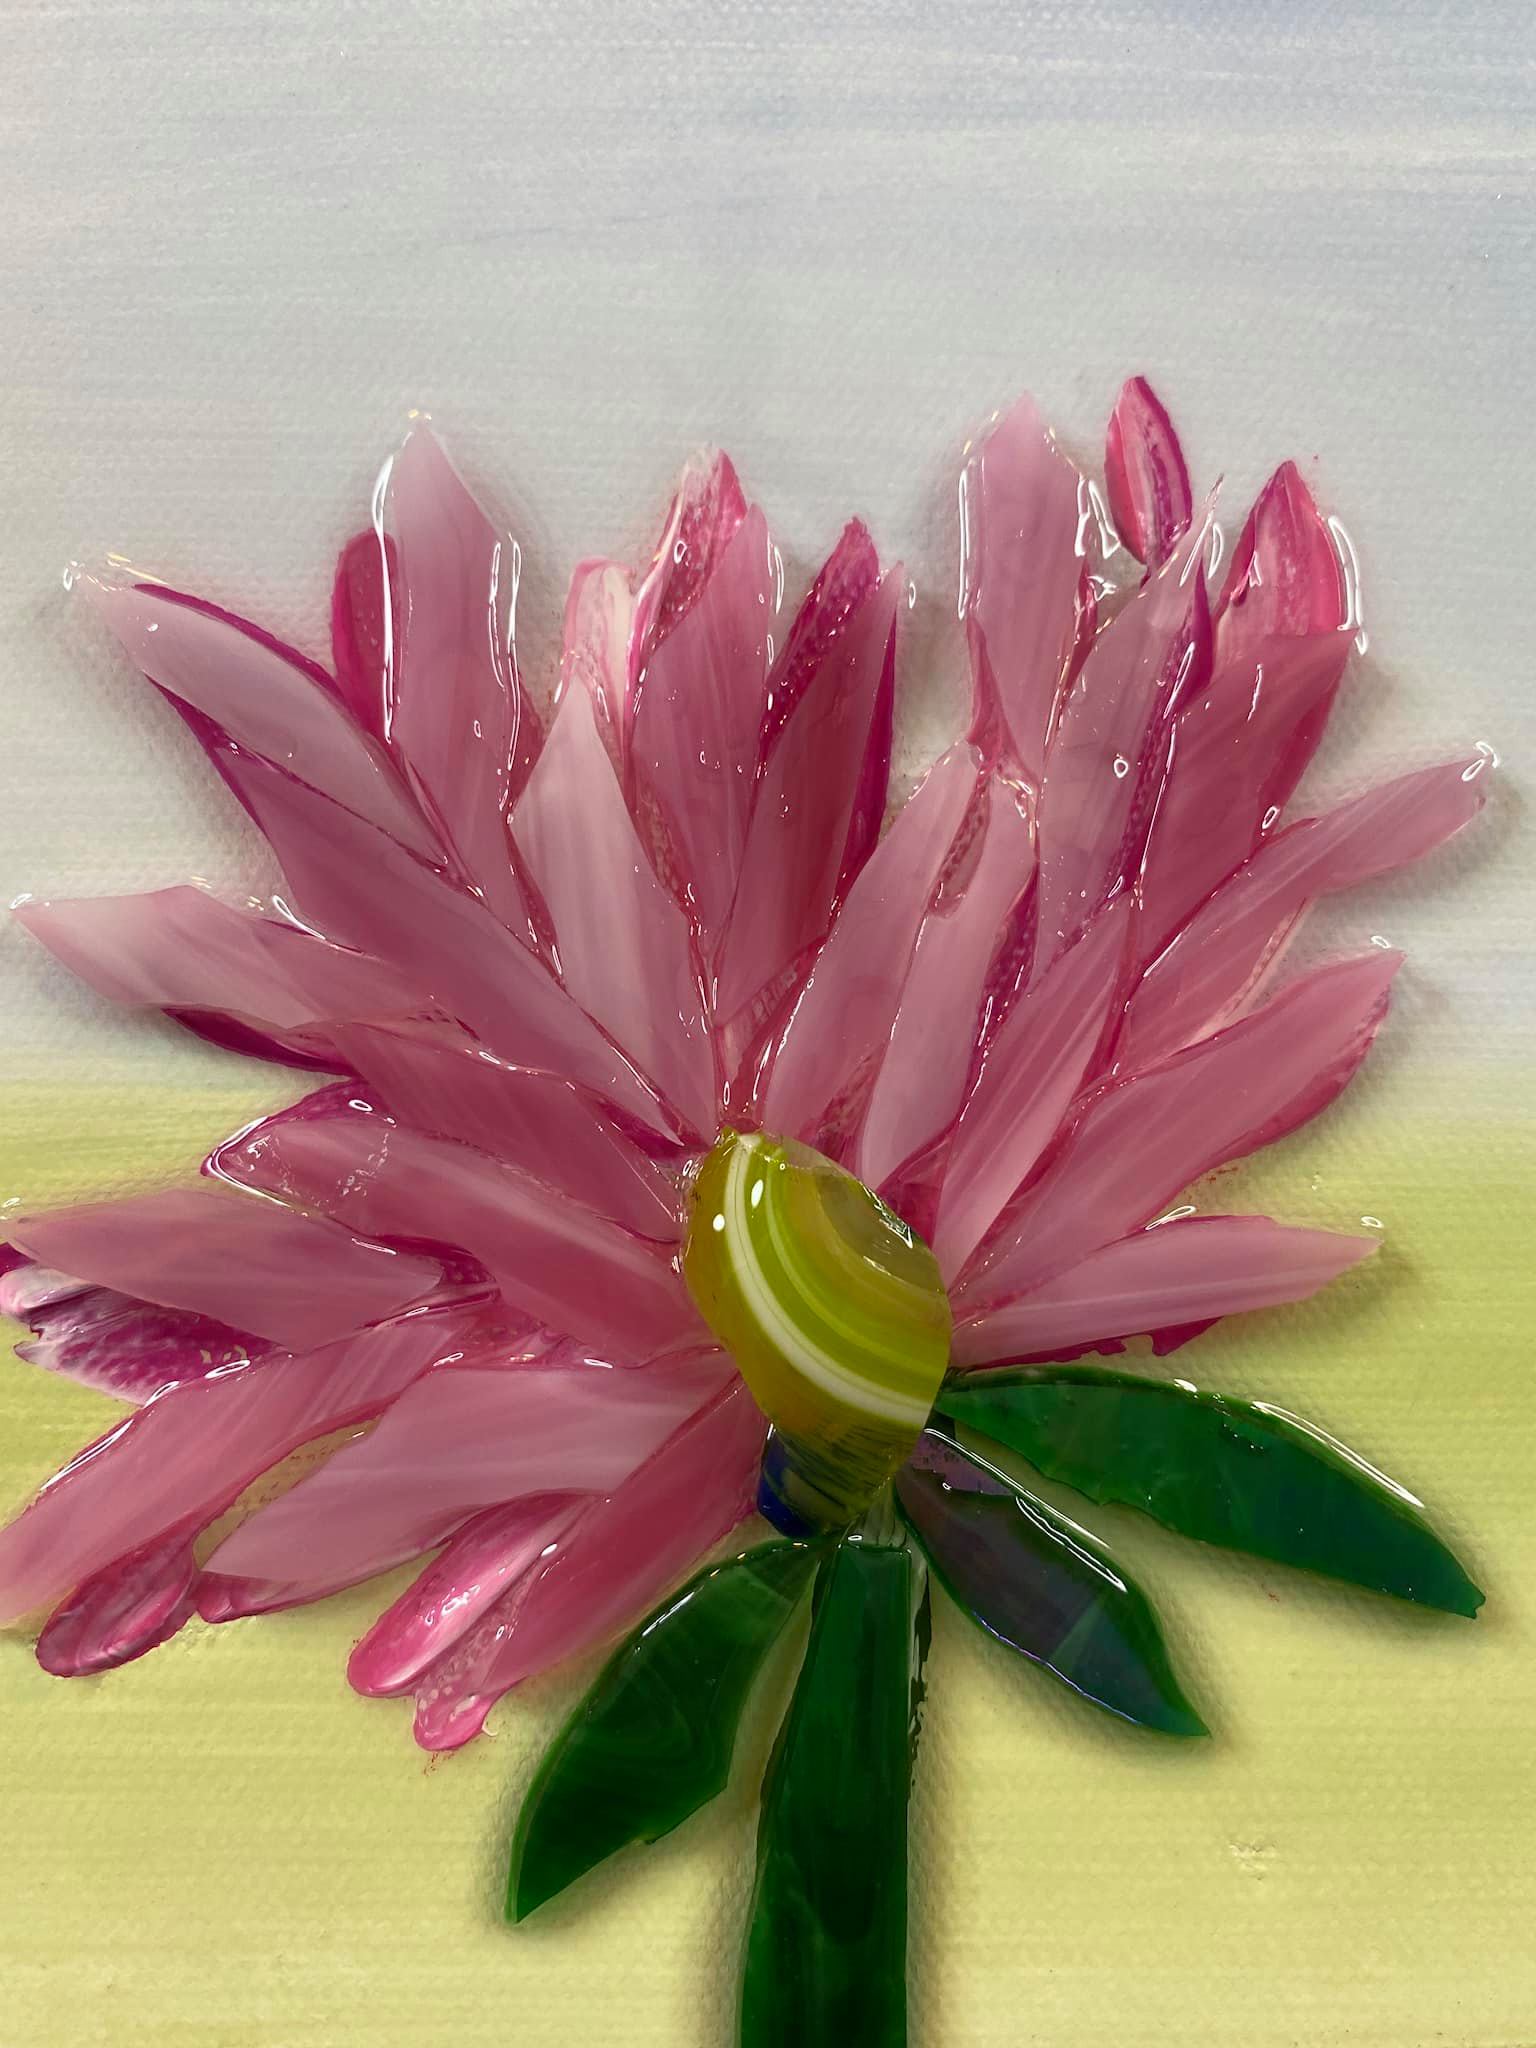
Step 5: Paint the Flower
Using the same small palette knife, begin building the flower at the bottom of the canvas. Start with dark pink, then blend in lighter pink and white, pulling each petal inward toward the flower center. Rotate the canvas as needed so you can shape the petals from different angles.
This flower does not need to be highly realistic. It just needs a soft, layered petal look with some variation in color. Let some of the darker pink show, then soften with white and light pink for contrast. Once the flower petals are in place, add a touch of green at the base along with a few simple painted leaves or leaf guides.
Before moving on to the glass, allow the hummingbird and flower to dry completely. This prevents the paint from shifting or muddying when you start adding glue and glass. If needed, use a heat gun to speed up the drying process, but be careful not to overheat the canvas.
Once dry, you can begin building the dimensional elements.
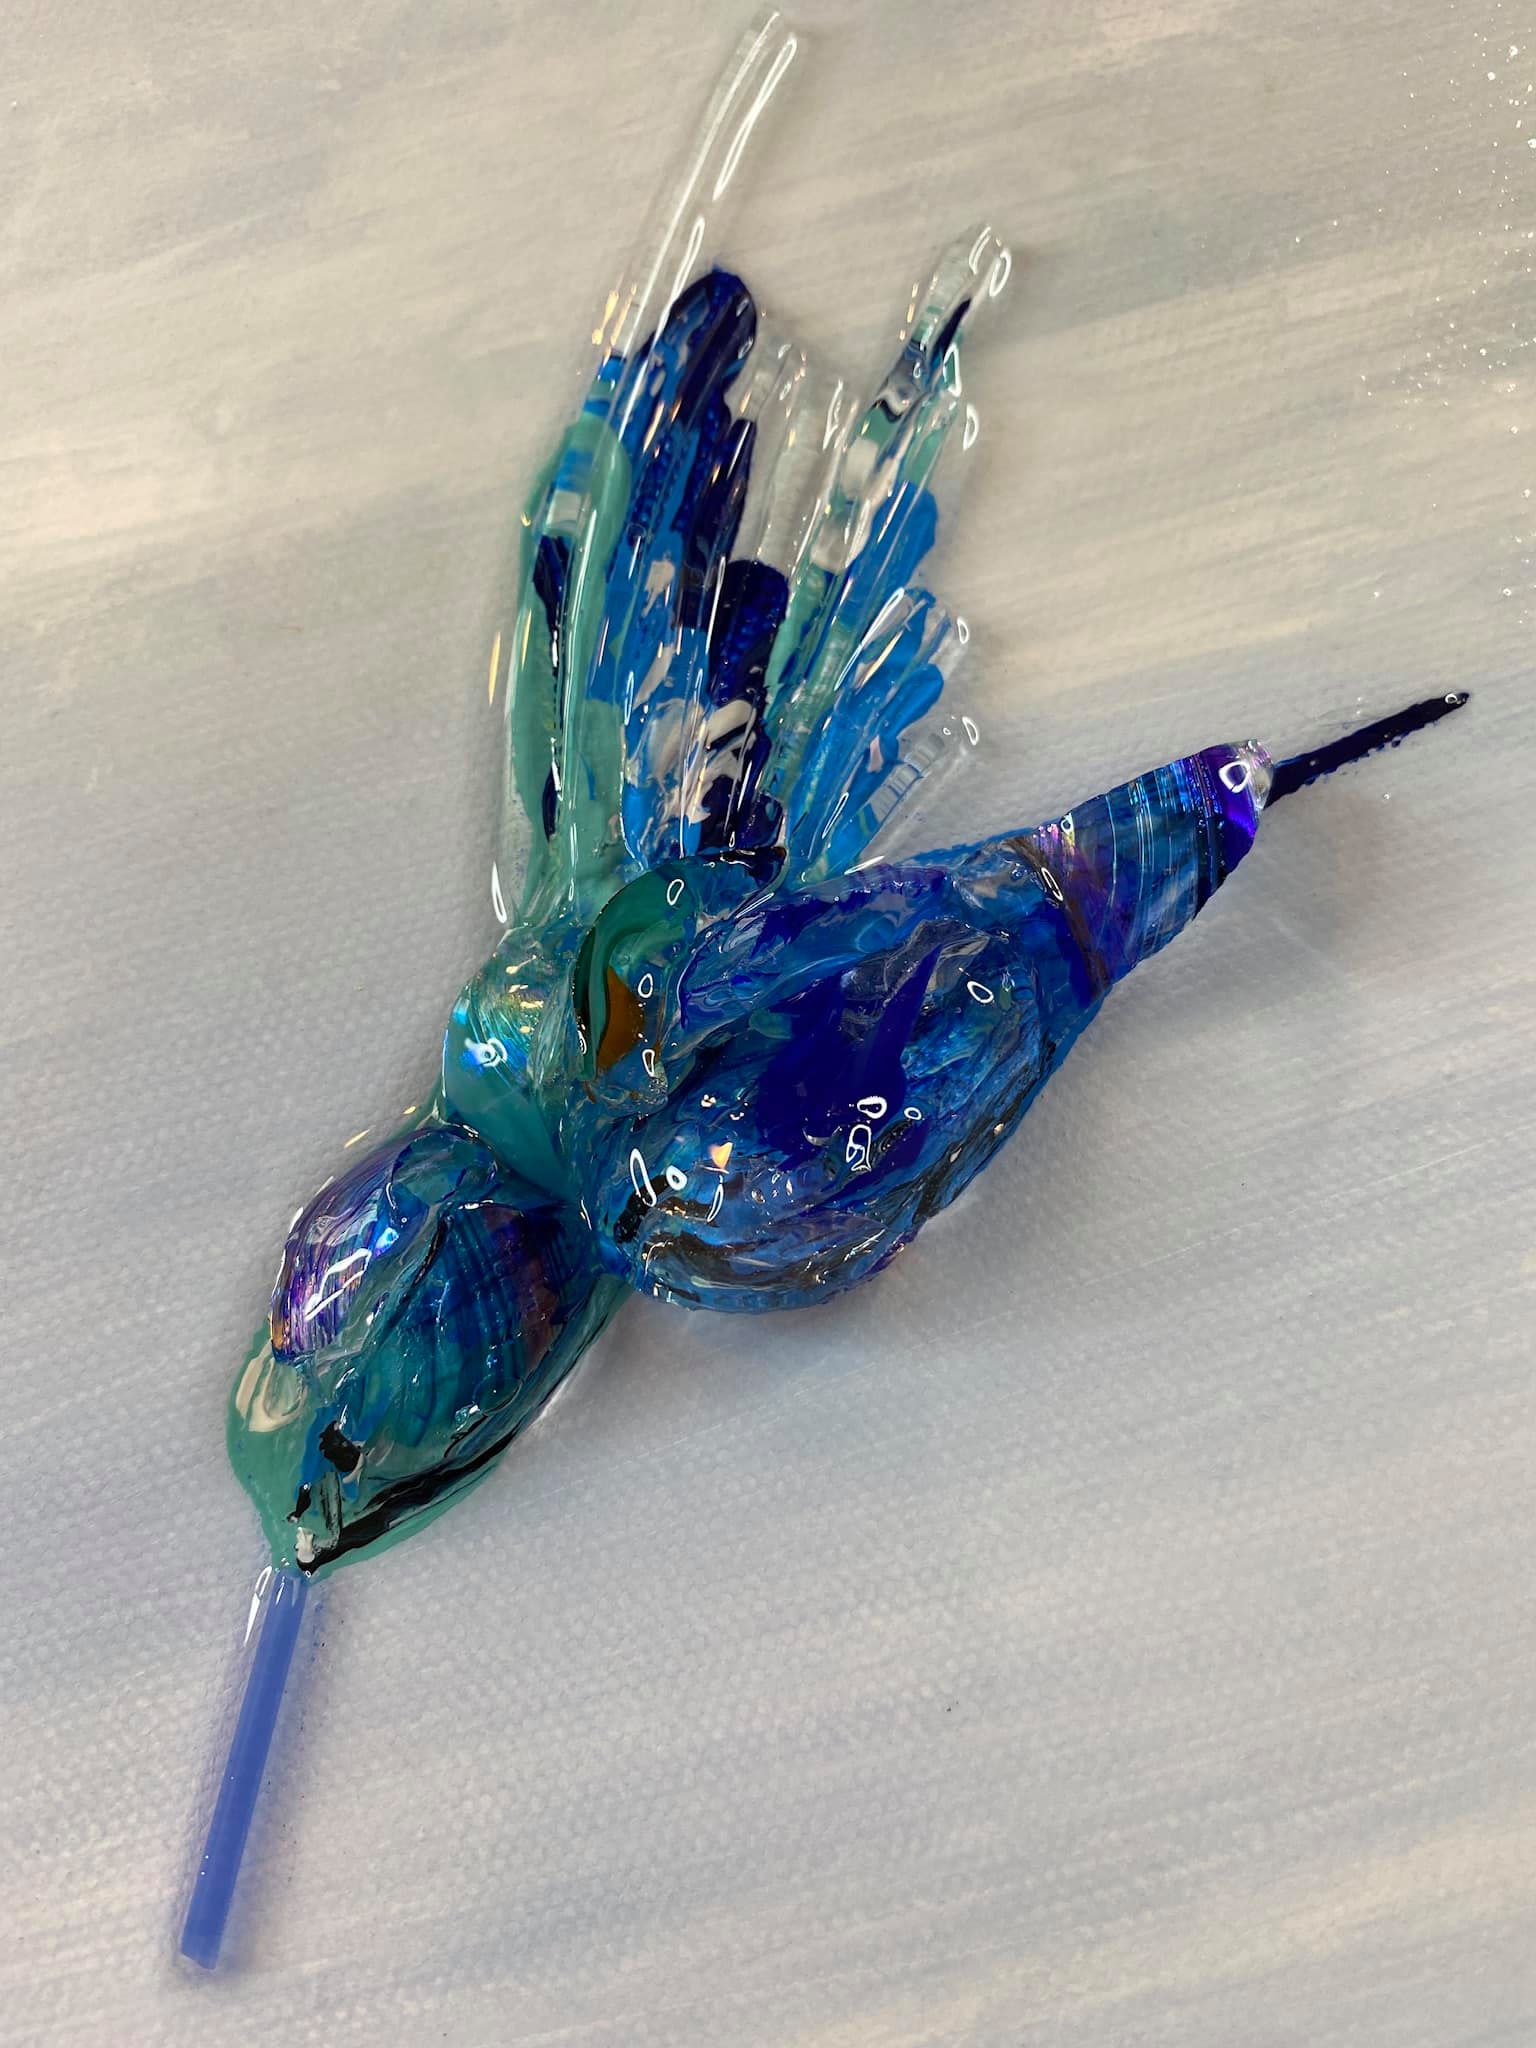
Step 6: Glue the Glass onto the Hummingbird
Brush a light layer of clear tacky glue onto the painted hummingbird body, avoiding the beak and the very tip of the tail. Then begin placing your preselected glass pieces onto the bird.
Use a slightly larger cobalt or blue-toned piece for the belly and body, then add smaller iridescent or translucent pieces around the head and upper body. Long slivers of tempered glass work especially well on the wings because they mimic the shape and movement of feathers. Let some of these slivers extend beyond the painted wing shape for a more dynamic, airy look.
The beauty of this project is that the glass does not need to fully cover the paint. Leaving some painted color visible underneath adds depth and makes the finished bird feel more layered and luminous.
Step 7: Build the Flower with Glass Petals
Next, add a light layer of clear tacky glue over the painted flower. Then begin placing the pink glass snippets one petal at a time. These can be cut from pink sheet glass using wheeled nippers. Start with the larger petals and work your way around the flower, overlapping as needed.
Do not worry about covering every bit of the painted flower. The paint underneath helps fill visual gaps and gives the flower more richness. Once the main petals are in place, add a green glass strip or stem and a few green glass pieces for the leaves.

Step 8: Mix the Resin
Once all the glass is glued in place, mix your resin. For this project, about 1 ounce total resin was used, made up of 1/2 ounce resin and 1/2 ounce hardener. Stir slowly for a full 3 minutes, scraping the sides and bottom of your cup as you go.
Mixing slowly helps reduce bubbles, and taking the full time ensures the resin cures properly. This step matters, so do not rush it.
Step 9: Resin the Canvas
Begin by drizzling resin directly over the glass pieces first. This helps the resin settle down into all the gaps and fully adhere the glass to the canvas. Cover the hummingbird body, wings, flower petals, leaves, and beak carefully.
After the dimensional elements are covered, pour the remaining resin onto the rest of the canvas and spread it gently with your gloved fingers. Make sure the canvas is elevated on blocks so excess resin does not cause it to stick to your table.
Because this piece includes dimensional glass, take a moment to inspect the flower and hummingbird closely to make sure resin has worked its way down between the pieces.
Use a heat gun or small torch to pop surface bubbles. Keep the flame or heat moving at all times and never let it sit in one spot. The goal is to warm the resin just enough to release bubbles without scorching it.
Once the surface looks smooth and glossy, leave the canvas in a safe, dust-free place to cure overnight. Make sure pets, little hands, and stray debris stay away while it dries.
It’s a perfect project for spring, for bird lovers, or for anyone who wants to practice layering paint and glass without needing tons of tiny details in the underpainting. The glass really does the heavy lifting here, and that makes it a fun and forgiving piece to create!
If you're a member of The Shattered Circle, you'll find this tutorial in your classroom under Art Shattered Weekly Facebook Lives, search for "Hummingbird".
If you don’t want to miss my Facebook LIVE art instruction, make sure you are on my texting list. I always text 10 minutes before I’m going to go LIVE, so you won’t ever miss it. You can text “Hey Cindy” to 901-519-2923.
Want more inspiration and artwork?
- My website artshattered.com with resources, shop, and more!
- My creative membership The Shattered Circle, where you can explore the world of glass art with online workshops, a supportive community, and more!
- My mini creative membership Just A ‘Lil Bit Monthly Glass Art Club, where you’ll get a new quick and easy online tutorial for just a lil' bit of sparkle in your life!
- My Facebook page where I go LIVE every Wednesday night.
- My YouTube channel which has tons of free art lessons right at your fingertips.
