
Dusty Rose Poinsettia 💗
We are using a 6x6 canvas to create a gorgeous dusty rose poinsettia flower, which would look amazing in your home during the holiday or winter season! This one requires very minimal painting (just the background!) and has tons of glass goodies. I'll be showing you how to create a flower out of pieces of a candle votive and we'll also add lots of beads and resin.

Use glass nippers or wheeled nippers to cut your flower petals from a candle votive. Take your nippers and cut horizontally around the edge with your votive, going around the entire votive until you get to the bottom. Your petals will not be perfect and that is okay! Once you have your petals, use a honing stone to sand down those sharp edges and points.
Paint your background with a coat of Metallic White. Then, I'll add some dots of Metallic Stone paint and pounce my paintbrush to give the background texture. I'll also use the plastic wrap that was on my canvas and just dab that on it too. Dry with a heat tool.

Now, ...
Buttons Snowman ⛄️
We are using a large 8x16 canvas to create a snowman art piece! This one is great for the holiday and winter season! I'll show you how to paint this from start to finish as well as add some fun embellishments, like real buttons, glass, and floral pick elements.

Grab your tracer, tape it to your canvas, place graphite paper underneath, and trace your snowman onto your canvas with a stylus. I am going to sketch mine out, but you can use the tracer if you would like to.
Next, I'm going to add a coat of white paint to my snowman and a coat of black paint to his hat. Dry with a heat tool.
Paint his scarf with Cherry Red paint and paint the nose with Red Spice. Dry again with a heat tool.

Let's add details! Add a quick coat of white on the snowman and add Slate Grey paint around the edges to add some shadowing. Add a second coat of black paint to the hat and then add in white for highlights. For the nose, I'll add more Red Spice and then Burnt Umber for shadows and white for highligh...
Red Mitten ❄️
We are using an 8x10 canvas to create a fun Christmas scene of a mitten filled to the brim with lots of fun holiday pieces. I am going to show you how to paint this from start to finish as well as how to add glass and other goodies to your art piece. This is a fun simple project perfect for the holiday or winter season!

Let's start by painting our background with a coat of white paint. Then, I'm going to add in some Desert Turqoise, applying it in a curve going in one direction. I'll also add some more streaks of white to tone it down. Dry with a heat tool.

Grab your tracer, tape it to your canvas, place graphite paper underneath, and trace your mitten onto your canvas with a stylus.
Paint your mitten with Cherry Red and the cuff of your mitten with white paint. Next, we are going to work on our pine needles. I'm going to use Avocado mixed with water to create an inky consistency. Load your brush, twirl some off, and lightly paint your branch and add swoops of pine needles. Pain...
Rose Gold Ornament 🎄
We are making a cute little rose gold ornament art piece, complete with holly berries made from beads and lots of rose gold glass. I absolutely love the combination of colors on this one, and the best part? It is so easy to create! If you are just getting started in your glass art journey, this one is for you!

We are going to start by painting our background with Metallic White. I'm also going to add some Splendid Gold, adding streaks in a diagonal direction to give it some texture. Dry with a heat tool.

Find something round that you can use to trace around to create your ornament on your canvas. I have a plastic ornament half to use, which worked perfectly. I'll also sketch on my ornament topper, holly leaves, and evergreen branches.
I'm going to paint the ornament with Rose Shimmer and the top with Splendid Gold. I'll paint my holly leaves with a base coat of Hauser Green Light. Dry with a heat tool.

Add another coat of gold to your ornament topper and another coat of Rose...
Green Glass Wreath ⭐️
We are making the easiest holiday glass art piece - a green glass wreath! This one requires very minimal painting (just your background) and all of the fun glass goodies you can find. I'll be using lots of green glass as well as tons of miniature Hobby Lobby Christmas stuff and a gorgeous glass flower that I made from a broken ornament. Use what you have and get creative!

I'm going to use Metallic White and Metallic Green for my background. When I use metallics, I like to apply them with a sponge brush because it lays out the metallics really nicely. Start by adding a coat of Metallic White with vertical strokes and then add a little bit of the green, pulling from top to bottom. Dry with a heat tool.

Grab a cup (whatever size you would like the center of your wreath to be). I am using a 16 oz tub that I use for mixing resin. Place it in the middle of your canvas and add handfuls of glass around your cup. I am adding Green Reflective, Solex Reflective, and Solex. Remove your cup.
...Christmas Mittens
I am using an 8x10 canvas today to create some Christmas mittens hanging on a line. I am going to add lots of glass and goodies sitting in my mittens, like a candy cane, pinecones, icicles, clear and green glass, Christmas miniatures, and more!

I am going to start by painting my background white. I'm going to add some Calypso Blue and just paint from top to bottom with strokes. I'm going to add some extra blue paint to the top of my canvas and spray it with my water mister to create drips down the canvas. Let dry.

Next, I'm going to add some snowflake splatters. Mix white paint with water to create a mixture. Dip an old toothbrush into your mixture and just run your finger along the bristles right above your canvas. Let dry.

Grab your tracer, tape it to the canvas, place transfer paper underneath, and trace your mittens with a stylus onto the canvas.
Now, we'll paint! I'm going to paint the top of my mittens white and the mittens with Cherry Red. Let dry. Then, do a second c...
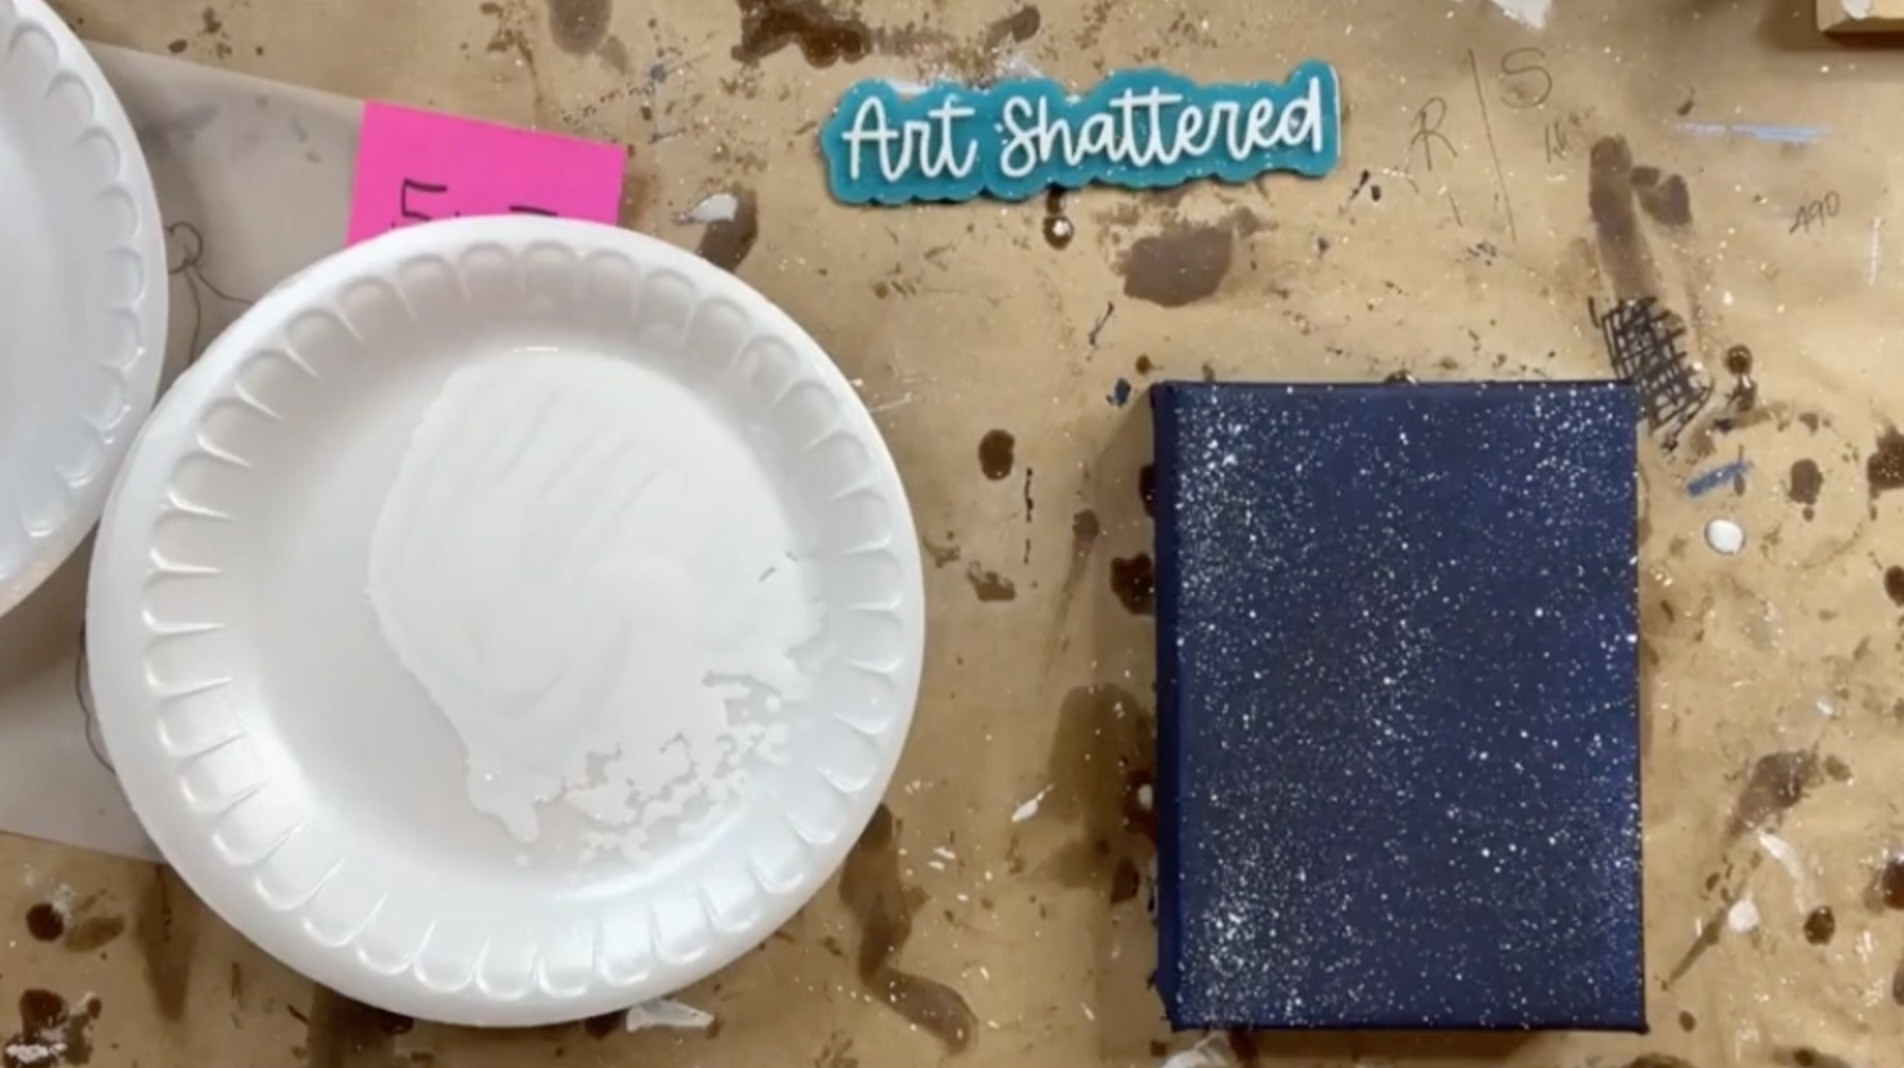
Christmas Lamb
We are creating an adorable little Christmas lamb today complete with a Santa hat and starry night sky. I'm using a 5x7 canvas along with some acrylic paint and Starfire glass to make this fun holiday piece!
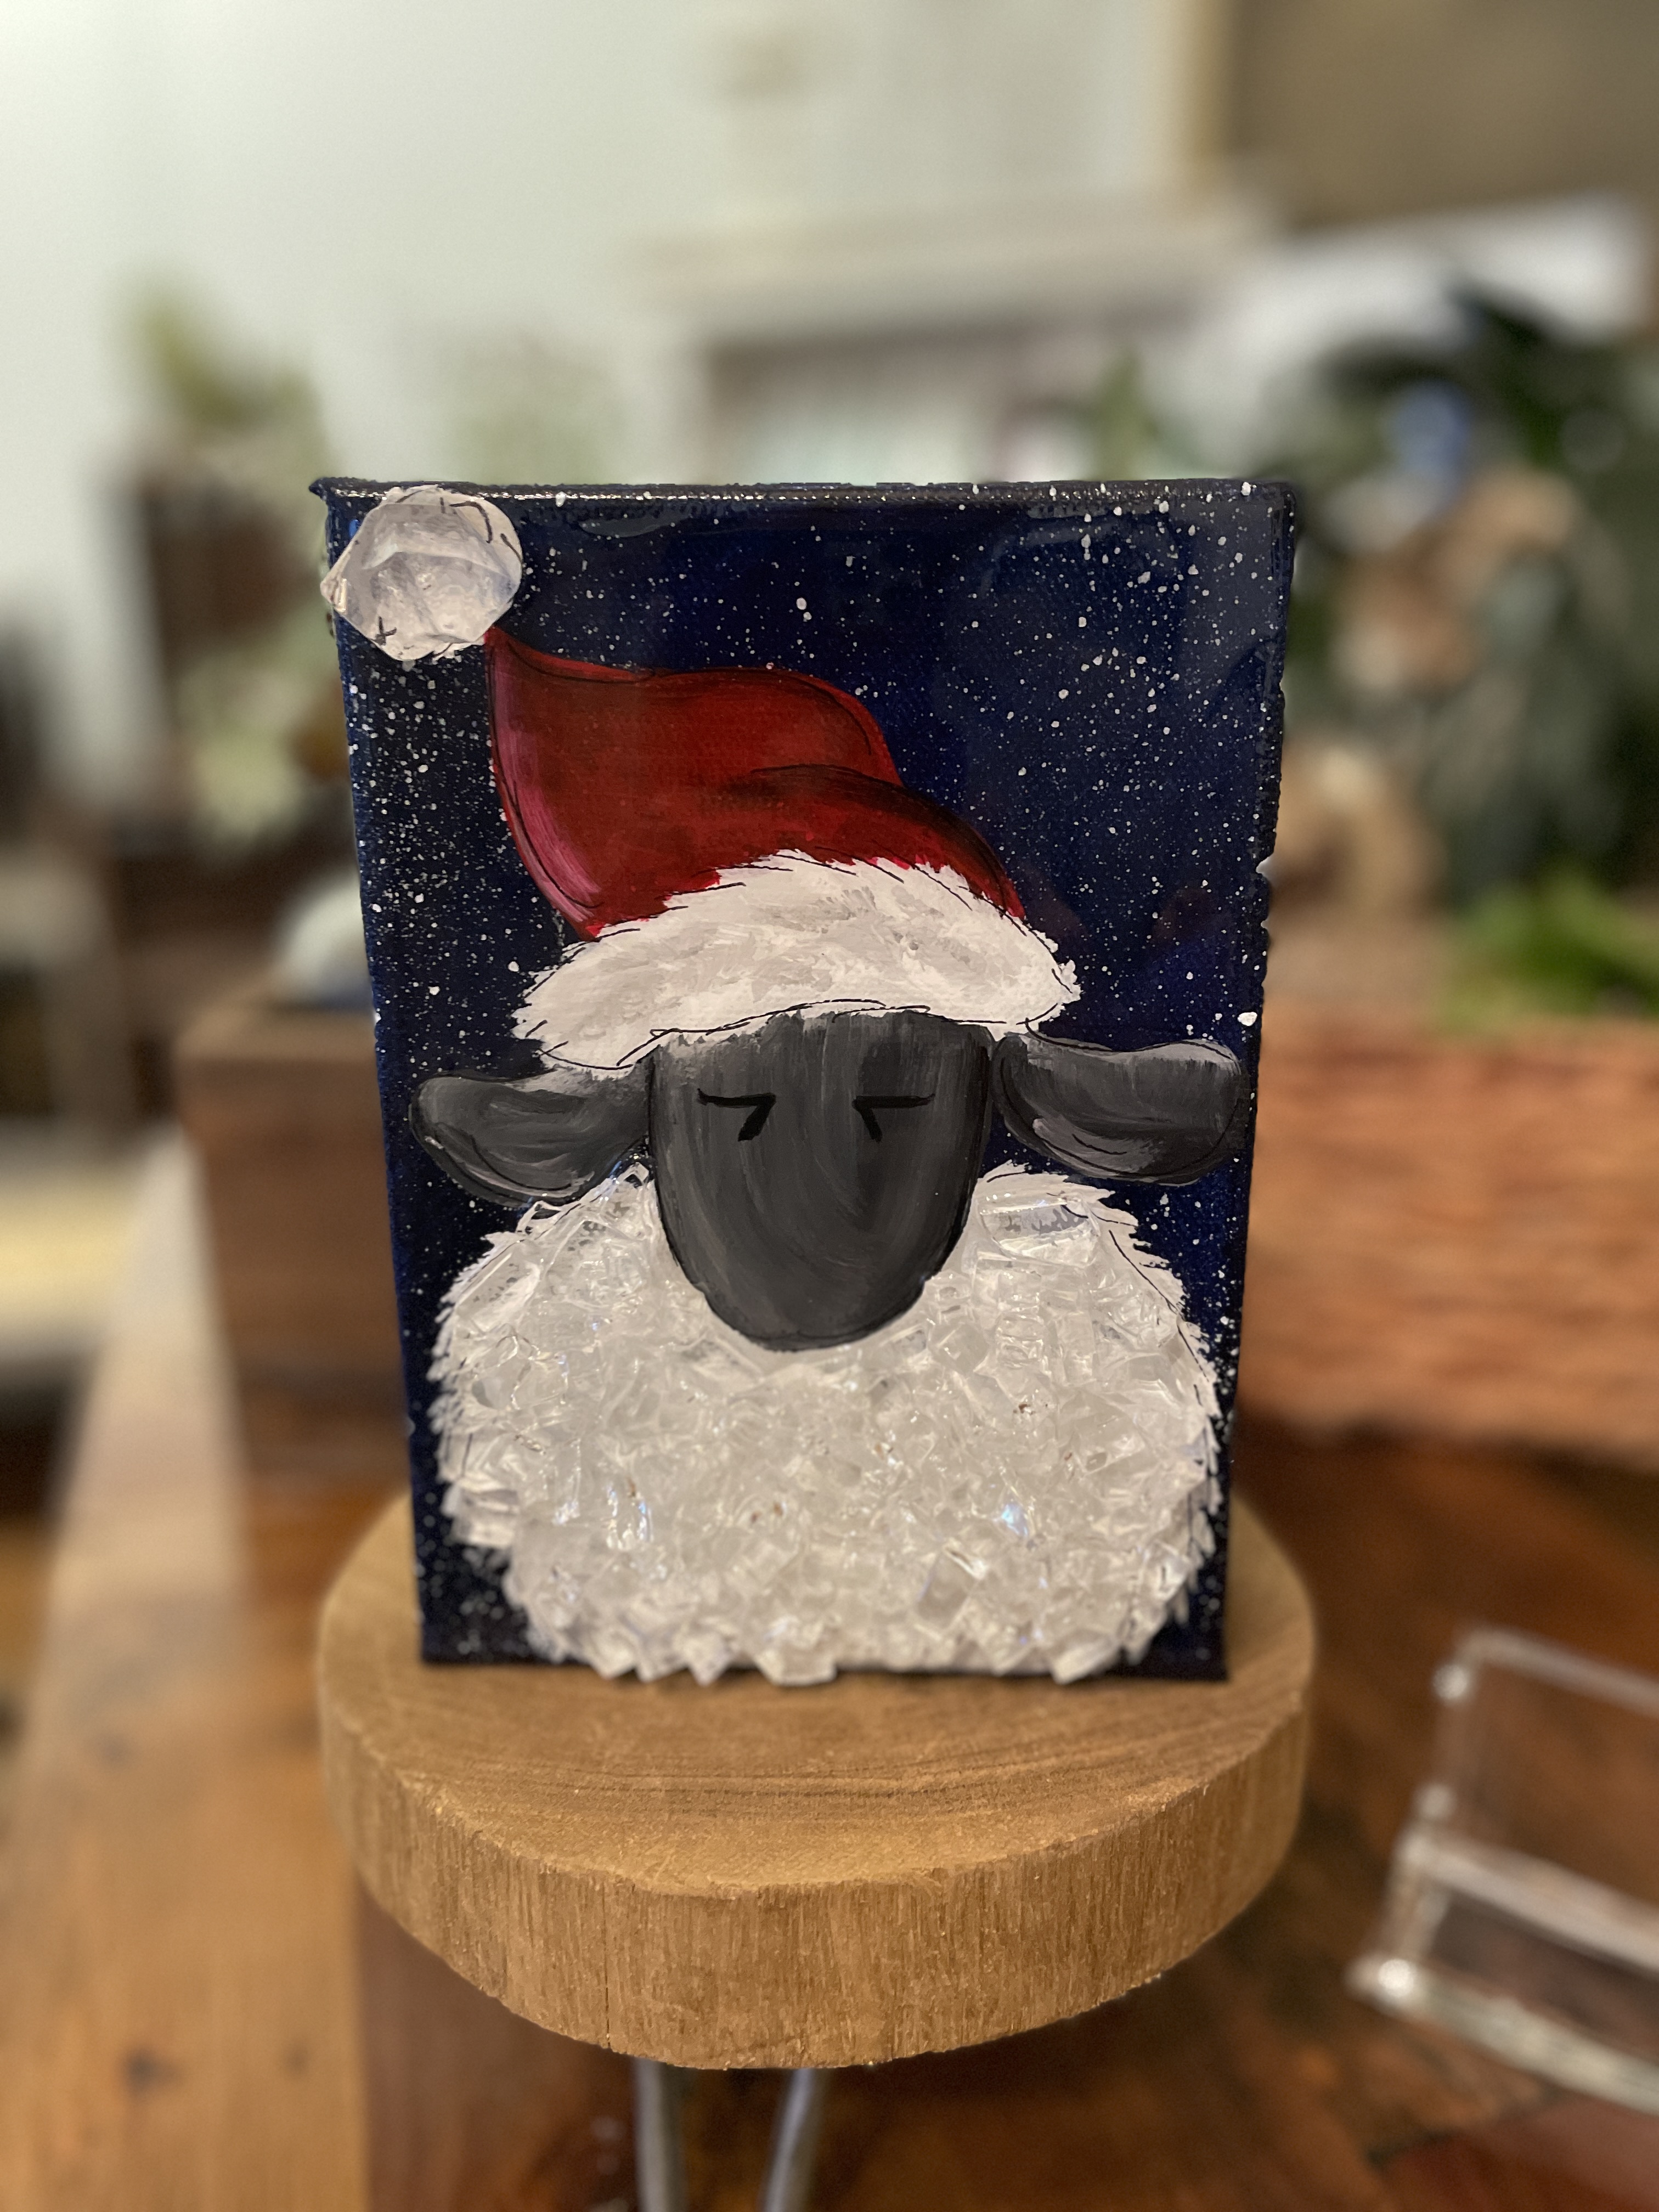
First, we are going to paint the sides and front of the canvas with Prussian Blue. Let dry. Then, we are going to create our stars! Mix white paint with water. Dip an old toothbrush into your mixture and run your finger along the bristles above your canvas to splatter your stars onto your canvas.
Grab your tracer, tape it to the canvas, place transfer paper underneath, and trace your lamb with a stylus onto the canvas. I am using white transfer paper so that it shows up on my dark background.
Then, we will start painting! I am starting by painting the white trim on the Santa hat and the white body of the lamb. Then, I'll paint the Santa hat with red paint. For the lamb's face and ears, I am using Anita's Charcoal paint.

Next, I am going to take some Drizzle Gray paint t...
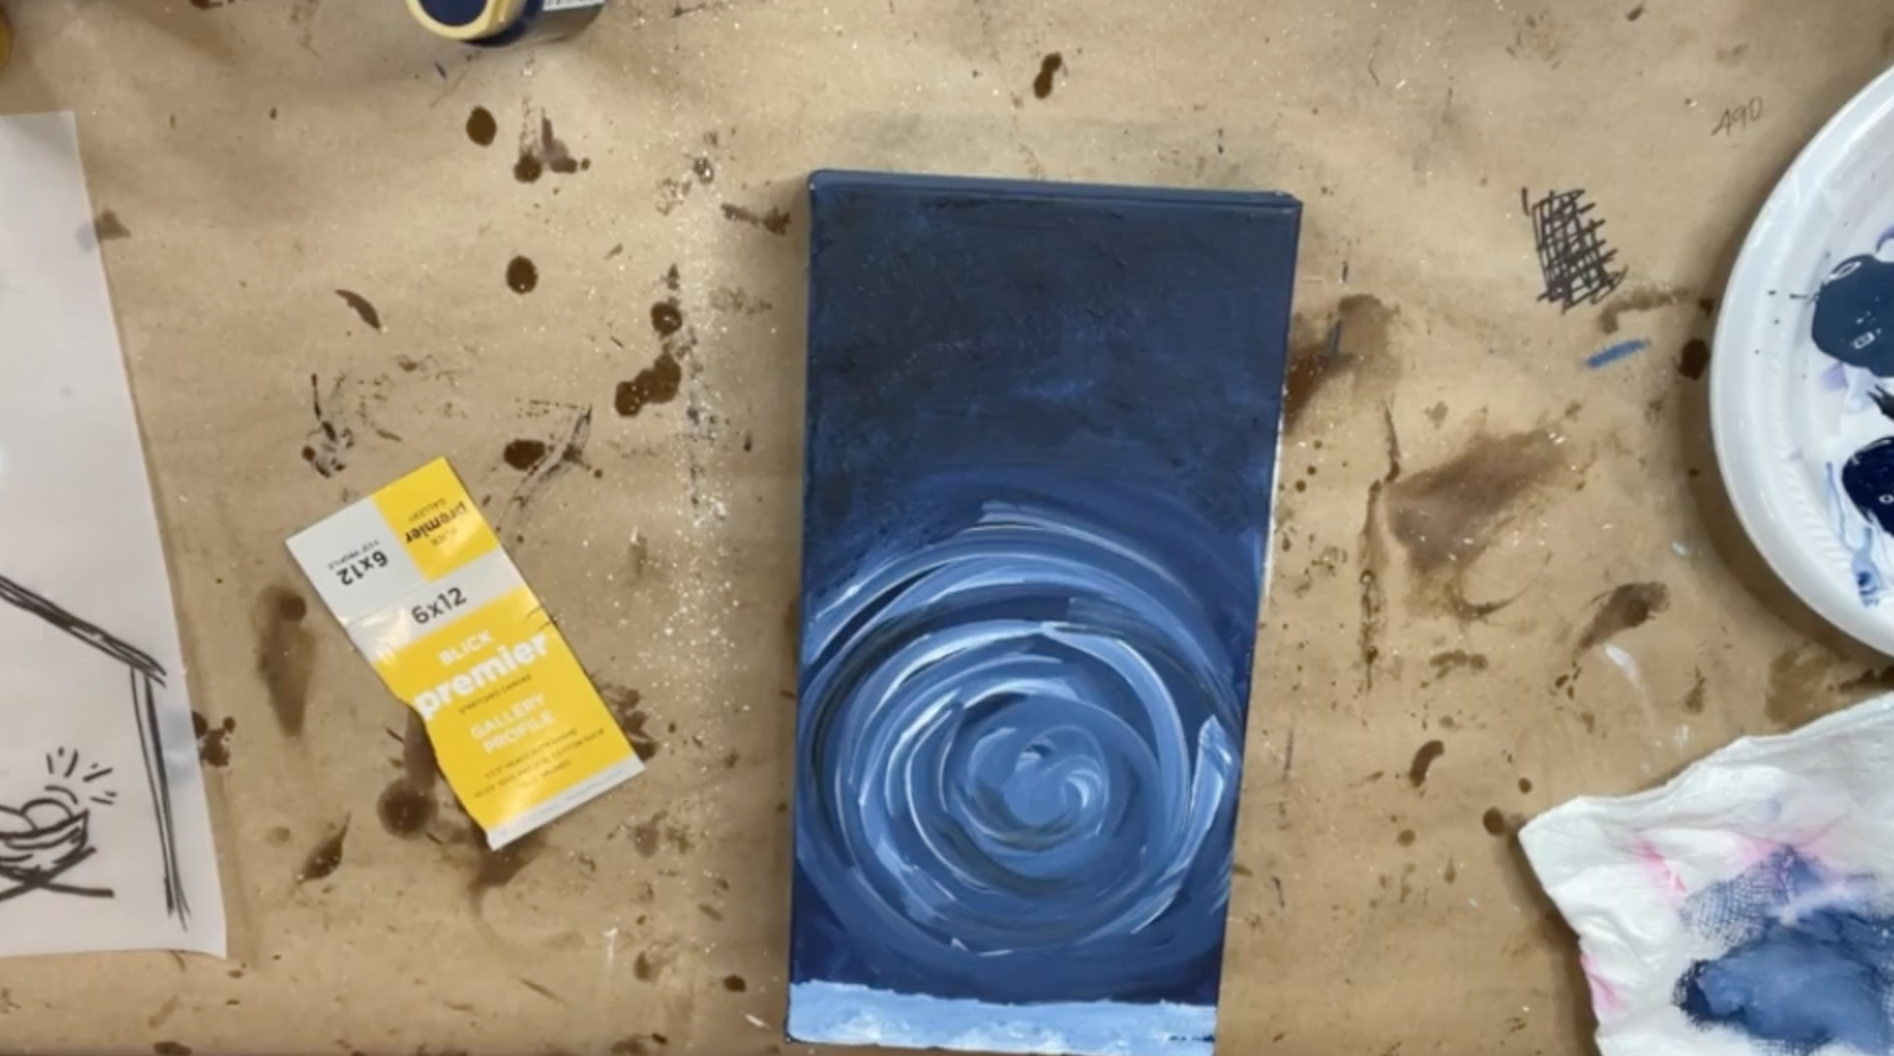
Christmas Manger
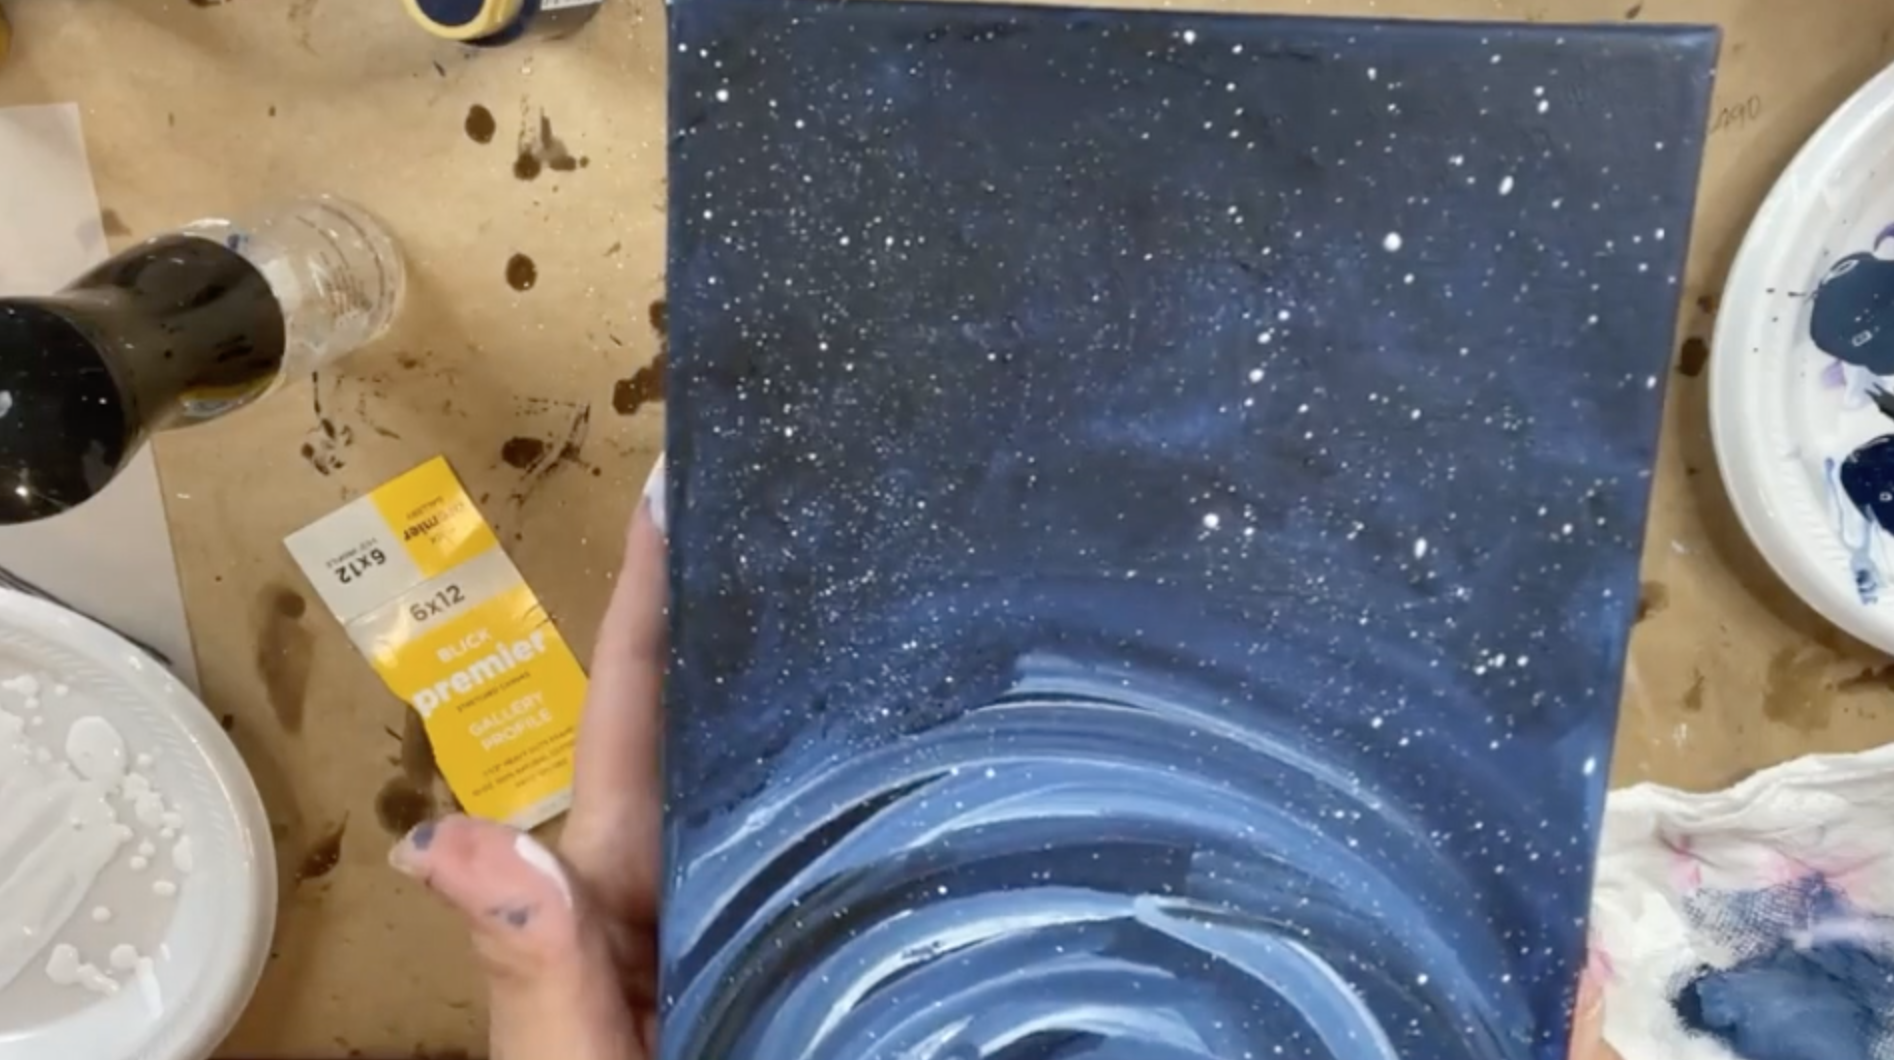
I am using a 6x12 canvas to create a beautiful Christmas manger scene with a night sky. We'll add some goodies like clear glass, seed beads, and some glass strips to create the star over the manger. Such a perfect piece for Christmas!
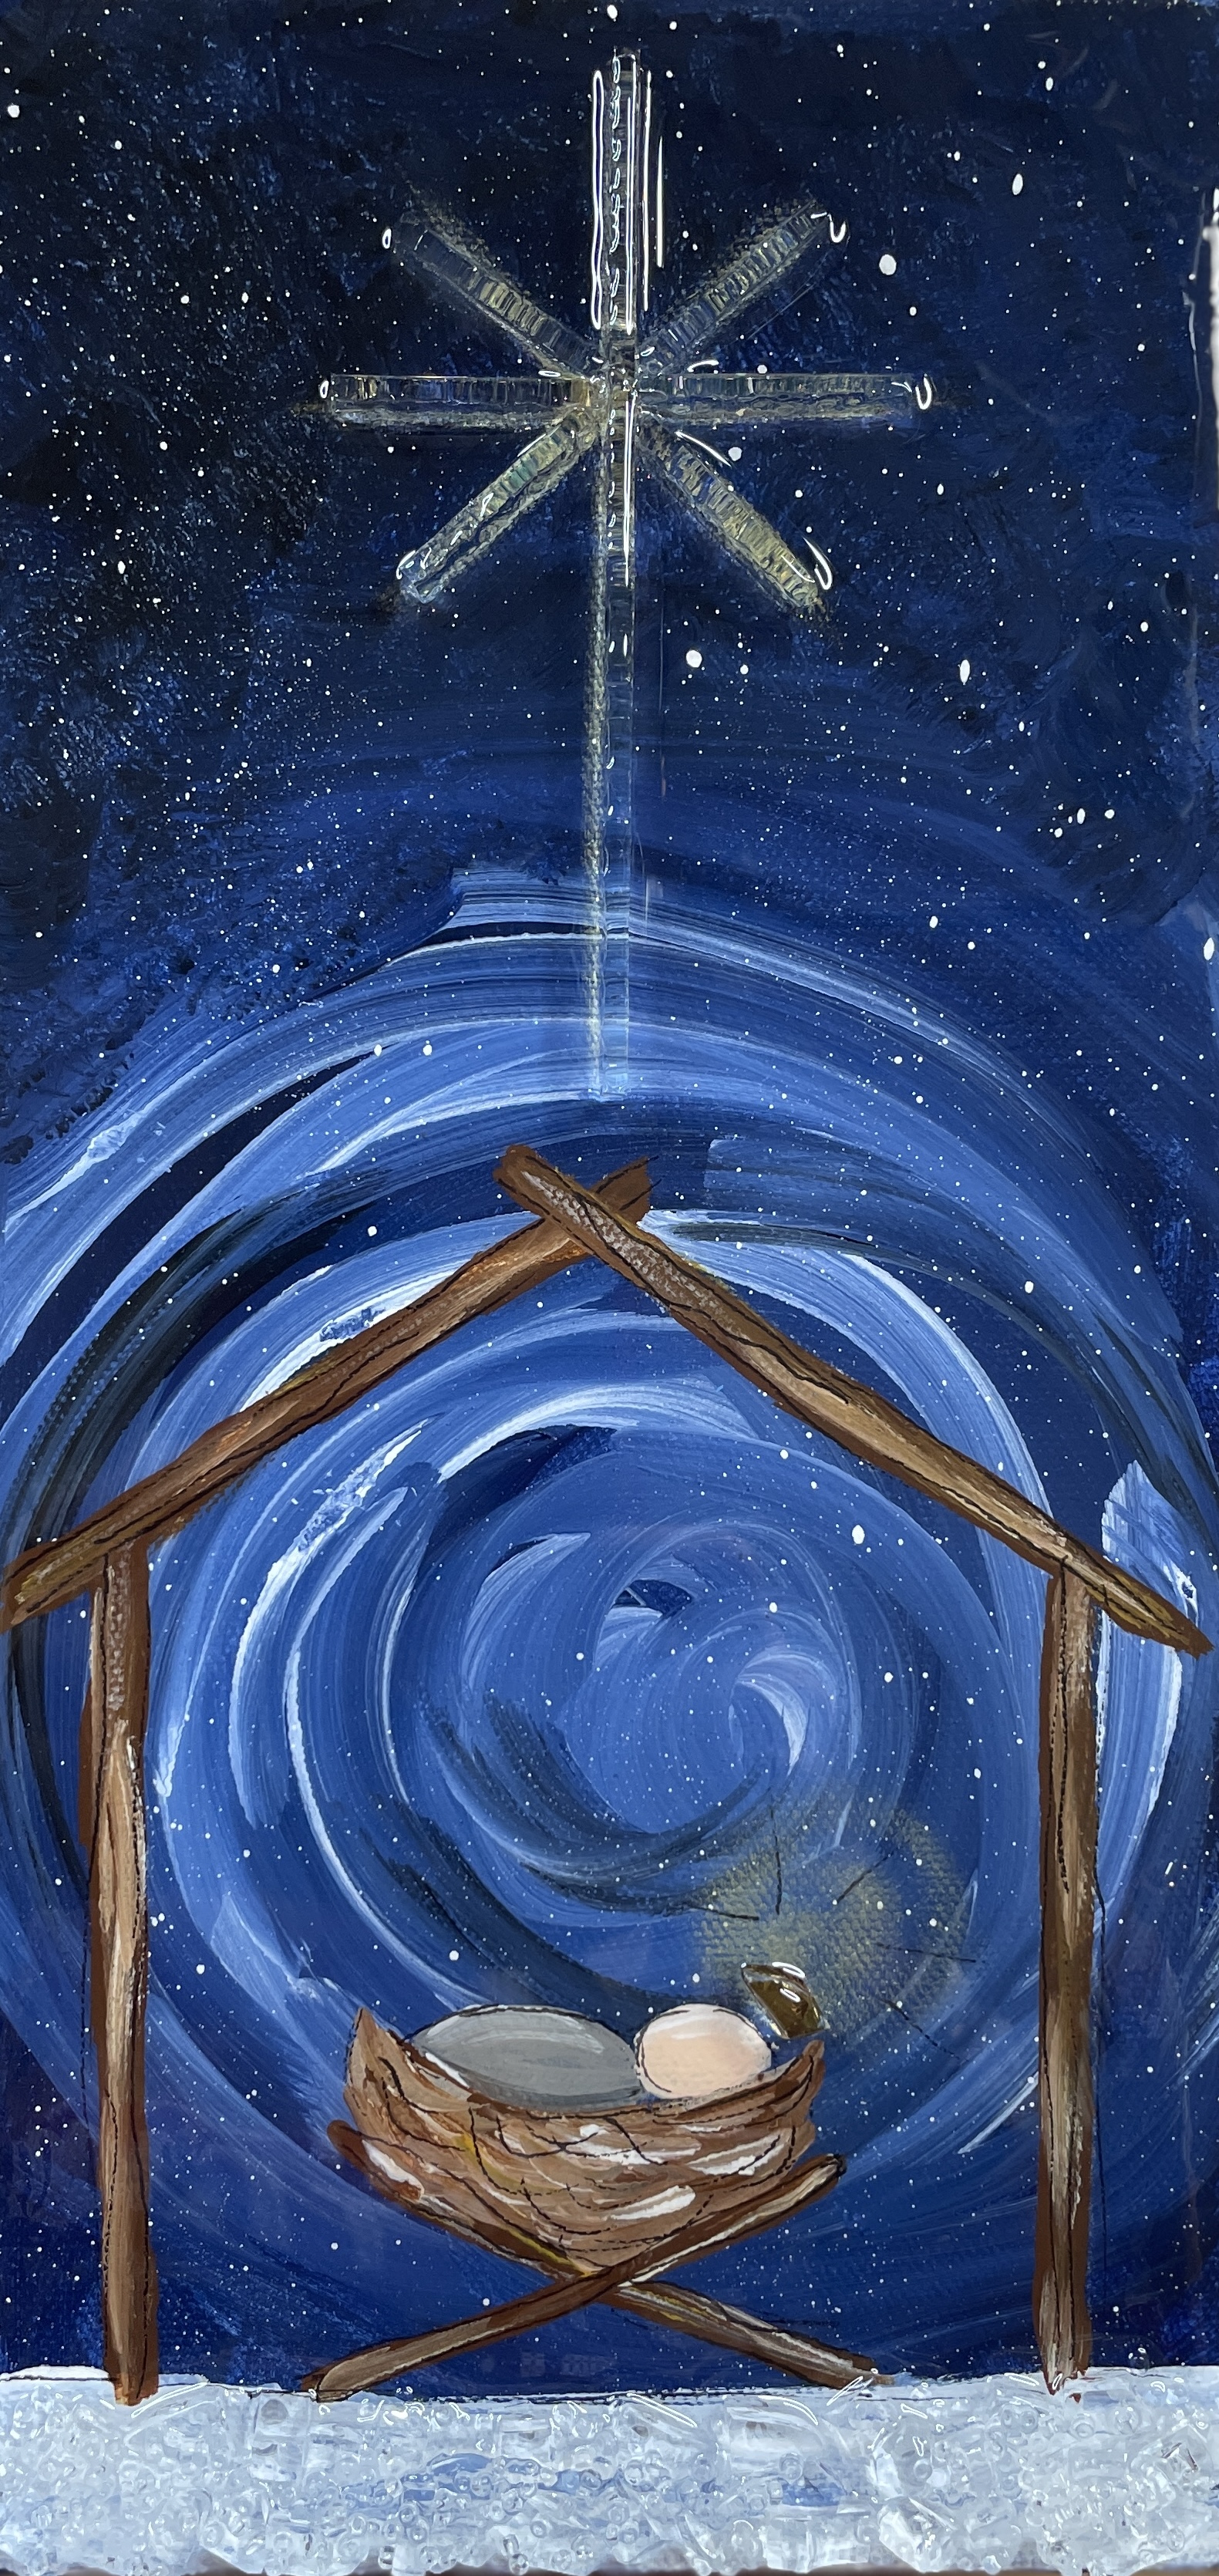
First, we are going to start by painting our background blue - I am using Deep Midnight and Prussian Blue. I'll also add in some black paint. I am also painting the sides of my canvas.
Then, I'm going to take some white to blend with my blue. I am just creating a swirly circle right where my manger will be. I'll also add some white to the bottom of my canvas too. Let dry.
Now, we are going to splatter! Take a little bit of white paint and add some water so it is a watery mix. Use an old toothbrush, dip it into the mixture, and run your finger along the bristles to create splatters on your canvas. Let dry.
Grab your tracer, tape it to the canvas, place transfer paper underneath, and trace your manger scene with a stylus onto the canvas.
Next,...
Christmas Tree 🎄
We are creating a simple and beautiful Christmas Tree out of a green votive candle. We'll be using an 8x10 canvas for this and adding candle glass nips, beads, acrylic paint, and more. This is a great way to use a cheap or broken candle votive in a festive and creative way - perfect for beginners too!

First, we will start by painting our background with Anita's White, Anita's Metallic White, and a tiny bit of Sky Blue.

Then, I'm going to take some Traditional Burnt Umber to paint on my tree trunk. Let dry.

I grabbed a green votive candle holder for 3 bucks and cut some glass nips from it. I'm using wheel knippers from Home Depot. Hold your vase sideways and cut around. You will get a curved shape kind of like a tree branch! Use a honing stone to dull your points.

I lined my pieces up by size and I'll just arrange my glass pieces onto my canvas to create a tree. I'm going to use a tiny bit of tacky glue to keep them in place. I'm also going to add some clear glass to the bot...
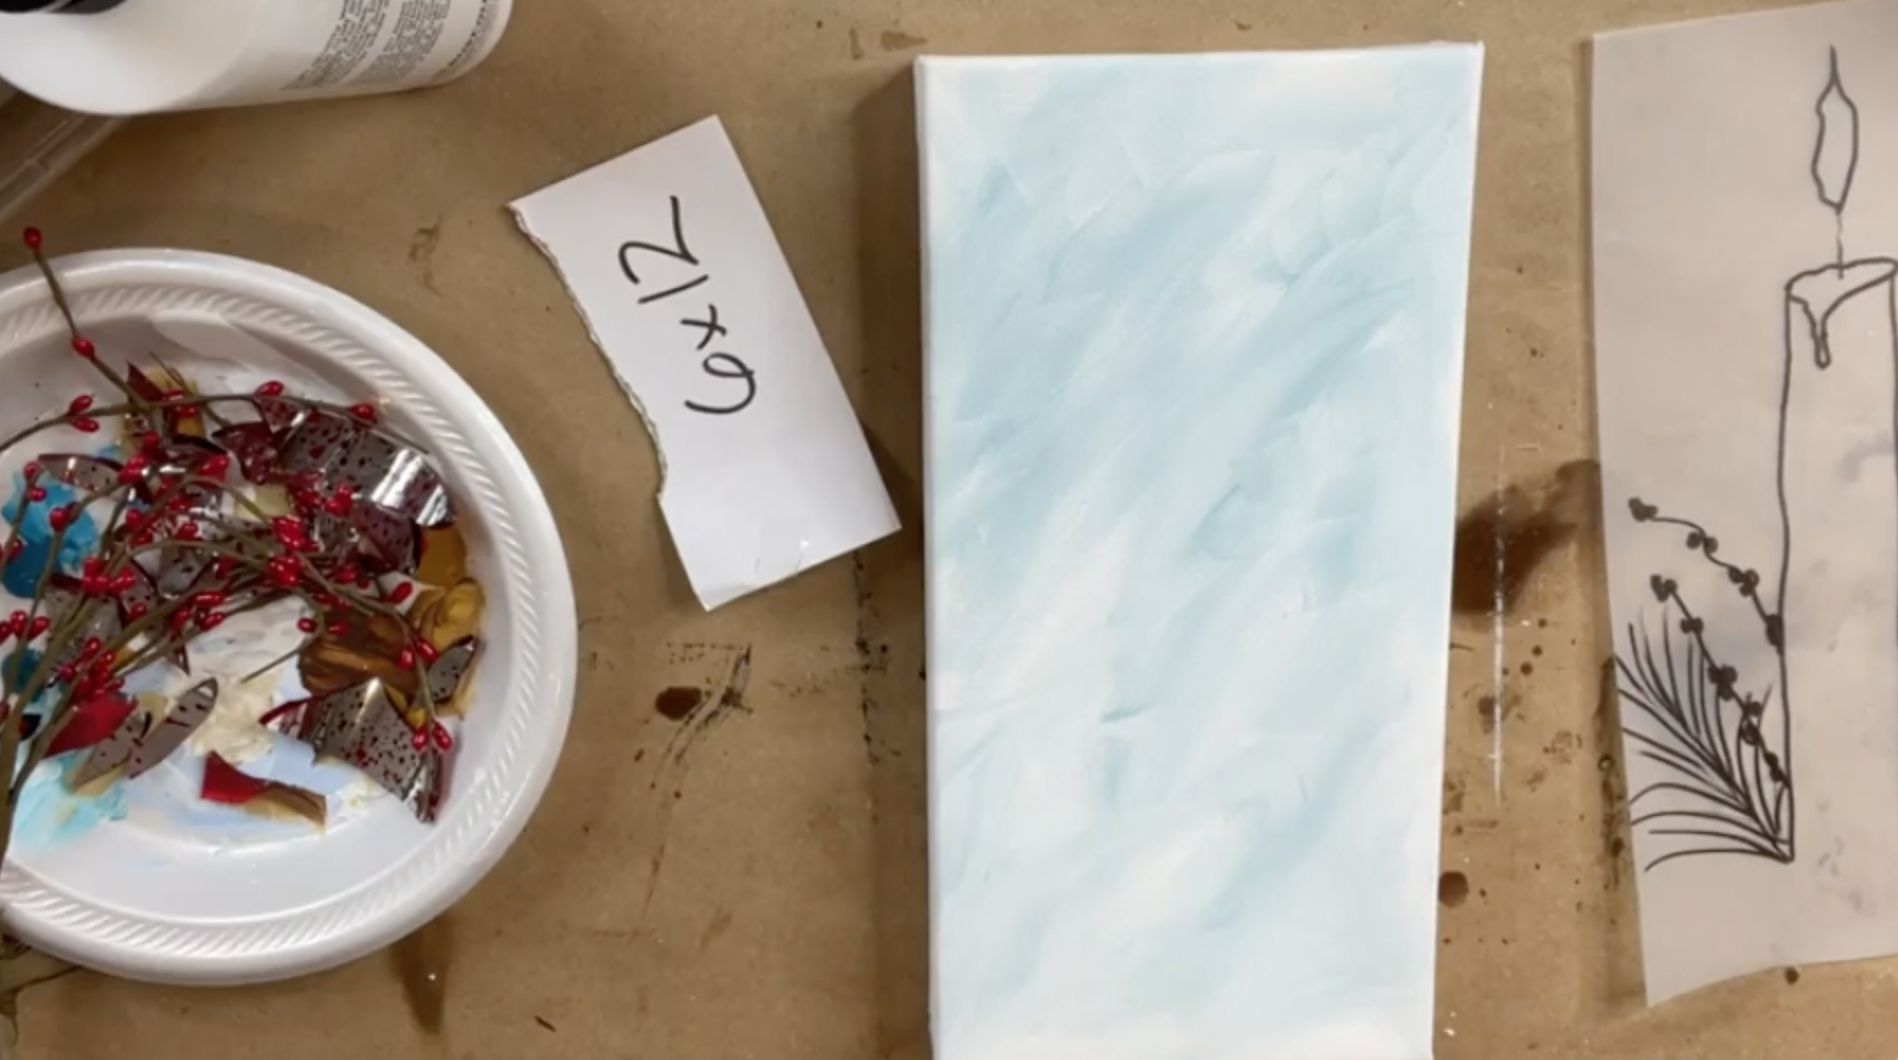
Christmas Candle
This is a super simple Christmas candle - it is just a rectangle! We are using a 6x12 canvas, but you can use whatever size you would like. We will be adding lots of fun goodies and glass as well as some acrylic paint. Let's get started!
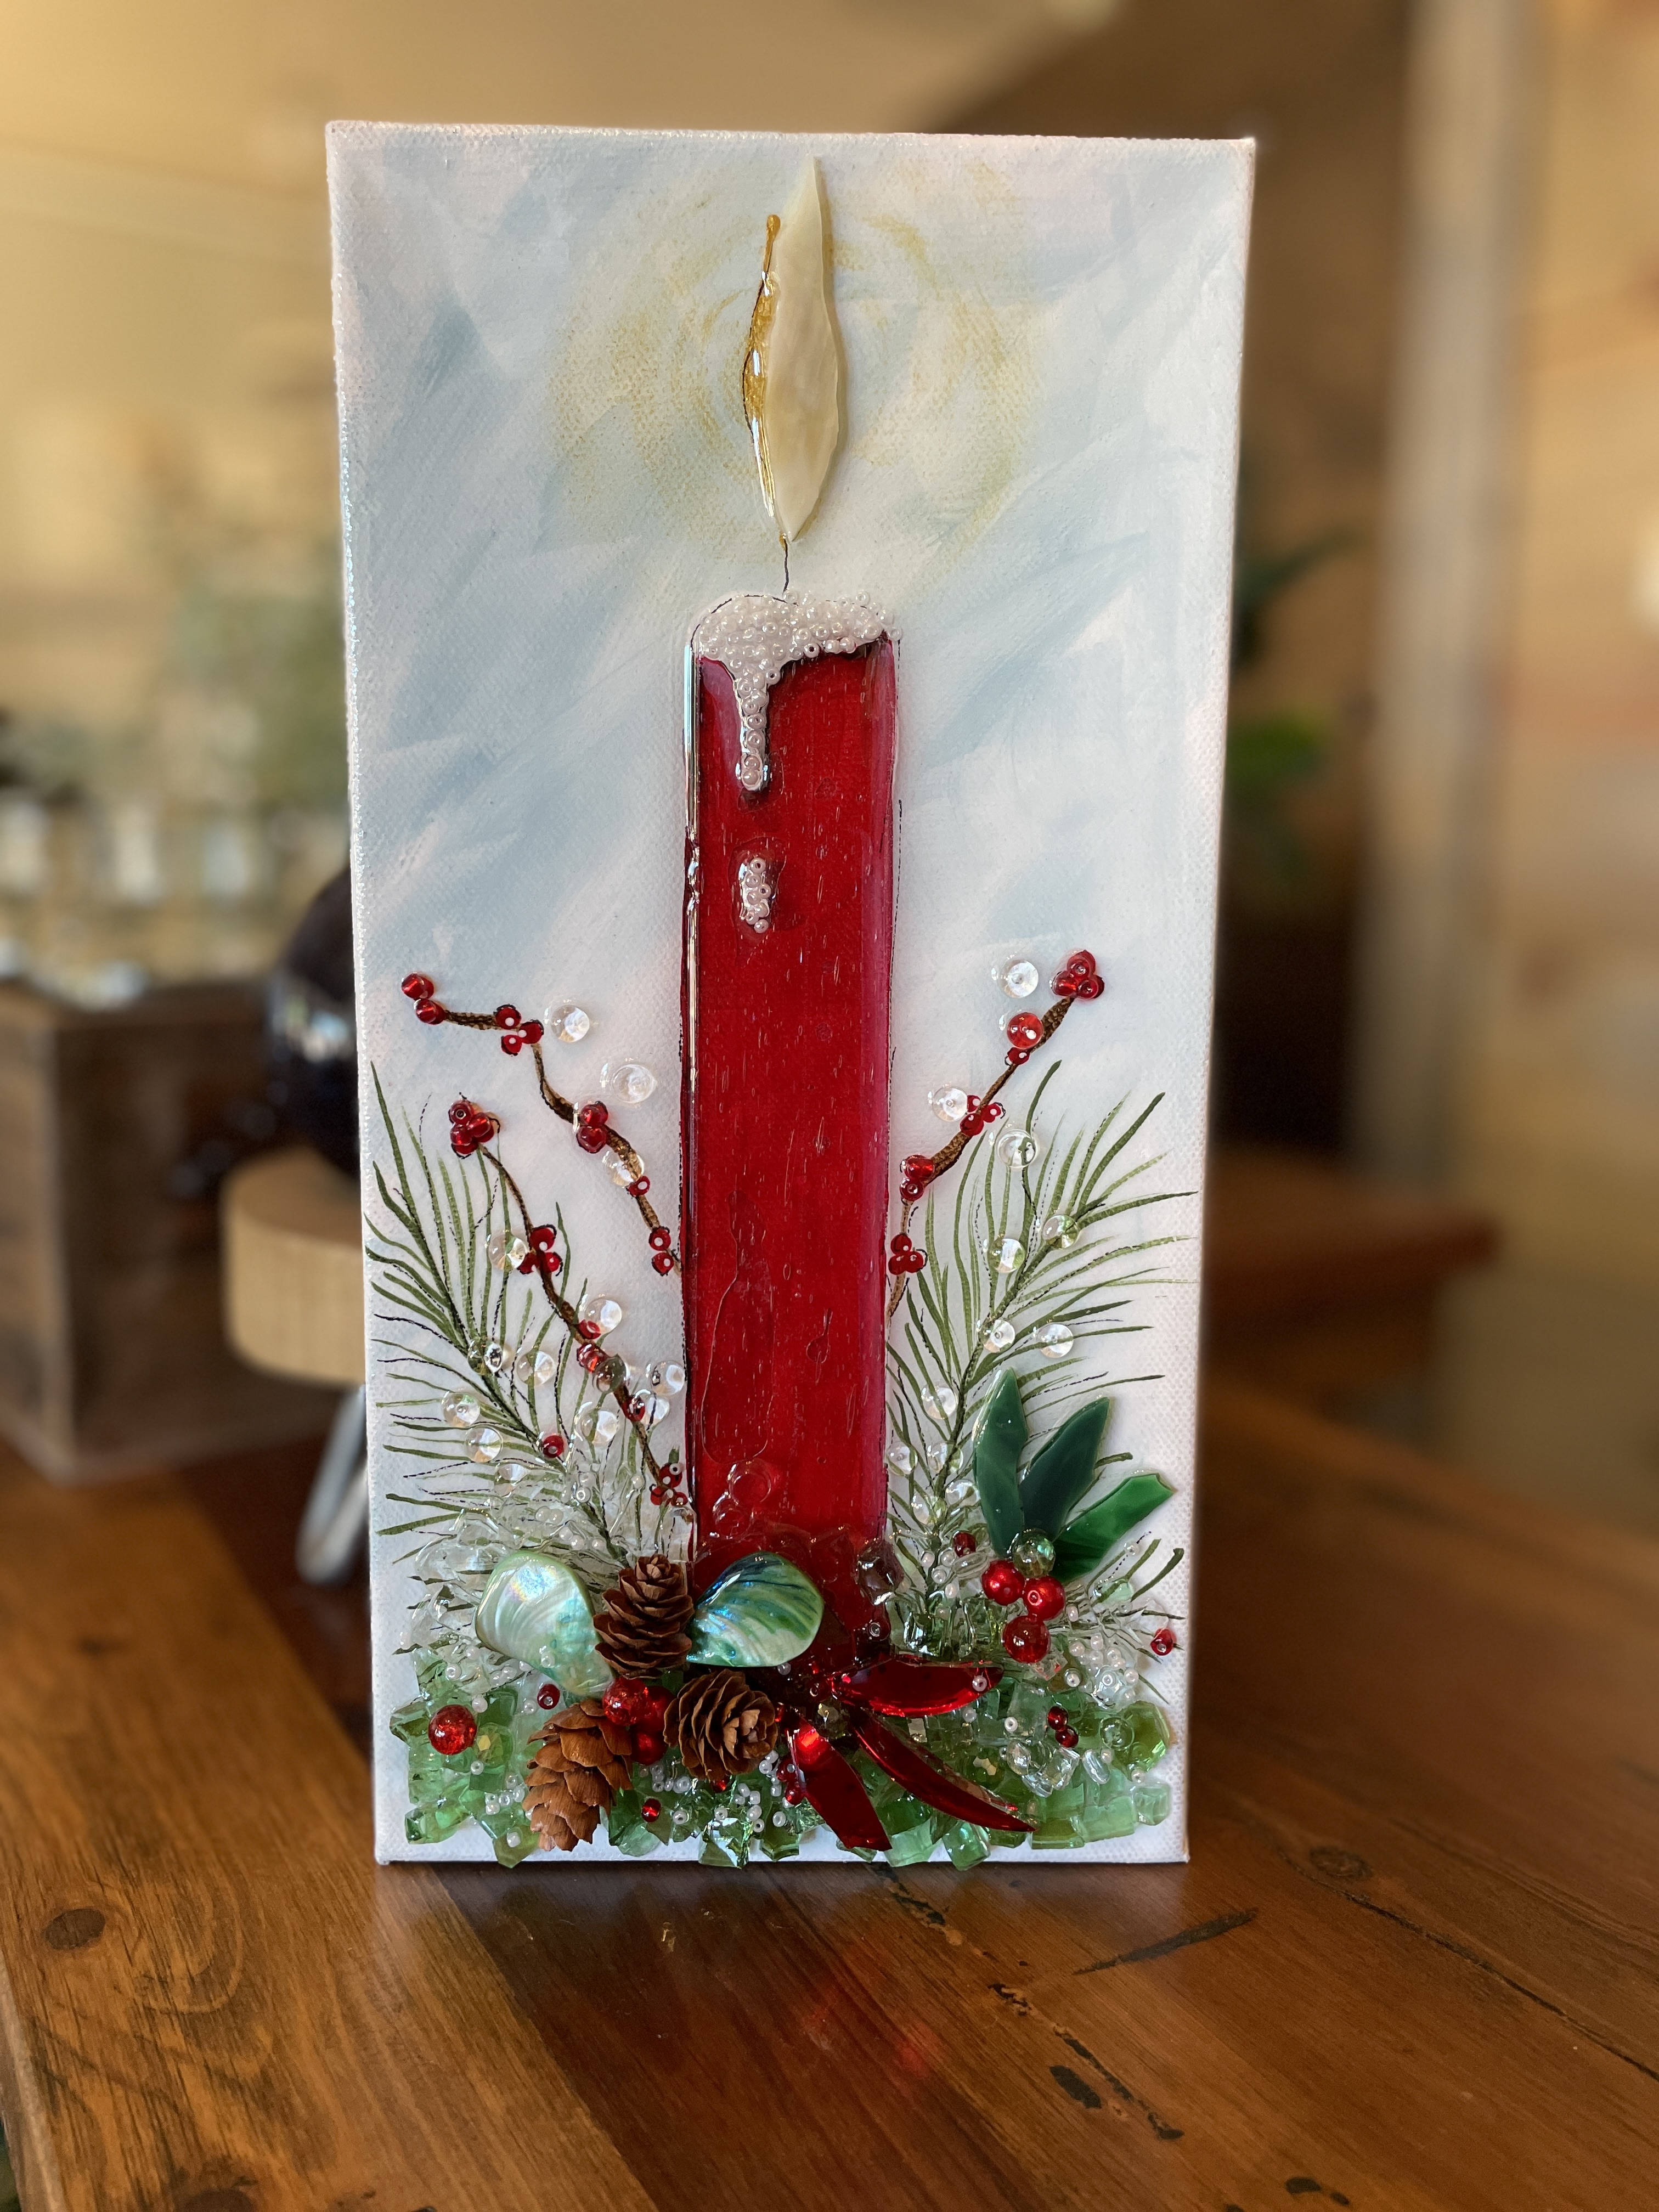
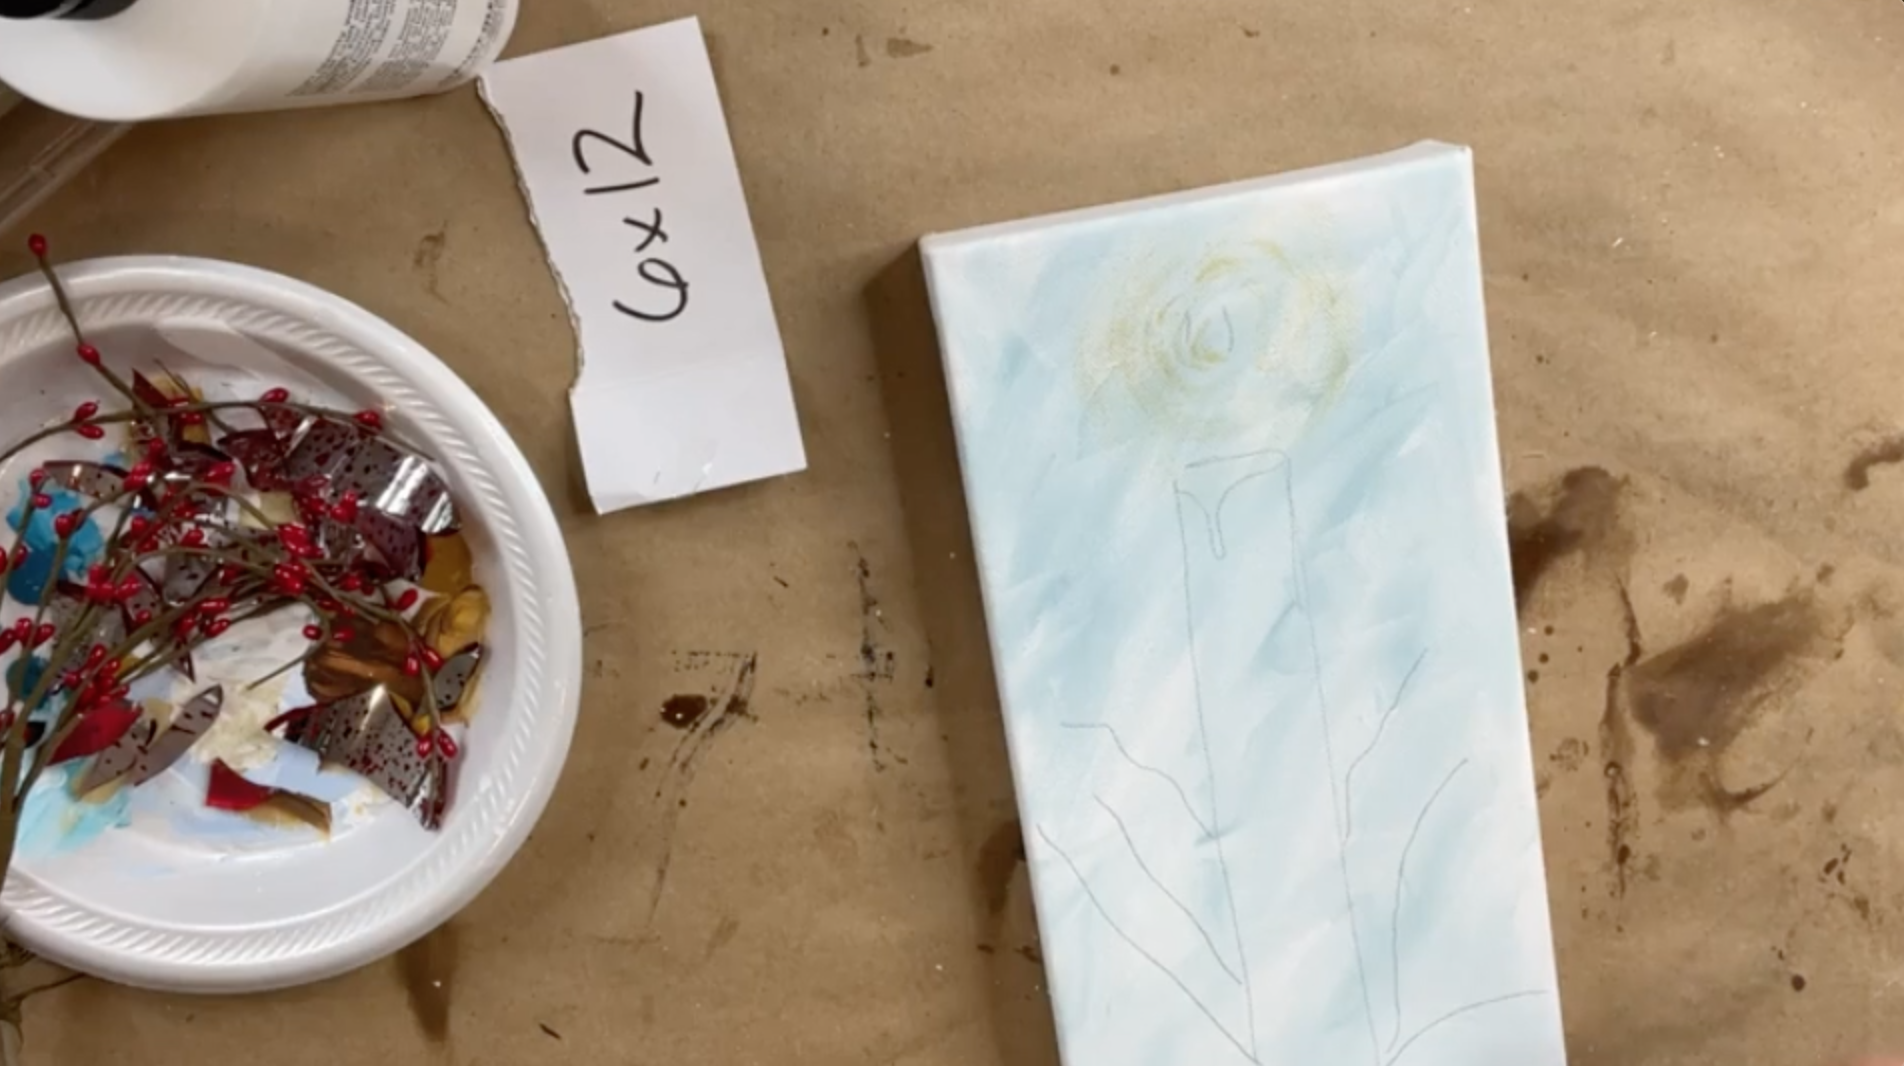
I am painting my background with white and a light blue called Waterfall.
I'm going to mark where my candle flame will be. I'm going to add a little bit of Metallic Gold paint. Dip it into the gold and swirl it onto your plate. I want this to just be a light glow on the canvas, just plaint a circle around where your flame will be.
Grab your tracer, tape it to the canvas, place graphite paper underneath, and trace your candle with a stylus onto the canvas.
Next, I'm going to paint my candle with Cherry Red. Then, I'm going to add some brown to my canvas with a liner brush to create my little evergreen branches. I'll also paint the melted tip of my candle with white paint and the flame with Metallic Gold. Also, add a second coat of the red p...
