
Happy Hour 🍸
Looking for a fun and creative way to spend an afternoon? Join me as we transform ordinary canvas panels into adorable, personalized happy hour magnets! This project is perfect for glass art crafters of all levels, and the end result is a set of cute magnets that will add a touch of personality to your fridge. These would also make thoughtful gifts or great products to sell as an artist!

Apply a few coats of white acrylic paint to each panel, allowing them to dry completely between coats. For added protection, finish with a coat of clear coat spray. Dry with a heat tool.
For this tutorial, we have two designs: "Cheers" with martini glasses, and "Happy Hour" with various drink glasses. Sketch our your drink glasses with a permanent pen along with writing the words "Cheers" and "Happy Hour".
To add a splash of color to your designs, consider painting the back of your sea glass pieces. Use acrylic paints in colors like yellow, green, and pink to mimic different drink flavors (yello...
Summer Pineapple 🍍
Join me for a fun and creative summer pineapple art tutorial! I'll guide you through painting a vibrant background with a paisley stencil design, adding colorful details to your pineapple, and embellishing with yellow and green glass pieces. Finish it off with a glossy resin coat and sparkling acrylic bubbles. This project is perfect for beginners and will add a tropical touch to your home decor!

For my background, I want to have something for the pineapple to sit on. Take a pencil and sketch a diagonal line across the bottom area of your canvas to create a surface for your pineapple. I'll take a 1-inch flat paintbrush and add white paint to the bottom area. Next, I'll blend in Calypso Blue.
Then, I'll add white paint to the top portion of my canvas. Add "Xs" of Calypso Blue and Windsor Blue paint. I'll also add in a little bit of Hauser Light Green. Dry with a heat tool.
I want to have something different on the wall in my background, so I'll use a paisley stencil to add a fun ...
Summer Snowman ⛄️
Join me for a fun Christmas in July glass and resin art tutorial! We’re making a cute summer snowman on the beach using acrylic paint, mini starfish, starfire glass, small shells, and beads. This easy project is perfect for adding a touch of holiday cheer to your summer decor!

We are going to start by painting our background with a sandy beach on the bottom and a night sky on the top. Make a tick mark about 3 inches from the bottom. Paint this bottom area with Bleached Sand paint. Dry with a heat tool.
Next, cover this with painter's tape and we'll work on the top portion of the canvas. Paint a circular swirl of white paint in the center of your canvas. Blend in Bleached Sand, making the circle bigger. I'll do the same thing with Midnight Garden and Deep Midnight Blue. Swirl in some more white and Bleached Sand to bring it all together. Dry with a heat tool and remove the painter's tape.
Add a second coat of Bleached Sand to your bottom area, blending in some white paint as well. ...
Crackled Daisy 🌼

For this art piece, I had been experimenting with crackle and came up with this background. I am using an 8x10 wooden frame that I painted with Tropical Blue, added Elmer's glue for crackle, and then painted another coat of Tropical Blue on top.
Next, I found some white sheet glass that I had cut into flower petals with my wheeled nippers. You will want to do this with gloves and eye protection on! I also have two cut pieces of green vase glass for the leaves.
We are going to mix our resin first, then start creating our flower by layering the glass flower petals. We will add resin ...
Dragonfly on Dots 😍
Discover the joy of creating a glass dragonfly art piece on a painted dot background! This fun and easy project is perfect for beginners. Learn to paint the dotted background and add a glass bead strand for the body, broken vase glass pieces for the wings, a bead for the head, and acrylic bubbles for that finishing touch!

Apply a thin coat of white paint over the entire canvas. This helps to blend other colors and gives a soft background. Squeeze out small amounts of Seashell (pastel pink), Buttercream (yellow), Wild Wasabi (green), Winter Blue (purple-blue), Spa Blue (sky blue), and white onto your palette.
Use a dotting tool to dip into Buttercream and make dots randomly across the canvas. Apply light pressure and twist slightly to form your dots. Clean the dotting tool between colors. Repeat the dotting technique with Seashell, Wild Wasabi, Winter Blue, and Spa Blue, allowing some overlap. Mix white with each color and dot around the original colors to create a gradient effect. ...
Beach with Shells 🏝️
Let's create some abstract beach art with this beginner-friendly tutorial! Using a combination of acrylic bubbles, glass chips, blue round flat gems, and shells, you'll create a stunning beach scene that's perfect for summer. The background is easily painted with a palette knife, requiring no tracer. Get ready to add some coastal charm to your home with this unique and fun 8x10 art piece!

We are going to start by painting our background with several different colors of blue (Shoreline, Bahama Blue, and Desert Turquoise) along with white. I am using a palette knife, dipping the back into my paint colors, and lightly swiping the color onto my canvas from left to right in a horizontal motion. I'll also paint the sides of my canvas too. Dry with a heat tool.

Now let's add our glass! I am going to start by adding Clear Classic glass, Caribbean Blue glass, and Light Azuria Reflective glass. I'll also stick in a couple of blue round flat gems. glass chips, and shells. I'm concentrating ...
July 4th Watermelon 🍉
Looking for a fun and festive art project to celebrate the 4th? This glass and resin art tutorial will guide you in creating an adorable patriotic watermelon! This art piece is perfect for displaying on a tiered tray or gifting to someone special. It's designed with beginners in mind, using only three paint colors and simple techniques.

Start by painting a coat of white acrylic paint on your background. Dry with a heat tool.
Mix red acrylic paint with water, dip an old toothbrush into your mixture, tap off the excess, and run your finger along the bristles about 8-10 inches above your canvas to create a splatter effect. Dry with a heat tool.

Grab your tracer, tape it to your canvas, place graphite paper underneath, and trace your watermelon with a stylus.
Next, we are going to add a base coat of dark blue, white, and red paint on each section of the watermelon. Dry with a heat tool.

Add a second coat of each color, blending the colors where they meet at each watermelon sect...
Star Spangled Flag 🇺🇸
We're creating a sparkling flag on a 4x12 canvas, perfect for beginners. It's easy to follow along - we'll use a palette knife technique to paint the stripes, then add some sparkle with plastic stars, glass, and a glossy resin finish. This project is the perfect way to celebrate summer and add a touch of patriotism to your home!

First, I'm going to paint a square on the left side of my canvas with Midnight Blue paint. Make sure you paint the side of the canvas as well. Dry with a heat tool.

Next, we will work on the stripes! I am going to scoop up some white acrylic paint with the back of my palette knife and swipe the color onto my stripes. This will not be perfect and will have a very natural and abstract look to it! I'll use this same technique to paint my red stripes. While the paint is still wet, use your palette knife to blend the colors of the stripes together more. I'll also add some Midnight Blue in the stripes.
Then, I'll add another coat of Midnight Blue to my square...
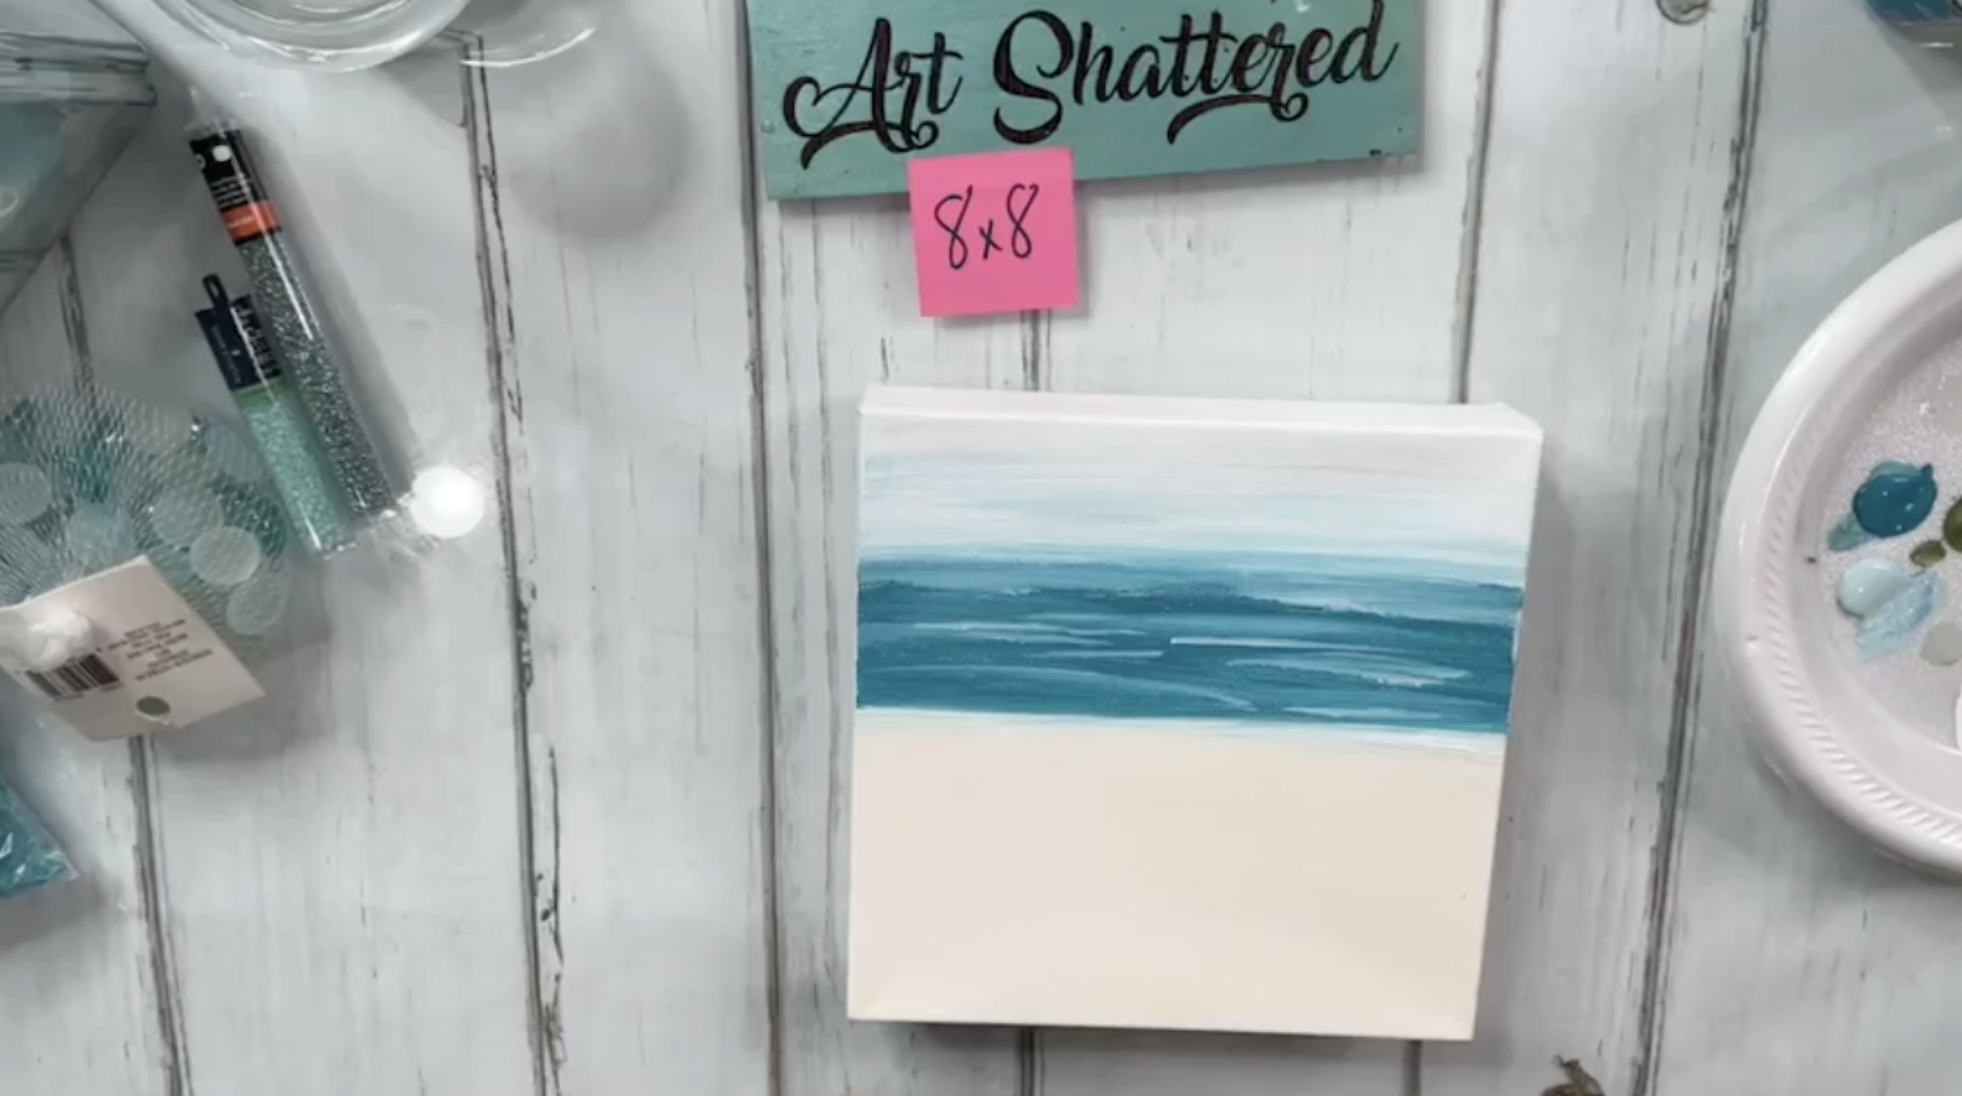
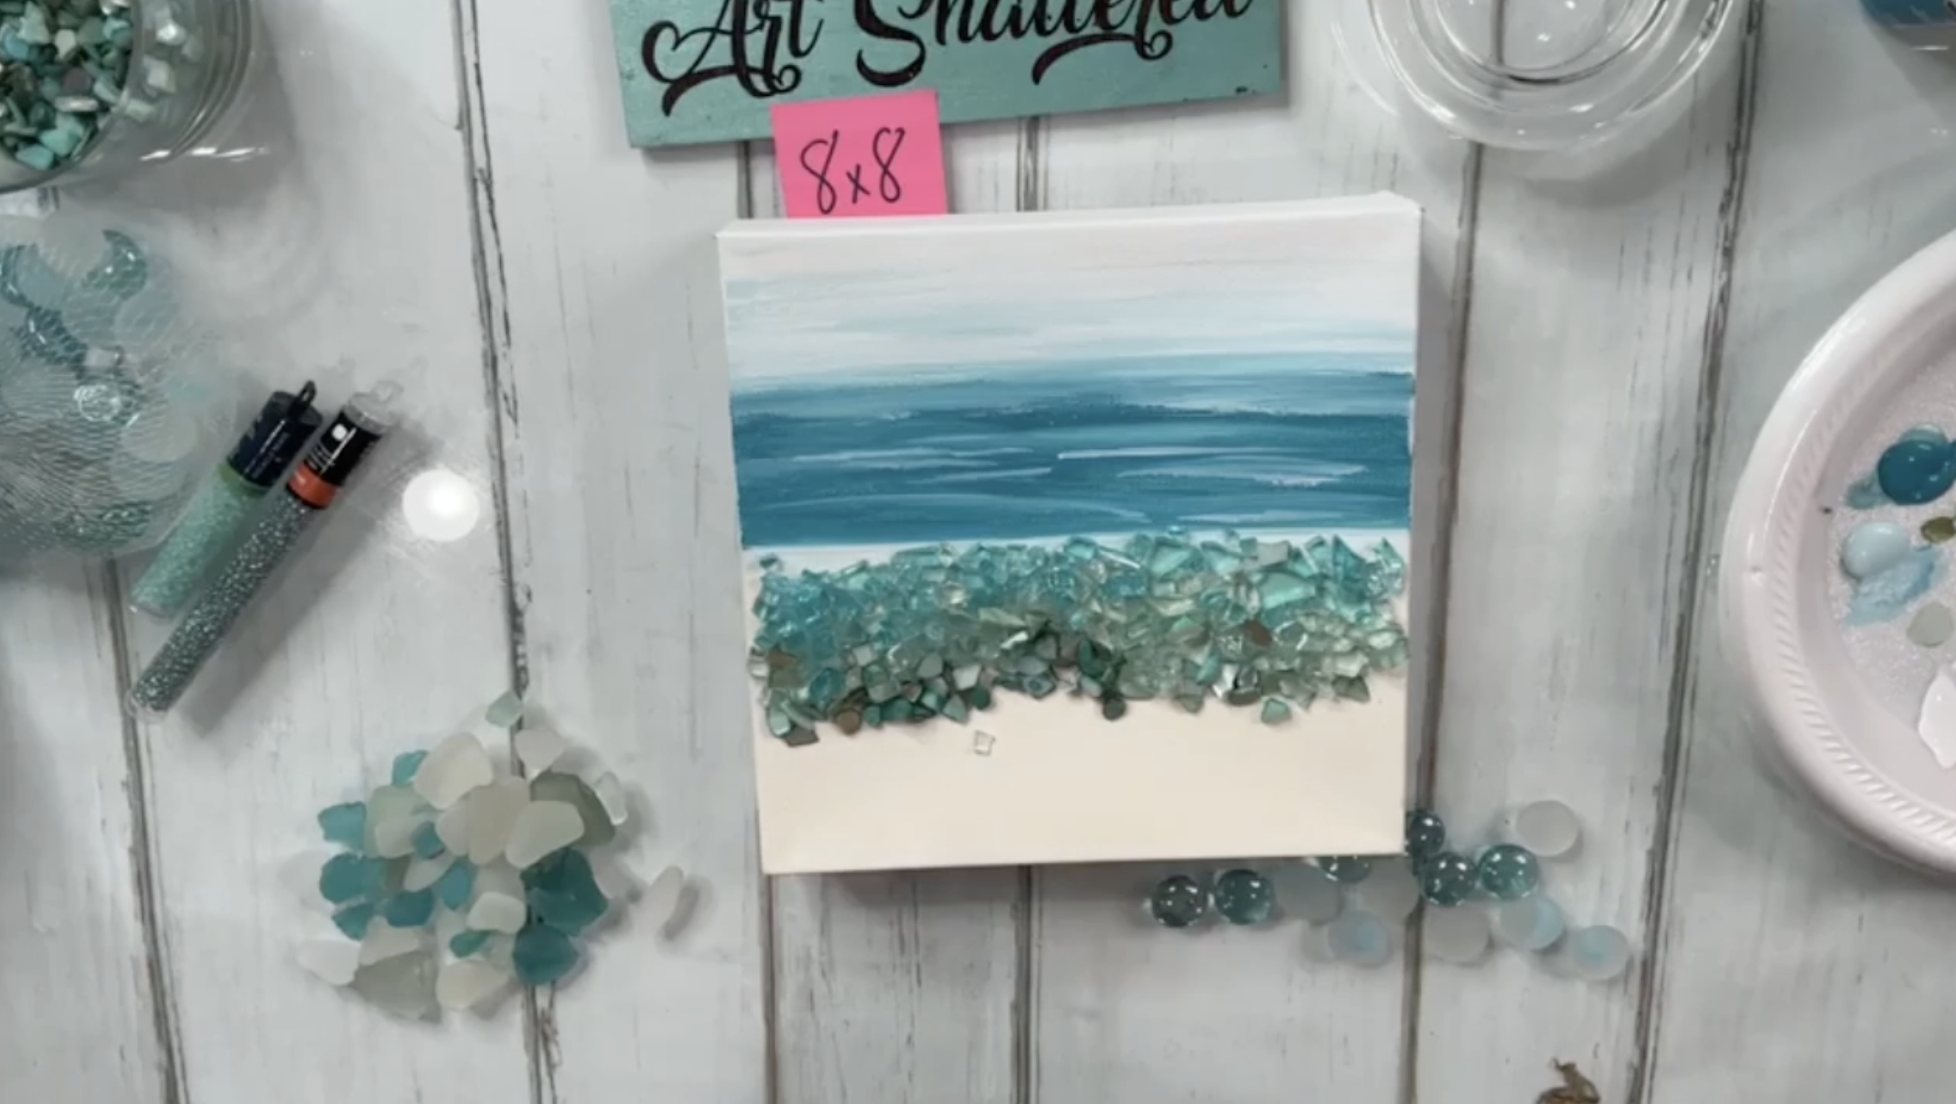
Seaglass Beach 🌊
I am dreaming of the beach, so we are going to squeeze in one last beach art piece before the summer is over! We are working with an 8x8 canvas, and this art project has minimal painting and lots of glass goodies. We'll be adding sea glass in blues and greens, tinted seashells, Caribbean Blue and Solex glass, flat gems, seed beads, bubbles, and more!
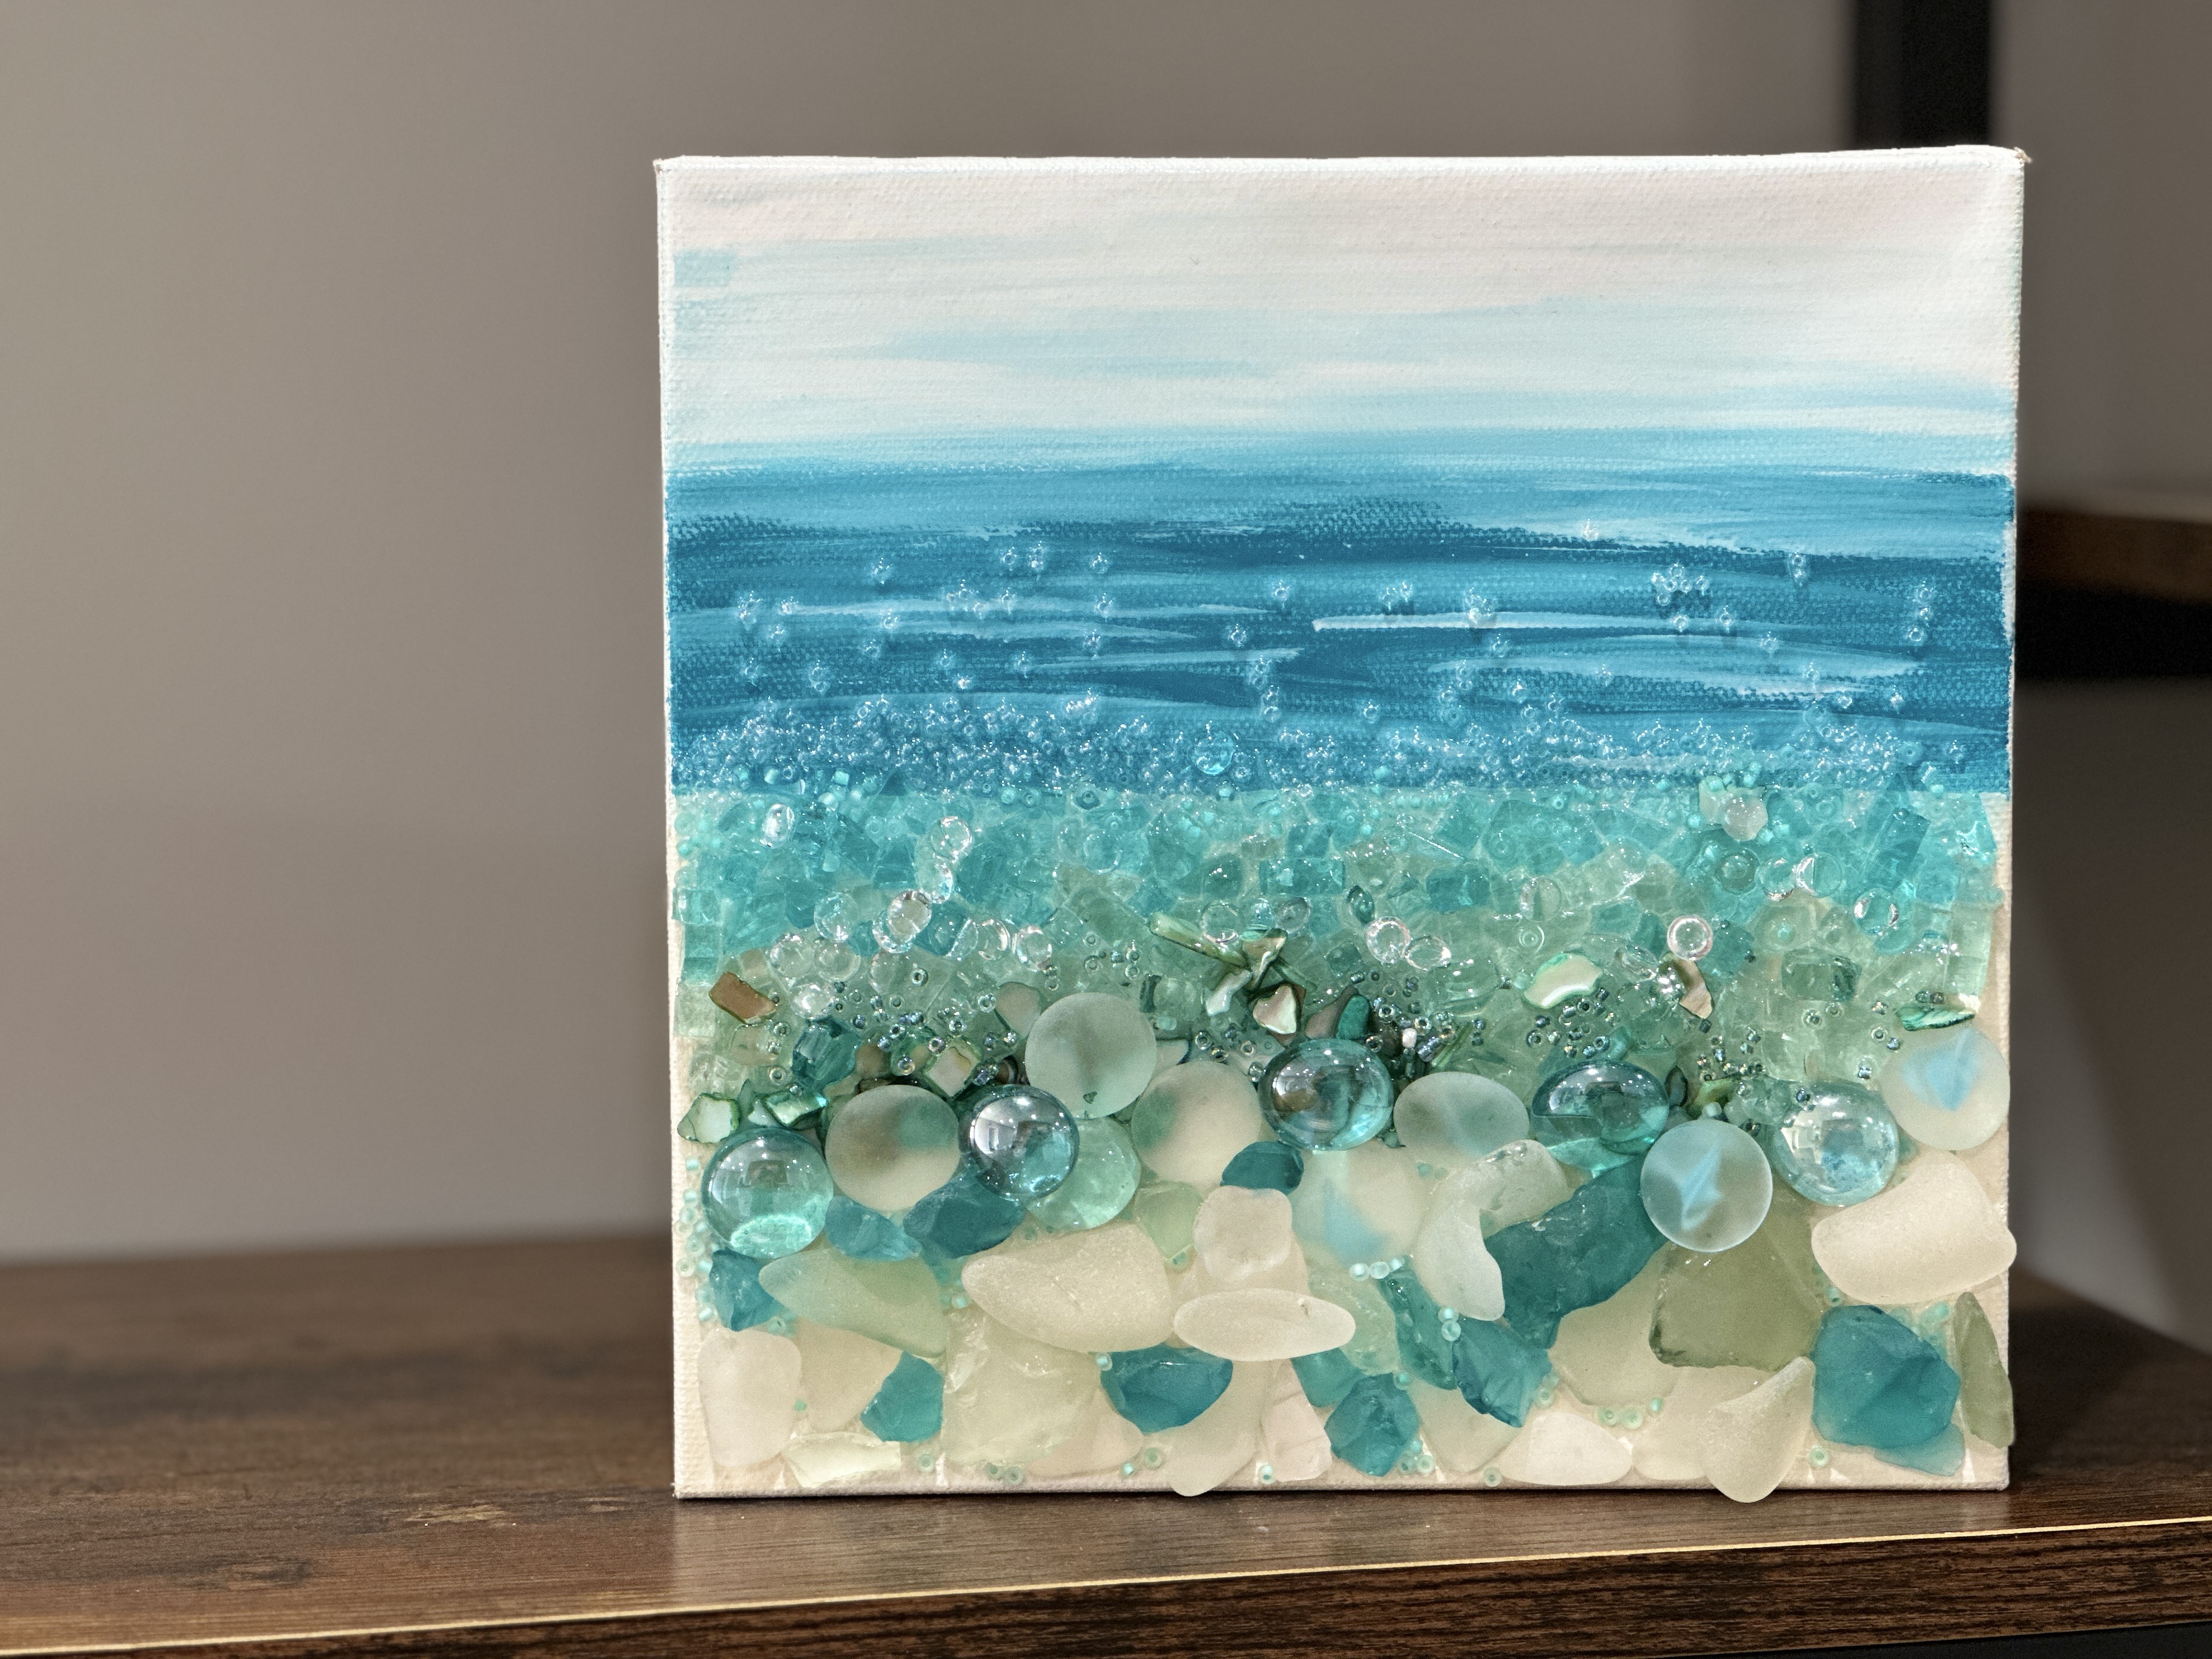
First, I am going to paint a beach background. I am going to paint the lower portion of my canvas with Vintage White for the sand. Then, I'll use Spa Blue, Castaway, and white paint to create my ocean and sky. I'm using Castaway for the ocean and going lighter towards the top of my canvas, blending the colors together. Dry with a heat tool.
Next, I am going to lay out some of the glass onto my canvas. I am adding the Solex glass, Caribbean Blue glass, and tinted seashells right where my sand and ocean meet. (We will add the rest of the sea glass, seed beads, and other glass after the resin is on)
Next, we'll add resin. We're goin...
Chubbie Dragonfly
We are working with an 8x8 canvas and creating a dragonfly with some acrylic paint and a piece of Chubbie glass from JL Glass. This little glass piece is the perfect thing to create a dragonfly's body! I'll also be using some seed beads to make those wings really sparkle.

Start by painting your background with Metallic White and then I'll also add the tiniest bit of Metallic Turquoise in an arch motion to create a pearly sky. Dry with a heat tool.

I have some small dragonfly stencils that I am going to use with some Enchanted Turquoise, which is an iridescent paint, to add two dragonflies in the background. I'll just place the stencil on my canvas and use a stencil brush in a pouncing motion to apply those. Dry with a heat tool.
Grab your tracer, tape it to your canvas, place graphite paper underneath, and trace just the wings onto your canvas with a stylus.
Next, I am going to paint the wings with Metallic Turquoise, Festive Green, Splendid Gold, and Metallic White, blendin...
