
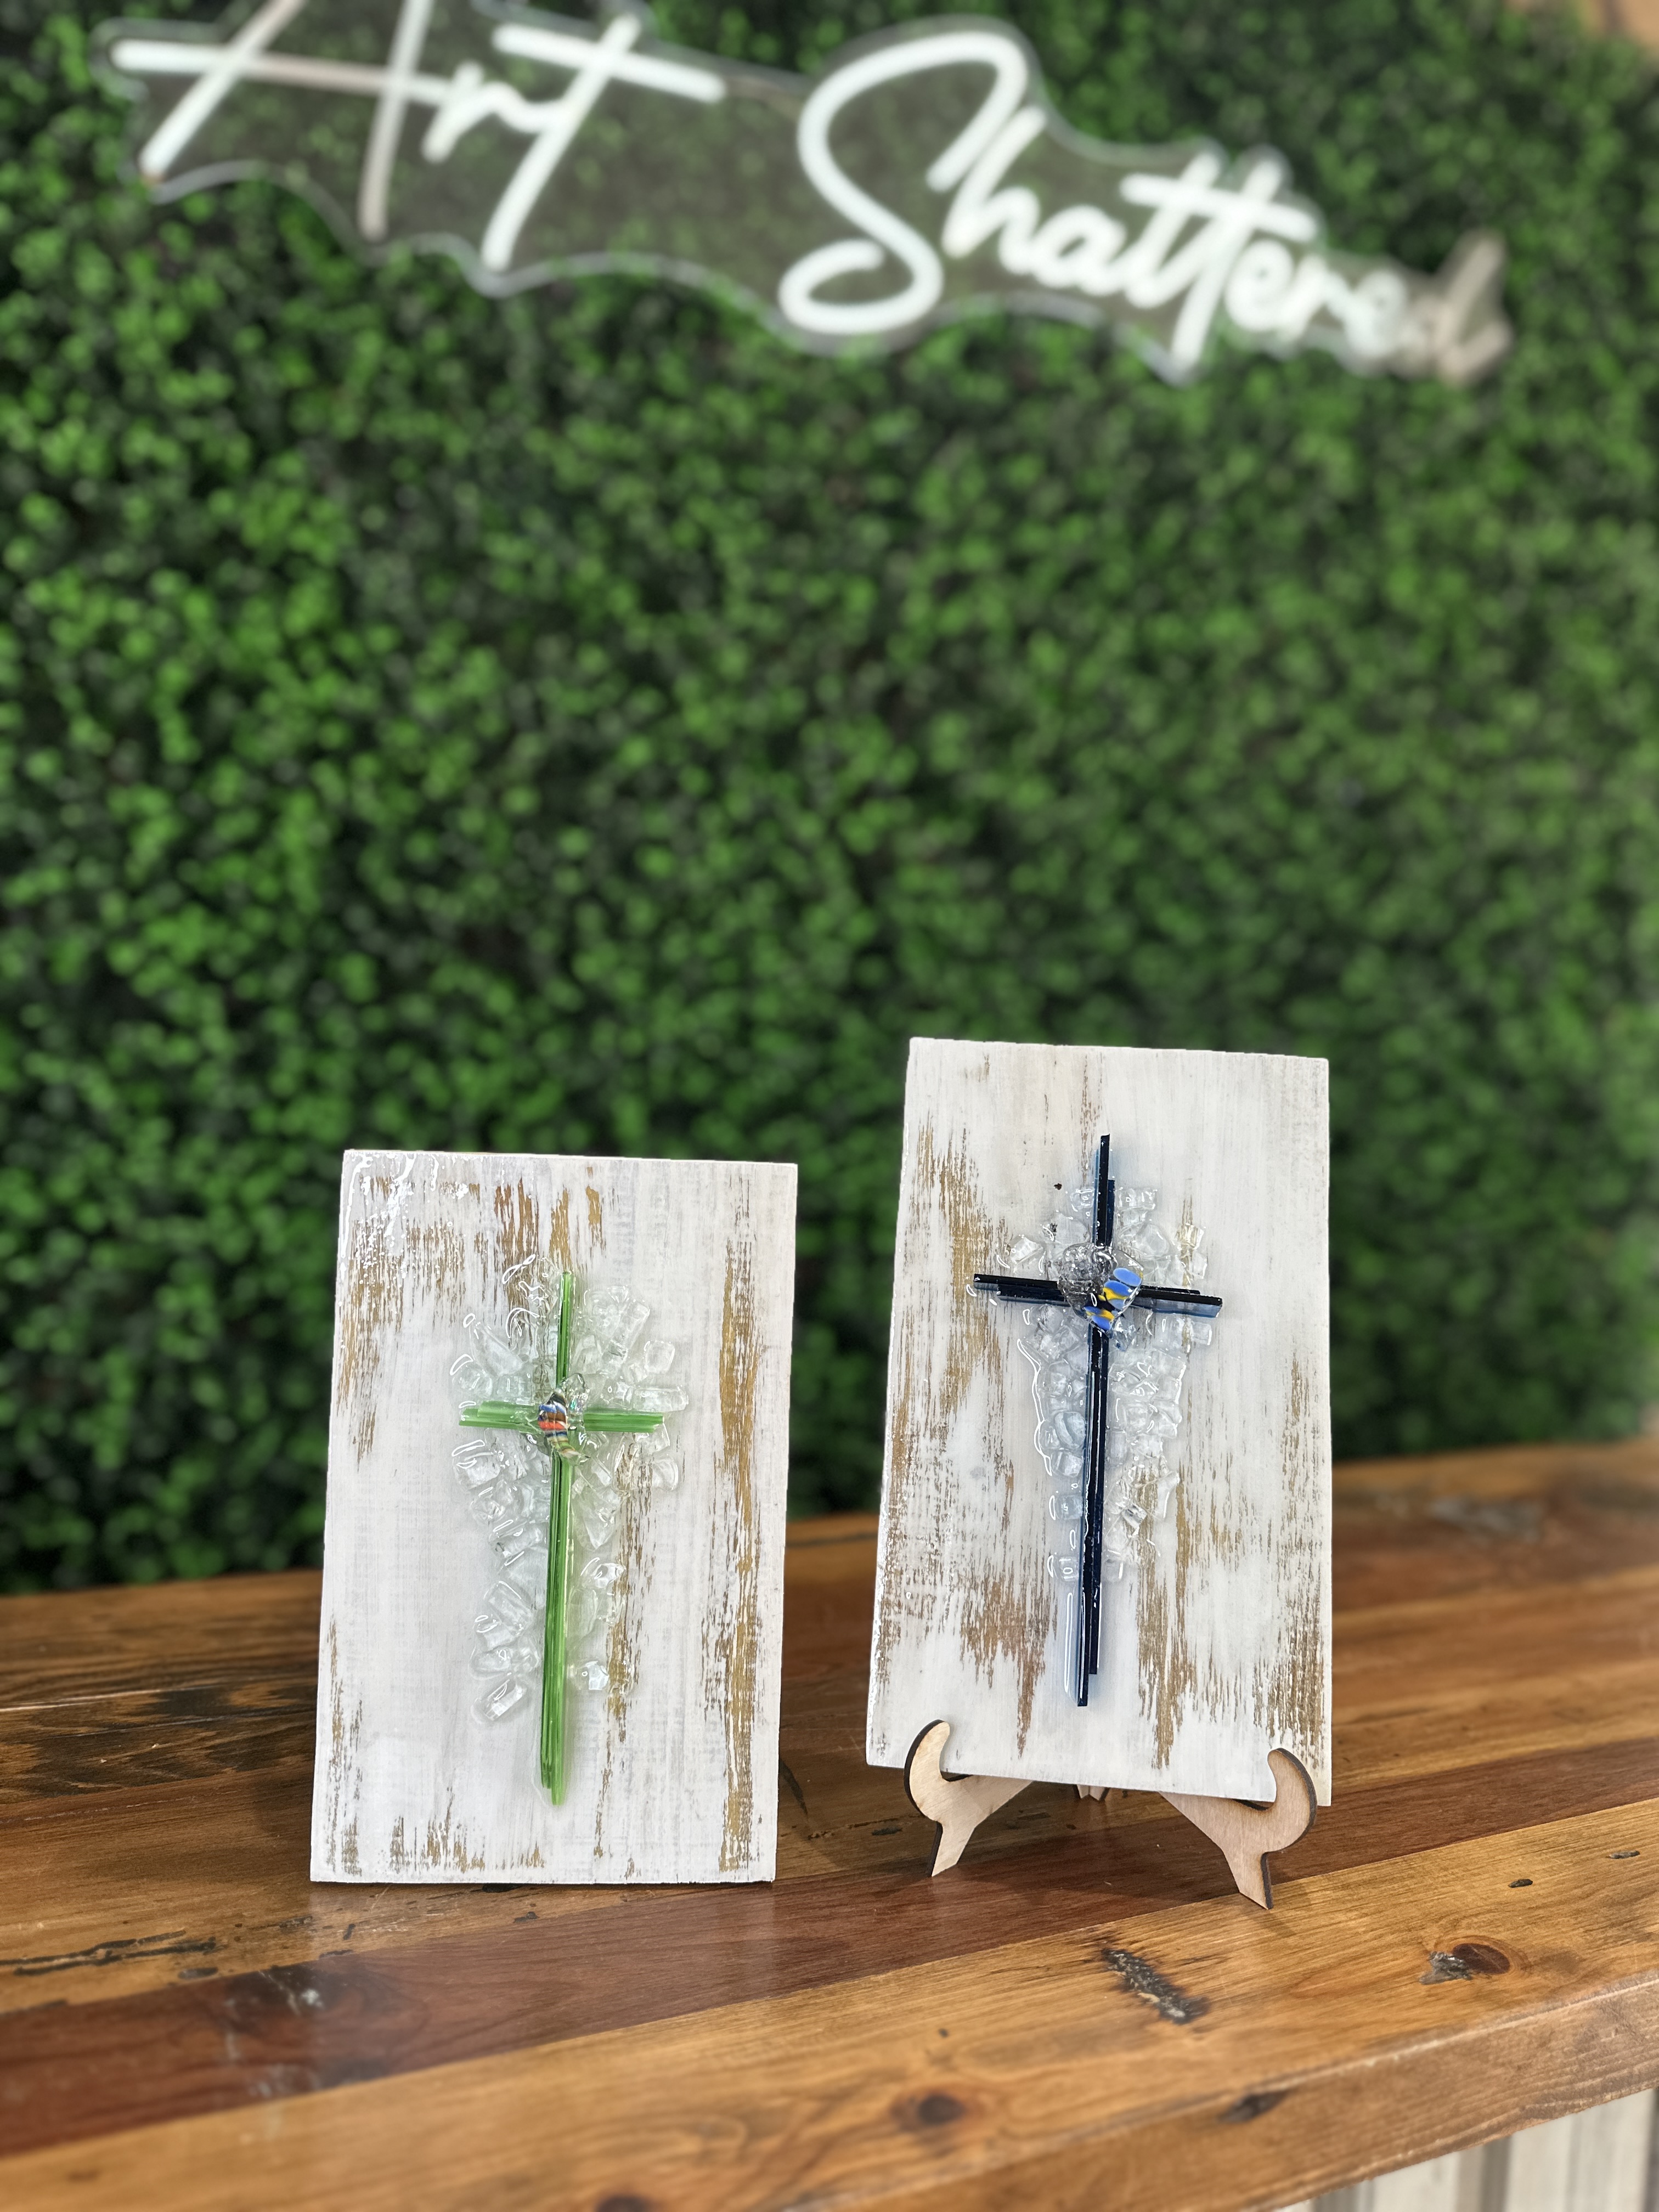
Rustic Cross ✝️
If you’ve ever wondered how to cut your own glass strips and create beautiful layered glass crosses, this tutorial is for you! Today I’m showing you how I make my bestselling glass crosses using simple tools, colorful glass sheets, and a bit of resin. These make perfect gifts and are always a hit at art and craft shows, especially around holidays like Mother’s Day and Christmas.
Step 1: Getting Started
To start, you’ll need a few basic glass cutting tools: a plastic grid (used to catch glass shards and keep your surface clean), an L-square ruler to help line things up, a scoring tool (either pencil or pistol grip style), and a pair of running pliers. You’ll also need a honing stone or sanding brick to smooth sharp edges.
For your glass, I recommend pre-cut 4x6 sheets. These are widely available online in a variety of colors. I used a mixed-color pack that came with 12 sheets for about $24 and included gloves too. You can choose themed packs like all blues or purples, or go with a ...
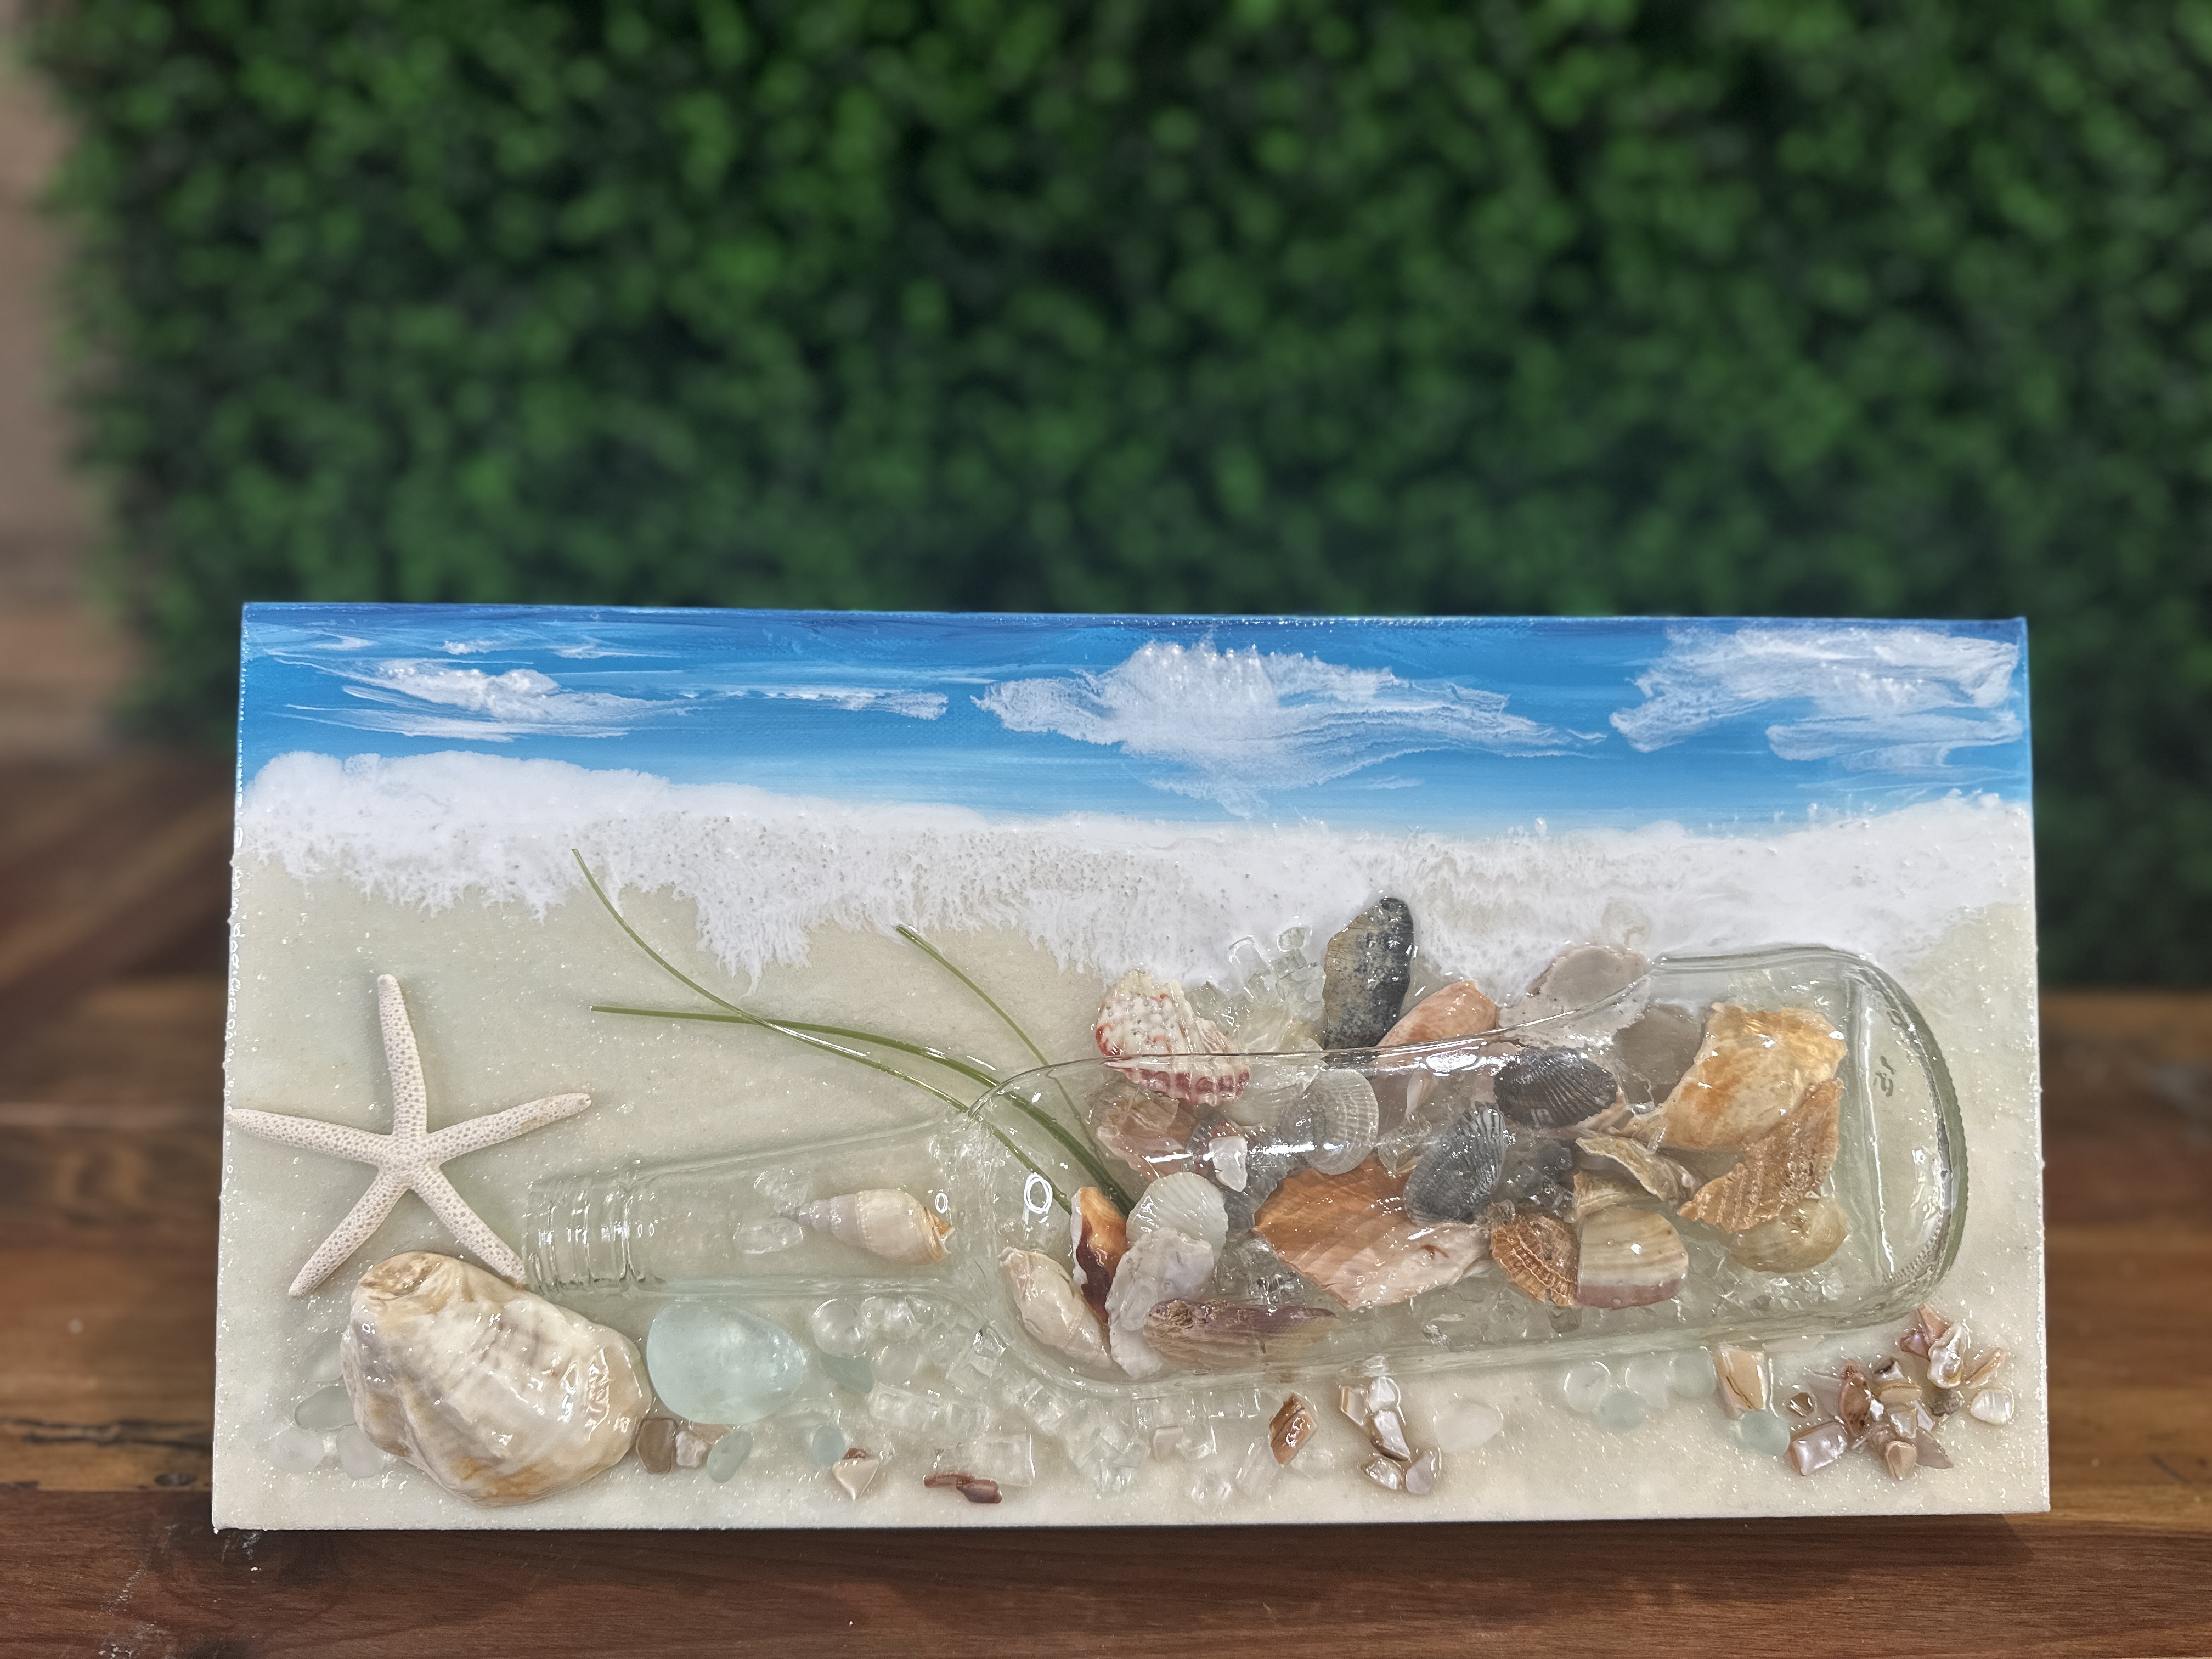
Tides Treasure 🐚
Got a broken bottle sitting around? Don’t toss it... turn it into a stunning mixed media art piece that captures the spirit of the ocean! In this tutorial, we’re creating a coastal-inspired canvas with a reclaimed glass bottle, resin, sea glass, and real shells. It’s the perfect project for beach lovers, shell collectors, and anyone who wants to transform “trash” into treasure.
Step 1: Prep Your Canvas
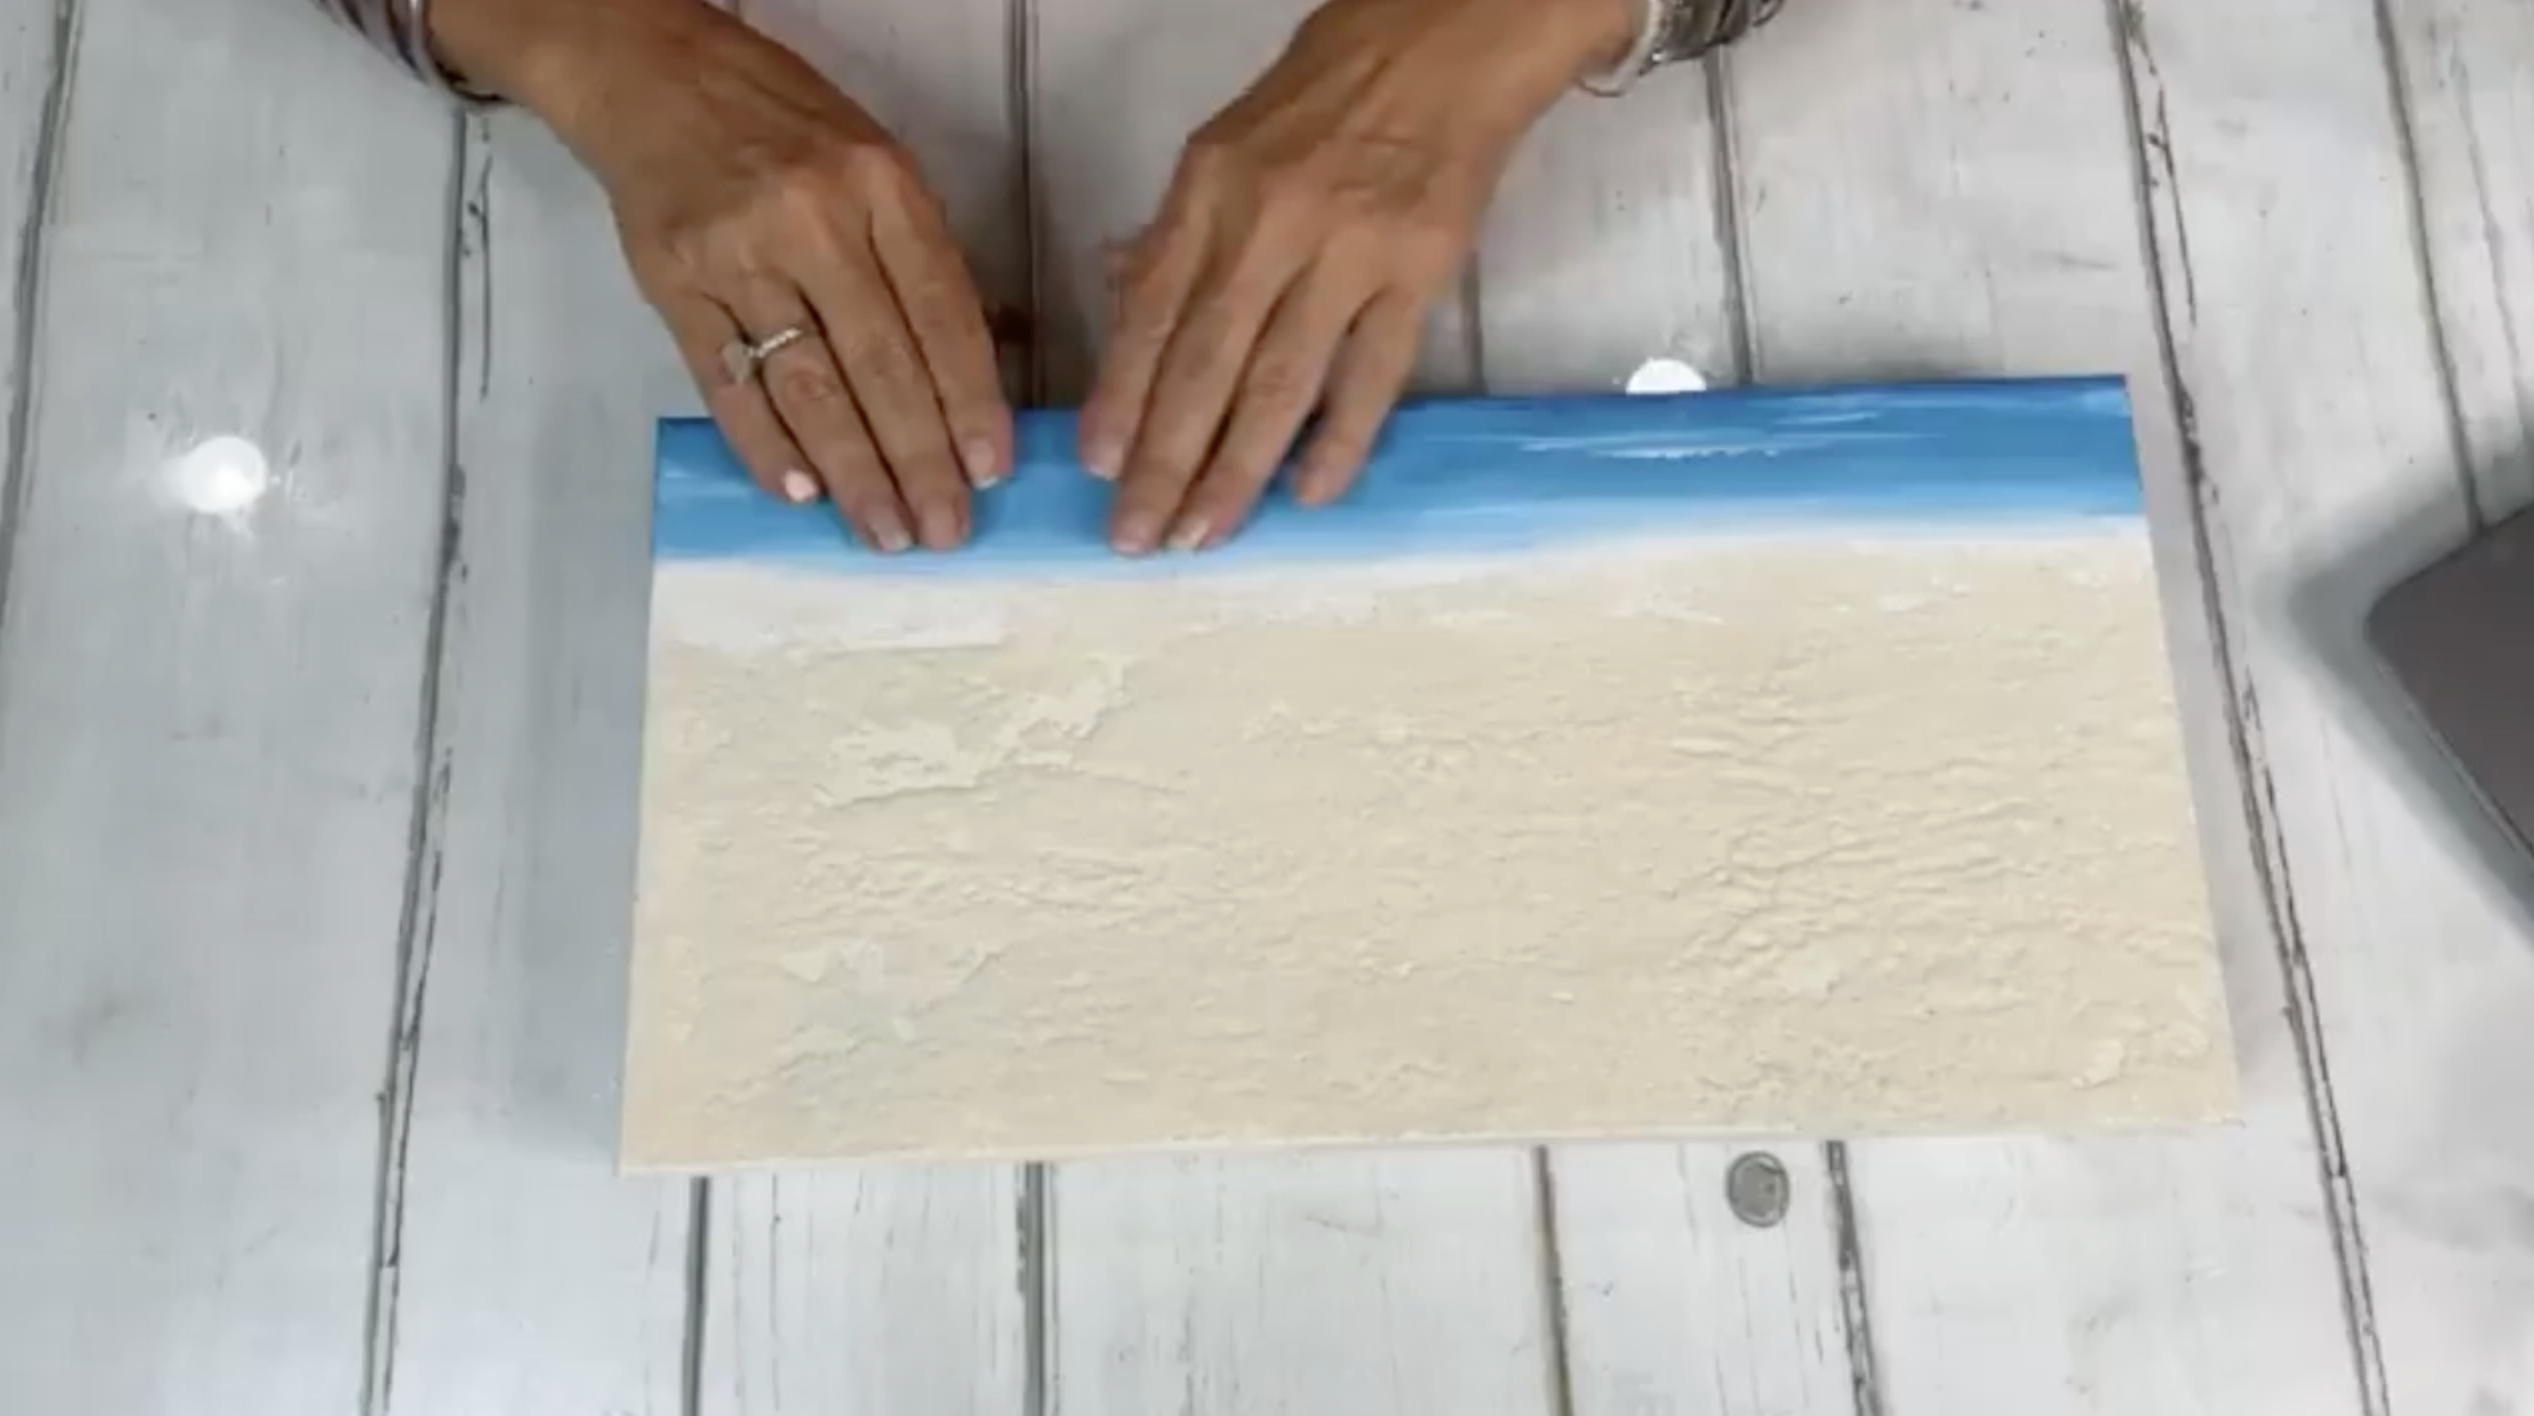
We’re working on an 8x16 canvas. To start, I prepped the background by painting the top portion with a soft ocean blue, blending in white acrylic paint to mimic the look of distant waves. For the sandy shoreline, I used a color called Oyster Beige and topped it with Coarse Texture Gel to give it a beachy, gritty finish just like real sand.
Let your background dry completely before moving on to the resin layers.
Step 2: Choose and Clean Your Bottle
For this piece, I chose a broken bottle that had a sliver missing but still looked beautiful and safe once honed down. If your bottle...
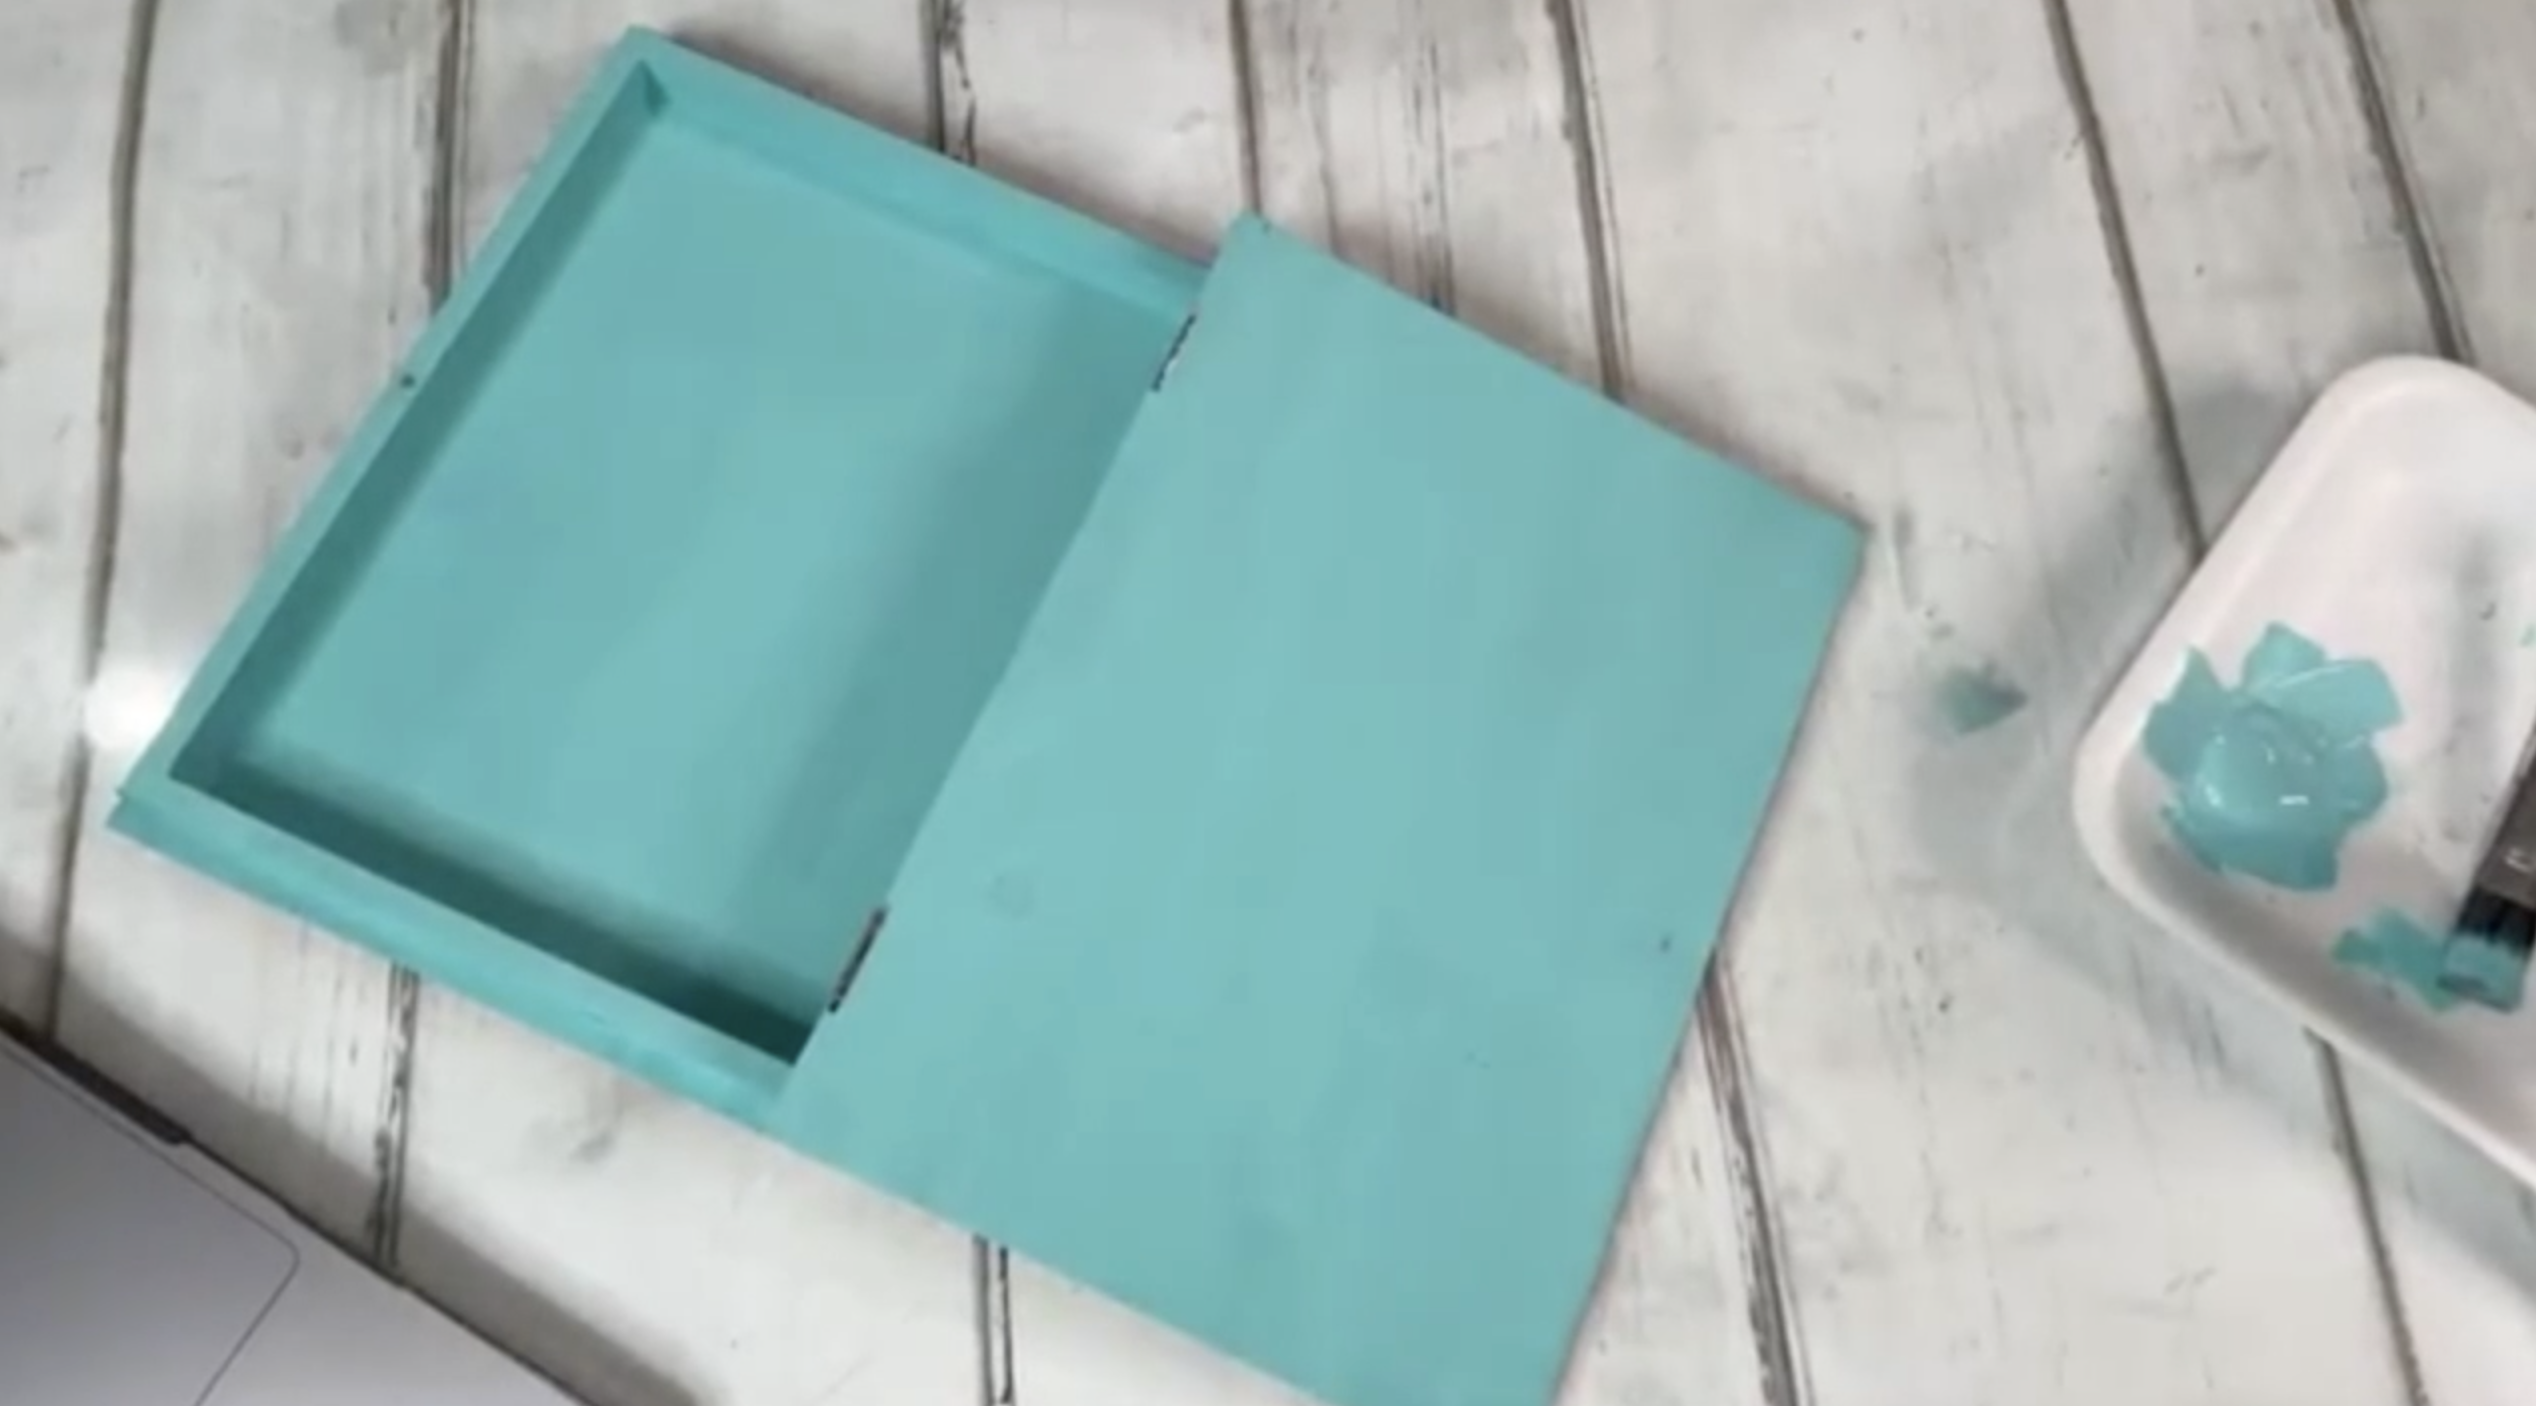
Beach Book Box 🌊
If you've got a stash of special seashells tucked away from beach vacations and don't know what to do with them, this Beach Book Box is the perfect project for you. In this tutorial, I’ll walk you through how I turned a wooden book box from Hobby Lobby into a gorgeous coastal keepsake, complete with a painted beach scene and real shells encased in resin. It’s perfect for holding your beachcombing treasures or gifting to a fellow sea-lover.
Step 1: Prep Your Wooden Book Box
I picked up this raw wood book box from Hobby Lobby and got started by sanding the inside to remove any splinters or loose wood bits. Then, I gave the entire inside one coat of Bahama Blue acrylic paint using a large flat brush. The raw wood really soaks up the paint, so I plan to do a second coat (and maybe even seal it) before adding resin later. Pro tip: sealing raw wood beforehand helps prevent it from eating up your paint and resin.
Step 2: Paint the Outside Base
For the outside bottom of the box, I blen...
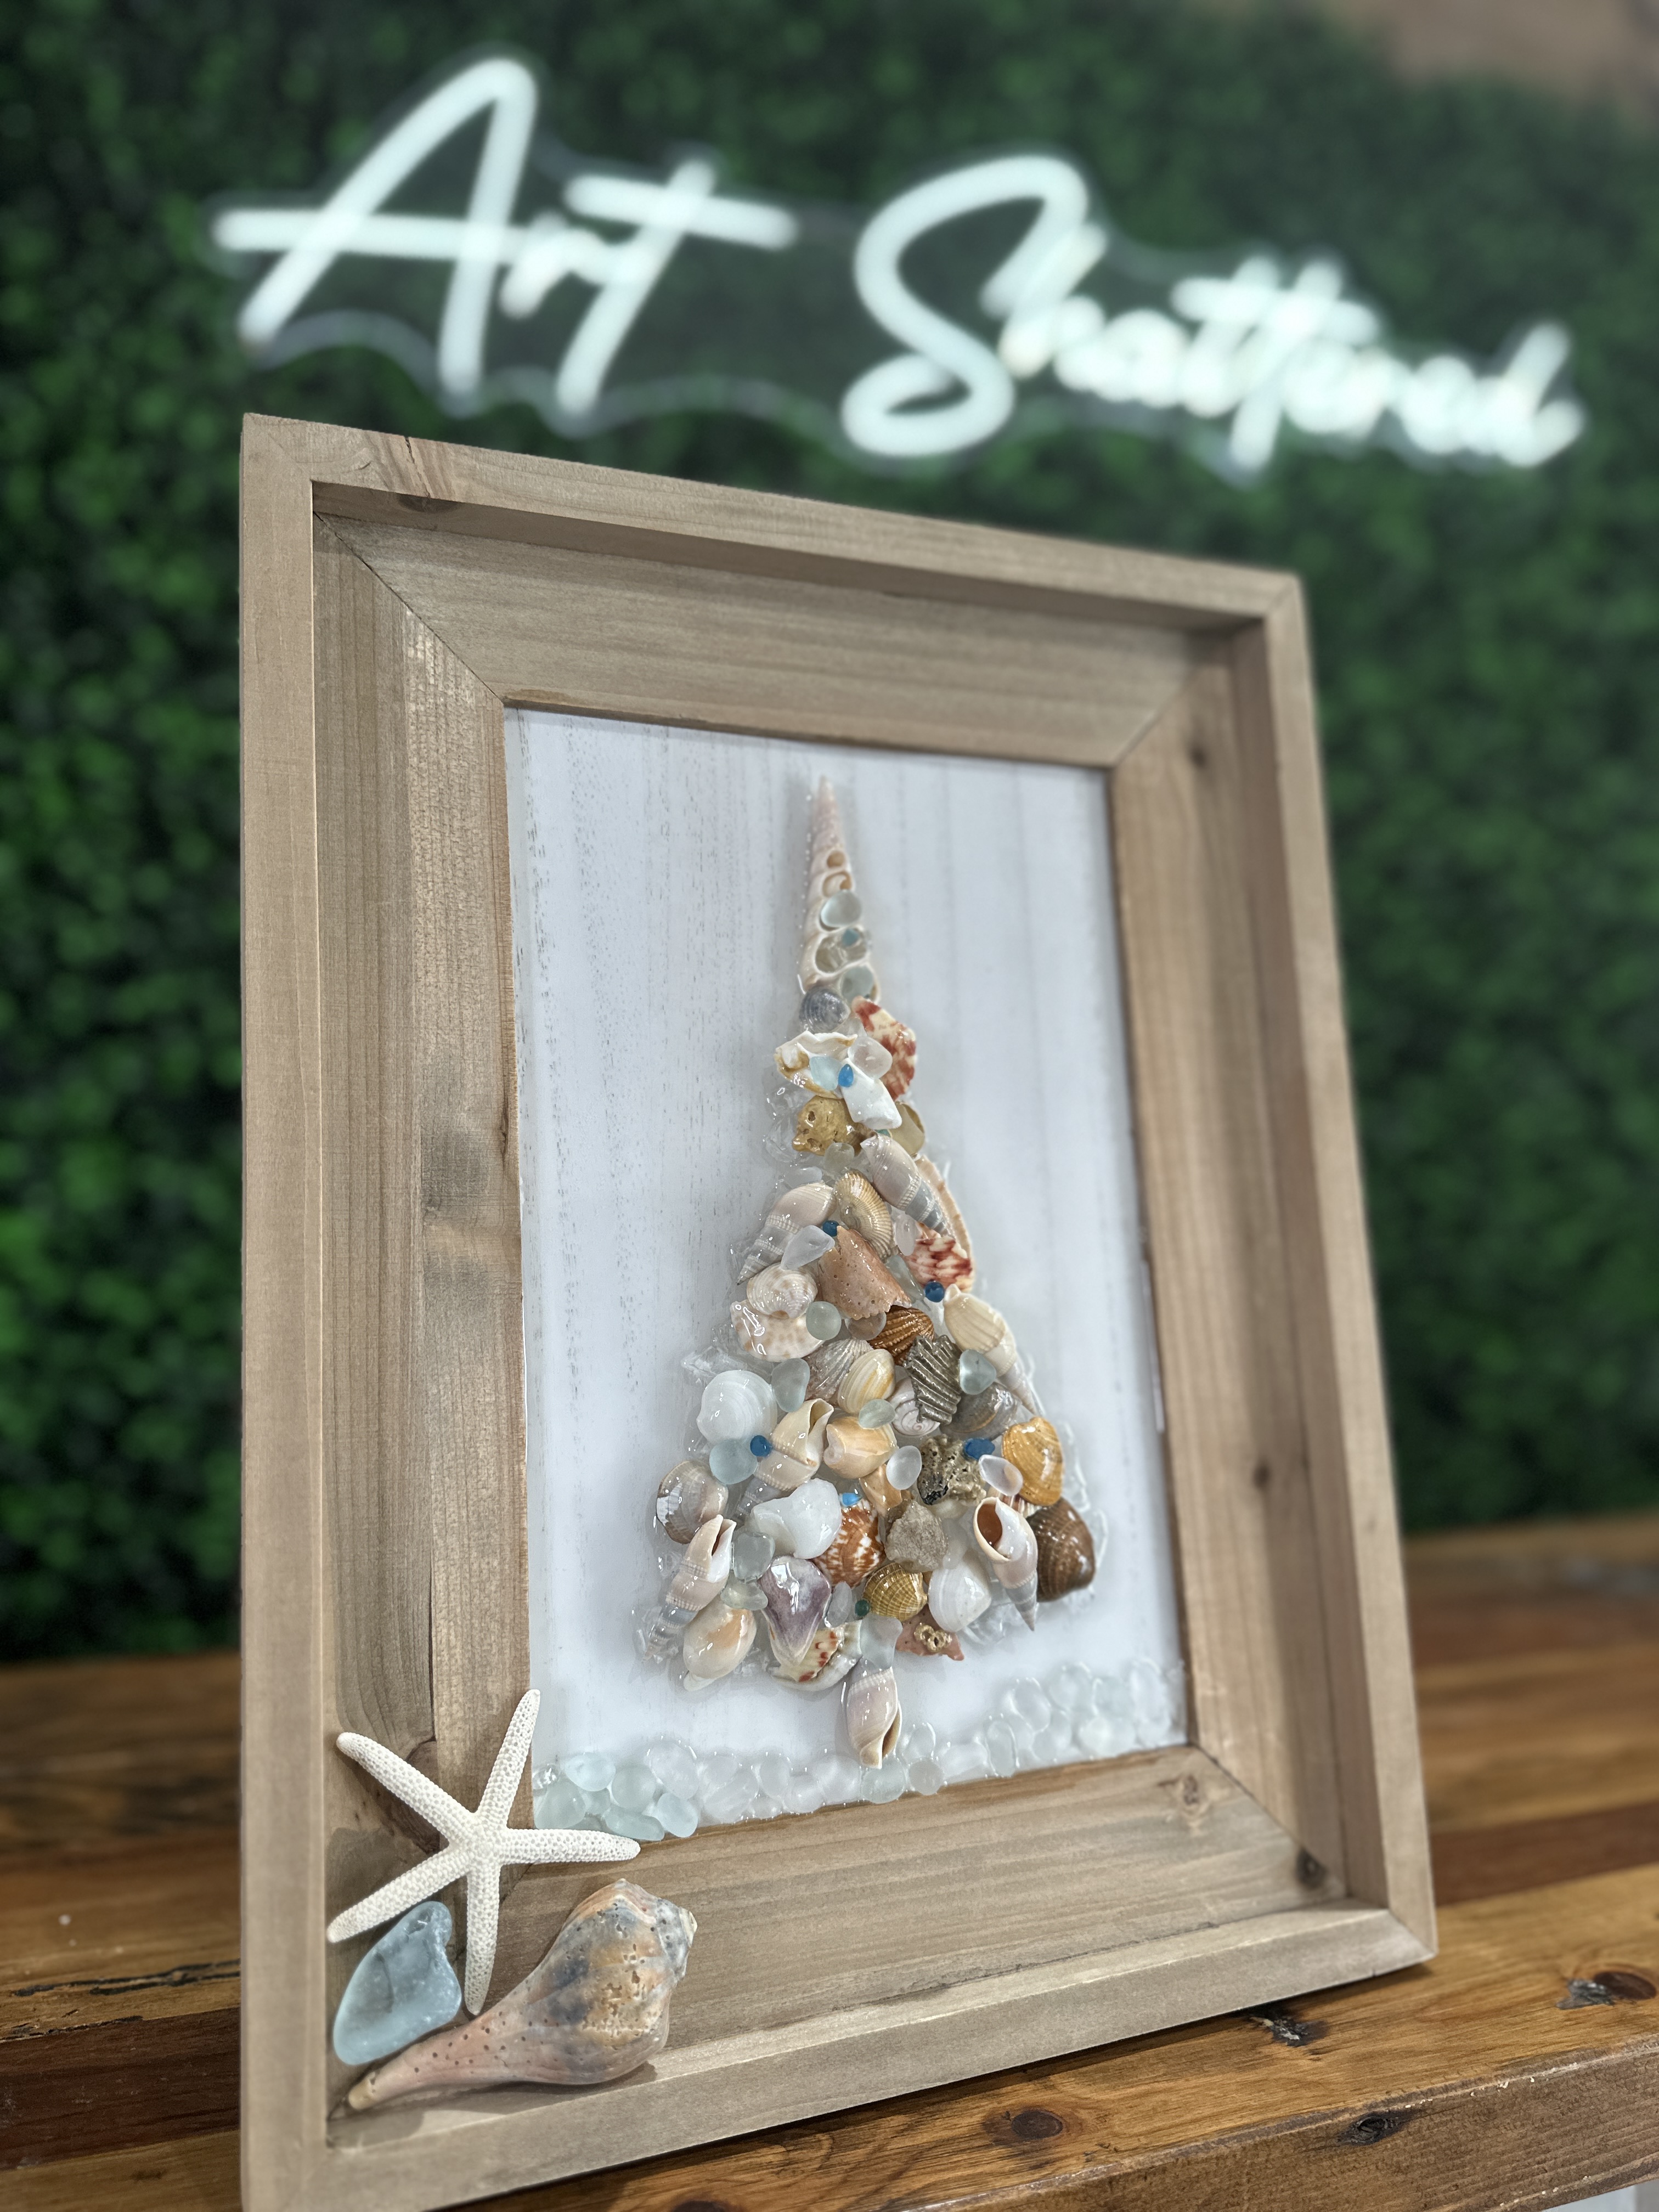
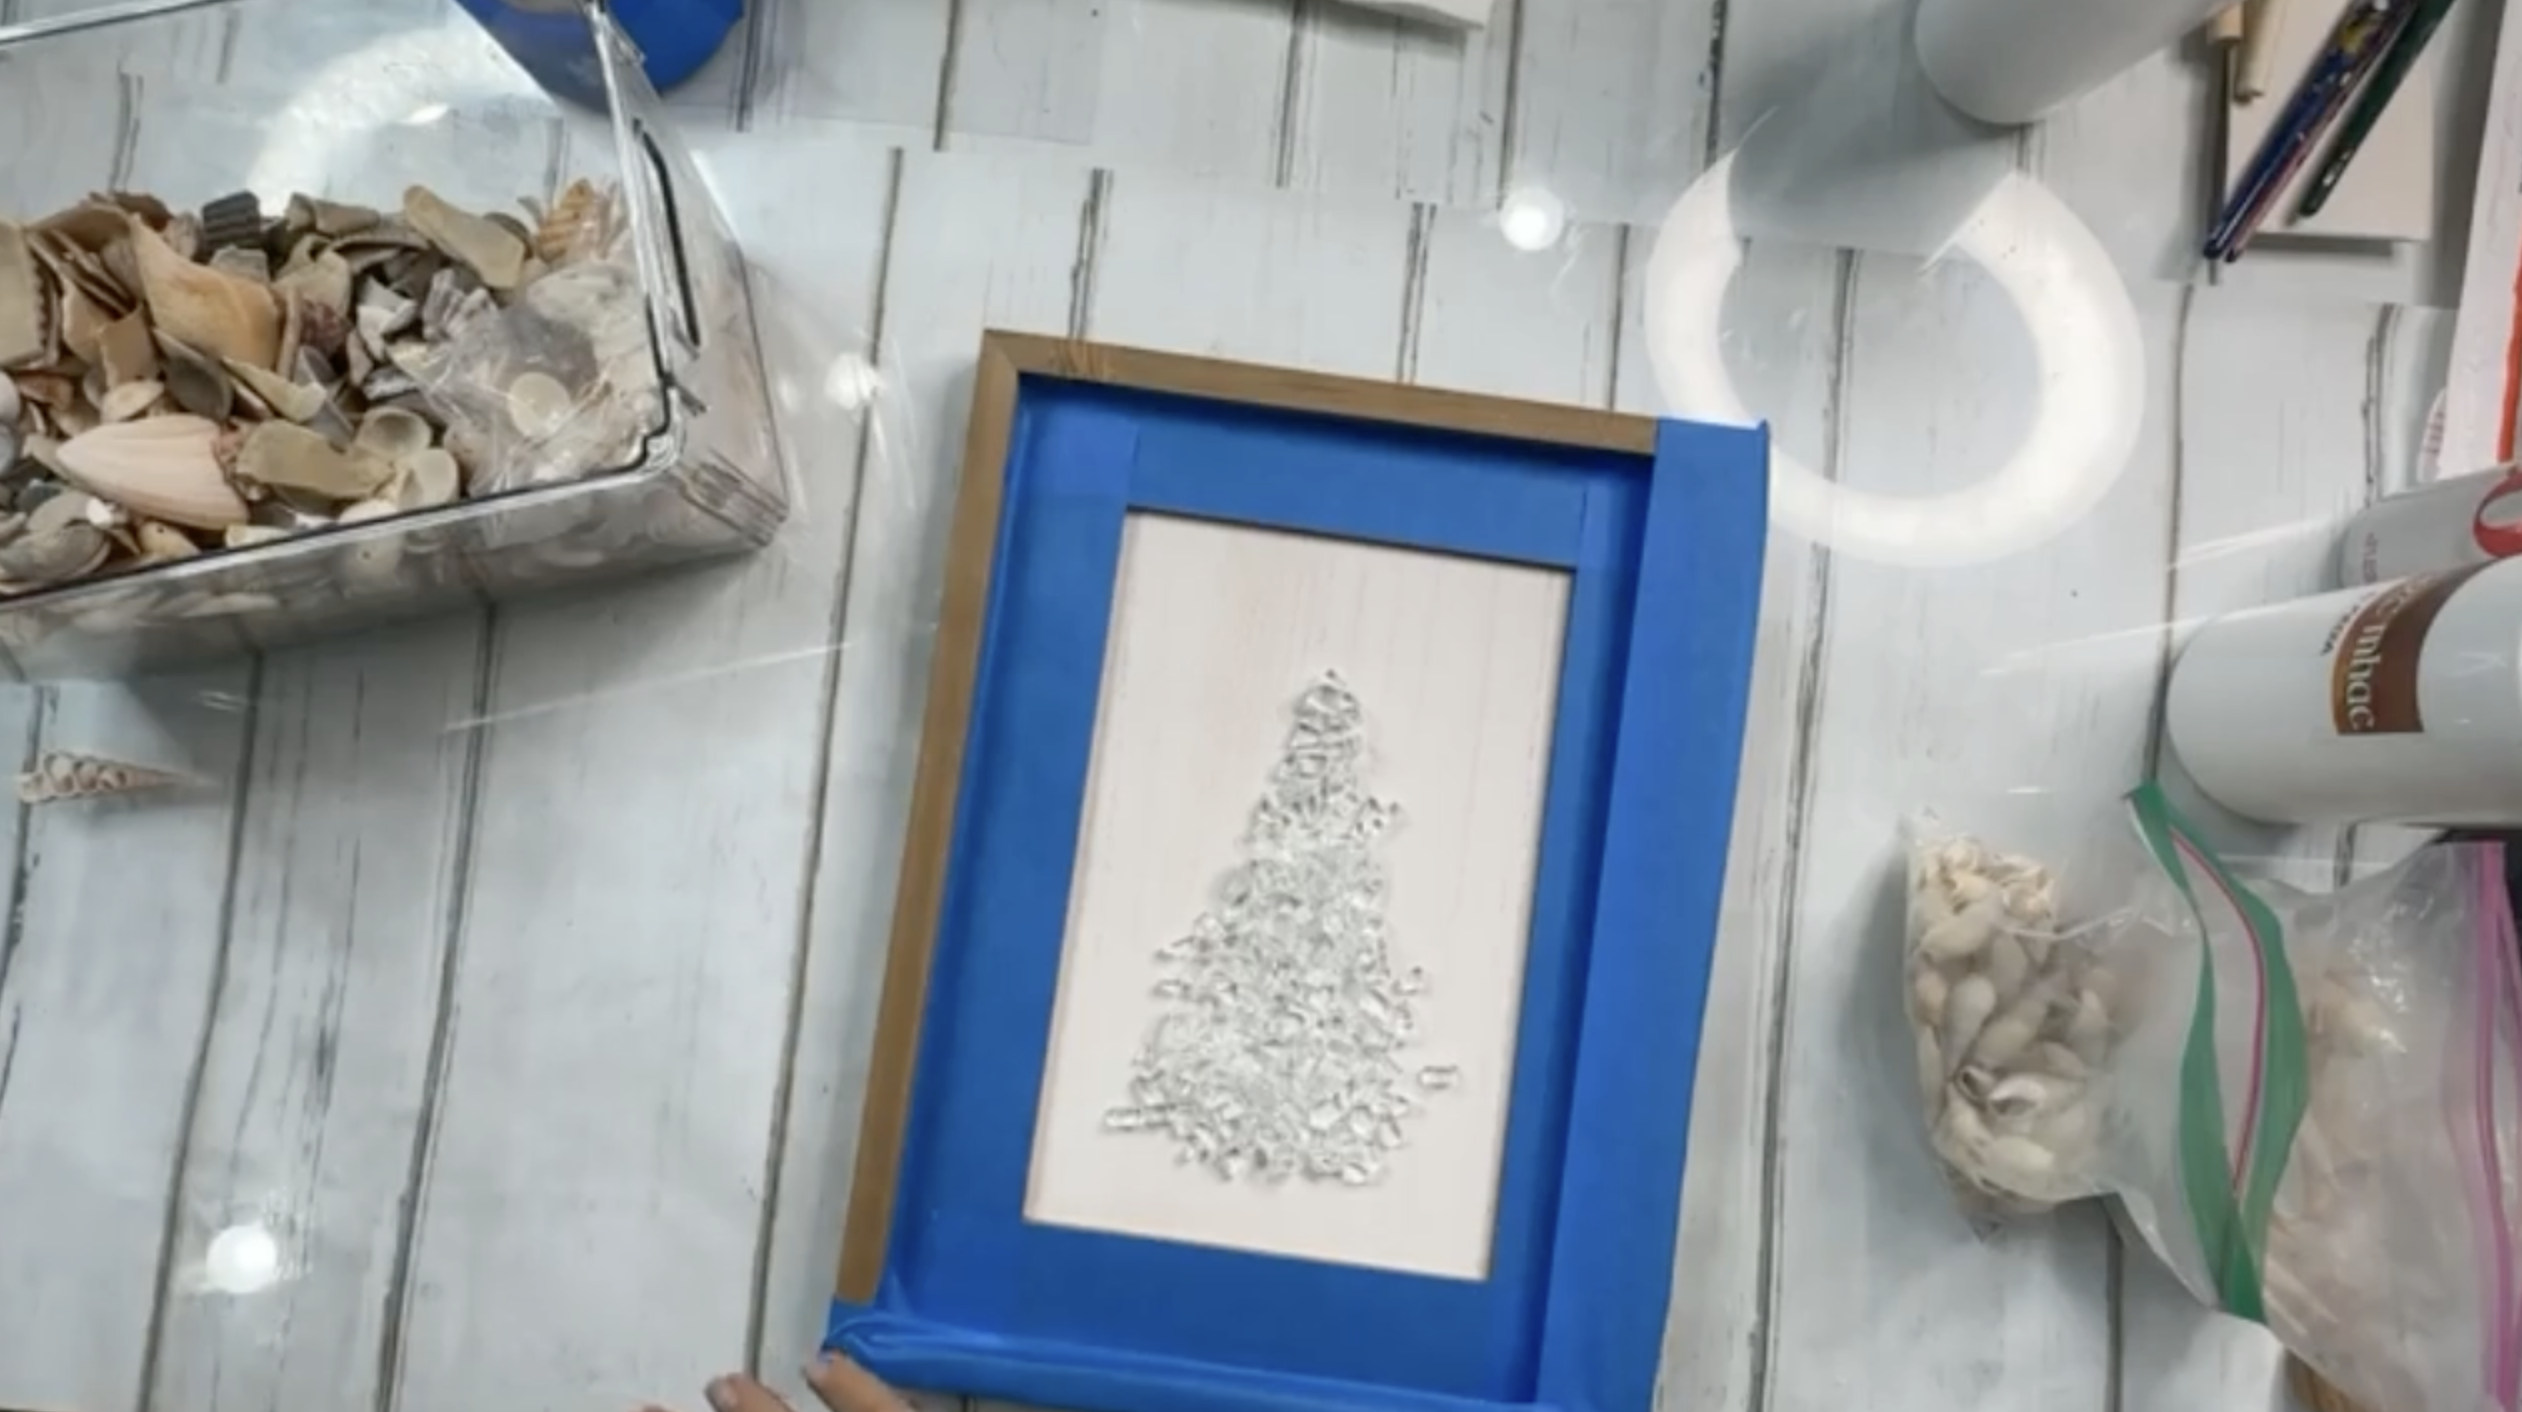
Seashell Christmas Tree 🎄
Bring a unique coastal twist to your holiday decor with this Seashell Christmas Tree Resin Wood Sign! Using a wooden sign base, resin, starfire glass, seashells, and sea glass, you’ll craft a sparkling, layered Christmas tree that blends rustic charm with beachy elegance!
Step 1: Prep and Protect Your Wood Sign
Tape off the edges and frame carefully with painter’s tape to prevent resin from dripping onto the wood and causing dark spots. This will keep your frame clean and crisp.
Step 2: Create the Base with Glass Shards
Spread a thin layer of starfire glass over the center area of your sign. This glass bed will act as a sparkling base for the shells to rest on and gives your tree that beautiful glittering look.
Step 3: Mix and Pour Your First Resin Layer
Mix your resin and hardener thoroughly, stirring for 3 minutes to avoid bubbles. Pour a thin layer of resin over the glass to “glue” them in place and create a smooth surface for arranging your shells.
Step 4: Build Your Sea...
Rum & Coke 🥃
If you're looking for a fun mixed media art project, this Rum & Coke art piece is the perfect blend of rustic charm and glossy glass art. Whether you’re making it for your bar area, a gift, or just a cool conversation piece, this wooden sign combines recycled glass, resin, and creative placement to create something truly unique.
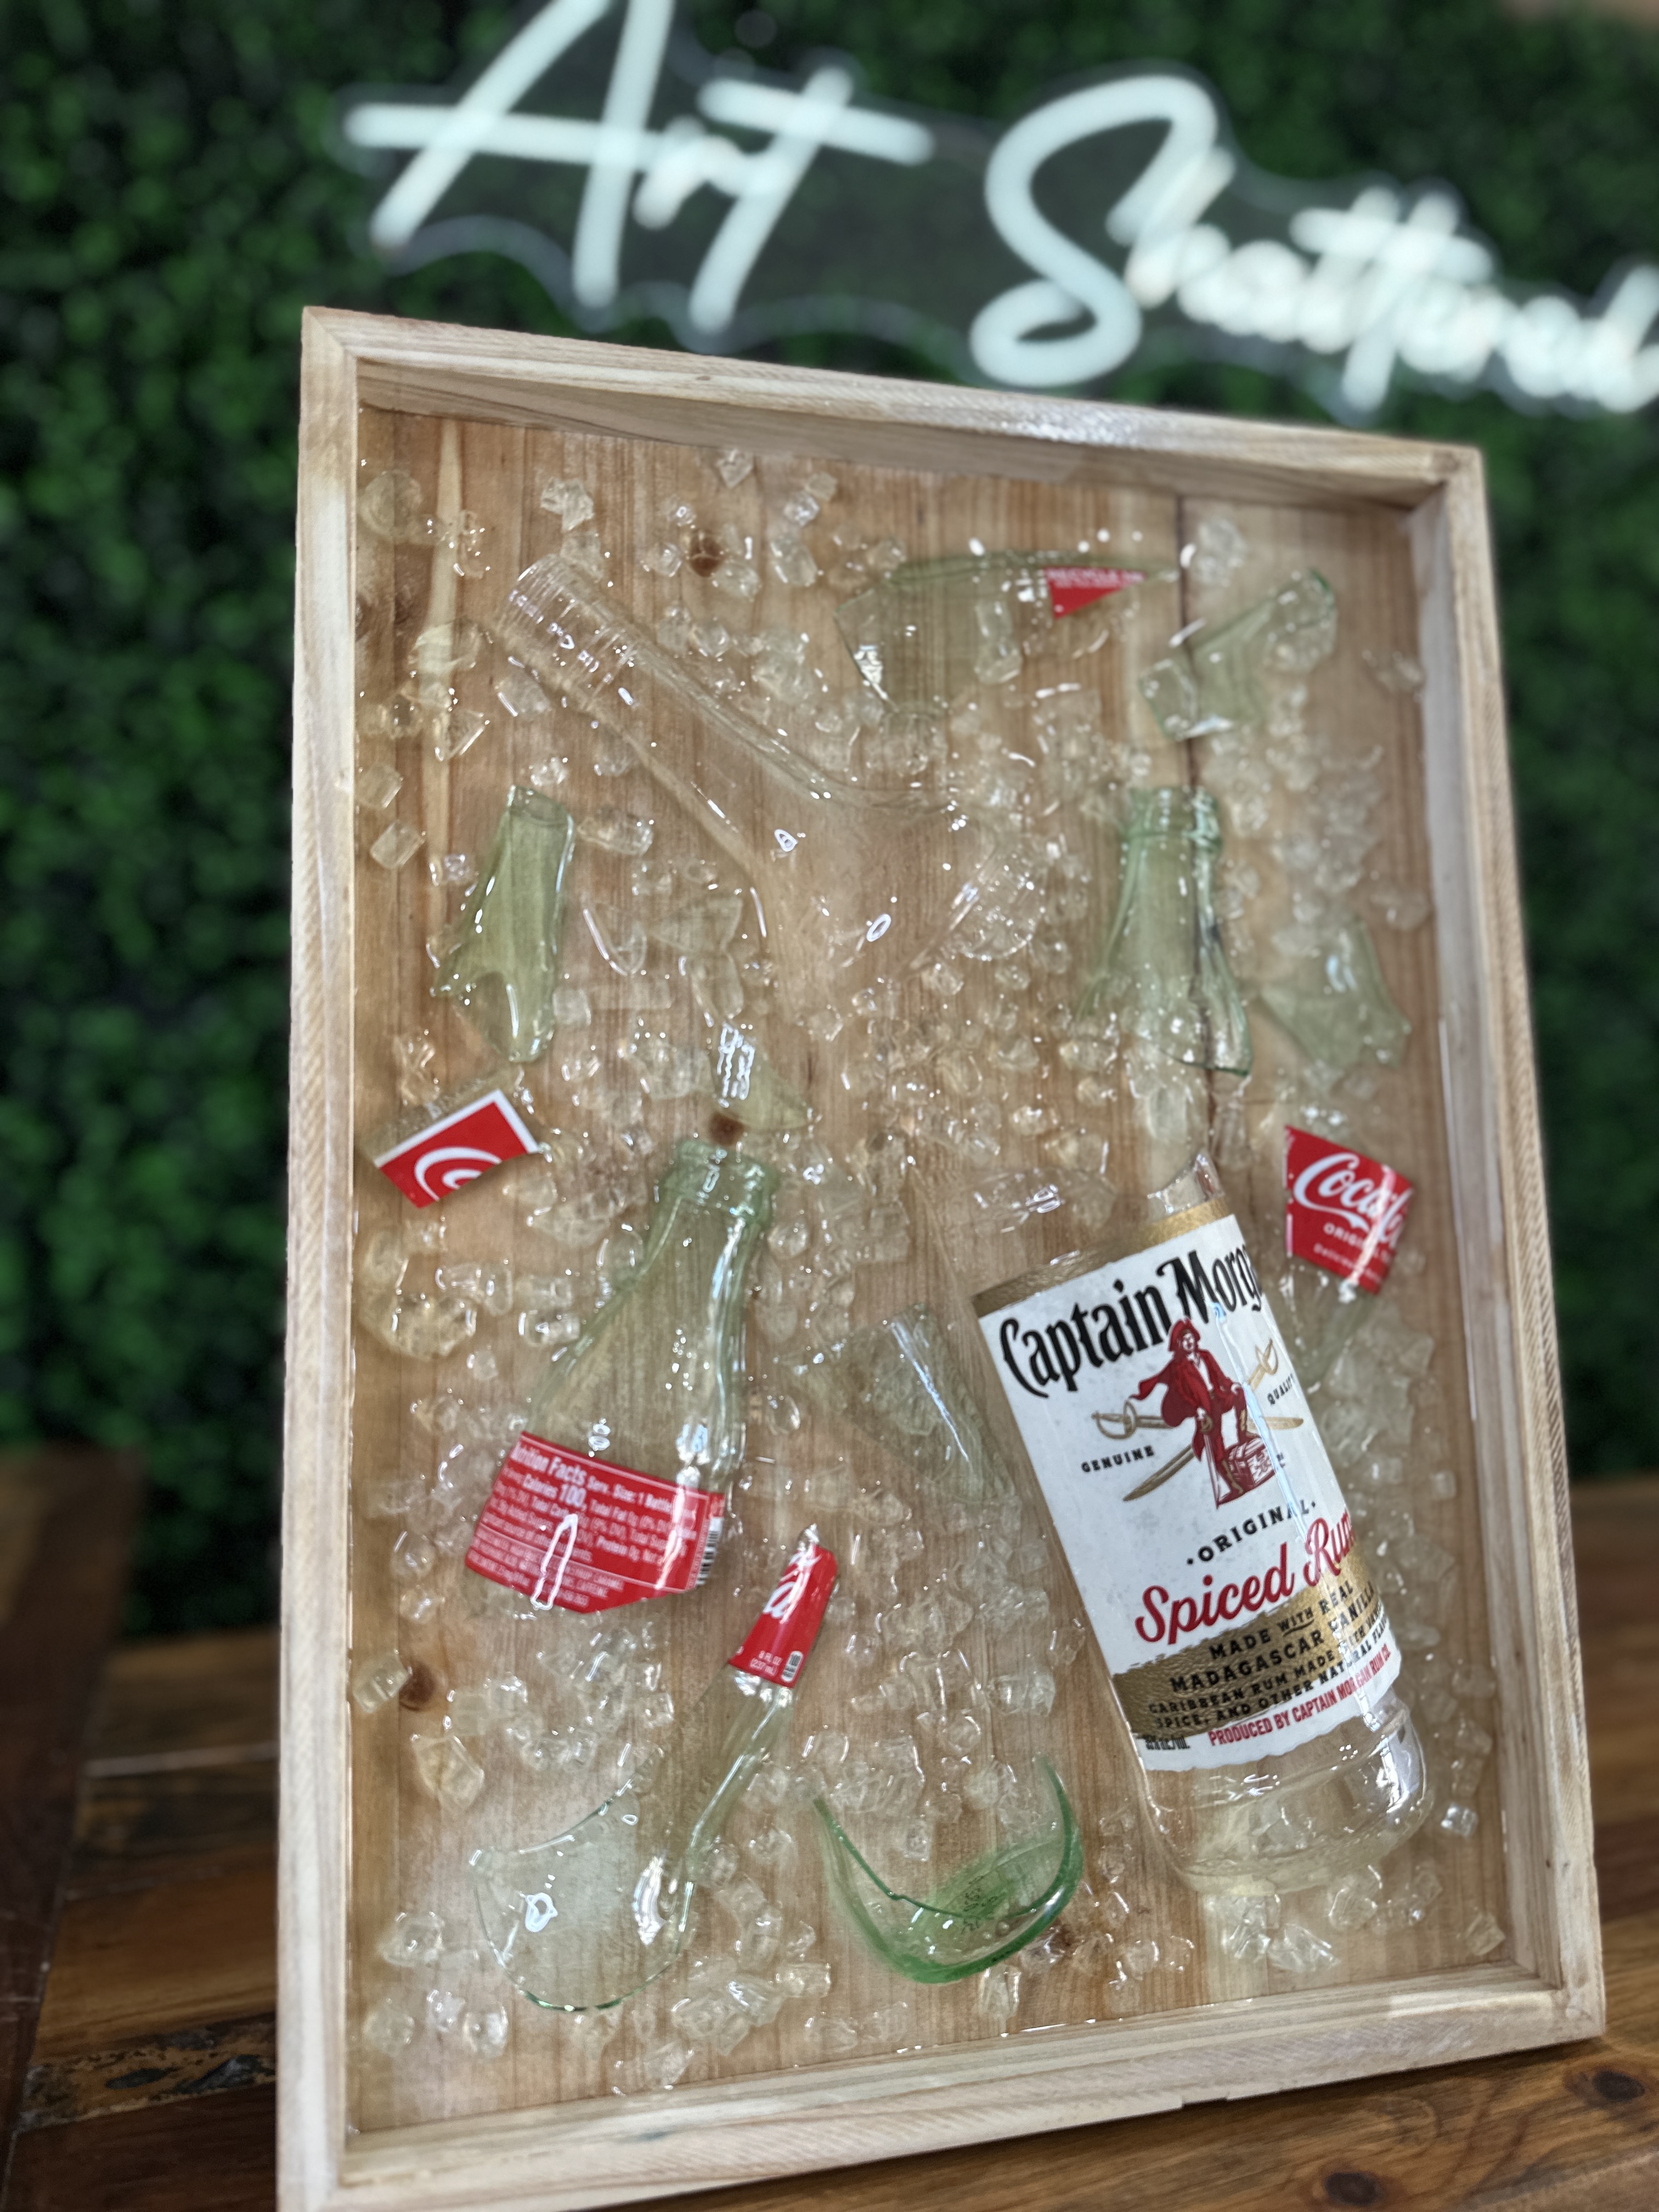
Step 1: Prep Your Tray
Start by sealing the wooden tray with a thin coat of clear sealer. This helps prevent the resin from soaking into the wood. If your tray has any seams, tape the underside to stop resin from leaking through. You can also tape around the outer frame if you want to keep it clean.
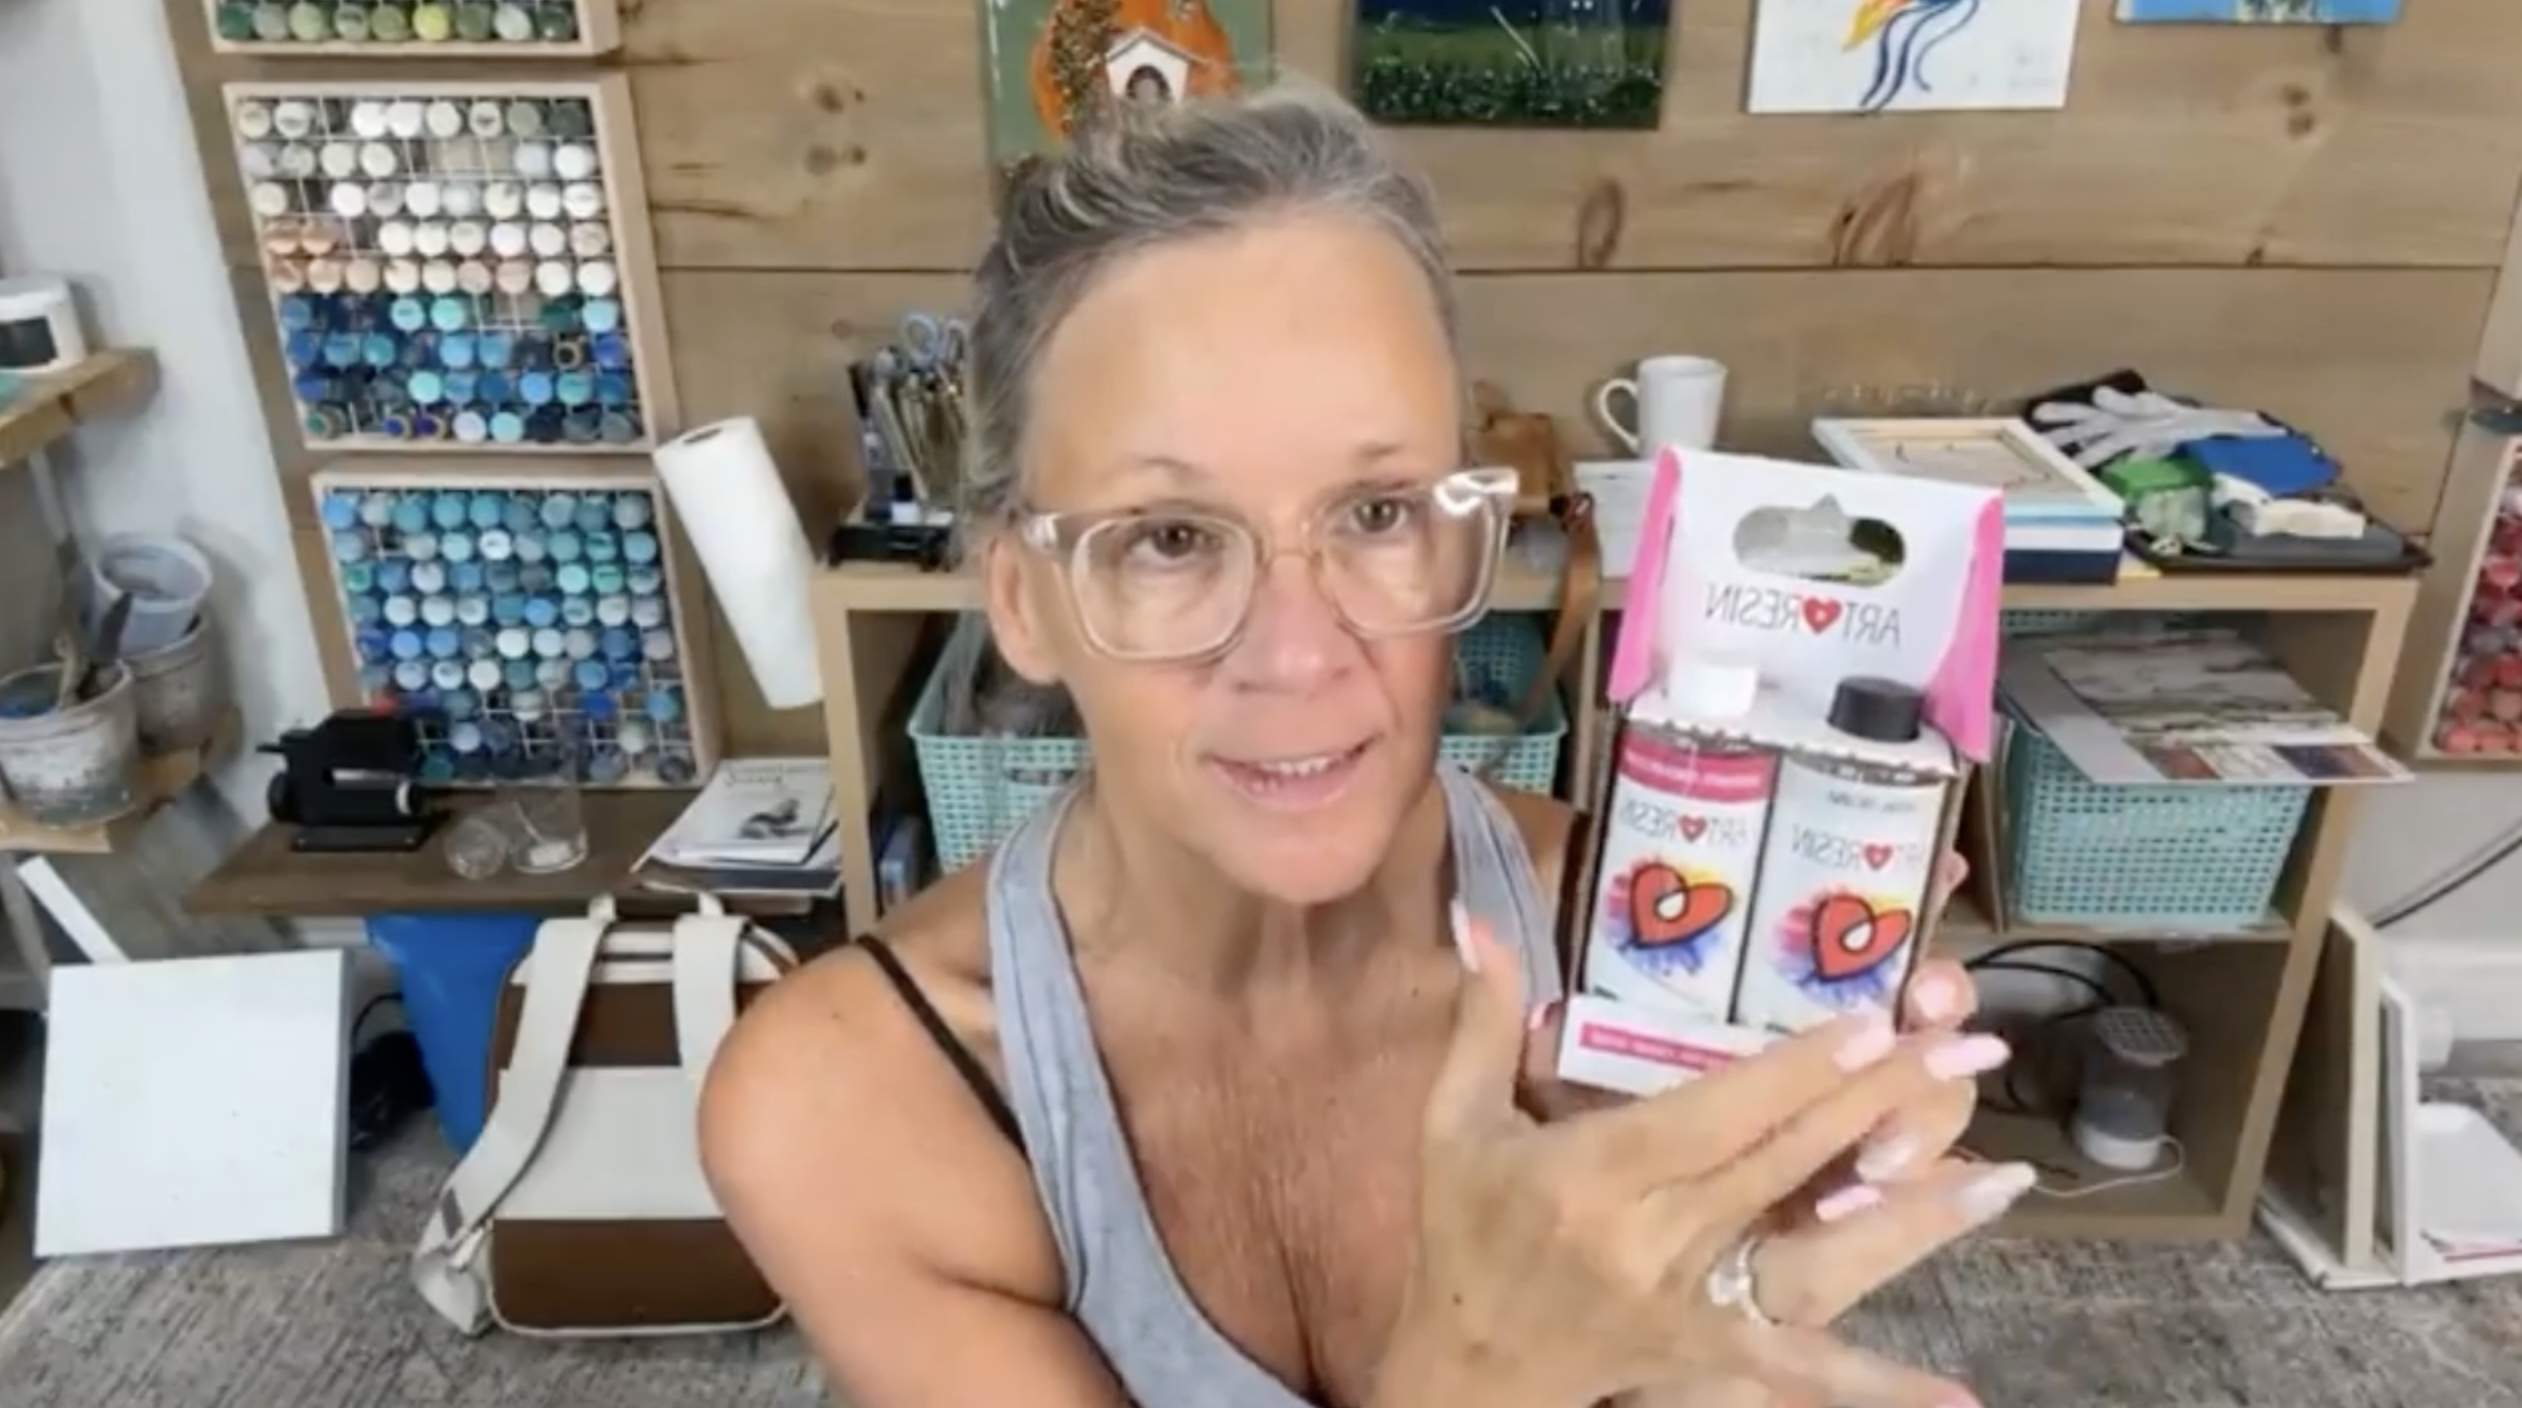
Step 2: Mix & Pour Your Resin
Put on rubber gloves. Mix 4 oz total of ArtResin and stir gently for three minutes. Be sure to scrape the sides and bottom of your cup and stir stick as you go. You’ll want a well-mixed, bubble-free batch for this first pour.
Pour a thin layer of resin inside the tray to act as the “glue” for your glass elements. Use a silicone ...
Coastal Driftwood Bird 🌊
If you’re looking for a fresh and simple way to bring a coastal vibe into your home, you’ll love this charming driftwood and seashell art piece. In this tutorial, I’ll walk you through how to paint a minimal beachy background, layer driftwood, glass, shells, and even a sweet little bird, all finished with resin for a beautiful glossy look.
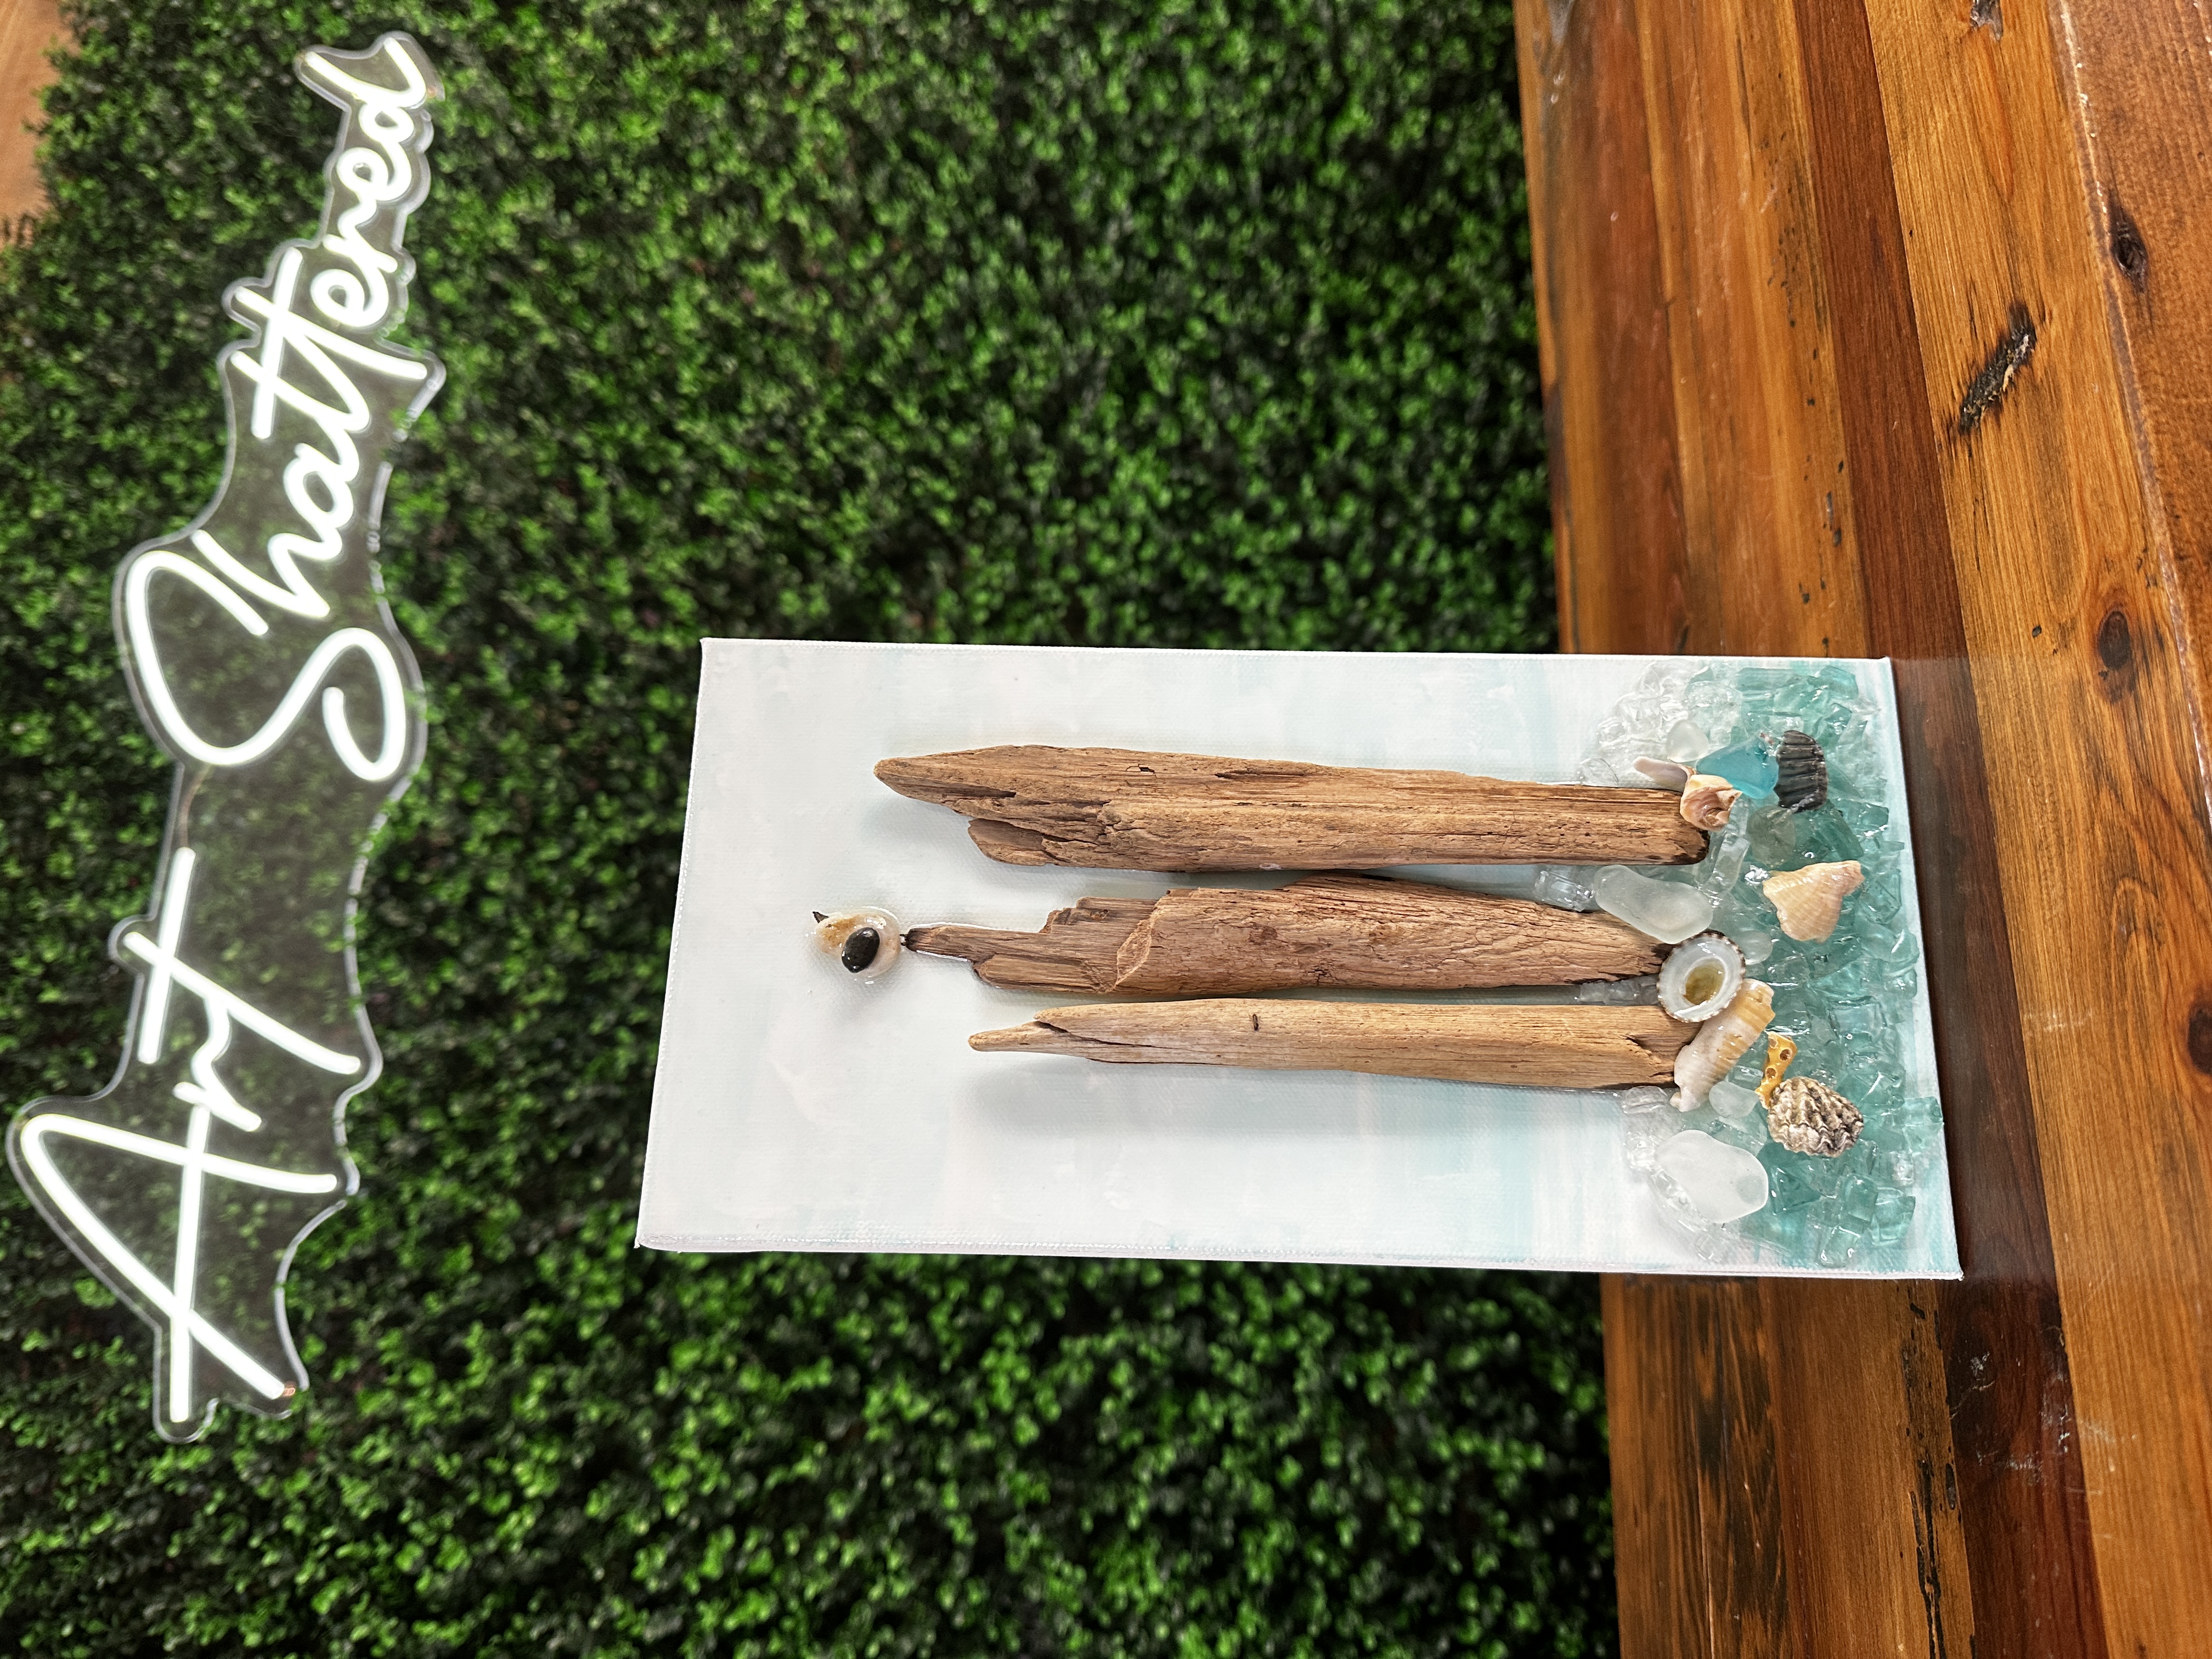
Step 1: Create the Beachy Background
I started with a simple canvas and chose a few soothing beach-inspired paint colors: Bahama Blue, Sea Breeze, and white.
First, I loaded a 1-inch brush with white paint and brushed it across the bottom third of the canvas to mimic ocean water. I blended a little Sea Breeze and Bahama Blue for extra dimension, working left to right using a flat brush for gentle horizontal strokes. I left “skippies” (small unpainted gaps) here and there for a natural look, and even added a few extra streaks of white on top to simulate seafoam.
Moving up the canvas, I used white as the base for the sky with just a bit of Bahama...
Seashell Trio with Ombre Background 🐚
If you’ve got a stash of seashells from a beach vacation and no idea what to do with them, this fun and easy art project is the perfect solution. In this tutorial, I’ll show you how to create a stunning ombre background, layer in crushed glass, and embed your favorite shells in resin to make a beautiful 6x12 coastal canvas that feels like a piece of the ocean right at home.
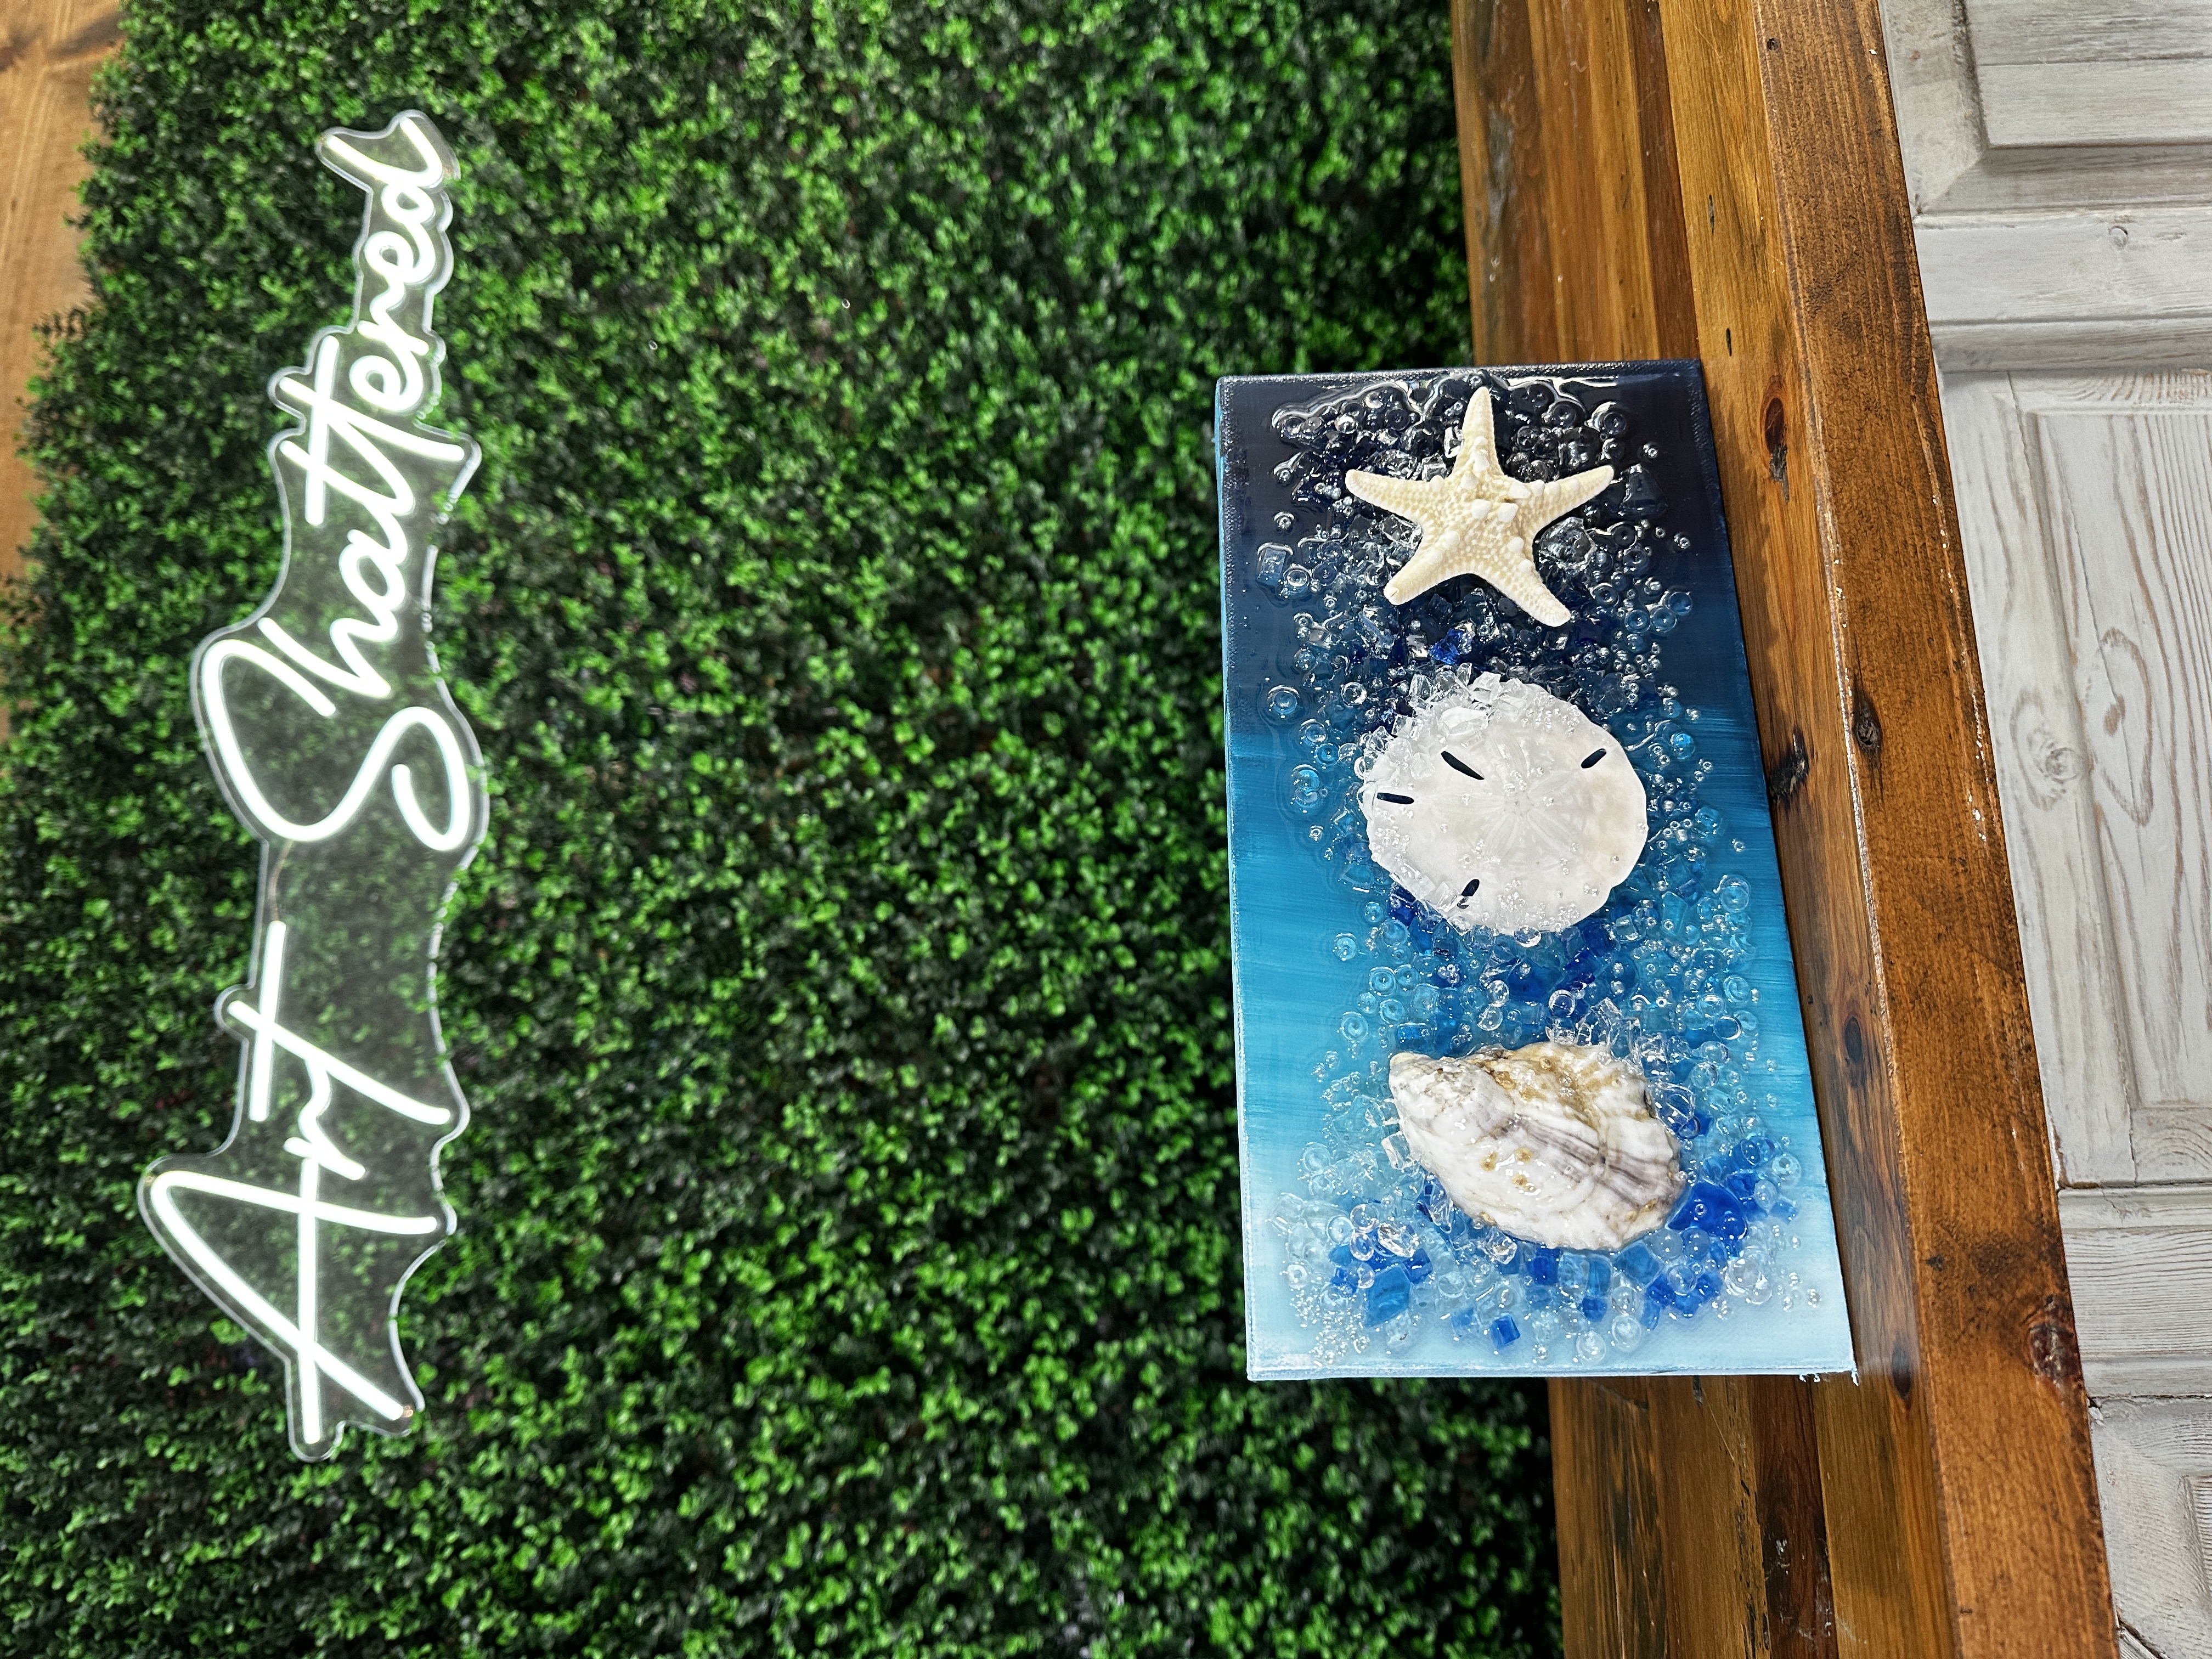
Step 1: Paint the Ombre Background
To start, I used a 6x12 canvas, but this technique works with any size. I chose three main colors: white, Desert Turquoise, and Midnight Blue for the ombre background. The trick to getting a smooth blend is to work wet-on-wet. I added dots of each color directly onto the canvas (white at the top, turquoise in the middle, blue at the bottom), then blended them together using a flat brush. Starting from the top with white, I worked my way down, gradually blending into the turquoise, and finally into the blue. I used light brush strokes and kept a steady rhythm, blending back and ...
DIY Painted & Upcycled Paintbrush Art 🖌️
Sometimes the best art starts with something old. That was definitely the case with this project - a funky, whimsical art piece made from a beat-up 2-inch chip brush. It had rust, personality, and plenty of potential. I decided to give it a total makeover with purples, gold, paint, beads, flowers, and resin. And the best part? It’s giftable!
Whether you’ve got a junk drawer full of old brushes or just want to try something different, this tutorial will walk you through every step to turn trash into sparkly treasure.
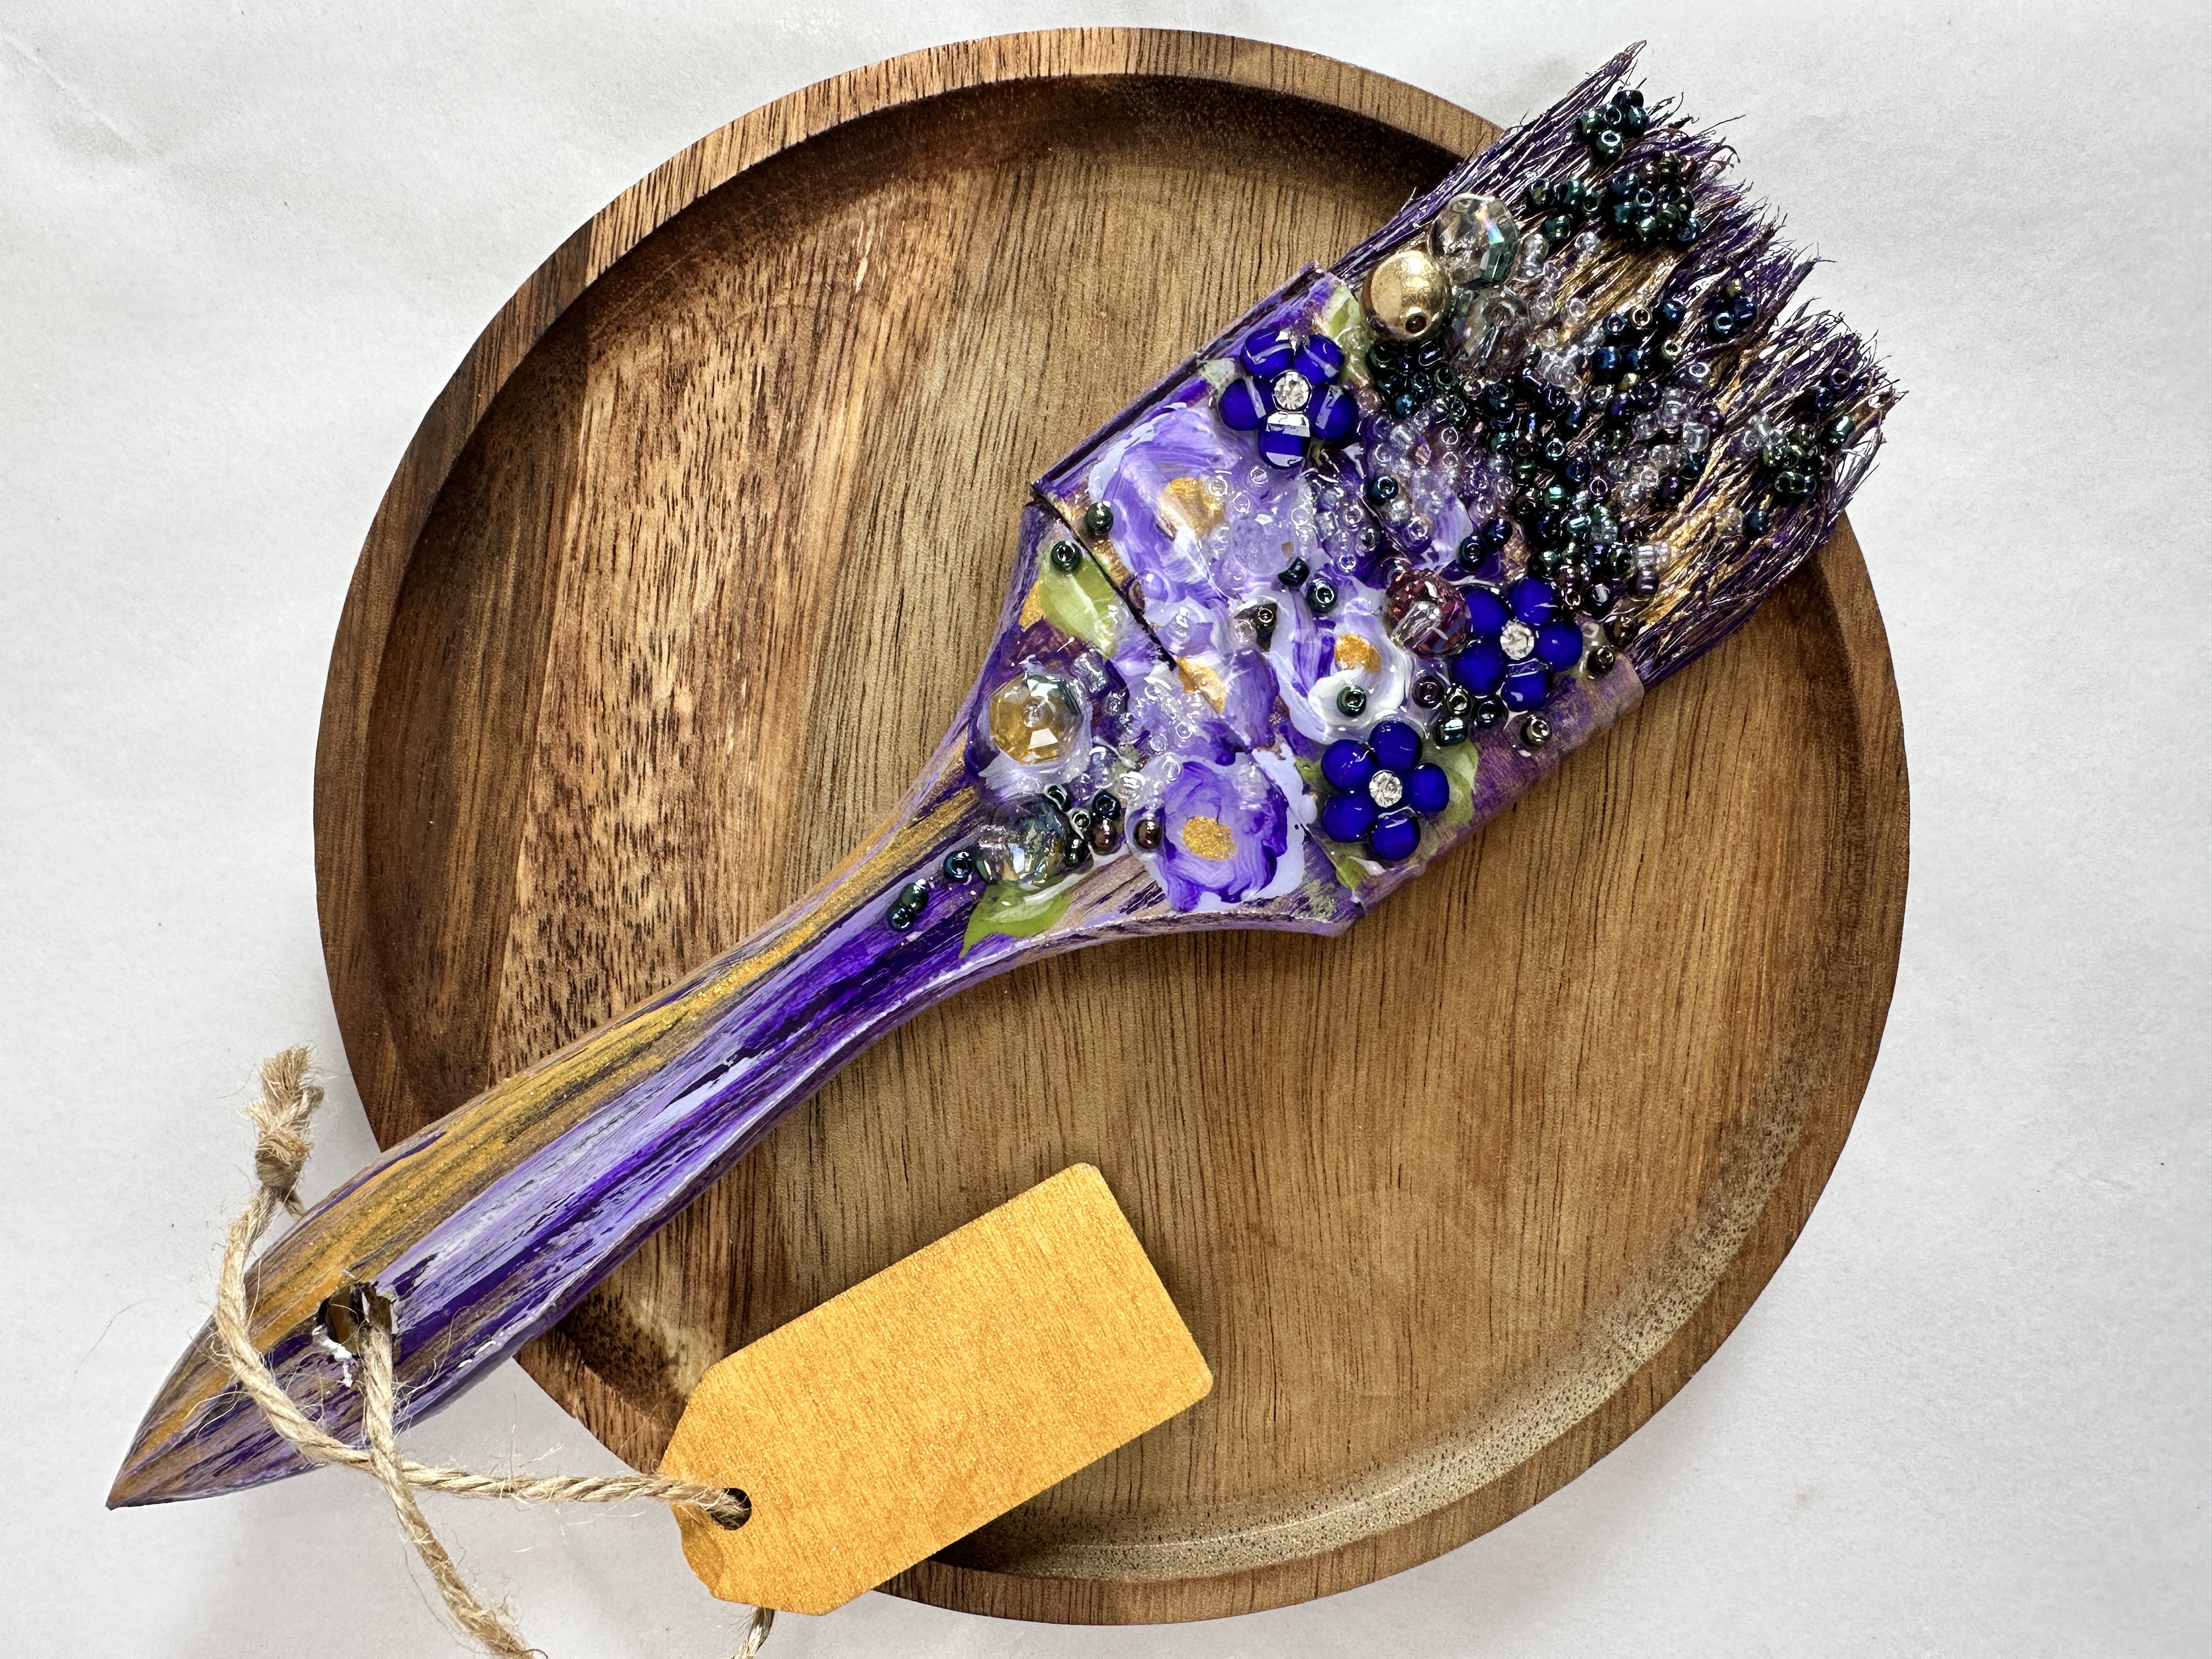
Step 1: Prep and Paint the Brush
I grabbed an old, rusty chip brush and gave it a quick sanding to knock off the loose bits. You can use painter’s tape to hold your brush in place while painting. I planned to paint both the handle and bristles, so I wasn’t worried about getting a little messy - this project is meant to be abstract and fun!
I was feeling the purple vibe, so I went all in with Purple Iris, Wisteria, a touch of metallic gold, and some white for highlight...
How to Store Resin and Glass Art Between Shows (Without Ruining It!) ☀️
If you’ve been making seasonal or show-ready glass and resin art, you’ve probably asked yourself: how do I store this safely until the next event? Or maybe you’ve opened a bin of artwork you lovingly created… only to find it ambered, warped, or scratched. Let’s talk about how to prevent that.
The White Paint & Resin Problem
Titanium white (which is in almost every white craft paint) doesn’t play nice with resin. It can cause yellowing called ambering over time, especially if exposed to heat or UV light. If you love those bright white backgrounds that make your glass pop (and who doesn’t?), here’s how to keep them safe:
Always seal white backgrounds with a non-yellowing spray sealer before adding resin.
Use a satin or matte finish - gloss can be too slick and prevent your resin from adhering properly. A quick mist, let it dry, then repeat with a second light mist. Don’t oversaturate the surface, or you’ll risk resin pinholes later on. This tiny step goes a long way in preserving th...
Blue Checked Cross 💙
This Blue Checked Cross is a charming mixed-media piece that brings together napkin art, paint, glass strips, and resin to create a shimmering piece of decor! Whether you're crafting for your home, a friend, or for a market table, this sweet little project is stunning!

Step 1: Paint Your Base
Start with a 2x4 wood block cut to about 6 inches long. Give it two coats of FolkArt Pure Gold paint, covering all sides. Let dry completely. The gold gives a beautiful shimmer and will peek through the napkin in just the right way.
Step 2: Adding the Napkin Art
Choose a blue and white checkered napkin. Cut one section to size, lining it up to fit the front face of your block. Peel off the white backing layers (there are usually two) so you're left with just the printed layer.
Before decoupaging, check that your piece fits just inside the edges, allowing a hint of that gold to show around the napkin.
Using Mod Podge (any finish works since you'll resin over it), brush a thin, even layer on...
