
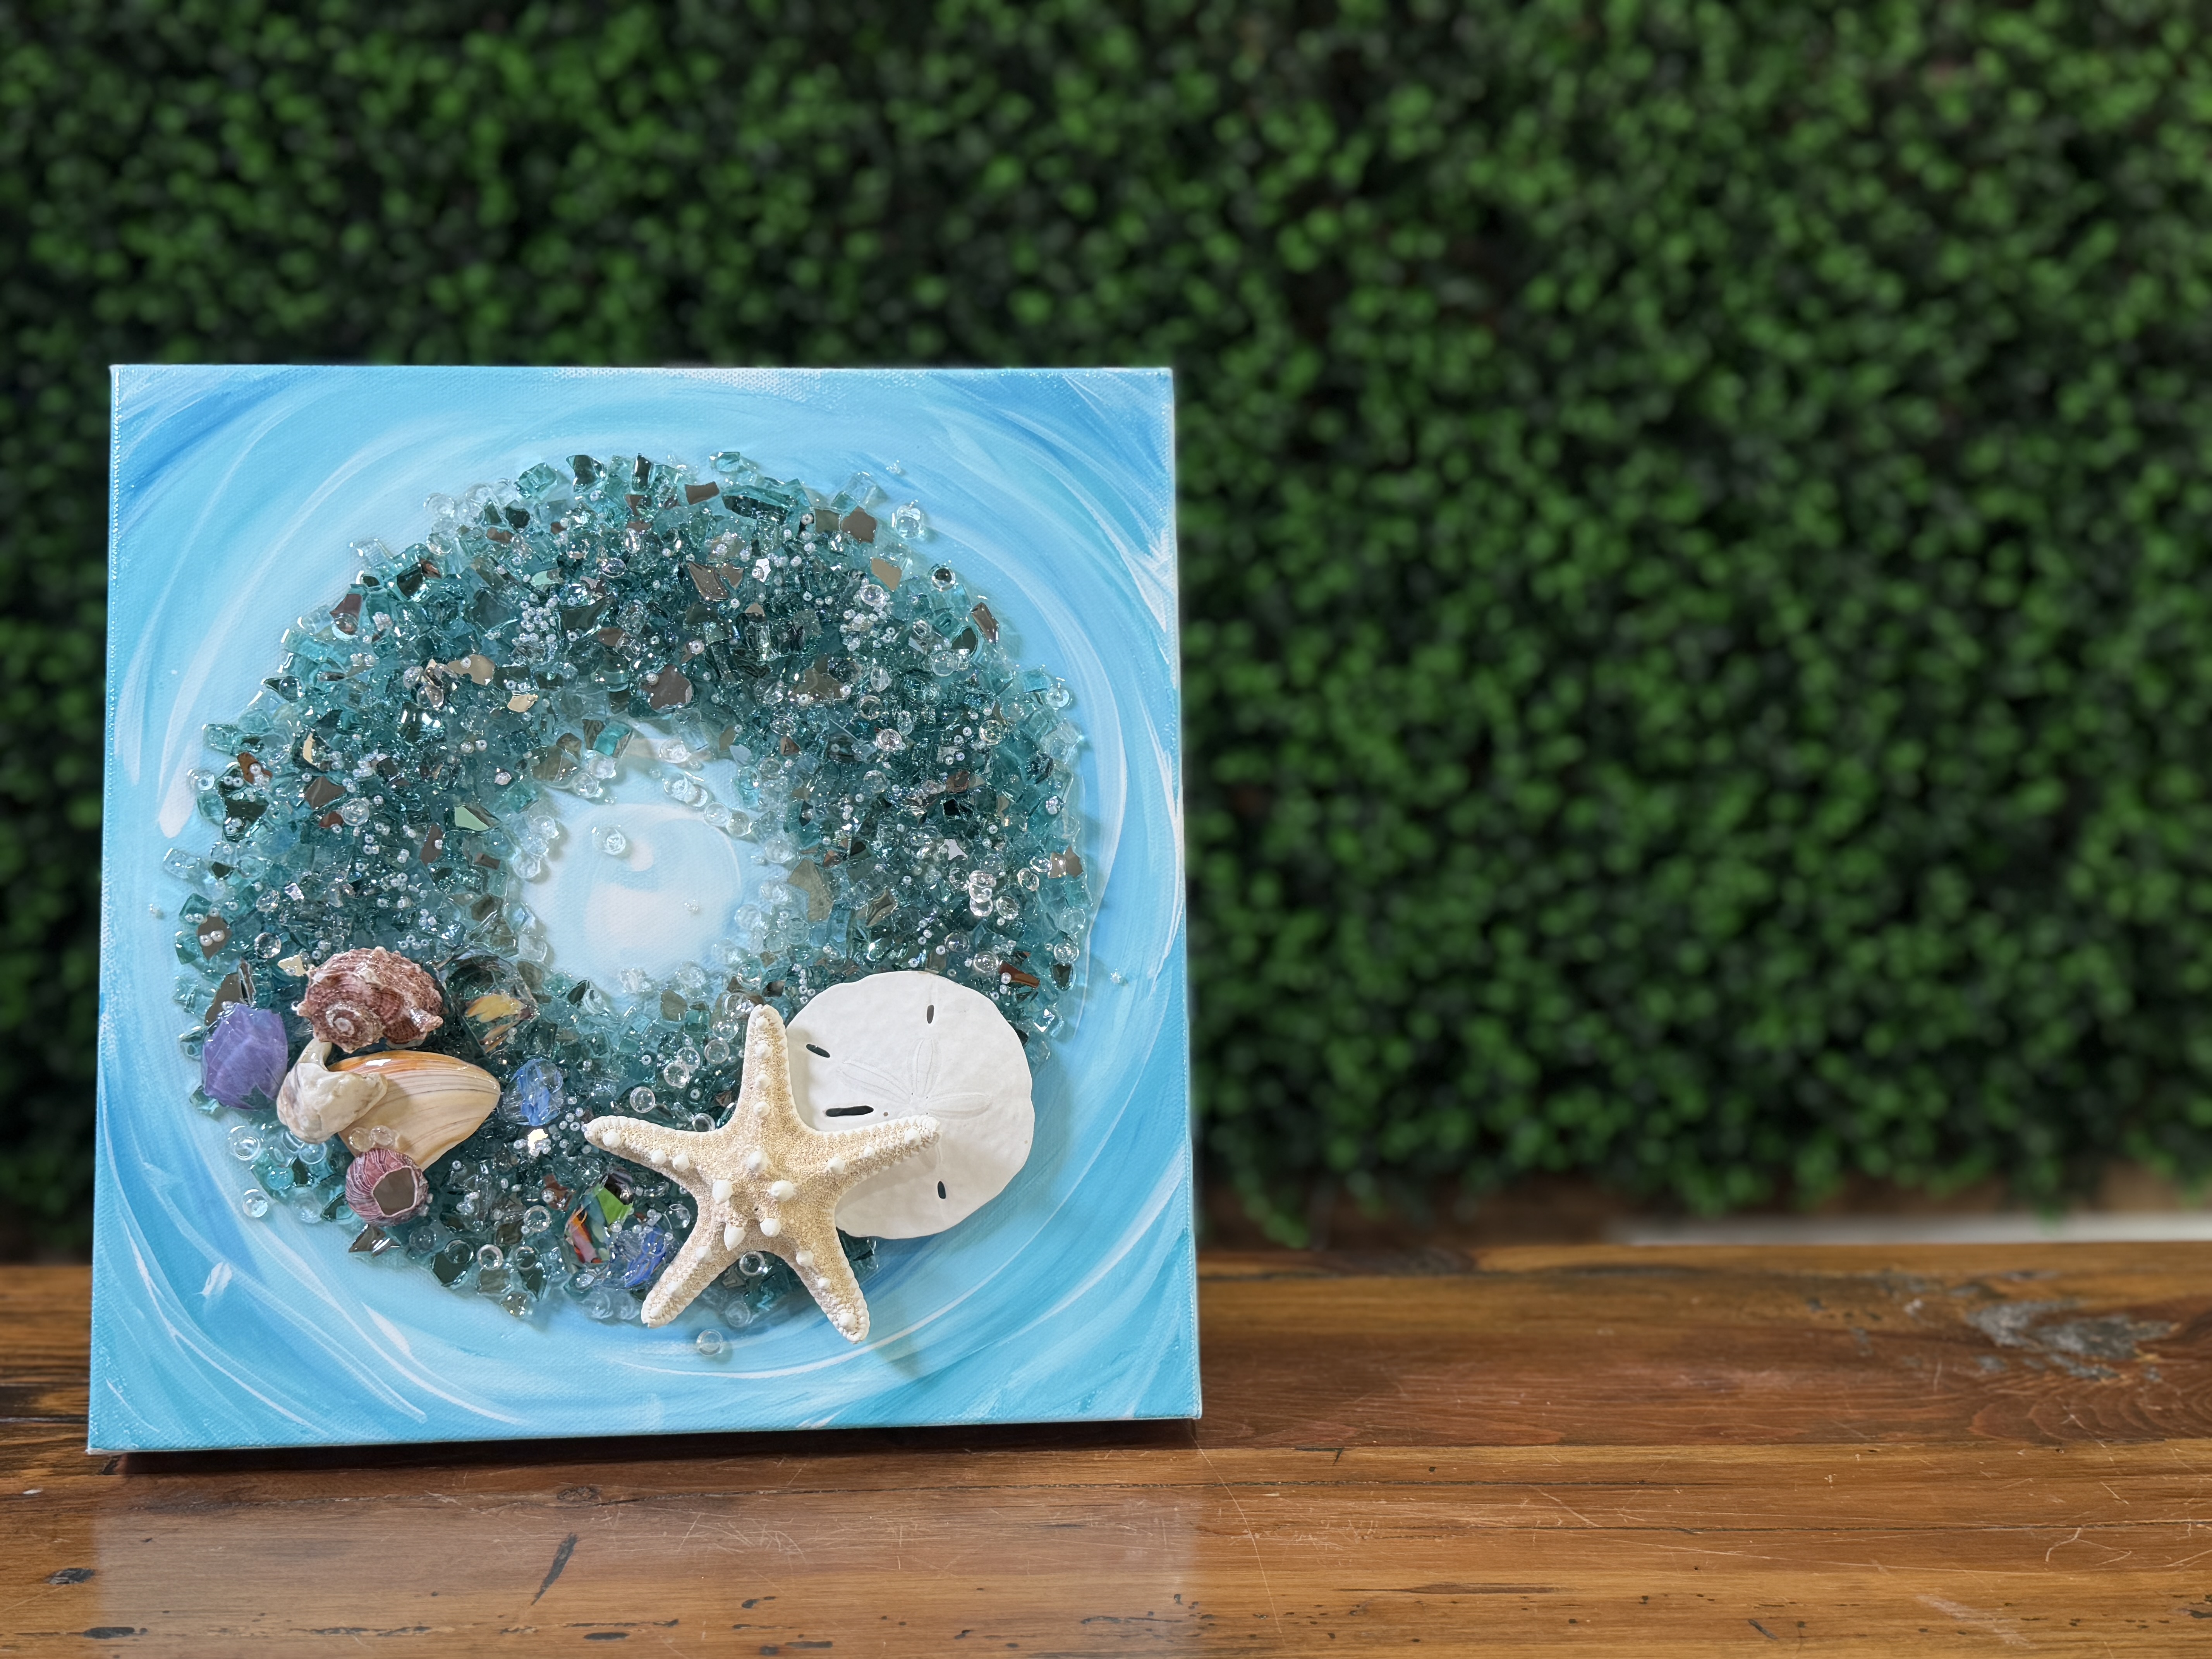
Beachy Wreath 🌊
Bring together the magic of Christmas and the relaxing vibes of the beach with this stunning Beachy Wreath! This unique glass art project combines acrylic painting, crushed glass, resin, seashells, and sparkling embellishments to create a wreath that feels perfectly at home during a Christmas in July celebration. Whether you're decorating a beach house for the holidays or simply love coastal decor, this wreath is a beautiful way to celebrate the season with an unexpected twist!
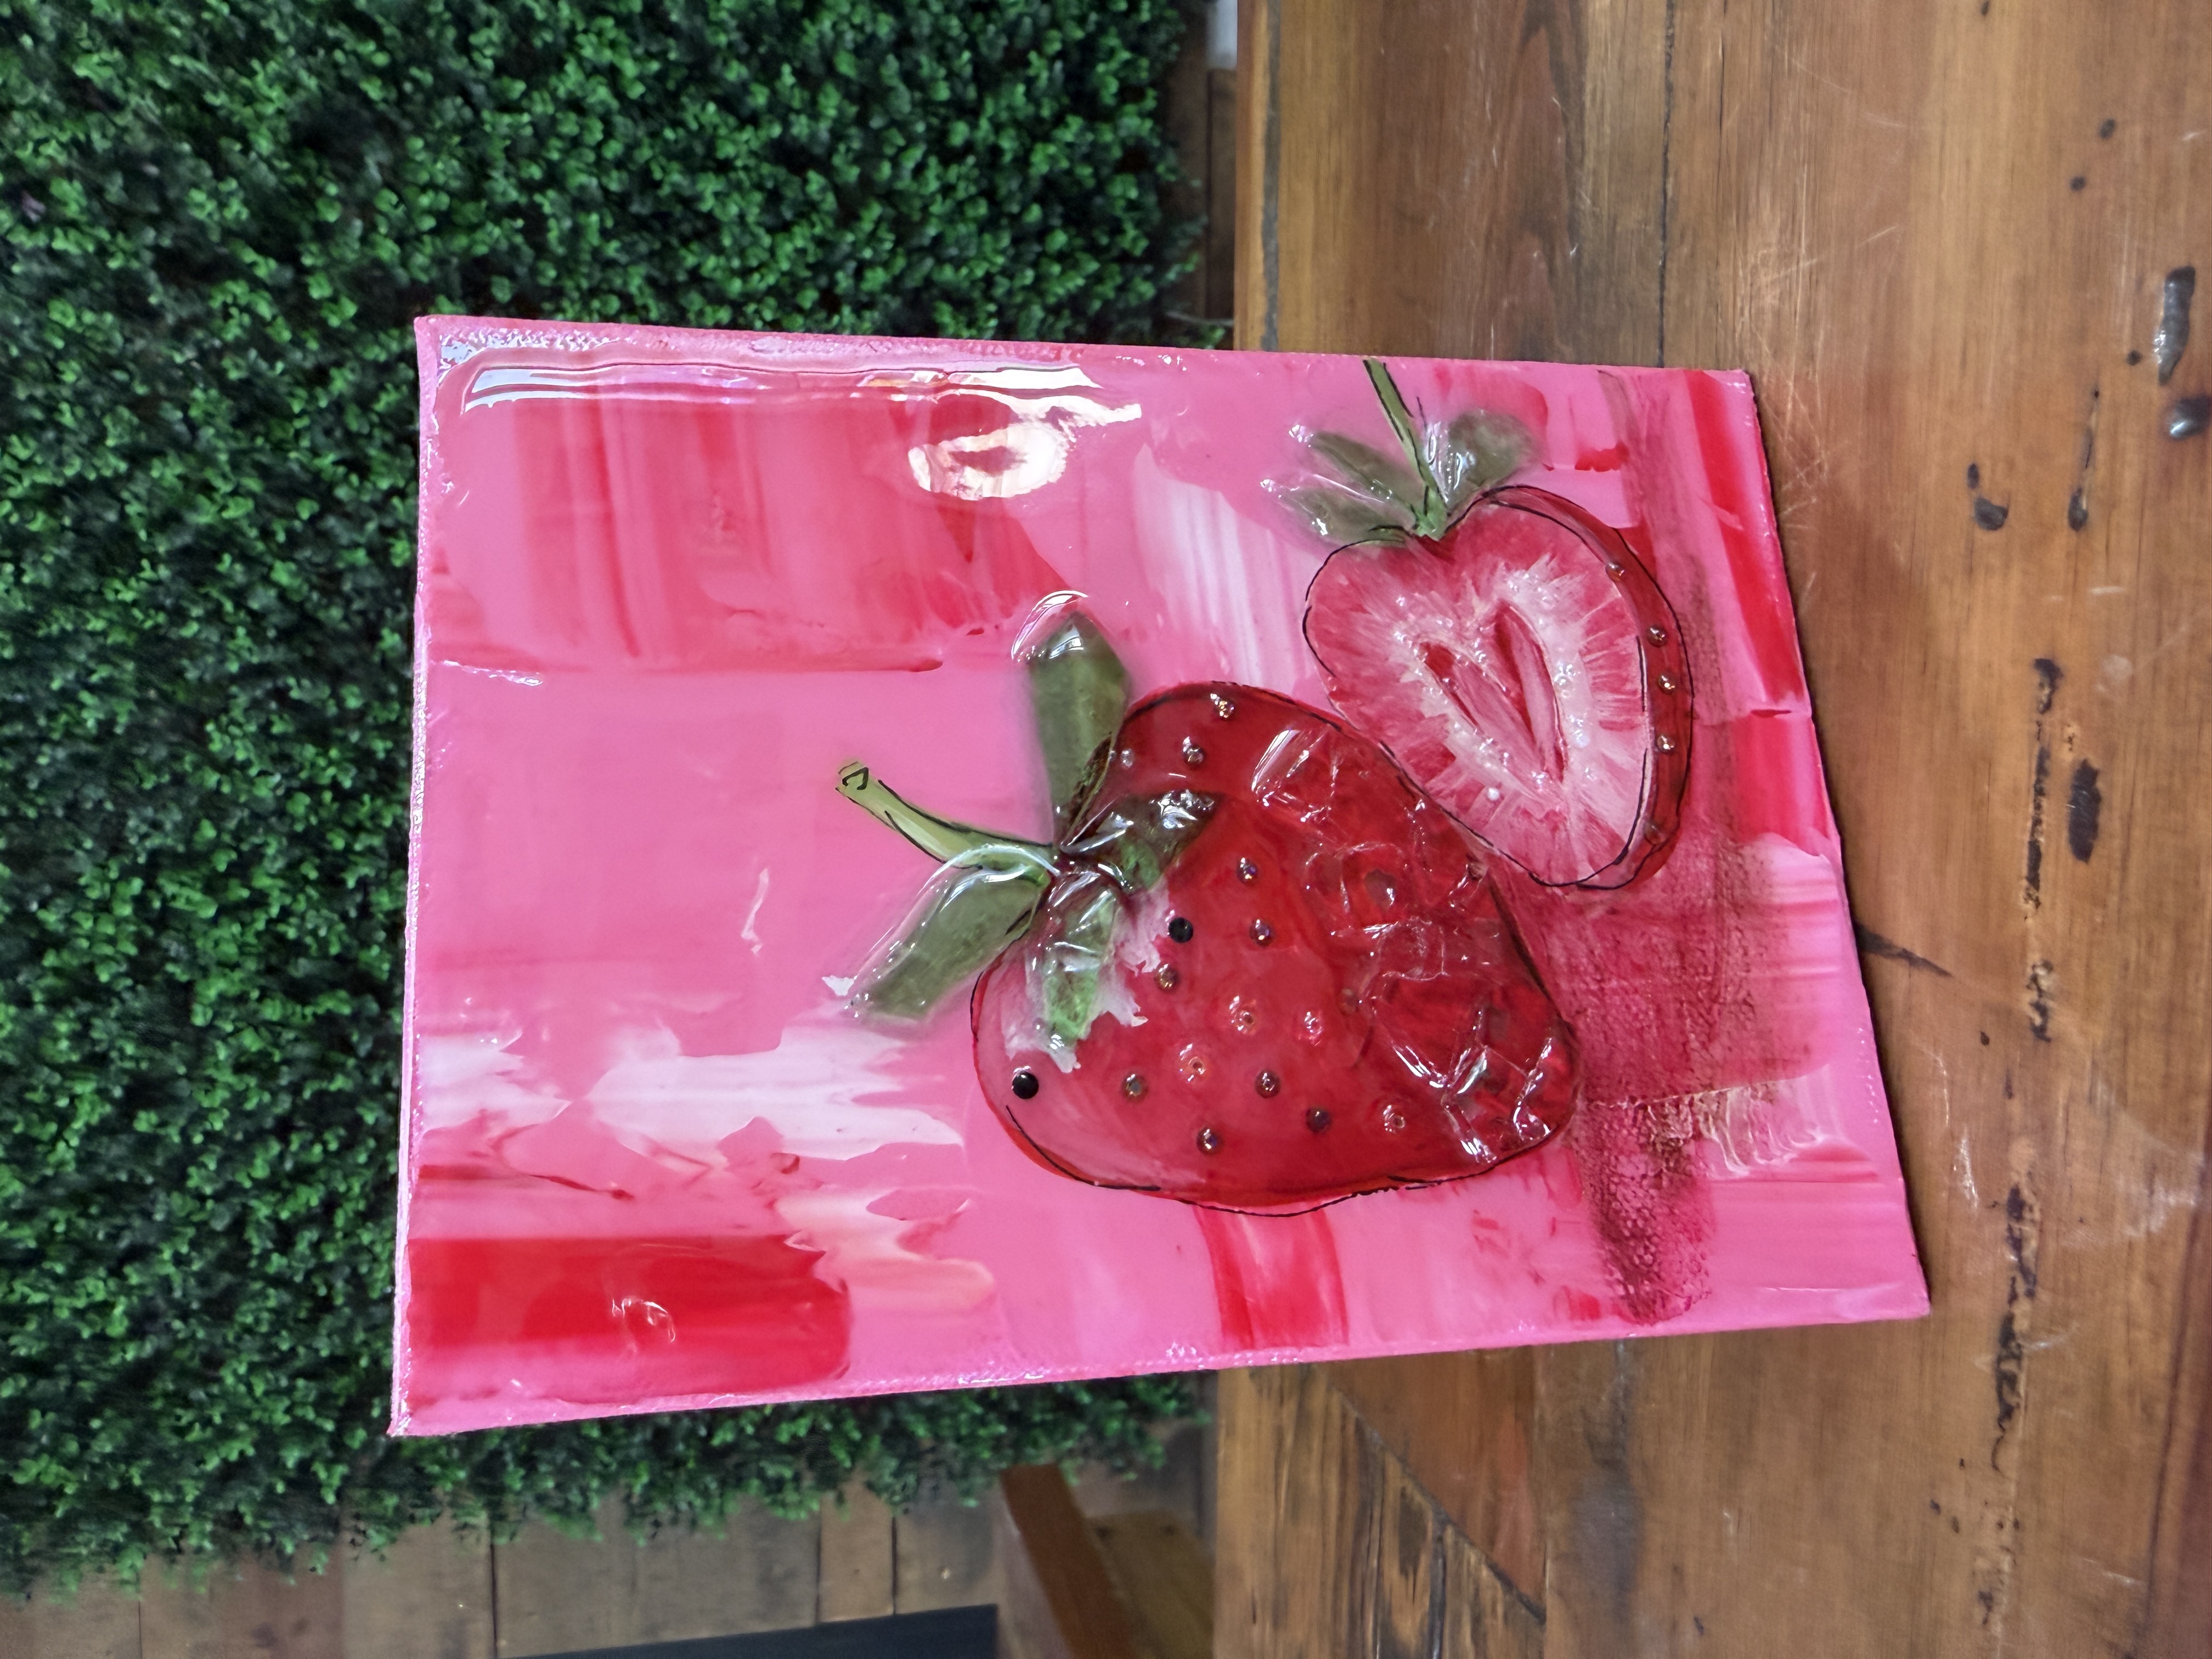
Summer Strawberry 🍓
This strawberry glass and resin project is bright, playful, and full of juicy summer color. With a bold textured pink background, painted strawberries, glass leaves, crushed glass accents, dimensional seed details, and a glossy resin finish, this piece has a whimsical style that feels perfect for kitchens, summer decor, and fruit-themed art displays!
For this piece, I already had a pink, red, and white canvas ready to go that I had previously painted with a palette knife.
Step 1: Trace the Strawberries
Place the strawberry tracer on the canvas and secure it with a small piece of tape. Slide graphite paper underneath and trace the outside shape of the whole strawberry, the sliced strawberry, the rim of the slice, and the stems.
Do not trace the leafy tops if you plan to use glass pieces for those areas. Leaving them off prevents the painted shapes from competing with the dimensional glass leaves later.
Step 2: Paint the Ground Coats
Begin by painting the large strawberry with ...
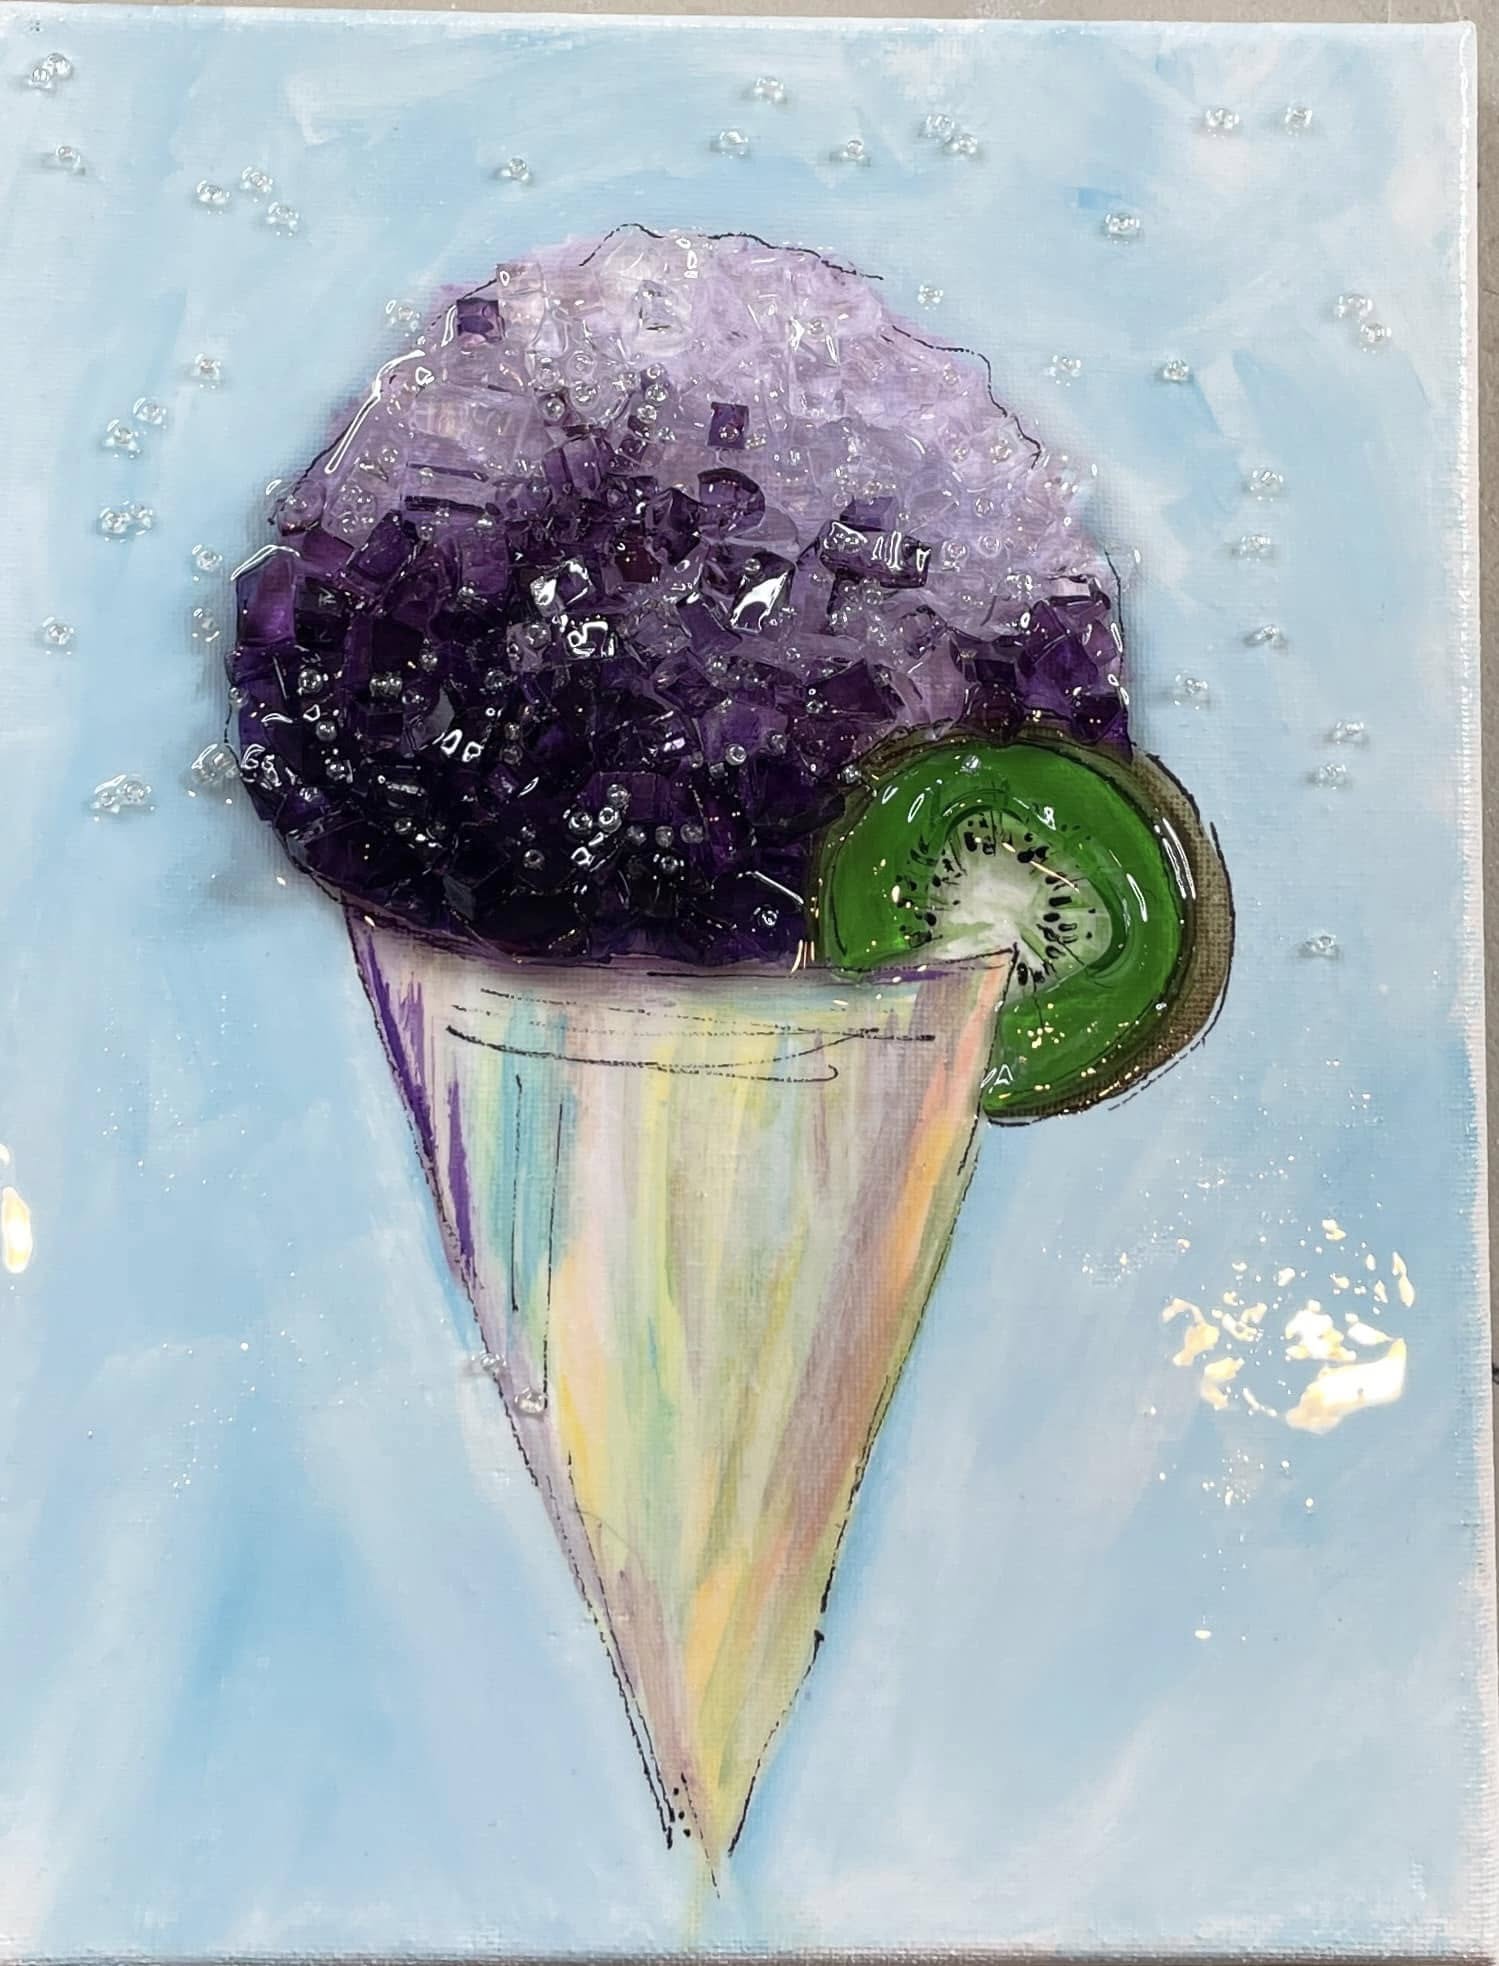
Grape Snow Cone 🍇
This grape snow cone project is the final piece in the snow cone series, and it might be the sweetest one yet. Using an 8x10 canvas, acrylic paint, purple-tinted Starfire glass, clear glass, resin, seed beads, and a painted kiwi accent, this project creates a bright and playful summer art piece full of sparkle, color, and dimension!
Step 1: Tint the Purple Glass
Before starting the project, tint clear Starfire glass with Krylon Stained Glass Spray in Royal Purple. Lightly mist the glass in several thin coats, allowing each layer to dry before adding another. This creates a rich grape-purple glass color while still allowing light to shine through.
If possible, let the tinted glass dry overnight and rinse away any outdoor dust or debris before using it in your artwork.
Step 2: Trace the Snow Cone
Place the snow cone tracer on your 8x10 canvas and secure it with a small piece of tape. Slide graphite paper underneath and trace only the cone and the icy snow cone top. Skip the fruit ...
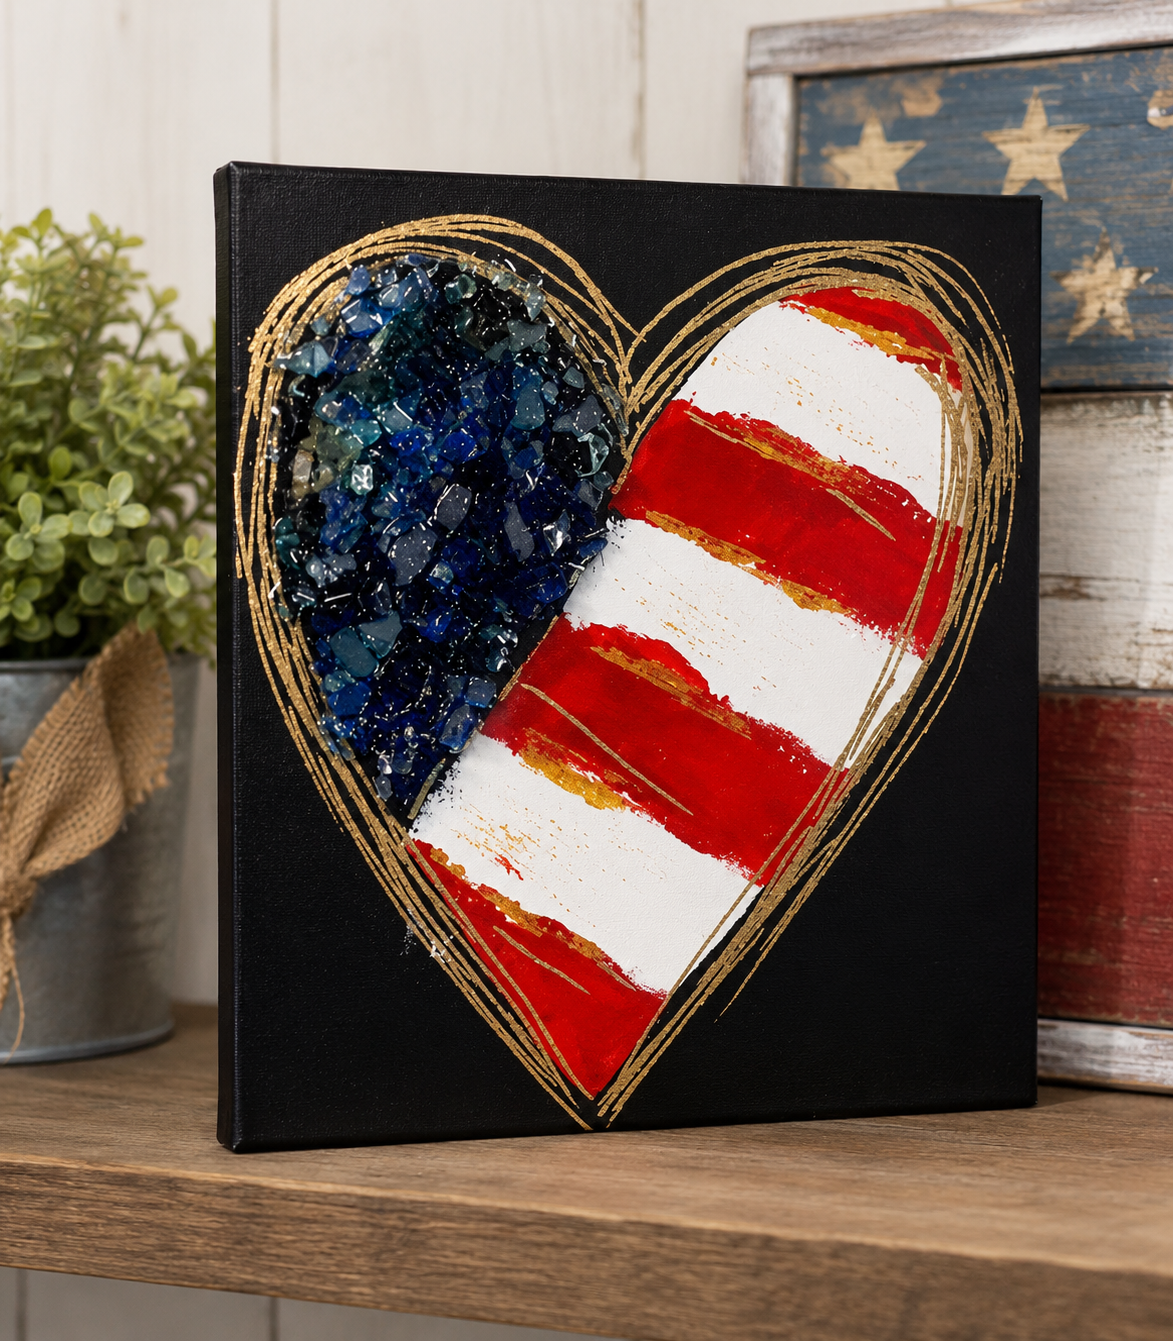
Flag Heart ❤️🇺🇸
This American Flag Heart project is the perfect way to celebrate the Fourth of July, Memorial Day, Veterans Day, or simply show your love for the USA. Featuring bold brushstrokes, shimmering reflective glass, metallic gold accents, and a dramatic black background, this beginner-friendly mixed-media project creates a one-of-a-kind piece that's perfect for patriotic decor!
Step 1: Trace the Heart Design
Tape the tracer to your canvas. Slide graphite paper underneath and trace the outside of the heart along with the center dividing line and the wavy flag stripes with a stylus.
The wavy lines don't need to be perfectly straight - in fact, a loose, hand-painted look adds character to the finished piece. Once the tracer is removed, you'll have a guide for the blue field of the flag and the red and white stripes.
Step 2: Paint the Black Background
Using a large flat brush, paint the sides of the canvas first with black acrylic paint.
Next, carefully paint the entire background around...
Lemon Drop Daiquiri Snow Cone 🍋
This lemon snow cone project is the perfect summer mixed media art piece. It combines soft acrylic painting, bright citrus colors, sparkling glass, resin, and tiny seed bead “ice crystals” to create a dimensional snow cone canvas that looks fresh, fun, and full of sunshine!
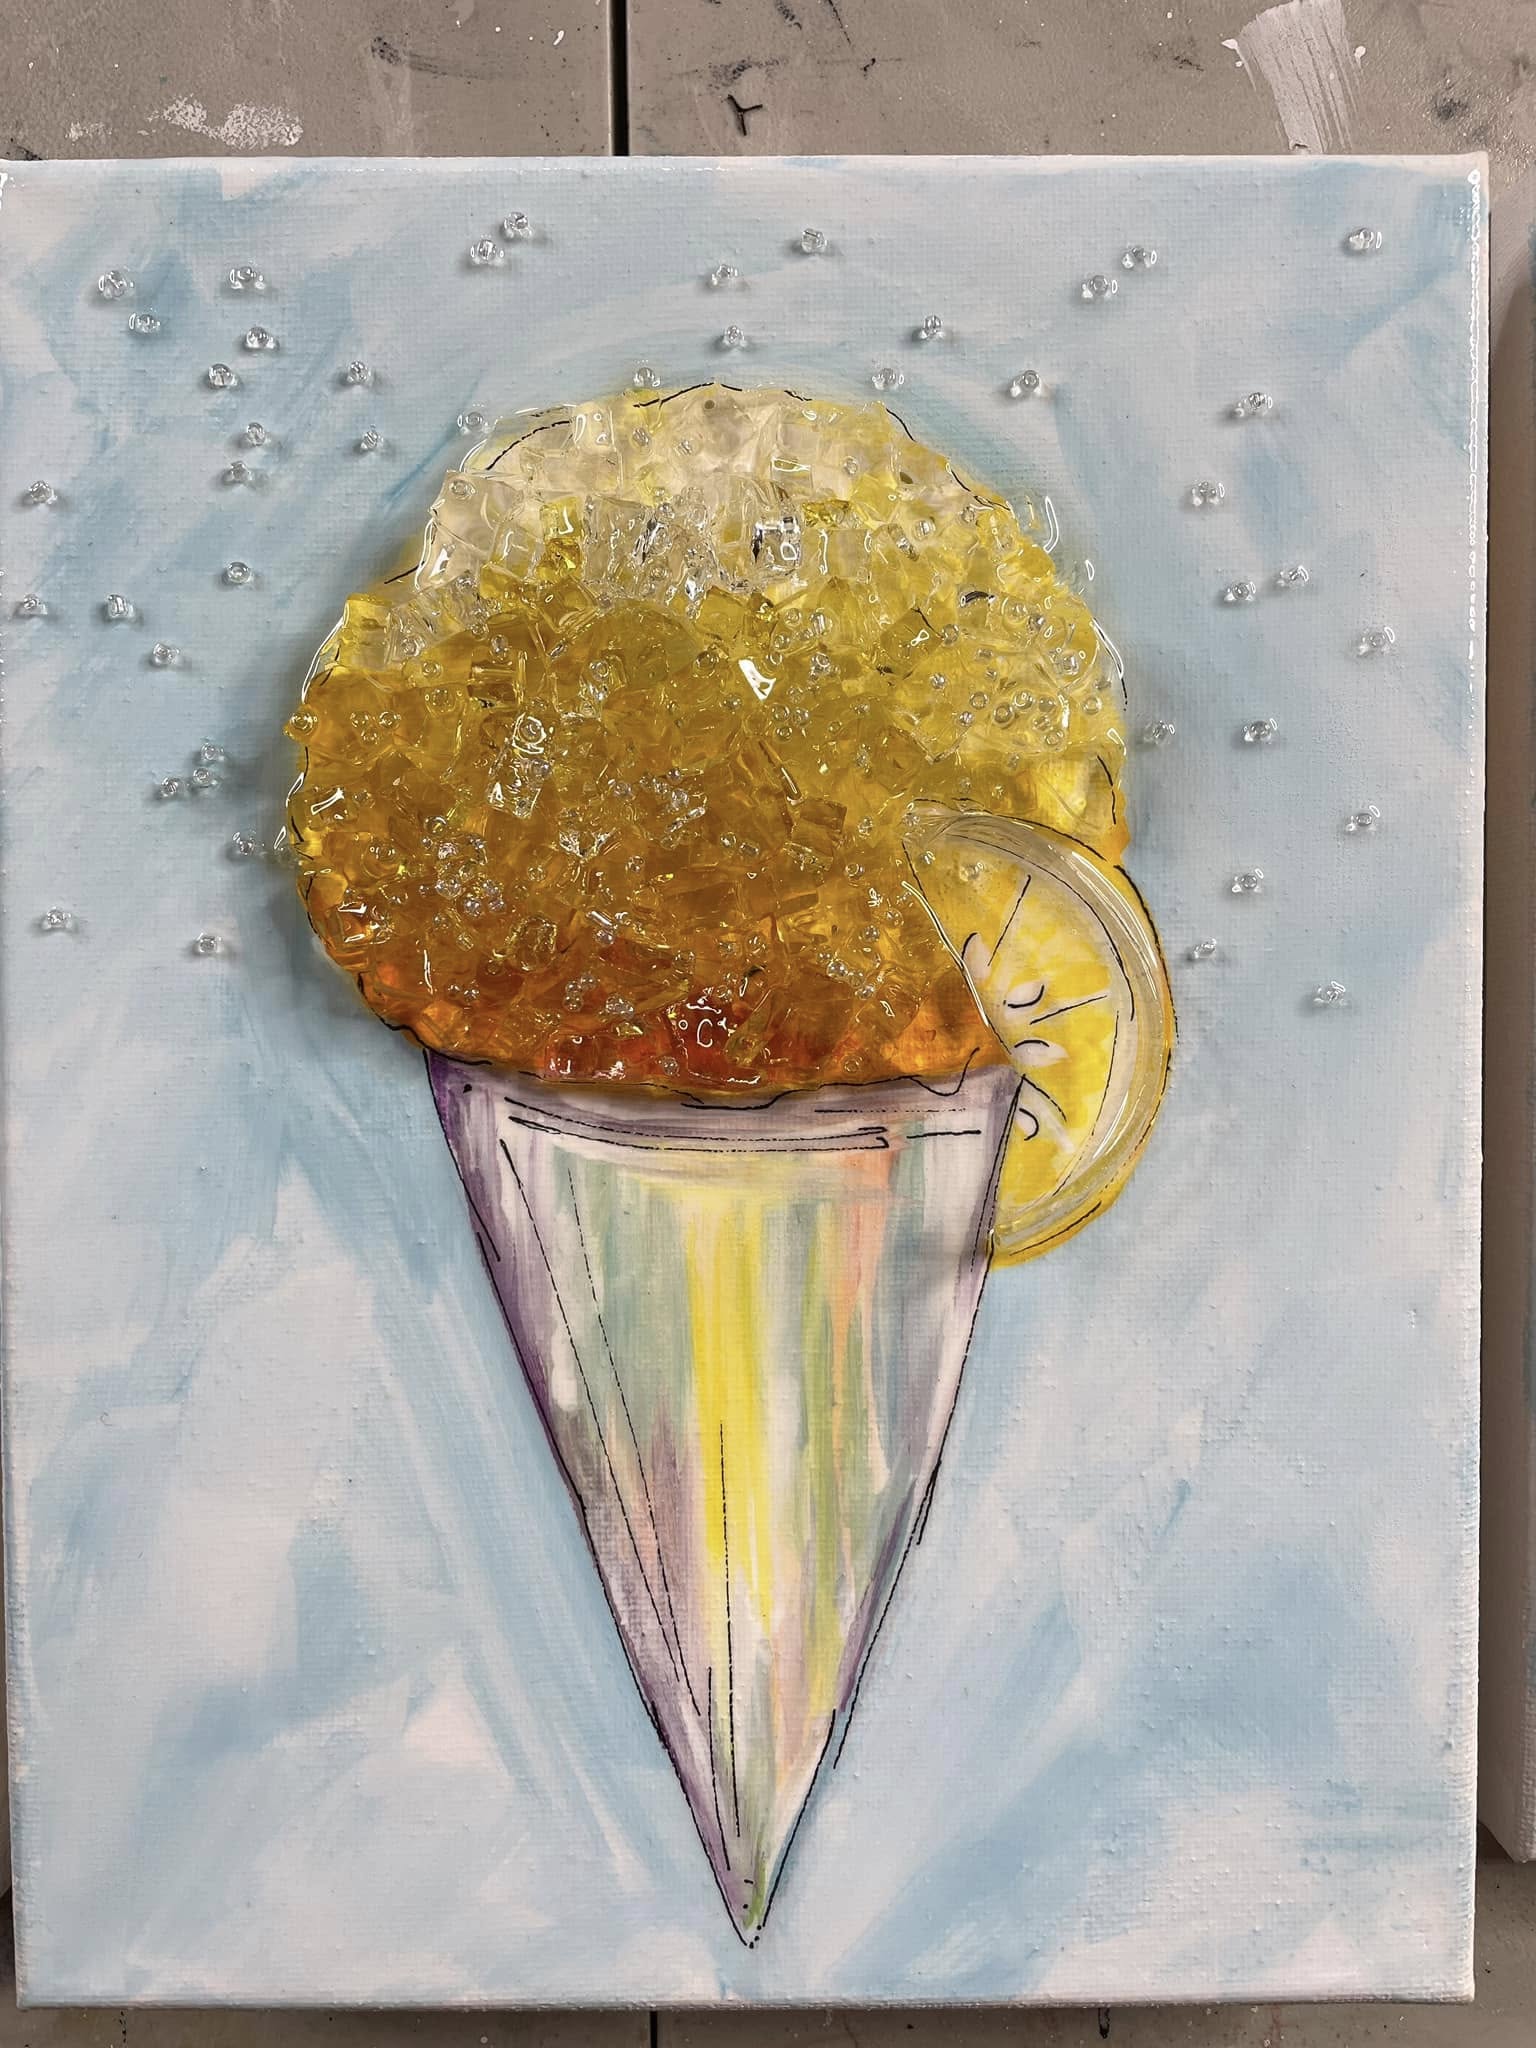
Step 1: Transfer the Snow Cone Design
Start by placing your snow cone tracer on the canvas and sliding transfer paper underneath. Trace the icy snow cone top and the cone shape onto the canvas. For this version, leave off the fruit detail at first because the lemon slice will be added later once the placement are decided.
Step 2: Paint the Background
Begin the background with white paint. Paint one half of the canvas first so you can work wet-on-wet before the paint dries. While the white paint is still wet, add a little Indian Turquoise and blend it loosely into the background using soft, messy brushstrokes. Repeat on the other half of the canvas.
The background should feel light, breezy, and summery. It doe...
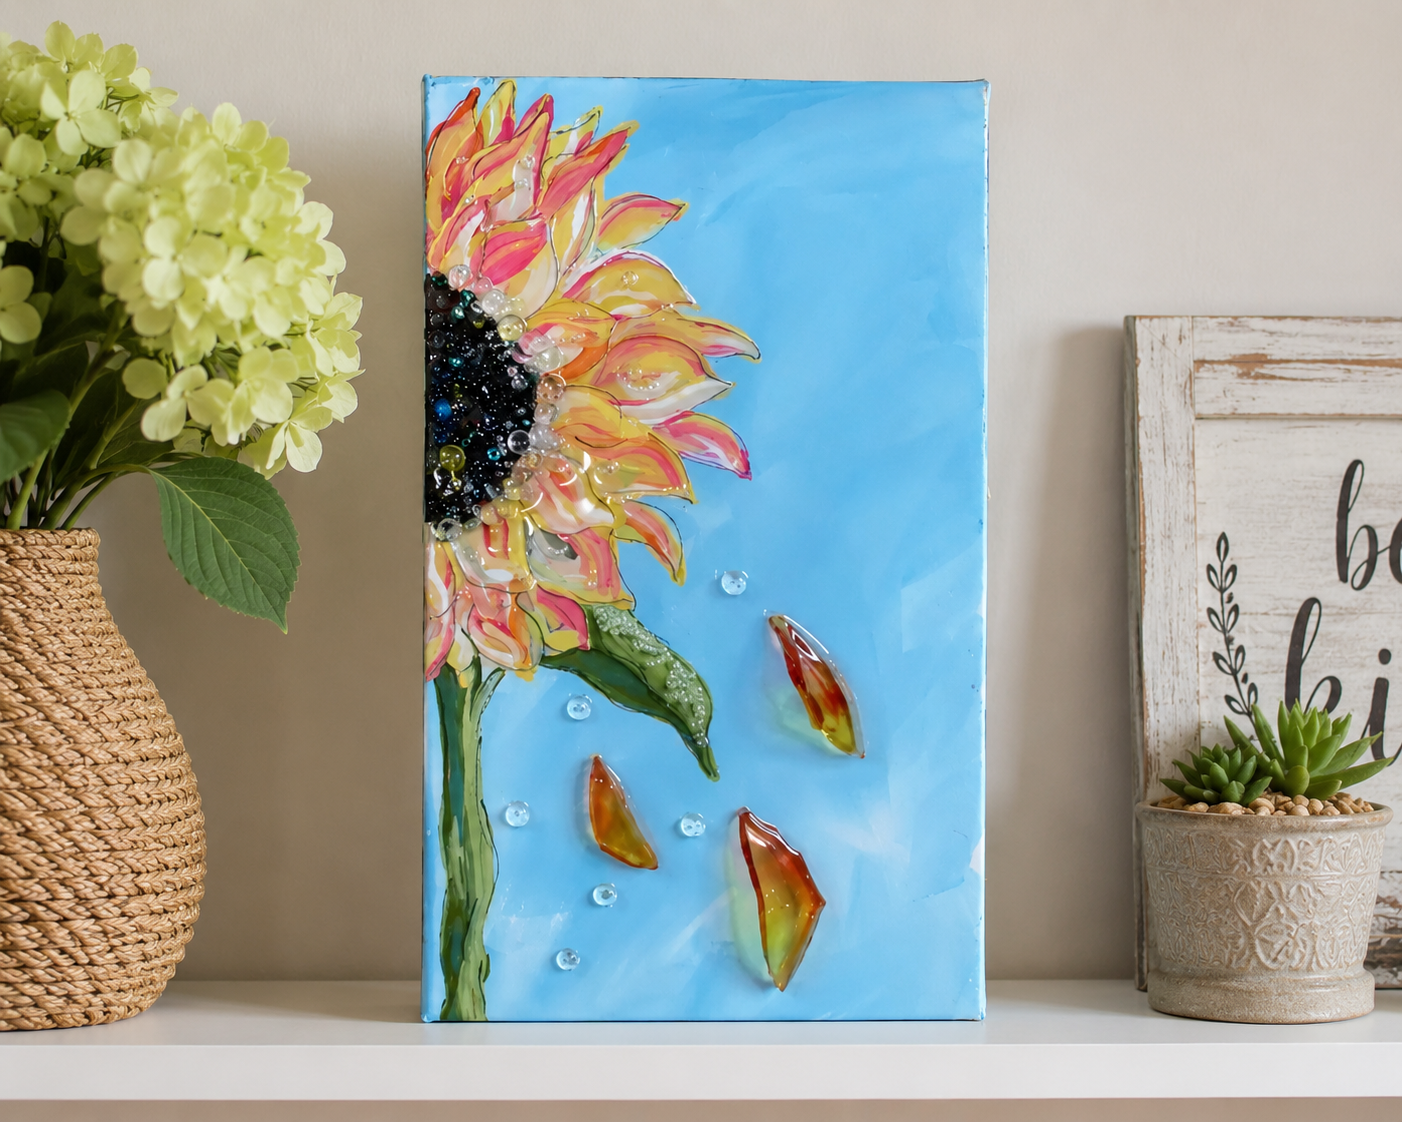
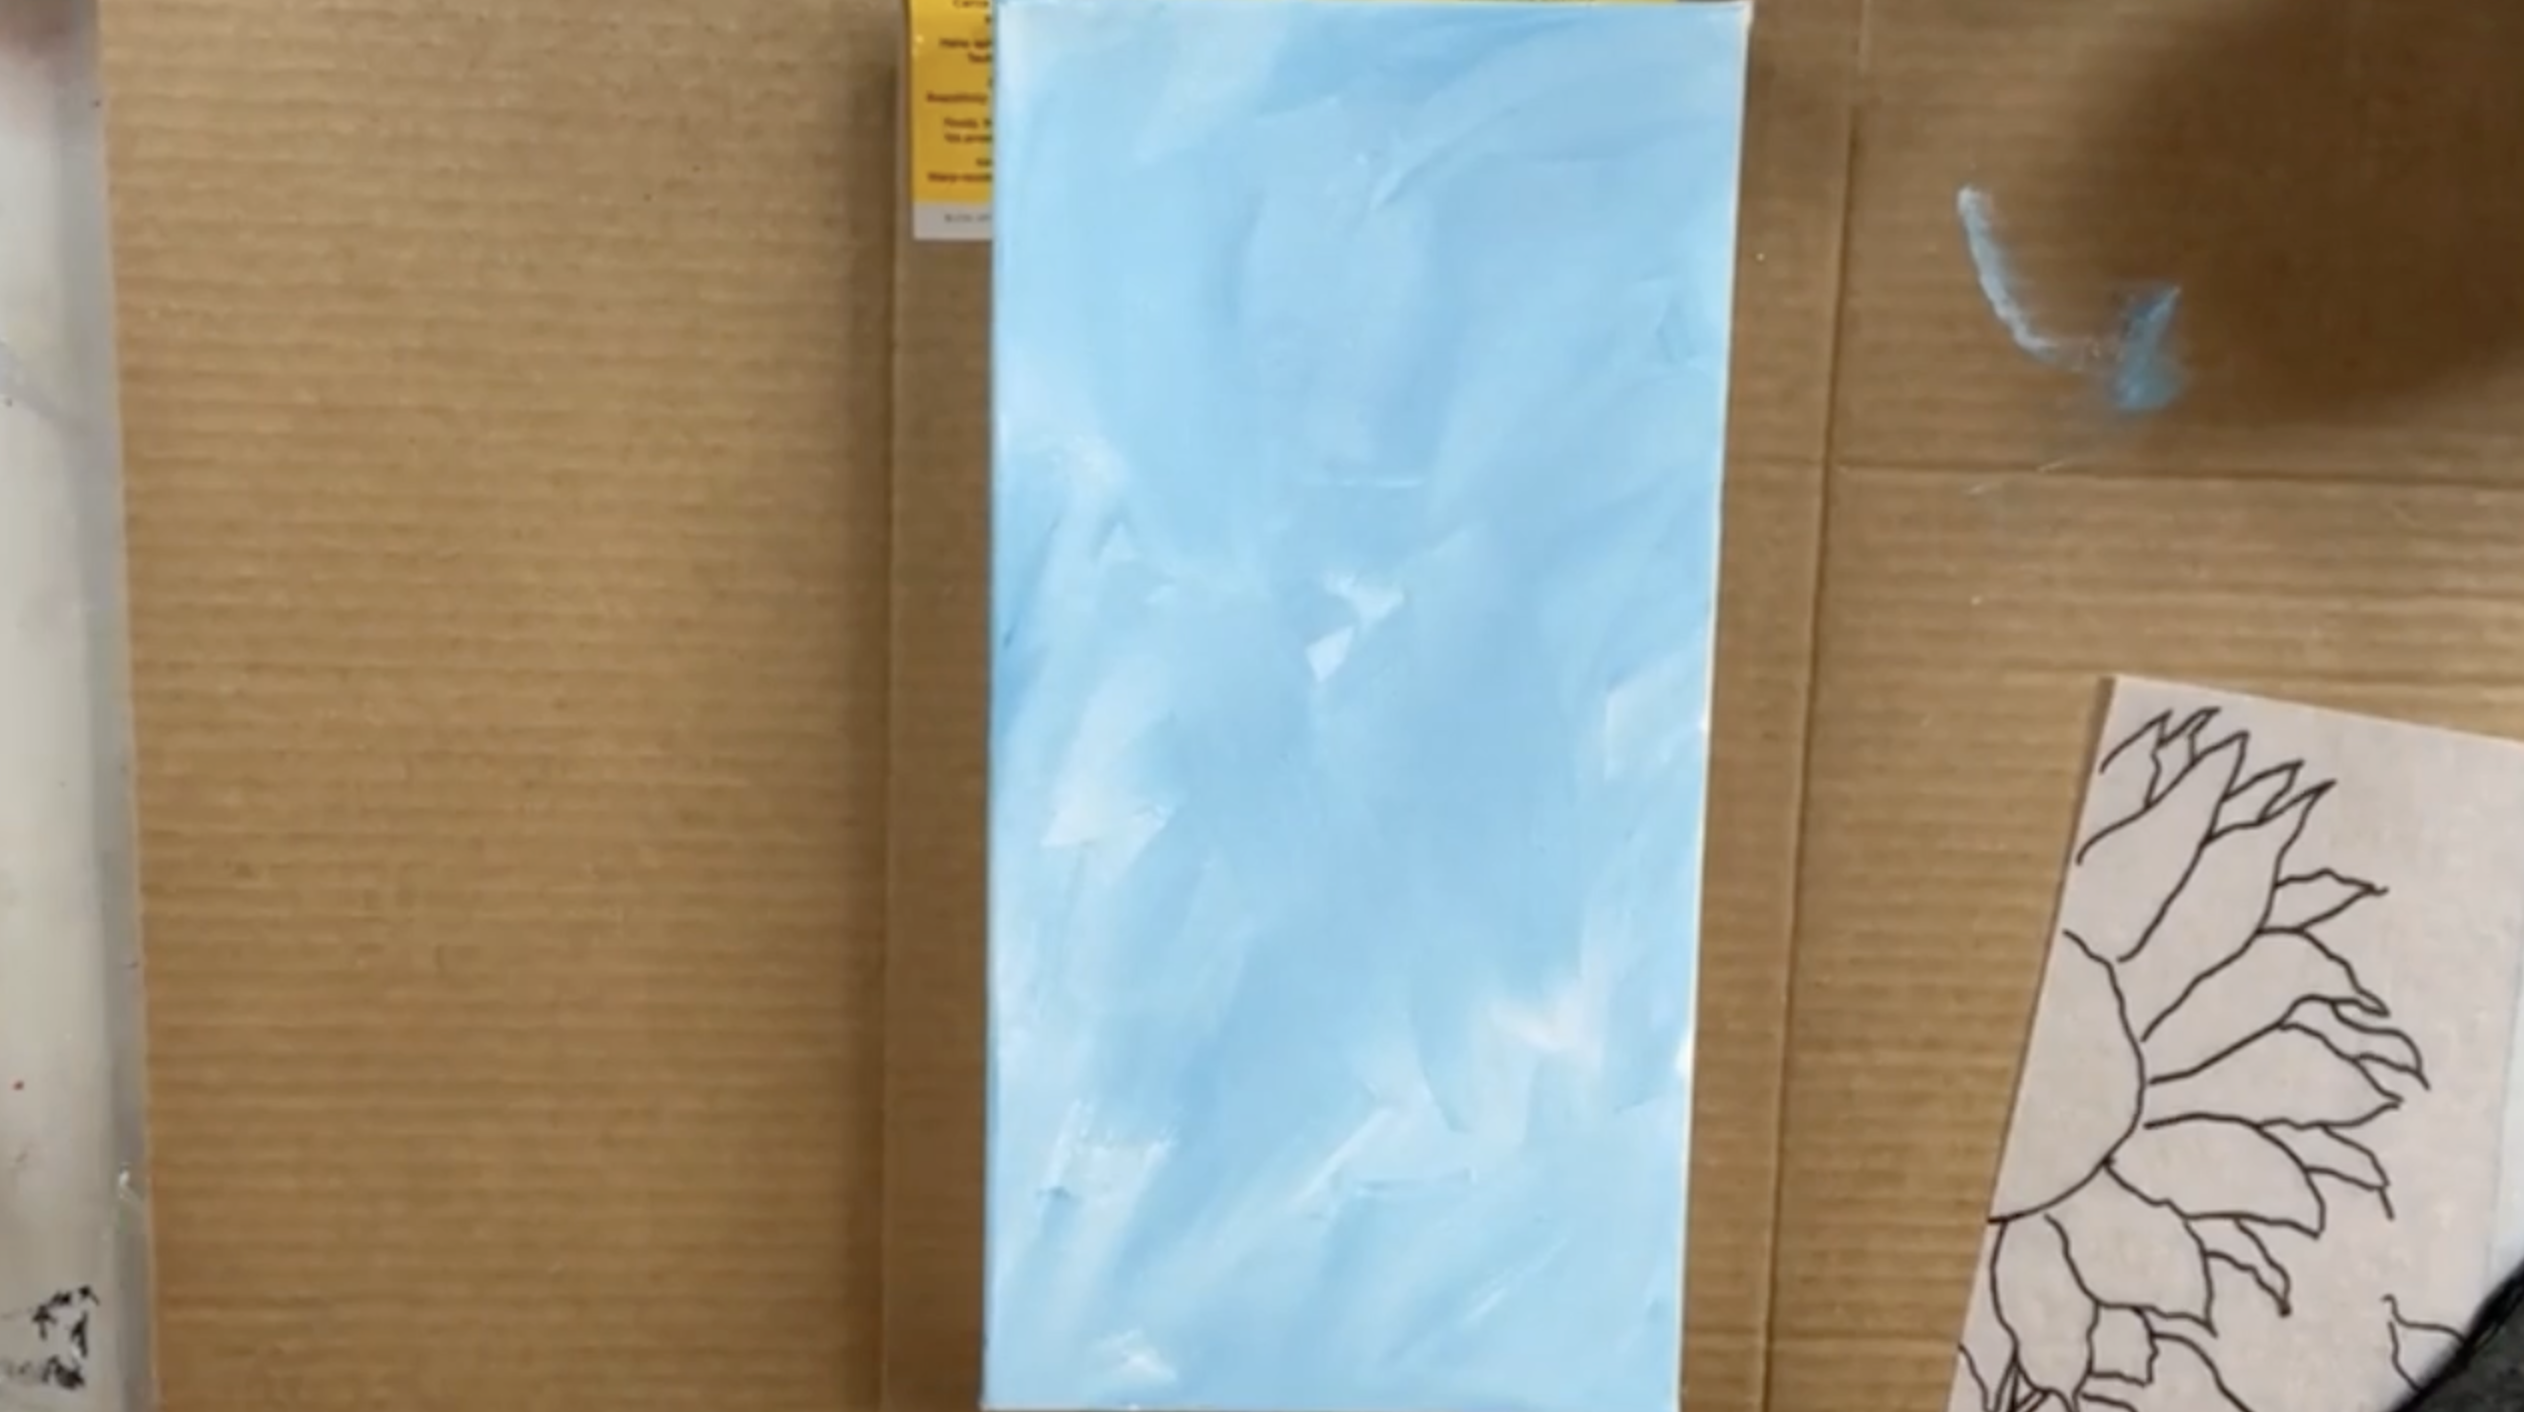
Star Spangled Sunflower 🌻🇺🇸
This patriotic sunflower project is such a fun way to combine summer florals with red, white, and blue style. Instead of painting a traditional sunflower, we’re turning the petals into an American flag-inspired design, then finishing the center with sparkling blue glass and resin. It’s perfect for summer decor, Memorial Day, the 4th of July, Veterans Day, or any patriotic art display.

Step 1: Paint the Background
Start by painting the canvas with Oyster White. This gives the background a soft off-white tone instead of stark white, which makes it easier to see the white petals later. Cover the full canvas with a thin coat, then dry it with a heat gun. Let the surface cool before tracing or painting on top of it.
Step 2: Trace or Sketch the Sunflower
Use the center of a sunflower tracer to place the middle of the flower. Then sketch larger sunflower petals around the center. The goal is to create petals large enough to hold the flag-inspired design, so don’t make them too tiny or d...
Strawberry Daiquiri Snow Cone 🍓
This strawberry daiquiri snow cone project is such a fun summer mixed media piece. Using an 8x10 canvas, acrylic paint, glass, and resin, you’ll create a colorful snow cone with a juicy orange slice and a dimensional glass topping that looks sparkly, icy, and delicious!
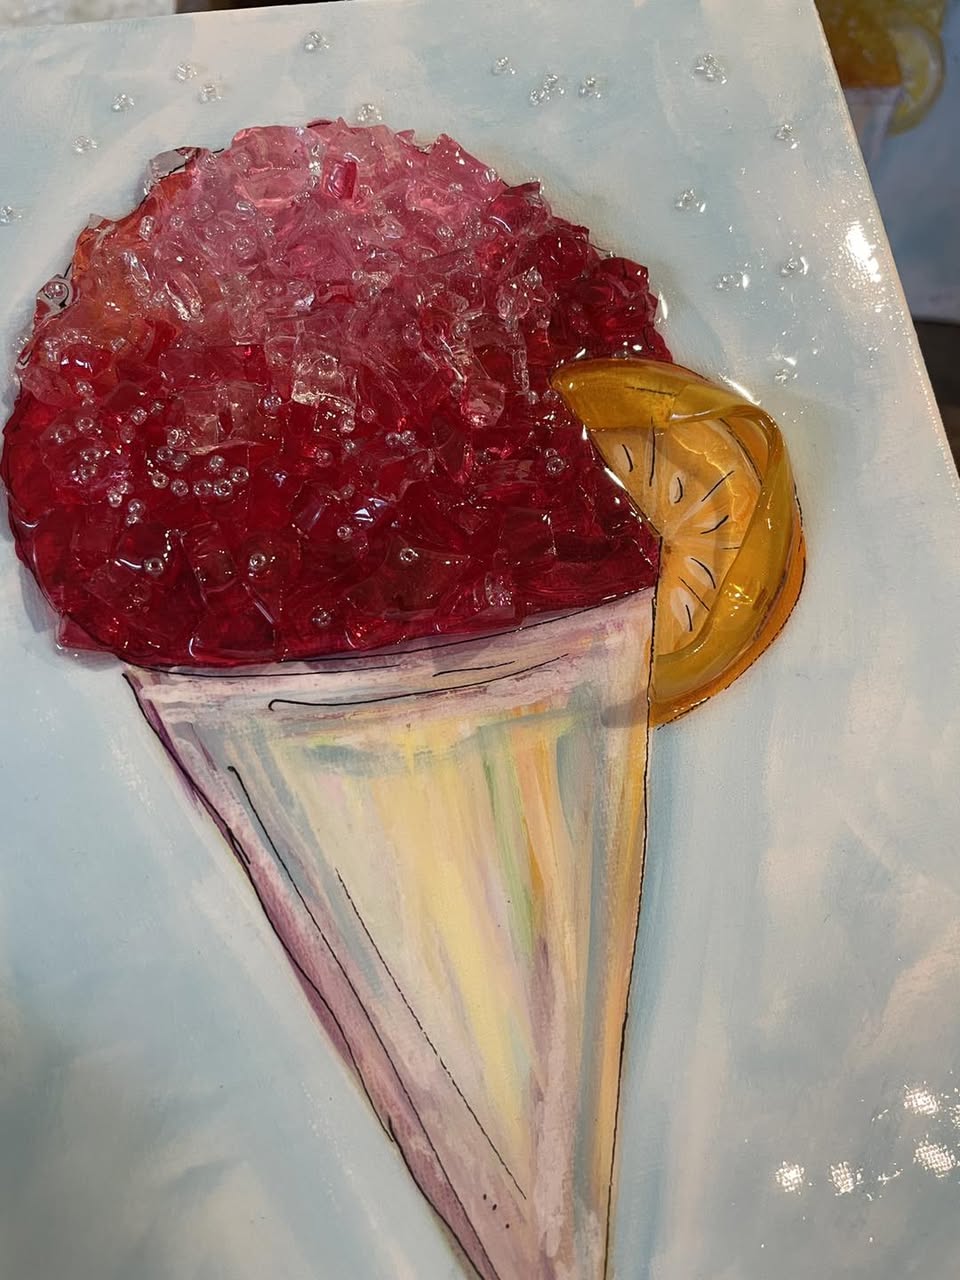
Step 1: Trace the Snow Cone Design
Start by placing your snow cone tracer on the 8x10 canvas. Slide transfer paper underneath the tracer and carefully trace the cone shape and the icy snow cone top. You do not need to trace the orange slice at this point because that will be positioned and painted later. Before moving on, lift one edge of the paper and check that your design transferred clearly.
Step 2: Paint the Background
Use white acrylic paint and Indian Turquoise to create a soft, blended background. Begin by painting one side of the canvas white around the snow cone shape. While the white paint is still wet, dip into a small amount of Indian Turquoise and blend it around the outside edge of the snow cone.
U...
Flag Cross Heart 🇺🇸
This patriotic heart project is a meaningful mixed-media piece that combines acrylic paint, glass, and resin on a simple white canvas board. The heart is painted loosely like an American flag, then finished with a raised glass cross in the center and crushed blue glass for sparkle and texture.

Step 1: Prepare and Trace the Canvas
Start with a hard canvas board that has already been painted white. Once the white paint is dry, place your heart tracer on the canvas and transfer the design using graphite paper. This gives you a guide for painting the flag-style heart and helps keep the overall shape balanced.
You do not need to worry about the heart being perfect. This project is meant to look loose, handmade, and expressive.
Step 2: Paint the Blue Section
Begin by painting the blue section of the flag heart. Use your blue acrylic paint and fill in the upper right portion of the heart. Cover your tracer lines as you paint so they do not show through later.
This section will eventua...
Sunny Flower 🌻
This bright sunflower project is full of color, texture, and sparkle. We’re painting a loose, whimsical sunflower on a Mermaid Blue background, then adding crushed glass, seed beads, acrylic bubbles, and resin for a dimensional mixed media finish.
Cactus 🌵
This glass cactus art project is such a fun way to create desert-inspired wall decor using canvas, crushed glass, and resin. Instead of painting the cactus underneath, this piece is built almost entirely with glass, which gives it beautiful texture, sparkle, and dimension. It’s a great project for anyone who loves cactus decor, succulent-inspired art, or mixed media glass and resin projects!

Step 1: Prep the Canvas Background
Start with a 9x12 thick canvas. Paint the entire canvas with a layer of white acrylic paint, then add a small amount of soft gray paint along the bottom edge. This creates just enough shading for the cactus to visually “sit” on something instead of floating on a blank white background. Keep the gray subtle and blended so it doesn’t compete with the glass cactus.
Step 2: Sketch the Cactus Shape
Lightly sketch your cactus onto the canvas using a watercolor pencil. Keep the lines very soft because this project does not have painted cactus color underneath the g...
